
Best Diecast Car Brands Australian Collectors Trust

You're standing in front of a crowded diecast wall, or scrolling a long online category page, and every box starts to blur together. One Kombi looks brilliant in the photo, another Beetle has a nicer badge, and somewhere in the mix there's a licensed piece that'll make a VW nut smile for years, plus a lookalike that won't hold up once it's out of the packet. That's the problem with choosing the best diecast car brands in Australia, the good ones aren't just prettier, they're more consistent, better licensed, and usually better value when you care about display quality and resale later.

For Australian VW collectors, the licensing filter matters just as much as the brand name. A properly licensed Volkswagen Beetle model or VW Kombi diecast Australia piece carries the details that make the shape feel right, while the wrong one can look flat, vague, or off in the paint and markings. If you've ever hunted for a buy diecast Kombi gift or tried to build a shelf of VW memorabilia collectibles, you already know that brand reputation, scale choice, and finish quality all pull together.

The brands that matter most in the local scene tend to sit in two camps. At the entry end, you get the mass-market names that collectors recognise straight away. At the other end, you get the display-grade makers that collectors trust when they want a model to look good under close inspection, not just from across the room.

Walking Into a Diecast Shop and Feeling Overwhelmed

A first visit to a diecast aisle can feel like opening a VW show swap-meet crate and finding thirty versions of the same van. One box says 1:18, another says 1:43, a third promises opening doors, and the labels start competing with the nostalgia. Before long, the shelf stops looking like a shopping trip and starts looking like a test of patience. That's usually the moment collectors realise they're not just buying a miniature car, they're buying a mix of scale, finish, licensing, and brand discipline.

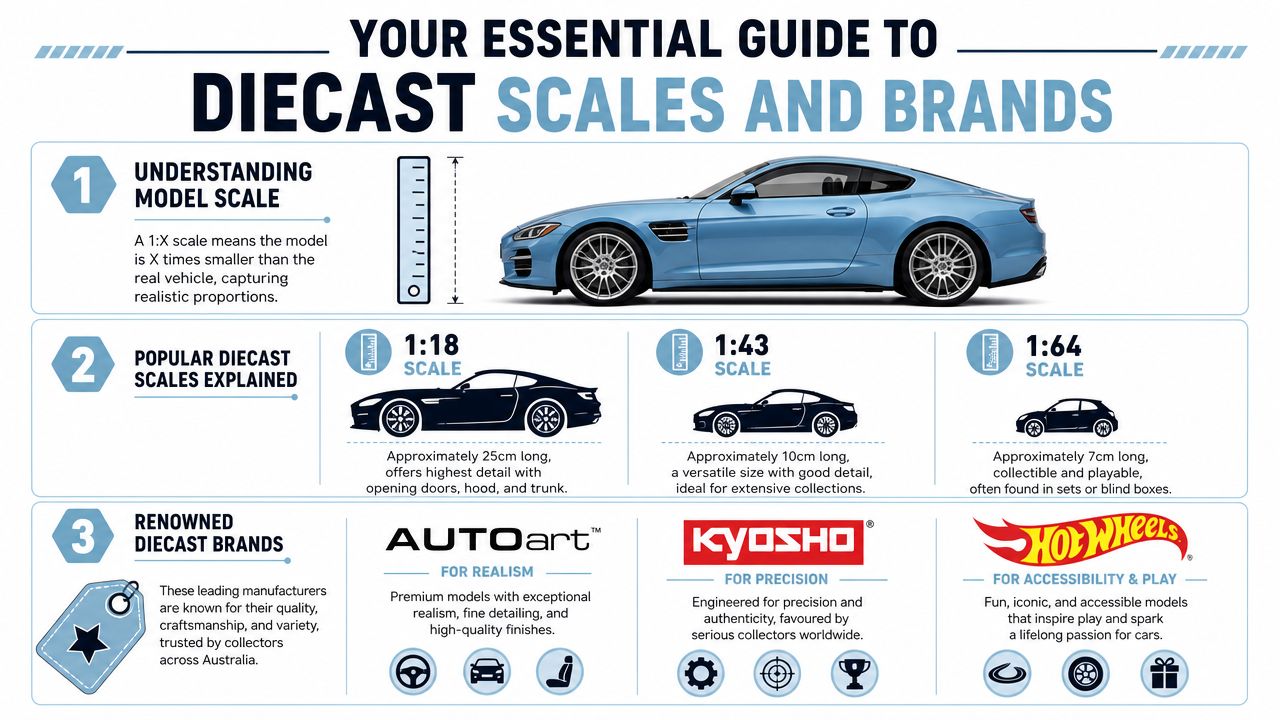
For Australian buyers, the strongest brands are the ones that make the decision easier. Hot Wheels and Matchbox are often the doorway in, because they're visible, familiar, and easy to recognise in mass retail, while collectors hunting a display piece want stronger detail and better scale consistency. Reputable diecast sourcing guides keep circling back to 1:12, 1:18, 1:24, and 1:43 as the core scale bands. That is the practical spread most local buyers use when they compare shelf space, detail, and price tiers.

Why the VW angle changes the choice

VW collecting is different from generic car collecting because the badge matters. A licensed Volkswagen piece with accurate markings, clean paint, and the right proportions feels like memorabilia, not just a toy with a familiar silhouette. That distinction is especially important for Beetles and Kombis, because their shapes are so iconic that any weakness in tooling stands out fast. A soft roofline, a lazy badge, or a sloppy window frame can ruin the whole model.

Practical rule: if the model doesn't look right before you read the box, the box probably won't save it.

The guide below favours pieces that hold up in real homes, on real shelves, and at real Australian shows. It gives you a way to judge the best diecast car brands without falling for box art or nostalgia alone, and it keeps the VW Kombi and Beetle at the centre of the comparison where they belong.

The Six Rules for Judging a Diecast Brand

A diecast brand earns trust through consistency. One good release can be a fluke, but a brand that keeps its proportions, print quality, and licensing in line across different ranges is doing the work collectors notice. I judge brands on six practical rules because that is the fastest way to separate shelf candy from pieces that still look right after a few years on display.

Start with scale and body construction

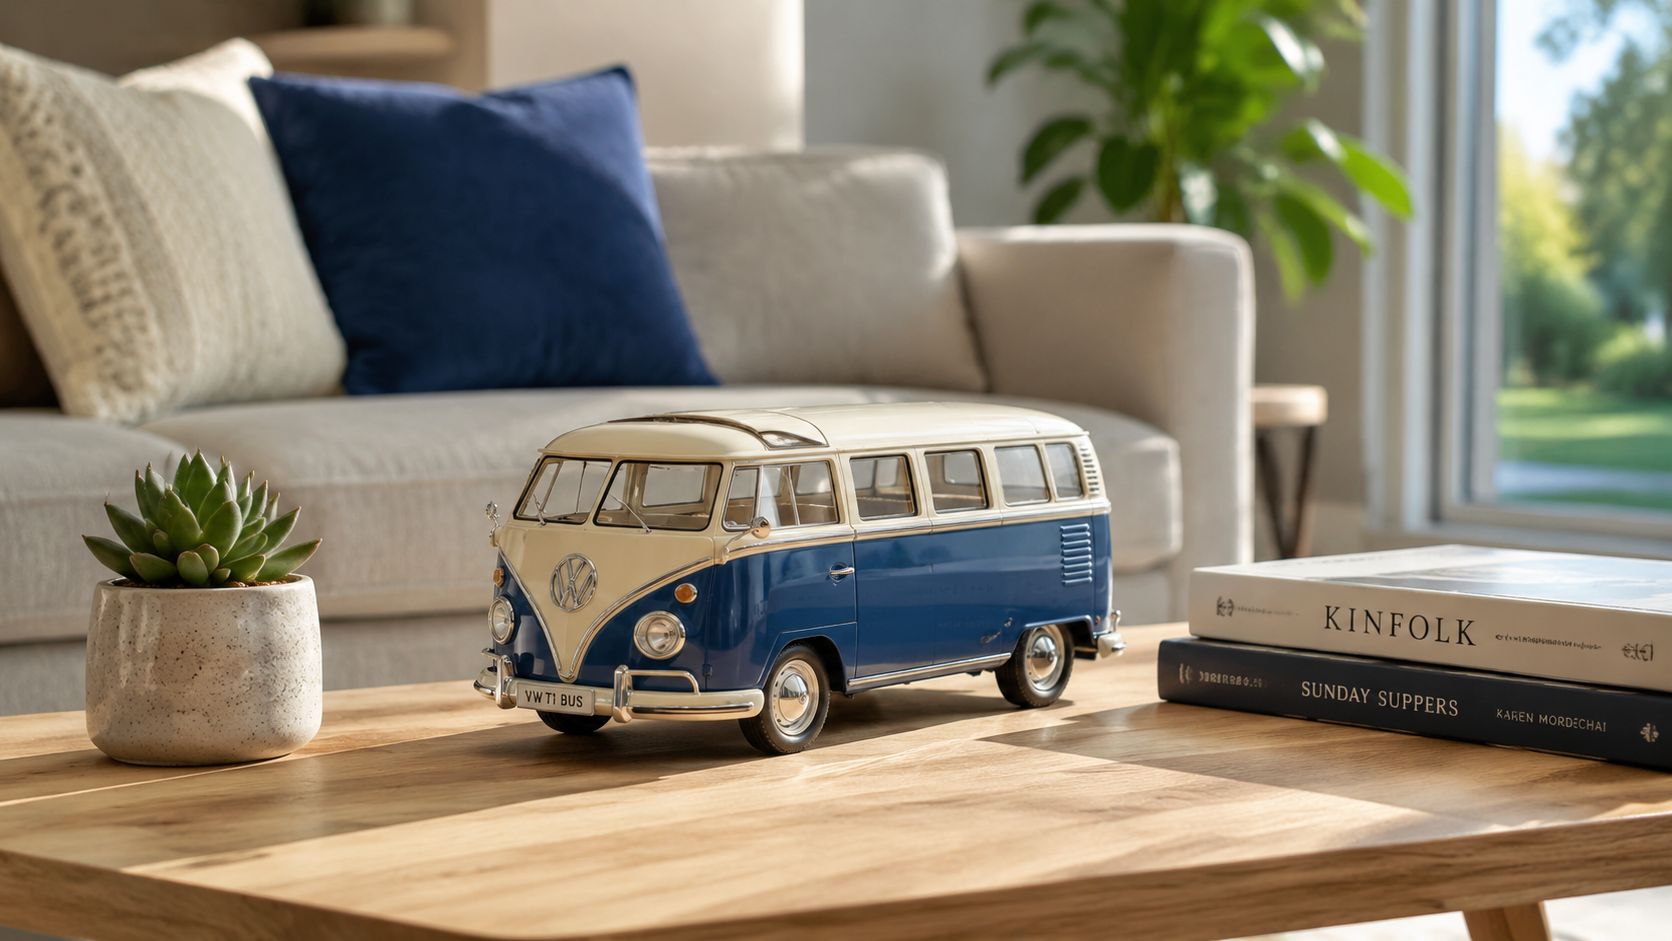
The scales most collectors keep circling back to are 1:18, 1:24, 1:32, and 1:43. Larger scales usually give you more interior depth, sharper panel lines, and hardware you can see, while smaller ones suit tight shelving or a clean themed row. A sealed 1:43 model can still be excellent, but a 1:24 Samba Bus with opening doors and a detailed cabin gives you more to inspect up close, especially when the body shape carries the whole appeal.

Check licensing before you admire the paint

A properly licensed model should carry the right logos, badges, and markings. That matters fast with VW pieces, because the badge is part of the value, not just the shape. If the licence looks vague, the markings look improvised, or the branding feels like a close enough copy, the model belongs in the maybe pile rather than the buy pile. For Beetles and Kombis, licensing usually tells you more about the collector credibility of a piece than the box art does.

Judge finish, seams, and tooling precision

Collectors should be looking at smooth hinges, tight seams, realistic paint, and tampo work that sits where it should. Better tooling usually means cleaner panel lines, more accurate wheel-arch geometry, and less paint bleed on two-tone liveries. That shows up quickly on Kombi and Samba Bus replicas, because the body is simple enough that even small flaws stand out the moment the model is under good light.

A strong diecast brand does not hide behind nostalgia, it earns trust in the details you can see under light.

Keep value in mind, not just appearance

Price-to-detail ratio is the quiet test many buyers skip. Some models cost more because they are better made, some cost more because they are scarce, and some cost more for no strong reason at all. A 1:24 Majorette Kombi at $15-20 can deliver more detail per dollar than a 1:18 loose-cast at the same price, especially if the larger piece is rough on paint, thin on licensing, or weak on finish. The better brands make the price feel fair because the scale, parts count, and finish quality match what is in the box.

Mass-Market Diecast Brands Worth Your Money

The entry-level tier is where most collectors start, and it's still where a lot of families buy gifts without overthinking it. Hot Wheels and Matchbox lead that conversation because they're widely recognised and easy to spot, especially in mixed retail environments. They're the brands most casual buyers already know, which makes them useful for play, gifting, and simple desk displays.

The familiar names

Hot Wheels is the brand you buy when you want instant recognition and broad availability. Matchbox tends to sit nearby in the same conversation, often appealing to buyers who want a practical, familiar miniature rather than a showcase model. Both are strongest when you're after affordable entry points, mixed packs, or impulse buys that don't demand a big shelf commitment.

Majorette, Welly, and Bburago usually sit a touch higher in perceived detail, depending on the release. They can be a smart middle step for buyers who want a little more realism without jumping into premium pricing. For VW fans, the key question isn't whether the badge is known, it's whether the specific release gives you a convincing Beetle or Kombi shape with decent printing and reliable proportions.

Mass-market diecast brands at a glance

Brand Common scales Typical price band (AU) VW models available
Hot Wheels Smaller play scales, often loose mix packs Entry-level Occasional VW-inspired castings and themed releases
Matchbox Smaller play scales, often loose mix packs Entry-level Occasional VW-inspired castings and themed releases
Majorette Mixed small scales Entry to mid VW-style replicas may appear in selected lines
Welly 1:24 and smaller display-friendly options Entry to mid Beetle and Kombi-style pieces appear in some ranges
Bburago 1:24 and display-oriented small scales Entry to mid VW replicas appear selectively

These brands make sense when you want something easy to source, easy to gift, and straightforward to display. They're not usually the final stop for a serious VW collector, but they're often the right first stop.

Premium Diecast Brands for Serious Collectors

Once you move into the display-grade tier, the mood changes. Collectors start caring less about brand familiarity and more about mould accuracy, part count, and how the model looks under closer inspection. That's where names like AUTOart, Minichamps, Kyosho, Solido, and Oxford Diecast come into their own.

Where detail starts paying for itself

The premium brands often do their best work in 1:18 and 1:43, because those scales suit either dramatic display presence or tighter shelf planning. AUTOart and Kyosho are especially respected when a buyer wants stronger tooling and more refined surfaces, while Minichamps remains a familiar benchmark for collectors who like accurate proportions and a serious presentation. Solido and Oxford Diecast bring good value for collectors who want convincing models without chasing the highest end of the price ladder.

For VW replicas, premium brands often make more sense than they first appear. A Kombi or Beetle has a clean, familiar shape, so a good premium mould can look especially convincing without needing the visual drama of a modern supercar. In plain terms, you often get more real-world presence per scale centimetre because the design is iconic and the details are easier to read.

Why premium can still be the better buy

The payoff isn't just surface detail. Better licensed models tend to hold up better in the collector market because scarcity limits supply, while strong finish quality keeps the model attractive in the used market. Australian collectors who care about long-term value usually lean toward the brands that control release quality rather than flooding the market with uneven batches.
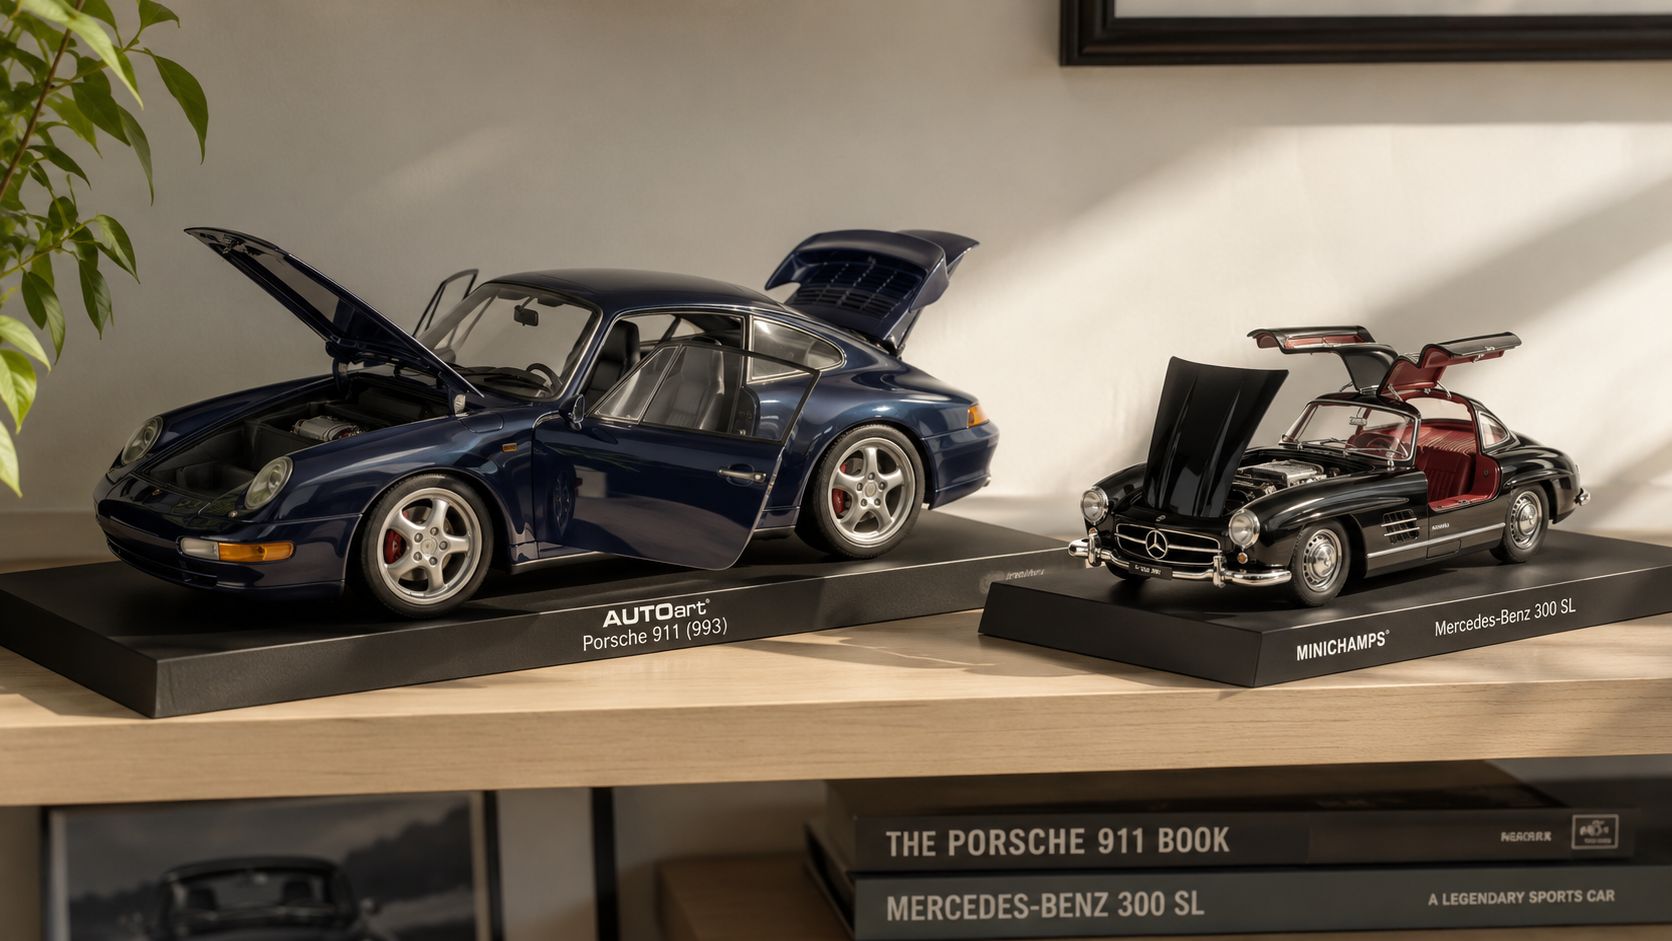
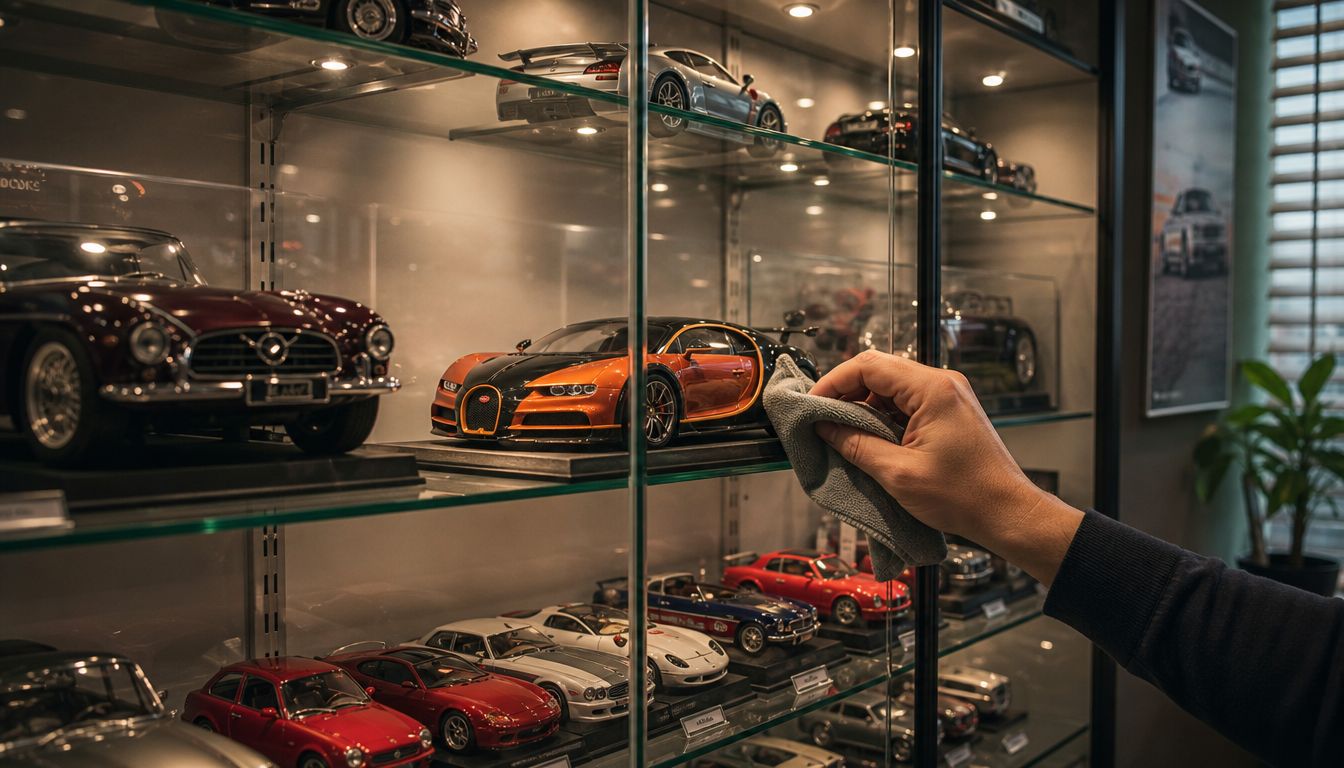
A display shelf featuring an AUTOart Porsche 911 993 model and a Minichamps Mercedes-Benz 300 SL diecast car.

Premium doesn't always mean perfect, but it usually means the brand has spent more time on the bits collectors notice first, badge detail, glazing, seam work, and paint finish. That's why serious VW buyers often end up here.

How the VW Kombi and Beetle Stack Up Across the Brand Ladder

The Volkswagen story gives diecast collecting its emotional centre. The Volkswagen Beetle ran from 1938 to 2003 and total production passed more than 21.5 million vehicles, which explains why the shape lands so hard with collectors across generations (VW Beetle production history). The Volkswagen Type 2, often called the Kombi, Bus, or Transporter, entered production in 1950, and the early split-window versions are prized because they're instantly recognisable on a shelf or at a show (VW Type 2 history).

Where each VW shape tends to sit

A 1962 Kombi Samba Bus usually makes the strongest impression in premium or strong mid-range form, especially when the brand gets the trim and glazing right. A 1967 Beetle can look excellent even in a smaller scale if the proportions are disciplined and the paint is clean. Flower Power variants sit somewhere between nostalgia piece and display model, and they can be a lot of fun when the colour treatment is tasteful rather than loud.

Australian collectors who want locally stocked licensed pieces often look for models like the 1:24 Samba Bus (KT7005WF) and 1:32 Blacktop Kombi (KT5376D). Those sit neatly in the middle of the market, where display appeal and affordability can coexist without asking you to commit to a huge cabinet. If you want a deeper VW-only browse, the VW Beetle models range is a useful reference point for seeing how different Beetle interpretations stack up.

The licensing filter matters even more here because VW badges, trim, and proportions are such a big part of the emotional hit. A licensed model feels like a small piece of VW history, while a generic lookalike just borrows the shape.

What to Look for When Buying a Diecast as a Gift

Gift buyers usually don't need to become diecast experts. They just need a model that looks right, feels solid, and lands with the person opening the box. A thoughtful 1:32 or 1:24 piece often gives more display pride than a flashy unlicensed 1:18 model, especially when the recipient cares about the badge as much as the body shape.

The quick in-store checklist
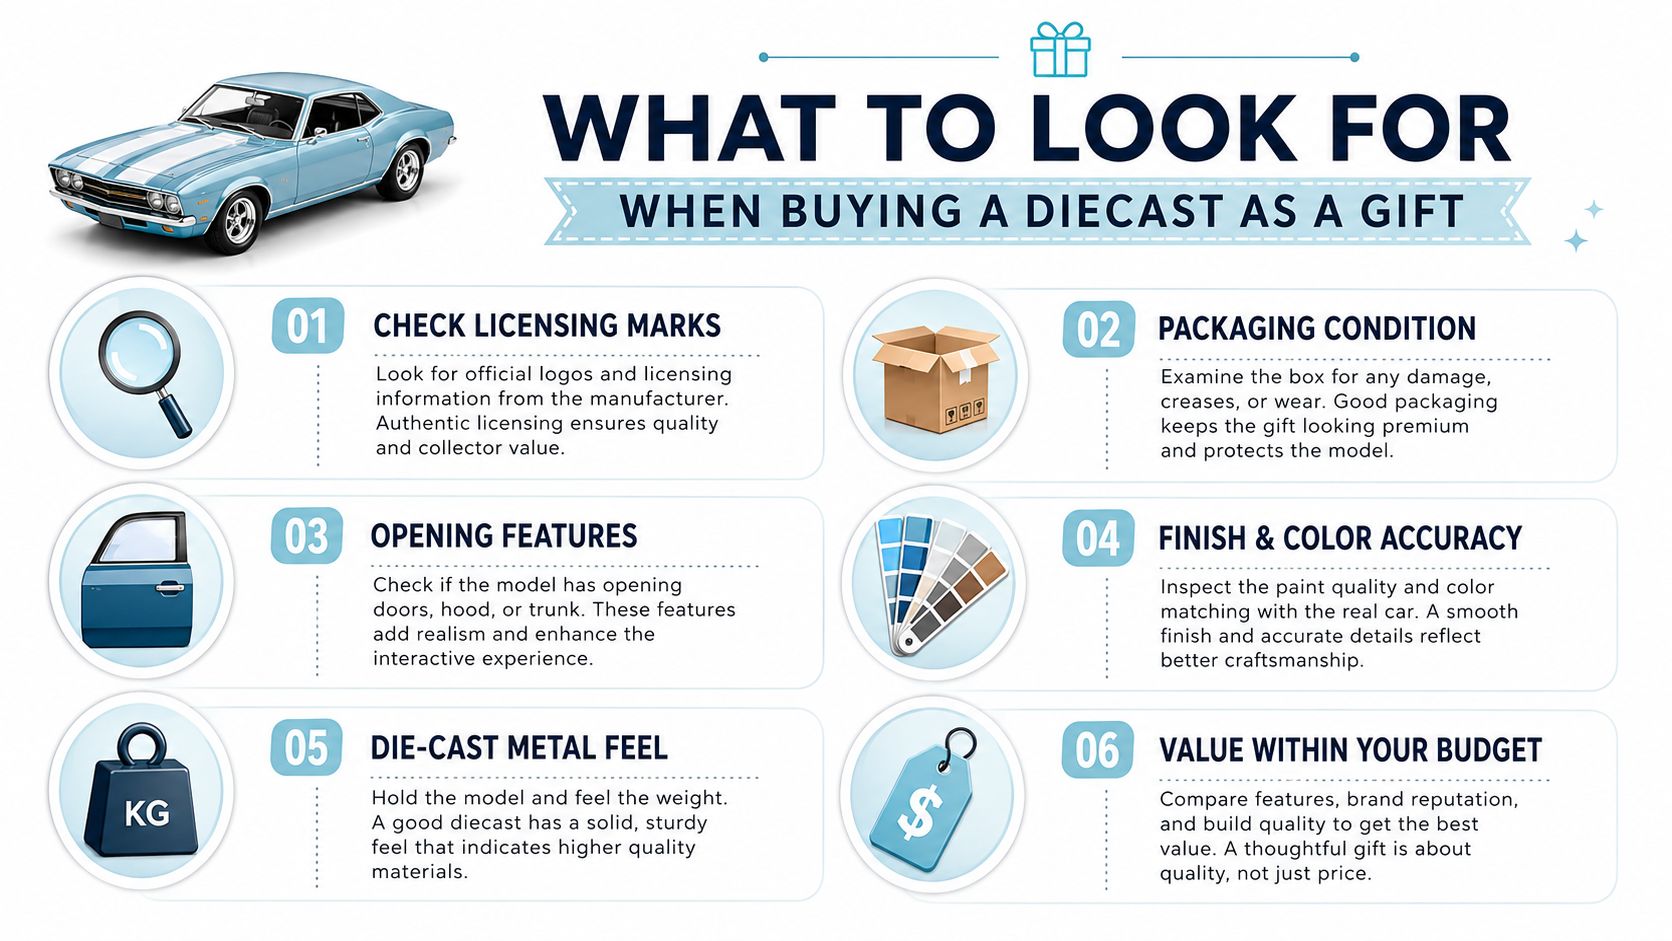
An infographic titled What to Look For When Buying a Diecast as a Gift featuring six tips.

A gift worth keeping usually ticks these boxes:

  • Check licensing marks: Look for the Volkswagen branding and any clear approval indicators, because that's the easiest way to avoid a lookalike.
  • Inspect the packaging: Crushed corners, loose windows, or torn seals can spoil a present before it's even opened.
  • Test the features: Opening doors, working hatches, or pull-back action should feel smooth, not gritty or loose.
  • Study the finish: Paint should look even, with clean colour separation and no obvious bleed on two-tone VW vans.
  • Feel the weight: A die-cast metal body has a different presence from a light plastic toy, and that difference matters on a shelf.
  • Match the budget to the display: Don't overpay for size alone. Spend for licensing and finish first.

Choose the scale the person can actually enjoy

A big model can be brilliant, but only if the recipient has room to show it off. If they live in a tighter apartment or already collect other VW memorabilia, a tidy 1:43 or 1:32 piece can be the smarter gift because it fits into a themed shelf without crowding everything else. That's especially useful when you're shopping for someone who likes the look of a Kombi but doesn't want a model taking over the room.

Why Smaller Scales Can Be Smarter Choices in Australia

A lot of buyers assume 1:18 is always the gold standard. It isn't. In Australian homes, especially where shelf space is limited, a well-made 1:32 or 1:43 can be the better fit because it's easier to build a coherent display without sacrificing the rest of the room.

Smaller doesn't mean lesser

The best smaller-scale pieces still rely on the same fundamentals, licensing, finish quality, and consistent tooling. When those are strong, a compact Beetle or Kombi can look just as satisfying as a larger model from across the room. That's why collectors often treat smaller scales as part of a curated display rather than a compromise.

Australian buyers also need to think about the environment. In humid coastal homes, paint and chrome wear become more visible over time, so a model with solid finish control and sensible storage needs can age better than a larger piece that's harder to keep pristine. The practical result is simple, a smaller premium model can be the smarter long-term buy if you value condition and display discipline.

Value and space work together

Resale value doesn't belong only to large display pieces. Limited-run models in smaller scales can hold value well when the licensing is strong and the release is controlled, because buyers still chase scarcity and finish quality. If you want a deeper primer on the category itself, the diecast model car overview is a handy starting point before you commit to a scale.

If the shelf looks cleaner, the collection usually feels better too.

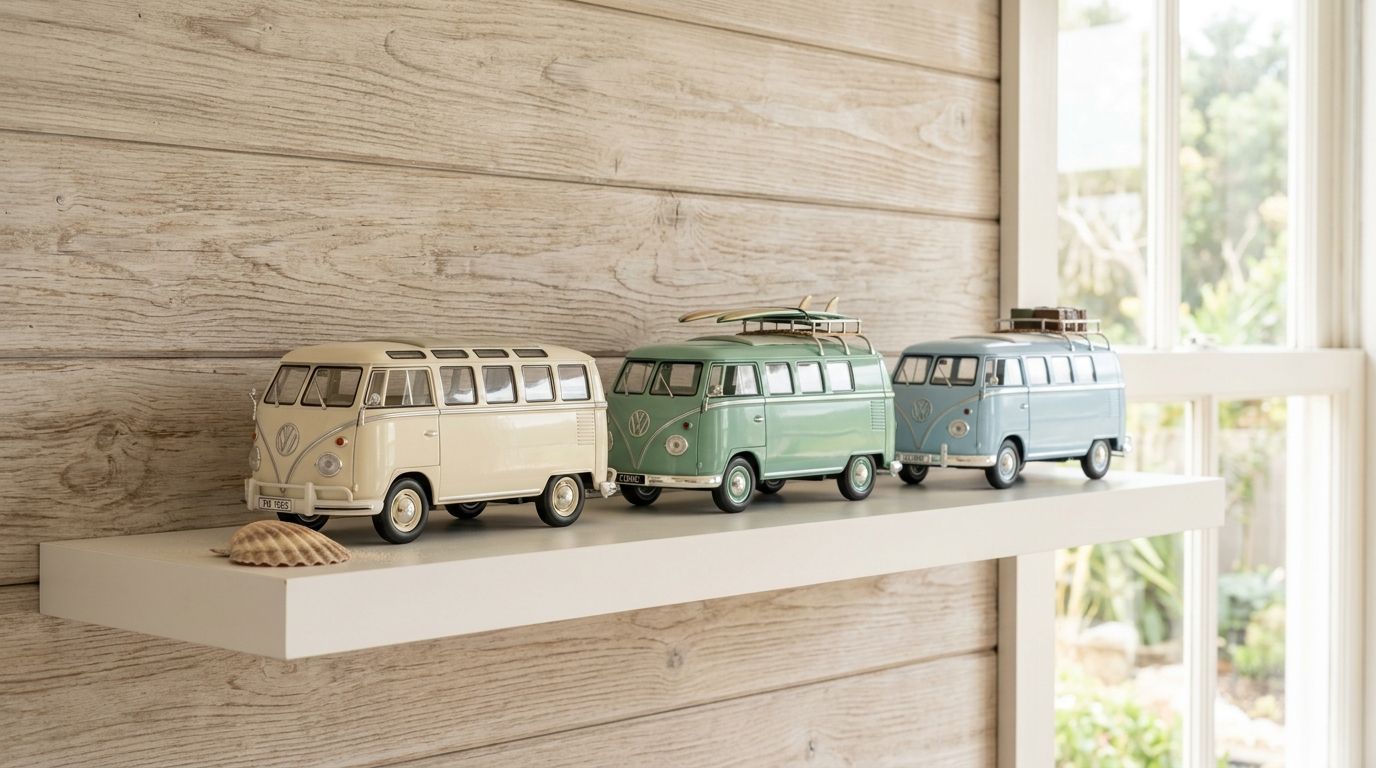
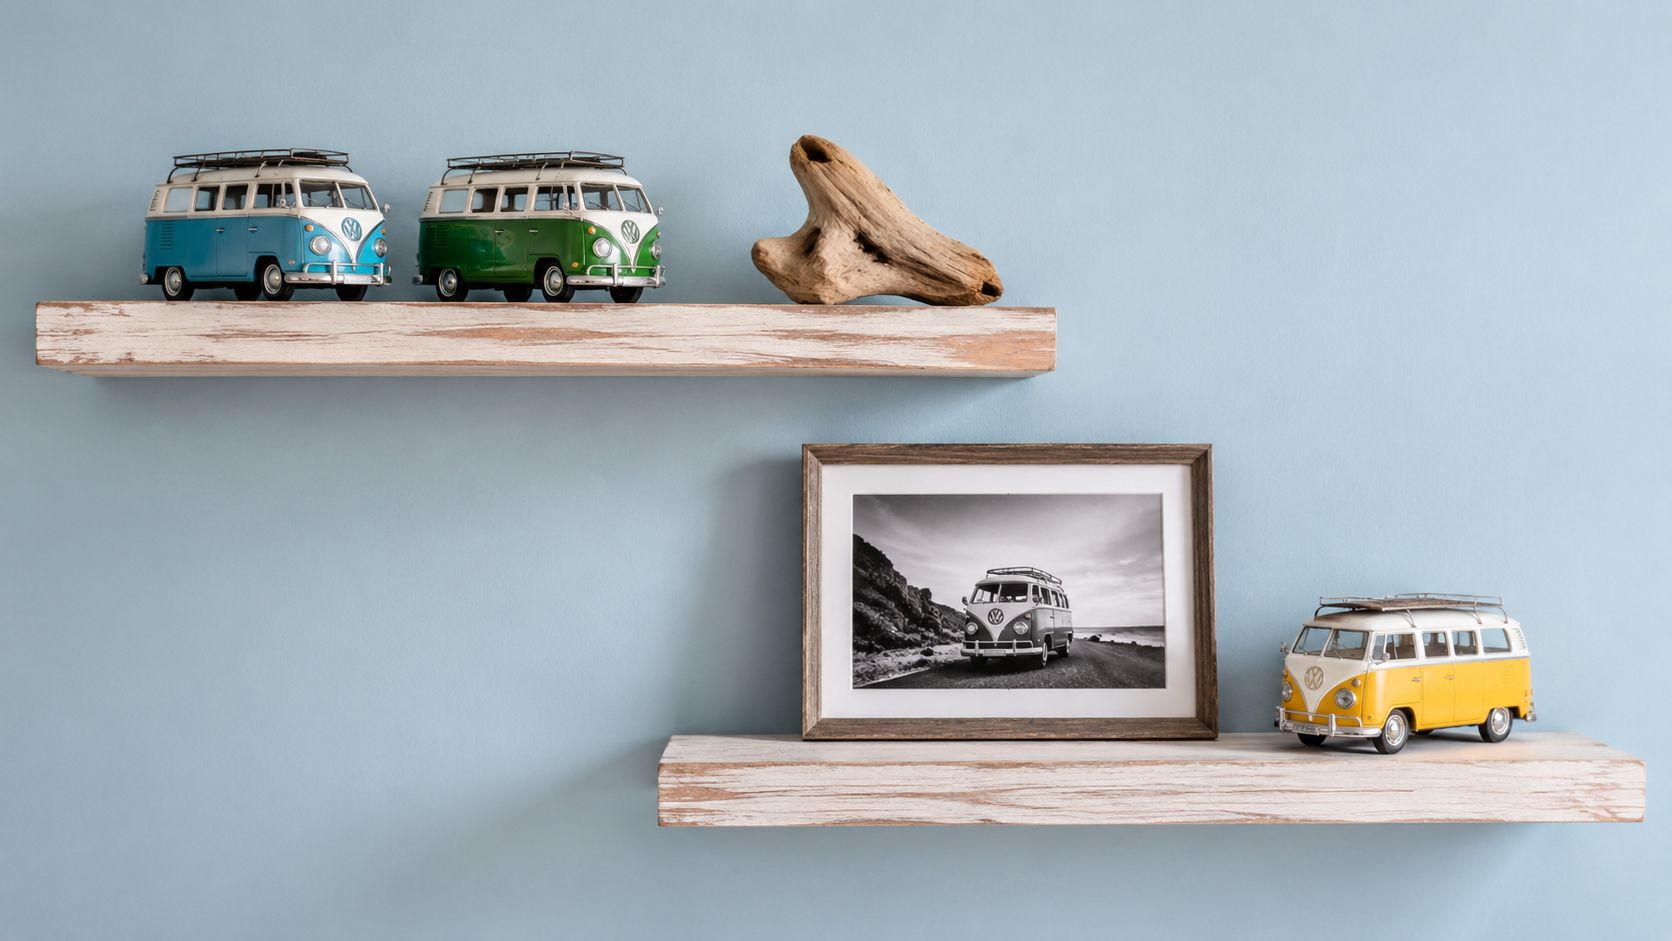
For Australian collectors building a VW theme, smaller scales let you mix Beetles, Kombis, and surfy special editions without crowding the bonnet line of the whole room.

Building Your Collection and Where to Start

The simplest way to build a good collection is to make three decisions in order. First, choose your scale. Second, decide whether you want a mass-market brand or a premium release. Third, only buy models that carry the licensing and finish quality you'd be happy to display for years.

A varied VW shelf usually works best when it mixes body styles and moods. A Samba Bus, a Beetle, and a Flower Power variant create more visual interest than three nearly identical vans, and that's true whether you're collecting for yourself or buying a present. If you want to browse a broader local selection of Volkswagen diecast models for sale, the diecast models Australia category is a sensible place to compare scale, style, and release type.

A practical way to start

  • Pick one scale first: That keeps the shelf coherent and helps you compare models fairly.
  • Buy licensed VW pieces only: It's the fastest filter for quality and long-term satisfaction.
  • Mix one showpiece and one everyday piece: That balance keeps the collection interesting without draining the budget.
  • Choose models that match the owner's taste: A Samba Bus suits a surfy collector, while a Beetle often lands better with someone who loves pure VW heritage.

FAQ

What is the safest scale for a first VW diecast?
1:43 is usually the easiest starting point for compact displays, while 1:24 often feels more gift-friendly because it has a bit more presence.

Are licensed models really worth it?
Yes, because licensing helps separate genuine VW-branded collectibles from generic lookalikes, and that matters for display pride.

Should I always choose the biggest model?
No. Bigger only helps if the finish, licensing, and shelf space all make sense together.

What's the best brand for a Beetle or Kombi gift?
The best choice is the one that matches the recipient's taste, scale preference, and desire for licensed authenticity.

If you're ready to add a properly licensed Beetle or Kombi to your shelf, have a look through Volkswagen Memorabilia and choose the scale and model that feels right. A well-chosen diecast should look good in the box, look even better on display, and feel like a small piece of VW history every time you walk past it.

7 Rad Retro Decor Ideas for Your Aussie Pad

Cruising past the surf clubs on a blue-sky arvo, a Kombi parked under the palms can stop you in your tracks faster than any showroom window. That's the spirit you want at home too, a space that feels sun-warmed, easygoing, and a little bit story-rich, with a Volkswagen Beetle model on the shelf and a bit of coastal character on the mantle.

1. Product Wooden Sailboat Decoration Retro White 53cm

This is the kind of piece that changes a room the moment it lands. The 53 cm size gives the Wooden Sailboat Decoration Retro White 53cm real presence, so it reads as a focal point rather than a small filler accent, and that suits a retro room that wants a bit of seaside theatre. Its retro white finish leans weathered and handmade, which makes it sit nicely beside VW keepsakes, especially if your display already has a Kombi or a surf-van theme.

The beauty of this sort of piece is how easily it bridges two moods. Retro decor ideas can go flat when everything leans too hard into one decade, but a sailboat like this adds a softer, coastal layer that keeps the room relaxed. It also works in a way that feels very Australian, because beach references, timber textures, and old-school motoring nostalgia have always played well together in local homes.

Practical rule: start with one hero object, then build around it with smaller bits that echo the same story. A sailboat, a diecast Kombi, and a framed surf print can do more than a room full of tiny decorations.

Where it shines

Put it on a mantel, a console, or a shelf where it can catch the light. The weathered white look suits pale walls, but it also gives darker furniture a nice lift, especially if you're working with timber, rattan, or painted cabinets. It's also a strong gift idea for anyone who loves beach houses, VW memorabilia, or both.

A couple of things to keep in mind. The product page doesn't spell out the construction details or mounting options, so it's safest to treat it as an indoor decorative feature. That said, the relaxed, surfy feel makes it a natural fit for coastal home decor ideas and for a display that already includes licensed Volkswagen keepsakes from the shop.

You can also use it to soften a more mechanical collection. A row of diecast models can look very precise, very linear, very “display case”, but a sailboat breaks that up with a breezier shape and a more handmade feel. That contrast is where the room starts to feel lived in, not staged.

2. Temple & Webster

Temple & Webster is useful when you want the fastest jump from inspiration to a purchasable retro room. Its Room Ideas area and style browsing make it easy to move from a Mid-Century or Retro look to actual items without losing the thread, which is handy if you're trying to assemble a room around a single VW Kombi diecast Australia display and a few supporting pieces. The site's “shop the look” approach suits people who'd rather see a finished vignette than start from scratch.

The big win here is variety. You can browse styled rooms, then click through the pieces one by one, which saves a lot of guesswork when you're building a retro corner with a chair, lamp, rug, and wall art that all need to talk to each other. For collectors, that matters because a carefully chosen shelf display beside a Volkswagen theme looks much stronger than random bits pulled from different styles.

The platform also suits buyers who like to compare options without leaving the one site. That's useful for retro decor ideas because the style can slip from warm and nostalgic into cluttered if the mix is off, and Temple & Webster gives you plenty of ways to refine the mood before you buy.

The best use of a big inspiration hub is not copying a room exactly. It's stealing the balance, then swapping in pieces that feel more personal, like a Kombi print, a brass lamp, or a low timber sideboard.

For an Aussie VW fan, the practical angle is simple. Use the site to source the bigger supporting furniture, then let the memorabilia carry the personality. That keeps the room from looking like a theme park set, and it gives your diecast collection room to breathe. You can browse the main Temple & Webster room ideas hub when you want a broad starting point, then narrow down to details that match your collection.

3. Adairs Insider Inspiration

Adairs works best when you want retro flavour without rebuilding the whole room. Its Insider Inspiration pages lean into quick styling ideas, and that's a good match for someone who already owns a few favourite pieces, maybe a Beetle model, a framed VW print, and a sofa that just needs the right cushion or throw to feel more intentional. The site is handy because it nudges you toward soft finishes and easy layers rather than hard, expensive commitments.

That makes it a strong stop for smaller retro updates. Cushions, throws, glassware, and rugs can shift a room toward a warmer, more nostalgic mood without demanding a full renovation, which suits Australian homes where people often want a refresh that feels light and practical. If you've got a shelf or sideboard that's already carrying a model car or van, these smaller pieces help the surrounding space feel curated rather than empty.

Adairs also plays nicely with a coastal-retro scheme. Think soft blue tones, textured fabrics, and glass accents that echo beach light and old holiday houses. Those details pair well with VW memorabilia because both worlds lean on memory, family trips, and a sense of easy summer living.

A good approach is to keep the hero objects obvious and use Adairs for the supporting cast. A retro diecast Kombi on a timber shelf looks better when the surrounding textile choices are calm and cohesive, not noisy. That's where a simple cushion or rug can do a lot of the heavy lifting.

You can start with the Adairs Insider Inspiration hub if you want quick room-refresh ideas, then bring the look home with one or two memorabilia pieces from your own collection. It's a neat way to keep the style relaxed, affordable, and still very much tied to your VW story.

4. Freedom

Freedom has a useful middle ground for retro lovers, because it combines inspiration with furniture ranges that lean into mid-century shapes. That's a solid fit for someone who wants a room to feel like a real living space, not just a display corner. A clean-lined sofa or chair gives your memorabilia proper context, especially if you're showing off a Kombi or Beetle model beside books, lamps, and framed prints.

The reason it works is simple. Retro decor ideas need structure as much as personality, and mid-century-inspired seating gives you that structure without making the room feel stiff. A lounge zone with the right chair or sofa can frame your collection beautifully, especially in an Australian home where natural light and open-plan living can make smaller decorative items disappear if the base furniture is too bulky or too bland.

Freedom's inspiration pages are handy because they point you toward occasional chairs and similar pieces that can anchor a corner. That matters if you're styling around one standout item, like a model display on a side table or a framed Volkswagen print above a low cabinet. The room stays calm, and the memorabilia gets the spotlight.

How to use it with VW pieces

Think in layers. A timber or upholstered anchor piece gives the room shape, then your memorabilia brings the story. If you're mixing a Volkswagen Beetle model with books and ceramics, the seating and side tables should sit back and let the pieces do the talking. If you're building a lounge with a Kombi vibe, choose furniture with rounded edges and a low visual profile so the whole space feels easy and open.

You can browse the main Freedom site for mid-century-inspired furniture and inspiration, then style the finished room with licensed Volkswagen memorabilia on shelves, tables, and consoles. That's a clean route for buyers who want retro character with a polished finish.

5. IKEA Australia Ideas by Style

IKEA Australia is the practical mate in the group, the one that helps you get the look without blowing the budget. Its Ideas by Style pages are especially handy for retro decor ideas because they show how to work with compact spaces, and that matters if your place is an apartment, studio, or a tricky little corner that needs more personality than floor space. The styling cues are approachable, and the flat-pack format makes it easier to test a look before you commit to anything bigger.

The best part is how easy it is to keep things functional. Retro style doesn't have to mean clutter, and IKEA's small-space ideas are a good reminder that a couple of strong shapes and colours can carry the whole room. If you're trying to display a diecast Kombi without overwhelming the shelf, this is the sort of place that helps you think in tidy, modular layers.

That's also where VW memorabilia wall art can earn its keep. A simple print above a compact console or storage unit gives the room a clear focal point, and it stops the setup from feeling like a pile of accessories. Use the furniture to solve the space problem, then let the memorabilia bring in the warmth.

Good fit for renters and first-time stylers

IKEA works well if you're testing a palette before moving on to more distinctive pieces. You can try out a bold chair, a playful lamp, or a simple shelving unit, then build the personality with your VW collection, some coastal accents, and maybe a vintage-style frame or two. That approach keeps the room flexible and lets you change things seasonally without starting over.

Browse the IKEA Australia Ideas by Style pages when you want a simple, budget-friendly base. Then finish the room with memorabilia that tells your story, not just a catalogue story.

6. Holy Funk

Holy Funk is the sort of retailer you visit when you already know you want a proper retro mood, not just a passing nod to it. The range is tightly curated around Mid-Century, Scandinavian, Danish, and Retro furniture and homewares, which makes it easier to keep a room visually coherent. That's a huge help if you're styling around a Kombi display or a Volkswagen diecast models for sale collection and don't want random pieces fighting for attention.

The site's strength is discipline. Big-box retailers can make retro styling feel scattered, but Holy Funk keeps the focus on furniture with the right lines, proportions, and finish. That means sideboards, bar carts, entertainment units, and similar anchor pieces become part of the story rather than background noise. For VW fans, that's perfect, because the memorabilia can do the talking while the furniture supports the mood.

There's also a local-showroom feel to how the site presents itself, which matters for buyers who want to check scale and finish before they commit. Retro decor ideas often live or die on proportions, and a low, clean-lined cabinet beneath a display of diecast models looks far better than something tall and heavy that swallows the whole wall.

Best pairing: use one strong furniture anchor, then keep the accessories intentional. A clean sideboard, a lamp with a sculptural shape, and a single row of licensed VW models can look far more considered than a crowded shelf.

If you're building a lounge or media area with vintage character, Holy Funk gives you the bones. Then your memorabilia, wall art, and coastal bits give it soul. Start with the Holy Funk homepage if you want a tighter retro edit and a cleaner path to a finished room.

7. Coastal Vintage

Coastal Vintage is where the seaside story gets more authentic and a bit more rugged. The mix of maritime pieces, brass hardware, glass fishing floats, oars, life rings, and vintage decor makes it a strong fit for anyone who wants a room that feels like an old coastal shack with better taste and less dust. If your VW taste leans toward surf vans, road trips, and beach-town memories, this is the kind of retailer that can make that mood feel real.

What stands out here is the sense of patina. New pieces can capture the look, but vintage or weathered items bring texture that's hard to fake. That matters when you're styling around Volkswagen memorabilia, because the cars and vans already carry a lot of personality, and the surrounding decor should feel like it belongs to the same world. A porthole mirror or a brass accent can do that beautifully.

The vintage home accessories range at Volkswagen Memorabilia fits neatly into this thinking too, because it helps you build a layered display without losing the relaxed coastal feel. Pair one strong maritime accent with a diecast Kombi, and the whole shelf suddenly tells a clearer story.

The best thing about this kind of shop is that one-off pieces don't feel generic. They feel collected. That's ideal for retro decor ideas because the style is at its best when it looks gathered over time, not bought in one cart and dropped into place. If you're aiming for a more authentic finish, this is the place to look for accents that give the room age and character.

Use the Coastal Vintage homepage when you want something with a bit of salt air in the grain. It's a good stop for anyone building a VW-themed room that leans into beach culture, road-trip memory, and the easy charm of old Australian seaside living.

Retro Decor Ideas, 7-Item Comparison

Item Complexity (🔄) Resource requirements (⚡) Expected outcomes (📊) Ideal use cases (💡) Key advantages (⭐)
Product – Wooden Sailboat Decoration Retro White 53cm Low 🔄, ready-to-display; minimal setup Low ⚡, single-item purchase; 53 cm footprint; indoor use likely 📊, Instant nautical focal point; enhances coastal/VW vignettes 💡, Mantels, shelves, centrepieces; gift for beach/VW fans ⭐, Large visual impact; vintage white finish; pairs with VW memorabilia
Temple & Webster Low 🔄, curated vignettes simplify implementation Medium ⚡, wide price range; online ordering and AU delivery 📊, Room-scale outcomes from inspiration to purchase 💡, Building cohesive retro/MCM rooms across budgets ⭐, Deep range; "shop the look"; frequent promotions
Adairs (Insider Inspiration) Low 🔄, bite‑size guides for quick swaps Low–Medium ⚡, affordable accents; membership perks reduce cost 📊, Quick on‑trend colour/texture refreshes 💡, Inject retro accents (cushions, throws, glass) on a budget ⭐, Accessible seasonal ideas; membership savings
Freedom Medium 🔄, requires planning to match ranges; showroom options High ⚡, investment for sofas/chairs; protection plans available 📊, Durable, cohesive mid‑century living zones 💡, Committing to mid‑century furniture sets; in‑store testing ⭐, Matching collections; national stores and care information
IKEA Australia (Ideas by Style) Low 🔄, shoppable flat‑pack vignettes; renter‑friendly Low ⚡, very price‑accessible; consistent stock and parts support 📊, Scalable retro‑inspired looks for small spaces 💡, Testing retro palettes; renters and compact rooms ⭐, Affordable, widely available, easy replacements/parts
Holy Funk Medium 🔄, curated selection needs careful pairing Medium ⚡, mid‑range pricing; AU delivery and showroom pickup 📊, Authentic mid‑century anchors and cohesive edits 💡, Curated furniture anchors for authentic retro styling ⭐, Tightly curated range; clear categorisation; quality focus
Coastal Vintage Medium–High 🔄, sourcing one‑offs requires ongoing search High ⚡, prices reflect rarity; wholesale options for retailers 📊, Unique patinated pieces that add genuine coastal character 💡, One‑of‑a‑kind maritime accents; retail vintage edits ⭐, Authentic vintage finds; wholesale for small retailers

Ready to Hit the Road with Your Retro Style?

You've got the map, you've got the inspiration, now it's time to start your retro decor journey. Whether you begin with a hero piece like a diecast VW Kombi or a coastal-cool sailboat, the trick is to choose items that tell your story and leave a little breathing room around them. That's where the room starts to feel like yours, not just like a mood board.

The strongest retro decor ideas usually start small and get better with restraint. A 60-30-10 colour split can help keep the balance steady, especially when you're mixing timber, white, brass, and a bright accent, while a few anchored statement pieces stop the look from drifting into clutter. If your place is compact, keep pathways clear and let one shelf, one console, or one corner carry the nostalgia.

Australian buyers are already comfortable with pre-owned and unique pieces, which makes this style feel right at home. A 2024 PayPal and Australian Retailers Association report found 68% of Australian consumers bought at least one pre-owned item in the previous 12 months, and 25% said they did so to find something more unique, which lines up neatly with the way retro styling depends on characterful finds and mixed sources. The same report also pointed to saving money and reducing waste as common motivations, so this isn't just about looks, it's about practical buying habits too.

If you're building a room with a VW heart, start with one anchor, then add the details that make you smile. Browse the Volkswagen Memorabilia shop for licensed diecast models, Kombi Samba Bus pieces, Beetle models, and coastal accents that suit a relaxed Aussie home, then mix in the bits that remind you of road trips, surf stops, and sunny show days. You'll end up with a space that feels warm, personal, and properly full of life.


A CTA for Volkswagen Memorabilia.

Nautical Table Decor Guide with VW Memorabilia

You're at a sunny Aussie car show, a Kombi Samba Bus is parked two bays down, and your mates are crowding around a tablescape that's doing more work than it should. The trick isn't piling on more shells, more rope, or more blue. It's building a nautical table decor setup that feels relaxed, practical, and a bit nostalgic, the same way a well-kept Beetle feels timeless without trying too hard. That's the sweet spot, coastal living with enough restraint to keep it fresh, not souvenir-shop loud.

Introduction to Nautical Table Decor

A good nautical table starts the same way a good VW display does, with one clear idea and no clutter fighting for attention. The style itself has deep roots in Europe, where marine decoration took off in the 18th century and became especially popular in the 1800s. Dining and side tables were styled with anchors, boats, maps, lanterns, and blue-and-white palettes that still read as coastal today, which is why the look has real staying power in Australia's beach-minded homes, not just holiday rentals or summer pop-ups. History of marine decoration

That matters here because Australia is a coastal country in both lifestyle and population distribution, with about 27.2 million residents as of June 2024, and most of them living in coastal states and territories rather than inland regions, according to the ABS population estimates cited in the marine-decoration history source. In other words, the style fits the way people live, entertain, and gather. It's not a novelty. It's a natural extension of coastal living.

Practical rule: if your table looks like a seaside gift shop exploded, you've gone too far. Keep the story tight, keep the objects intentional.

A smart starting point is to think in layers, one for colour, one for texture, one for the focal point. If you want a broader coastal-home angle to pair with your table styling, the coastal home decor ideas collection is a handy companion. The best tablescapes feel like they belong at a relaxed backyard lunch after a VW run, not like they were assembled in a panic ten minutes before guests arrived.

Choosing a Coastal Colour Palette

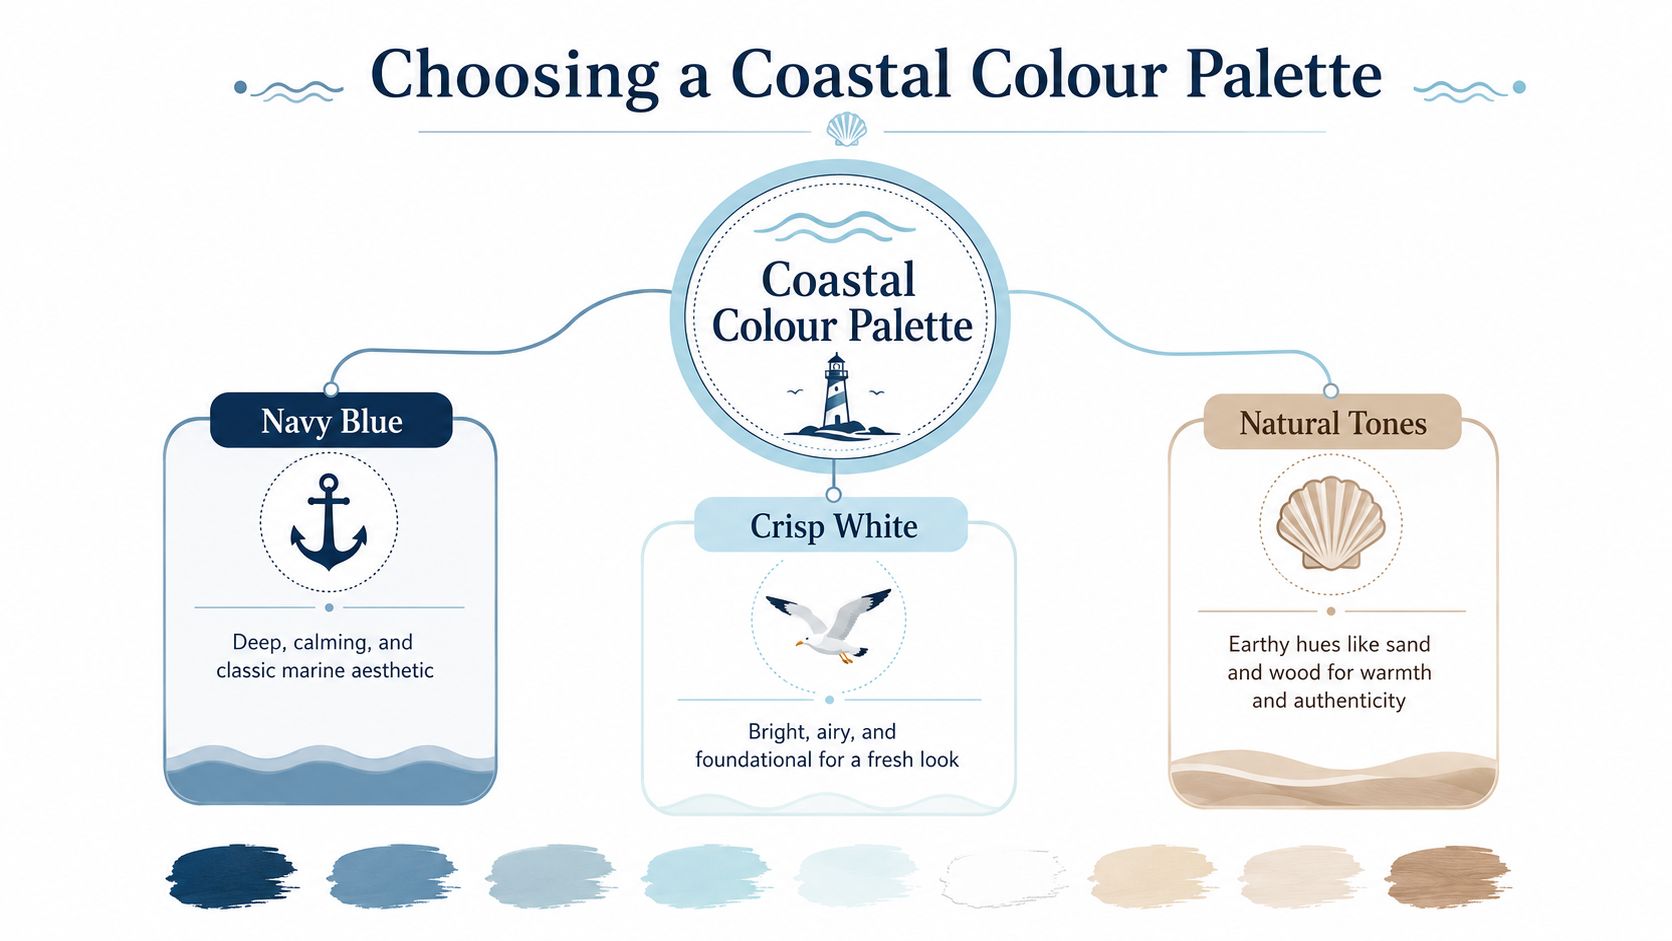
A limited palette is what makes nautical table decor look polished instead of random. If you throw every beach colour onto the table, the eye bounces around and the whole setting loses its calm. Stick to navy blue, crisp white, and natural tones, then let the materials do the rest of the work. That restrained mix is the core visual language of nautical decor, with anchors, rope, driftwood, stripes, and ocean-life imagery reinforcing the theme rather than fighting it. Nautical decor overview

An infographic showing a coastal color palette featuring navy blue, crisp white, and natural sand tones.

How to balance the colours

Use the 60-30-10 approach as a simple visual check. Keep about 60% neutral, 30% secondary colour or texture, and 10% accent colour, while keeping the overall height low enough for easy conversation across the table. That rule comes from polished tablescape guidance, and it works because it stops the table from becoming top-heavy or visually noisy. Tablescapes as an art

For a VW collector, this palette is a gift. Navy and white frame a Volkswagen Beetle model beautifully, while a Kombi's red, cream, pastel, or surf-inspired paintwork pops against neutral linen and sand-toned pieces. The classic VW shapes already carry the nostalgia, so the table shouldn't compete with them.

Here's the simplest way to test the palette before you commit:

  • Lay the textile first. Start with a white, natural, or navy base so the table reads calm from the edge of the room.
  • Add one dominant tone. Navy works best if you want a crisp maritime look, while white keeps things airy.
  • Reserve accent colour for the smallest items. A tiny flash of red from a VW diecast or a pale seafoam napkin keeps the eye moving without breaking the theme.

Good styling is subtraction. Every colour you remove makes the final look more confident.

If you're unsure, place your items in natural daylight and step back. If the table still looks balanced from a few metres away, the palette is doing its job.

Selecting Textures and Tableware

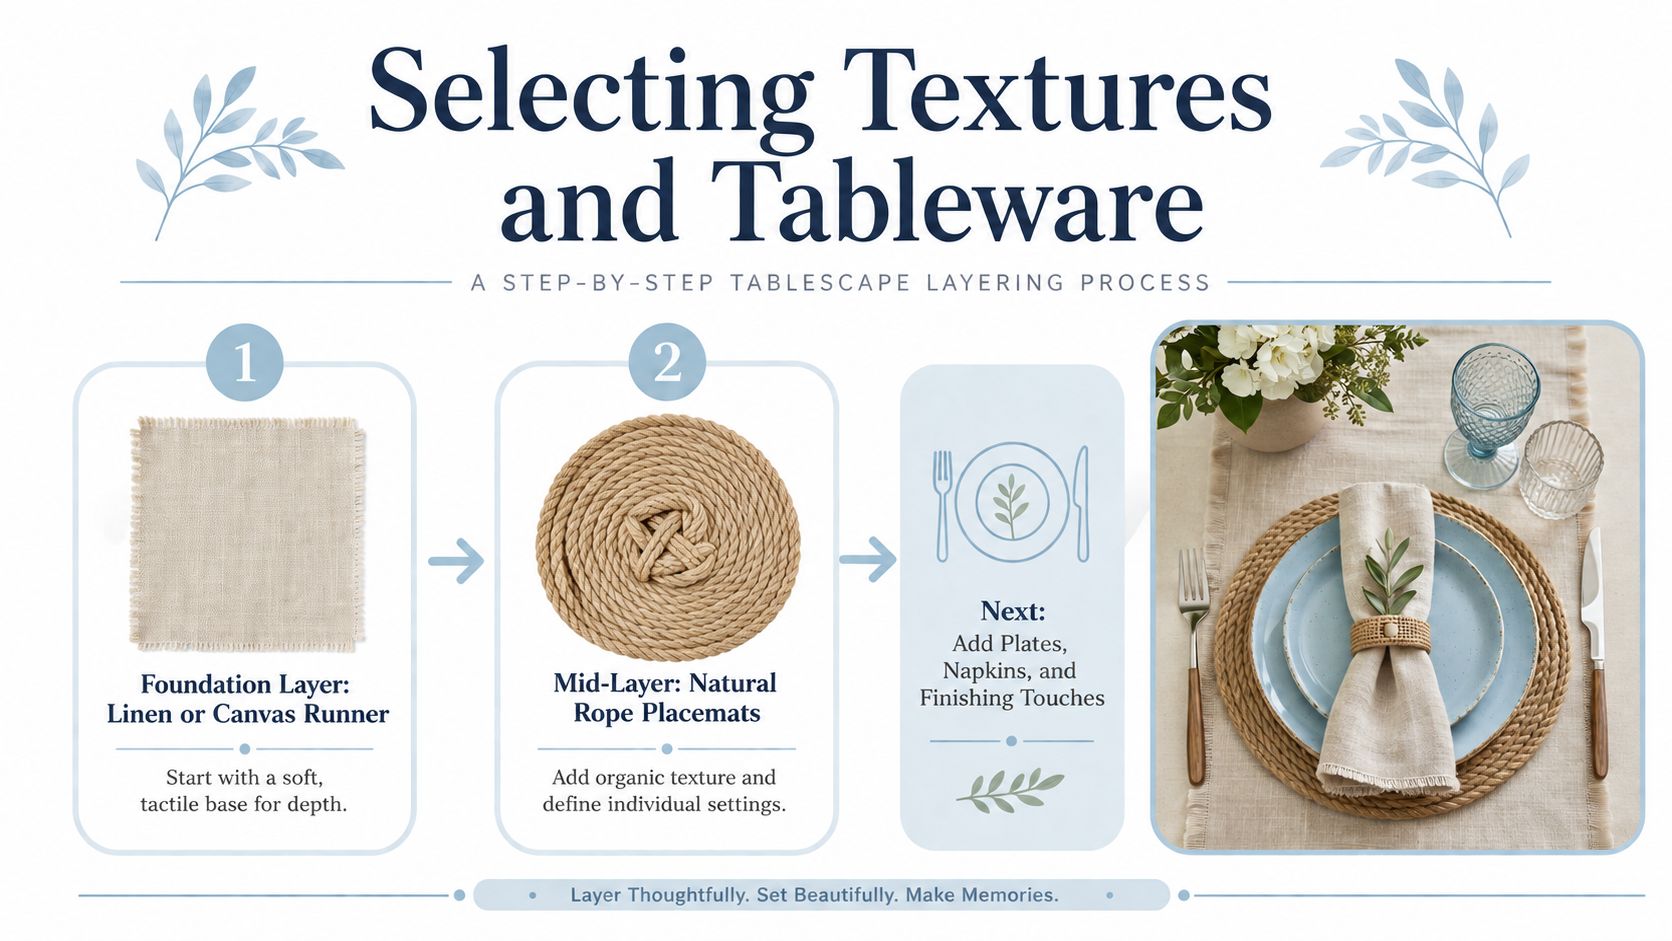
The table feels coastal when your hand notices the materials before your eye notices the props. That's why linen, rope, wood, and ceramic matter more than extra trinkets. A practical AU-relevant nautical setup is built around a constrained maritime material system, because tactile contrast is what makes it read as coastal rather than just blue. Table-setting in a nautical style

A step-by-step instructional infographic on creating a layered tablescape featuring natural rope placemats and a linen runner.

Build the base first

Start with a linen or canvas runner. That gives the table a soft foundation and stops the surface from feeling stark. A jute table runner is a strong choice if you want something with a bit more texture and a slightly earthier coastal feel.

Then layer in rope placemats or a woven charger if you want each setting to feel framed. Don't overdo the hard nautical cues. You're after texture, not a ship's chandlery display.

Choose tableware that supports the scene

White porcelain or blue-rimmed plates are the cleanest options because they echo the palette without stealing focus. Low-profile glassware keeps the sightline open, which matters once you add a model Kombi or a shell bowl to the centre. Brushed silver or aged brass flatware works too, but only if the finish stays quiet.

A few sharp choices beat a pile of themed objects every time:

  • Linen runner. Soft, simple, and easy to style around.
  • Rope placemats. Enough texture to signal coastal without shouting.
  • White or blue-rimmed plates. Clean shape, classic look.
  • Anchor or fish accents. Use sparingly, on napkin rings or serving pieces.
  • Low glassware. Keeps the table open and conversational.

That's the whole game. Let the tactile layers do the storytelling, then place the VW memorabilia where it can be seen clearly, not buried in clutter.

Creating Centrepieces with Shells and VW Collectibles

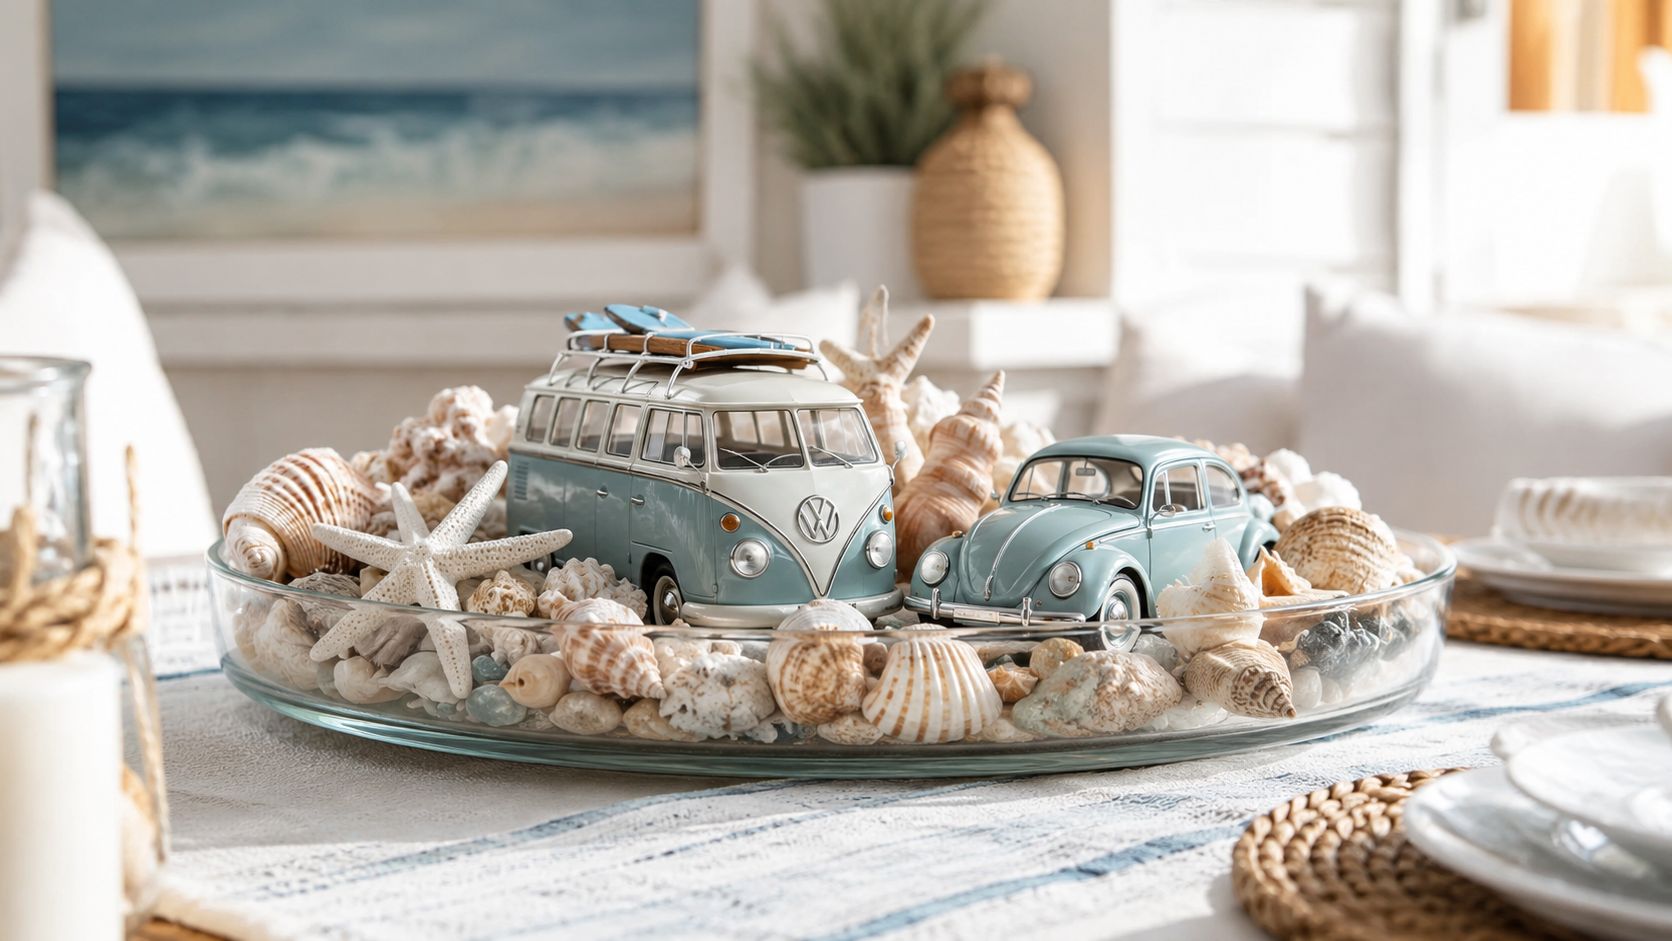
The centrepiece is where the tablescape either lands beautifully or tips into chaos. Keep it low, keep it anchored, and give the eye one clear object to settle on. A shallow glass bowl, a sand-filled vase, or a low tray gives you a base that can handle shells, driftwood, and a Kombi Samba Bus diecast without blocking the view across the table. Marine-decoration catalog categories

A glass bowl filled with seashells, a starfish, and miniature vintage Volkswagen bus and beetle toy cars.

Build around one focal object

Marine-decor assortments are usually organised around defined product families, like model ships, lighthouses, knot frames, and nautical replicas. Use that logic at table scale. Pick one primary focal object, for example a model Kombi, a lantern, or a small ship, then support it with shells or rope rather than competing focal points.

That approach keeps the arrangement readable. If you add too many sub-themes, the table starts to feel eclectic instead of nautical. One clear story is always stronger than five weak ones.

Keep the arrangement low and balanced

Drop a few natural shells into the bowl, add a driftwood piece, then nestle the diecast slightly off-centre so it feels placed rather than staged. A starfish can work if it's secured well and doesn't look like an afterthought. If you want evening ambience, a small lantern cluster beside the bowl gives you glow without raising the height.

A simple arrangement order works best:

  1. Place the base. Use the tray, bowl, or sand-filled vase.
  2. Set the focal object. Put the Kombi Samba Bus or Beetle model where it can be seen from multiple angles.
  3. Add texture. Shells, driftwood, and rope come next.
  4. Check the height. If guests can't see each other, trim it back.

A Beetle model gives the arrangement a more compact, retro feel. A Kombi adds the surf-culture mood. Both fit the same scene, so choose the one that suits the table's personality. For a longer dining table, the dining table decor category is the neatest way to keep the styling tied together without overfilling the space.

Adapting Decor for Seasons and Budgets

The best coastal tables aren't locked to one look. They shift with the weather, the mood, and the occasion, which is exactly why they work so well for Australian homes. The modern version of the style leans toward natural textures, restrained palettes, and layered neutrals rather than loud anchor-and-shell overload, so you can keep the look current without losing the seaside feel. Coastal inspired accent table

Budget-friendly versus premium pieces

If you're building a table on a tighter budget, start with mixed shell sets, painted driftwood, linen napkins, and a single diecast focal piece. Those items give you the mood without draining the wallet. If you want a more refined finish, hand-blown glass buoys, solid brass lanterns, and heavier ceramic serveware lift the whole scene.

The smart move is to buy the pieces that work hard every time, then rotate the decorative extras. A quality runner, durable tableware, and one good focal object will outlast a drawer full of novelty bits.

Seasonal swaps that still feel nautical

Summer wants lighter energy. Think crisp whites, pale blues, seafoam accents, and a looser arrangement with more breathing room. Winter asks for deeper tones, so grey linens, storm-blue accents, and darker wood pieces make the table feel grounded without turning heavy.

Seasonal styling works best when the palette shifts, not the theme. Keep the maritime story, change the temperature.

You can also repurpose VW bits with a bit of humour and sentiment. A small Beetle key ring can work as a place marker, and a miniature van can sit beside a guest's napkin as a casual conversation starter. That's how you make the table feel personal without loading it with extra purchases.

Where to Source Durable Decor in Australia

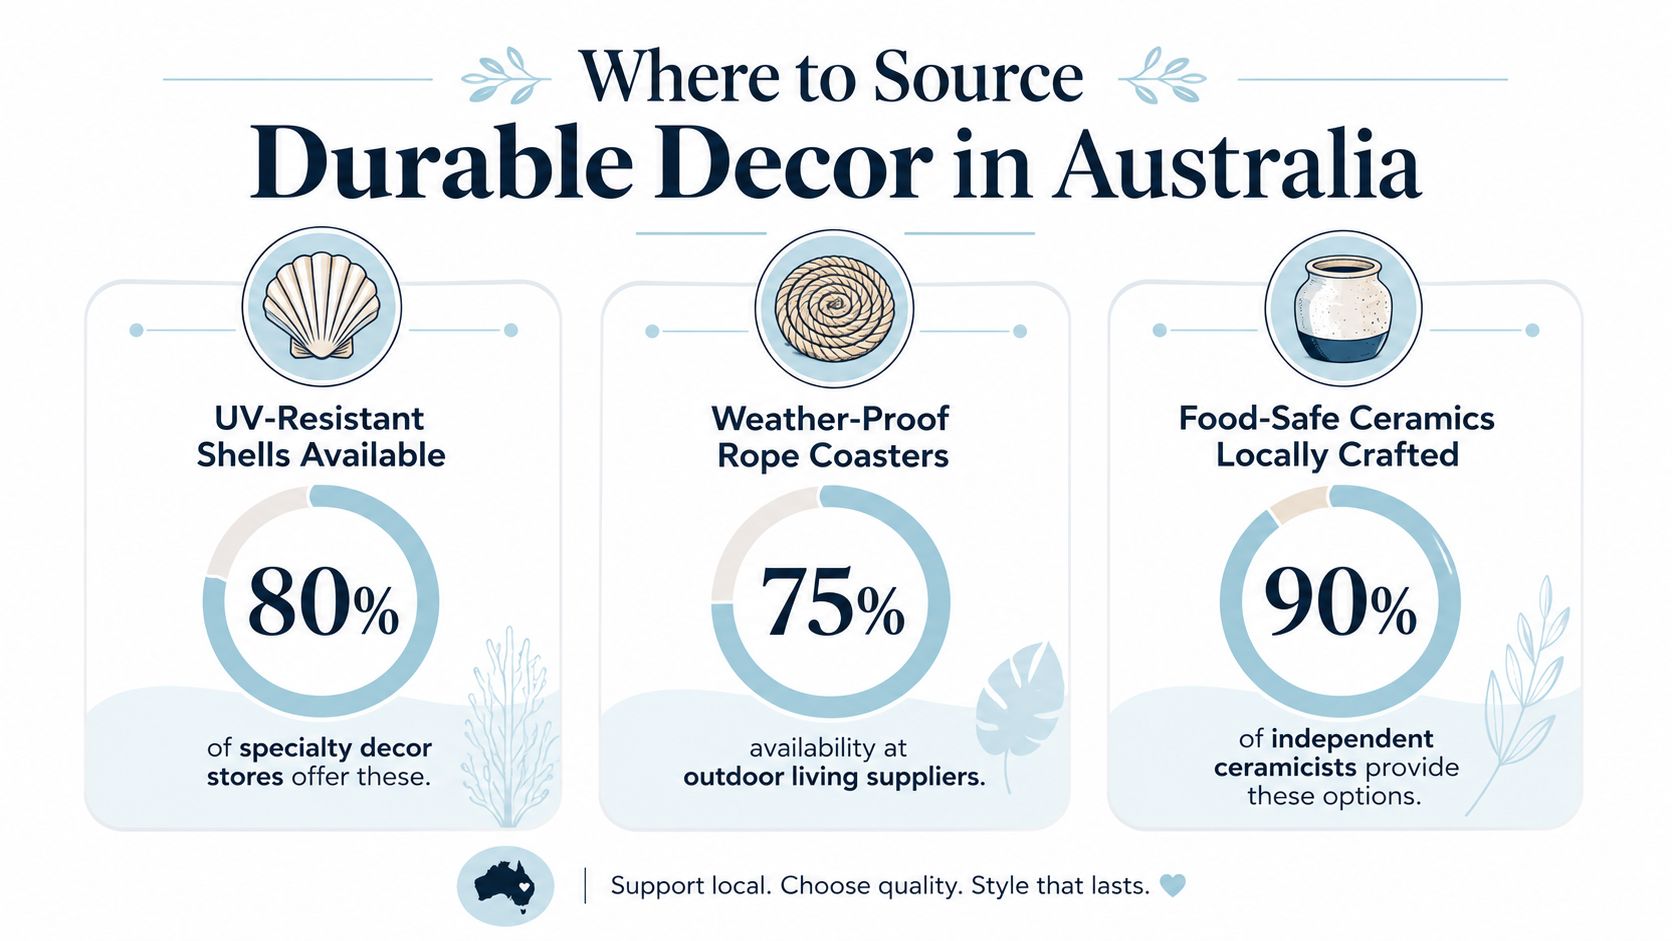
Durability is the big missing piece in most nautical decor advice, especially for Australian outdoor entertaining. Humidity, strong UV, and constant in-and-out dining demand materials that won't look tired after one season. Most guides stay on the surface, but outdoor settings need pieces that are easy to clean, stable in heat, and sensible around food. Yacht table decor beginner's guide

An infographic showing statistics on sourcing durable nautical home decor items like shells, rope, and ceramics in Australia.

What to buy for Australian conditions

Choose food-safe ceramics, sealed wood, and rope pieces that can be wiped down without fuss. Shells and driftwood look right, but they need to be used as accents, not fragile centre-stage pieces that will be knocked around during service. For model cars and vans, look for finishes that won't be handled roughly or left baking in direct sun for hours.

A simple maintenance routine is enough. Rinse salt exposure off outdoor pieces, use a gentle detergent where needed, and store anything delicate inside when the weather turns rough. That's not fussy, it's sensible.

Why local sourcing helps

Australian importers have the edge because local stock reduces waiting and keeps replacement simple when you need it fast. For gift buyers and collectors, that's a real advantage, especially if you're trying to line up a table for an event or a weekend catch-up. A local source also makes it easier to match a diecast model to the rest of your decor while keeping the look cohesive.

Use the rules below when you shop:

  • Outdoor settings: prioritise wipe-clean finishes and stable materials.
  • Food-adjacent decor: keep ceramics and serveware clearly food-safe.
  • Feature pieces: choose one strong model or lantern rather than several small distractions.
  • Sun exposure: keep delicate items shaded, because UV is unforgiving.

That approach is more practical than chasing every trend piece you see online. The table needs to survive Australian conditions first, then look good second.

Bringing It All Together and Next Steps

The strongest nautical tables are built in layers. Lock in the navy, white, and natural palette, add linen and rope for texture, keep the centrepiece low, and use a VW Kombi Samba Bus or Volkswagen Beetle model as the personality piece. Once you do that, the table feels modern, coastal, and nostalgic at once, which is exactly the right mix for an Aussie home or car-show gathering.

Before you call it done, check three things, balance, sightlines, and material durability. If the arrangement feels calm from across the room and still looks good up close, you've nailed it. For more ways to finish the look with locally sourced pieces, head to Volkswagen Memorabilia and choose the accents that suit your table best.

Fire Extinguisher for Cars a Complete Guide for VW Owners

A Beetle at the far end of the paddock, the bonnet up, the sausage sizzle going, and someone spots that sharp smell of hot wiring. That is the moment a fire extinguisher for cars stops feeling like spare kit and starts looking like the thing that might save a weekend, and maybe the car too. In Australia, private cars generally do not have to carry one, but motorhomes and caravans are different because of extinguisher requirements under ADR 44/01.

For classic VW owners, that practical side matters straight away. A Beetle engine bay, a Kombi cargo area, or a Samba Bus full of treasured trim can turn a small flare-up into a costly mess if the extinguisher is buried under bags or wedged where nobody can reach it in time. If your VW has had modern touring gear added, it also makes sense to check a few related safety points, including the slimline lithium battery safety checklist, so the setup stays sensible as well as nostalgic.

Why Every VW Owner Needs a Fire Extinguisher

A Beetle owner at the far end of a grass field notices smoke curling from the engine lid, and the first thought isn't compliance, it's preservation. That's the heart of it. When you've spent years keeping an old Volkswagen alive, a small, contained fire is not just a safety issue, it's a question of whether the car drives home or goes onto a tow truck.

Car fires can move fast. One Australian safety guide notes they can double in size every 60 seconds (car fire extinguisher guide), which is why the effective strategy isn't heroic firefighting, it's having the right extinguisher within arm's reach and knowing when to back off. The advice is to use it only on something small and contained, then evacuate if the fire is already spreading.

Practical rule: if you'd need to open the bonnet, boot, or rear hatch and the smoke is already building hard, your best move is usually to get everyone clear and call 000.

For VW drivers, the old-school layout changes the stakes. A Beetle's rear engine, a Kombi's tight packaging, and years of road-trip clutter mean a loose extinguisher in the wrong spot can be useless at the exact moment you need it. That's why many owners think of it the same way they think about a good jack, a spare belt, or a clean service book, part of the car's survival kit, not an accessory.

Types of Fire Extinguishers Suitable for Cars

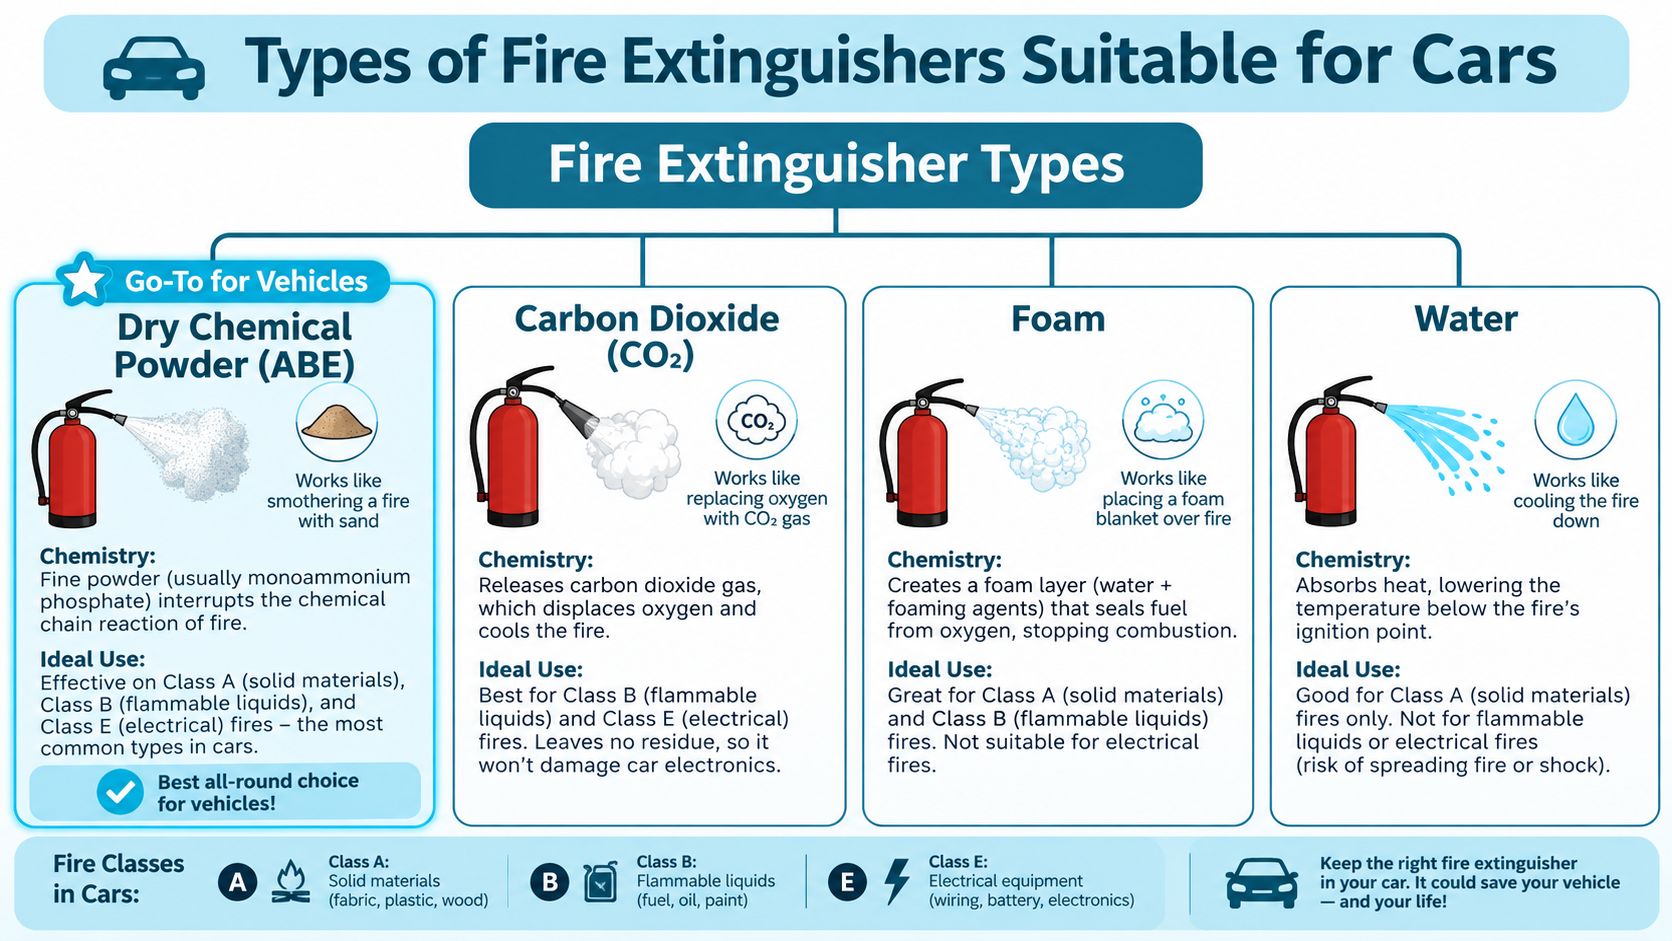
A car extinguisher has to handle a mixed bag of risks. In a VW, that can mean wiring faults, fuel vapour, upholstery, or a hot engine bay, so the agent inside matters more than the label on the front. For Australian vehicle use, dry chemical powder is the common fit because it can deal with several fire types and is easy to keep in the cabin, as noted in Australian vehicle extinguisher guidance.

An infographic showing four types of fire extinguishers suitable for car emergencies, including dry chemical, CO2, foam, and water.

Dry chemical powder

Dry chemical powder works by interrupting the fire's reaction and covering the flames, a bit like dropping a controlled cloud right over the burn zone. For cars, ABE models are the usual pick because they suit Class A, B and E fires, which covers ordinary combustibles, flammable liquids, and energised electrical hazards. For a Beetle with ageing wiring or a Kombi carrying holiday gear and fuel fumes nearby, that broad coverage makes practical sense. Australian guidance also points to a 1 kg or 1.5 kg dry chemical powder extinguisher as a common vehicle choice because it is compact and suited to the mixed risks found in vehicles (Australian extinguisher market and vehicle context).

Carbon dioxide

CO₂ leaves no powder residue, which sounds tidy, especially around electrical parts or a dashboard full of old trim. It can suit sensitive equipment, but a classic VW usually needs something that covers a wider spread of possible fire sources. In a rear-engined car, a clean gas discharge alone is often a narrower tool than you want on a roadside stop.

Foam

Foam makes a blanket that helps separate fuel from oxygen. That helps on liquid fires, but a vehicle fire is often a mixed problem, not a neat fuel spill in a workshop. For a Kombi loaded up for a surf run, foam is useful in some settings, yet it is not the most flexible choice for the car itself.

Water

Water cools the fire, and on the right material that is exactly what you want. In a car, though, it has limits because it does not suit electrical faults or fuel-related flare-ups, so it is not the practical pick for classic VW touring. If you are dealing with a Beetle engine bay or a Kombi wiring issue, water is usually the wrong tool for the job.

Bottom line: for roadgoing Volkswagens, ABE dry chemical stays the strongest all-round choice because it gives the broadest usable coverage in a small package.

Reading Ratings and Certifications

Australian extinguisher labels can look like a jumble of letters unless you know what to read. The simplest way is to treat the letters as the fire family, and the number as the unit's practical scale. For vehicle use, the important bit is that the extinguisher is built to Australian expectations rather than chosen from generic overseas advice, because AS 2444 is the local reference for portable extinguishers and hose reels, including vehicle applications.

Extinguisher Class Ratings Risk Type Real-World VW Example
A Ordinary combustibles Seat trim, carpet, cardboard service records
B Flammable liquids Petrol around a fuel line, fuel drips near the engine bay
E Energized electrical equipment Wiring fault behind the dash, ignition-related electrical issue

What matters in a classic VW is matching the extinguisher to the kind of problem you're likely to face, not the kind you hope never happens. A Beetle with ageing wiring and a Kombi with long-road-trip fuel heat soak are different from a kitchen or workshop, so the label should reflect vehicle risk, not just general household use.

The certification side is just as important. An extinguisher can look brand new and still be the wrong type, the wrong size, or not suited to the vehicle environment. That's why local compliance matters, and why checking for AS 2444 alignment is a smarter move than trusting a bargain import with a fancy sticker.

Selecting the Right Size for Your VW Beetle or Kombi

A Beetle cabin and a Kombi cabin don't give you the same storage freedom, so size choice is really about access and reach, not just capacity. Australian guidance points to 1 kg to 1.5 kg ABE dry chemical extinguishers for in-car use, with the unit mounted where it's easy to grab, because cargo-area storage slows you down when seconds matter (size and mounting guidance).

Beetle first, Kombi second

For a Volkswagen Beetle model, a 1 kg unit usually makes sense because the cabin is tight, the mounting space is limited, and the aim is quick access rather than extra bulk. A 1.5 kg extinguisher can suit a Kombi better, especially when the van's carrying more gear, more passengers, or a full weekend load of chairs, tools, and camping bits.

Here's the simple comparison:

  • 1 kg unit: lighter, tidier, easier to tuck under a seat in a Beetle.
  • 1.5 kg unit: more reassuring for longer road trips in a Kombi, with a bit more capacity before the bottle is empty.
  • Either size: only works if you can reach it fast without unloading half the interior.

A good rule for VW owners is to think about where your hand naturally goes in a hurry. If the extinguisher sits in the boot under luggage, it might as well be in the garage. If it's under the front passenger seat or another clear, fixed spot, you've got a chance to act before the fire changes shape.

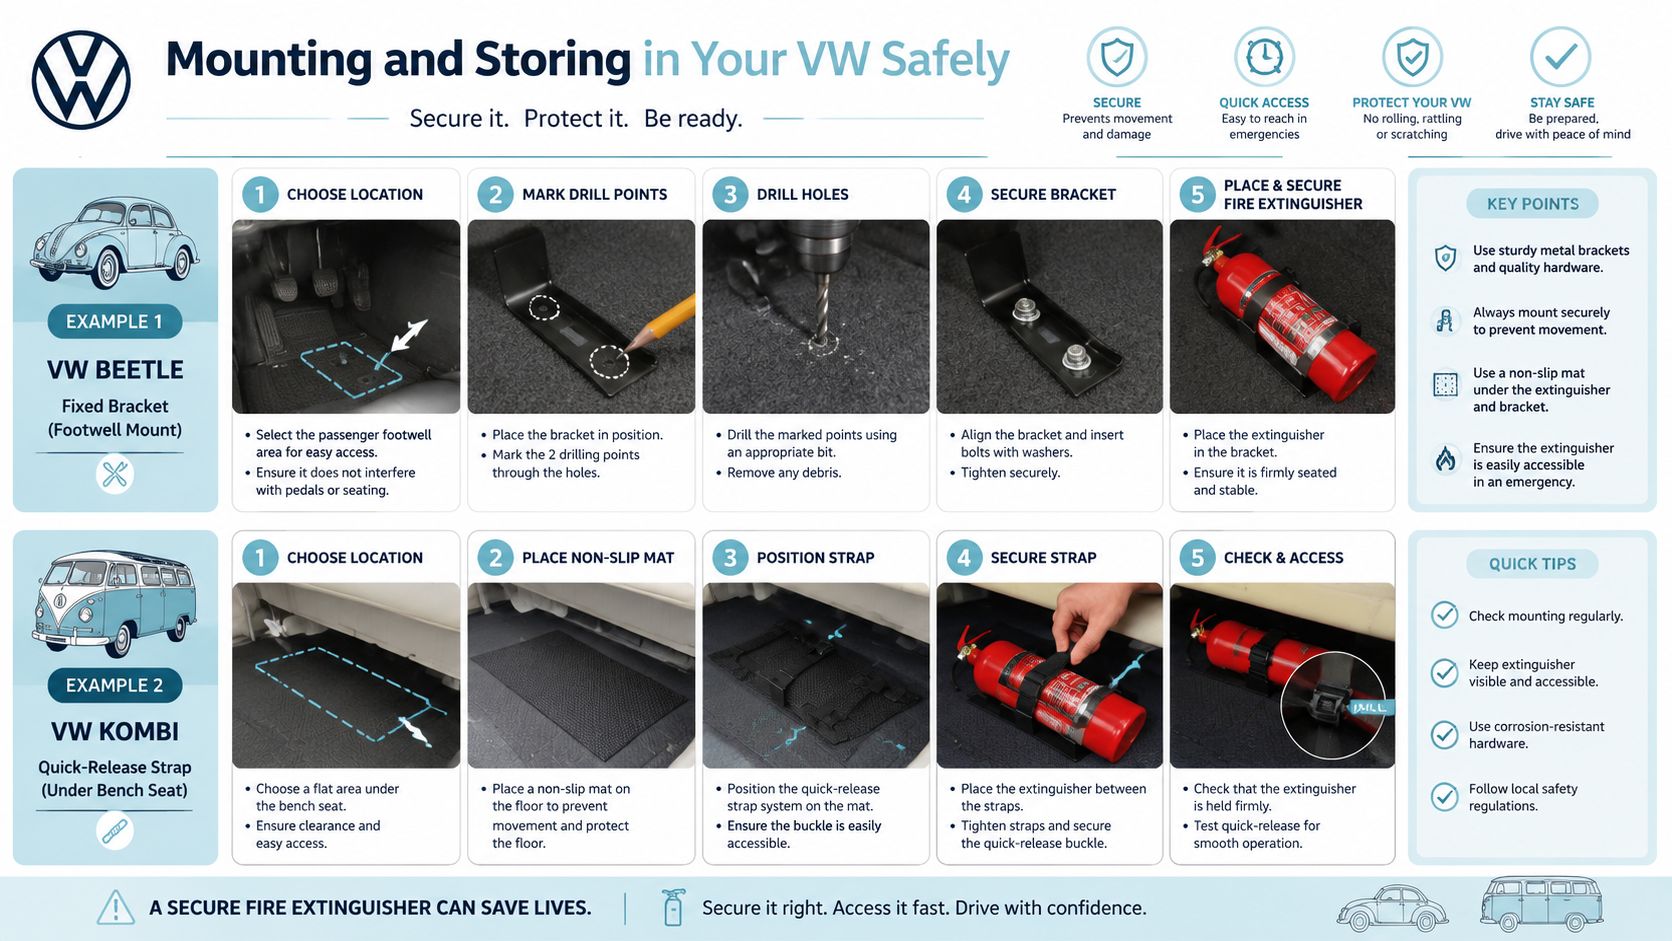
Mounting and Storing in Your VW Safely

An extinguisher that slides around the cabin isn't safety gear, it's a loose object waiting for a sharp stop. Australian vehicle-fire guidance says the unit needs to be quickly accessible from the driver's seat and secured so it can't become a projectile while you're driving. That's the same common-sense approach most VW owners already use for tools, speakers, and spare parts.

A safety infographic showing step-by-step instructions for mounting a fire extinguisher in VW Beetle and Kombi vehicles.

A Beetle and a Kombi need different mounting logic

A Beetle usually works best with a bracket in the footwell or another low, fixed location where the driver can reach it without twisting around. A Kombi gives you a bit more flexibility, so a quick-release strap under a bench seat can work well if it stays firmly clipped and doesn't interfere with passengers or luggage.

The right mindset is simple:

  • Choose a rigid mount: use a proper bracket or strap system that keeps the extinguisher from rolling.
  • Keep the path clear: don't bury it behind boxes, picnic gear, or spare parts.
  • Test the reach: sit in the driver's seat and make sure you can grab it fast.
  • Protect the interior: use a neat, fitted solution that suits the car's look without sacrificing function.

A clean mounting point under the front passenger seat is usually better than a prettier spot in the boot.

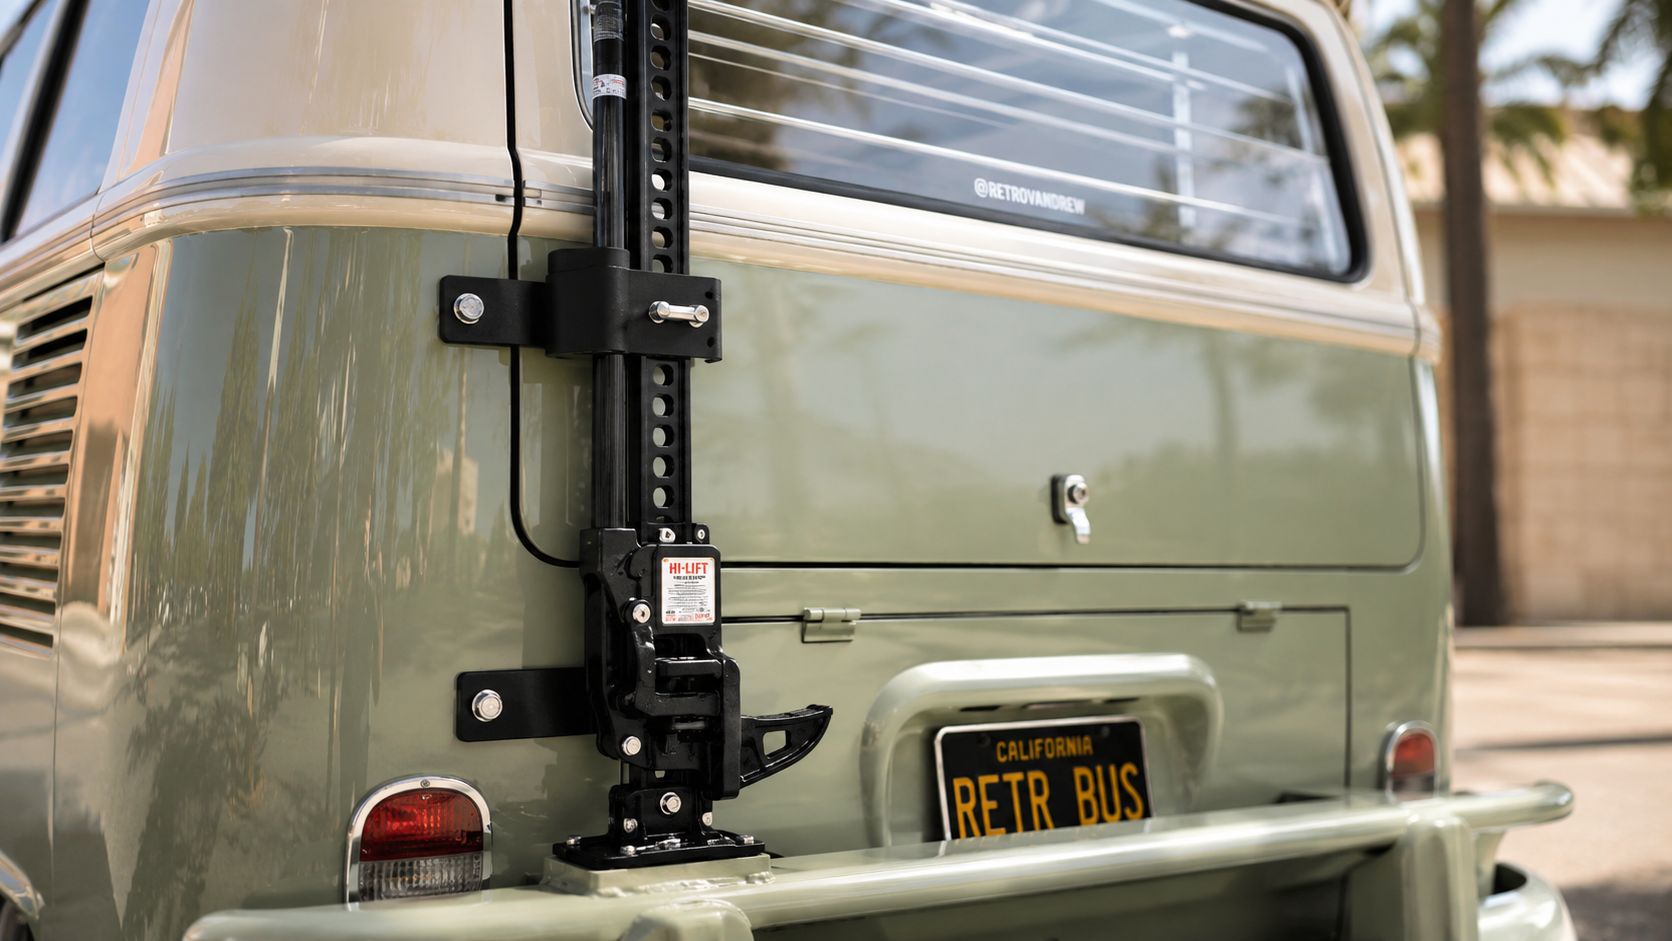
If you're the sort of owner who likes a tidy cabin, the bracket should feel like part of the car, not an afterthought. A practical accessory approach works nicely alongside restoration thinking, and a mounting idea similar to a high lift jack bracket setup can help you think about secure, fixed storage without cluttering the interior.

Using Your Fire Extinguisher with PASS Method

When a Kombi engine bay starts to flare, the best response is calm, fast, and low to the ground. The PASS method is the standard approach, and it's simple enough to remember even when your pulse is up. Use it only on a small fire you can reach, then stop if it isn't going out quickly.

The sequence is straightforward:

  1. Pull the pin. Break the seal and get the extinguisher ready.
  2. Aim at the base. Don't chase the flames at the top, aim where the fire is feeding.
  3. Squeeze the handle. Start the discharge in a controlled way.
  4. Sweep side to side. Cover the burning area evenly.

A few practical habits make a big difference. Stay low to avoid smoke, keep a safe distance from hot panels, and don't stand in front of a bonnet or hatch that can throw heat back at you. If the fire doesn't respond quickly, or you can see it spreading beyond a small contained area, get everyone out and call 000.

Practical rule: use the extinguisher for the first minute of a small fire, not for a full engine-bay blaze.

Maintenance and Inspection Tips

A car extinguisher only helps if it's still serviceable when you need it. Check the pressure gauge, the safety pin, and the seal on a regular basis, and give the cylinder a visual look over for dents, corrosion, or anything that looks out of place. If the unit has powder residue, clean the surrounding area so you're not mistaking old dust for a fresh leak.

Your monthly routine doesn't need to be fancy.

  • Read the gauge: make sure it's in the normal range.
  • Check the pin and seal: they should be intact and secure.
  • Look at the cylinder body: watch for wear, rust, or damage.
  • Confirm the mount: it should still be tight and not wobbling.

For a classic VW, there's one extra sanity check. Make sure stray powder hasn't coated anything important under the dash or around brake lines, because tidy storage is part of safe ownership. If you keep a restoration diary, service book, or digital log, record each check so you don't lose track of the unit's condition, and if you're using a proper logbook style record, the Volkswagen service book guide is a handy reminder of how neatly a well-kept car history can be organised.

Frequently Asked Questions

Can you service an old extinguisher canister? Sometimes, yes, but only if the cylinder is still in good condition and a qualified service provider says it's suitable. Will powder damage chrome or trim? It can leave residue, so clean-up matters after use. How long does an extinguisher last? Check the service status and replace or service it when the pin, seal, gauge, or cylinder condition tells you it's time. How do you dispose of an expired unit? Take it to a proper service or disposal point, don't just bin it.


If your Beetle, Kombi, or Samba Bus is part of the family, sort the safety kit before the next drive. Visit Volkswagen Memorabilia to browse VW-themed gifts, diecast models, and memorabilia that keep the passion alive while you gear up for the road.

Double Jerry Can Holder Your Kombi Road Trip Essential

A mate of mine once rolled his Bay Window into a dusty servo outside a tiny outback town, smiling like he'd just won TattsLotto, only to find the bowser taped off and the next fuel stop a very long stretch away. The grin came back when he swung open the rear carrier and pulled out two full cans, because the trip was still on and the sunset camp still happened.

The Ultimate Symbol of Kombi Freedom

A classic Kombi always promises more than transport. It promises that old feeling of following the road just to see where it bends, windows open, warm air coming through the cabin, a board on the roof and a kettle rattling in the back. In Australia, that promise means long distances too, and long distances can turn romance into arithmetic very quickly when the fuel gauge starts playing games.

That's why a double jerry can holder has such a place in the touring story. It isn't glamorous hardware on its own. Yet in the life of an old VW, it becomes part of the folklore, right alongside the striped camp chairs, the enamel mugs and the map folded badly into the glovebox.

A vintage Volkswagen camper van driving down a desert highway during a beautiful orange sunset.

The connection between old Volkswagens and Australian road culture runs deep. The Volkswagen Beetle was formally introduced to the Australian market in 1953, with local assembly kicking off in Clayton, Victoria, just a year later, cementing its place in Australia's automotive culture, as noted in the Volkswagen Beetle history entry. Once Beetles and Kombis settled into local life, they became more than imported curiosities. They became beach cars, camping rigs, family runabouts and memory-makers.

Why this bit of gear matters

A Kombi asks you to travel with intention. You pack carefully. You listen to the engine. You pay attention to wind, heat and hills. Adding spare fuel fits that same old-school rhythm.

Practical rule: If your trip depends on one fuel stop being open, your trip needs a better backup plan.

For many VW owners, the double holder becomes the difference between staying relaxed and watching the dashboard with a knot in your stomach. It protects the spirit of the trip. That's its primary purpose.

The freedom machine in one glance

  • More confidence: You can head beyond the usual town-to-town loop.
  • Better trip planning: You're less tied to hoping every roadhouse is operating when you arrive.
  • A stronger touring setup: The holder turns a charming classic into a more capable adventure companion.

That's why this humble accessory belongs in the same conversation as the Kombi itself. It keeps the journey open.

Choosing Your Holder Styles and Materials

Some gear suits a lifted four-wheel-drive but looks like a gate hinge bolted to the back of a Splitty. A classic VW needs practicality, yes, but it also needs a bit of visual sympathy. The right holder should look purposeful rather than clumsy.

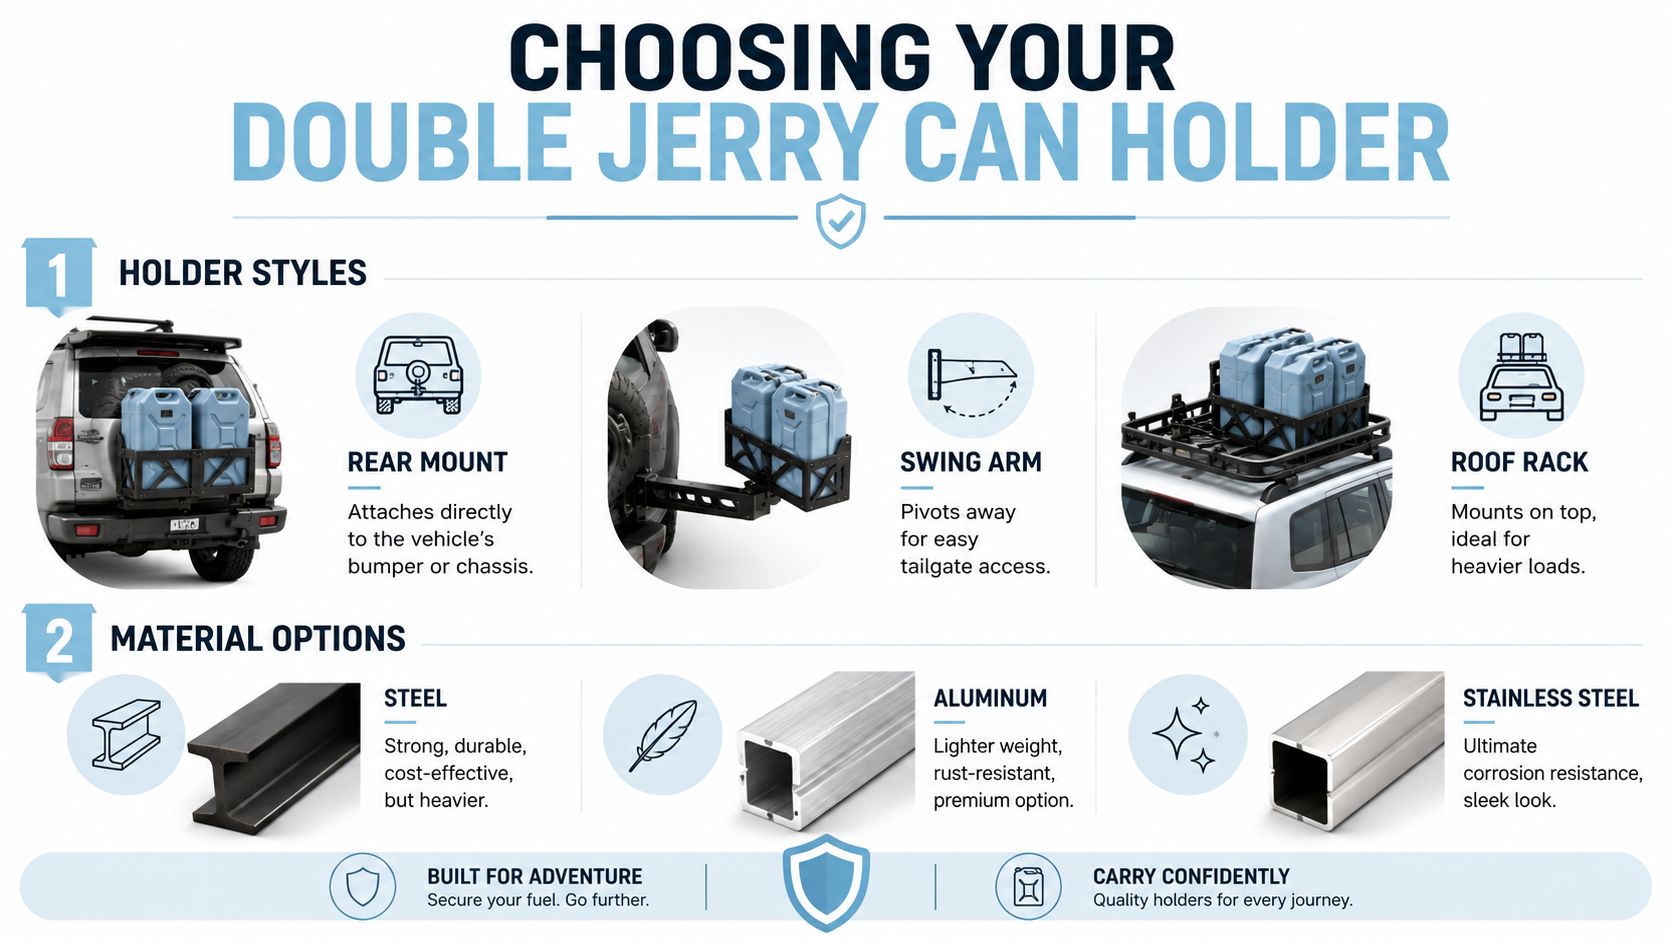
An infographic showing various types and materials for double jerry can holders for vehicles and adventure travel.

The main holder styles

Three layouts come up most often when enthusiasts talk about carrying extra fuel on touring vehicles.

Style Where it suits best What to watch
Rear mount Vans and utes with strong mounting points at the back Check access to engine lids, doors and lights
Swing arm Touring setups where rear access matters Hinges and latches need to stay tight and clean
Roof rack mount Vehicles already set up for roof storage Higher lifting effort and extra weight up top

A rear mount tends to look the most natural on a Kombi because the weight sits lower and the cans are easy to reach. It can also echo the period-correct touring look many owners love.

A swing arm setup is clever if you still need to get at the back regularly. For campers and weekenders, being able to move the carrier out of the way without unloading everything is a big win.

A roof rack mount can work, especially if your VW already wears a rack as part of its personality. Still, fuel up high changes the feel of the vehicle, and lifting full cans overhead isn't everyone's idea of a pleasant roadside stop.

Keep the clean lines of the car in mind. On a classic VW, the best accessory often looks like it belongs there even when it's doing a hard job.

Steel, aluminium or stainless steel

Material choice is where utility and style really meet.

  • Steel: Tough, familiar and usually the easiest on the wallet. It suits owners who value ruggedness and don't mind a bit more heft.
  • Aluminium: Lighter and naturally attractive for anyone trying to keep extra mass under control. It often feels like the smarter choice where weight matters more than brute toughness.
  • Stainless steel: The polished old pro of the bunch. It offers strong corrosion resistance and a tidy finish, though it usually sits in the premium end of the conversation.

Steel is the work boot. Aluminium is the running shoe. Stainless is the nicely polished RM Williams pair you still expect to survive a bit of weather.

Matching the holder to the VW look

If your Beetle or Kombi wears original-style trim, hubcaps and soft pastel paint, a bulky industrial carrier can look out of place. If your bus is more adventure-spec, with roof rack, awning and camping gear, a sturdier black-finished holder might look spot on.

A good rule is simple:

  • For touring authenticity: choose a tidy rear-mounted style with understated hardware.
  • For practical camping use: prioritise access and durable construction.
  • For show-and-drive pride: pick a finish that complements the vehicle's colour and period feel.

The holder shouldn't steal the scene. It should support it.

Mounting Tips for Your VW Kombi or Beetle

Classic Volkswagens are charming because they weren't designed like modern SUVs with accessories in mind. That means mounting a double jerry can holder takes more thought than just grabbing a drill and hoping for the best. On a Kombi, access matters. On a Beetle, proportions matter even more.

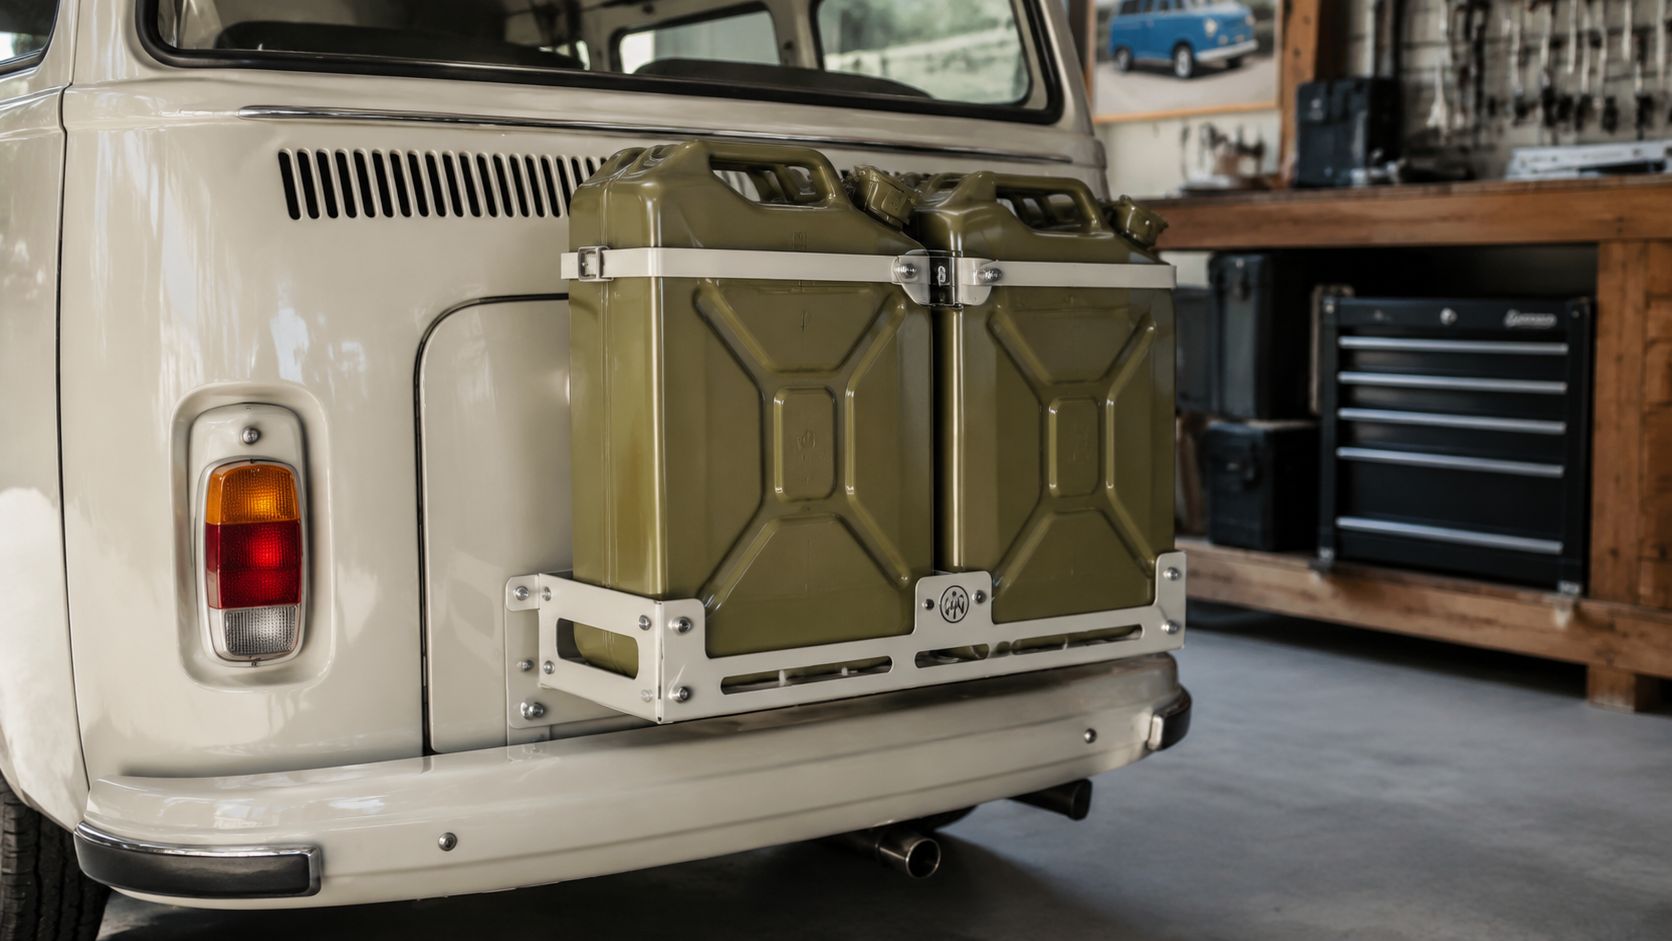
A beige Volkswagen bus featuring a white metal rack holding two olive green jerry cans on the back.

Kombi mounting points that make sense

A Type 2 gives you more room to work with, but each version has its own quirks. Split Screens and Bay Windows both reward careful placement.

For a Kombi, think about these points before you commit:

  • Rear access first: If the holder blocks the engine lid or rear hatch, routine checks become a nuisance.
  • Weight close to structure: Mounting should tie into strong points, not just thin body panels.
  • Departure angle: If the holder sits too low, the first steep driveway or spoon drain will remind you.

A rear swing-away arrangement often suits a touring bus because it keeps fuel outside the cabin and leaves the interior free for camping gear. The trick is making sure the opened carrier still gives you enough space to work around the back of the van.

Splitty versus Bay Window

A Splitty has that wonderfully upright rear, and almost every accessory shows. That means neatness counts. A simple, symmetrical setup usually looks better than anything overbuilt.

A Bay Window can wear a slightly sturdier arrangement without looking awkward. Its broader rear profile tends to absorb the visual weight of a carrier more gracefully.

If the mount looks like an afterthought, it probably was. Take the extra time to line it up, brace it properly and check how it opens with the vehicle loaded.

Beetle solutions that respect the shape

A Beetle is trickier. You're working with one of the most recognisable silhouettes ever sold here. Hanging too much off the tail can spoil both the look and the balance.

Some owners look at spare-wheel-adjacent solutions or custom rear mounting ideas, but the same rule always applies. Don't ask thin vintage metal to do a chassis job. If you're carrying fuel externally, the support needs to be up to the task.

For owners thinking through brackets, force distribution and safe support, the ideas around high-lift jack bracket mounting options are worth browsing because they sharpen your eye for strong attachment points and sensible load paths.

Workshop checklist before first use

  1. Cycle every opening panel with the holder fitted and loaded as intended.
  2. Check latch and hinge movement after a short local drive on mixed roads.
  3. Inspect for flex around mounting points, especially on older bodywork.
  4. Retighten hardware after the first few trips because vibration will find any weakness.

The prettiest setup in the club car park means nothing if it rattles loose on corrugations. Mount it like you plan to trust it.
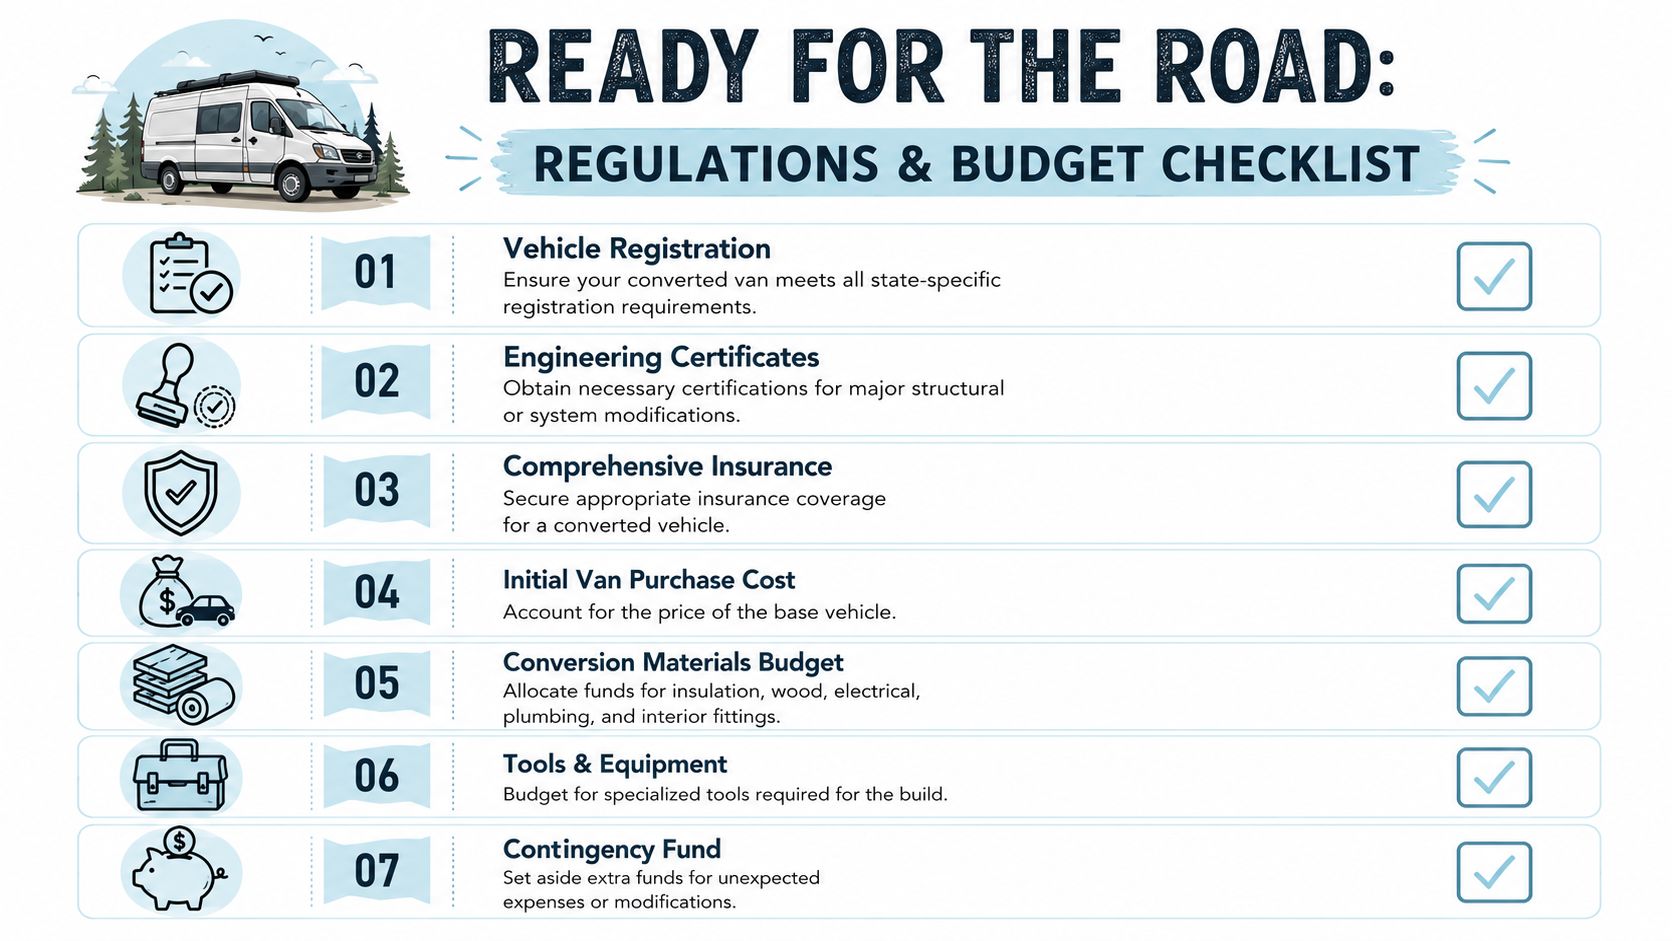
Sizing Capacity and Safe Fuel Transport Rules

Fuel is one area where old-car charm shouldn't lead the decision-making. The right setup has to be secure, sensible and legal. If you treat fuel carrying casually, you're gambling with the vehicle, your passengers and everyone else on the road.

A common double jerry can holder is designed around two standard 20L jerry cans, giving a total load of 40L, and many designs use gas struts to help manage weight and reduce swinging on rough ground, as described in the Kaymar Left Double Jerry Can Holder listing. That figure gives Kombi owners a straightforward mental picture of what the carrier is meant to handle. It also underlines why mounting quality matters so much.

Safe transport habits worth sticking to

You don't need drama to learn these lessons. You just need to be disciplined.

  • Use approved containers: Don't carry fuel in makeshift vessels or old cans with questionable seals.
  • Secure the load properly: Straps, latches and locking points should stop movement in all directions. The gear in tie-down ratchet cargo securement is a useful reminder that restraint matters just as much as the holder itself.
  • Keep fuel outside the cabin: In a Beetle or Kombi, fumes and spills have no place near passengers, bedding or cooking gear.

A simple risk check before you leave

Check Why it matters
Seal condition Stops leaks and vapour escape
Holder latch tension Prevents bounce and side-to-side movement
Clearance from hot components Reduces fire risk
Load balance Helps the vehicle stay predictable on the road

Carrying extra fuel isn't just about extending range. It's about doing it without creating the very emergency you were trying to avoid.

If you're unsure about local transport requirements for fuel where you live or travel, check the relevant state or territory guidance before the trip. Rules can differ, and this is one area where “she'll be right” doesn't belong.

Keeping Your Gear Classic Maintenance and DIY

A salty coastal breeze can make even a tidy VW owner slightly paranoid, and for good reason. Metal accessories live a hard life. They catch road grime, moisture, fuel splashes and whatever the last muddy campsite threw at them.

Small maintenance jobs that pay off

The nicest holders I've seen at shows aren't always the newest ones. They're the ones owners keep after. A rinse, a dry-off and a close look at hinges and fasteners can save a lot of grief later.

Try this routine:

  • After dusty trips: Wash off grit before it starts wearing moving parts.
  • After beach runs or wet roads: Dry the unit properly and check for early rust stains around bolts.
  • When paint chips appear: Touch them up early, before surface rust gets a foothold.

A classic VW teaches patience. The same habit that keeps a Kombi's paint gleaming will keep a fuel carrier respectable for years.

The DIY temptation

VW people are resourceful. Someone in every club can fabricate brackets, weld tabs and make an accessory from raw stock over a weekend. That spirit is part of the culture, and it deserves a nod.

Still, a fuel carrier isn't the place for guesswork. If you're building or modifying one, strength, latch security, alignment and long-term corrosion protection all matter. So does the way the whole assembly behaves on bumpy roads. If your setup also ties into broader camping or touring storage, looking through van fit-out utility systems can help you think more cohesively about how your gear works together.

The sweet spot is simple. Build carefully if you know exactly what you're doing. Buy quality if you want confidence without experimentation. Either way, maintain it like it belongs on the vehicle, not hanging off it as an afterthought.

From Real Adventures to Timeless Collectibles

A mate of mine keeps a faded photo in his garage. It shows his orange Bay Window at a servo outside Broken Hill, two fuel cans strapped on the back, kids barefoot in the dirt, kettle already on the boil. On the shelf below sits a little diecast Samba with the same cheerful stance and the same promise of miles to come. That pairing says more about Volkswagen life than any brochure ever could. The holder carried the trip. The model kept the memory.

A double jerry can holder earns its place in that story because it speaks the language old VWs have always spoken. Go a bit farther. Stay a bit longer. Leave room for the detour to the beach, the camping spot by the river, or the gravel road that looked too good to pass by. In a Kombi or Beetle crowd, practical gear has never been separate from sentiment. The touring bits become part of the folklore.

Analysts at Market Intelo link growing interest in jerry can holders with adventure travel and off-road recreation. You can see that shift at any weekend meet. Alongside polished hubcaps and old enamel signs, there is real affection for the accessories that made these cars into freedom machines.

Why collectors get it straight away

Collectors rarely fall for perfect metal alone. They fall for a scene.

A small Kombi model with a roof rack, a fuel can, and a sun-faded paint scheme can bring back a whole chapter of life. Early starts. Hot vinyl seats. The smell of petrol and instant coffee. A stop on the side of the road while someone digs out a map and swears the campsite is only ten minutes away. The holder on the working vehicle and the miniature on the shelf belong to the same tradition. One helped write the yarn. The other keeps it within reach.

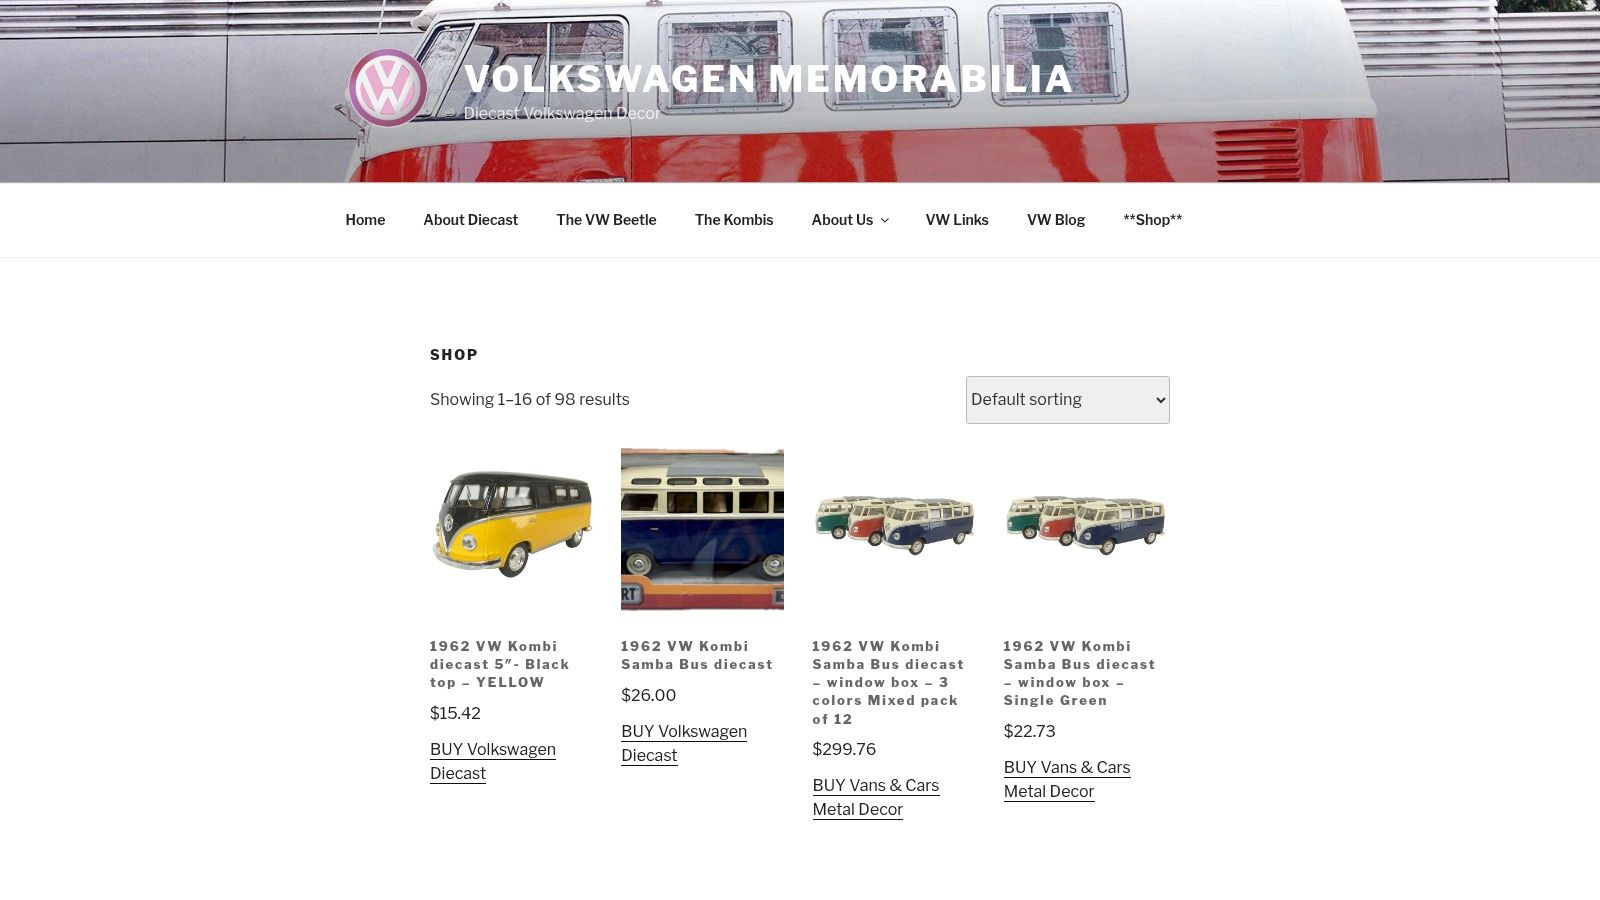
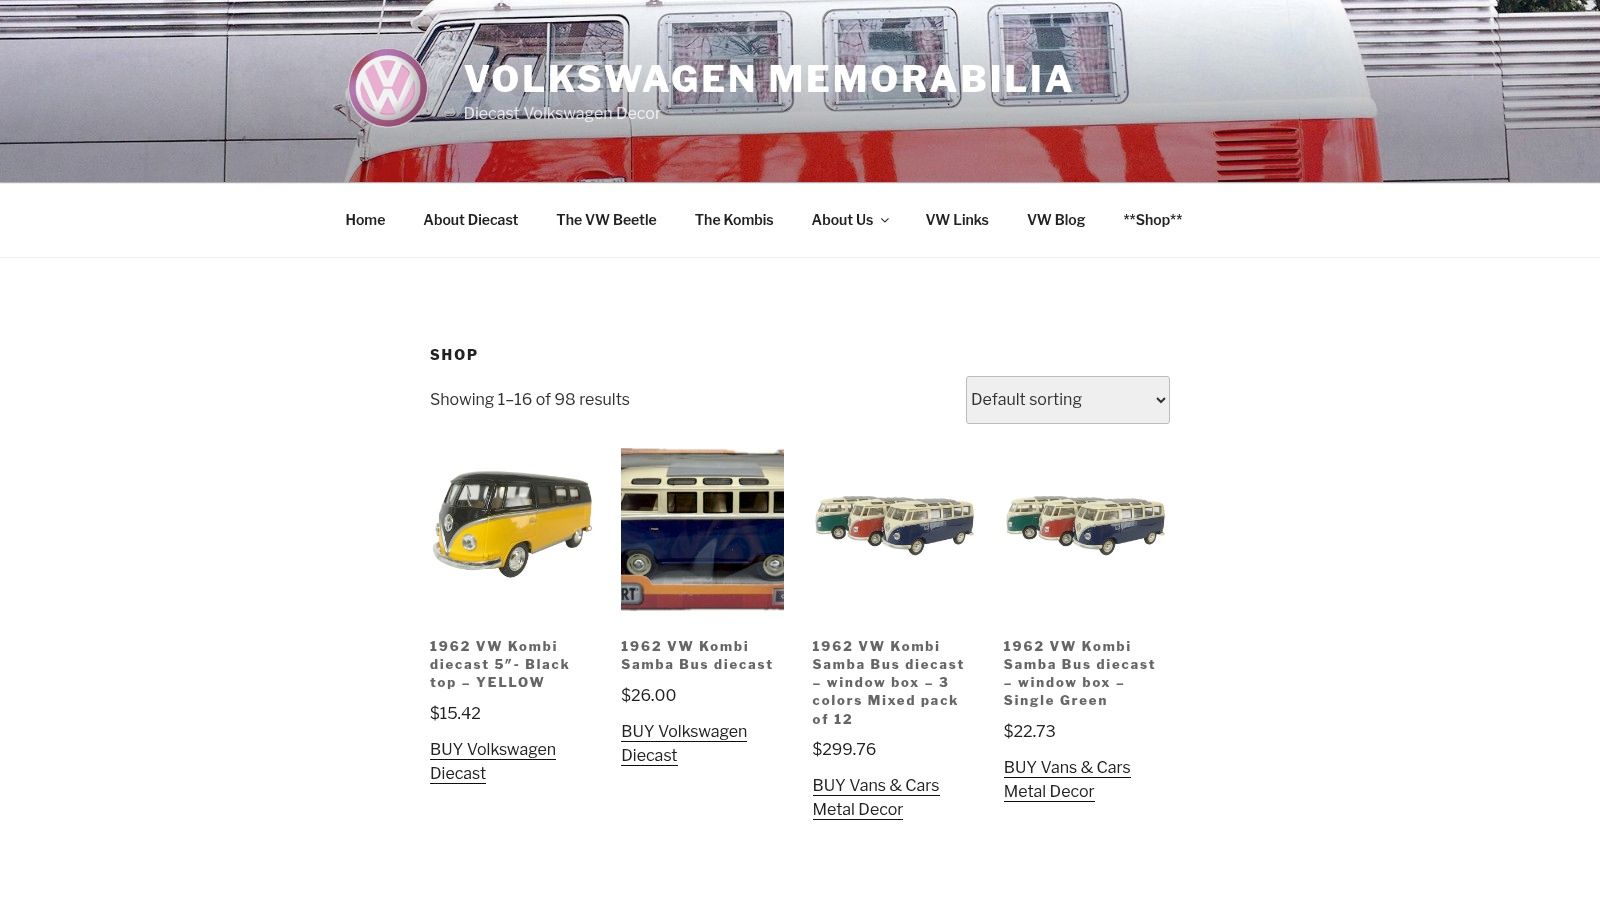
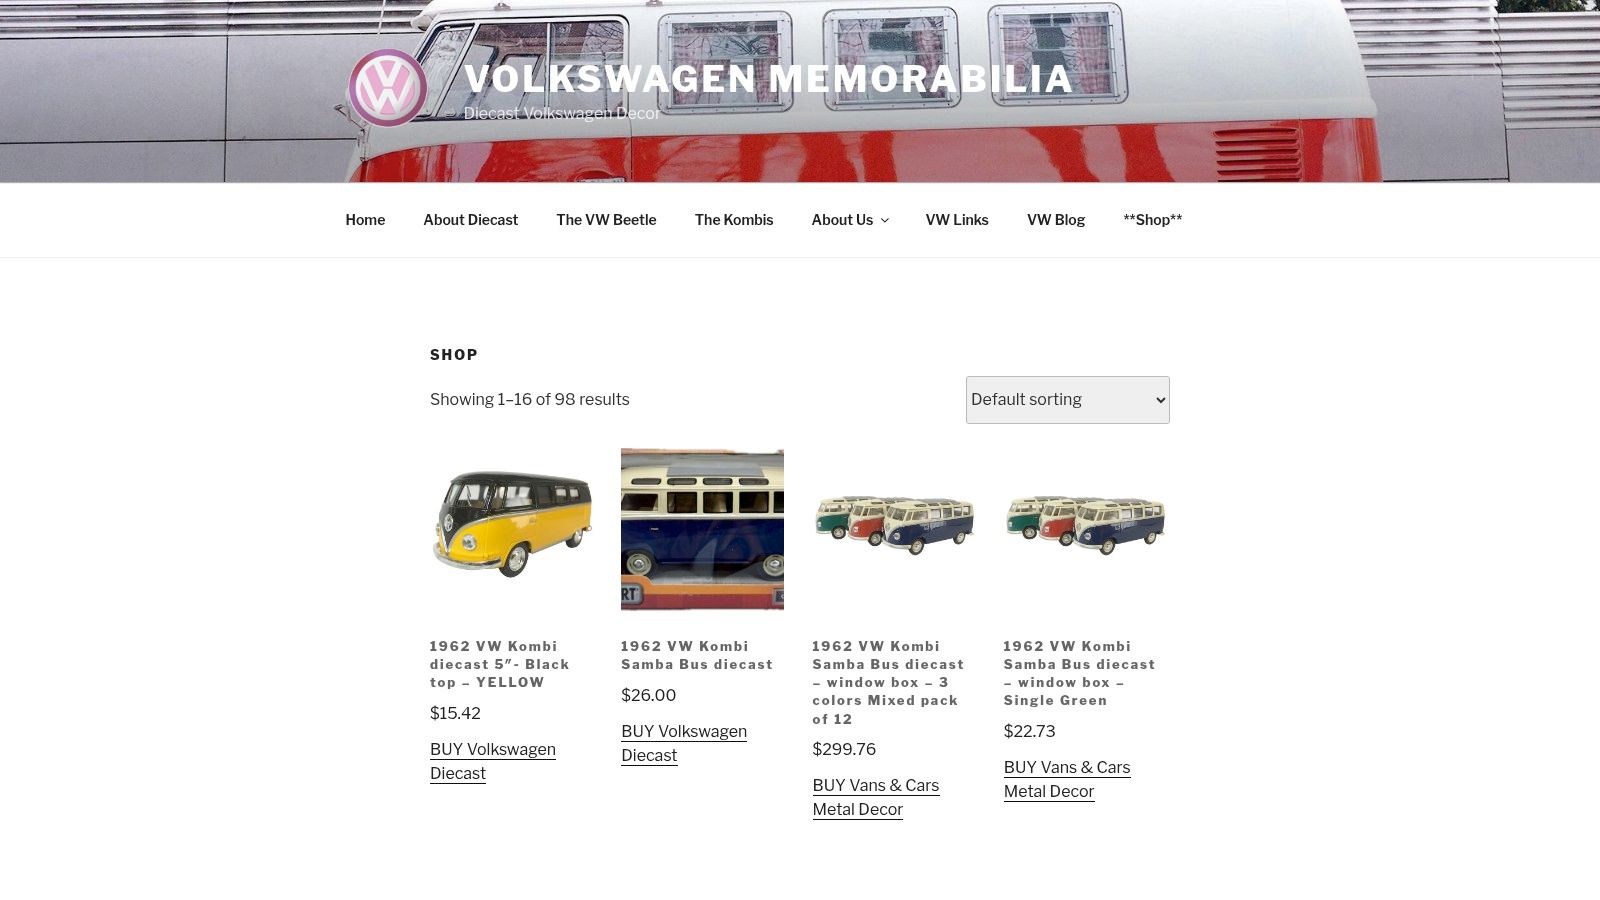
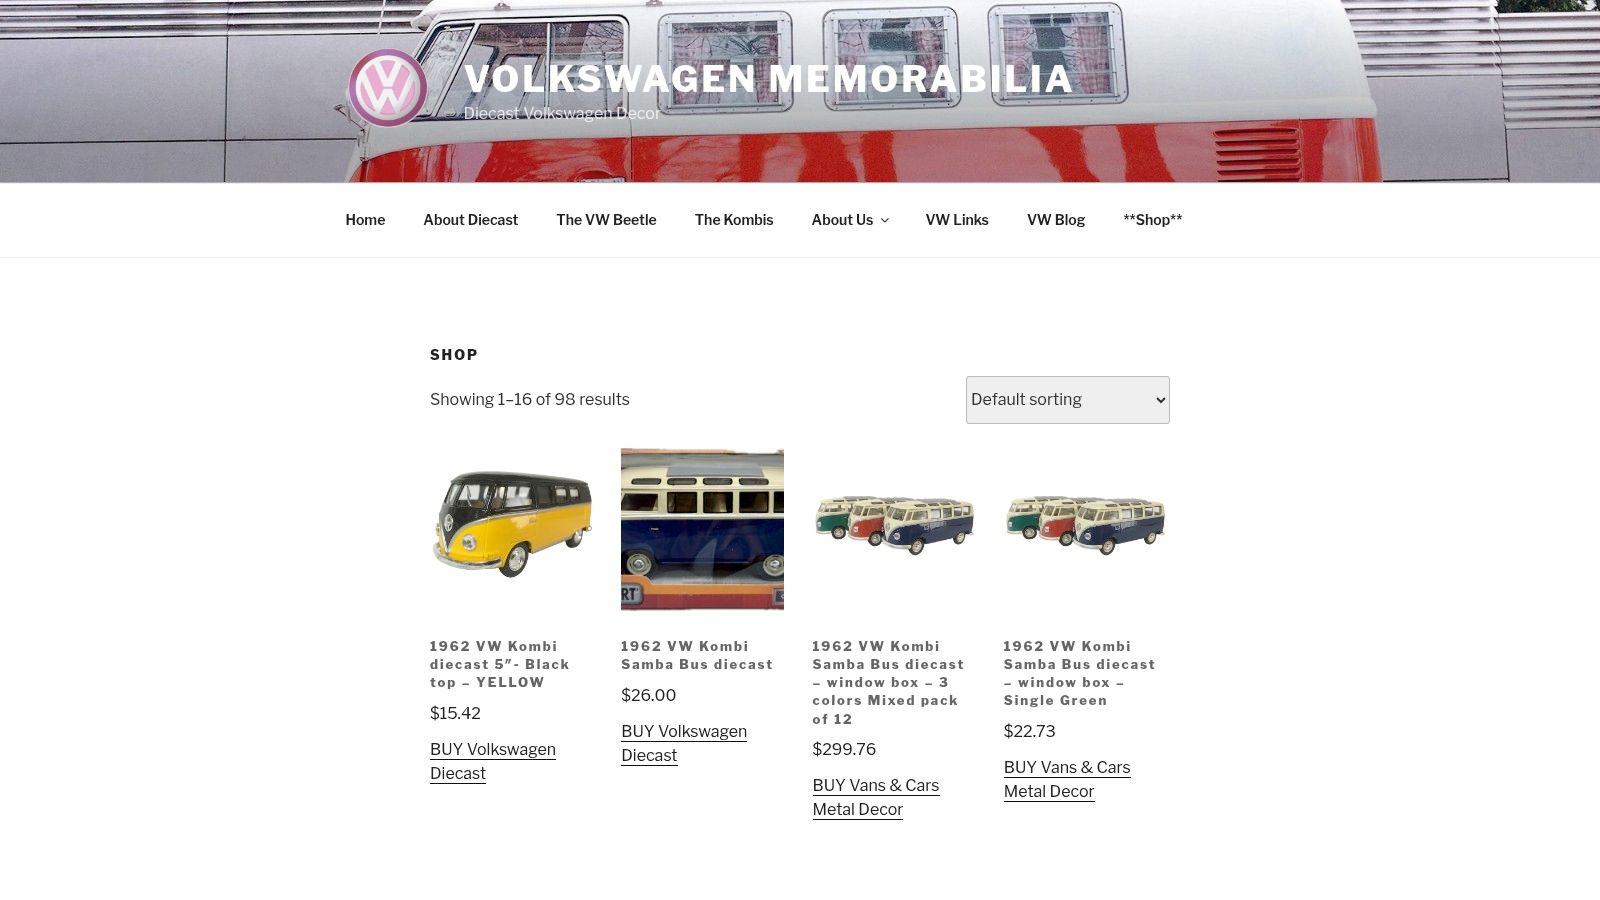
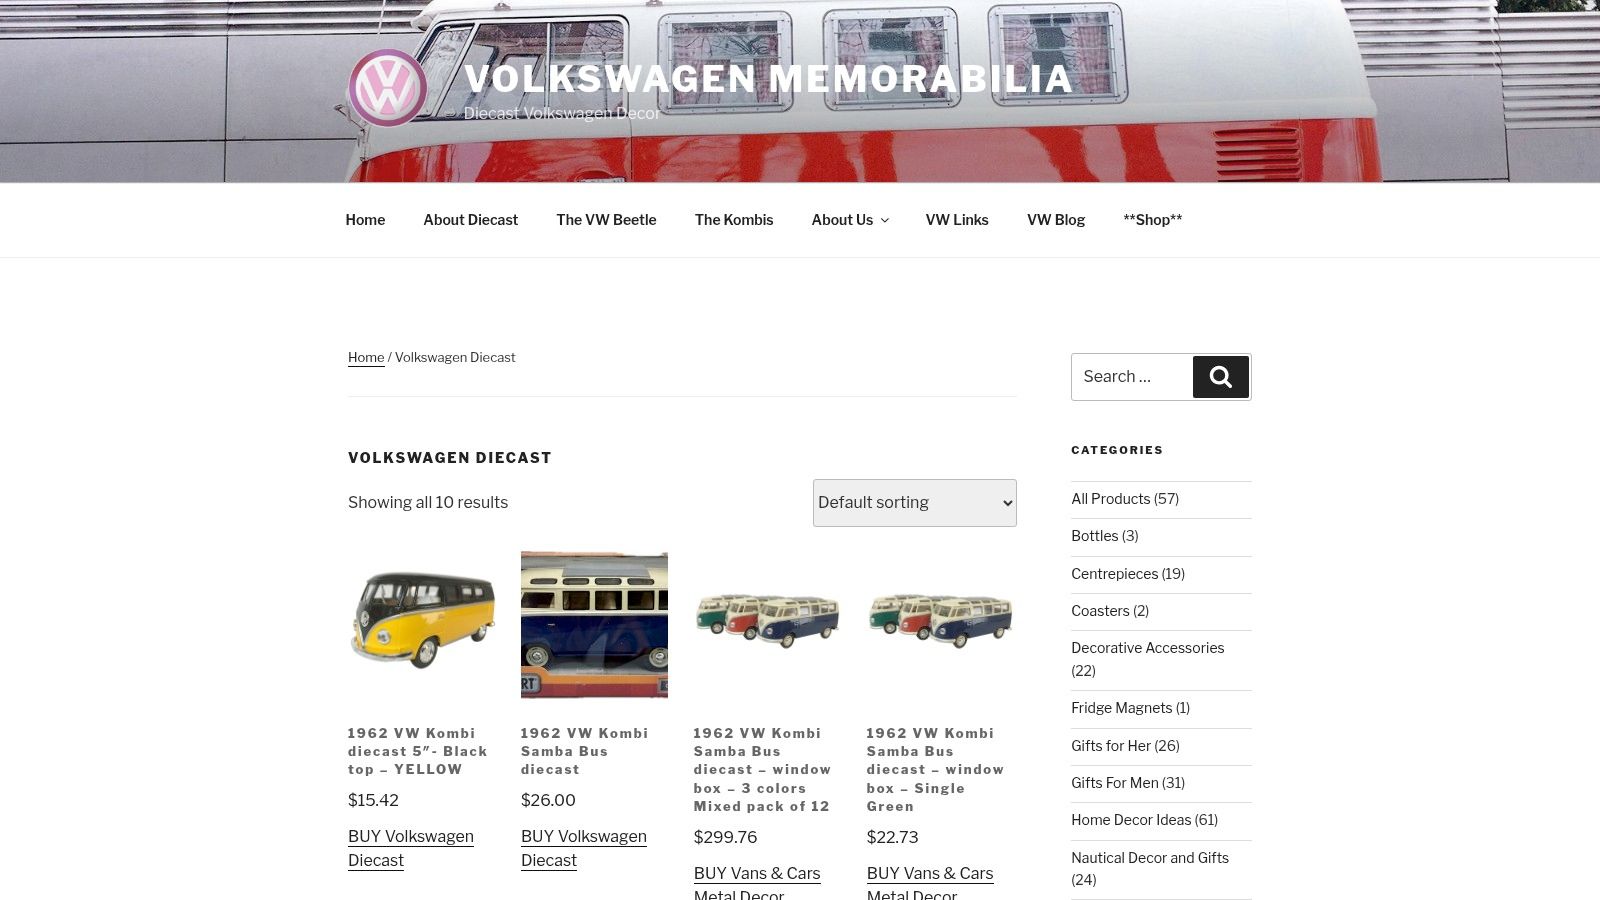
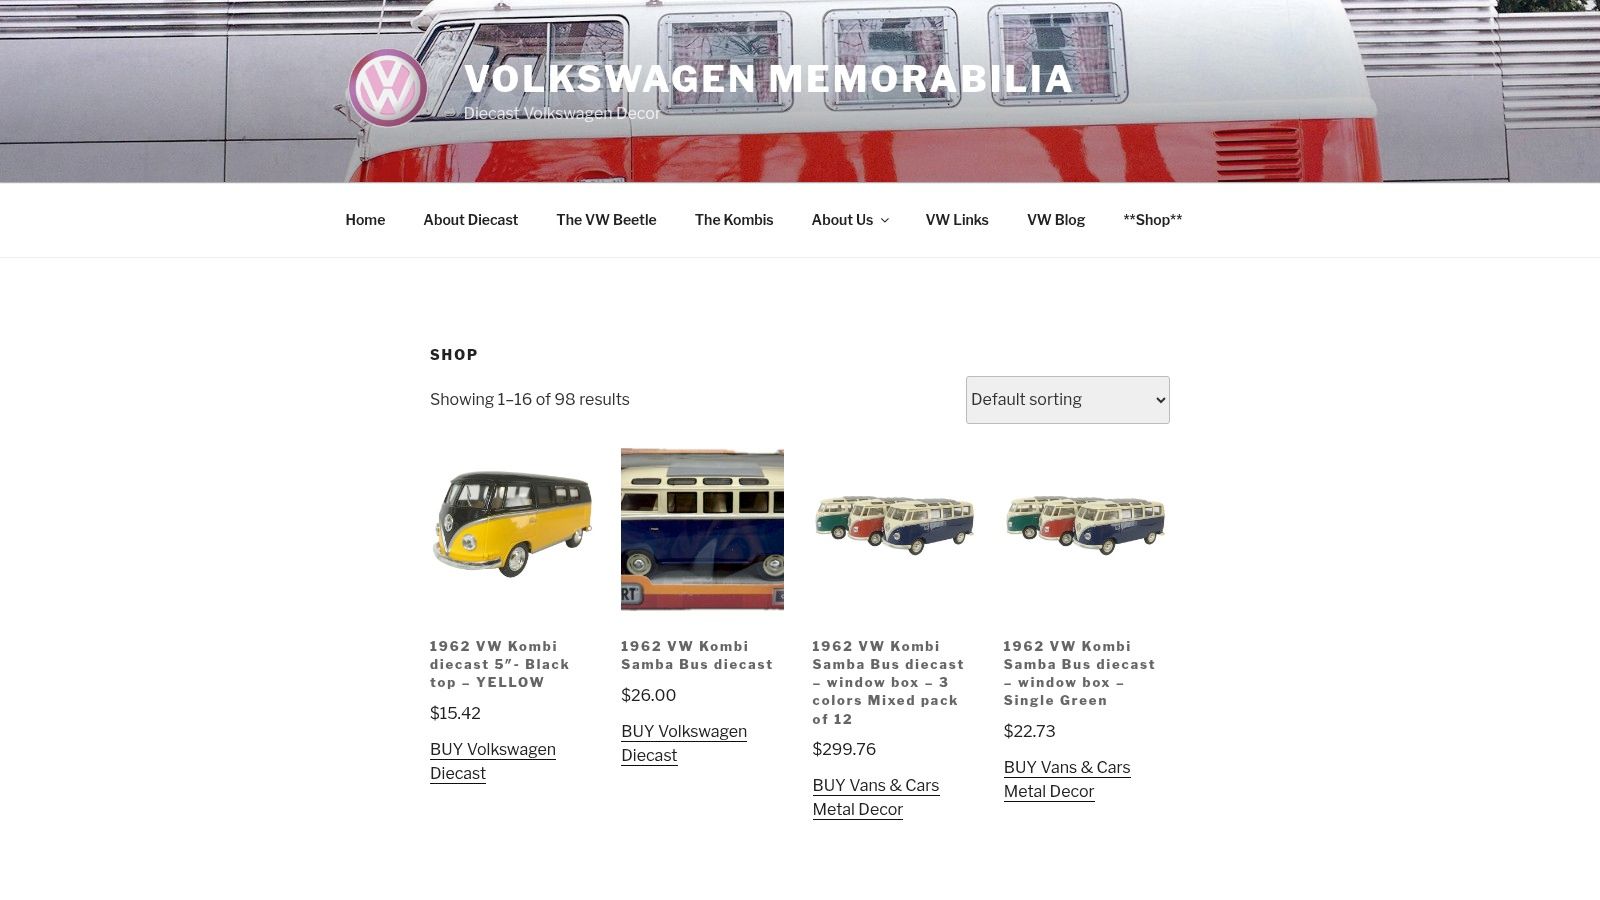
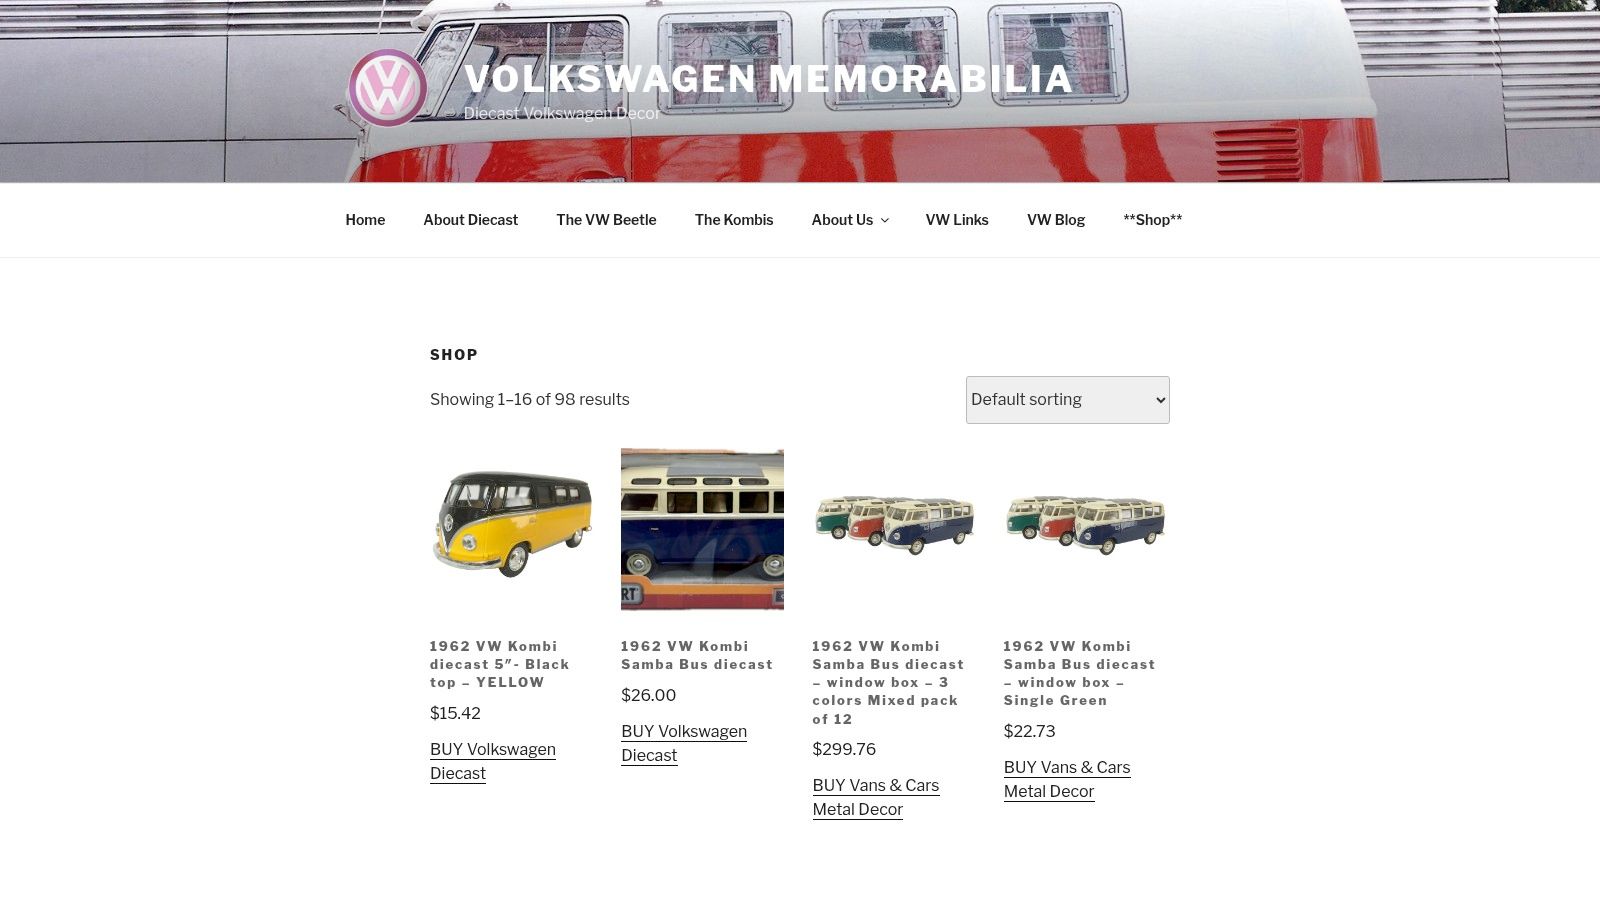
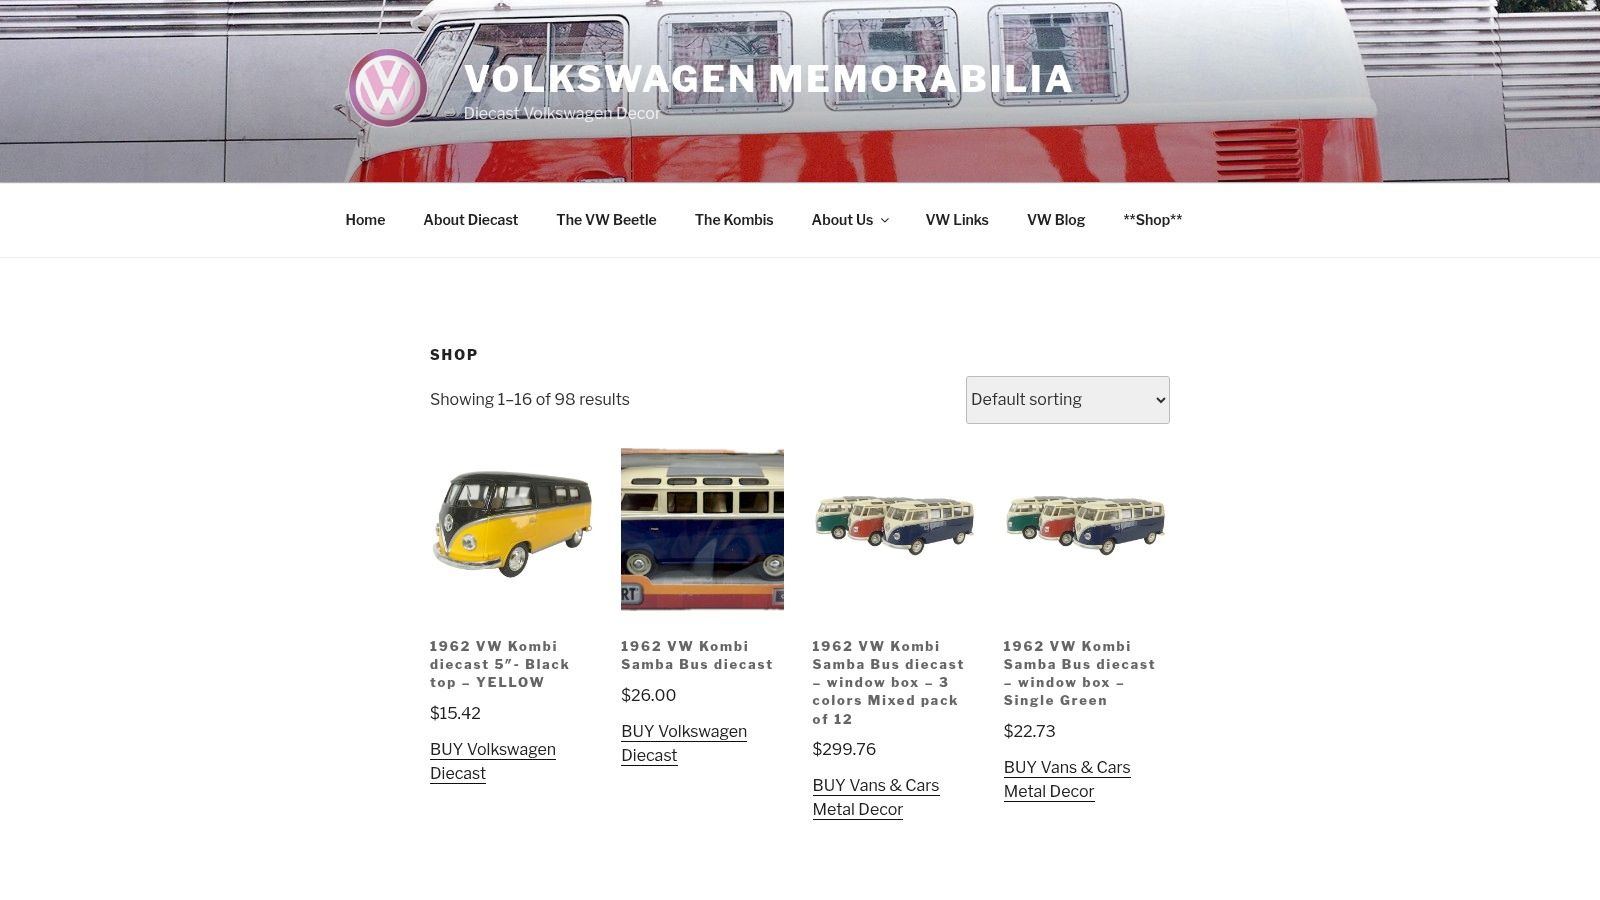
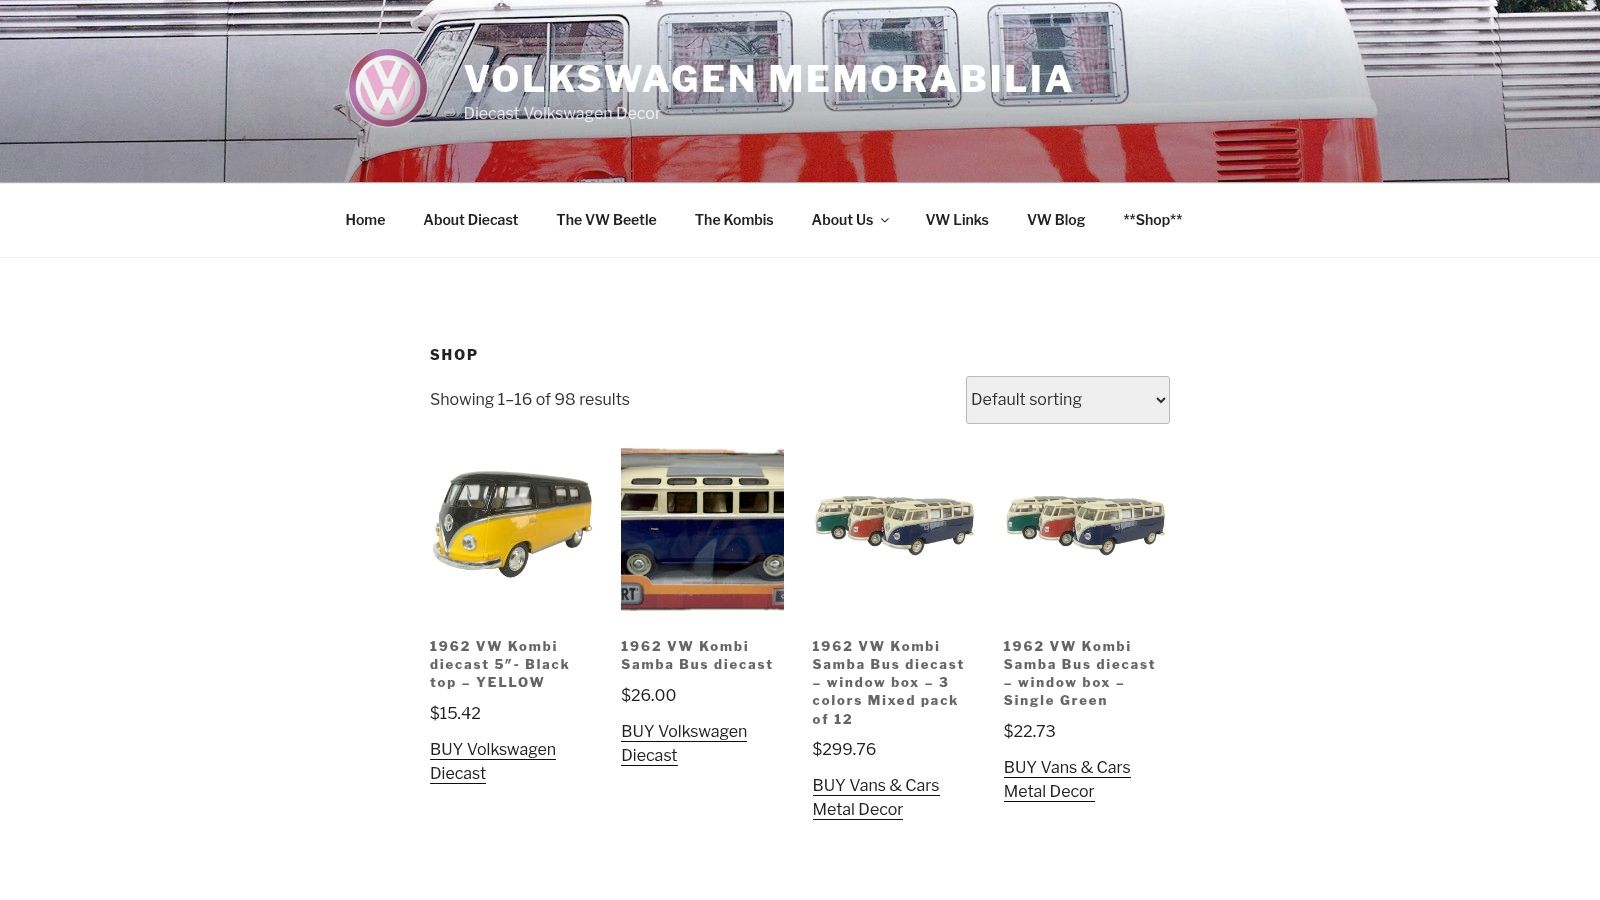
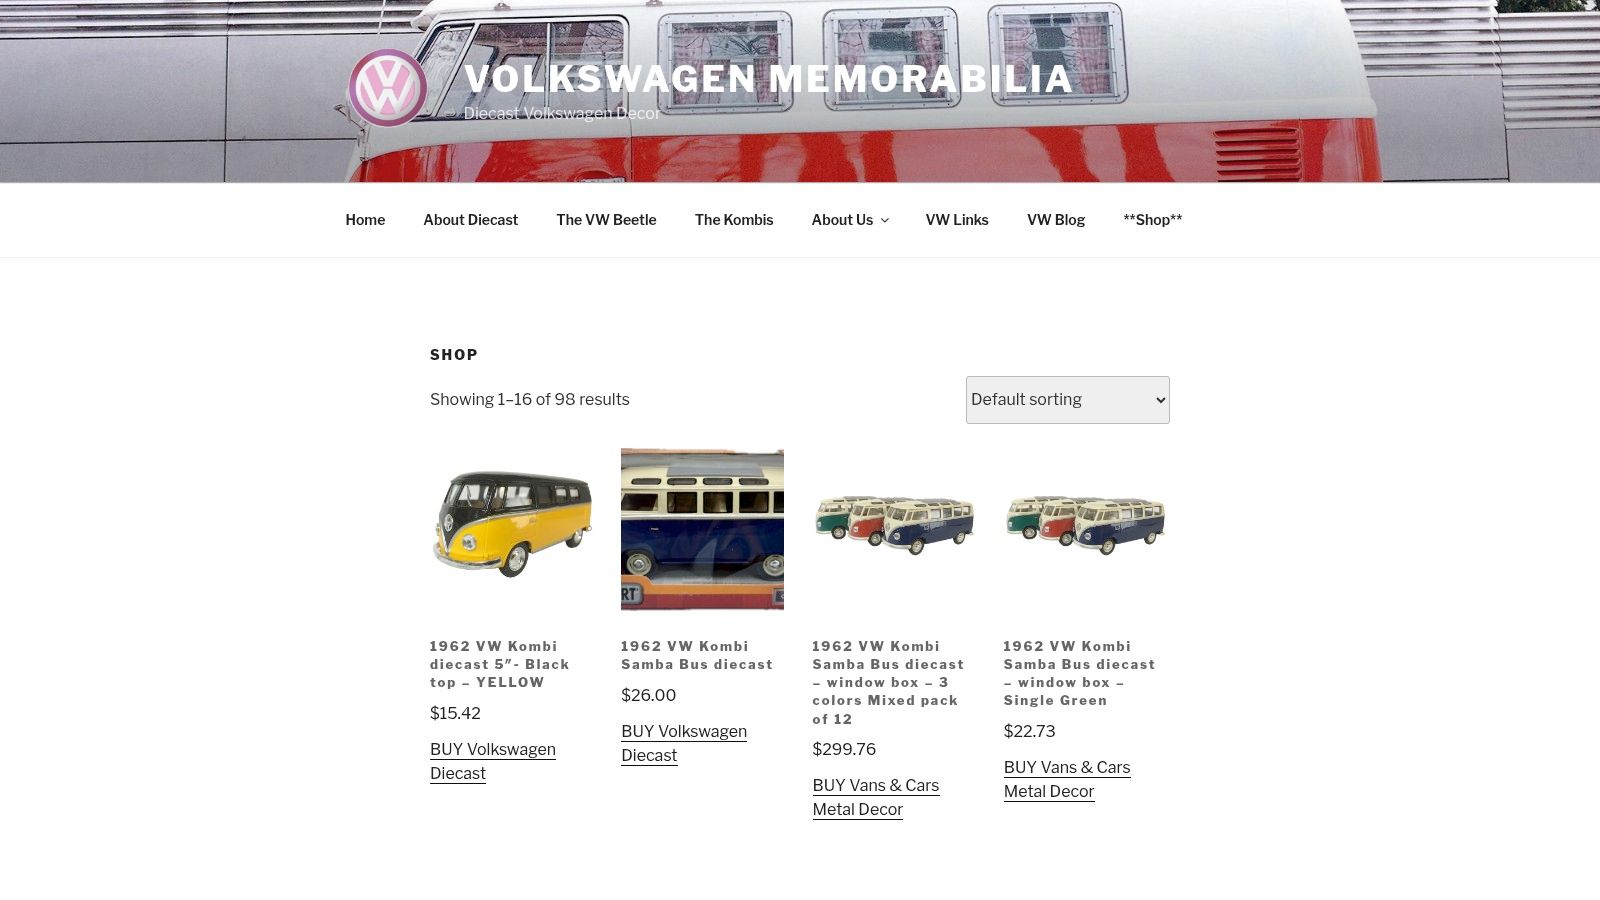
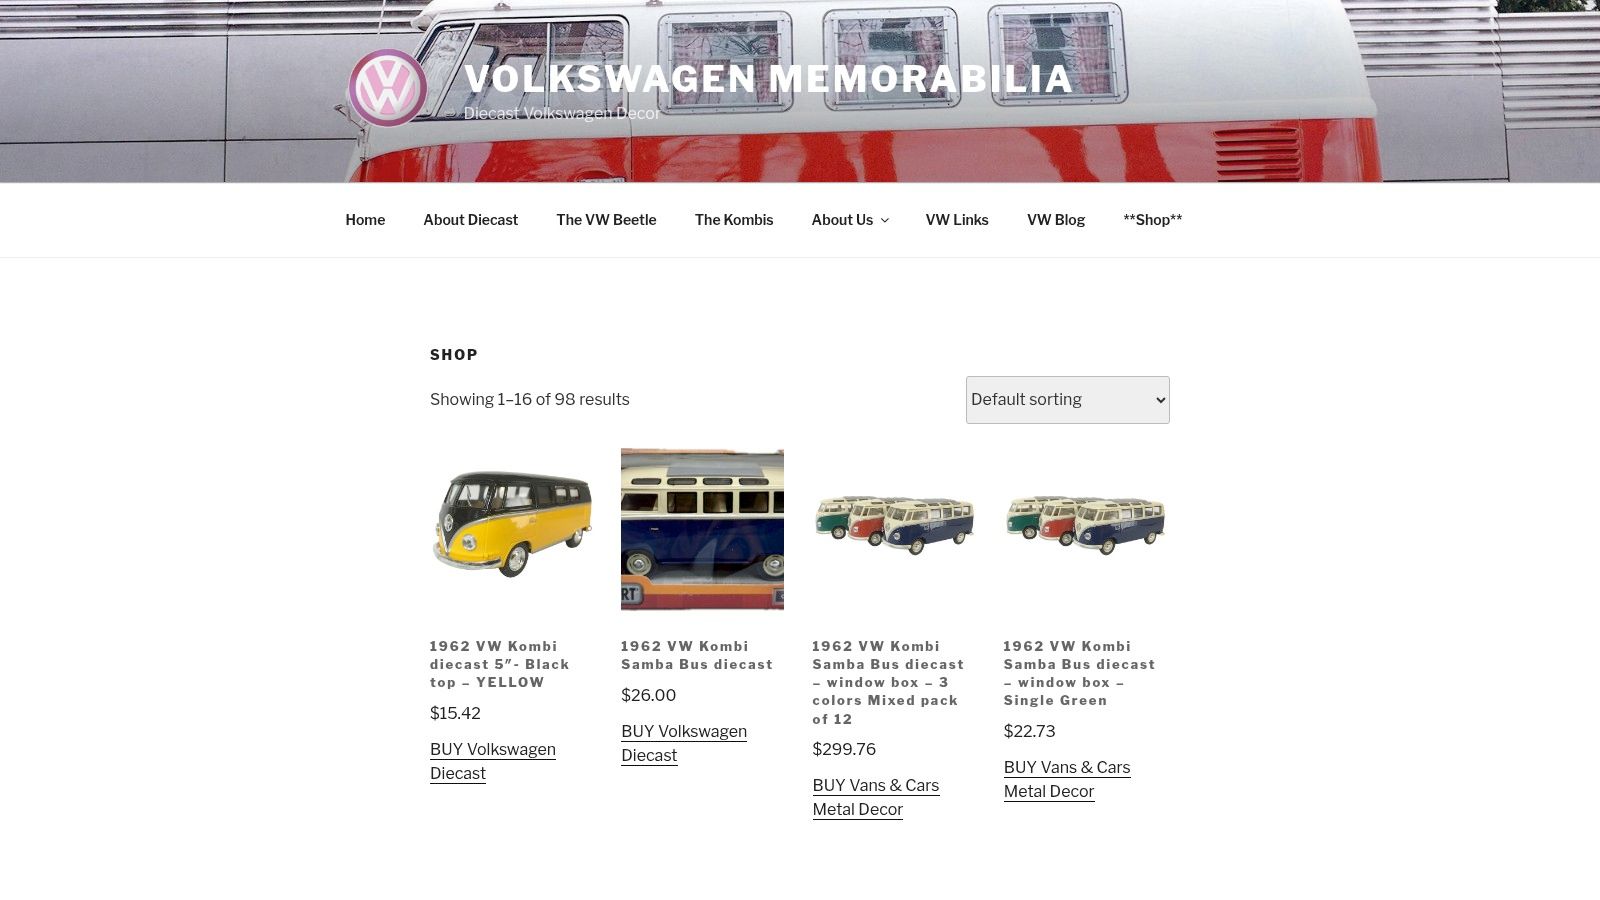
Screenshot from https://vwmemorabilia.com.au/shop/

Display ideas that feel like a real VW life

  • Match the model to the trip: Set a diecast Kombi beside an old campsite photo, a rally badge, or a dog-eared road map.
  • Build a proper bench vignette: A Beetle model, an enamel mug, a spare key tag, and a vintage petrol tin give the shelf the feel of a shed with stories in it.
  • Show the family resemblance: Mix Beetles and buses together, especially if your real-world VW history has included both.

People hunting for VW Kombi diecast Australia, Volkswagen Beetle model, buy diecast Kombi, VW memorabilia collectibles, or Volkswagen diecast models for sale are usually chasing that same spark. They want something solid in the hand that brings the road back into the room.

FAQ

Does a double jerry can holder suit every classic VW

No. Kombis usually give you more realistic mounting options. Beetles need more careful thought about access, balance, and structure.

Is a roof rack holder a good idea for a Kombi

It can work, though lifting fuel that high is a chore and the added weight changes how the van feels. Plenty of owners prefer rear-mounted setups for easier handling.

Can I build my own holder

Yes, if you know your way around fabrication and can get the mounting, latch security, and corrosion protection right. Fuel gear deserves careful work, not rough guesswork.

Why does this matter to VW collectors

Because the hardware is part of the legend. A holder, a rack, a weathered can, and a bus pointed toward the coast all belong to the same picture collectors have loved for decades.


If those road-trip scenes sound familiar, have a wander through Volkswagen Memorabilia and browse the locally stocked range of VW diecast models, Kombi pieces, Beetle collectibles, and other shelf-friendly reminders of why these old cars still tug at people's hearts.

Car Window Fly Screen: A VW Kombi & Beetle Guide

You're parked up by the water in a classic Kombi. Kettle's on, side window cracked, sunset doing its best work across the paint. Then the mozzies arrive and turn the whole evening into a slap-dance. That's usually the moment people start thinking seriously about a car window fly screen.

On a modern SUV, you can get away with almost anything that's black, stretchy, and vaguely window-shaped. On a Beetle or Kombi, it's different. These cars have character. The screen needs to work, but it also needs to look right. If it flaps, scratches paint, ruins the line of the window frame, or feels like a cheap camping hack, you'll notice it every time you walk up to the car.

That's why most classic VW owners end up treating this as a small custom job rather than a simple accessory purchase. In Australia, there's no established market data for car window fly screens as a distinct product category, unlike the much better documented residential fly screen trade, which is a good sign this remains a niche, enthusiast-led solution rather than a standardised off-the-shelf fitment, as noted in this Melbourne fly screen guide.

Choosing Your Fly Screen Material and Style

A mate of mine brought a tidy bay-window Kombi to a camp weekend and fitted one of those slip-on sock screens over the door frame. It worked well enough once the van was parked. But every time the door opened, the thing shifted a touch, and by the end of the weekend it looked more “temporary bush fix” than “sorted touring setup”.

That's the trade-off. The easiest option isn't always the one that suits a classic VW.

A hand waving from the open window of a vintage camper van overlooking a sunset lake scene.

Mesh that suits the way you use the car

For most owners, fibreglass mesh is the sensible starting point. It's easy to work with, has a soft look, and doesn't feel too harsh against older trim and painted frames. If you're building a removable screen for summer touring and weekend markets, that's often enough.

If you travel with a dog, or you've got kids leaning on the window opening, a heavier-duty pet mesh makes more sense. It's tougher, but it also looks chunkier. On a splitty or an early Beetle, that heavier weave can feel visually out of step with the car's lighter lines.

A quick way to think about it:

Style choice What it does well Where it falls short
Fibreglass mesh Light, tidy, easy to tension Can sag if handled roughly
Heavy-duty mesh Better for pets and harder use Heavier look, less subtle
Fine dark mesh Good outward visibility in camp use Can look too modern on some classics

Practical rule: If the screen is obvious from three metres away, it's probably too bulky for a Beetle.

Screen styles that actually suit old Volkswagens

You've really got three common directions.

  • Slip-on sock screens work for quick camping jobs. They're easy to store and don't ask much of you. They also look the least integrated.
  • Magnetic screens can be neat if the mounting is discreet. They're handy on vans that see frequent use, but cheap magnets and rough edges can mark older paint.
  • Channel-fit or framed screens take more effort, yet they usually suit a classic VW best. They look intentional, sit flatter, and don't scream “universal accessory”.

For inspiration on the sort of relaxed touring setup many VW owners are chasing, even beyond the screen itself, it's worth a look at these awning fabric samples for vans. The colours and camping vibe are often the same cues people use when choosing mesh tone and trim finish.

What works visually

A classic VW rewards restraint. Soft black or charcoal mesh usually disappears better than bright grey. Slim edging beats chunky tape. If your Kombi's got a warm cream roof, polished trim, or original-style rubbers, match the screen to that mood instead of fighting it.

The best car window fly screen is the one nobody comments on until dusk, when everyone else is getting eaten alive and you're still sitting comfortably.

Nailing the Measurements for a Perfect Fit

Bad measuring ruins more fly screen projects than bad materials. The classic mistake is taking one quick width and one quick height, cutting confidently, then discovering an old VW window opening is less square than your memory.

That's especially true on cars that have had seals replaced, doors adjusted, or frames repainted over the years.

A five-step instructional checklist for measuring a car window accurately before installing a fly screen.

How to measure a Kombi sliding window

On a Kombi with a sliding side window, clean the channel first. Dust, old adhesive, and hardened grime can throw your reading off. Use a tape measure that hooks firmly, and take your height in three places. Front, centre, and rear.

Then measure the track depth at the top and bottom. For a DIY track-mount screen, the key formula is H = CH + TD – 3mm, where the 3mm tolerance helps account for track irregularities and thermal expansion in Australian heat, preventing the screen from jamming, according to the DIY measuring guidance from Flyscreens in a Box.

That little subtraction matters. Old Volkswagens spend plenty of time in the sun, and a snug fit in the shed can become a sticky fit at the beach.

Measuring a Beetle pop-out window

A Beetle's pop-out is a different animal. You're not usually dealing with a straight sliding channel. You're measuring the usable opening and the arc of the frame.

Do this instead:

  1. Measure the maximum width across the opening, but don't assume that's your cut line.
  2. Take several height readings because the frame curve changes the usable shape.
  3. Make a cardboard template before you touch the mesh.
  4. Check latch clearance so the screen doesn't foul the hardware.
  5. Test the template with the window partly open and fully open.

Measure the shape the air passes through, not just the shape the glass sits in.

That sounds simple, but it's where people go wrong. Beetle windows often look more symmetrical than they are.

The small habits that save rework

A tidy setup starts before the cutting.

  • Clean first: Dirt in the channel creates false readings and scratches.
  • Use a rigid tape measure: Soft sewing tapes are fine for trim, not ideal for frame work.
  • Mark orientation: Top, bottom, left, and right on your template. Don't trust memory after tea break.
  • Re-check after lunch: Fresh eyes catch mistakes.

If you want a handy nod to the measuring side of workshop life, this customised floor mat with tape measure design is the sort of thing that makes VW garage spaces feel a bit more personal.

A Weekend Guide to DIY Installation

This job sits nicely in a Saturday-and-Sunday rhythm. Saturday is for cutting, trial fitting, and muttering at corners. Sunday is for final tension, clean-up, and that satisfying moment when the screen pops into place and looks like it belongs there.

Start with the gentlest part of the job first. Protect the paint and trim before you build anything rigid.

A person installs a black mesh car window fly screen onto the rear door frame of a vehicle.

Before you fit anything

Lay out your tools on a blanket or bench, not directly on the van. For most DIY installs, I'd want:

  • A tape measure and square
  • Cardboard for templates
  • Sharp scissors or a fresh utility blade
  • Spline roller if using framed mesh
  • Painter's tape for temporary positioning
  • Felt tape or soft edging where a frame may touch painted metal
  • A marker that wipes off easily

If you're building a framed screen, do a dry assembly first. Don't tension the mesh until you know the frame sits cleanly.

Building the screen without making it look homemade

The difference between neat and rough is usually tension. Pull the mesh evenly, not brutally. If one corner goes drum-tight while the opposite side is still soft, you'll end up with a twist that shows the moment it's installed.

For framed screens, work opposite sides in sequence rather than chasing one edge all the way around. That keeps the pull balanced. If you're using magnetic mounts, test each point with the door shut and then reopened. A magnet that feels fine static can shift the second the panel flexes.

Workshop note: Felt tape on contact points is cheap insurance for original paint and older powder-coated trim.

A lot of owners also underestimate edge finishing. A beautifully cut mesh can still look unfinished if the perimeter tape is wavy or oversized. Keep the border narrow and even.

Fitting and final checks

On a Kombi sliding window, insert the screen gently and check for rattle before you call it done. On a Beetle pop-out, test both latch operation and seal compression. You're not just checking if it fits. You're checking if the car still feels normal to use.

This installation clip is handy for getting your eye in before you start cutting:

If your van also runs touring gear, it helps to think of the fly screen as part of a broader camp setup rather than a random add-on. The same clean, functional approach shows up in a well-fitted Fiamma F45 awning installation for a van. Good accessories should look settled, not bolted-on in a hurry.

What a finished job should feel like

A proper car window fly screen on a classic VW should do four things:

Check What you want
Fit Sits snug without forcing
Look Doesn't dominate the window line
Use Allows normal opening, latching, or sliding
Sound No rattles at idle or in a breeze

If it fails one of those, adjust it. Don't live with a result that annoys you. These cars teach patience, and usually reward it.

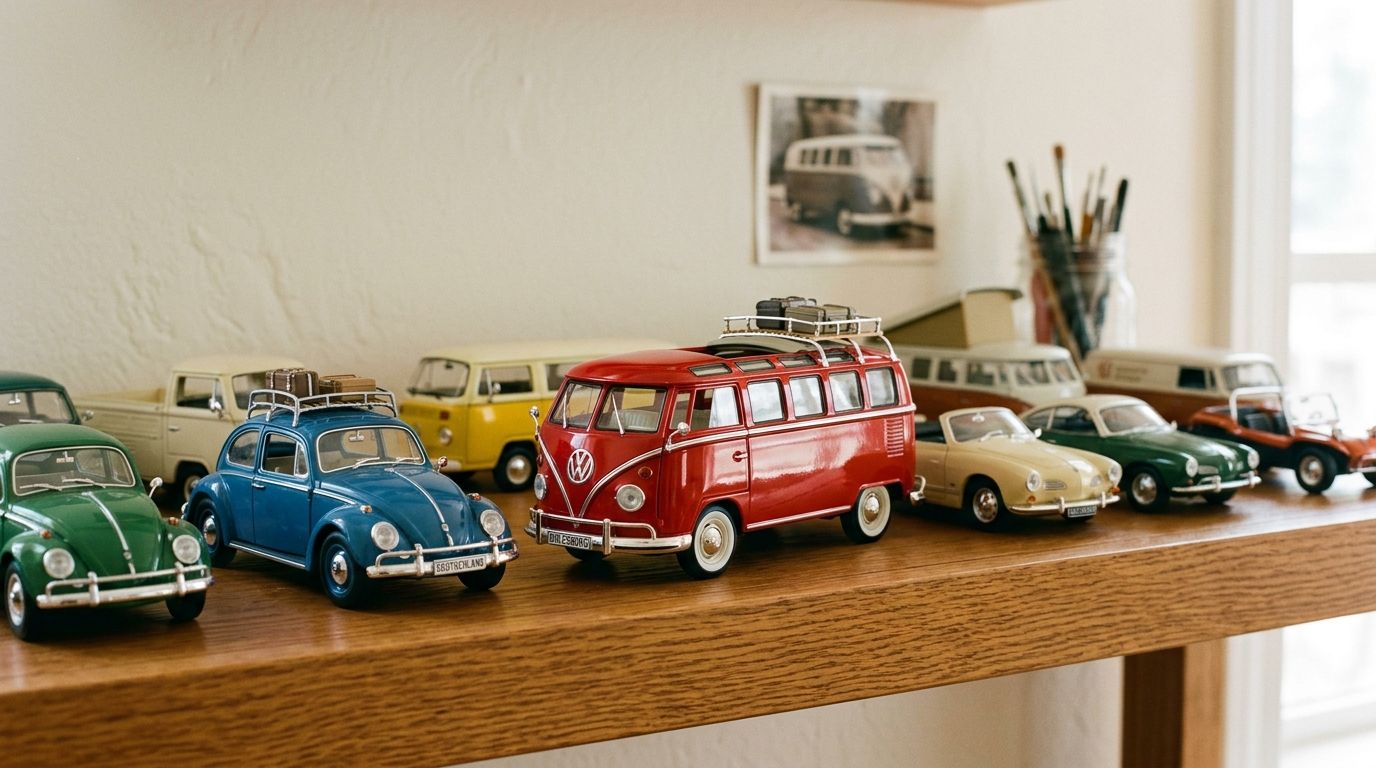
VW-Specific Tips and Classic Aesthetics

A fly screen on a Volkswagen shouldn't feel like camping gear borrowed from another hobby. It should feel like something a careful owner added because they use the car properly. Beach runs, overnighters, swap meets, summer shows. That's the spirit.
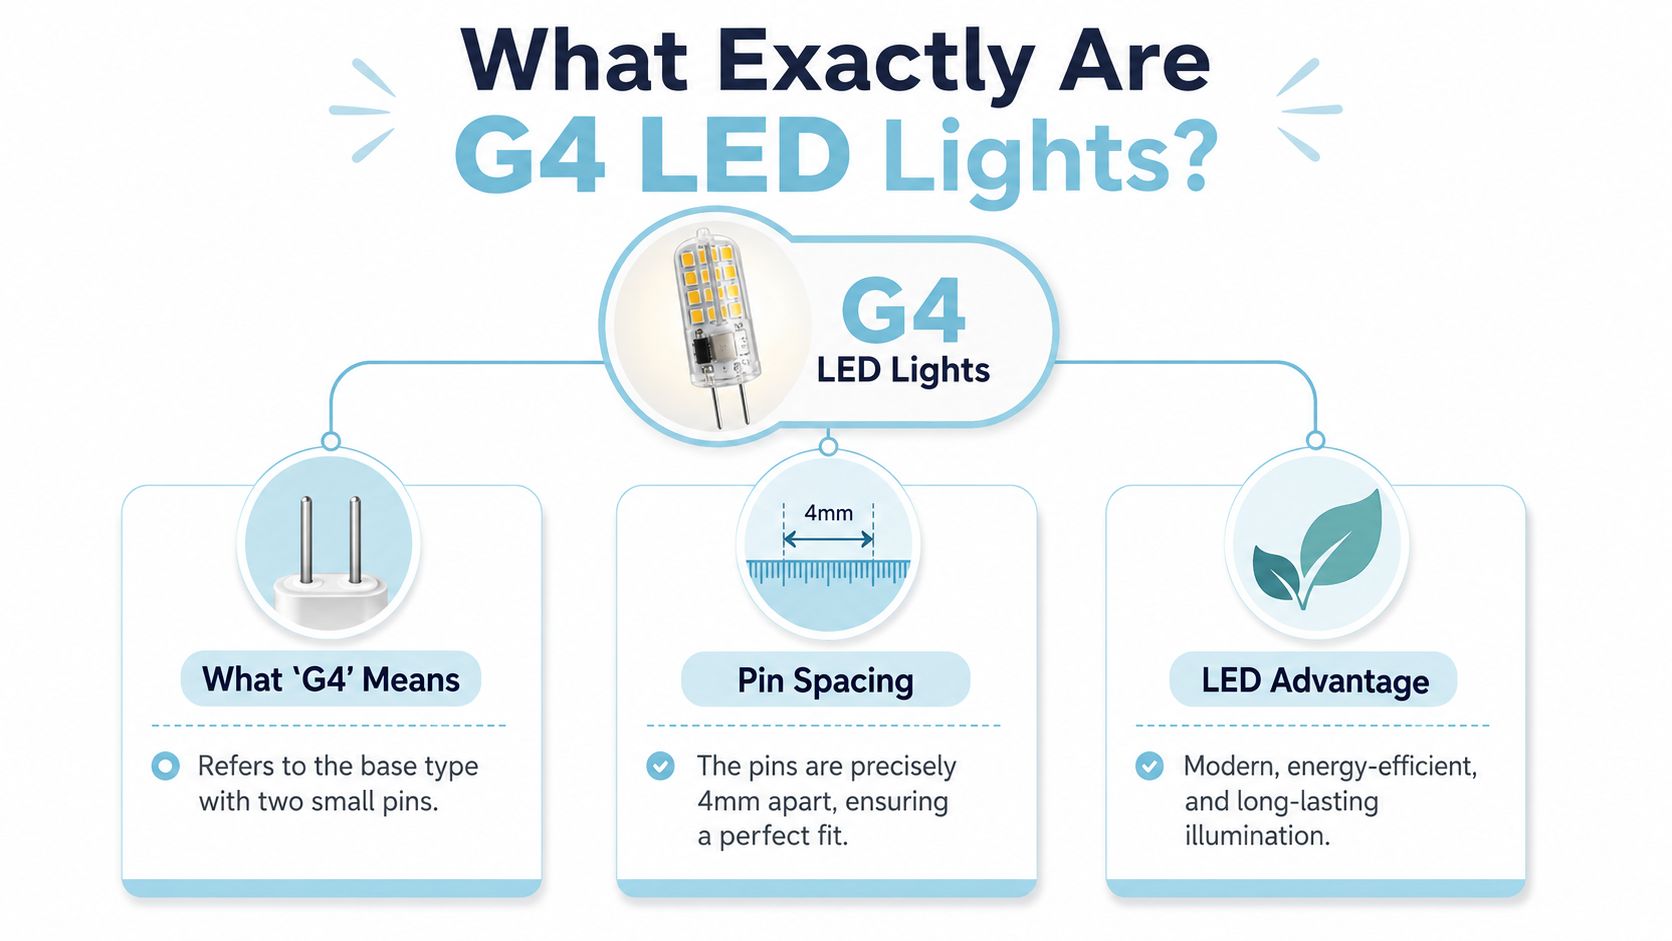
The line between useful and ugly is thin on an old VW.

A close-up view of a vintage sage green Volkswagen Beetle parked outdoors with a black mesh window screen.

Let the car's era lead the design

Early Beetles suit lighter visual treatment. Thin surrounds, softer mesh colour, and hardware that disappears. A chunky black frame can look too aggressive against rounded guards, narrow pillars, and delicate chrome.

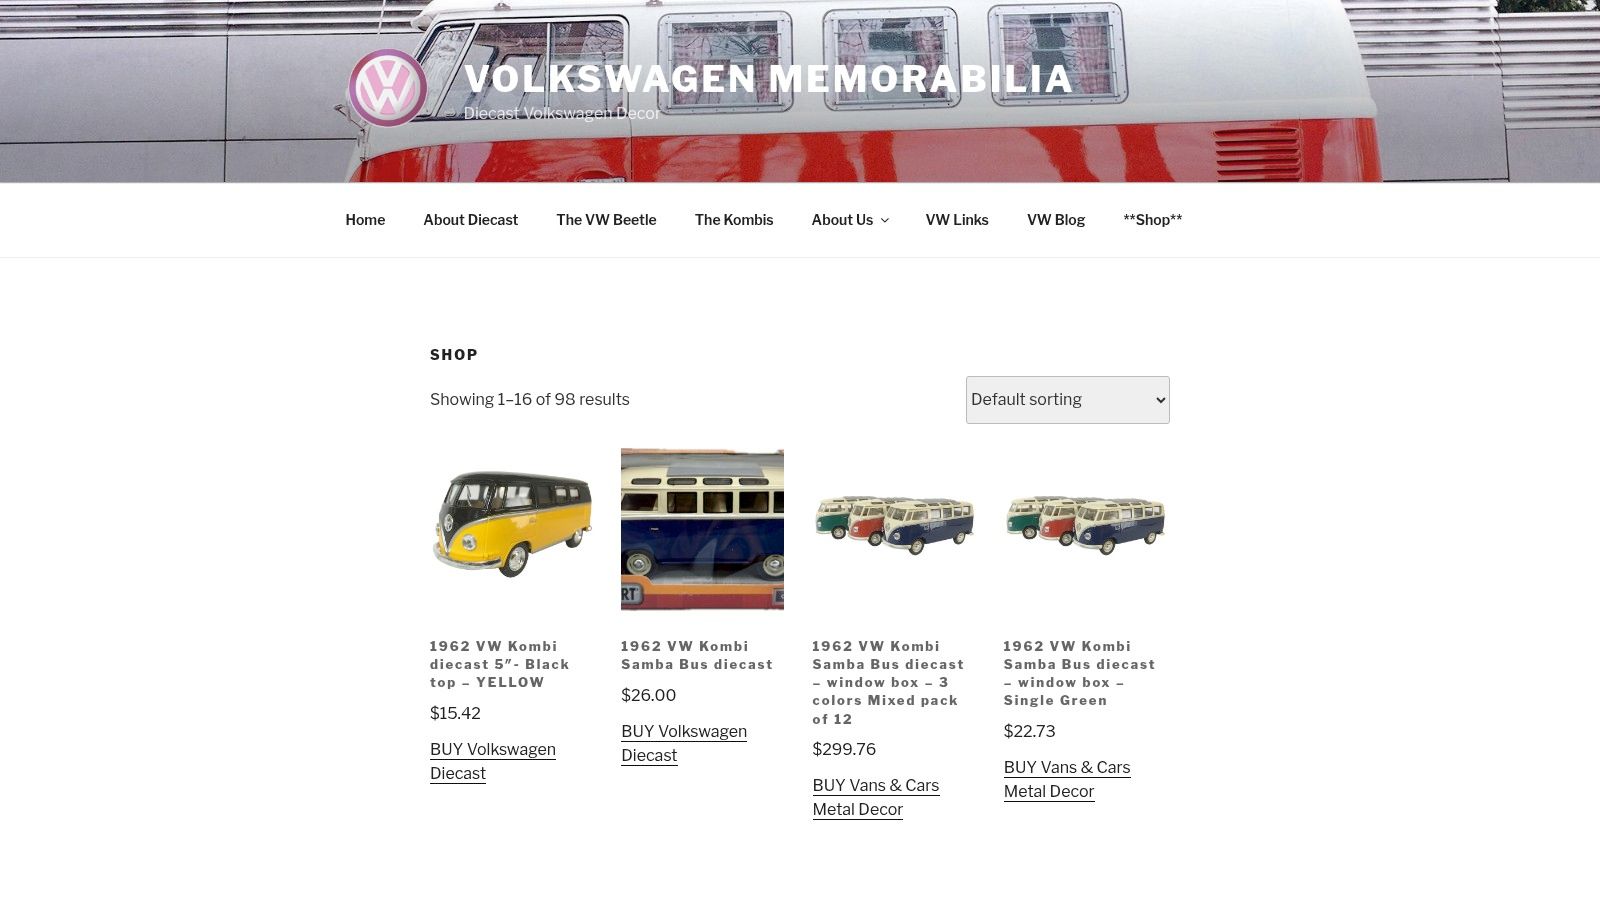
Kombis give you a little more freedom, especially campers with roof racks, awnings, timber interiors, or surf styling. Even then, the best screens still echo the van's shape instead of fighting it.

A few combinations that usually work well:

  • Pastel or lighter body colours pair well with charcoal mesh and slim edging.
  • Commercial or utility builds can carry a slightly more durable framed screen.
  • Samba-inspired looks benefit from the neatest possible finish because the extra glass makes any clutter more obvious.

Why old Volkswagens deserve a tailored approach

The Beetle wasn't just another imported novelty. It was officially introduced to Australia in 1953, with local assembly beginning a year later, which helped cement it in Australian motoring culture, as recorded in the Volkswagen Beetle history entry. That matters because these cars aren't appliances to their owners. They carry memory, family history, and a very particular visual language.

The same goes for the Kombi name. In Australia, enthusiasts use it with real affection because it means more than “van”. It points to a whole lifestyle around road trips, markets, surfboards, and slow weekends.

The best modifications on a classic VW never try to modernise the car out of its personality.

Small aesthetic choices that make a big difference

If you want the screen to feel almost factory-minded, pay attention to the details around it.

  • Match the trim mood: Satin finishes usually sit better than glossy ones.
  • Respect original hardware: Don't cover latches, catches, or signature frame shapes unless there's no alternative.
  • Avoid oversized tabs and straps: They break the silhouette immediately.
  • Keep storage tidy: A removable screen should store flat or in a simple sleeve, not as a crumpled bundle in the parcel area.

For many owners, diecast models are surprisingly useful here. A well-finished model often highlights the colour breaks, trim lines, and proportions that make a real Beetle or Kombi look “right”. If you're restoring or accessorising a car, studying those familiar lines in miniature can sharpen your eye before you commit to materials on the full-size vehicle.

Care Maintenance and Common Pitfalls

A good screen can last well if you treat it like trim, not like camping rubbish. Most damage happens off the car. People toss the screen into the back, fold it sharply, or scrub the mesh with whatever cleaner is nearby.

Use mild soapy water, a soft cloth, and patience. Let the mesh dry fully before storage, especially after coastal trips. Salt and damp don't do older fittings any favours.

The problems that show up after the first trip

Most issues aren't disasters. They're signs that the screen needs a small rethink.

  • Wind flap at low speed: Usually means the mesh isn't tensioned evenly or the perimeter isn't supported enough.
  • Tiny gaps at corners: Common on curved windows. A revised template often fixes it better than trying to stretch the mesh harder.
  • Rubbing on paint or trim: Add softer isolation at contact points before the marks become permanent.
  • Difficult window operation: The screen may fit the opening but still interfere with latches, sliders, or seals.

If insects are still getting in, don't assume the mesh is wrong. More often, the opening around the edge is the culprit.

The legal grey area that's worth taking seriously

This is the part many generic guides skip. A car window fly screen might work brilliantly at camp, but road use is a separate question.

Australian vehicle rules already deal with visibility and obstruction. The key point for owners is that side mirrors are required if rear vision is obstructed, but no source explicitly clarifies whether mesh fly screens breach the common 20% Visible Light Transmittance limit for rear side windows in states like NSW and VIC, which leaves a legal grey area, as discussed in this Australian guide touching on window screen and visibility rules.

That means common sense matters.

If you're unsure whether a screen could affect legal visibility while driving, remove it for road use and refit it at camp.

That's the cautious path, and for classic VW owners it's usually the sensible one. These screens make the most sense as parked-up comfort gear, not as something left on permanently without checking the rules that apply in your state.

A simple maintenance rhythm

Keep it boring and you'll keep it working.

  1. Brush dust off before washing
  2. Wash gently
  3. Dry fully in shade
  4. Store flat if possible
  5. Inspect mounting points before every trip

A tidy routine beats a heroic repair later.


If you love the classic Volkswagen lifestyle as much as the cars themselves, Volkswagen Memorabilia is well worth a browse. It's a proper local Australian shop for VW memorabilia collectibles, with local stock and fast shipping that makes gift buying and collecting much easier than chasing overseas listings. You'll find everything from the main VW shop collection to favourites for people searching Volkswagen diecast models for sale, including VW Kombi diecast Australia pieces, Volkswagen Beetle model collectibles, and classic bus-inspired items that suit anyone looking to buy diecast Kombi. If your heart leans toward the iconic split-window look, have a look at the 1962 VW Kombi Samba Bus range. It's a lovely way to bring a bit of that Beetle and Kombi magic onto the shelf when the real car is in the shed.

Collectable or Collectible? a VW Fan’s Guide

You're polishing up a listing for a tidy little Kombi Samba Bus diecast. The photos look sharp, the box is crisp, and you know some other VW tragic out there will love it. Then your cursor hovers over one word and stalls.

Is it collectable or collectible?

That tiny spelling choice feels small, but it matters more than most of us realise. It shapes how local buyers read your listing, how your product sounds in Aussie English, and how search engines connect your page with people hunting for a Volkswagen Beetle model, VW memorabilia collectibles, or a buy diecast Kombi gift for Dad before the next Volksfest.

That Classic Collector's Conundrum

I've seen it happen at swap meets, club displays, and online seller groups. Someone has a lovely Beetle model or a surfy old Kombi piece on the bench, and they can describe every detail of the paint, the scale, and the era. But when it comes time to write the listing title, they pause at the same fork in the road. Collectable or collectible?

A classic golden Holden Monaro GTS muscle car displayed on a grassy field during an automotive event.

That hesitation makes sense. Collecting in Australia isn't some niche side hobby anymore. Australia has an estimated 7.6 million active collectors, and personal collections are estimated at $16.8 billion AUD, which means more Aussies collect than attend live theatre or hold Netflix subscriptions, according to eBay's State of Collectables Report 2025.

When a hobby gets that broad, language starts doing heavy lifting. The right word helps buyers feel they're dealing with one of their own. It also helps when your diecast display spills into other parts of the home, like vintage shelves, beachy corners, or VW-inspired home accessories that carry the same nostalgic spirit as the vehicles themselves.

Practical rule: If a word in your listing makes an Aussie buyer stop and think, it's worth choosing the spelling that feels local and natural.

For VW fans, that's not nit-picking. It's part of the culture. We care about details because details are what make a Beetle look right, a Samba Bus feel special, and a model shelf tell a story.

The Great Spelling Showdown Explained

Both spellings are real. That's the first thing to get straight.

Collectable and collectible both point to the same general idea. They describe something people want to collect. Where the confusion starts is in tone and usage.

An infographic comparing the spellings of collectable and collectible, explaining their subtle differences in meaning and usage.

How the two words usually behave

A handy way to think about it is this:

Word Common feel Typical use
Collectable Broader, more descriptive An adjective in Australian and British usage
Collectible More market-focused, more American Often used as a noun, or in US retail language

You might say, “That's a collectable VW Kombi diecast,” because you're describing the model as something worth collecting.

You might also hear, “It's a rare collectible,” especially in American marketplaces where the word often stands alone as a noun.

Why both spellings keep turning up

Part of the reason both spellings are everywhere is that diecast collecting itself is global. The audience isn't limited to one country, and online shopping mixes British, Australian, and American wording on the same results page. That's no surprise in a market this big. The global automotive diecast scale model market was valued at USD 4.09 billion in 2025, with collectors and hobbyists contributing over 65% of total demand, according to Business Research Insights' automotive diecast scale model market report.

So yes, both spellings are technically acceptable.

But they don't land the same way.

Use collectable when you want your wording to sound Australian and natural. Use collectible strategically when you want to catch searches or speak to overseas buying habits.

That's the sweet spot. Grammar, audience, and search intent all pulling in the same direction.

Aussie Lingo and The Rest of The World

If you write for Australian buyers, collectable is usually the better fit. It sits comfortably alongside colour, centre, and organised. It sounds like us.

That matters in the VW world because the local connection runs deep. The Beetle wasn't some passing curiosity in Australia. The Volkswagen Beetle was formally introduced to Australia in 1953, with local assembly beginning the following year at Clayton, Victoria, as noted in the Volkswagen Beetle history summary. That heritage is one reason these little cars still stir up such affection at shows and on display shelves.

Why local spelling builds trust

Aussie buyers notice tone even when they don't consciously think about it. If a listing says “collectible,” “color,” and “center,” it can read like a copy-paste from an overseas seller. That doesn't make the item bad, but it can make the listing feel less grounded.

For locally minded VW enthusiasts, these signals help:

  • Australian spelling: It gives your listing a familiar voice.
  • Specific VW naming: Beetle, Kombi, Samba Bus, Type 2. Buyers know what they're looking at.
  • Clear condition notes: Boxed, licensed, display-ready, shelf wear, mint paint, or opened but complete.

A simple way to decide

If your audience is mostly Australian, write the way you'd speak at VW Nationals over a coffee van queue.

If your audience is broader, keep collectable as your main spelling in visible copy, then work collectible into less prominent places like tags, alt text, or secondary wording.

The best listings don't sound imported. They sound like they came from someone who knows the local scene and cares about the details.

That local feel is especially important with nostalgia-driven models. A vintage Volkswagen Beetle model isn't just a product. For plenty of buyers, it's a memory of family road trips, first cars, beach holidays, and old photos tucked into the glovebox.

Writing Titles That Sell Your VW Models

A good title does three jobs at once. It tells the buyer what the item is, it gives search engines enough context, and it nudges the emotional part of the brain that says, “Yep, that's the one.”

Screenshot from https://vwmemorabilia.com.au/shop/

Start with the model, then add collectable value

For Australian listings, I'd usually build a title in this order:

  1. Brand or vehicle name
  2. Model type
  3. Scale or edition
  4. Condition or licensed status
  5. Collectable phrasing

That gives you titles like these:

  • Volkswagen Kombi Samba Bus 1:18 Diecast Model, Licensed Collectable
  • Volkswagen Beetle Model in Display Box, Highly Collectable Gift
  • Classic VW Kombi Diecast Australia, Limited Edition Collectable

Now compare those to weaker titles:

  • VW toy car
  • collectible bus model
  • old Volkswagen car

The weak versions are vague. They waste precious words on broad language and skip the terms buyers search for, such as VW Kombi diecast Australia, Volkswagen Beetle model, and Volkswagen diecast models for sale.

What to highlight in the description

The description is where you support the word collectable with real reasons.

A short checklist helps:

  • Licensed authenticity: Say if the model is officially licensed.
  • Scale detail: Mention whether it's 1:18, 1:24, or another scale.
  • Condition notes: Be clear about box condition, paint, moving parts, or display wear.
  • Edition status: If it's a limited run, say so plainly.

That last point matters. In the Australian diecast market, limited-edition models with fewer than 500 units can appreciate by 35 to 50 per cent more than mass-produced versions, especially for classic Kombis, according to Redline Diecast's analysis of diecast investing.

Before and after examples

Before After
collectible VW bus Licensed Volkswagen Kombi Samba Bus Diecast, Limited Edition Collectable
Beetle toy model Volkswagen Beetle Model Car, Boxed Collectable for Display
VW van for sale Buy Diecast Kombi Model, Classic VW Van Collectable in Gift-Ready Box

If you're browsing ideas for naming conventions, scales, and model wording, it helps to study how dedicated Volkswagen model car collections are grouped and described.

Seller's shortcut: Don't use “collectable” as fluff. Use it after you've shown why the piece deserves the label.

That's the difference between a title that sounds padded and one that sounds credible.

Our SEO Strategy for VW Memorabilia

If I were setting up an Australian VW store from scratch, I'd standardise on collectable as the primary spelling across category pages, product titles, and blog articles. It gives the whole site a consistent local voice.

A miniature green Volkswagen Beetle model sitting on a white shelf next to a vintage Volkswagen book.

Why one main spelling works better

Search engines can understand close variants, but people still respond to clarity. If half your pages say collectable and the other half say collectible, the site can feel messy. A single house style keeps product pages, image labels, and category names aligned.

That's especially sensible in Australia because toys, which include diecast models, are the second most-collected category in the country at 33% of all collectors, according to the Sterling Currency summary of the 2025 State of Collectables Report. In other words, there's a big local audience for this niche, and speaking their language helps.

How to use the American spelling without losing your voice

You don't need to ignore collectible. You just need to place it carefully.

A sensible approach looks like this:

  • Primary copy uses collectable: Page titles, headings, and main descriptions stay in Australian English.
  • Secondary references use collectible: Tags, search synonyms, and occasional blog phrasing can catch American spelling habits.
  • Product-specific keywords stay concrete: “VW memorabilia collectibles” can work as a search phrase, but it should sit beside sharper terms like “Volkswagen Beetle model” or “buy diecast Kombi”.

The local importer edge

For Australian buyers, spelling is only part of trust. The other part is confidence in the seller. Local stock, faster shipping, and support during local business hours are practical advantages, especially when you're buying a gift or a fragile diecast piece you want packed properly.

That's why the strongest SEO strategy isn't only about keywords. It's about matching the expectations behind the search. Someone typing “VW Kombi diecast Australia” usually wants an Australian seller, local delivery, and a clear product description written by someone who understands the hobby.

A good keyword strategy gets the click. Local credibility gets the order.

That applies whether the buyer is after a boxed Beetle for the study shelf or a Kombi Samba Bus model to sit beside coastal décor in the lounge room.

Your Collectable Questions Answered

Does the spelling matter for hashtags on social media

Yes, a bit. Use both if you can do it naturally. For an Australian audience, I'd lead with #collectable, then add #collectible if the platform and caption suit it. Social discovery is looser than on-page SEO, so covering both spellings can help without making your caption look odd.

Should I use both spellings in product tags

Yes, but don't cram both into the title. Keep the visible title clean with collectable, then use collectible in backend tags, image names, or supporting copy. That gives you broader reach without making the listing feel clunky.

Is one spelling better for vintage pieces and the other for new releases

Not really. The better distinction is audience, not age. A mint new Beetle release can still be called a collectable in Australia, and a vintage Samba Bus can still appear under a collectible search from an overseas buyer.

What about display items that aren't diecast, like décor or signs

Use the same principle. If it's part of a VW-themed display, collectable works well in Australian-facing copy. For pieces you want to protect and show off properly, pairing them with proper display cases for models or dedicated shelving also helps reinforce that they're valued items, not random ornaments.

The short answer is simple. If you're writing for Australians, lead with collectable. If you're selling online, make room for collectible behind the scenes.


If you're keen to add something special to the shelf, the study, or the gift list, have a look through Volkswagen Memorabilia. You'll find licensed Volkswagen diecast models, Kombi and Beetle favourites, coastal-inspired VW pieces, and local Australian stock with friendly support and fast shipping.

A Customised Floor Mat Guide for VWs and Coastal Decor

You know the feeling. The Beetle's finally sitting right, the Kombi interior smells faintly of old vinyl and warm weekends, or the beach house entry is almost there, just waiting for that one piece that pulls the whole look together. Not a generic mat from a chain shop. Something with a bit of soul. Something that looks like it belongs beside salt air, timber floors, chrome hubcaps, and a shelf full of carefully chosen VW models.

That's where a customised floor mat earns its keep. It isn't just there to catch sand, road grit, or the drip from a wet esky. It's the finishing touch that tells people what you're into before you even say a word. In a classic Volkswagen, it can echo the curves and colours of the cabin. In a coastal home, it can carry that surfy, laid-back energy without looking kitschy.

There's a good reason this kind of product stands out. Australia's broader floor covering retail industry has been sliding, with a 3.1% annual decline between 2021 and 2026, yet it still represents $3.7 billion in 2026 across 2,049 businesses according to IBISWorld's Australian floor covering retailing profile. Mate, that tells you plenty. Buyers aren't rushing toward generic. They're hunting for pieces with purpose, fit, and personality.

That Finishing Touch for Your Ride or Retreat

A stock-standard mat does the job. A well-made customised floor mat does more than that. It ties the whole story together.

Take the classic VW owner who's spent months chasing the right trim, the right seat pattern, the right stance. Dropping in an off-the-shelf mat at the end feels wrong. Same with a coastal hallway styled with whitewashed timber, shell pieces, and vintage surf prints. A plain black rectangle kills the mood in two seconds flat.

Why generic often falls flat

Generic mats usually miss in one of three ways:

  • The fit is sloppy. Corners ride up, edges curl, pedals catch, or the mat floats awkwardly in the room.
  • The material is wrong. Too plush for a sandy entry. Too flimsy for a workshop. Too shiny for a period-correct cabin.
  • The design says nothing. It fills space, but it doesn't add character.

A mat should look intentional. If it feels like an afterthought, it usually looks like one too.

That's why custom work suits VW people so well. Beetle and Kombi owners already think in details. They notice stitch lines, paint shades, hubcap styles, roof racks, and period decals. The same instinct applies to the floor.

Where it works best

A customised floor mat can earn its place in more than one setting:

Setting What matters most What usually looks best
Classic Beetle cabin Fit, pedal clearance, vintage feel Period-friendly carpet or rubber-look finish
VW Kombi or Transporter Coverage, durability, easy cleaning Hard-wearing layered construction
Garage display corner Sharp edges, logo clarity, visual impact Branded or silhouette-led design
Coastal entryway Sand control, colour stability, moisture handling UV-stable, easy-clean surface

If you're the sort who can spend ten minutes choosing between a surfboard rack and a stock roofline for your Kombi display, you'll appreciate this. The right mat doesn't just protect the floor. It anchors the whole vibe.

Choosing the Right Material for Your Masterpiece

Material is where good intentions either turn into a ripper result or an expensive annoyance. If you get this part wrong, the nicest design in the world won't save it.

An infographic showing different floor mat materials categorized for car mats and home mats usage.

For the VW cabin and workshop crowd

If the mat's going inside a car, shed, or service area, think first about mess, movement, and edge stability. In Australian custom roll-out applications, a triple-layer construction is commonly used: polypropylene on top, a closed-cell foam core, and a non-slip rubber backing rated to AS/NZS 4586 for wet slip resistance. One supplier states this setup reached a 94% success rate in containing spills up to 5mm depth during standardised testing, while 38% of early failures were tied to poor edge sealing that allowed liquid to wick underneath, according to EzyMats' custom roll-out mat product information.

That matters if your old VW sees wet shoes, oily tools, or the odd dribble from a leaky classic. It also matters if the mat sits under a display or workbench and gets a hiding.

For the beach house and coastal entry

Home use near the coast is a different beast. Salt in the air, high humidity, relentless sun, and sandy feet will sort the decent materials from the rubbish very quickly.

The safest call for exposed or sunlit coastal spots is UV-stabilised polyethylene. According to Mats R Us, it retains 87% of its colour after 2,000 hours of simulated Australian sunlight, while non-stabilised alternatives can lose over 60% of their colour in the same period. If your mat sits near a bright front door, under a louvre window, or in a sunny beach shack entry, that difference shows up fast.

Practical rule: For coastal styling, choose the material for sun and moisture first, then choose the colour and artwork.

If you're already matching the inside of your vehicle, it's worth checking related trim pieces too. A lot of enthusiasts pair floor treatments with automotive dashboard covers so the whole cabin feels thought-through instead of patched together.

What works and what usually doesn't

  • Rubber or layered utility mats suit workshops, drivers, and messy jobs.
  • Carpet-style mats suit show cars and tidy interiors, but they need the right backing and edge finish.
  • UV-stabilised polyethylene suits bright coastal spaces where fading is the enemy.
  • Cheap non-stabilised plastics often look tired long before the rest of the room does.

A flashy design on poor material is still a poor mat. Start with the abuse it'll take, then build the look from there.

Getting the Perfect Fit for a Classic or a Coastline

Fit is where plenty of custom jobs go sideways. The artwork might be spot on, but if the shape is off, the whole thing feels second-rate.

A tape measure lying on a black custom floor mat inside a vintage Volkswagen beetle interior.

Classic Volkswagens are the big challenge here. There's a genuine gap in the local market for older models. Search data cited by Matcraft Australia's Facebook presence indicates 68% of vintage car owners are looking for non-destructive fitment for pre-1970s vehicles. That makes sense. Nobody restoring a tidy early Beetle or Kombi wants to drill fresh holes or butcher original rubber mounts just to hold a mat in place.

How to template a classic VW properly

For an older VW, don't trust a “close enough” template. Build one from the actual floor area.

  1. Use kraft paper or builder's paper and tape sections together until they cover the footwell.
  2. Mark pedal travel clearly so nothing fouls the accelerator, brake, or clutch.
  3. Trace around seat mounts, rubber studs, and tunnel edges without forcing the paper into unnatural lines.
  4. Cut slightly proud first, then trim back gradually.
  5. Test with the seats in driving position, not pushed back for convenience.

The trick is to respect the car. A proper customised floor mat for a vintage VW should sit securely without demanding permanent changes.

Sizing a mat for a coastal room

Home sizing is less mechanical, but it still needs discipline. A mat at the front door should look intentional, not like it shrank in the wash. In a hallway or beach-house nook, you want enough coverage to catch sand and frame the space cleanly.

Here's a simple check:

  • At the entry. Make sure the mat looks centred to the doorway, not just the wall line.
  • Under a bench or console. Let the mat extend visibly beyond the furniture so it reads as part of the styling.
  • Near a display. Give diecast shelves or a surfy accent chair enough visual breathing room around the edge.

If your space leans more workshop or van-life than lounge room, van fit-out ideas can help you think about how floor areas, storage, and styling work together.

Don't measure the car or room once and call it done. Measure, mock it up, then look at it from standing height. That's when odd proportions show themselves.

Designing Your VW or Coastal Inspired Artwork

You can spot the good ones straight away. A mat under the pedals of a tidy Beetle, or by the door of a weatherboard beach house, says something before anyone notices the details. Get the artwork right and it feels personal. Get it wrong and it looks like a novelty gift that turned up in the wrong place.

A good starting point is whatever you already keep around you. The diecast on the shelf, the old club sticker, the faded photo of your Kombi at the coast. Those pieces usually reveal the shapes, colours, and era you care about, and that matters more than grabbing a random template with a surfboard or VW badge slapped on it.

Screenshot from https://vwmemorabilia.com.au/shop/

Design directions that actually translate well

Floor mats reward bold, readable design. They sit low, cop dirt, and get viewed from standing height. That means the artwork needs to read fast.

The designs that hold up best usually fall into a few proven lanes:

  • Vehicle silhouette. A Beetle side profile, Kombi front, or early bus roofline is clear and familiar without needing much detail.
  • Coastal graphics. Clean wave lines, sun shapes, palm forms, and retro floral cues suit both a surf-inspired room and an old VW with a bit of personality.
  • Personal references. A suburb name, trip slogan, shed name, or plate-style text gives the mat character without clutter.
  • Period colour blocking. Cream, aqua, mustard, faded orange, seafoam, and sandy neutrals work because they connect classic VW paint culture with coastal interiors.

Mate, here's the trick. Pick one hero idea and one support idea. Kombi nose plus a subtle stripe. Beetle silhouette plus a dune colour palette. If you try to squeeze in flowers, waves, engine parts, number plates, and three fonts, the mat loses its punch.

Use your collection as a design brief

Collectors already have a design brief sitting on the shelf. Line up a few favourite models or bits of memorabilia and look for repetition. You might notice that every piece you love has rounded forms, two-tone paint, or that faded pastel look older Volkswagens wear so well.

For inspiration, it helps to browse broader VW memorabilia collectibles and study the recurring colours and motifs across Kombis, Beetles, and garage pieces. That usually gives you a stronger direction than generic custom mat galleries.

The crossover with coastal styling is stronger than plenty of people realise. Both worlds like weathered charm, practical materials, sun-washed colour, and design that feels collected over time instead of bought in one hit. That shared character is what makes a VW-inspired mat work just as well in a beach house entry as it does in a classic bus.

Prepare artwork so the final piece looks sharp

Suppliers can tidy small issues, but they cannot rescue weak source art. Start with clean files and the finished mat has a far better chance of looking crisp.

  • Vector artwork suits line work and logos best because the edges stay clean at different sizes.
  • High-resolution raster files are fine for photos or textured artwork if the original image is sharp.
  • Strong contrast matters because floor-level graphics lose definition quickly once dust and foot traffic enter the picture.
  • Simple fonts beat ornate ones because script and thin lettering tend to blur or fill in.
  • Limit the colour count if you want a classic look. Too many tones can make the design feel busy, especially in smaller footwells.

Here's a handy visual reference for VW-inspired styling and model cues:

A useful test is to print the design on plain paper and put it on the floor. Stand over it. If the shape still reads clearly and the text is easy to catch in a glance, you are on the right track. If it only works when you hold it at arm's length like an art print, simplify it.

The best customised floor mat designs feel tied to a real life. A Beetle in the shed. Salt on the doorstep. A bit of road-trip history under your feet.

From Design to Your Doorstep Ordering and Care

Ordering a custom mat is much easier when you know what questions to ask before you pay the invoice. The Australian automotive floor mat segment is already substantial, valued at USD 3.12 billion in 2024 and projected to reach USD 4.85 billion by 2033, growing at 5.2% annually, according to this Australian car floor mats market overview on LinkedIn. That tells you the category is active and competitive. You've got options, which is great, but it also means you need to separate the proper suppliers from the mobs who just print and pray.

What to ask before ordering

Start with the build, not the artwork mock-up.

Ask this Why it matters
How is the edge finished? Weak edging shortens mat life and can lead to lifting
What backing is used? Backing controls slip, shape retention, and floor compatibility
Is the material suited to sun, moisture, or workshop use? A good print on the wrong substrate still fails
Can the fit be templated for older vehicles? Essential for classic VW owners avoiding permanent modification
Is the stock in Australia? Local supply usually means quicker delivery and easier problem-solving

Printed, flocked, or inlaid

Each production method has its place.

  • Printed mats suit colourful graphics and home decor themes. Best when the design itself is the hero.
  • Flocked finishes can give a softer visual effect, though they're better in lighter-duty settings.
  • Inlaid styles tend to feel more integrated and durable, particularly when you want a cleaner, more premium look.

For Australian buyers, local stock is worth favouring where possible. You'll usually get faster shipping, easier communication, and less mucking around if there's a fit issue or production question. That matters when the mat is part of a gift, a show setup, or a tidy-up before an event weekend.

Basic care that keeps them looking right

A mat doesn't need babying, but it does need sensible care.

  • Shake or vacuum regularly if it lives in an entryway or garage corner.
  • Rinse utility-style mats promptly after oil, sand, or salt exposure.
  • Avoid harsh scrubbing on printed areas. Use a gentler clean so the artwork stays tidy.
  • Dry fully before putting it back down, especially in humid coastal rooms.

The best custom mats age like old Volkswagens do. Not by accident, but because somebody kept on top of the basics.

Styling Your Space and Final Thoughts

Once the mat arrives and drops into place, the payoff is immediate. The cabin feels finished. The hallway feels intentional. The garage display suddenly has a centre.

A coastal-themed rug with starfish and coral patterns displayed on a light wooden floor in a room.

A classic Beetle looks more complete when the floor treatment matches the personality of the car instead of fighting it. A coastal corner feels warmer when the mat picks up the same easygoing lines as your wall art, model vans, or beach finds. That crossover is part of the charm. VW culture in Australia has always sat nicely beside surf culture and road-trip freedom.

That's especially true when you remember the local language around these vehicles. In Australia, the passenger van version was marketed as the VW Kombi, while the commercial variants were known as VW Transporters, as outlined in this Australian Kombi history note. That naming carries a whole mood with it. Kombi means beach runs, mates, boards, and long drives with nowhere urgent to be.

If you're styling a room around that spirit, coastal home decor ideas can help pull the rest together. The best result doesn't scream for attention. It just feels right the moment you walk in.

Frequently Asked Questions

Can I use the same design for a car mat and a home mat?

Yes, the artwork can carry across, but the build should change to suit the job. A Beetle front mat has to clear the pedals, sit flat over older floor pressings, and stay put when you climb in with sandy thongs or wet boots. A home mat has different problems. It needs the right backing for timber, tile, or polished concrete, and it usually wants a lower-profile edge where doors swing over it.

Mate, here's the trick. Keep the colours, linework, or VW and coastal theme consistent, then let the material and backing do the hard work for each setting.

What's the safest way to clean a printed customised floor mat?

Start dry. Shake out grit, vacuum with a plain head rather than a hard beater, and spot-clean before dirt gets ground into the print. For most printed mats, mild soap in lukewarm water works better than strong cleaners, because harsh products can dull the surface, stiffen the fibres, or weaken the edge binding over time.

Car mats usually cop heel wear, dust, and the odd bit of oil. Home mats near an entry cop salt, sand, and moisture. In both cases, soak less, scrub lightly, and let the mat dry flat before it goes back down. If the supplier gives care instructions for the print method, follow those over generic rug advice.

Are custom mats worth it for older Volkswagens?

Usually, yes. Older Volkswagens often have floor shapes, seat mounts, and pedal layouts that off-the-shelf mats never quite respect. A proper custom set sits cleaner, looks period-correct if that's the goal, and saves you from trimming corners just to make something “close enough” fit.

That matters more in classics than many owners expect. A bad mat can bunch under the pedals, curl near the heater channels, or look out of place against original trim. A well-made one can echo the cabin without pretending the car just left the factory. Same story in a coastal room. The custom route gives you the freedom to nod to Kombi culture without ending up with a loud novelty piece.

What should I budget for?

For a basic printed home mat or simple universal design, expect the lower end of the range. For a templated classic VW set, heavier carpet, better rubber backing, stitched edging, or inlaid rather than printed details, the price climbs fast.

As a rough guide, a simple custom home mat often starts around $80 to $150. A better-quality large home mat with denser pile or marine-friendly materials can land around $150 to $300. For vehicle mats, a basic custom pair or set can start around $150, while a multi-piece set made to suit an older Beetle, Kombi, or Transporter with proper templating and upgraded finishes can run from $300 to $600 or more.

The biggest price jumps usually come from three things. Complex patterns, especially multi-colour inlays. Custom templating for classics where no standard pattern exists. Better backing and edging, which is money well spent if the mat will see sand, wet feet, heavy use, or plenty of time in the sun.

A cheap mat can look fine on day one and turn shabby fast. The better buy is the one that fits properly, cleans up well, and still looks right after a season of road trips or summer traffic through the house.


If you're into classic Volkswagens, diecast collecting, or giving your space that relaxed Kombi-meets-coast feel, Volkswagen Memorabilia is well worth a look. The shop carries local stock, offers friendly Australian support, and has a strong range of licensed VW pieces, from diecast Beetles and Samba Bus models to beachy decor that fits the same laid-back lifestyle. If you're chasing inspiration for your next display, gift, or styling project, it's a top place to start.

Your VW Camper Van Conversion: From Dream to Driveway

You're probably standing in the driveway right now with two versions of the same dream in your head. One is the glossy one. A tidy old VW with the side door open, kettle on, boards strapped up top, sunset throwing honey-coloured light across the dash. The other is the practical one. A van with tired trim, mystery wiring, a patch of rust near the sill, and a notebook full of half-finished sketches.

That's how most camper van conversion stories begin in Australia. Not with perfection. With affection.

At local shows, I always end up chatting to someone who's torn between keeping a classic Volkswagen untouched and turning it into something they'll use. My answer is always the same. If the van's meant to travel, build it to travel well. Respect the shape, respect the history, but make it yours. A good conversion doesn't erase the soul of a Kombi. It gives it another chapter.

The charm is already there. Australia formally welcomed the Volkswagen Beetle in 1953, and local assembly started at Clayton in Victoria in 1954 on the very next beat of that story, as noted in this Beetle history entry. The Type 2 story has its own local flavour too. In Australia, the passenger van version was marketed as the VW Kombi, while the utes and commercial carriers wore the VW Transporter name, as explained in this Australian Kombi overview. That distinction still matters when you're choosing a base for a camper van conversion, because the badge on the nose often hints at how the vehicle was originally used, loved, and worked.

The Blueprint for Your Dream Rig

A proper build starts long before the first screw goes in. It starts when you realise what sort of traveller you are.

Some people want a weekend surf wagon. Bed, storage, coolbox, nothing fussy. Others want a rolling little cottage with solar, water, cupboards, and enough comfort to disappear for days. If you skip that decision and buy only with your heart, you can end up with the wrong van for your own habits.

An infographic showing the five-step process of planning a classic Volkswagen camper van conversion project.

Choosing the right classic VW

The romance often points straight at a Kombi, and fair enough. Nothing else wears the road-trip grin quite like it. But nostalgia needs a partner called practicality.

A few starting points help:

  • Original use matters. A passenger-spec Kombi often gives you a different starting point from a harder-worked commercial Transporter.
  • Body condition beats pretty paint. Fresh paint can hide trouble. Solid metal saves misery.
  • Mechanical honesty counts. A van that starts, stops, and tells the truth is better than one with dazzling trim and a long list of promises.
  • Parts confidence helps. If your comfort with tools is modest, choose a base that won't frighten you every time something rattles.

If you're still hunting, it helps to browse a dedicated van for conversion shortlist and compare body styles with your intended use rather than just your favourite photos.

Practical rule: Buy the van that suits your trips, not the one that only suits your daydreams.

Sketch the life before the layout

I've seen beautiful builds that were awkward to live in because the owner designed them like a furniture catalogue instead of a moving campsite. Before you measure timber, measure habits.

Ask yourself where you'll make tea when it's raining. Where you'll throw sandy thongs. Whether you want to sit upright inside with the door shut. Whether the bed stays made, or folds into a bench. Whether storage needs to swallow tools, fishing gear, camera kit, or a little box of treasured VW bits from swap meets.

A simple planning sequence keeps things honest:

  1. Mark your fixed needs. Bed length, cooking spot, and the gear you always carry.
  2. Draw walking space. Tiny vans feel smaller once cupboards go in.
  3. Decide your must-haves. Fridge, sink, surfboard slot, reading light.
  4. Leave room for maintenance. Access panels save arguments with your future self.
  5. Plan for weight and compliance early. Last-minute heavy additions can spoil the build.

Match the build to the story you want

A weekend warrior can stay charmingly simple. A longer-haul touring van asks more of the design. That's where the blueprint earns its keep. Once the sleeping, cooking, and storage zones are settled on paper, every later choice becomes clearer. You stop guessing and start building with purpose.

Building the Bones of Your Van

The glamorous photos never show the first filthy weekend. Seats out. Old lining peeled back. Dust in your hair. Surface rust staring at you like a smirk from the past. This is still one of my favourite phases, because it's the moment a van stops being “an old bus” and starts becoming your bus.

Strip it back and read the shell

Pulling out worn flooring and trim tells you what sort of life the van has lived. You'll find old screw holes, odd repairs, and sometimes the remains of someone else's half-finished dream. Don't rush this stage. Clean every surface and inspect the shell properly before you bury anything behind timber and panels.

Rust deserves patience. Treat what you can see now, because hidden rust doesn't become charming later. It becomes expensive.

A good bones-first approach usually looks like this:

  • Remove old interior pieces carefully. You may want templates, fixings, or reference points later.
  • Check every floor edge and seam. Moisture loves corners.
  • Test mounting points. Bed frames and cabinetry need trustworthy anchors.
  • Keep notes as you go. Label wiring routes, holes, and factory features before the shell disappears behind your fit-out.

Build a floor that feels solid

The floor changes the whole character of the van. Get it wrong and every step feels hollow, cold, or noisy. Get it right and the build starts to feel planted.

The subfloor is more than a sheet of board. It's the base layer that evens out irregularities, supports the finished floor, and helps the van feel quieter under way. I've seen people race to the visible finishes and regret it later when the floor creaks, flexes, or lifts at the edges.

A quick comparison helps:

Part What it does What happens if you rush it
Floor prep Gives you a clean, sound base Trapped moisture and hidden corrosion
Subfloor Adds structure and support Soft spots and movement underfoot
Wall panels Shape the cabin and cover insulation Rattles and poor fit around curves
Ceiling lining Finishes the shell overhead Sagging panels and awkward gaps

A neat timber finish can hide a bad foundation for a while. The first rough road will reveal it.

Keep the structure serviceable

A strong build also stays accessible. Don't entomb critical areas. Leave paths to wiring runs, wheel arches, and any area you may need to inspect later. Old Volkswagens reward builders who think like caretakers rather than decorators.

By the end of this phase, the van still won't look finished. That's fine. What you've done is harder to photograph and far more important to live with.

Insulation and Airflow for Aussie Climates

Australia is merciless with badly insulated vans. A metal shell left half-done turns savage in summer and clammy in winter. This is the stage where many first-time builders cut corners because insulation feels invisible. Then they spend their first trip sweating, wiping condensation, and wondering why the floor feels like an ice tray at dawn.

An infographic showing the pros and cons of insulation and ventilation for Australian camper van conversions.

Cover every bit of bare metal

One of the most common mistakes in an Australian camper van conversion is leaving sections of metal exposed. According to this van build guide on insulation practice, the recommended approach is a two-layer system. First comes an adhesive closed-cell foam layer with aluminium backing, 1–2cm thick, covering the full interior. Then comes a second reflective layer, often called Reflectix.

That advice sounds fussy until you've camped through a hot spell or a cold snap. Any skipped patch becomes a weak point. Heat barges in. Condensation gathers. The van feels unsettled and damp.

If you're comparing materials for your own van insulation options, focus less on marketing language and more on full coverage, clean fitment, and how the layers work together.

Airflow isn't optional

Insulation solves only half the problem. A van also needs to breathe.

Warm air from cooking, sleeping, and wet towels has to go somewhere. If it can't leave, it turns into moisture on glass and steel. That's when mould, stale smells, and general misery arrive. Good airflow can be simple, but it has to be deliberate. A roof vent, smart window habits, and clear air paths matter more than decorative extras.

Consider the trade-offs in plain terms:

  • Closed-cell foam gives dependable coverage and helps with heat control.
  • Reflective layers support radiant heat management when fitted neatly.
  • Vinyl flooring with foam underlay can improve comfort underfoot when paired correctly, which matters in dusty Australian conditions noted in the same build guide.
  • Ventilation openings protect the interior from trapped moisture, even when the weather isn't dramatic.

Skip insulation and the van works against you. Add insulation without airflow and the van still wins.

Comfort changes the whole trip

People talk about engine notes, paint colours, and clever storage. Fair enough. But cabin comfort shapes every hour you spend inside. A well-insulated van settles down at night. It sounds calmer. It feels more controlled. It gives you the sort of quiet comfort that makes a short trip feel longer and a rough day easier.

That's why this part deserves care. You won't show it off much at a meet, but you'll thank yourself every morning.

Powering Your Adventure and Keeping the Water Flowing

This is the point where the van stops being a shell with furniture and starts acting like a tiny home. Lights flick on. A fridge hums. Water runs. The first time that happens, even a grizzled old VW hand feels a bit smug.

An infographic detailing essential power and plumbing systems for an off-grid camper van conversion project.

Start with simple electrical maths

Electrical planning frightens people because they picture black magic. In most DIY camper van conversion work, it starts with a list and some basic arithmetic.

The benchmark used in Australian DIY guidance is clear. Work out your daily power use in watt-hours, divide by six hours of proper sunlight per day, then round the required solar wattage up by 20% to cover shade parking or heavier use, according to Camplify's Australian van conversion guide.

Here's the practical shape of that process:

  1. List each device you'll use in a day.
  2. Convert usage into watt-hours for the full daily load.
  3. Divide by six to estimate panel wattage for Australian conditions.
  4. Add 20% headroom so the system isn't constantly on the edge.
  5. Choose battery capacity based on how long you want to stay off-grid.

That same guide also outlines the battery side. Divide your watt-hours by system voltage to get amp-hours, then multiply by your desired autonomy days. It gives the example of 960Wh divided by 12V, then expanded by 2 days of autonomy. That's the kind of tidy working you can follow without pretending to be an auto sparky.

If you're planning a larger touring setup, a slim battery format such as this 200 Ah slimline lithium battery gives you a useful reference point for how modern storage solutions fit tighter spaces.

To see the systems thinking in action, this walkthrough is handy:

Wire for vibration, not just theory

Classic Volkswagens don't live pampered lives. They buzz, bounce, and vibrate. The Australian guidance above notes chassis mounting with self-tapping screws and shake-proof lock washers to reduce vibration-related issues. That's the sort of detail that separates a clean weekend install from a long-term reliable one.

Use fuses, tidy cable runs, and accessible shut-offs. Build so you can troubleshoot later without dismantling half the interior.

Small electrical choices become big reliability stories on corrugated roads.

Keep plumbing as simple as your trips allow

Not every van needs a pressurised palace. Some of the happiest setups use a basic sink, portable fresh water, and a simple waste container. Others justify pumps, fixed tanks, and more integrated plumbing because the van stays out longer and does more work.

A practical comparison looks like this:

Setup style Best for Character
Hand-pump sink Weekend trips Simple, light, easy to maintain
Electric pump and fixed tanks Longer touring More convenience, more planning
Minimal water storage Day use and quick overnighters Fast to fill, easy to clean
More developed water system Multi-day living Better comfort, more components

Build the system that suits your use, not the one that wins the loudest applause online.

Custom Cabinetry and Clever Storage Solutions

Cabinetry is where a camper van conversion gets its personality. Up until now, you've been protecting the shell, taming temperatures, and making the systems behave. Then one Saturday afternoon you dry-fit a bench, stand back, and suddenly the van feels hospitable.

I remember a split-screen build at a show years ago. On one side was a tidy but generic fit-out with square cupboards and dead space everywhere. On the other was a home-built interior in pale ply, curved corner shelves, a bench seat that turned into a bed, and hidden cubbies under the base for tools, leads, and camp gear. The second one wasn't fancy. It was thoughtful. That's why everyone kept peering inside.

Make each piece earn its spot

In a small van, furniture can't be lazy. A bench should store something. A bed base should lift, slide, or open. A galley should leave room to stand without twisting like a circus act.

The best cabinetry choices often follow these patterns:

  • Lightweight plywood keeps the fit-out manageable without making the van feel top-heavy.
  • Vertical storage turns dead wall space into shelves, spice racks, or slim lockers.
  • Lift-up bed bases make bulky items easier to reach than deep front-opening boxes.
  • Curved edges and rounded corners feel kinder in a tight cabin and suit classic VW lines.

Build around daily rituals

I like to judge a layout by tiny repeated moments. Can you reach the kettle without unpacking the bed? Can you grab a jumper at night without unloading half the van? Can the passenger seat still feel like a seat, not a barricade?

Those questions shape cabinetry better than any trendy fit-out phrase. One owner I met had built a narrow side cabinet just deep enough for enamel mugs, a torch, maps, and two weathered workshop manuals. Another used the void beside the wheel arch for a slide-out pantry. Neither solution looked showy. Both made the van easier to inhabit.

Good cabinetry doesn't just store gear. It reduces friction in the day.

Leave room for the van's character

Old Volkswagens already carry a strong personality. Cabinetry should work with that, not smother it. Keep sightlines to the windows. Don't overbuild until the interior feels like a timber corridor. Let the curves of the body still speak.

That balance is part craft, part restraint. A van should feel lived in, not packed to the roof with cleverness.

Styling with Classic VW Memorabilia and Diecast Decor

Once the practical work is done, you can finally have a bit of fun with the soul of the thing. At this stage, the build shifts from “nice conversion” to “that's your van, isn't it?”

The easiest mistake is going overboard and turning a beautiful old camper into a novelty shop. The better move is to use a few VW touches that feel earned. Think of them as punctuation marks, not wallpaper.

Let small objects tell the story

A finished van always benefits from personal details with history behind them. In a Volkswagen-themed interior, diecast models work beautifully because they echo the actual machine without shouting over it.

A few styling ideas that suit a classic VW camper:

  • A compact display shelf near the rear cabinet for a licensed Kombi or Samba Bus model.
  • A Beetle model on a dash shelf or overhead nook where it catches the morning light.
  • A small framed Volkswagen print or badge display tucked into the galley wall.
  • A themed storage tin or tray for keys, coins, and campsite odds and ends.

Collectors know the appeal already. A VW Kombi diecast Australia search usually starts as a gift hunt and ends as a shelf problem. That same instinct can soften a van interior. One carefully placed Volkswagen Beetle model can make a timber cabinet feel like part workshop, part memory box.

Match decor to the van, not just the brand

A bright Flower Power piece suits some builds and jars with others. A patinated split-window look calls for subtler accents. A surfy beach-runner can carry bolder colours and playful details. The trick is to style in harmony with the van's mood.

A simple pairing guide helps:

Van mood Decor that fits
Restored classic Kombi Heritage-style VW art, muted diecast pieces
Beachy cruiser Colourful Kombi models, surf-inspired VW accents
Workshop-inspired build Badge displays, manuals, metal signs
Minimal touring interior One or two licensed models, restrained shelf styling

Keep it stable and useful

Anything decorative in a camper still has to survive the road. Use secure shelves, non-slip liners, and enclosed nooks for display items. If you're going to buy diecast Kombi pieces for the van itself, choose spots that won't send them skittering across the cabin at the first roundabout.

That's also why VW memorabilia collectibles work best when they're folded into useful features. A model on a lip shelf above the kitchen. A tiny framed piece above a book cubby. A Beetle tucked into the end of a cabinet beside a torch and a map. It should feel like the owner loves Volkswagens, not like the van is trying too hard to prove it.

Done well, the styling becomes the final handshake between machine and memory. That's when the conversion feels complete.

Navigating Aussie Regulations and Your Budget

The last stretch of a camper van conversion often feels less romantic than the first. There's paperwork, state rules, engineering questions, and the sharp reality of what the build has cost. It's still part of the craft. A van isn't finished when the curtains go in. It's finished when it's legal, insurable, and financially understood.

A checklist for van conversion including vehicle registration, insurance, materials, tools, and budget planning for road trips.

What the build can cost

Australian costs vary wildly by ambition. For 2026 projections, Rising Rides reports that camper van conversion costs range from $3,000 for a basic DIY setup to over $60,000 for a full professional touring conversion. The same source places a comfortable mid-range build at $10,000 to $25,000 for the conversion alone.

That spread tells an honest story. A simple weekend setup is one thing. A touring fit-out with proper systems, cabinetry, and finish quality is another. Builders often underestimate how quickly small purchases stack up. Timber, fasteners, flooring, sealants, electrical protection, plumbing fittings, trim pieces, and rework all have a habit of joining the tally.

State rules can trip you up

Australia doesn't give DIY builders one tidy national rulebook in practice. State-by-state differences in compliance can catch people badly if they treat registration, gas work, electrical changes, and modification approvals as a generic checklist.

That matters because confusion around compliance has been identified as a major reason projects get abandoned, and many guides still don't map the differences clearly. If your build includes gas or major electrical work, get proper local advice before the interior closes up. It's cheaper to ask early than to undo finished work later.

Insurance needs proof, not hope

Insurance is another area where people get casual at exactly the wrong moment. Standard vehicle cover may not respond kindly to uncertified DIY modifications. If your build includes significant changes, document them properly, keep receipts, photograph each stage, and ask insurers direct questions about converted vehicles before assuming you're covered.

A short checklist keeps the risks in view:

  • Confirm state-specific registration requirements before the build is final.
  • Check certification needs for gas, electrical, and structural changes.
  • Document the conversion with photos, receipts, and component details.
  • Ask insurers how they treat DIY modifications and certified work.
  • Budget for surprises, because old vans always have opinions.

If the build bug has bitten hard and you want the finishing touches that celebrate the old VW spirit, have a look through Volkswagen Memorabilia. It's a strong local option for officially licensed Volkswagen diecast models for sale, Kombi and Beetle gifts, and display pieces that suit a shed, shelf, or freshly finished camper. For Australian buyers, the local stock and fast shipping are a real advantage, especially when you want your next VW piece without the long wait.

G4 LED Lights for Your VW Kombi & Diecast Collection

The other night I was tidying a shelf of old favourites. A little 1962 Samba Bus sat beside a rounded Beetle model, both beautifully painted, both nearly swallowed by shadow once the room light went off. All that chrome trim, all those cheerful curves, and the display still looked flat. If you've ever fussed over the angle of a Kombi diecast on a shelf, you'll know the feeling. You want the collection to feel alive, not like it's parked in a dim shed.

The same thing happens in a real VW, too. Plenty of classic Kombis and Beetles still wear the sort of interior lighting that was acceptable decades ago but feels a bit tired now. You open the camper at dusk, flick the light on, and get a weak yellow puddle instead of the warm, welcoming glow you were hoping for after a day by the coast.

That's where G4 LED lights earn their keep. They're tiny, practical, and perfect for compact fittings, whether you're lighting a display cabinet or freshening up a vintage 12V setup. Across the country, LED adoption keeps growing. The Australian LED lighting market was valued at AUD 2.06 billion in 2025 and is projected to grow to AUD 5.20 billion by 2035. That tells you something simple. LEDs aren't a novelty anymore. They've become the standard choice for smart, energy-efficient lighting in homes, workshops, and campers alike.

Giving Your VW Collection the Spotlight It Deserves

A mate of mine keeps his VW pieces in the lounge room, not the garage. Good choice, too. He's got a shelf with a Beetle model, a couple of buses, and a prized Samba sitting centre stage. During the day they look bonza. At night, though, the whole display disappears unless the overhead light is blazing, and that ruins the mood of the room.

A wooden shelf displays a collection of miniature vintage Volkswagen toy cars including buses and beetles.

What changed it wasn't a new cabinet or a bigger shelf. It was adding compact lighting in the right spots. Suddenly the paintwork had depth, the windows caught the light properly, and the little chrome bits stopped vanishing into the dark. That's the sort of job G4 LED lights do brilliantly. They suit the tucked-away fittings often used in cabinets, displays, and older camper interiors.

Why small lights matter for small treasures

Classic VW memorabilia has personality in the details. The split windows, the two-tone paint, the roofline of a Samba Bus. A bulky bulb can overpower all that. A compact G4 globe slips into places where a standard bulb won't fit, which makes it handy for shelves, under-cabinet lighting, and neat custom display work.

If your models live in a glass cabinet or a timber unit, proper lighting can matter almost as much as the shelf itself. A good display setup isn't only about storage. It's about presentation. That's why collectors who care about neat presentation often pair careful lighting with proper display cases for models.

A well-lit model doesn't just look brighter. It looks more finished, more intentional, and more loved.

It's not just for shelves

If you've got a classic Kombi camper, you already know how valuable a reliable interior light can be. You're making a cuppa at dusk, looking for a jumper, or sorting gear after a surf. In those everyday moments, better light makes the van feel easier to live with.

That's the charm of G4 LED lights for VW folk. They sit right at the intersection of practicality and nostalgia. They help your diecast collection look its best, and they can also bring a cleaner, more dependable glow to the cosy corners of a beloved old bus.

What Exactly Are G4 LED Lights

The name sounds more technical than it really is. G4 refers to the bulb base. It's the little two-pin fitting, with the pins spaced 4mm apart. That's the bit that matters most when you're standing in front of a fitting wondering whether the new bulb will slot in.

A descriptive infographic explaining the meaning, pin spacing, and key advantages of G4 LED light bulbs.

Choosing the right part for an old Beetle provides a useful comparison. You wouldn't expect any random wheel to suit the car. The fitting has to match. Same story here. If the socket is built for a G4, that two-pin arrangement is what you need.

The little bulb with a very handy job

G4 bulbs are popular because they're compact. That makes them useful in places where there isn't much room to move, including:

  • Display cabinets where you want discreet lighting above or beside your models
  • Reading lights and camper fittings in classic vans
  • Small accent lights tucked into shelves, nooks, or custom display boards

Their size is the magic. You can hide the light source more easily and let the model or the interior do the talking.

Why LED makes the old fitting feel modern

The older halogen versions of these little bulbs did the job, but they ran hotter and worked harder for the same result. The LED version gives you a more modern option in the same style of fitting. For VW people, that's ideal. You keep the spirit of the original setup, but you get a smarter light source.

Here's a quick comparison of the idea:

Feature Traditional small halogen fitting G4 LED equivalent
Fitting style Small two-pin style Same G4 two-pin style
Best use Older cabinets and vintage fittings Updated lighting in the same compact spaces
Feel Old-school, often dimmer and hotter Cleaner, more efficient, longer-wearing option

Practical rule: Always match the base first. Brightness and colour come after that.

For a VW enthusiast, that's the beauty of G4 LED lights. They're not some giant upgrade that changes the whole character of your setup. They're a neat little improvement that fits into the spaces you already have.

Choosing the Right Bulb for Your Bug or Bus

Picking the right bulb is a bit like choosing paint for a restoration. The wrong choice works, technically, but it never feels right. With G4 LED lights, there are three things worth checking before you buy. Voltage, brightness, and colour temperature.

An infographic titled Choosing the Right Bulb for Your Bug or Bus outlining three key factors.

Start with voltage

For classic VWs, campers, and a lot of automotive-style fittings, 12V is the key number to look for. If the bulb doesn't match the system, you're asking for trouble. In a Kombi or Beetle, the voltage needs to suit the vehicle setup. In a cabinet at home, the voltage needs to suit the transformer or driver running the lights.

This sounds obvious, but plenty of headaches start here.

Then check light output

Brightness is usually described in lumens, while power use is measured in watts. What matters in plain English is this. You want enough light to see what you're doing or to highlight the model, without turning the shelf or cabin into an operating theatre.

For VW owners, the efficiency side is especially handy. According to the federal Energy Rating lighting guidance, high-quality G4 LED lamps use at least 75% less energy and last up to 25 times longer than the old halogen bulbs they replace. For a classic car owner, that means less strain on a vintage electrical system and battery.

A related tip for those refreshing older lights around the house as well as in the shed. The same guidance notes that replacing ten halogen lamps with LEDs can save over $2,000 and cut three tonnes of greenhouse gas emissions over 10 years.

Colour is where the mood lives

For old Volkswagens, I usually steer toward warm white, around 2700K to 3000K. That range keeps the light cosy and flattering. It suits timber interiors, cream paint, old gauges, and nostalgic displays.

Cooler white light has its place, especially if you want a crisp, modern display look, but it can make a classic setup feel a bit clinical. If your shelf features a VW headlight-inspired piece or other nostalgic details, a warmer glow usually feels more in tune with the era.

A quick box-checking list

  • For your Kombi or Beetle. Check the bulb is suitable for 12V use.
  • For a display shelf. Decide whether you want a soft accent or enough light to fully illuminate the models.
  • For vintage atmosphere. Pick warm white if you want that familiar old-school glow.

Warm light tends to flatter classic curves. That matters when the whole reason you bought the model was the shape.

Compatibility Traps for Aussie VW Owners

This is the bit that catches people out. You buy the bulb, fit it carefully, turn it on, and instead of a lovely glow you get flickering, buzzing, or a bulb that gives up early. Many might blame the bulb straight away. Often, the actual culprit is the existing transformer.

For Australian collectors and restorers, that's a very real issue. A local guide on G4 LED compatibility notes that around 50% of households with older G4 halogen fixtures experience flickering when switching to LEDs due to incompatible magnetic transformers. It also notes that only about 30% of replacement LEDs sold here clearly state they are "transformer-compatible".

Where this shows up in VW life

The problem isn't limited to kitchen cabinets and hallway fittings. It turns up in all sorts of places VW owners care about:

  • Older display cabinets picked up second-hand or built years ago
  • Custom shelving with inherited low-voltage fittings
  • Classic camper fit-outs where a previous owner added lighting long ago

If you're working with older hardware, don't assume a new G4 LED will play nicely with it.

What to do before you blame the bulb

A quick check can save a lot of mucking around:

Check Why it matters
Look at the transformer Older magnetic transformers can cause flicker with LEDs
Read the packaging carefully "Transformer-compatible" wording matters
Check the broader wiring setup Old components elsewhere can affect performance

For restorers already chasing hard-to-find bits and pieces, this is another reason to stick with trusted suppliers for VW parts in Australia and to inspect the whole setup, not just the globe itself.

If an LED flickers, don't force the issue and hope it settles down. Check compatibility first.

Lighting Up Your VW Pride and Joy

A properly lit diecast display changes the whole room. One warm pool of light above a little Beetle model can sharpen the roofline, bring out the wheel detail, and stop the shelf looking like dead space. A Kombi Samba Bus model, especially one with cheerful paintwork and extra window detail, comes alive when the light lands from slightly above and to the front instead of straight down.

Screenshot from https://vwmemorabilia.com.au/shop/

For diecast displays

If your shelf holds several models, don't just blast the whole thing with one harsh light. Use smaller points of light to create depth. That way the front bumper of a Beetle catches a gleam, and the side windows of a Samba don't sink into darkness.

Collectors searching for VW Kombi diecast Australia, Volkswagen Beetle model, or Volkswagen diecast models for sale usually care about the same thing. They want the model to look special once it's home, not just while it's sitting in the product photo.

A few display ideas work especially well:

  • Top-front placement gives a gentle showroom feel
  • Side lighting helps with chrome, mirrors, and trim
  • A warm bulb behind the model can add depth in deeper cabinets

For the real bus

The same logic applies in a classic Kombi. Interior lighting should feel useful and sympathetic to the age of the vehicle. You want enough light to read a map, sort gear, or find the kettle, but you don't want the inside of the van to feel like a modern office fit-out.

And because classic VW values have climbed, even the smaller touches feel worth doing properly. The RACV feature on the VW Kombi revival notes that top-condition 21-window VW Kombi vans can sell for over $100,000 in Australia. When the full-size icon is that prized, it makes sense to show equal care with the scale models and memorabilia that celebrate it.

Matching light to collectible style

If you're curating a shelf or buying a gift, here are the combinations that usually look best:

Collectible style Lighting mood that suits it
Samba Bus diecast Warm and slightly directional
Classic Beetle model Soft warm white that flatters curves
Surf-themed VW memorabilia collectibles Relaxed glow with gentle side lighting
Mixed shelf of buses and bugs Even warm lighting with one subtle highlight point

That's the core appeal. Good lighting doesn't steal attention from the VW piece. It helps the design do what it's always done. It makes people smile.

A Quick and Safe Installation Guide

Swapping a G4 bulb is usually a simple job, but old fittings deserve a bit of respect. If it's a display cabinet, unplug it first. If it's in a Kombi or Beetle, disconnect the relevant power source before putting your fingers anywhere near the fitting.

The basic swap

  1. Turn the power off first. Don't skip this, even for a quick test.
  2. Let the old bulb cool down. Older halogen bulbs can stay hot.
  3. Remove the old globe gently. Pull it straight out if the fitting allows.
  4. Insert the new G4 LED carefully. Don't force the pins.
  5. Restore power and test it.
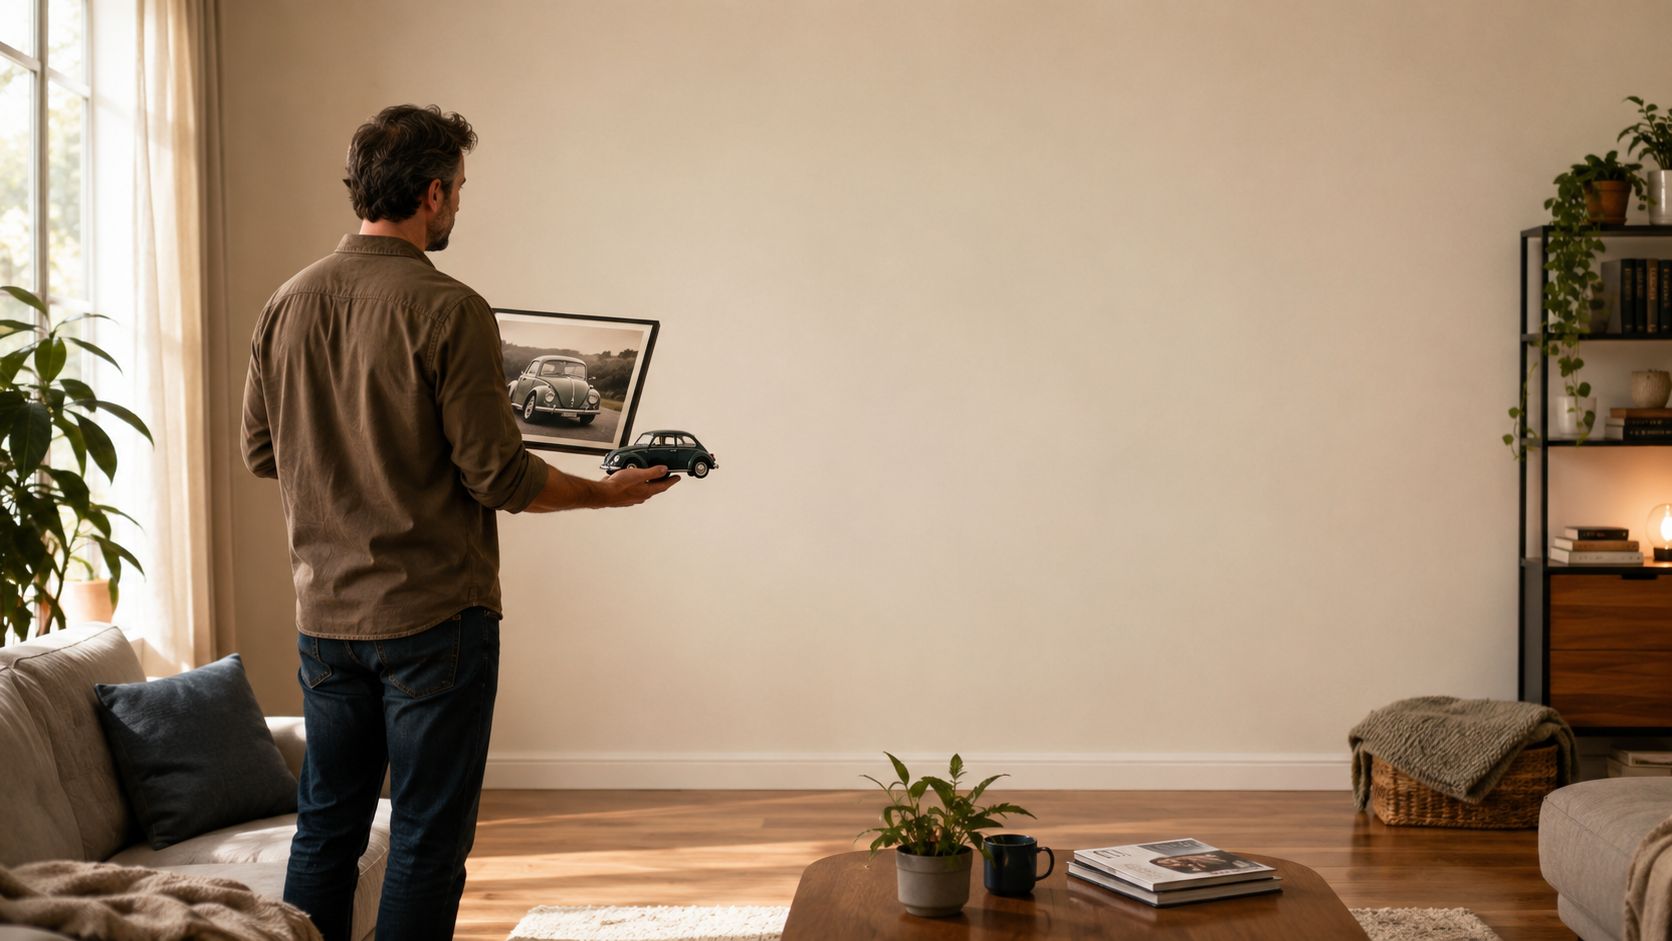
If it lights up cleanly, you're in business.

If it doesn't work properly

Most of the usual hiccups are straightforward:

  • It doesn't light at all. Remove it, turn it around, and reinsert it. Some LED bulbs are polarity-sensitive.
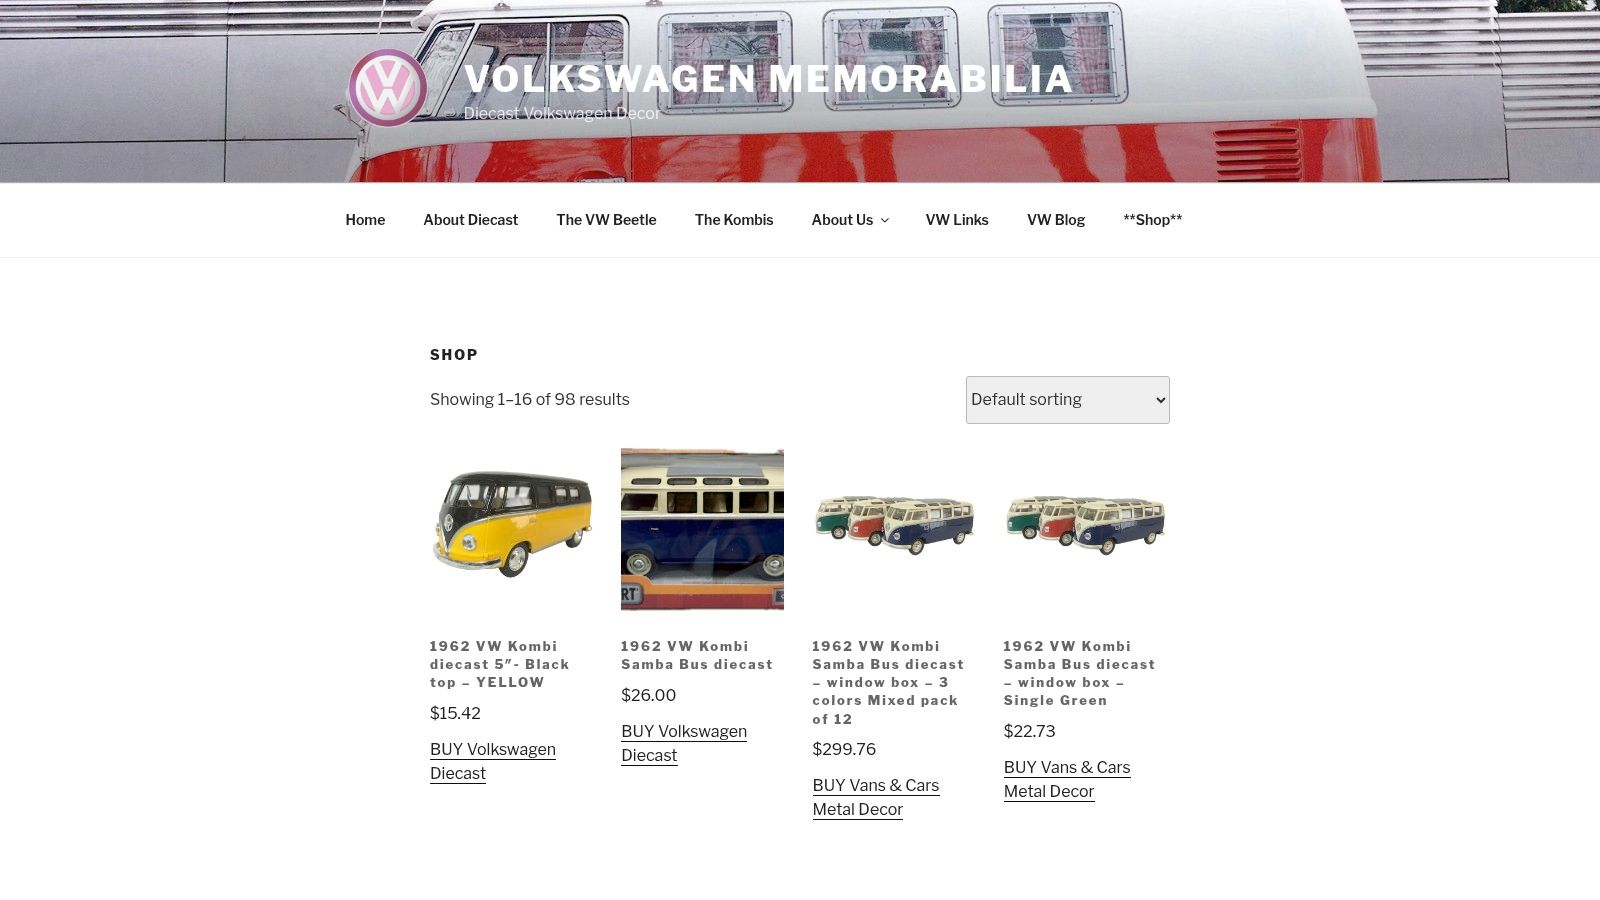
  • It flickers. The transformer or driver may not suit LEDs, especially in older Australian fittings.
  • It sits loose. Check that the bulb base is the correct G4 size and that the socket hasn't worn over time.

Old fittings reward gentle hands. If the bulb doesn't want to go in, stop and recheck the base instead of pushing harder.

For vehicle interiors, it's also smart to test one bulb first before replacing the whole lot. That keeps troubleshooting simple.

Common G4 Questions from VW Mates

Can I use any 12V G4 bulb in my Kombi

Not automatically. The voltage might match, but the bulb still needs to suit the fitting and the electrical setup. In an old van, space inside the housing, polarity, and overall compatibility all matter. If the light is part of an older conversion or camper fit-out, check the existing hardware before buying a full set.

Will swapping to LEDs drain my classic car's battery

In normal use, LEDs are chosen because they put less strain on the system than the halogen bulbs they replace, as noted earlier. That makes them appealing for campers and older VWs where every bit of battery efficiency helps. They're not a magic cure for a weak battery, though. If the battery or wiring already has issues, lighting upgrades won't solve those on their own.

How many lights do I need for my diecast display shelf

That depends on shelf depth, model size, and how dramatic you want the look to be. A small shelf with a single Beetle model might only need one well-placed light. A wider shelf with several buses usually looks better with multiple smaller light points rather than one strong source in the middle. Start modestly, test the shadows at night, and adjust from there.

If you're trying to buy diecast Kombi pieces, arrange VW memorabilia collectibles, or build a shelf around Volkswagen diecast models for sale, lighting is one of those finishing touches that makes the whole collection feel complete.


If you're ready to give your shelf, study, or camper corner a proper VW glow, have a browse through Volkswagen Memorabilia. It's a ripper spot for licensed Volkswagen gifts, Beetle models, Kombi favourites, and locally stocked pieces that make collecting easier for Australian enthusiasts.

Dent Removal Auto: A VW Fan’s Guide to a Flawless Finish

You roll into a Sunday meet with the Beetle washed, tyres dressed, chrome catching the morning light, and there it is. A small dent on the guard. Maybe it happened in a crowded car park. Maybe a loose door at the servo kissed the panel when you weren't looking. However it got there, that little mark can feel bigger than it is.

Anyone who's loved an old Volkswagen knows the feeling. These cars carry stories in their curves. The Beetle's rounded guards and the Kombi's broad sides aren't just sheet metal. They're memory, effort, and pride. Getting a dent sorted isn't vanity. It's part of keeping the magic alive, the same way a flawless miniature on the shelf reminds you what made you fall in love with the original in the first place.

That Heart-Sinking Moment the First Ding Appears

A dent has a way of stealing your eye. You stop seeing the whole car and start seeing only the blemish. On a tidy Beetle, one little ding on a front guard can feel like a shout. On a Kombi, a ripple on a long side panel seems to catch every reflection at once.

A person pointing to a small dent on the shiny chrome bumper of a vintage white car.

The good news is that a first ding isn't the end of the romance. It's usually the moment you start learning your car in detail. You begin to notice where the metal is forgiving, where access is tight, and why factory paint matters so much on a classic VW.

Why this matters more on an old Volkswagen

Classic Volkswagens wear their shape plainly. A Beetle doesn't hide panel imperfections behind sharp modern creases. A Kombi's sides are a big canvas. That means careful dent removal auto work can make a dramatic difference, but rushed work can leave a panel looking worse in certain light.

Practical rule: Treat the dent like a preservation job, not a shortcut repair.

A lot of owners jump straight for a gadget. Better to pause, make a cup of tea, and inspect the panel properly. A smooth shallow ding is one thing. A sharp crease with damaged paint is another beast altogether. The smartest enthusiasts know that patience at the start saves regret later.

And there's something satisfying about the whole ritual. You're not just fixing metal. You're restoring the line that made a Beetle charming and a Kombi iconic.

Assessing the Blemish on Your Beauty

Before any pulling, heating, or poking starts, you need to read the story of the dent. The panel usually tells you exactly what happened if you look closely enough. Stand the car where light runs across the surface and move your head side to side. Reflections reveal depth better than a quick glance ever will.

A technician inspecting a small dent on the hood of a blue car using a flashlight.

What to check first

Start with the paint. That's the make-or-break test.

A definitive benchmark for failure is any dent accompanied by cracked, chipped, or compromised paint, because Paintless Dent Removal addresses only the metal substrate and cannot restore surface paint integrity, as noted in this Carsales guide on DIY dent removal.

Then look at the shape. A smooth, rounded depression is usually kinder to deal with than a sharp crease. Body lines also matter. If the dent sits on the crisp edge of a panel, the repair becomes more delicate because the metal has been stretched and folded into a stronger shape there.

A simple inspection checklist

  • Paint condition. If you see chips, fractures, or paint lifting, stop thinking paintless.
  • Dent shape. Rounded dings are friendlier than pointed creases.
  • Panel location. Flat open metal is easier than edges, swages, or tight corners.
  • Rear access. If you can reach behind the panel, your options improve.
  • Reflection test. Use a torch or inspection light and watch how the lines bend.

Once you've looked over the panel, it helps to see how technicians approach the same problem in practice.

Reading the dent like a VW person

Beetle owners get good at this quickly. The rounded guards can turn a small dent into a visual nuisance because the light rolls so beautifully over them. Kombi owners face the opposite issue. Flat side panels make even shallow damage visible from metres away.

If the metal looks softly pushed in and the paint still looks healthy, you may have a worthwhile DIY candidate.

That doesn't mean every home fix will work. It means the panel has given you permission to proceed carefully.

Your Garage Toolkit for DIY Dent Removal

A decent home dent removal auto setup doesn't need to look like a body shop. What matters is choosing the right method for the right dent, and knowing when a tool's helping or when it's starting to bully the metal.

An infographic showing three DIY dent removal methods for cars using suction cups, glue, and temperature contrast.

The three methods most owners try

Method Best use Why it can work Why to be cautious
Suction cup puller Large, shallow dents on flatter panels Pulls evenly without adhesives Won't do much on sharp or tight dents
Heat and cold contrast Very mild surface distortions Metal expands and contracts with temperature change Results are inconsistent and paint needs care
Glue pull kit Smaller dents where rear access is limited Targets the centre with a tab and controlled pull Too much force can raise a high spot

Suction cup puller

This is the friendliest starting point for many DIYers. If a dent is broad and shallow, especially on a flatter area of a Kombi or a less curved section of a Beetle, a suction puller can sometimes coax the panel outward without drama.

Use a clean surface. Any dust trapped under the cup weakens the seal. Wetting the cup slightly can help it grab. Then pull steadily rather than yanking like you're starting a mower.

It's a blunt instrument, though. If the dent has a centre point or sits near an edge, you'll often get very little movement.

Heat and cold contrast

This old shed trick has been around for ages. The idea is simple. Warm the panel, then introduce cold so the metal contracts and may move back toward shape. Owners usually use a hairdryer rather than anything more aggressive.

The catch is consistency. Sometimes nothing happens. Sometimes the panel shifts a little. Sometimes the result is too subtle to notice unless you knew exactly where to look. It's best seen as a gentle experiment for very minor marks, not a guaranteed fix.

Workshop note: Be gentle with heat on older paint. The goal is warmth, not punishment.

Glue pull kit

When you can't reach behind the panel, glue pulling is the method most closely associated with paintless repair. It needs a steadier hand than social media clips make it seem.

For dents lacking rear access, a glue pull is used. You heat glue until drizzling, apply it to a tab, press onto the dent, wait 30–60 seconds, then pull gently with a slide hammer using a quick tap to avoid creating high spots, as described in this paintless dent technique guide.

A few practical habits make a difference:

  • Match the tab to the dent. Too large and you pull too much area. Too small and you over-focus the force.
  • Watch the reflections. Stop after each pull and inspect. Don't chase perfection blindly.
  • Work gradually. Several light attempts beat one heroic tug.
  • Know when to quit. If the panel starts rising around the dent, you're creating trouble.

If you're also tracking down trim pieces, clips, or other bits while tidying a project car, it's worth bookmarking VW parts in Australia for broader restoration inspiration alongside your panel work.

What belongs in a sensible starter kit

  • A small suction puller for broad shallow dings.
  • A hairdryer for mild temperature-contrast attempts.
  • A basic glue pull kit with tabs in different sizes.
  • Microfibre cloths because dirt on the panel ruins good judgment.
  • A torch or inspection light so you can read reflections clearly.

The trick isn't owning every tool. It's stopping before enthusiasm outruns skill.

The Classic VW Touch for Beetles and Kombis

A Beetle and a Kombi ask for different hands. I learned that years ago helping a mate with a door ding on a cream Beetle, then later fussing over a ripple on a splitty's side panel before a local show. Same family badge. Completely different personalities in steel.

The Beetle rewards finesse. Its curves mean the panel often needs tiny, patient corrections because a slight distortion becomes obvious as light slides over the guard. A Kombi is more about broad visual harmony. You're usually trying to make a larger flat area read cleanly again from a few steps back.

Where each model tends to test you

  • Beetle guards can be deceptively tricky because their rounded form magnifies poor finishing.
  • Beetle doors may offer useful access once trim is removed, but old clips and cards deserve care.
  • Kombi sides give you room to work visually, though large flat areas show waviness fast.
  • Kombi interior panelling can sometimes provide useful access routes if you remove pieces carefully.

In the Australian market, the passenger van variant of the Type 2 was specifically marketed as the VW Kombi, a name that became synonymous with our local surf and road trip culture, as noted in this history of the VW Kombi in Australia.

That's why panel care feels personal on these vans. A Kombi isn't just transport. It's picnic rugs, boards on the roof, and salt in the air.

Screenshot from https://vwmemorabilia.com.au/shop/

A well-finished Beetle panel has the same satisfaction as seeing the proportions captured perfectly in miniature. That's part of the charm behind old-school collecting. The same rounded bonnet, the same cheerful stance, the same silhouette that made you stop and smile. If you enjoy tracing those details from full-size car to model form, Volkswagen Beetle parts inspiration is a useful rabbit hole to wander down.

When to Call a Pro for Your Pride and Joy

Smart enthusiasts don't prove anything by forcing a bad DIY repair. They protect the car. That means recognising the jobs that need a technician with proper PDR tools, lighting, and experience.

Professional help makes sense when the dent sits on a body line, has a sharp crease, or leaves you unsure whether the metal has stretched too far. It also makes sense if your first attempts have started to make the reflection look uneven. High spots are easy to create and annoying to undo.

In Australia, professional Paintless Dent Repair for a single panel typically costs between $150 and $250 AUD, while conventional methods can range from $800 to $2,000+ AUD and take days instead of hours, according to this Australian dent repair cost guide.

That's a strong argument for calling a pro early on the right job. You preserve the factory finish, avoid filler and repainting where possible, and save yourself the misery of turning a tidy little ding into a bigger panel drama.

A good repair isn't the one you did yourself. It's the one that leaves the car looking right.

Keeping That Shine and Celebrating the Legend

Once the dent's sorted, step back and check the panel in natural light. Wash the area properly, use a gentle polish if appropriate for the finish, and compare reflections from several angles. A repair that looks perfect under garage lighting can tell a different story in afternoon sun.

Prevention matters too. Leave extra room in car parks. Be picky about where you park at shows. On a Kombi, think about the long flank catching wandering doors. On a Beetle, remember those lovely guards sit where bumps are easy to notice. If you're freshening the whole look of the car, details such as car rim powder coating options can complement panel care beautifully.

A few habits worth keeping

  • Clean before inspecting. Dust can disguise a dent or mimic one.
  • Use light, not guesswork. Reflections tell the truth.
  • Respect original paint. Preserving factory finish is often the ultimate win.
  • Keep perspective. These cars are meant to be enjoyed, not hidden away in fear.

There's a lovely connection between repairing a real Volkswagen and admiring a licensed diecast one on a shelf. Both come down to shape, finish, and affection for the design. You're keeping a piece of motoring history looking the way it deserves to look, whether it lives in the garage, on the road to the coast, or in a display cabinet beside old rally badges and surfy postcards.


If keeping a Beetle or Kombi looking its best is part of how you celebrate the marque, it's worth taking that same care indoors too. Browse the officially inspired collection at Volkswagen Memorabilia, where Australian VW fans can find local stock, fast shipping, and a warm mix of diecast models, gifts, and nostalgic pieces that keep the spirit of the classic Volkswagen alive long after the garage door closes.

Sockets with USB: Your 2026 Australia Buyer’s Guide

You know the spot. One corner of the kitchen bench, the bedside table, maybe the little shelf near the front door. There's a power board on the floor, two chunky phone chargers hogging the outlets, a tablet cable twisted around a smartwatch lead, and someone's borrowed adapter has gone walkabout again.

That mess is why more homeowners are asking about sockets with USB. Not because they want a flashy gadget, but because they want less clutter, fewer plug packs, and a cleaner way to charge the devices they use every day. It's a small upgrade, but in the right room it can make the house feel far more organised.

In Australia, that choice comes with an extra layer often overlooked straight away. It's not just about whether the socket looks neat or charges your phone. It's about whether the unit is suitable for Australian installation, whether it complies with the right standards, and whether the product is the sort of thing a licensed electrician would be happy to fit in their own home.

Tired of the Great Wall of Chargers

A lot of homes end up with the same workaround. One double power point. Then a power board. Then a tangle of adapters multiplying like rabbits.

By the time everyone's charging a phone, earbuds, a tablet, and maybe a handheld game console, the whole setup starts to feel clumsy. You unplug one thing to plug in another. The toaster loses its spot. The lamp gets moved. Cables slip behind furniture and collect dust.

A messy tangle of power strips, charging cables, and electrical plugs on a bedroom floor near a bed.

That's where integrated USB wall sockets start to make sense. They combine the normal power outlet you already use with built-in charging ports for low-voltage devices, so you can charge your phone or tablet without sacrificing a standard outlet to a plug pack.

Why people are switching

The appeal is mostly practical.

  • Less bench clutter means fewer bulky adapters sticking out of the wall.
  • More usable outlets means your regular appliances still have a place to plug in.
  • Cleaner everyday charging feels tidier in bedrooms, kitchens, and study nooks.

Australian buyers are clearly leaning this way. Over 70% of residents in the AU region prefer direct charging via built-in USB outlets over traditional adapters, according to USB socket outlet market data for the AU region.

A USB socket won't solve every charging problem, but it does solve one common one very neatly. Too many adapters, not enough room.

It's the kind of upgrade people often appreciate most after it's installed. Not exciting in the way a new kitchen is exciting. More like finally fixing that annoying rattle in your Kombi. Small change. Better daily life.

What Exactly Are Sockets with USB

A USB wall socket is a hybrid power point that combines the standard 230V AC outlet you already know with built-in USB charging ports on the same faceplate.

In plain terms, one part runs your everyday appliances. The other part converts mains power down to the low-voltage DC power that phones, earbuds, tablets, and similar devices need for charging. That conversion happens inside the fitting itself, which is why product quality and Australian compliance matter.

The simple version

If you look at one on the wall, a socket with USB usually includes:

  • Standard AC outlets for lamps, vacuums, chargers, and other household appliances
  • USB-A and/or USB-C ports for charging portable electronics
  • An internal charging module that converts 230V mains power into USB charging power

That internal module is the hidden working part. A good unit does this safely and consistently. A cheap import may look similar from the front, but the electronics behind the plate can be very different. That matters in an Australian home, where the fitting has to suit local voltage, local installation rules, and local approval requirements.

What it does in daily use

Here's the practical split:

Use around the home Standard outlet does the job USB port does the job
Bedside lamp Yes No
Phone charging Not directly, needs adapter Yes
Tablet charging Not directly, needs adapter Yes
Hair dryer Yes No

That's why these sockets suit places where small devices get charged every day. Bedside tables are the obvious one. Home offices, kitchen bench areas, and family drop zones near the entry also make sense.

They can be handy in travel setups too. If you've ever tried to keep a van or weekend setup tidy, the same idea applies in a smaller space, as you'd see with a 12 volt air conditioner setup for a camper van. Fewer adapters usually means less clutter and less mucking around.

The key point is simple. This is not just a standard power point with an extra hole in it. It is a combined electrical product. In Australia, that means the outlet side and the USB charging side both need to be suitable for local installation, correctly certified, and installed by a licensed electrician.

Decoding the Tech Specs USB-A USB-C and Power Jargon

Many buyers get lost amidst the terminology. Product listings throw around terms like USB-A, USB-C, amps, watts, and Power Delivery, and before long it all sounds more complicated than it really is.

Start with the ports themselves.

A detailed comparison chart explaining the technical differences between USB-A, USB-C, and Power Delivery standards.

USB-A and USB-C

USB-A is the older rectangular port most of us know well. It works fine for plenty of cables and older devices, but it's physically larger and generally more limited.

USB-C is the newer, smaller, reversible port. You don't have to fiddle around trying to insert it the right way up, and it's become the preferred option on many newer phones, tablets, and laptops.

The physical difference is very real. A USB-C port needs an 8.34mm x 2.56mm panel cutout, while USB-A needs 12.0mm x 4.5mm. Beyond physical size, USB-C can support up to 240W Power Delivery, while older USB-A standards are much more limited, as outlined in this USB connector dimensions and capability guide.

What watts and amps mean

You don't need to be an electrician to read charging specs sensibly.

  • Amps (A) tell you about current.
  • Watts (W) tell you about total power.
  • In plain English, more available power usually means faster charging, assuming your device can accept it.
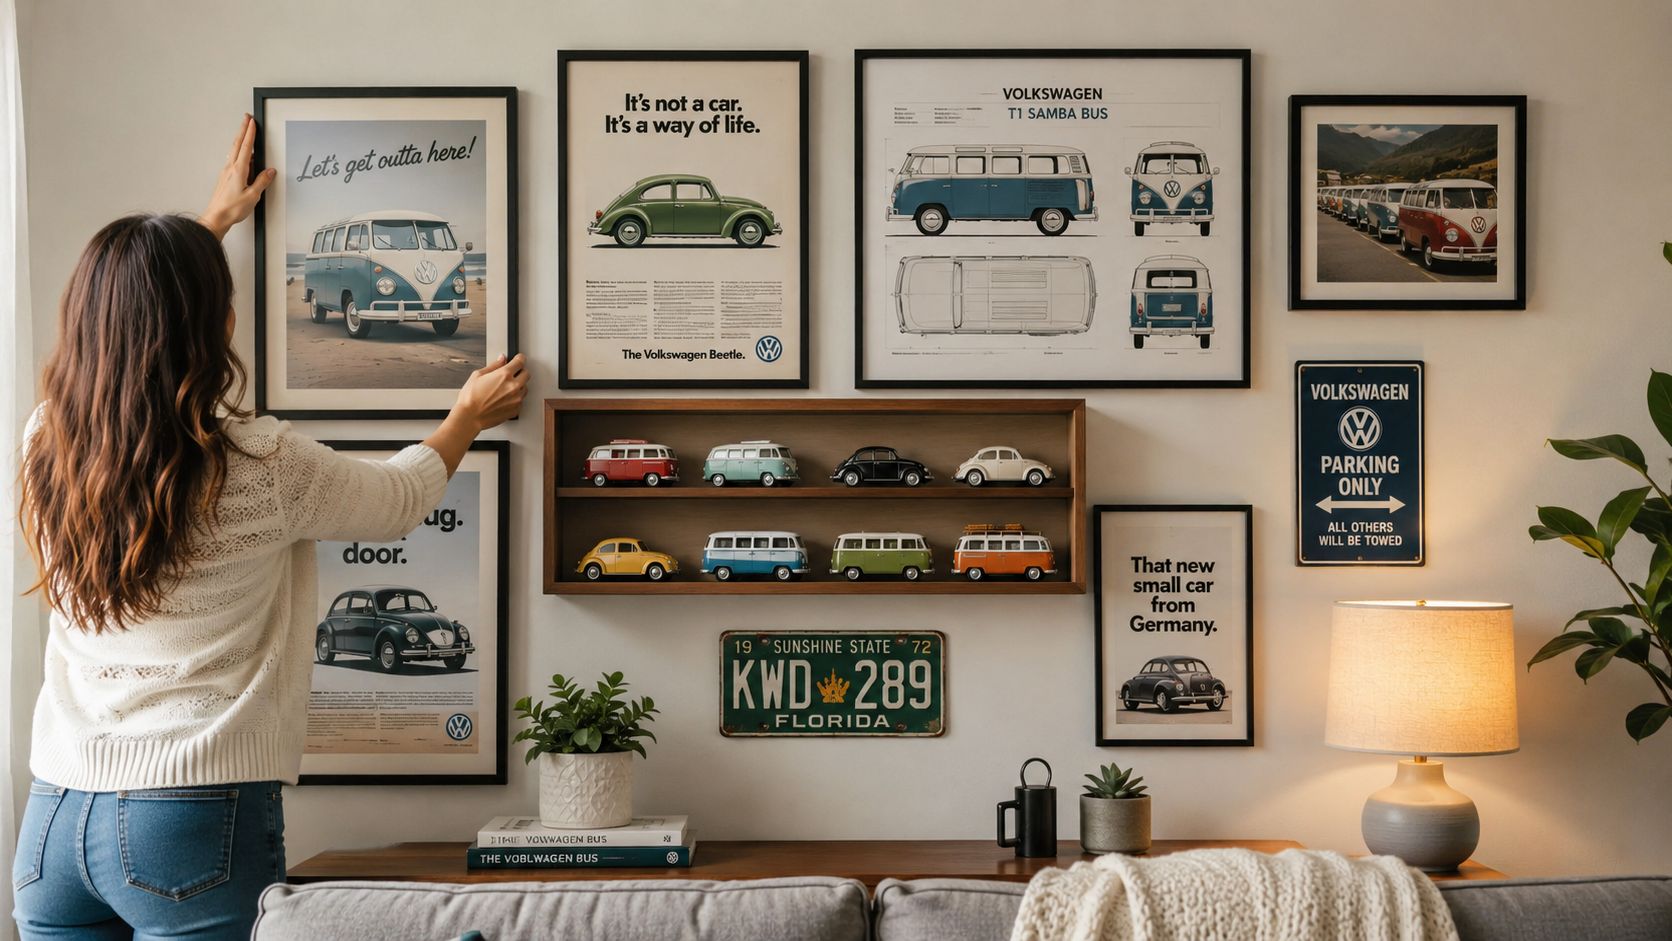
That last part matters. Your phone, tablet, or laptop only takes what it's designed to take. So a higher-powered USB-C socket doesn't force too much power into the device. Good charging gear matches the device's needs.

Where Power Delivery fits in

Power Delivery, often shortened to PD, is the smart charging language used mainly with USB-C. It allows the charger and the device to “talk” to each other and settle on a safe, suitable charging level.

That's why USB-C with PD is the better fit if you want more flexibility for newer gear.

Practical rule: If you only charge older phones overnight, USB-A may be enough. If you want a more future-ready setup, USB-C is usually the smarter choice.

USB-A vs. USB-C at a Glance

Feature USB-A USB-C
Shape Larger rectangular port Smaller reversible port
Ease of use Only inserts one way Inserts either way
Device compatibility Older and legacy devices Many newer phones, tablets, laptops
Power potential More limited Can support much higher power, including Power Delivery
Best for Basic charging Faster, more versatile charging

If you're fitting out a caravan, camper, or mobile setup as well as your house, the same charging language pops up in plenty of 12V gear too. This camper van 12 volt air conditioner guide is a good example of how power planning and real-world device use often overlap.

Safety First Australian Standards and Installation

This is the part where it pays to be fussy.

A USB socket might look simple from the front, but it's still a fixed electrical fitting connected to your home's wiring. In Australia, that means safety and compliance are not optional extras.

An infographic titled Electrical Safety First: Australian Standards Checklist featuring three steps for safe USB socket installation.

What compliant actually means

One of the biggest traps for homeowners is assuming that if a product is sold online, it must be fine to install here. That's not a safe assumption.

A key issue for Aussie homeowners is compliance. Only products meeting AS/NZS 3112 for the AC outlets and using properly isolated USB modules are legal and safe for installation in Australia, as noted in this Australian compliance discussion for switch and socket products.

There's also a practical product-level detail worth knowing. In AU applications, integrated wall sockets with USB charging must comply with AS/NZS 3112 for the AC outlet side, while the USB charging section needs to be correctly integrated and isolated. A product example such as the Hager Silhouette twin socket with USB-A and USB-C shows how compliant designs keep the USB charging module separate in function from the main AC circuit while maintaining overall electrical integrity.

Cheap imports versus certified local stock

The danger with bargain imports isn't just disappointing performance. It's uncertainty.

A cheap online listing may tell you the socket is “safe”, “smart”, or “premium quality”, but that wording doesn't tell you whether the unit is suitable for Australian fixed wiring, whether the AC outlet side complies locally, or whether the USB module has been properly designed for safe installation.

Look for signs of credibility before anyone touches your wall:

  • Australian suitability. The product should be intended for Australian use, not just adapted from another market.

  • Clear compliance details. Vague marketing copy isn't enough.
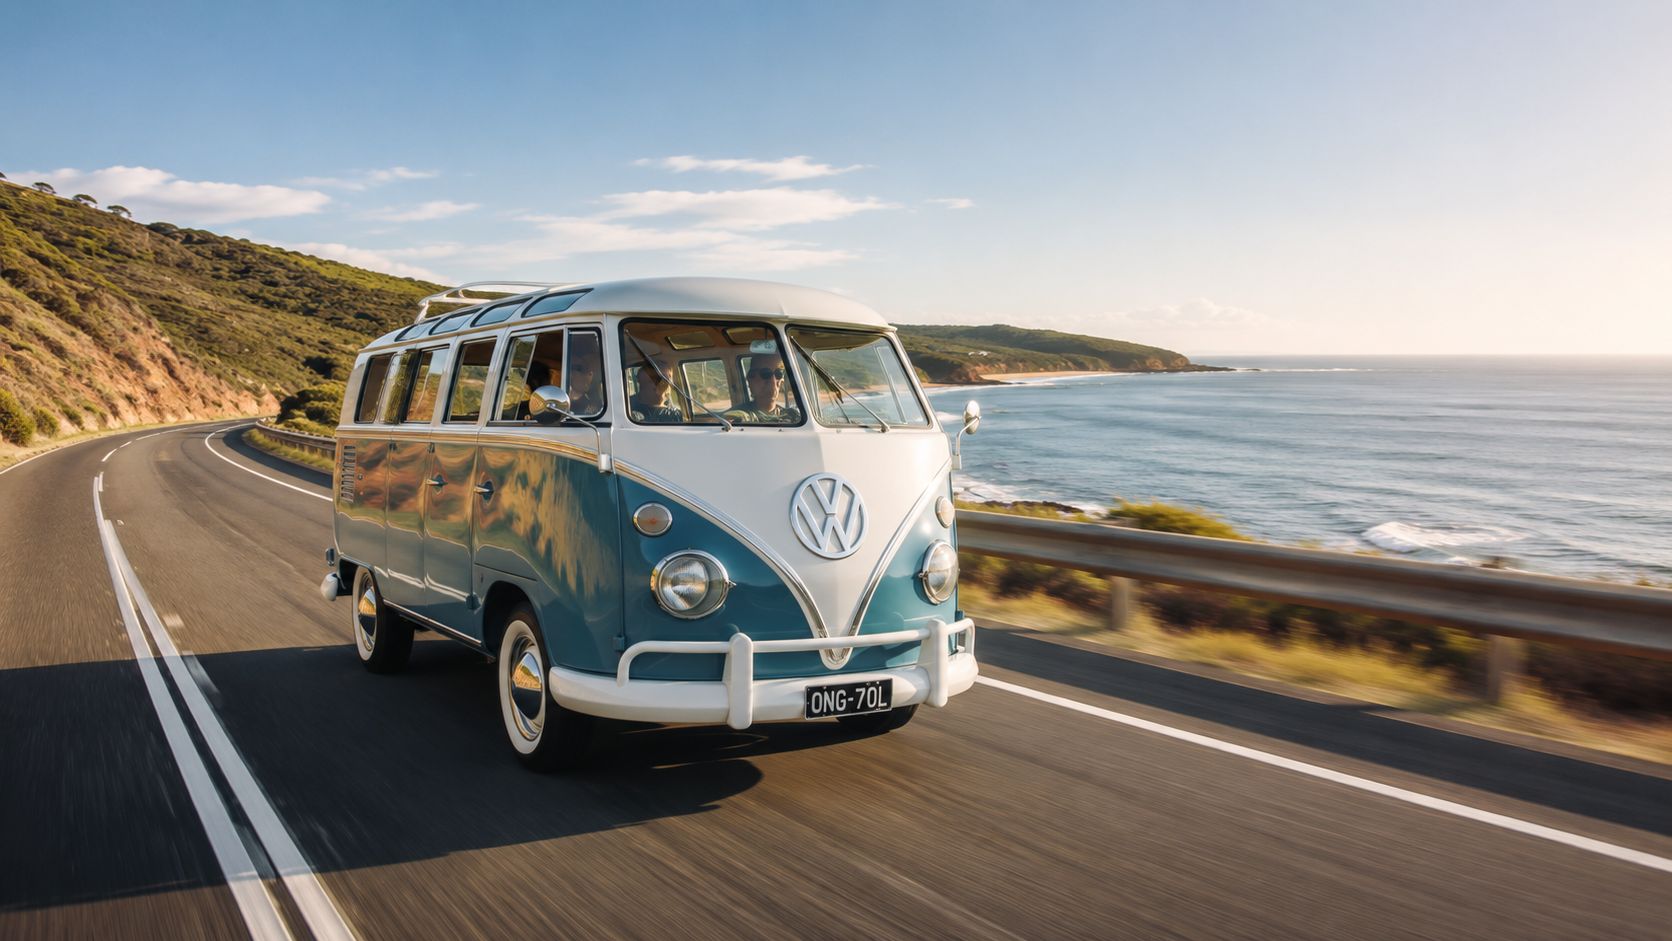
  • Known electrical brands or reputable local suppliers. You want traceability if questions come up later.

Buy the socket the same way you'd choose brakes for a Beetle you actually drive. Neat appearance matters, but the hidden engineering matters much more.

Who should install it

A licensed electrician. Every time.

Replacing or installing a wall socket involves fixed 240V electrical work. That is not a DIY weekend job. A licensed electrician can check the circuit, confirm the product is suitable, fit it correctly, and test the final result.

If your project also involves a shed, van conversion, or utility setup, power planning matters just as much there. This van fit-out utility systems guide is a useful reminder that good electrical decisions always start with the right system, not just the right accessory.

How to Choose the Right USB Socket for Your Home

Not every room needs the same setup. The best socket for the kitchen might be the wrong one for a guest bedroom.

A hand points to a wall-mounted electrical outlet featuring integrated USB and USB-C charging ports.

The broader shift is clear enough. The global market for these products is projected to reach $4.66 billion in 2025, reflecting how strongly integrated sockets are being adopted in modern homes and renovations, according to global market projections for sockets with USB ports.

Start with the room

Ask where the charging happens.

Bedside tables usually suit a simple combo unit. One or two standard outlets, plus USB for phones and earbuds.

Kitchen benches often need more thought. You may still want room for the kettle, toaster, or coffee machine, so built-in USB helps preserve the normal outlets.

Home offices benefit from flexibility. If you charge newer devices, USB-C becomes more appealing here.

Then think about your devices

A frequent issue is that people often buy the wrong thing.

  • If you mostly charge older phones, e-readers, or accessories, a socket that includes USB-A can still be useful.
  • If you charge newer phones, tablets, or USB-C gear, prioritise USB-C.
  • If you want a more future-friendly choice, a mix of USB-A and USB-C is often the most practical compromise.

A lot of homeowners don't need the fanciest unit on the shelf. They need one that matches what lives in the room.

Here's a quick visual explainer before you choose:

A simple buying checklist

Question Why it matters Good fit
Where will it go? Charging habits differ room to room Bedroom, kitchen, study, entry
What devices will use it? Port type affects convenience Older gear, newer USB-C gear, mixed household
How many devices charge there? Prevents underestimating demand One person, couple, family zone
Do you want future flexibility? Avoids replacing too soon Mixed USB-A and USB-C can help

If you're comparing products for a mobile lifestyle too, this slimline 200Ah lithium battery feature guide is a handy example of how choosing electrical gear always comes back to use case, available power, and charging expectations.

Common Questions About USB Wall Sockets

Why is my phone charging slowly from the USB port

Slow charging usually comes down to a mismatch between the socket, the cable, and the phone.

A lot of built-in USB wall sockets are designed for convenient everyday charging, like topping up your phone overnight on the bedside table or keeping a tablet going in the kitchen. They are not always built to replace the fast charger that came in the box. If your device is set up for USB-C Power Delivery and the wall socket only provides basic output, charging will be slower even though the socket is working properly.

The cable matters too. A cheap or worn cable can bottleneck charging, a bit like putting a narrow garden hose on a full-pressure tap.

Can I install a USB socket myself

No.

In Australia, any fixed 240V electrical work must be done by a licensed electrician. Replacing a standard power point with a USB wall socket is not a DIY job. That matters for your safety, and it matters for compliance with Australian requirements such as AS/NZS standards and local wiring rules.

Do USB ports draw power when not in use

Some do draw a small standby amount, depending on the product design.

For most homeowners, the bigger question is whether the unit is certified for Australian use, installed correctly, and suitable for the devices charged there every day. A compliant product from a reputable local supplier is usually the safer bet than a bargain import with unclear approvals or vague specifications.

Is it worth getting USB-C if my current phone still uses USB-A

In many homes, yes.

USB-C is now common on newer phones, tablets, headphones, and other portable gear. If you are updating a room once and want the socket to stay useful for years, adding USB-C now can save you from replacing the fitting later. A combination unit with USB-A and USB-C often suits mixed households best.

If you are paying for electrical work once, it makes sense to choose something that suits both the devices you own now and the ones you are likely to buy next.

Are sockets with USB worth it

They can be. It depends on how you use the room.

If everyone in your place charges devices in the same spot each day, a USB wall socket can cut clutter and free up the regular outlets for lamps, vacuums, or other appliances. Its primary value is convenience without turning the bench or bedside into a tangle of plug packs.

Choose carefully, though. The right pick is a certified product that matches your devices and is installed by a licensed electrician. That is the difference between a neat, safe upgrade and a shortcut that can cause headaches later.

If you enjoy practical gear, classic design, and VW collectibles, have a browse through Volkswagen Memorabilia. It's a local Australian shop with licensed gifts, diecast favourites, and collectible pieces for Beetle and Kombi fans, including Volkswagen diecast models for sale.

Top Beach Office Decor Ideas: VW Lover’s Guide

You shut the study door, drop into the chair, and want the room to feel a bit like an early run up the coast to a VW meet in Coolum or Byron. Salt-air calm. Old-school character. Enough order to get through the day's work.

That's the mark of a good beach office for a VW fan. It uses coastal colour, texture, and light in a way that suits the memorabilia instead of fighting it. A few well-chosen Beetle or Kombi pieces can carry plenty of personality, but the room still needs to read as an office first, not a cluttered display corner.

The trade-off is always the same. Go too hard on surf shack styling and the space starts to feel noisy. Strip it back too far and you lose the charm that makes classic Volkswagen gear worth showing off in the first place. The best result sits in the middle, with soft whites, sandy neutrals, washed blues, and natural materials giving your collection room to breathe.

That approach fits where Australian coastal interiors are heading too, with recent trend forecasts from Coral Homes favouring serenity, simplicity, and relaxed finishes over heavy theming. For collectors, that's good news. A calmer backdrop makes chrome trim, vintage badges, diecast paintwork, and retro beach artwork stand out without turning the whole room into a museum.

If your desk is flat, your wall is bare, or your shelf looks like it needs a proper run through a swap meet and back, these beach office decor ideas will help you build a space that feels personal, usable, and unmistakably VW.

1. Vintage VW Kombi and Samba Bus Diecast Displays

You walk into the office with a coffee, glance at the shelf, and there it is. A tidy row of Kombis and Samba Buses that feels a bit like an early morning cruise to a coastal VW show. That small setup can carry a lot of mood without crowding the room.

Diecast models work well here because they bring in nostalgia, colour, and shape on a manageable scale. For a beach office, the best displays usually stick to a narrow palette. Soft white, faded blue, sage, cream, and sandy tones sit comfortably against coastal finishes. If you own a louder piece, like a Flower Power bus or a bright split-window hero, give it space and let it do the talking.

Three vintage style miniature Volkswagen bus models displayed on a white shelf against a wood paneled wall.

Placement matters more than collectors sometimes realise. Filtered natural light gives chrome trim and curved panels a nice lift, but hard afternoon sun can fade paint and warm up plastic windows over time. In a spare room, study nook, or studio, a shelf near the light usually beats a shelf in the light.

How to make the display look intentional

Start with a simple base. A floating shelf in light timber, a slim glass-front cabinet, or a compact tiered stand all suit the coastal VW mix better than a chunky dark bookcase. The room stays airy, and the models read as part of the decor instead of a stash tipped out after a swap meet.

The other part is editing. Modern Australian coastal interiors generally look better with fewer, better-chosen objects, so keep the beach references subtle. One small driftwood piece, an old surf snapshot, or a weathered tray is plenty. Shells, rope, anchors, and ten buses on one shelf will push the room away from relaxed and straight into themed.

A few setups that work well:

  • Group by colour or body style: A row of two-tone Kombis looks calmer than a mixed shelf with every finish competing for attention.
  • Create one clear hero piece: Put the best Samba Bus slightly higher or centred, then support it with smaller models.
  • Leave negative space: Empty space around each model helps the curves stand out and keeps the shelf from feeling fussy.
  • Rotate pieces through the year: Boxed models stay cleaner, and the display stays interesting without getting overcrowded.

Practical rule: If the shelf feels busy, remove one-third of the pieces before adding anything else.

This is also one of the easiest ways to bring your collection out of storage and into daily life. A couple of well-placed diecasts from a local memorabilia shop or your own stash can give the office that familiar Australian VW club feel, without turning your workspace into a full museum wall.

2. Nautical Metal Wall Art Featuring VW Icons

You sit down at the desk, the light's good, the timber looks right, and the wall still feels flat. That's usually the moment a metal VW piece earns its keep. It gives the room a focal point straight away, and it brings a bit of grit that stops coastal decor from going too soft.

A Kombi cut-out works particularly well in a beach office because the shape already carries a bit of surf-club nostalgia. Go for seafoam, weathered white, driftwood grey, or sandy beige if you want it to sit comfortably with the rest of the room. Beetle-themed metal art suits a cleaner setup, especially if your desk, shelving, and storage already have simple lines.

Why metal works better here than another print

Metal has presence. It casts a slight shadow, catches the afternoon sun, and gives the wall some texture without asking for a whole gallery arrangement. In a home office, that means one piece can do the job of three smaller framed prints and still leave the room feeling calm.

Placement matters more than people realise. Hang it where you see it from the chair, not too high, and give it clear space around the edges. A good wall piece needs room to breathe, especially in a coastal office where the whole point is to keep things light and uncluttered.

Soft wall colours make these pieces read better. White, cream, pale blue, and light grey are the safe choices.

There's also a trade-off with metal that's worth being honest about. It can look brilliant against plaster, VJ panelling, or limewashed walls, but a heavily distressed finish can tip into café-fitout territory if the rest of the room is already busy. If you've got patterned rugs, retro signs, or a shelf of memorabilia from local VW shows, choose a simpler silhouette rather than a rusty, overworked design.

I usually prefer one strong Kombi or Beetle piece over a themed cluster. It feels more like a considered nod to Australian VW culture, the kind of thing you'd spot in a tidy corner at a club meet, rather than a wall trying to prove the point too hard. A well-chosen piece from your own collection, or from a good Australian memorabilia shop, ties the office back to the hobby without turning the space into a novelty room.

If the choice is between another generic beach print and a VW metal wall piece, the VW piece usually gives the room more identity and does more visual work.

3. Soft Furnishings with Beach and VW Themes

You roll back into the office after a Sunday coastal drive, drop into the chair, and the room should feel like the calm part of the day, not a spare bedroom with a desk shoved in the corner. Soft furnishings do that job better than people give them credit for. They take the hard edge off a workspace, cut a bit of echo, and make the VW theme feel collected rather than stuck on.

The colour mix is simple. Soft white, seafoam, faded blue, sandy beige, and sun-washed green all sit nicely in a beach office. Add VW motifs carefully and the room keeps its coastal feel. Go too loud with prints and it starts reading like a kid's surf shop.

Cream linen cushions with a small Kombi sketch work well. A light throw over the chair with a subtle Beetle pattern also works. Big prints with vans, palms, surfboards, and slogans all on the one cushion usually feel busy, especially if you already have diecast models, posters, or club-meet finds elsewhere in the room.

Natural fabrics suit this style best. Linen, cotton canvas, and textured blends have that relaxed Australian beach-house character, and they age better than shiny synthetics. They also sit comfortably with light timber, painted joinery, and older VW memorabilia that has a bit of patina.

I'd keep the ratio heavily in favour of plain pieces. One themed cushion can carry the idea. Two is often enough for a full office.

  • Start with solid colours: Cream, sand, pale blue, or washed sage give the room a calm base.
  • Use one hero VW print: A single Kombi or Beetle cushion reads cleaner than a matched set.
  • Choose washable covers: Home offices collect dust, coffee splashes, and everyday grime faster than people expect.
  • Repeat the motif once only: If the cushion has the van graphic, let the throw stay plain.

That last point matters. Repeating the same Kombi print across cushions, throws, and curtains can tip the room from nostalgic to novelty. The better approach is restraint, the same way a tidy Beetle at a car show stands out more than one covered in every accessory from the swap meet.

If you want ideas that fit that balance, have a look at VW wall accents and home decor pieces and match soft furnishings to one standout item rather than building the whole room around fabric prints.

A lightweight throw is also practical, not just decorative. Air-conditioned rooms can feel cold and a bit clinical, even in summer. A soft cotton throw on the chair back warms up the space and finishes it off without crowding the desk.

It's a small layer, but it changes the feel of the whole office.

4. Coastal Wall Shelving with Curated Collections

A good shelf does what a well-set-up Kombi display does at a local VW meet. It gives every piece room to be noticed without turning the whole scene into visual noise.

Two rustic wooden shelves on a light blue wall holding vintage Volkswagen bus toy models and decor.

In a beach office, wall shelving works best when the materials feel relaxed and sun-worn. Pale oak, whitewashed timber, and natural pine sit comfortably with sea-glass blues, sandy neutrals, and older VW pieces with a bit of history to them. If your desk or filing cabinet has a cleaner, more modern look, steel brackets can tighten up the shelf line and stop the room drifting too rustic.

The trick is curating, not just storing. A row of 1:24 Kombis arranged by colour can look brilliant in a Melbourne studio. A smaller shelf in a coastal home office might carry one Beetle model, a framed swap-meet photo, and a single shell or coral-toned object. Both approaches work because each item has space around it.

Shelf styling that stays tidy

Collectors often own more good pieces than a shelf should hold. That is where restraint pays off.

  • Build one focal point per shelf: Try one hero VW item, then support it with two or three quieter pieces.
  • Mix finishes carefully: Diecast metal, aged timber, glass, and a natural coastal element usually give enough contrast.
  • Keep some open space: Gaps make the collection feel deliberate and keep the office calmer to work in.
  • Rotate pieces by season or mood: You do not need every favourite item out at once.

I've found shelves look better when the memorabilia tells a small story. One shelf might nod to surf-trip nostalgia with a Kombi, a faded beach photo, and a simple driftwood piece. Another might feel more club-rego and car-show weekend, with a Beetle model, a badge, and a clean framed print. That sort of separation keeps a collection from blending into one busy line of objects.

If you want pieces that suit that balance, the VW wall accents and living room range for coastal-style displays is a handy place to start.

Modular shelving still makes sense here, even without overthinking it. Shelves that can be shifted, added to, or spaced differently are easier to live with as your collection changes. That matters in a working office, because today's display shelf can become tomorrow's book shelf, printer shelf, or spot for a framed photo from the last VW Nationals.

5. Nautical and Beach-Themed Photo Displays

You walk into the office, set the keys down, and the wall gives you the same feeling as rolling into a coastal VW meet just after sunrise. That is what a good photo display can do. It brings in the salt-air mood without crowding the room with more objects.

For VW people, photos carry the story better than almost anything else. Old Beetle workshop shots, a Kombi parked near the dunes, a faded beach print from an Australian road trip. Put those together with a bit of restraint and the office feels personal, settled, and easy to work in.

Keep the story clear

A Brisbane accounting office might suit neat timber frames with vintage VW brochure images and quiet Queensland beach scenes. A Gold Coast creative studio can handle a looser layout with Kombi restoration photos, surf snapshots, and one stronger hero image that pulls the wall together. Different rooms, same rule. The photos need a shared colour palette and a clear reason for being there.

Frame choice does a lot of the heavy lifting. Natural timber, brushed metal, and whitewashed finishes usually sit well in a beach office. Mix too many frame styles and the wall starts to feel like a market stall instead of a considered collection.

I usually tell people to lay the arrangement out on the floor first. It saves patching holes later, and it helps you spot when one photo is throwing the balance off.

There is a practical side to this as well. Beach-style spaces often get strong natural light, and that is great until glossy glass starts bouncing glare onto your screen. Keep reflective frames away from direct sun and opposite your monitor. If the room gets hard afternoon light, matte prints or anti-glare acrylic are often the better buy.

Renters have an easier path than they realise. Removable strips work well for lighter frames, while owners can use paper templates on the wall before hanging anything permanently. A bit of planning makes the whole display look sharper.

If you want pieces that already suit that surf-trip, car-show, coastal-office mix, the VW vintage home accessories collection for beach-inspired displays is a solid place to start.

This approach works because photos add character without eating up desk space. In a working office, that balance matters.

6. Vintage Signage and Retro Beach Posters

You walk into the office, spot a faded surf poster beside an old-school Kombi tin sign, and the room suddenly feels less like a spare study and more like a little corner of Cooly after a Saturday car show. That shift matters. Good signage sets the mood fast, especially in a coastal VW space where nostalgia is part of the appeal.

The trick is restraint. Signs and posters carry more visual punch than photos, so a small number usually works better. Three pieces often does the job. One hero print or metal sign can anchor the wall, then two supporting pieces can bring in surf culture, beach colours, or a nod to classic Beetle and Kombi travel.

I've found the best mix is one part motoring history, one part seaside attitude. A retro beach poster with sun-faded blues and sandy reds sits nicely beside vintage-style VW advertising art. That pairing feels collected, not themed to death.

Choose pieces that suit the room, not just the hobby

A home office with timber shelving and white walls can handle a distressed tin sign without feeling heavy. A cleaner commercial fit-out usually looks better with framed retro prints and just one metal piece for texture. The trade-off is simple. Too many weathered finishes and the room starts to feel like a garage wall. Too many polished frames and you lose the relaxed coastal character.

A Sunshine Coast studio might use a large beach poster as the main feature, then add a smaller Kombi sign near a bookcase. A Sydney collector with a tighter office could hang one vertical surf print beside the desk and keep the VW element on the adjacent wall so the whole setup breathes.

  • Start with a feature piece: Pick the sign or poster you want people to notice first.
  • Match the colour story: Sea blues, off-whites, faded reds, and sun-worn yellows usually sit well together.
  • Mix materials carefully: One or two metal signs add charm. More than that can make the wall feel noisy.
  • Watch the finish: Matte posters are easier in bright rooms than glossy prints.

If you want pieces that already suit that surf-trip, car-show, coastal-office mix, the VW vintage home accessories collection for retro wall styling is a handy place to start.

Character matters in a workspace, but placement matters just as much. Keep bold graphics off the wall directly behind your screen if you do long hours at the desk. Strong colours and busy lettering can pull your eye all day. Put the hero piece where you can enjoy it on breaks or when someone walks in, and the room keeps its personality without getting in the way of work.

7. Beach-Inspired Table Décor and Desk Accessories

The desktop is where beach office decor ideas can go wrong fastest. Too much stuff, and you've got nowhere to work. Too little, and the room feels unfinished. The answer sits in the middle.

A single diecast Beetle or Kombi at the desk corner does more than a pile of novelty trinkets. Add a shell pen holder, a driftwood tray, or a simple coastal photo frame, and the desk feels personal without losing function.

A miniature Volkswagen van, a palm tree notebook, and pens in a seashell holder on a wooden desk.

What earns a spot on the desk

Every item should either help you work or make the space calmer. If it doesn't do one of those jobs, it probably belongs on a shelf instead.

A Sydney lawyer might keep one neat Kombi model, a pebble paperweight, and a timber organiser. A Melbourne designer might lean into a mini VW planter, a desk mat in sandy tones, and one small stack of reference books.

  • Keep the count low: Five to seven accessories is usually enough for a working desk.
  • Choose natural finishes: Timber, metal, stone, and shell all suit the beach look.
  • Mind the light: Put your diecast where a lamp or soft window light catches the curves.

The hidden trade-off is distraction. A desk full of collectibles can look fun for about a week, then start to feel visually noisy. You'll realise pretty quickly which pieces help the mood and which ones just take up elbow room.

This is also where gift buyers can do well. A licensed Volkswagen Beetle model or a small Kombi piece makes an easy, displayable present that doesn't ask for a full room makeover.

8. Colour Psychology and Coastal Paint Treatments

Late arvo sun hits the office wall, the cream on your Beetle diecast starts to glow, and suddenly the whole room feels more like a surf-club nook than a spare study. That shift usually comes down to paint.

Paint sets the mood before the memorabilia even goes up. Soft whites, sandy neutrals, muted aqua tones, and washed seafoam shades all suit a coastal VW office because they calm the room and let the fun pieces do their job. A bright two-tone Kombi or a vintage sign has more presence against a quiet wall than it does against a colour shouting for attention.

Colours that work in a real office

Soft white is the reliable choice if you want flexibility. It reflects light well, keeps smaller rooms open, and won't fight with red, blue, or cream VW pieces. Sandy beige or warm stone is better if the space already has lots of white furniture, because it stops the room feeling clinical. Seafoam and pale blue can look brilliant behind timber shelving or a framed poster wall, but they need testing first. In some Australian light, especially near the coast, a cool paint can turn flat or slightly grey by mid-afternoon.

One feature wall is often enough. The wall behind the desk, display cabinet, or floating shelf usually gives you the biggest return for the least effort.

Texture matters too. Limewash, mineral paint, or a low-sheen finish can soften the room and give it that weathered beach-house feel VW fans tend to love. The trade-off is maintenance. Textured finishes hide small scuffs well, but they can be harder to patch neatly if you move shelves or swap artwork after the next VW show haul.

The wall should support the memorabilia, not compete with it.

I'd also be picky about undertones. A warm white works beautifully with cream Kombis, timber frames, and older metal signs. A blue-based white can make those same pieces feel colder and less nostalgic. Grab sample pots, paint decent-sized test patches, and check them in morning light, afternoon light, and under your desk lamp before committing.

Australian homes near the coast also deal with strong light for much of the year, so finish choice matters as much as colour. Washable paint with a durable low-sheen or satin finish usually makes more sense in a working office than flat matte, especially if the room gets salt air, dust, or plenty of sun. If you want styling ideas that already suit this softer palette, browse these coastal home décor ideas for VW-inspired spaces.

Warm lighting ties it together. A soft globe around 2700K to 3000K keeps seafoam, sand, and off-white tones relaxed and flattering. Cool office lighting can make a carefully chosen coastal palette feel like a medical fit-out, and that's no place for a lovely old Kombi display.

8-Item Beach Office Decor Comparison

Item 🔄 Implementation Complexity ⚡ Resource Requirements 📊 Expected Outcomes Ideal Use Cases ⭐ Key Advantages
Vintage VW Kombi & Samba Bus Diecast Displays Medium, requires shelves/cabinets, careful placement and dust control Moderate cost; display shelving or cases, lighting; larger scales need more space High visual nostalgia and focal interest; strong engagement with visitors Reception desks, window displays, themed meeting rooms, tourism offices Authentic licensed detail; compact yet impactful; strong collector appeal
Nautical Metal Wall Art Featuring VW Icons Low–Medium, wall mounting, anchors and planning for scale Moderate, cost varies by size and finish; secure fixings and careful delivery for large pieces High wall impact and texture; durable long-term statement Feature walls, cafés, lobbies, gallery clusters Sculptural texture; weather-resistant finishes; transforms blank walls
Soft Furnishings with Beach & VW Themes Low, no structural work, simple placement and seasonal swaps Low–Moderate, cushions, throws, quality fabrics; removable washable covers recommended Improved comfort and warmth; subtle thematic cohesion and colour infusion Lounge areas, seating zones, client meeting spaces Affordable way to add colour/pattern; washable covers; tactile comfort
Coastal Wall Shelving with Curated Collections Medium, proper anchoring, leveling, and load assessment required Moderate, shelving, brackets, installation tools; optional LED lighting Maximises vertical display; layered visual rhythm; flexible curation Compact offices, studios, retail displays, shared workspaces Flexible reconfiguration; shows mixed media; efficient use of wall space
Nautical & Beach-Themed Photo Displays Low–Medium, framing, arrangement planning, anti-glare/UV considerations Low–Moderate, prints, frames, archival materials; occasional protective glass Personalised storytelling; emotional connection; strong visual depth Hallways, meeting rooms, reception gallery walls Cost-effective high impact; easily refreshed; highly personalisable
Vintage Signage & Retro Beach Posters Low, simple hanging; large/heavy pieces need secure anchors Low–Moderate, signs/posters in tin, canvas or wood; quality affects authenticity Instant retro atmosphere and focal points; strong nostalgic appeal Feature areas, cafés, retail fronts, reception desks High nostalgia value; affordable statement pieces; wide design variety
Beach-Inspired Table Décor & Desk Accessories Low, minimal installation; requires intentional curation to avoid clutter Low, small, affordable items; occasional replacements and cleaning Personalised, functional workspace; subtle calming and tactile benefits Individual desks, meeting tables, reception counters Dual-purpose items (functional + decorative); promotes mindfulness; easy rotation
Colour Psychology & Coastal Paint Treatments Medium–High, paint/finish selection and application; may need professionals Moderate, quality paint, samples, possible contractor; lighting adjustments Cohesive calming atmosphere; improved focus and long-term wellbeing/productivity Full office refreshes, feature walls behind displays or seating Unifies aesthetic; enhances other décor; evidence-based calming effects

Your Coastal VW Escape Awaits

The best beach office setups feel like the morning after a big VW show on the coast. Salt in the air, a Kombi parked nearby, and that easy mix of nostalgia and calm that makes you want to stay a while. That is the mood worth chasing in a workspace.

A good result comes from restraint. Start with a coastal base that allows the room to function. Soft whites, sea blues, weathered timber, natural fibres. Then bring in the VW pieces with some discipline, the Kombi Samba Bus diecast you hunted down years ago, the Beetle model that reminds you of your first project car, or a sign that feels right for an old surf club office. Give each item space so it reads like part of the room, not stock piled from a swap meet.

That balance matters in real offices as much as home setups. As noted earlier, Australian fit-out trends continue to favour spaces with personality, provided they still feel organised and practical. In plain terms, themed décor works best when it earns its place. A shelf can hold diecast models and still keep reference books close. A framed poster can set the tone without shouting over the whole room. That is usually the difference between a collector's office and a cluttered spare room.

For Australian VW fans, the connection runs deeper than style. Australians first got Volkswagens as imports in late 1953, with official sales beginning in early 1954, and local assembly at Clayton in Victoria gave the market its own chapter before fully imported sales resumed from March 1977, as noted by the Club VW history of Australian Volkswagen sales. That history is why a Kombi or Beetle on display carries weight. It points to road trips up the coast, car show mornings, restoration chats over a bonnet, and the freedom these cars have always represented here.

Keep the final look simple and honest. Choose licensed pieces. Repeat colours already in the room. Mix metal, timber, linen, and glass so the space feels collected over time. If a piece does not suit the room or means nothing to you, leave it out.

If you are ready to finish the space properly, Volkswagen Memorabilia is a solid place to start. The range suits Australian collectors who want licensed diecast models, Kombi and Beetle display pieces, and coastal-friendly décor that fits a study, studio, reception area, or collector's corner without going over the top. Local stock and fast Australian shipping help too, especially when you have finally found the exact spot for that next Kombi or Beetle piece.

Volkswagen ID. Buzz: Australia Guide 2026

A bloke rolled into a sunny VW meet in a faded Bay Window, and two spaces over sat a bright ID. Buzz with kids climbing in and out like it was already part of the family. That's the moment the penny drops. The story never stopped, it just changed soundtrack.

The Electric Kombi We Have All Been Waiting For

If you grew up around Volkswagens in Australia, you already know the silhouette. A Kombi parked near the surf. A Beetle tucked under a gum tree at a country show. A Samba Bus on a poster wall, promising a freer sort of life than the Monday morning commute.

The reason the Volkswagen ID. Buzz lands so warmly here isn't just that it's new. It's that plenty of us have spent years hoping Volkswagen would build a proper spiritual successor to the old bus. Not a cold appliance. Not a cynical retro badge. Something with the same generous face, the same sense of occasion, and the same invitation to gather your mates, your family, or your dogs and just head for the coast.

At Aussie shows, that feeling is easy to spot. The classic owners lean in for a proper look. The younger crowd realise they're seeing a van that speaks both languages at once. One is memory. The other is tomorrow.

The ID. Buzz feels less like a replacement for the Kombi and more like a reunion with an old friend who's learned a few new tricks.

That's why the buzz around the Buzz matters. It's not only a car launch. It's a cultural handover from split screens and air-cooled fan shrouds to batteries, silent cruising, and a fresh generation of Volkswagen fans who'll collect this chapter just as lovingly as the old ones.

A Legend Reimagined The Story Behind the ID Buzz

Volkswagen's place in Australia goes back further than plenty of people realise. Volkswagens were first imported to Australia in late 1953 and commenced official sales in early 1954, which marked the brand's formal local arrival before assembly began, as noted in Australian Volkswagen history records.

That matters because the Kombi didn't become beloved here by accident. It became part of the furniture. It hauled boards, tools, camping gear, market stock, and whole friend groups. It wasn't precious. It was useful, cheerful and unmistakably Volkswagen.

A vintage light blue Volkswagen bus parked on a beach with a modern green ID Buzz behind it.

The design cues old fans spot straight away

Stand in front of an ID. Buzz and the family resemblance jumps out before anyone mentions platforms or battery packs. The friendly face is there. The broad stance is there. So is that visual lightness people love in the old vans.

A few touches do the heavy lifting:

  • The V-shaped front recalls the classic Type 2 nose without pretending it's still the 1960s.
  • Two-tone colour schemes bring back the playful spirit that made old Kombis feel more like companions than transport.
  • The cab-forward look keeps that sense of sitting up front, looking out at the world rather than being buried in it.

More evolution than imitation

That's why the ID. Buzz works. It doesn't copy the old van panel by panel. It translates the idea. The old Kombi was honest about its era, and the ID. Buzz is honest about this one.

You can sense that long thread of intent in the shape. It feels like Volkswagen finally stopped flirting with the notion of a reborn Kombi and built one capable of a real Australian life, from suburban school runs to coast road weekends.

The Electric Heartbeat ID Buzz Specs and Performance

The clever bit about the Volkswagen ID. Buzz is that its tech doesn't need to feel intimidating. Think of it the same way you'd think about the old Kombi's mechanical personality. Back then, enthusiasts learned the engine note and the rhythm of the gearbox. Now, you learn battery range, charging habits, and how beautifully smooth an electric motor feels in traffic.

For Australia, the core numbers are straightforward. The ID. Buzz uses a 77kWh lithium-ion battery, sends 150kW to a rear-mounted electric motor, offers a WLTP-tested range of up to 450km, and comes with Volkswagen Australia's 5-year, unlimited kilometre warranty, according to the official Volkswagen Australia ID. Buzz model page. If you want a broader local look at the electric van conversation, this guide to electric van Australia adds useful context.

An infographic detailing the technical specifications and performance features of the Volkswagen ID. Buzz electric vehicle.

What those numbers feel like on the road

The easiest way to understand 150kW is this. You press the pedal, and the van moves with clean, immediate shove rather than building power with revs and noise. Around town, that suits the ID. Buzz brilliantly. Pulling away from lights feels effortless, and the quietness changes the whole mood in the cabin.

The up to 450km WLTP range is equally easy to frame in real life. For many owners, that's the kind of figure that covers daily driving for days at a time, then asks for a recharge when it suits your routine rather than when the vehicle starts nagging you every afternoon.

Practical rule: Treat battery size like a fuel tank and range like the distance you can expect in the right conditions. Driving style, load, weather, and road speed all shape the real outcome.

Why the warranty matters

Volkswagen's 5-year, unlimited kilometre warranty brings the sort of reassurance family buyers and long-distance drivers want. It takes some of the unknowns out of the shift from combustion to electric. If you're keen on the idea but wary of making the jump, that warranty is one of the friendliest parts of the whole package.

The result is a van that feels less like a gadget and more like a modern touring companion. It's easy to operate, easy to understand, and still has enough character to feel special every time you walk up to it.

Find Your Perfect Buzz Australian Models and Pricing

The local line-up makes decent sense. Australian buyers can choose a five-seat short-wheelbase version or a seven-seat long-wheelbase version, which means the ID. Buzz can lean either family runabout or people-mover depending on how you want to use it.

Pricing changed the conversation in a big way. Following price cuts of up to $12,000, the five-seat ID. Buzz Pro now starts at $79,990 drive-away and the seven-seat LWB sits at $84,990 drive-away, and that shift helped triple interest and lift December 2025 sales to 108 units, according to Drive's Australian ID. Buzz sales report. Buyers comparing local offers may also find this breakdown of Volkswagen ID. Buzz Australia price handy.

Volkswagen ID. Buzz Australian Models at a Glance (2026)

Feature ID. Buzz Pro (SWB) ID. Buzz Pro (LWB)
Seating 5 seats 7 seats
Wheelbase Short-wheelbase Long-wheelbase
Drive-away price $79,990 $84,990
Best suited to Smaller families, urban use, weekend touring Larger families, extra passenger flexibility

Why the pricing shift matters

This isn't only about shaving money off the sticker. It changes who can realistically consider one. The ID. Buzz went from being something people admired from a distance to something more buyers could pencil into the family spreadsheet.

And the sales movement gives that story some weight. A model that recorded 108 unit sales in December 2025, after a slower start earlier in the year, looks like a vehicle finding its audience rather than fading as a curiosity. That matters if you're the sort of buyer who likes knowing your quirky choice is also gaining local traction.

A simple way to think about it is this:

  • Choose SWB if you want the tidier footprint and don't regularly need the extra row.
  • Choose LWB if your life involves more passengers, more flexibility, or a bit more people-moving duty.
  • Watch the market closely because the recent adjustment shows Volkswagen is serious about giving the model a stronger foothold here.

Old Soul New Body ID Buzz vs Classic Kombis

A classic light blue and white Volkswagen van parked next to a modern yellow and white ID. Buzz electric van.

No one who loves old Volkswagens needs to be told that a classic Kombi has its own heartbeat. The steering talks back. The cabin smells like old vinyl, warm metal and adventure. The engine doesn't hum politely. It chatters and works for its living.

The historical line is part of that affection. The second-generation Volkswagen Kombi entered production in 1967, the third-generation followed in 1979, and later the line gave way to the Transporter and Caravelle in Australia, as outlined in this history of the Volkswagen Kombi van.

Same spirit, different soundtrack

The ID. Buzz doesn't try to recreate the mechanical theatre of an old bus. It captures the social side instead. You still sit high. You still get that broad, airy view. You still feel like the vehicle wants to be part of a trip rather than merely complete one.

That's the true bridge between generations. A classic Kombi makes every drive feel slightly ceremonial because it asks something of you. The ID. Buzz makes every drive feel easy, but still memorable, because it keeps that warm, open-hearted sense of occasion.

For a moving side-by-side impression, this clip shows the family connection from another angle.

A Splitty, a Bay, and an ID. Buzz all answer the same question in different accents: how do you make travel feel cheerful?

If you're a purist, you won't confuse them. You shouldn't. But if you love what Kombis have always represented, freedom, friendliness, and a touch of playfulness, the lineage is easy to see.

Living the Dream What to Expect Owning an ID Buzz

Owning an ID. Buzz in Australia looks best when you're realistic from day one. Home charging is the quiet hero because it turns the van into something you top up while you sleep or while the house is already switched on and humming along. Public charging is still useful, especially on longer runs, but the easiest ownership rhythm starts at home.

The most useful reality check comes from other owners. Australian owners have reported that real-world range can fall to around 300 km in cold weather, especially if they're sticking to the recommended 80% daily charging limit, which is worth remembering in southern-state winters compared with the official range figure, based on owner discussion in this Australian ID. Buzz community post. If you like the idea of eventually turning the modern van dream into a touring lifestyle, the idea-rich world of the ID Buzz camper is easy to get lost in.

Everyday habits that make ownership easier

A few habits help quickly:

  • Charge around your week rather than waiting for the battery to get low.
  • Expect winter variation if you live in Melbourne, Canberra, Hobart, or colder inland pockets.
  • Use the official service rhythm to keep ownership simple. Volkswagen Australia specifies service intervals every 30,000km or 24 months on the local ID. Buzz range, as noted earlier from the official model information.

Honest expectations make happy owners

The ID. Buzz establishes trust because it doesn't need fantasy to be appealing. For many households, a realistic winter estimate and a simple home-charging routine are enough to make the van feel easy.

In mild conditions, range worries fade quickly. In colder weather, planning matters more than optimism.

That sort of honesty is good for buyers and good for the broader VW community. The old Kombi crowd has always respected practical knowledge, and the electric era deserves the same straight talk.

Start Your Collection The ID Buzz and VW Memorabilia

Every time Volkswagen launches a vehicle that stirs emotion, collectors respond almost instinctively. The ID. Buzz feels made for that response because it sits at such a lovely meeting point. It's recognisably linked to the classic vans people already treasure, yet distinct enough to deserve its own place in a display cabinet.

For collectors, that opens up a fun way to tell the whole Volkswagen story on a shelf. You might line up a classic Beetle model beside a 1962-style Samba Bus diecast, then finish the row with an ID. Buzz to show how the design language travelled from rear-engine simplicity to electric modernism.

Screenshot from https://vwmemorabilia.com.au/product-category/volkswagen-diecast/

Display ideas that feel personal

Collectors don't need giant rooms or museum budgets. A strong display usually comes down to theme.

  • Timeline shelf with Beetle, early Kombi, Bay Window and ID. Buzz in order.
  • Beachy corner display using surf-themed VW pieces, pale timber shelving and coastal décor.
  • Gift pairing where a licensed Volkswagen Beetle model sits with a Kombi diecast for a birthday or Father's Day present.

What to look for when buying

If you're shopping for VW Kombi diecast Australia, Volkswagen Beetle model pieces, or newer Volkswagen diecast models for sale, a few basics matter most:

  • Licensed branding matters because it gives the piece proper credibility for long-term collecting.
  • Finish and paint detail can make a modestly sized model feel premium.
  • Local stock is a genuine advantage for Australian buyers who want faster shipping and easier support.
  • A balanced collection often looks better than chasing one era only. Old and new Volkswagens play brilliantly together.

That's the charming twist with the ID. Buzz. It isn't only a new car. It's already part of the memorabilia story, joining the Beetles and Kombis that have filled cabinets, workshops and study shelves for years.

FAQ

Is the Volkswagen ID. Buzz sold in more than one Australian body style?

Yes. Australian buyers can choose a five-seat short-wheelbase version and a seven-seat long-wheelbase version, as covered in the local pricing section above.

What's the official Australian range figure for the ID. Buzz?

Volkswagen Australia lists the ID. Buzz with a WLTP-tested maximum range of up to 450km on the official local model page linked earlier.

Does real-world range always match the WLTP figure?

Not always. Owner reports in Australia suggest colder weather and an 80% daily charging limit can bring practical range closer to around 300 km in winter conditions.

How often does the ID. Buzz need servicing in Australia?

Volkswagen Australia specifies 30,000km or 24 months service intervals for the local ID. Buzz range.

Why does the ID. Buzz matter to collectors?

Because it bridges eras beautifully. It gives collectors a modern electric chapter that still belongs naturally beside classic Kombi and Beetle memorabilia.


If the Volkswagen ID. Buzz has you feeling keen to celebrate both the old-school classics and the electric future, have a wander through Volkswagen Memorabilia. It's a terrific Australian source for licensed VW memorabilia collectibles, from Kombi Samba Bus diecast and Beetle models to gift-worthy display pieces, with the local-stock advantage of fast shipping and friendly support for Aussie collectors.

Classic VW LED H1 Headlight Upgrade Guide

You're probably in the same spot plenty of classic VW owners hit sooner or later. The car's running sweet, the paint still turns heads at the servo, and a late arvo drive feels spot on until the sun drops and those old headlights start looking more charming than useful.

That's where the led H1 headlight conversation usually starts. Not because anyone wants to modernise the soul out of a Beetle or Kombi, but because using these old girls on modern Australian roads asks a bit more of the lights than it did decades ago.

The trick is doing it properly. With classic Volkswagens, especially Australian cars and long-loved restorations, the primary issue isn't just whether an H1 LED bulb fits the socket. It's whether the beam pattern stays safe, tidy, and roadworthy once it's sitting inside an old reflector housing. Get that wrong and you haven't upgraded anything. You've just made the car harder to use and more likely to attract unwanted attention.

That Dusk Cruise Feeling Just Got Brighter

There's a special kind of joy in an evening run in an air-cooled VW. Windows cracked, engine humming away behind you, and that familiar view over a Beetle bonnet or through a splitty screen. It's part machine, part memory.

Then the road gets darker.

Anyone who's driven an older VW outside the city knows the feeling. A halogen setup that seemed acceptable around town suddenly looks thin and yellow on a country road. Signs don't pop the way they should. Surface changes arrive later than you'd like. You start driving the car around the headlights instead of driving with confidence.

That's why a led H1 headlight upgrade gets so much attention among restorers and owners who use their cars. It isn't about chasing a trendy white light for the sake of it. It's about making a classic Volkswagen easier to enjoy after sunset, without taking away the character that made you fall in love with it in the first place.

Australian VW history gives that idea a bit of weight too. The last original Volkswagen Beetle was assembled in Australia in July 1976, before the Kombi, Golf, and Passat assembly lines ended in February 1977, as recorded by Club VW's Australian Volkswagen reference. Keeping those cars practical now is part of keeping the story alive.

Old VWs earn their keep when you can drive them more often, not when they only come out in perfect daylight.

A tidy lighting upgrade can sit in the same camp as better tyres, careful brake work, or sensible wiring repairs. Respect the car. Improve the drive. Keep the spirit intact.

Shining a Light on LED H1 Bulbs

Before you buy anything, it helps to know what H1 means. It's the bulb format, not a magic performance label. In simple terms, an H1 bulb uses a P14.5s base, which is the round metal base design with a single spade connector used in many headlight applications.

An infographic explaining what H1 light bulbs are and comparing traditional halogen bulbs with modern LED bulbs.

What changes when you move from halogen to LED

A traditional H1 halogen globe makes light with a filament. An LED version uses small light-emitting chips instead. That sounds simple enough, and in physical fitment terms it often is. According to the H1 lamp reference on Wikipedia, H1 LED headlight bulbs replace the original P14.5s base halogen globes and can produce around 2800 to 3600 lumens per bulb, compared with roughly 700 to 900 lumens for a typical H1 halogen.

That's the part that gets everyone excited. More light from the same basic socket.

But an LED bulb isn't just a halogen with a different glow. Most kits add extra hardware. You'll usually see a driver module, plus a cooling arrangement such as a fan or heatsink on the rear of the bulb. That matters a lot in a classic VW because headlight buckets don't offer endless room to play with.

The easy way to think about it

Consider the act of swapping an old torch globe for a modern LED torch insert. While both may fit the same space, they produce light differently, dissipate heat differently, and behave differently in a reflector.

Here's what to keep straight before ordering a kit:

  • Socket match: H1 tells you the bulb base style.
  • Light source shape: The reflector was designed around a filament, not automatically around LED chips.
  • Rear clearance: Cooling hardware can foul on the back of the bucket or dust cover.
  • Wiring style: Plug-and-play claims can still hide small fitment surprises.

That last point catches plenty of owners. A bulb can be marketed as easy-fit and still create real headaches once it meets old VW hardware.

Seeing the Difference Halogen vs LED Performance

The biggest practical difference between halogen and LED isn't marketing fluff. You see it on the road. A good LED setup produces a cleaner, whiter light that makes roadside detail easier to pick up, especially when your eyes are dealing with a dark stretch of road and mixed traffic.

A comparison chart showing the performance differences between halogen and LED H1 headlight bulbs for vehicles.

The hard numbers that matter

The useful thing about quality H1 LED products is that some of the claims are backed by proper figures rather than pub talk. On Philips' Australian road-legal LED page, high-performance H1 LED replacements can achieve up to 2,345 Max Lux, compared with 482 Max Lux for standard halogen, and Philips says that's 238% brighter in that test. The same page notes the Philips Ultinon Pro6000 offers up to 3,000 hours of bulb life, lasting six times longer than comparable halogen globes, as shown on the Philips Ultinon Pro6000 page.

That sounds brilliant, and often it is, but there's a catch seasoned owners learn quickly. Not every LED bulb behaves the same way in every lamp.

A lot of Australian drivers also gravitate to the cool white look. Some commercial H1 LED kits sold for the local market, such as the F22 Series mentioned in the verified data, are listed at 6500K with 110W and 24,000 lumens total brightness. That sort of output can look fantastic on paper, but old reflector housings don't care about marketing. They care about where the light source sits.

Here's a quick side-by-side view.

Feature H1 Halogen H1 LED
Light colour Warmer, more yellow Usually cooler, whiter
Output potential Lower Can be much stronger
Bulb life Shorter Can last much longer
Electrical load Higher Often easier on an older system

A video walk-through helps if you want to see how beam shape changes from one bulb style to another.

What works well in a classic VW

The best result usually comes from restraint, not maximum claimed brightness.

  • Choose beam control over bragging rights: A lower-output bulb with better chip placement often beats a wild-output bulb with messy scatter.
  • Use white light sensibly: A crisp colour can improve clarity, but only if the beam lands where it should.
  • Value longevity: Changing bulbs in a classic isn't difficult, but fewer failures are always welcome.

Practical rule: If a bulb gives you more glare than reach, it's not an upgrade.

For a Beetle, Type 3, or Kombi that sees regular use, the sweet spot is a kit that offers tidy optical performance, manageable heat, and consistent reliability. That's the kind of upgrade you appreciate every time the daylight fades.

Installation and Wiring for Your Classic VW

Classic VW fitment is where the led H1 headlight story gets interesting. Plenty of kits are sold as plug-and-play, but anyone who has wrestled with an old headlight bucket knows there's often more going on than the listing suggests.

Bucket space is the first hurdle

The rear of many LED bulbs is bulkier than the old halogen globe they replace. Cooling fans, heatsinks, and drivers all need somewhere to live. In a Beetle or Kombi with snug buckets, that can mean the bulb fits the socket but not the housing.

That's why it pays to measure before buying. Check the bucket depth, check the dust cover clearance, and check where the wiring needs to sit once the lamp is reassembled. If you're sorting other restoration jobs at the same time, it's worth looking over your broader VW Type 1 parts options so the headlight upgrade isn't being asked to hide cracked boots, tired connectors, or brittle old hardware.

Orientation matters more than people realise

This is one of the big ones. Premium H1 LED kits can feature CSP LED chips and IP68 weatherproof ratings, but enclosed headlight buckets create thermal headaches, and the bulb must sit with the LED chips on the left and right sides for proper heat dissipation and beam pattern, as noted on Lightforce Australia's H1 upgrade kit page.

If the chips point up and down, the reflector usually won't throw the beam the way you want. You can end up with a smeared pattern, extra glare, and wasted light.

Fit the bulb, then check orientation before buttoning everything up. Three and nine o'clock is the usual goal.

A practical install checklist

  • Dry-fit first: Don't lock everything down until you know the fan or heatsink clears the bucket.
  • Watch the connectors: Old VW wiring can be serviceable but tired. Clean terminals and inspect insulation while you're in there.
  • Keep the rear sealed: If the dust cover won't go back on properly, moisture and grime will make a mess of things.
  • Aim after fitting: Even a correctly installed bulb can throw poorly if the lamp aim is off.

One more thing. Heat kills LEDs faster than most owners expect. A powerful bulb trapped in a small sealed bucket can cook itself over time, especially if airflow is poor. That doesn't mean LED is a bad idea. It means the kit has to suit the housing, not just the socket.

Staying Roadworthy With Your LED Upgrade

This is the bit many generic guides get wrong. In Australia, the issue isn't whether someone can sell you an LED bulb that fits an H1 socket. The issue is whether the entire headlight system remains compliant once that bulb is installed.

An infographic detailing the requirements and safety checklist for upgrading vehicle headlights to LED H1 bulbs.

Legal bulb versus legal beam pattern

According to Drive's explanation of Australian headlight rules, LED headlights using the H1 format are legal only if they comply with ADR 13/00, which requires white light, intensity not exceeding 430,000 candelas, mounting height between 500mm and 1200mm, and placement not extending more than 400mm longitudinally from the vehicle. Drive also notes that non-compliance can lead to defect fines from $100 to $900, plus defect notices and a vehicle being deemed unroadworthy under enforcement, as detailed in this Drive article on LED headlight legality in Australia.

For classic VW owners, the most important part of that isn't the paperwork language. It's the beam. Old reflector housings were designed around a halogen filament shape. Swap in a flat LED chip layout and the reflector can scatter light in ways that don't show up until you test the beam against a wall or meet oncoming traffic.

That's why “ADR compliant bulb” and “ADR compliant result” are not the same thing.

Where restorers get caught out

A lot of Beetle and Kombi owners assume a plug-in globe is a legal shortcut. It often isn't.

  • Reflector mismatch: The lamp may throw glare instead of a controlled cut-off.
  • DIY aiming isn't enough: You can point a messy beam lower, but you can't fix bad optics with adjustment alone.
  • State-level quirks exist: Some wiring requirements and inspection expectations vary, which adds another layer for enthusiasts.

If you're refreshing the front end while sorting lights, it's worth checking broader Volkswagen Beetle parts for restoration jobs so the whole system is working as it should, not just the bulb.

A legal upgrade isn't the brightest one on the shelf. It's the one that puts clean light on the road without annoying everyone coming the other way.

For some cars, the honest answer is that a projector-style conversion or a professionally assessed setup is the safer path if you want LED performance without roadworthy dramas.

Choosing Your Kit and Cruising with Confidence

Once you know the traps, buying gets much easier. You're not shopping for a miracle bulb. You're shopping for a kit that suits an old VW housing, leaves enough room for cooling, and gives you the best chance of a proper beam.

The shortlist I'd use

  • Check dimensions first: If the rear hardware won't fit, stop there.
  • Look for adjustable positioning: Being able to rotate the bulb helps nail that left-right chip orientation.
  • Buy from an Aussie supplier who understands local fitment: That usually means better support and fewer surprises.
  • Treat huge brightness claims carefully: The neatest beam wins.

A reputable local supplier also means local stock and faster shipping, which is handy when the car's apart and you don't want it sitting on stands while a mystery parcel circles the globe. If you're already deep into a bigger build, keeping an eye on your broader VW parts in Australia can save you from doing jobs twice.

For plenty of owners, the best outcome is simple. Better night vision, less strain on old electrical gear, and a classic Volkswagen that still feels like itself.

To finish on a lighter note, there's something nice about celebrating the actual car while it's in the shed getting fettled. A shelf full of classic VW pieces keeps the passion alive between drives, especially if you're into VW Kombi diecast Australia, a well-made Volkswagen Beetle model, or hunting down Volkswagen diecast models for sale with proper licensed detail.

Screenshot from https://vwmemorabilia.com.au/shop/

Quick FAQ

Are H1 LED bulbs always legal in Australia?
No. The bulb fitting the socket doesn't automatically make the beam pattern legal.

Will an LED H1 bulb fit my classic VW?
Maybe. The socket may match, but rear clearance, dust cover fit, and connector style can still cause trouble.

Do I need professional help?
If you want the best shot at a compliant beam and proper aim, professional installation is the sensible move.

Are all LED kits brighter than halogen in practice? No. Output varies, and beam control matters just as much as raw brightness.


If you love cars and the stories wrapped around them, have a look through Volkswagen Memorabilia. It's a top spot for VW memorabilia collectibles, licensed Kombi and Beetle diecast pieces, and gift-worthy finds for the Volkswagen tragic in your life. Local Australian stock and fast shipping make it easy to grab a classic buy diecast Kombi piece or a beautifully finished Beetle model to keep that VW spirit going in the shed, the office, or the display cabinet.

VW DPF Warning Light: An Aussie Driver’s Guide to a Fix

You're heading off for a decent run. Maybe it's the coast, maybe it's a club meet, maybe it's just the school drop followed by work and a coffee. Then an orange symbol lights up on the dash and suddenly the whole drive feels a bit less carefree.

If you grew up loving old Volkswagens, this sort of warning can feel especially rude. A Beetle with an air-cooled flat-four never tried to talk to you with dashboard hieroglyphics. It rattled, hummed, smelt faintly of warm oil, and got on with it. Modern diesel VWs are a different beast. They're cleaner, cleverer, and a fair bit fussier.

That doesn't mean the DPF warning light is a disaster. Most of the time it's your car asking for the right kind of driving or the right kind of diagnosis. If you know what it means, you can often sort it before it turns into a proper wallet-bruiser. Keep your cool, think methodically, and treat it like advice from an old club mate who's seen a few things before.

That Unwanted Light on Your VWs Dash

One of the most common stories goes like this. The car's been doing short trips all week. Shops, traffic lights, school zones, stop-start suburban stuff. Then on Friday or Saturday, the warning pops up just as you finally point the nose toward a better road.

A car dashboard displaying a DPF filter warning light alongside a miniature black Volkswagen car model.

That catches plenty of VW owners off guard because the car may still feel normal. It starts, drives, and idles. No smoke show, no mechanical racket, no drama. But the dash is telling you the diesel particulate filter needs attention, and it's best handled sooner rather than later.

Why it feels more alarming than it is

Classic VW people are used to faults you can feel. Loose cable. Sticky carb. Valve noise. A DPF issue is different because it begins as a system problem, not a sensation problem. The car often gives you a warning before it gives you a symptom.

Practical rule: If the vehicle still drives normally and the light is steady, don't panic. Start with the basics and give the car the conditions it needs before assuming the worst.

The DPF itself is part of the emissions setup on modern diesel Volkswagens. It traps soot from the exhaust and then burns that soot off when the conditions are right. When those conditions never arrive, usually because the car lives on short urban trips, the filter starts loading up.

The modern VW problem in plain English

Think of it this way. An old Beetle liked being driven. A modern diesel VW also likes being driven, but in a very specific way every so often. It needs heat, load, and time. Without that, soot hangs around longer than it should.

If you keep service records in the glovebox, it's worth treating them with the same respect as a Volkswagen service book. Patterns matter. How the car is used matters. When the warning appeared matters. That little bit of context helps you decide whether the fix is a solid road run or a booking with the workshop.

What Your Diesel VW Is Trying to Tell You

The Diesel Particulate Filter, or DPF, is basically a self-cleaning soot trap in the exhaust. It catches the dirty particles a diesel makes, then burns them off during regeneration when the exhaust gets hot enough. Clever bit of engineering. Slightly needy bit of engineering too.

According to Volkswagen Australia's DPF guidance, the DPF warning light illuminates when the filter is approximately 45% full of soot. That's the car telling you regeneration is required. It isn't saying the filter is ruined. It's saying the car hasn't been able to finish the clean-out process by itself.

A diagram explaining the purpose, mechanism, benefits, and location of a Diesel Particulate Filter in VW vehicles.

Steady light versus flashing light

Owners save themselves a lot of grief by reading the signal properly.

Warning state What it usually means Your next move
Steady DPF light The filter is loaded with soot and wants a proper regeneration Give it the correct driving conditions promptly
Flashing DPF light The situation is more urgent and may involve faults beyond normal soot build-up Stop guessing and get it checked professionally

A steady light is often a request. A flashing light is closer to a complaint.

The mistake I see most often is treating every DPF warning the same. They aren't the same, and the dash is trying to tell you that.

Why this matters for VW owners

A modern diesel VW is happiest when it gets a regular open-road stretch. If your daily routine is mostly crawling through suburbs, idling in traffic, or short cold starts, the car may never get the chance to complete regeneration properly.

That's why it helps to understand the system, not just the symbol. If you want a plain-language explainer on the hardware itself, a diesel particle filter overview makes the jargon easier to follow before you start chasing faults that may not even be there.

How to Safely Clear the DPF Warning Light Yourself

If the light is steady, the first move is usually a proper regeneration drive. This is not a quick lap around the block. It's a deliberate run to give the exhaust enough heat and time to burn the soot off.

A silver Volkswagen Passat station wagon driving along a scenic coastal road during a sunny day.

Volkswagen's own guidance is specific. The driver must operate the vehicle above 60 km/h under a higher engine load of 2,500 to 3,000 RPM for approximately 25 to 30 minutes, and regeneration won't activate if the fuel tank is less than one-quarter full. Those details matter because guesswork often fails where a disciplined run succeeds.

The right way to do the regeneration run

Use an open road where you can drive legally and steadily. This job doesn't suit dense city traffic, a school-zone crawl, or a quick errand.

  1. Check fuel first. If the tank is under a quarter, fill up before you try. The car may refuse to start regeneration otherwise.
  2. Pick the right road. You want a sustained stretch, not a route broken by traffic lights and roundabouts every few hundred metres.
  3. Hold the revs where they need to be. Keep the engine in that 2,500 to 3,000 RPM band rather than lugging along in a tall gear.
  4. Give it enough time. Stay at it for 25 to 30 minutes. Cutting the run short can leave the job unfinished.

What works and what usually doesn't

A lot of owners lose time by doing the almost-right version.

  • Works well: A clean highway or regional road run where speed and engine load stay consistent.
  • Usually fails: City driving that occasionally touches the right speed but never holds it long enough.
  • Also fails: Turning around halfway through because the light hasn't disappeared yet.

Here's a useful visual rundown before you try it:

Workshop reality: If the light clears after a proper run, great. If it comes straight back, don't keep repeating the same trick forever. At that point you're no longer testing the simple fix. You're delaying diagnosis.

When Your DPF Light Is Flashing or Just Wont Go Away

A flashing DPF warning light is a different conversation. Auto Expert Australia notes that a flashing orange DPF light means the filter is over-capacity and needs immediate attention, often because of upstream faults such as injector issues, EGR failures, or excessive ash accumulation from long use. You can read that directly in their explanation of DPF warning light faults.

A chart explaining DPF warning light signals and the required professional actions to take.

If you've already done the proper road run and the light stays on, treat that as a sign the car needs more than enthusiasm. It may need a scan, a forced regeneration in the workshop, or repair of the fault that caused the DPF problem in the first place.

What a mechanic should check before talking replacement

A good technician won't jump straight to “new filter.” They'll look at the reason the filter can't clear.

  • Driving pattern: Lots of short trips and idling can stop normal regeneration from finishing.
  • Upstream engine faults: Injectors, EGR problems, or air leaks can increase soot production.
  • Oil level issues: Some vehicles can also flag DPF trouble when the oil level is too high.
  • Sensor trouble: The pressure sensor and its wiring can send the whole system astray if they're not reading properly.

That last point matters more than many guides admit.

The overlooked Australian angle

In coastal parts of Australia, sensor connections can suffer from corrosion and terminal oxidation. That means some cars show repeat DPF lights not because the filter is hopelessly blocked, but because the sensor side of the system is giving poor information.

That's why I'd always want a mechanic to inspect the pressure sensor circuit and connector condition before signing off on a major parts bill. A simple connection issue can send owners chasing an expensive answer to the wrong question.

If the warning is flashing, or if a steady light survives a proper regeneration run, the smartest money is spent on diagnosis first and replacement talk second.

Looking After Your VWs DPF and Your Wallet

Prevention is cheaper, simpler, and far less annoying than dealing with a blocked DPF after the car has had enough. The broad pattern is familiar across brands. Diesel vehicles that miss out on regular open-road running tend to build soot more quickly, while those that get a decent stretch cope much better.

For a lot of owners, the practical answer is to build one proper drive into the routine. Not a heroic blast. Just a regular, sensible road run that lets the car get fully warm and stay there.

Habits that help

  • Give it open-road time: Short urban trips are hard on a diesel DPF. A regular longer drive gives the system a better chance to look after itself.
  • Use the correct oil: The wrong oil can leave ash the DPF can't burn away. Always stick to the specification the vehicle calls for.
  • Act on warning signs early: A workshop regeneration or inspection is usually kinder to the budget than waiting until the car is sulking in reduced-power mode.

Some Australian vehicles add another wrinkle. A flashing DPF light can indicate oil dilution exceeding 10%, which means the oil needs replacing straight away rather than trying another regeneration drive, as discussed in this Australian video on DPF light and oil dilution.

The expensive mistake to avoid

Owners often assume every DPF light means “take it for a flog and she'll be right.” Sometimes that works. Sometimes it absolutely doesn't. If the issue is oil dilution, a faulty sensor, or another supporting fault, driving harder won't fix the root cause.

That's where sensible maintenance pays off. If you're already tracking service items and sourcing bits for the car, it helps to stay organised with dependable VW parts options in Australia. Keeping the right consumables and service habits in mind is far cheaper than turning neglect into a major repair.

Back to Simpler Times A True VW Legacy

There's comfort in knowing this modern nuisance still responds to the same old-fashioned approach VW owners have always valued. Listen to the vehicle. Don't panic. Do the simple checks first. Then get the right expert involved if the simple path doesn't work.

That may sound a long way from air-cooled motoring, but the spirit is familiar. Australians have been living with Volkswagens for generations, and our connection runs deep. Volkswagen Australia assembled Knocked Down Beetle kits at Clayton, Victoria from 1954 until 1976, creating a distinctly local chapter in the marque's story, as noted in this reference to Clayton Beetle assembly.

The old Beetles and Kombis were simpler. No argument there. But the reason people still love the badge is bigger than carbies versus computers. It's the shape, the memories, the road trips, the club chats, the thumbs-up from strangers, and the feeling that every VW has a bit of personality. Sort the DPF properly, keep the modern daily driver happy, and you can get back to enjoying the broader Volkswagen story without the panic.


If you'd like to celebrate that VW heritage once the dashboard drama is sorted, have a look at Volkswagen Memorabilia. It's a local Australian shop with licensed Volkswagen-themed gifts, diecast models, Kombi and Beetle pieces, local stock, and fast shipping that suits collectors, gift buyers, and anyone who still smiles at the sight of a classic Vee-Dub.

Liqui Moly Injection Cleaner: A VW Guide for Aussies

You know the feeling. The Beetle fires up, the Kombi settles into its familiar note, and for the first few minutes everything seems fine. Then you pull away from the servo, give it a bit of throttle, and the old dub just feels a touch flat. Not broken. Not dramatic. Just not as crisp, eager, or smooth as it used to be.

That's often where Liqui Moly Injection Cleaner earns its keep. It's one of those simple maintenance jobs that can help a petrol VW feel cleaner in the way it runs, especially if the engine has spent a lot of time on short trips, club runs with plenty of stop-start, or weeks sitting between weekend outings.

That Feeling When Your Dub Starts to Lag

A lot of VW owners notice the change before they can name it. The idle isn't terrible, but it's a bit fussier. Throttle response feels woolly. Starting takes that fraction longer on a cool morning. Your classic still gets smiles at the lights, but behind the wheel you know it's not quite on song.

That matters with Volkswagens because they're more than transport. The Volkswagen Beetle was produced for 65 years globally from 1938 to 2003, growing from its 1930s German origins into a symbol of freedom and counter-culture that's recognised around the world, as noted in this history of the Volkswagen Beetle. When you own one, or even a later VW that carries the same spirit, you don't ignore those little signs.

The sort of symptoms owners notice first

  • Lazy pickup: It doesn't leap off the mark the way it did a few months ago.
  • Uneven idle: Not a full miss, just a slight shudder or wobble.
  • Reluctant cold starts: It catches, but not with the usual confidence.
  • A less happy engine note: Seasoned VW ears pick this up fast.

I've always looked at fuel system cleaning as a bit like clearing dust out of a treasured shed radio. It may still work, but once it's cleaned properly, the whole thing comes back to life with less fuss.

A good VW tells you how it's feeling. You just need to listen before the small roughness turns into a bigger drama.

For many petrol Volkswagens, especially those used as weekend cars or daily drivers in mixed conditions, Liqui Moly Injection Cleaner for VW owners is a sensible first step before chasing more involved fixes. It's not magic in a bottle. But used for the right engine and for the right problem, it can be a tidy, low-effort way to bring back some of that smooth, willing feel that makes a dub such a pleasure to drive.

Why Your VW's Engine Deserves a Regular Cleanse

Deposits build slowly. That's why so many owners miss them. You don't wake up one morning to a completely different engine. Instead, the fuel system gathers tiny bits of grime over time, and the car loses that clean, easy-running character in small steps.

With a petrol VW, that matters because the engine rewards precision. Clean delivery helps the motor idle more steadily, respond more cleanly, and burn fuel more tidily. If you think of the fuel system like the inside of a set of old pipes, an injection cleaner helps shift the muck before it hardens into a bigger nuisance.

Two fuel injectors, one clean and one dirty, resting on a metal container in front of an engine.

What a cleaner is really doing

It's not a substitute for proper mechanical work. If you've got split hoses, ignition issues, worn components, or stale fuel, a bottle won't fix that. What it can do is help remove deposits from the parts it's designed to treat, which often sharpens up how the engine behaves.

One practical result stands out. Users report live fuel consumption at idle dropping from 0.7 L/H to 0.6 L/H after using Liqui Moly Injection Cleaner, which points to a measurable improvement in real-world efficiency, according to this user-reported fuel consumption example.

Where it makes sense

Situation Why a cleaner can help
Weekend VW that sits a lot Fuel system deposits can build while the car sees irregular use
Daily driver in traffic Repeated short runs can leave the engine feeling less crisp
Car with mild roughness Cleaning can be a sensible first move before deeper diagnosis

Practical rule: Use a fuel cleaner for deposits. Use a workshop diagnosis for faults. They aren't the same job.

That's why I see cleaner as part of maintenance, not as a rescue mission. If you're already looking after the rest of the car, pairing fuel system care with broader engine protection products like Liqui Moly Cera Tec for smoother running can make your maintenance routine a lot more rounded.

Picking the Right Potion for Your Volkswagen

Not every VW should get the same bottle. Many owners make a mistake in this regard. The cleaner has to match the engine and the problem, otherwise you're wasting time and sometimes chasing the wrong fault altogether.

For classic Beetles, Kombis, and many petrol Volkswagens, a petrol injection cleaner is the obvious lane. For diesel models, you need a diesel-specific product. Sounds simple, but the modern VW world adds a wrinkle with direct injection engines.

A comparison guide for Liqui Moly Injection Cleaner products, showing options for petrol and diesel engine fuel systems.

Petrol, diesel, and where people get caught

Here's the straightforward version.

  • Classic petrol VW
    Beetles, Kombis, and older petrol Volkswagens are the natural fit for a petrol injection cleaner.

  • Modern diesel VW
    Use the correct diesel treatment. Don't mix categories and hope for the best.

  • Modern direct injection petrol VW
    This particular aspect requires owners to slow down and read carefully.

A 2024 Australian automotive technician survey found that 68% of direct injection vehicle owners misdiagnosed fuel system issues due to using cleaners ineffective for direct injectors, which is a strong reminder to choose the right product for the right system, as mentioned in this Australian technician survey reference.

What it can do and what it can't

If you've got a VW with FSI or TSI hardware, don't assume every injection cleaner does every job in the system. A standard tank additive may help the parts it reaches, but it won't solve every direct injector issue. That's where a lot of frustration starts. The owner expects a full cure, the symptom stays, and then everyone blames the product.

If the engine is direct injection, check exactly what the cleaner reaches before you pour it in.

That kind of careful thinking is the same mindset you want when sourcing quality components and accessories for a VW build. If you're tracking down bits for maintenance or restoration, Volkswagen parts in Australia are worth choosing with the same care you'd give to fuel additives. Right tool, right engine, right result.

A Simple Weekend Guide to Using Injection Cleaner

This is one of the easiest jobs you can do in the driveway. No special tools, no dismantling, no greasy afternoon underneath the car. Just a bit of care and a decent drive afterwards.

A person pouring Liqui Moly injection cleaner additive into a car's fuel tank filler neck.

Start with the fuel level

For Liqui Moly Petrol Injection Cleaner, product code 2786, the guidance is clear. The vehicle should have at least 30 litres of fuel before adding the 300 ml bottle, and the cleaning effect is stated to last up to 2,000 km, according to the product details for Liqui Moly Petrol Injection Cleaner 2786.

That fuel level matters because it helps the additive mix properly through the tank as you drive. Tip it into nearly empty fuel and you're not giving the product its best shot.

Pour it in cleanly

Use the whole bottle as directed for the tank volume it's intended to treat. Don't overthink it. Just make sure the filler area is clean, the cap area isn't full of grit, and you don't spill the stuff all over your paintwork.

A quick routine helps:

  • Park level: It makes pouring easier and less messy.
  • Check the label: Confirm you've got the petrol product for a petrol VW.
  • Add before a drive: Let the car circulate it properly instead of leaving it to sit for ages.

Then go for a proper run

Once it's in, the best thing you can do is drive the car. Not a tiny loop around the block. Give it a decent run so the cleaner gets the chance to move through the system under real operating conditions.

For a classic VW, that might mean a morning run along the coast or a country road stretch where the engine gets fully warm. For a modern VW, a solid mixed drive is usually better than endless stop-start suburb crawling straight after adding it.

Don't add injection cleaner and then leave the car parked all weekend. Let it work.

What to watch for afterwards

You're not looking for fireworks. You're watching for subtler improvements.

Sign after treatment What it may suggest
Smoother idle Deposits may have been affecting fuel delivery
Cleaner throttle response The engine is fuelling more evenly
Easier starting Mild fuel-system fouling may have eased

If you're doing the job on a Saturday arvo, there's every chance you'll end up browsing the Volkswagen shop collection afterwards while the kettle's on. That's part of the fun of VW life. A bit of tinkering, a bit of planning, and maybe the next road trip in the back of your mind.

Pro Tips for Long-Lasting Engine Health

The bottle gives you the basics. Real-world VW ownership in Australia adds a few wrinkles. Heat, short trips, traffic, long storage periods, and the way many enthusiast cars get used all change how long any cleaner's effect really feels.

One local factor matters more than most. Data from the Australian Automobile Association shows that 62% of Australian drivers operate in urban stop-start conditions, which can reduce the effective lifespan of fuel cleaners to under 1,200 km, rather than the longer interval claimed under more ideal driving, as noted in this AAA fuel system maintenance reference.

A Liqui Moly injection cleaner bottle stands on a wooden table with automotive repair tools and motor oil.

Match the cleaner to your driving

If your VW spends most of its life in traffic, school runs, quick coffee dashes, and short errands, don't assume the longest advertised duration will match your reality. Urban use is harder on the whole routine.

If your car gets long highway runs and regular exercise, the cleaner has a better chance to do its job under steadier conditions. That's why two owners can use the same product and come away with different impressions.

Habits that help

  • Add it before a decent drive: A cleaner works better when the engine gets fully warm and stays there.
  • Don't use it to avoid diagnosis: If there's a real fault, sort the fault.
  • Keep the rest of servicing current: Spark, timing, filters, and fuel quality still matter.

If you don't notice much

That doesn't always mean the product failed. It may mean deposits weren't the main issue. Vacuum leaks, tired ignition parts, stale fuel, old hoses, or carburettor and tuning problems can all mimic fuel system roughness in a classic VW.

For gift hunters who love the VW scene as much as the workshop side of it, VW-themed gifts for men can be a top shout when you want something with a bit of personality and heritage attached.

Your Top Questions Answered

Is Liqui Moly Injection Cleaner safe for an older VW?

Generally, for a petrol VW using the correct petrol product, it's intended for fuel system cleaning through the tank. The bigger issue with older cars is often the condition of hoses, seals, and the rest of the system. If those parts are tired, address them as part of normal maintenance.

Can I use it if my VW only gets weekend drives?

Yes, that's often when it makes the most sense. Cars that sit between outings can benefit from a cleaner, provided you follow it with a proper drive rather than letting the car continue to sit.

Will it fix rough running in every case?

No. If deposits are the cause, it may help. If the problem is ignition, vacuum leaks, poor tuning, or a mechanical fault, you'll need to fix that directly.

Is it suitable for direct injection VWs?

Be careful here. Some owners assume one cleaner handles every direct injection issue. It doesn't. Check exactly what the product is designed to clean on your engine type.

Can I combine it with other additives?

You can, but don't turn your fuel tank into a chemistry set. Add one product with a clear purpose, then judge the result properly.

What's the sensible mindset with this stuff?

Treat it like maintenance, not a miracle cure. For many VWs, that's exactly where it shines.


If you love the whole Volkswagen world, from keeping actual vehicles running sweetly to celebrating the shape and story on your shelf, have a look through Volkswagen Memorabilia. It's a ripper spot for VW memorabilia collectibles, Volkswagen diecast models for sale, and gift ideas with genuine VW charm, with local Australian stock and fast shipping that makes buying easier. Whether you're after a VW Kombi diecast Australia collectors will proudly display, a Volkswagen Beetle model for the study, or you're ready to buy diecast Kombi pieces that capture the spirit of the marque, the shop is packed with licensed favourites for enthusiasts who want a bit of VW magic at home.

A Camping Chair with Side Table for Your VW Adventures

You're parked on the grass at a sunny VW show, kettle just boiled, and someone three cars down has fired up a conversation about split screens, semaphores, and whether any modern van will ever have the soul of a proper Kombi. You reach into the back of the bus, pull out your chair, flip out the side table, and suddenly your whole patch feels sorted. Mug on one side. Sunnies on the other. Keys off your pocket. You settle in and the day starts properly.

That little ritual is why a camping chair with side table has become such a good fit for the Aussie VW crowd. It isn't only camping gear. It's part of the setup. It belongs beside a Beetle at a coastal lookout, outside a Kombi at Volksfest, or next to the esky while the kids chase each other between rows of chrome and two-tone paint.

A lot of people are leaning into that kind of outdoor comfort now. The global camping chair market was valued at USD 128.16 million in 2024 and is projected to surge to USD 210.53 million by 2032, driven by growing outdoor activity and demand for multi-functional furniture in places including Australia, according to Data Bridge Market Research on the camping chair market. That feels about right when you look around any beach car park or show field. We're all trying to travel lighter, relax better, and make a small space feel like home.

More Than Just a Seat Your Home on the Road

Last summer at a coastal meet-up, a bloke in a tidy cream Beetle rolled up with the kind of setup that makes you nod in respect. No fuss. No giant gazebo. Just a classic picnic rug, a striped cooler, and a sturdy chair with a fold-out side table parked neatly beside the car. By the time everyone else was balancing coffee cups on bumpers and searching the grass for dropped phones, he was already settled, chatting away like he'd been there for hours.

That's the charm of this sort of chair. It creates a little home base straight away. You're not just sitting. You're claiming a comfortable corner of the day, whether you're beside the show ’n' shine line or pulled up near the dunes with the back doors of the Kombi open.

A vintage green and white Volkswagen camper van parked at a campsite during a beautiful golden sunset.

A small comfort that changes the whole stop

Classic VW owners already understand compact living. Beetles teach you to pack cleverly. Kombis teach you to make every bit of space count. A chair with its own table fits right into that mindset. It gives you a perch, a place for a drink, and a handy landing zone for the bits and pieces that usually end up in the sand or under the seat.

If you love the road-trip side of the hobby, there's a familiar rhythm to it. Pull over. Open the hatch. Set the chair. Put the cuppa down. Watch people wander over to yarn about their first Bug, their uncle's Bay Window, or the dream Samba they still hope to own one day.

Practical rule: The best camp gear for VW travel earns its space twice. Once for comfort, and once for convenience.

That's why this style of chair suits the scene so well. It feels organised without being flashy. It's useful at a campsite, but just as handy at a club run, swap meet, or beach picnic after a Sunday drive. If you enjoy road stories and old buses, there's a similar spirit in this look at van life in Australia and the open-road adventure.

Where the chair fits in the VW lifestyle

A good camping chair with side table works especially well for:

  • Car shows and Nationals days where you'll be parked for hours and want a proper spot to sit
  • Beach stops with a Kombi when you need somewhere to keep your drink and phone out of the sand
  • Scenic roadside breaks where a quick fold-out setup beats sitting on the grass
  • Backyard barbies when you want that same relaxed VW-and-coast mood at home

Why a Side Table Makes All the Difference

A standard folding chair is fine until you start noticing the little annoyances. Your coffee ends up on the ground. Your phone slips between the chair legs. Your keys jab your thigh because there's nowhere else to put them. Then the wind picks up and your snack napkin heads for New Zealand.

That's where the side table earns its keep. It handles all the tiny jobs that make a stop feel easy instead of messy.

An infographic detailing the pros and cons of using outdoor chairs with integrated side tables for relaxation.

The upgrade you notice all day

The attraction isn't hard to understand. Portable chairs and stools hold a 47.90% share of the global camping furniture market, and dedicated tables account for 14.8%, according to Future Market Insights on camping furniture. Put those two needs together and the appeal of an integrated table becomes obvious. People want a seat, and they want a surface.

At a VW event, that surface does more than hold a drink. It keeps your camera ready for photos. It gives your sunglasses a safe landing spot. If you collect models, it's even a tidy little platform for a quick snap of your favourite Volkswagen Beetle model or Kombi diecast against a car in the background.

Where it beats an ordinary chair

Some advantages are simple, but they matter:

  • Drink security so your mug or can isn't wobbling on uneven grass
  • Cleaner gear because your phone, wallet, and keys stay off dusty ground
  • Easy reach when you're in and out of the chair all afternoon
  • Tidier photos if you're styling a little display around your car

Keep the chair beside the vehicle, not behind it. You'll spend less time twisting around for your gear and more time enjoying the day.

There's also a quirky side to these tables that plenty of campers recognise. Some chairs include a circular holder meant for stemware, yet people often use these little cut-outs for odd bits and bobs instead. In real life, owners adapt gear to suit the trip. That's the sort of practical thinking VW people have always been good at.

A side table suits the way VW people gather

VW meets are social. You're rarely sitting alone for long. Someone asks about your wheels. Someone else wants to know the paint code. Another person notices the old dealer sticker on the rear window and suddenly you're twenty minutes deep into a story. A side table lets you stay in that conversation without juggling your belongings like a circus act.

That's why this feature stops feeling like an extra and starts feeling necessary.

Choosing Your Perfect Road Trip Companion

Not every chair suits every VW outing. The one that works beautifully beside a Splitty at a full-day show might be a pain to squeeze into a Beetle boot with tools, picnic gear, and a jacket stuffed around it. Choosing well comes down to a few practical details.

Start with the frame

Frame material shapes the whole experience. Steel usually feels more planted and confidence-inspiring, especially in a director-style chair. Aluminium tends to be lighter and easier to carry, which matters if you're loading up a smaller car or walking from the car park to the beach.

If you favour comfort and support over featherweight packing, a stronger frame can make sense. The KingCamp ASH C30 has a 200 kg weight limit, with a heavy-duty powder-coated steel frame and reinforced cross-bracing, which shows what sturdier engineering looks like in practice, as outlined on the KingCamp ASH C30 product listing.

What weight capacity really means

It is easy to glance at a weight rating and move on. It's worth pausing there. A higher capacity often points to more than just who can sit in it. It can also suggest how the chair handles getting in and out, leaning to reach for a drink, or shifting around over a long afternoon.

For VW touring, that matters. Sometimes you're not only carrying yourself. You've got a jacket over one arm, camera in your pocket, maybe a snack plate on the side table. A better-built chair tends to feel calmer and more stable through all that movement.

A chair that feels solid when you stand up from it is often the chair you'll keep using for years.

Don't ignore the pack-down shape

Classic Volkswagens reward compact gear. In a Kombi, you've got room, but it disappears quickly once the esky, bedding, and tools go in. In a Beetle, every oddly shaped item starts a negotiation with the boot lid.

Look for these practical signs:

  • Flat-folding design that slides beside other gear instead of fighting it
  • Reasonable carry weight if you often walk from parking areas to the event grounds
  • Firm side table that won't feel flimsy once it's loaded with the basics

If your trips usually include roadside lunches or simple camp cooking, a compact setup works especially well with an organised camping utensil set for road trips.

Table design matters too

Not all side tables are equal. Some are rigid and stable. Others are really just fabric organisers with a token cup holder. Think about how you'll use it.

If you mostly want a place for a mug, keys, and sunnies, a smaller table is enough. If you want to hold a plate, camera, notebook, or a diecast model for photos, a firmer hard surface feels much more useful.

Camping Chair Feature Comparison

Feature What to Look For Best For
Frame Powder-coated steel for strength, aluminium for easier carrying Shows, beach trips, regular use
Weight capacity A chair that feels stable when you sit, shift, and stand Long sits, larger users, gear-heavy days
Seat width Enough room to relax without perching on the edges Director-style comfort
Pack-down size Flat or compact folding shape Beetle boots, tightly packed Kombis
Side table Firm surface, sensible cup space, easy swing-out action Drinks, phones, snacks, display photos
Fabric Tough, easy-clean material that dries well Coastal trips, dusty events

From Surf Trips to Show and Shines

The best chair for a beach run isn't always the best one for a full day on the oval at Volksfest. That's where a bit of matching helps.

For the coast

If your favourite drives end at the water, go for something light enough to carry over sand and practical enough to wipe down after a salty afternoon. A lower-fuss chair works well here. You want it to set up fast, hold the essentials, and not feel precious.

The side table shines on these trips. It keeps your phone, car keys, and drink off the sand while you watch the surf roll in beside the bus.

For show days

Car shows ask more of a chair. You might be in it for hours, hopping up to admire an Oval, returning to chat, then sitting back down for lunch. A taller director-style chair usually suits this rhythm better because it's easier to get in and out of and tends to feel more supportive.

That's also the style that looks right beside classic Volkswagens. There's something about a neatly parked Beetle, polished hubcaps, and a proper camp chair that feels part of the tradition.

For home and everything between

Some chairs earn a permanent spot on the deck after a trip. That's not a bad sign. It means you picked something versatile enough to carry the same easy-going spirit from the road to home.

A camping chair with side table suits plenty of VW-centred moments:

  • Surf checks at dawn beside the Kombi
  • Swap meets and club runs where you want a dependable perch
  • Backyard display days with mates and model cars on show
  • Christmas and birthday gatherings when extra seating suddenly matters

It becomes less of a camping item and more of a familiar part of the lifestyle.

Styling Your Setup The VW and Coastal Way

A good setup has a bit of rhythm to it. The chair isn't trying to outshine the vehicle. It's there to complement it, the same way a striped beach towel suits a pastel Kombi or a faded canvas bag looks right beside an old Beetle.

A rustic wooden folding chair and a small side table placed on a sandy beach at sunset.

Build around the car's colour and character

A Sea Blue bus, a cream Beetle, or a brighter retro finish each asks for something slightly different. Neutral chairs let the car do the talking. Soft blues, greens, and sandy tones lean beautifully into the coastal look many VW owners love.

The nicest setups usually keep things simple:

  • Match one accent colour from the car, not all of them
  • Use natural textures like canvas, timber-look accessories, or woven rugs
  • Keep the table uncluttered with only a mug, book, camera, or one display piece

A side table can also become a tiny stage. Put a small diecast there, line it up with the car in the background, and you've got one of the best photo opportunities of the day.

Why the old VW shapes still work so well

That connection runs deeper than style. The 1962 Volkswagen T1 Samba Kombi Bus was Volkswagen's second car model, evolving from the original Type 1 Beetle, a lineage noted in this video on the 1962 Volkswagen T1 Samba Kombi Bus. That shared design heritage is a big reason both full-size classics and their model versions feel so instantly recognisable.

If you collect, that history adds another layer to the scene. A split-screen Samba diecast on the side table beside a real Type 2 doesn't feel random. It feels like the story folding back on itself.

For a closer look at that kind of model presence, this clip captures the visual appeal nicely.

A full setup that feels lived in

One of the best-looking arrangements I've seen was beside a two-tone Kombi at a beachside meet. The owner had a simple navy chair with side table, a cream throw for the late arvo breeze, and a small VW model placed on the table while he chatted with passers-by. Nothing expensive-looking. Nothing overdone. Just thoughtful.

The best VW setups don't look staged. They look ready for another story.

That's the sweet spot. Your chair should feel like it belongs with the car, the coast, and the memories attached to both.

Care Maintenance and Perfect Gift Ideas

A chair that travels with you deserves a little care, especially after a beach run. Salt, sand, and damp fabric can shorten the life of even a decent frame if you chuck it straight back in the car and forget about it.

Keep it ready for the next trip

A quick routine helps:

  • Brush off sand early before it grinds into hinges and fabric
  • Wipe the frame down after coastal use, especially if it's been near salt spray
  • Dry it fully before folding it away for more than a day or two
  • Store it somewhere sheltered so the fabric and moving parts stay in better nick

If the side table swings or folds, check that area now and then. A bit of grit there can make a good chair feel old before its time.

Why it makes such a good gift

For a VW enthusiast, this sort of chair lands in a sweet spot. It's useful, a little nostalgic, and easy to picture in real life. It suits the person who goes to shows, the Kombi owner who loves the beach, and the collector who enjoys creating a full retro setup around their cars and models.

If you're buying for someone like that, it also pairs beautifully with model cars, coastal décor, or retro motoring gifts. A thoughtful place to start is this guide to unique gifts for car lovers with VW gift ideas.

Quick FAQs

Is a camping chair with side table better for car shows than a standard folding chair

Usually, yes. The side table gives you a dedicated place for a drink, phone, keys, and small items, which makes long show days much easier.

Is a heavy-duty chair worth it for occasional use

It can be, especially if you value comfort, easier standing, and a sturdier feel over the lightest possible pack weight.

Can a chair like this work for a Beetle as well as a Kombi

Yes, but pack-down shape matters more in a Beetle. Look for a flatter folding design that won't fight for boot space.


If your idea of a great day includes classic Volkswagens, coastal air, and a few well-chosen pieces that bring the whole scene together, have a look through Volkswagen Memorabilia. It's a local Australian shop with VW-themed gifts, licensed diecast models, Kombi and Beetle favourites, plus coastal-inspired décor that fits beautifully with the laid-back road-trip look. For collectors and gift buyers alike, local stock and fast shipping make it easier to find something special without the long wait.

Diecast Models Australia: A Collector’s VW Guide

A few summers ago, I watched a sun-faded Kombi roll into a beachside car meet with salt on the paint and boards on the roof. Half the crowd smiled before the engine even stopped, because in Australia a VW like that doesn't just arrive, it brings a whole bundle of memories with it.

The Magic of Holding a Memory in Your Hands

There's something wonderfully familiar about a classic Volkswagen on an Australian road. A Beetle buzzing along a coastal strip. A Kombi parked near the dunes with sandy thongs by the door. For a lot of us, these aren't just old vehicles. They're little pieces of freedom, family holidays, surf culture, first cars, and stories told over a folding chair at a car show.

That's why diecast collecting grabs people so quickly. A good model doesn't feel like a random shelf item. It feels like a memory you can hold. For VW fans, that feeling runs deep because the Kombi and Beetle have such a strong place in local culture.

The Kombi's story started long before it became an Aussie icon. The iconic Volkswagen Kombi (Type 2) originated in 1949 when Dutch businessman Ben Pon sketched the first prototype after observing VW utility vans, leading to its official debut in 1950 and its eventual status as an Australian cult classic, as noted by Volkswagen Australia's Kombi history.

A miniature light blue Volkswagen T1 bus model parked on a cliff overlooking a sandy beach.

Why VW models feel different

Some marques inspire admiration. Volkswagens often inspire affection. That's a different thing entirely.

A diecast Samba Bus with tiny windows and bright paint can remind one collector of a real van they restored years ago. A simple Volkswagen Beetle model can remind another of a parent learning to drive. Even gift buyers who've never collected before often pick a Kombi because it instantly says summer, adventure, and easy-going style.

A well-made model car can do what a photograph sometimes can't. It gives memory weight, shape, and presence.

Why this hobby keeps growing in Australia

The local appetite for collecting is getting stronger. The Australia Diecast Model Car Market is projected to reach sales revenue of $245.6 Million by 2030, growing at a 5.2% CAGR between 2026 and 2030, reflecting strong collector demand and cultural interest, according to Cognitive Market Research's diecast model car market report.

For anyone exploring diecast models in Australia, that growth tells you something important. You're not wandering into a tiny niche. You're joining a lively hobby with plenty of fellow enthusiasts, from seasoned Volkswagen restorers to people looking for the right VW memorabilia collectibles for a birthday, Father's Day, or a home office shelf.

Your Guide to Diecast Scales and Brands

If you're new to collecting, scale is usually the first thing that causes confusion. The numbers look technical, but the idea is simple. A 1:18 model means the car is eighteen times smaller than its full-size counterpart. A 1:24 is smaller still. The second number gets bigger as the model gets smaller.

Consider photo prints as an analogy. A larger print shows more detail and has more presence on the wall. A larger-scale diecast does much the same on a shelf.

An infographic guide explaining diecast model scales and popular collector brands for hobbyists in Australia.

Why 1:18 gets so much attention

In local collecting circles, 1:18 is the most popular diecast model size among Australian collectors, driven by stronger demand and higher market activity that sustains meaningful price appreciation and trading volume, according to this Australian diecast valuation post.

That popularity makes sense when you've held one. A good 1:18 Kombi or Beetle has room for the little details collectors love, such as interior trim, badges, wheel design, and opening parts. It feels substantial without becoming awkward to display.

A quick scale comparison

Scale What it feels like Best for
1:18 Bigger presence, stronger detail Feature pieces, gifting, close-up display
1:24 A handy middle ground Home shelves, desk displays, relaxed collecting
1:43 Compact and easy to line up Wider collections in smaller spaces
1:64 Tiny and playful Casual collecting, sets, pocket-money fun

What to look for in a brand

Brand matters, but not only because of the logo on the box. It matters because different makers chase different goals.

  • Licensed accuracy: If you want a proper Volkswagen Beetle model, start with officially licensed products. They're more likely to get proportions, badging, and trim right.
  • Material quality: Better diecast pieces often use zinc alloy construction and feel solid in the hand.
  • Functional detail: Opening doors, tidy hinges, removable parts, and clean paint lines usually separate a collectible from a simple toy.
  • Model focus: Some brands lean into realism, while others favour affordability or playful design.

For VW fans, this becomes especially obvious with a VW Kombi diecast Australia search. One model may be charming but basic. Another may show off split-screen details, a more convincing cabin, and neater exterior finishing.

A beginner rule that saves regret

Practical rule: Buy the scale that suits your display space first, then compare brands within that size.

That approach stops a common mistake. New collectors often buy by impulse, then realise the model doesn't fit their cabinet, desk, or room style. If you want a more detailed primer on the basics, this guide on what a diecast model car is gives a straightforward overview before you start comparing specific Volkswagens.

Where to Find Your Next VW Diecast Model in Australia

Buying diecast in Australia is half practicality, half treasure hunt. Some collectors love the chase of finding a hidden gem in person. Others would rather compare options online with a cup of tea and a clear return policy.

Both approaches work. The trick is knowing what each one does well.

Screenshot from https://vwmemorabilia.com.au/shop/

The joy of buying in person

Physical hobby shops, swap meets, and VW events can be brilliant places to buy. You get the box in your hands, you can check the paint, and sometimes you'll find older pieces that never appear in a standard online catalogue.

Events like Volksfest or VW Nationals can be especially fun because you're already surrounded by people who understand why a particular Kombi roofline or Beetle wheel style matters. The atmosphere helps. A model bought at a great show often carries the memory of that day with it.

Still, there are trade-offs.

  • Selection varies: A local stall may have one lovely Samba Bus and nothing else in your preferred scale.
  • Condition can be mixed: Sun-faded boxes, missing mirrors, or vague model history can turn a bargain into a gamble.
  • Prices are harder to compare: At an event, you often decide on the spot.

What online shopping does better

Online stores make comparison much easier. You can check body styles, colours, scale, and stock without driving across town. That matters as the local hobby expands. As noted earlier, Australia's diecast market is on a clear growth path, and that usually means more buyers trying to source the same sought-after pieces.

For people searching Volkswagen diecast models for sale, online buying also helps with one very practical issue. You can slow down and inspect listing photos. That gives you a better shot at spotting whether the model is licensed, whether the detailing is crisp, and whether the seller understands what they're offering.

Why buying from an Australian importer helps

Local stock becomes especially valuable. An Australian importer can remove a lot of the friction that comes with overseas ordering.

Buying route Main advantage Main caution
Car shows and swap meets You can inspect the item in person Limited choice and variable condition
General marketplaces Wide range of sellers Authenticity and consistency can be patchy
Australian specialist stores Local stock and simpler shipping Range depends on the shop's focus
Overseas sellers Access to unusual releases Slower delivery and more uncertainty

If you're trying to buy diecast Kombi models without the usual hassles, local stock means fewer surprises. Shipping is generally faster, support is easier to reach, and you're not left guessing about customs issues or waiting weeks to learn whether the item matches the photos.

One option is the 1962 Volkswagen Kombi Flower Power classic bus with surfboard, which shows the kind of beachy, nostalgic styling many Australian collectors and gift buyers look for. It sits nicely at the meeting point between classic VW heritage and the relaxed surf aesthetic that makes Kombi memorabilia so appealing here.

Choosing the right place to buy

A simple way to decide is to match the purchase to your goal.

  • For a gift: A local specialist website is often the easiest path because sizing, style, and condition are clearer.
  • For a serious collector piece: In-person inspection or detailed specialist listings usually beat casual marketplace browsing.
  • For a fun shelf model: You've got more flexibility, so colour and character might matter as much as rarity.

Spotting a Gem How to Check for Quality and Authenticity

Not every diecast Volkswagen deserves shelf space. Some are cheerful little toys, and there's nothing wrong with that. But if you're collecting rather than buying a novelty, quality and authenticity matter a great deal more than a cheap price tag.

That's particularly important in Australia because authentication is a pressing need for enthusiasts as global data shows Asia Pacific is the fastest-growing region for automotive diecast, yet local resources often lack guides to distinguish premium brands from budget or counterfeit models, according to Research and Markets' model vehicle coverage.

Start with the licence

The first question is simple. Is it officially licensed by Volkswagen?

Licensed products are more likely to show the right body shape, model naming, badges, and trim. On a Kombi or Samba Bus, those details make a huge difference. If the front end looks slightly off or the proportions feel clumsy, collectors notice immediately.

Learn the signs of a better model

You don't need to be an expert restorer to tell the difference between a proper collectible and a forgettable knock-off. A careful look usually tells the story.

  • Check the casting: Better models tend to feel solid and balanced, not tinny or flimsy.
  • Inspect paint lines: Look where colours meet around windows, doors, and trim.
  • Study the windows and lights: Cloudy plastic, poor fit, or obvious glue marks usually suggest lower quality.
  • Look inside: Seats, dash detail, steering wheel shape, and interior colour all help separate premium work from generic moulding.
  • Examine moving parts: Opening doors or panels should align neatly and close properly.

If the wheels sit oddly, the logos look vague, and the interior is little more than a plastic blob, it's probably not the collectible you hoped for.

Online photos can tell you plenty

When you can't inspect a model in person, use the listing images like a checklist. Zoom in on front badges, panel gaps, and wheel detail. Check whether the seller shows the box, the underside, and close-ups of the cabin.

A seller who only shows one distant photo often leaves too many questions unanswered. A better listing usually includes multiple angles and clear product naming. That won't guarantee quality, but it gives you more to work with.

A simple authenticity checklist

Before you buy, ask yourself:

  1. Does the model name match the body style?
  2. Is Volkswagen branding presented clearly and consistently?
  3. Do the proportions look true to the original vehicle?
  4. Are there clear close-up photos of key details?
  5. Is the finish clean enough for a collector display?

For popular VW subjects, especially Beetles and Kombis, the safest mindset is this. Buy fewer pieces, but buy better ones. A shelf with three licensed, well-finished models usually brings more long-term pleasure than a crowded row of compromises.

Caring for Your Collection Display and Storage Ideas

Once you've found a model you love, the next job is keeping it looking the part. Dust, direct sun, rough handling, and damp storage can take the sparkle out of even a lovely little VW.

A few simple habits make a big difference.

A person cleaning a high-quality diecast sports car model displayed inside a glass cabinet collection.

Everyday care that protects the finish

The easiest mistake is placing a model in a sunny spot because it looks great there at first. Bright light can dull colours over time, and dust settles quickly on roofs, mirrors, and window edges.

For most collectors, a better routine looks like this:

  • Keep it out of harsh sun: Indirect light is much kinder to paint and decals.
  • Dust gently: Use a soft brush or microfibre cloth rather than anything abrasive.
  • Handle by the base when possible: Mirrors, roof racks, and doors are often the first parts to suffer.
  • Store the box if you have room: Original packaging can be helpful for protection and resale.

Display ideas with a bit of personality

VW models suit more than one style of display. A polished cabinet works beautifully, but so does a relaxed, themed shelf that reflects the life those vehicles represent.

Display style Works well with Overall feel
Coastal shelf Kombis, surf-themed buses, pale timber Easy-going and beachy
Retro garage nook Beetles, signs, workshop-style décor Mechanical and nostalgic
Glass cabinet Licensed collector pieces Clean and organised
Desk display One standout bus or Beetle Personal and conversational

A coastal arrangement is especially fun with VWs. A Flower Power bus, a surfboard accessory, a bit of white décor, and a touch of beach texture can turn a simple shelf into a scene.

For collectors who want a tidier setup, these display cases for models are a practical way to cut down on dust while letting the details stay visible.

Cleaning technique matters

Collector habit: Clean less often, but clean carefully.

Frequent rough wiping causes more harm than patient, gentle dusting. If your model has opening doors or removable parts, move slowly and support the body while you inspect or clean it.

This video gives a handy visual sense of careful model handling and display care:

When storage becomes important

If your collection rotates with the seasons, use a dry cupboard and avoid stacking loose models together. Soft wrapping and stable shelves are far safer than tossing several pieces into one box. It's a simple step, but it helps preserve mirrors, paint, and presentation.

Joining the Aussie VW and Diecast Community

Collecting gets even better once you stop doing it alone. A shelf of Volkswagens at home is lovely, but the hobby really comes alive when you talk to people who know why a split-screen bus sparks debate, or why one Beetle colour instantly reminds them of childhood holidays.

Volkswagen has had a long runway in this country. Volkswagen sales officially began in Australia in 1953, marking the start of the brand's deep cultural presence in the country that fuels the passion for collecting today, as outlined by Shannons Club's look at the Volkswagen Beetle in Australia.

Where enthusiasts tend to gather

Some collectors find their people at major car events. Others do it from the lounge room through online groups, collector pages, and enthusiast forums. Both are worthwhile because the hobby has two sides. There's the object itself, and there's the conversation around it.

Places worth keeping an eye on include:

  • Volksfest and VW Nationals: Good for seeing real cars, meeting owners, and spotting memorabilia stalls.
  • Facebook collector groups: Handy for model identification, swap discussions, and honest opinions on new releases.
  • Classic car clubs: Often full of people who appreciate both the full-size vehicle and the miniature version.
  • Special interest communities: Kombi fans, Beetle restorers, and surf-culture collectors each bring a slightly different angle.

Why community improves your buying eye

Talking with other collectors sharpens your judgement faster than scrolling alone. You start to recognise which finishes look right, which body styles are often mislabelled, and which models people repeatedly mention with affection.

You also realise something comforting. Most collectors started exactly where you might be now, with one bus, one Beetle, or one gift purchase that unexpectedly turned into a hobby.

A few questions new collectors often ask

Is a VW model only for serious collectors

Not at all. Plenty of people buy one model because it reminds them of a car they owned, a surf trip, or a family story. That's a perfectly good reason to start.

Are Kombis more popular than Beetles

They each attract a slightly different kind of affection. Kombis often bring in surf, travel, and coastal nostalgia. Beetles tend to spark memories of everyday life, first cars, and classic design.

Should I collect one scale only

If you like a neat, unified display, sticking to one scale helps. If you're collecting for joy rather than symmetry, mixing scales is completely fine.

What makes a good gift for a VW fan

A licensed Kombi or Beetle model with a design that matches their taste usually lands well. Some people love classic factory looks. Others grin at playful surfy colourways.

The best part of diecast collecting in Australia is that it sits at the crossroads of motoring history, home display, and shared memory. It's practical enough for the detail-minded collector, and sentimental enough for the person who just wants one lovely Volkswagen on the shelf.


If you're ready to start or add to your collection, have a browse through Volkswagen Memorabilia for licensed VW-themed diecast models, Kombi and Beetle designs, and display-friendly pieces that suit Australian collectors, gift buyers, and anyone who can't resist a bit of classic Volkswagen charm.

VW Caddy Maxi Kombi for Sale: Your 2026 Buying Guide

You're probably doing what plenty of VW people do on a Sunday arvo. Coffee in hand, tabs open, searching for a VW Caddy Maxi Kombi for sale while half-dreaming about beach runs, market mornings, and that first overnight trip where everything just works. Not a full-size camper. Not a fragile classic that needs a trailer and a prayer. Just a sensible Volkswagen with enough Kombi spirit to make everyday life feel a bit more like a holiday.

That's the sweet spot the Caddy Maxi hits in Australia. It's the van for the person who grew up loving Splittys and Samba Buses, but also likes air-conditioning, easy parking, and a diesel that's built to do real work. One mate brings his polished Beetle to the show field. Another rolls up in a weathered Bay Window with surf stickers on the glass. Then someone arrives in a clean Caddy Maxi, tailgate up, camp chair out, kettle on. Different era, same tribe.

The charm of the old Volkswagen world still matters. In Australia, the first-generation Volkswagen Kombi was produced from the 1950s until 1967, and that local history helped turn the Kombi into a symbol of surf culture and road-trip freedom, as noted in this history of the Volkswagen Kombi van. That's why so many buyers aren't just shopping for transport. They're buying into a lifestyle that stretches from real vans to shelves full of licensed diecast and garage memorabilia.

The Modern Kombi Dream A Caddy Maxi Awaits

You see it at a beachside car park in Byron. A Splitty gets the cameras. A tidy Bay Window gets the nods. Then a silver Caddy Maxi rolls in with two kids in the back, boards on the roof, a camp table in the tailgate, and enough room left over for the dog. By the time the kettle is on, you understand why so many Australian buyers end up here.

The Caddy Maxi carries the part of the Kombi story that still fits real life. It suits the school run, the hardware store, the early surf check, and the long haul up the coast without asking you to become a part-time mechanic. That matters if you love old Volkswagens but want to spend your weekends driving them, not lying under them.

A lot of people hunting for a VW Caddy Maxi Kombi for sale are chasing that balance. They grew up with posters of Samba Buses, or maybe a parent had a Beetle, and now they want something with the same friendly Volkswagen character in a shape that works every day. The Maxi earns its keep here. The extra length gives bikes, prams, camping tubs, and market gear proper space, so the cabin feels settled instead of packed to the roof.

That extra room also explains why the Caddy keeps popping up in conversations about practical camper builds. A well-bought example can become a smart weekender, but Australian buyers need to keep an eye on conversion costs, engineering shortcuts, and home-built fit-outs that look neat in photos and cost a bomb to sort later. If that side of ownership is already on your mind, this guide to a VW Caddy van camper setup gives a good sense of how the platform fits into the wider VW lifestyle.

There is a strong emotional thread running through all of this. Australians still put serious value on classic Kombis. One locally delivered 1960 Volkswagen Kombi Samba Bus brought $202,000 at auction in Melbourne, as reported by Shannons Club and detailed later in this guide. The point is not that a Caddy Maxi belongs in the same collector bracket. The point is that the badge still means something here, from a concours bus to a daily driver with sandy floor mats.

That is the modern Kombi dream in a nutshell. You get the Volkswagen spirit, the upright view out, the useful boxy shape, and the freedom to throw gear in the back and go. Then, if you are the sort of VW tragic who keeps diecast models on the shelf at home, the Caddy slots neatly into that bigger story too. It is transport, yes, but it is also membership in the same old tribe.

Finding Your Dream Caddy Maxi in Australia

Start broad, then get picky. The Australian market can look simple at first glance, but Caddy listings often blur the line between commercial vans, passenger models, and camper conversions.

A white Volkswagen Caddy Maxi Kombi parked on a scenic coastal road during a beautiful golden sunset.

A realistic budget helps straight away. A 2025 Volkswagen Caddy Maxi can start from around $48,060 in Australia, and it measures 4,500 mm long with an 11.4-metre turning circle, which explains why it feels tidy around town for something so useful, according to Carexpert's Volkswagen Caddy pricing and dimensions.

Where to search beyond the obvious

Carsales and dealer stock are the first stop, but the best vans often surface through enthusiast circles before they hit the big listing sites. VW clubs, local Facebook groups, and word-of-mouth at events can be gold, especially if you're chasing a cared-for example rather than a hard-worked fleet van.

Try a mix of these:

  • Dealer-used stock: Ex-fleet or trade-in vans can be worth a look if they've been serviced properly.
  • VW owner groups: Owners often share details the ad forgot, including what the van's been used for.
  • Independent specialists: Some workshops know which vans have had thoughtful conversions and which ones have been stitched together.
  • Lifestyle-focused pages: If you're considering a light camper setup, browse inspiration like this VW Caddy van camper guide to sharpen your eye for useful layouts.

Know your Caddy language

A lot of confusion comes from badges and body styles. “Cargo” usually points to a commercial van. “Kombi” tends to mean a people-friendly setup with extra seating and windows. “Maxi” means the longer body, which is usually what buyers want if touring, family duties, or conversion plans are part of the brief.

Here's a simple way to sort your shortlist:

Model type Best suited to What to watch
Standard Caddy Daily urban use, lighter loads Less room if you plan to camp or carry bulkier gear
Caddy Maxi Touring, family use, flexible storage Make sure the extra space hasn't been wasted on a poor conversion
Cargo Trade work, gear hauling Commercial wear can be heavier than the photos suggest
Passenger or Kombi-style setup Mixed lifestyle use Check seat configuration and compliance if modified

If you want a moving look at the shape and feel of the van, this walkaround helps bring the Caddy Maxi into focus before you inspect one in person.

A buyer's filter that saves time

Don't just search by price. Search by intended life. If the van needs to carry family, camping gear, and maybe a dog, be ruthless about rear access, seat setup, and evidence of careful ownership. A shiny ad can hide a tired van. A plain ad from a fussy owner can hide a gem.

Practical rule: Buy the van that fits your weekends as well as your workdays. That's where the Caddy Maxi earns its keep.

Your Caddy Inspection Checklist Beyond the Basics

A mate in Byron bought a silver Caddy Maxi that looked perfect in the listing. Clean seats, tidy paint, cute little camp setup in the back. On inspection day, the story changed fast. The sliding door roller grated, the rear floor felt damp under the mat, and one peek underneath showed flaky surface rust starting around a poorly finished fit-out. That is the sort of van that teaches you to slow down.

A Caddy inspection checklist infographic detailing engine, exterior, interior, and test drive checks for vehicle maintenance.

The Caddy Maxi can be a brilliant Australian all-rounder. Plenty run the 2.0 TDI diesel, and it suits the longer body well if the van has been serviced properly. The catch is hidden cost. Compliance work, rust repair, and fixing rough camper conversions can run into thousands, so your inspection needs to go further than a quick walk around with the seller chatting in your ear.

Under the bonnet and underneath the van

Start with a cold engine if the seller allows it. A warm engine hides plenty. You want a clean start, steady idle, and no plume of smoke hanging around longer than it should.

Then get your knees dirty. Look under the front lip, along the sills, around jacking points, and near the rear floor. Beach air, wet camping gear, and badly sealed accessories can all leave their mark on an Australian van.

Check these areas closely:

  • Engine behaviour: Listen for rattles on startup, feel for vibration at idle, and check for warning lights that disappear a bit too conveniently.
  • Gearbox feel: A manual should engage cleanly. A DSG should shift without jerks, hesitation, or a thunk into gear.
  • Leaks and residue: Scan around the engine, gearbox, intercooler hoses, and undertray area for oil mist, fresh drips, or coolant staining.
  • Tyre wear: Feathering, inner-edge wear, or mismatched tyres can point to suspension wear, poor alignment, or a harder life than the ad suggests.
  • Suspension and underbody: Bushes, shocks, exhaust hangers, and scraped underbody sections tell you how the van has been treated.

The conversion traps that catch people out

This is the part many buyers get wrong, especially if they have one eye on road trips and another on the shelf of VW models at home. A real Caddy and a diecast one can both look spot on from three metres away. Only one can hide dodgy wiring behind a timber panel.

A “ready camper” setup needs the same scrutiny as the vehicle itself. Check seat mounts, extra batteries, inverters, USB outlets, flooring, insulation, and any cut panels around windows or vents. If the seller says, “Previous owner did that,” ask what paperwork backs it up. In Australia, the neatest-looking conversion can still sting you later if the work was never finished properly or does not line up with compliance requirements in your state.

A tidy folder of records helps here. Even a small habit like keeping notes in a Volkswagen service book themed collectible says something about how an owner thinks. You are looking for that same care in the van.

Cabin checks people rush

The inside usually gives the game away before the mechanicals do. A family Caddy with honest wear feels different from an ex-tradie van that has spent years hauling tools and getting slammed shut ten times a day.

Take your time with the cabin.

  1. Seats and rails
    Slide, fold, lift, and latch every seat. If it is a Kombi with aftermarket seating, inspect the mounting points and surrounding floor closely.

  2. Switches and electrics
    Test windows, mirrors, lights, wipers, air conditioning, infotainment, charging points, and any added camping electrics.

  3. Water ingress signs
    Lift mats, press into the rear corners, check window seals, and trust your nose. Damp carpet always has a cause.

  4. Load area condition
    Scratches are normal. Patch repairs, random bolt holes, cracked trims, and fresh carpet over rough metalwork deserve questions.

What a good test drive feels like

A sorted Caddy Maxi feels settled. It should track straight, brake evenly, and stay composed over rough patches instead of bouncing or crashing through them. On a tight turn, listen for clunks from the front end. On a clear stretch, ease off the wheel for a moment and see if it pulls.

Drive it at suburban speed first, then on a faster road if you can. A van that feels fine around the block can still reveal wind noise, transmission hesitation, or tired suspension once it stretches its legs.

And if the seller keeps talking, ask for a minute of quiet. The van has plenty to say on its own.

Making an Offer and Navigating Aussie Paperwork

Buying well isn't just about spotting a good van. It's also about finishing the deal cleanly, with no loose ends waiting for you after the handshake.

Keep the final steps boring

Boring is good here. Before money changes hands, confirm identity, registration details, and ownership status. Ask direct questions and match the answers to the documents in front of you. If the seller gets slippery about paperwork, walk away politely.

A few habits make this easier:

  • Run a PPSR check: It helps confirm there isn't money owing or a write-off history hanging over the vehicle.
  • Check the roadworthy rules in your state: A certificate matters, but it doesn't replace your own inspection.
  • Confirm registration transfer steps early: Each state handles timing and forms a bit differently.
  • Keep receipts and messages: Save everything, even if the deal feels friendly and informal.

Negotiation that fits the VW community spirit

You don't need to smash a seller to get a fair deal. Most VW people respect a buyer who's prepared, calm, and honest. If you've found faults, name them clearly. If the van has good history and presents well, recognise that too.

A respectful offer usually lands better when you can point to specifics:

What you found How to raise it
Cosmetic wear Mention it as future tidy-up cost, not a moral failing
Missing service records Ask for a sharper price because uncertainty has value
Questionable conversion work Treat it as risk, because you may need to redo it
Good history and careful ownership Say so. Sellers respond well when buyers notice effort

Buy with your head, but don't leave your manners at home. The VW scene in Australia is smaller than it looks.

If you're also daydreaming about the broader Volkswagen van world while you shop, browsing a page like Kombi for sale can remind you how wide the VW family tree really is, from practical vans to dream garage classics.

The final handover

On collection day, take your time. Get the spare key, books, receipts, wheel lock, and anything included in the sale. Pair your phone later. First, make sure the basics are in your hands.

Then drive home the long way.

The Caddy Maxi vs Its Classic VW Cousins

Saturday morning in Byron Bay, a white Caddy Maxi pulls up beside a split-window Kombi at the markets. One has child seats, surf wax in the door pocket, and a boot full of camping gear. The other has everyone crouching for photos before the owner has even switched it off. That little scene explains the whole VW family better than any brochure ever could.

A comparison infographic featuring a modern white VW Caddy Maxi alongside a classic VW camper and beetle.

The Caddy Maxi earns its place with use. It handles the school run on Monday, the Bunnings dash on Wednesday, and a run down the coast on the weekend without turning every outing into a mechanical gamble. For plenty of Australian buyers, that matters more than romance by the second month of ownership.

The classics live in a different part of the heart. They bring ritual, shape, and history. Early Type 2 production was tiny, which helps explain why collectors still chase them so hard. Heritage Parts Centre notes that in 1949, only 8 Volkswagen Type 2 vehicles were built globally for the year, made up of 6 panel vans, 1 Kombi, and 1 Microbus, according to Heritage Parts Centre's Type 2 history.

Practicality versus pure nostalgia

A Caddy Maxi suits the owner who wants one Volkswagen to do the lot. You can load bikes, friends, tools, or camping gear and still expect decent manners in traffic and on the highway. That is a big part of the modern Kombi dream in Australia. You stay in the VW world without signing up for constant tinkering.

A classic Kombi, Beetle, or Samba gives back something less practical and more personal. The steering wheel feels different. The smells are different. Even the way people smile at traffic lights is different.

That is why the decision is rarely about which one is better. It is about which chapter of VW life you are in.

A side-by-side view

VW type Best quality Trade-off
Caddy Maxi Everyday usability, comfort, flexibility Less of the old-school visual theatre
Classic Kombi Heritage, charm, club appeal More upkeep, more compromise
Beetle Simple joy, unmistakable style Not the same cargo or touring versatility
Samba Bus Collector icon status A dream garage piece for many enthusiasts, but not an easy daily choice

There is an Aussie reality here too. A classic van that looks affordable at first glance can hide expensive conversion rework, rust repair, missing trim, and engineering headaches. A Caddy Maxi usually keeps those surprises in check, while still giving you the badge, the community, and the excuse to park beside older Volkswagens at a meet and feel part of the same story.

Classic buyers and diecast collectors often chase the same thing. They want a shape they can keep close. Listings on sites like Carsales show that older models can still appear at entry-level prices, while the best examples sit in a very different bracket. That spread is part of the appeal. You can join the VW lifestyle with a usable modern van, then collect the icons in smaller form while you decide whether a full classic project belongs in your future.

A smart VW garage in Australia often starts with the Caddy you can use and grows into the classics you admire, whether they live under a carport or on a shelf.

Why diecast belongs in this story

That collector streak makes perfect sense once you have owned a Volkswagen. You notice the roofline of a Samba, the stubby stance of a Beetle, the honest shape of an early Kombi. A diecast version keeps that connection alive without the cost, storage worries, or workshop bills.

The Caddy Maxi sits neatly in that broader VW journey. It is the van that gets you to the beach, to the swap meet, and home again. The classic cousin, even if it only lives in miniature for now, keeps the older dream in view.

Celebrate Your New VW With the Collector's Spirit

Once you've found the right van, something shifts. It stops being a search and starts being ownership. You begin noticing other Volkswagens more keenly. You wave at Kombis. You park carefully. You start collecting little bits of VW life without even meaning to.

That collector's instinct has always sat beside real-world ownership. Some people restore a Beetle. Some hunt vintage brochures. Some line up licensed buses and Beetles in 1:18 and 1:24 scale on the office shelf because the shapes make them smile at the end of a long day. It's all part of the same culture.

Screenshot from https://vwmemorabilia.com.au/shop/

Small objects, big memories

A real van gives you stories. A diecast model lets you keep them in sight. That's why VW Kombi diecast Australia, Volkswagen Beetle model, buy diecast Kombi, VW memorabilia collectibles, and Volkswagen diecast models for sale all feel connected rather than separate. They serve the same affection from different angles.

If you're choosing pieces for a display, gift, or garage corner, a few categories always feel right:

  • Classic Kombi and Samba Bus diecast: Ideal if your heart still leans toward the old buses.
  • Beetle models: Perfect for rounding out a collection with another all-time Volkswagen icon.
  • Mixed display pieces: Great for a shelf that tells the whole story, from workhorse vans to surfy classics.
  • Gift-ready memorabilia: Handy when the VW fan in your life already has the tools and the T-shirts.

FAQ for buyers and collectors

Is the Caddy Maxi a good modern stand-in for the Kombi spirit

Yes. Not because it looks the same, but because it supports the same kind of life. It's useful, compact enough for real roads, and still feels like a Volkswagen with purpose.

Should I buy a converted van or build my own

That depends on the quality of the conversion. A poor conversion can create compliance and repair headaches, so careful inspection matters more than the sales pitch.

Why do diecast models appeal to real VW owners

Because they carry the same design language and history in a form you can keep close. For many enthusiasts, collecting is another way of enjoying the brand.

Are local Australian shops better for collectors

Often, yes. Local stock is simpler for gifts, easier for support, and generally a nicer experience when you want your item without a long wait.


If your new van has sparked that familiar Volkswagen feeling, have a wander through Volkswagen Memorabilia. It's a terrific place to find licensed VW pieces that suit the same lifestyle, from the main shop to Volkswagen diecast picks, Kombi-inspired collectibles, classic Samba Bus styles, and Beetle-themed gift ideas. Local Australian stock, friendly service, and fast shipping make it easy to celebrate your Caddy Maxi with a little piece of VW history for the shelf, desk, or dashboard.

Camper Van Awnings: Your Complete Guide for VW Kombis

You're probably in that familiar spot right now. The van's packed, the kettle's rattling in the cupboard, and you're staring at a stretch of Australian coast or bush thinking, “A bit of shade out the side of the Kombi would make this perfect.”

That's where camper van awnings stop being an accessory and start feeling like part of the trip itself. They turn a parking space into a little front porch. Suddenly there's somewhere to kick off sandy thongs, lean back with a cuppa, and watch the afternoon slide by while the old VW cools down beside you.

For Kombi people, that feeling runs deeper than convenience. It's tied up in why these vans still pull at us after all these years, and why the right setup matters so much when you're chasing simple, sun-drenched weekends in a classic Volkswagen.

That Instant Verandah Feeling

I still reckon one of the best sights in motoring is a Kombi pulled up by the water with an awning stretched out like a little beachside verandah. Not fancy. Not overdone. Just enough shelter for two camp chairs, an enamel table, and a pair of salt-stiff towels drying in the breeze.

That scene fits the Kombi perfectly because the Kombi has always been more than transport. The Volkswagen Kombi's story in Australia starts in 1950, and by the 1960s it had become the “hippie van”, tied to freedom, counterculture, and adventure across late 60s and 70s Australian life. That's exactly why so many of us still smile when we hear an air-cooled engine burble into a showground.

An awning carries that same spirit. It says you're not rushing off in five minutes. You're staying long enough to make lunch, trade stories, and watch people wander over for a yarn about the first Beetle or Bay Window they ever owned.

Why the awning matters so much

A classic VW cabin is full of charm, but no one's pretending it's sprawling. Once you add bags, an eski, spare parts, and the usual road trip clutter, a bit of outside shelter changes everything. The van feels bigger without losing its cosy character.

A good awning doesn't just give you shade. It gives your Kombi a front room.

That's the bit many first-time owners don't realise. The best camper van awnings don't fight the VW lifestyle. They extend it. Morning coffee happens outside. Wet gear stays outside. Mates gather outside. The van remains the heart of camp, but the awning makes it liveable in that laid-back Aussie way we all chase.

The memory-maker beside the van

At any VW meet, you'll spot it straight away. One Kombi has an awning up and people gravitate there. Kids duck in and out. Someone's fiddling with a surfboard rack. Somebody else is telling a story that starts with, “Back in ’76…”

That's why this stuff matters. Awnings aren't only about fabric and poles. They're about creating the sort of setup that makes a classic Volkswagen feel like home.

Choosing Your Perfect Shady Spot

Some awnings are made for quick roadside tea stops. Others suit a longer camp where you want proper living space. The trick is matching the awning to how you typically travel, not how you imagine you travel on your most organised day.

In Australia, the biggest names are Fiamma, Dometic, Carefree, and Aussie Traveller, and they lead the market across roll-out, box, bag, and inflatable styles built for our UV-heavy conditions and changing winds, according to RV Daily's guide to caravan and motorhome awnings.

An infographic comparing four types of camper van awnings including roll-out, bag, freestanding, and drive-away designs.

Four common styles on Aussie roads

Type Best for What it feels like in use
Roll-out awning Quick stops and simple touring Like a sturdy window blind for your van. Fast, neat, and easy to live with.
Bag awning Lightweight classic setups A softer, old-school option that suits period-style vans nicely.
Freestanding awning or tent Longer stays Gives you a separate zone for gear, chairs, or extra shelter.
Drive-away awning Campers who base themselves in one spot Lets you leave the awning standing while you take the van out.

How to choose without overthinking it

If your weekends are usually one-nighters, a roll-out makes a lot of sense. You pull in, wind it out, and you've got instant shade without turning arrival into a project.

If you like your Kombi looking period-correct, a bag awning has real charm. It doesn't feel as sleek as a cassette unit, but it suits older vans beautifully and keeps the visual style relaxed and classic.

If your trips involve staying put for a few days, cooking outside, or giving the family a bit more breathing room, freestanding and drive-away setups start looking very attractive. They create a proper camp footprint instead of just a strip of shade.

Practical rule: Buy for your most common trip, not your most ambitious holiday.

What different owners usually prefer

A simple way to think about it:

  • Solo cruiser in a Bay Window. A roll-out is often the sweet spot.
  • Couple doing beach weekends. Bag awning or roll-out, depending on whether style or speed matters more.
  • Family with a bus full of gear. Freestanding shelter gives you room to breathe.
  • Campground base-camp traveller. Drive-away design earns its keep.

One more thing matters. Fit. A brilliant awning that doesn't suit your van's rails, gutters, or body shape becomes a headache fast. That's especially true for old Splitties and Bays, where owners usually want secure mounting without turning the body into Swiss cheese.

Will It Fit My Splitty Or Bay Window

You pull into a grassy spot at Busselton, kettle still warm from the drive down, and the first thing you notice is the wind tugging at anything loose. That is usually the moment a Kombi owner stops caring about brochure words and starts asking the key question. How does this awning attach to my van without upsetting old paint, bent gutters, or a carefully kept original body?

A close-up view of a vintage white and light blue Volkswagen camper van with a Thule awning.

On a classic VW, fit is about more than width on a spec sheet. A Splitty, a Bay, and a later Transporter all carry their awnings a bit differently, and old buses often have their own little quirks after decades of repairs, restorations, and beach runs. Gutters might be deeper on one side, doors may sit slightly proud, and some vans wear fresh paint that you will not want rubbed raw by a poor clamp.

The attachment setup many VW owners end up happiest with uses a kador strip and figure of 8 channel. In plain English, the beaded kador edge slides into an awning rail or channel, then the figure of 8 piece joins that edge to the awning itself. It is a tidy system, especially for owners who want something secure but still kind to an older body.

What usually suits each VW

A Split-screen Kombi deserves a close look at the gutter before you buy anything. Early vans can vary more than people expect, particularly if they have had roof work over the years. Measure both the depth and the shape, not just the length.

A Bay Window often plays nicely with gutter-mounted setups. Plenty of Bay owners like them because they keep the van looking right and avoid turning a weekend shade solution into a permanent body modification.

A later Transporter usually gives you more straightforward mounting options thanks to rails and model-specific hardware.

A Samba or freshly restored show bus calls for the gentlest approach of the lot. Reversible fittings and paint-safe contact points are the ones worth chasing.

If you want to see what a popular side-mounted option looks like on a VW body, the Fiamma F45 awning for Volkswagen campervans is a handy reference.

The bit owners forget until camp is set

Door clearance.

I have seen lovely old buses set up with plenty of shade, only for the owner to realise the side door now catches fabric, straps, or hardware every time someone reaches for the tea tin. On a camper, that gets annoying fast. Check how the awning sits when the door is fully open, and make sure the attachment method does not turn normal van life into a shuffle.

For vans with deep gutters, a figure of 8 channel can often clip on neatly. For shallower gutters, a pole and clamp kit may give a safer, steadier hold. Either way, take a tape measure to the van itself. Do not trust memory, and do not assume every Bay or Splitty matches the next one parked beside it at the show.

A moving visual helps if you're still trying to picture how all these parts come together.

Fit first, fabric second. If the mounting does not suit your Kombi, the awning will never feel right.

Sizing It Up For Sun and Salty Air

At Inverloch one summer, a mate rolled in with a tidy Bay and a bargain awning that looked the part in the morning. By mid-arvo, the fabric had gone limp in the heat, the fittings were already showing a dusty bloom from salt air, and everyone had shuffled their chairs back under the van's skinny strip of shade. That was the day he learned what plenty of VW owners learn the hard way. Aussie sun and coastal air sort the good gear from the cheap stuff very quickly.

Awnings live a rough life here. They cop harsh UV, hot gusts off the beach, and salt that creeps into hinges, screws, and brackets while you are busy putting the billy on. Size matters, but material matters just as much.

A family of four enjoys a picnic lunch under the shade of a camper van awning on a beach.

What a good size looks like on an old VW

On a Splitty or Bay, a compact awning often feels better balanced than an oversized one that sticks out like a patio bolted to a surf shack. For quick overnight stops, enough cover for two chairs, the kettle, and a small table is usually plenty. If your weekends tend to turn into long, lazy camp sessions with kids, mates, or a camp kitchen spread out under the side door, the extra width starts to earn its keep.

The trick is matching the awning to how you camp. Solo tourers usually appreciate something lighter and easier to wrestle into place. Families parked up near the coast for three nights straight will usually forgive a bit more bulk if it buys proper shade and room to move.

If you want a feel for the proportions many owners like, these wind-out awning options for Volkswagen campervans show the sort of coverage that suits a classic VW without dwarfing it.

Sun, salt, and the bits that wear out first

Coastal camping is where weak hardware gets exposed. The first signs are usually small. A bit of staining on a bracket, a sticky hinge, a fastener that no longer looks happy. Leave it long enough and setup gets annoying, pack-down gets rougher, and the whole thing starts feeling tired before its time.

Aluminium frames generally cope better than cheaper steel parts in salty air, especially if the finish is decent. Fabric wants proper UV resistance too, because strong sun does more than make shade important. It also dries, fades, and weakens cloth over seasons of use. Dense fabric often feels steadier and more reassuring, though it can add weight and take up a bit more room in the van.

A quick buyer's comparison

Priority Better choice
Beach use Corrosion-resistant frame and UV-rated fabric
Frequent solo touring Lighter awning with easy handling
Long family stays Larger covered area for chairs, cooking, and gear
Classic VW aesthetics Proportions that suit the van and do not overpower it

One good rule has never let me down. Buy for the worst day, not the best one. A pretty awning looks lovely on the grass at a car show, but a Kombi awning in Australia earns its stripes in hard sun, sea breeze, and a campsite full of sand.

A No Fuss Guide To Getting It Up

The first setup always feels like a bit of theatre. You've got the awning out, someone's offering advice they definitely haven't tested, and the pegs are rolling under the van. Then you do it properly once and realise it's much easier than it looked.

In Australia, Achtung Camper's awning guide puts single-person setup for the basic configuration at 3–5 minutes, using a strap extension system where straps go over the roof and tension down to ground pegs. That sounds about right when the gear suits the van and you're not fighting the wind.

The simple setup flow

  1. Attach the awning properly
    Slide or secure the awning into its channel or mounting point before you tension anything. A rushed start usually causes the fiddly bits later.

  2. Pull the straps over the roof
    That strap system earns its keep. It keeps the setup controlled and manageable, even if you're on your own.

  3. Extend to the ground and peg out
    Tension matters. Too loose and the fabric sags. Too tight and you'll make adjustments harder than they need to be.

The wind-out awning options for Volkswagen campervans give you a good feel for the sort of setup many VW owners prefer when ease and speed are high on the list.

One rookie mistake worth avoiding

Don't peg where the sliding door wants to travel.

It sounds obvious until you're tired, hungry, and trying to beat the weather. Ground pegs should sit far enough away from the van that doors can open freely and nobody catches a foot on a strap every five minutes.

A tidy setup routine

  • Park with intention. Give yourself room on the awning side.
  • Face the van sensibly. Think about wind and shade before you deploy.
  • Peg wide, not messy. Clean lines are safer and easier to live with.
  • Check tension after a few minutes. Fabric can settle once it's opened up.

Once you've done it a couple of times, setting up an awning becomes part of arriving. It's as natural as popping the kettle on.

Keeping Your Awning Shipshape

Awnings cop plenty. Dusty showgrounds, salt breeze, sudden rain, and that one pack-up where you promise yourself you'll dry it later. If you want yours to last, maintenance can't be an afterthought.

The big insider trick is drainage pitch. Plenty of owners know they should lower one side in rain, but not enough realise how important the angle really is. Carefree's awning guidance points to an optimal 10–15° tilt for heavy Australian monsoon-style rain. The same source says a flat setup increases water retention by 40% in tropical climates, and 60% of technician-reported awning failures come from mould rather than wind damage.

An infographic titled Keeping Your Awning Shipshape providing six essential maintenance tips for camper van awnings.

The maintenance habits that actually matter

That drainage pitch alone can save you grief. Water pooling stretches fabric, encourages mould, and adds load where you don't want it.

Then there are the basics, which sound dull until you've had to scrub out mildew or replace worn gear.

  • Wash off salt and grime after coastal trips.
  • Dry the awning completely before packing it away.
  • Inspect stitching, clamps, and frame points before the next run.
  • Store it clean and dry so you're not opening a musty mess next time.

Wind noise and fabric fatigue

Rain isn't the only enemy. Flapping fabric wears out faster and makes a peaceful campsite sound like a loose yacht sail. Achtung Camper notes that Anti-Flap Kits are standard inclusions for Australian-made awnings such as Queensland-made examples, using curved bars and tensioning hardware to reduce flutter and protect the vinyl fabric during frequent gusts.

That's one of those accessories owners often skip until they've had one noisy, windy night and changed their tune.

A practical care checklist

After each trip Before the next trip
Rinse off salt Check for mould spots
Air dry fully Inspect pegs and straps
Brush off debris Look over rails or channels
Roll or pack neatly Test moving parts

Workshop wisdom: Most awnings don't fail in dramatic fashion. They get neglected in small, fixable ways until one wet weekend finishes the job.

If you want a VW-specific reference point for upkeep, the Fiamma F45 awning maintenance guide is a handy place to compare your cleaning and care routine.

Your VW Awning Buying Checklist

Last summer at a meet-up near Torquay, a mate rolled in with a lovely Bay Window and a bargain awning still in the box. By lunch, the van looked the part, but the awning legs were fighting the slope, the fabric sat too low over the slider, and the sea breeze had everyone grabbing cups before they skittered off across the grass. Same bus, same sun, very different afternoon once he swapped to a setup that suited how he camps and where he parks.

That is the checklist worth using. Not the glossy catalogue version. The practical one you run through with a cup of tea in hand, picturing your own Splitty or Bay by the beach, out west in harsh sun, or tucked into a shady holiday park.

The checklist I'd use before spending a cent

  • How do you use the van?
    A quick one-nighter down the coast suits a simple awning you can throw up fast. A week away with the family usually calls for more covered space and a bit more structure.

  • Will it suit your particular VW?
    A Splitty, a Bay, and a later camper can all need slightly different mounting gear. Check the gutters, door clearance, roofline, and any existing rails before you buy.

  • Does the shade match Australian conditions?
    Strong sun changes the equation here. Fabric that holds up in mild weather overseas can feel ordinary after a run of bright days in an Aussie summer.

  • How will it cope near the coast?
    Salt air gets into everything. Frame finish, fittings, and hardware quality matter a lot more if your best trips involve sand, sea spray, and fish and chips in the car park.

  • Can you put it up without turning camp setup into a project?
    The best awning is the one you will use often. If it takes too long, needs too many hands, or always ends in muttering, it will stay packed away.

  • Does it leave room for the way you live around the van?
    Make sure you can still move easily through the side door, set up a table, and shuffle a couple of camp chairs under cover without feeling cramped.

  • Will you still be happy owning it after a few trips?
    A good awning needs basic care and a bit of common sense. Buy one you can clean, dry, pack, and inspect without making a fuss of it.

The VW owner's final gut check

A good awning makes the van feel settled within minutes. The kettle goes on. Wet towels get a place to hang. Someone pulls out a camp chair, and all at once the old bus feels less like transport and more like home for the weekend.

That matters with a classic Volkswagen because these vehicles already ask for a bit of patience and affection. Your awning should add to the pleasure, not pile on more jobs. It should suit the lines of the bus, cope with our hard sun, and stand up to those breezy foreshore camps that look calm until late afternoon.

If you are still torn between two options, pick the one you can see yourself using on an ordinary trip, not just on a perfect one. Practical always wins in the long run.

FAQ

Which awning type suits a classic Kombi best

For plenty of owners, a roll-out or bag awning gives the nicest mix of ease, appearance, and day-to-day usefulness. The better choice comes down to your mounting points and whether you stay put for a night or a week.

Can I fit an awning without drilling into my VW

Often, yes. Gutter-mounted systems and kador-style setups can be a tidy option for owners who want to avoid altering original bodywork.

Are camper van awnings worth it for short trips

Yes. Even a modest awning gives you quick shade, a dry patch for the camp stove, and somewhere pleasant to sit when the sun is belting down.

What matters most for Australian conditions

UV resistance, hardware that copes with salt air, and a setup that stays manageable when the weather changes quickly.

Do awnings suit Beetles too

Not in the same way they suit Kombis and campervans. Beetle owners usually enjoy that touring spirit through club days, displays, and collectible pieces rather than vehicle-mounted camping setups.

If the camper van life has you daydreaming even when the Kombi's parked at home, have a browse through Volkswagen Memorabilia. It's a cracking Australian shop for licensed VW collectibles, with local stock and fast shipping that suits collectors and gift buyers alike. You'll find Volkswagen diecast models for sale that celebrate the same charm discussed here, with plenty to suit Kombi and Beetle fans who like a little Wolfsburg soul on the shelf as well as in the driveway.

Living Room Wall Hangings a VW & Coastal Style Guide

That blank wall above the sofa can be surprisingly hard to crack. You know the one. The couch is in, the rug's down, maybe there's a surfy lamp in the corner and a shelf full of little VW treasures, but the wall still looks like it's waiting for something with a bit of soul.

For a lot of us, that “something” isn't generic décor from a big box shop. It's a framed Beetle print, a metal Kombi sign, a small shelf with a licensed Samba Bus diecast, or a laid-back mix of coastal tones that feels right at home after a morning at a car meet and an arvo by the water. Good living room wall hangings don't just fill space. They tell your story.

That's why a VW-themed approach works so well in Aussie homes. Volkswagen has a rich history down under, officially starting sales in 1953 and assembling the iconic Beetle from Knocked Down kits at the Clayton, Victoria factory from 1954 until 1976, as noted in this Shannons history of Volkswagen in Australia. If you love classic Volkswagens, you're not decorating around a fad. You're putting a bit of motoring heritage on the wall.

Turn That Blank Wall Into a VW Story

A bare living room wall often feels bigger than it is. The room can be comfortable and still seem unfinished, a bit like a tidy Beetle shell before the badges, trim, and proper wheels go on. The structure is there, but the character hasn't arrived yet.

A man holds a framed picture and a miniature toy car while standing in a minimalist living room.

That's where living room wall hangings can do their best work. They anchor the seating area, soften a big stretch of plasterboard, and give visitors something to notice straight away. If that piece also nods to your first Kombi trip, your diecast collection, or the old Beetle your family had years ago, even better.

Start with the memory, not the frame

The easiest mistake is shopping by colour first and meaning second. A better method is to ask what you want the wall to say.

Maybe it says:

  • Road-trip nostalgia with a framed print of a split-window Kombi and faded beach tones
  • Collector pride with a neat row of licensed diecast models displayed on slim picture ledges
  • Australian coastal ease through sandy neutrals, weathered timber, and hints of surf culture
  • Classic VW history with one hero piece centred above the sofa and a few supporting objects nearby

Good wall décor should feel like part of the room, not something stuck on after the fact.

Why VW themes suit coastal interiors

Classic Volkswagens already carry that relaxed spirit. A Beetle brings curves, charm, and simplicity. A Kombi leans naturally into freedom, adventure, and beach-town energy. Put those cues beside white walls, pale timber, rattan textures, or ocean blues, and the whole room starts to feel coherent without looking over-styled.

That's the sweet spot. Not a shrine. Not a showroom. Just a living room that reflects what you love.

Choosing Pieces With a VW & Coastal Vibe

The best walls usually mix more than one type of object. A single framed print can look great, but a room gets more personality when you blend flat art, small display pieces, and a few materials with texture.

The Kombi is especially useful as a decorating theme because its story already carries so much feeling. The iconic Volkswagen Kombi (Type 2) concept was first presented by Dutch pioneer Ben Pon to Volkswagen in 1949, sparking the creation of a vehicle closely tied to freedom and adventure, as shown on Volkswagen Australia's Kombi history page.

Screenshot from https://vwmemorabilia.com.au/shop/

What works on the wall

You don't need to stop at framed prints. Some of the most inviting living room wall hangings use a layered mix.

  • Framed Volkswagen artwork. Think Beetle side profiles, Kombi beach scenes, old-style motoring posters, or surf-inspired illustrations.
  • Metal wall signs. These bring a bit of garage character and pair well with timber, linen, and coastal whites.
  • Small floating shelves or picture ledges. Handy for licensed diecast pieces, especially if you want to rotate displays now and then.
  • Shadow box frames. Great for smaller memorabilia, such as a special miniature, a badge-style piece, or a compact themed arrangement.
  • Coastal companions. Shell tones, driftwood finishes, woven textures, and soft blue-green accents stop the display from feeling too heavy.

A simple way to combine both styles

Try this formula if you're stuck:

  1. Pick one VW hero piece. A Kombi Samba Bus image, a Volkswagen Beetle model display, or a surf-themed sign.
  2. Add one coastal texture. Timber, rope, woven matting, or a washed frame finish.
  3. Keep the palette relaxed. White, sea blue, sandy beige, faded red, and sun-worn green all play nicely together.
  4. Repeat one motif. Curves, chrome, beach colour, or vintage type.

If you want more inspiration for the overall look, this guide to coastal home décor ideas gives you a handy visual direction.

Which VW pieces suit which mood

Style you want VW piece to start with Best room feel
Beachy and bright Kombi Samba Bus artwork or surf van sign Relaxed, sunny, casual
Vintage and nostalgic Beetle print or retro dealer-style art Warm, story-rich, classic
Collector display Licensed diecast on ledges or in shadow boxes Organised, personal, curated
Playful and colourful Flower Power van piece or mixed miniatures Fun, conversational, light-hearted

Getting the Scale and Size Just Right

Scale is what makes a wall look polished instead of accidental. You can choose a beautiful piece, hang it carefully, and still feel something's off if the size doesn't relate to the furniture underneath.

Consider hubcaps on a classic VW. The details matter, but they still have to fit the car. Wall art works the same way.

A graphic comparing good and poor scale for wall hangings above living room furniture pieces.

The easiest sizing rule to remember

For living room wall hangings above a sofa, professional guidance in Australia says the artwork should span 60% to 75% of the sofa's total width. That rule helps avoid the floating look that happens when the art is too narrow for the furniture beneath it. The same Australian guide also notes a 2/3 rule as a practical shorthand for statement pieces and grouped arrangements above furniture, as outlined in this room-by-room wall art size guide.

Practical rule: If the wall piece looks tiny compared with the sofa, don't measure the wall first. Measure the furniture.

What that looks like in real life

A long sofa needs art with some visual presence. That could be one large framed Kombi print, two coordinated coastal-VW pieces treated as one arrangement, or a compact gallery grouping that reads as a single unit.

A smaller sofa can carry one medium piece well, especially if the frame has enough visual weight. Thin little prints above broad furniture rarely look intentional.

For Beetle fans, a dedicated VW Beetle wall art collection streamlines the process. It helps you compare options that already suit the theme, so you can focus on proportion and placement instead of starting from scratch.

A quick gut check before buying

Ask yourself these three questions:

  • Does it relate to the sofa? If not, it may feel adrift.
  • Will it still read from across the room? Fine detail can disappear in a larger living area.
  • Does it suit the wall shape? Wide walls usually prefer wider arrangements.

If you're torn between slightly too small and slightly too big, bigger usually looks more deliberate.

The Art of Placement Hang It Like a Pro

Once the size is sorted, placement becomes much less mysterious. Most hanging mistakes come from one of two things. Art goes too high, or it sits too far from the furniture beneath it.

Australian interior design standards suggest hanging art with its centre at 152 cm from the floor. When you're hanging above furniture, the bottom of the frame should sit 15 to 25 cm above the piece to create a visual link, according to this Australian wall art placement guide.

The centre-point rule

For a single piece on an open wall, use the 152 cm centre height as your starting point. That puts the artwork around natural eye level and helps the room feel settled.

If you've ever walked into a room and felt like the art was hovering near the ceiling, that's usually the problem. The piece wasn't anchored to where people see it.

Above a sofa is different

When art sits over seating, the sofa becomes part of the composition. That's why the 15 to 25 cm gap matters so much. It creates a connection between the furniture and the hanging above it.

Too high, and the art looks detached. Too low, and it can feel cramped.

A quick method that works well:

  • Measure the sofa width first
  • Confirm the artwork suits the width, as covered earlier
  • Mark the sofa centre on the wall
  • Hang the piece so the bottom edge lands 15 to 25 cm above the backrest
  • Step back and check from both seated and standing positions

Stand on the opposite side of the room before you commit. A wall can feel balanced up close and awkward from the seat where you actually relax.

Creating a Cracking VW-Themed Gallery Wall

A gallery wall is perfect for collectors because it lets you tell a bigger story. One frame can celebrate a favourite model. A gallery can show your whole VW personality, from Beetle nostalgia to Kombi surf culture to a few coastal touches that make the room feel easy and lived-in.

A woman hanging Volkswagen themed wall art and displaying die-cast model cars in a cozy living room.

Build it on the floor first

Before you put a single hook in the wall, lay everything out on the floor. That lets you shuffle frame sizes, test colours, and work out where the visual weight sits.

For gallery walls, treat the whole group as one piece. The combined width should be 60% to 75% of the furniture beneath it, and spacing between frames should stay consistent at 5 to 8 cm to keep the arrangement visually calm, as explained in the Australian placement guide noted earlier.

Mix media, but keep one thing consistent

A great VW gallery wall doesn't have to be all prints. In fact, it's often better when it isn't.

Try combining:

  • A large anchor print with a Kombi or Beetle theme
  • Two or three smaller framed photos from shows, road trips, or restorations
  • A small metal sign for texture
  • A slim shelf holding a licensed diecast model
  • One coastal element such as a weathered timber frame or beach-toned artwork

The consistency can come from frame colour, subject matter, or palette. Black frames feel crisp. Timber feels more beachy. White frames lighten things up.

For more layout inspiration, this coastal boho gallery wall guide is useful if you want the collection to feel curated rather than crowded.

A good sequence for hanging

  1. Put the biggest piece down first in your floor layout.
  2. Add medium pieces around it.
  3. Fill gaps with smaller works or objects.
  4. Check that the outer edge of the whole grouping still suits the furniture below.
  5. Keep frame spacing even. Don't eyeball this part too casually.

This walkthrough can help if you want to see a gallery arrangement come together in motion.

A gallery wall should look collected, not chaotic. If every piece is shouting, none of them get heard.

Your Wall Your Story Now Go For It

The nicest living room wall hangings are the ones that feel personal the moment you walk in. They suit the room, they sit at the right height, and they say something real about the people who live there.

If you remember only a few things, make it these. Choose pieces you'd still love even if nobody commented on them. Make sure the scale relates to the sofa or wall area. Hang them with intention, not guesswork. And if you've got a few favourite VW pieces, don't hide them away in cupboards when they could be part of the room every day.

A classic Volkswagen theme works beautifully in Australian living rooms because it carries warmth, history, and that easy coastal spirit so many of us love. A Beetle print can bring charm. A Kombi display can loosen the room up. A gallery wall can turn a plain lounge into a proper conversation starter.

You don't need a designer's budget or a giant house to make it work. You just need a clear idea, a tape measure, and a bit of confidence.

A Few More Questions Answered

Some decorating questions only pop up when you've already started hanging things. Fair enough too. Real homes have odd proportions, high ceilings, kids, sunlight, and all the little quirks that don't show up in perfect showroom photos.

One common issue in Australia is ceiling height. A significant challenge for Australian homeowners is adapting wall art placement for high ceilings, with 68% reporting their art feels “too low” because many guides focus only on standard 2.4 m ceilings, according to this article on wall décor ideas in Australian homes.

Quick FAQ Guide

Question Answer
How do I handle high ceilings in the living room? Don't automatically push the art higher just because the ceiling is tall. Keep the arrangement visually connected to the furniture and the part of the room where people sit and look.
Can diecast models be part of living room wall hangings? Yes. Use slim shelves, enclosed shadow boxes, or ledges so the models feel displayed rather than perched.
Should all my frames match? Not necessarily. Matching frames look neat, but mixed frames can work well if the colour palette or subject matter stays consistent.
What if my wall art feels too small? Group pieces together so they read as one larger arrangement, or swap to a wider hero piece that better suits the furniture below.
How do I keep memorabilia looking tidy, not cluttered? Limit the number of colours, repeat one material, and give each item breathing room. Crowding is usually the issue, not the objects themselves.
Is direct sun a problem for wall displays? It can be. If possible, keep framed prints, paint finishes, and collectible displays out of harsh direct sunlight to help preserve colour and surfaces.

One smart approach for unusual pieces

If you've got something a bit different, such as a metal badge-style piece, a small sign, or a miniature that matters to you, use a shadow box or ledge instead of forcing it into a standard frame setup. That keeps the display feeling intentional.

For collectors who like to rotate displays

Seasonal rotation works well in living rooms. You might show beachy Kombi pieces in warmer months, then bring in richer colours or a more heritage-heavy Beetle mix later on. That keeps the wall fresh without needing a complete redo.


If you're ready to bring a bit of VW charm into your lounge room, have a browse through Volkswagen Memorabilia. It's a handy spot for officially licensed Volkswagen diecast, VW-themed gifts, and coastal décor pieces that suit Australian homes, with the added bonus of local stock and fast shipping from an Australian specialist that gets the hobby.

G13 Coolant VW: Your 2026 Guide to G12 & Mixing Rules

You're probably here because you've popped the bonnet, stared at that coolant bottle, and thought, “Righto, is this G13 stuff the right one for my VW?” That's a fair question. Volkswagen coolant names can feel like a raffle ticket, especially when you've got a cherished Beetle, a tidy Golf, or a Kombi that means more to you than most modern cars ever could.

For a lot of Aussie VW owners, maintenance isn't just a chore. It's part of the relationship. You hear it in the engine note, feel it in the steering, and spot it in the little habits each car develops over time. That's true whether you're keeping a daily driver happy or preserving a weekend classic that turns heads at every servo stop.

The Heartbeat of Your Beloved VW

There's a certain feeling only a Volkswagen gives you. Windows down, sun out, the road unwinding ahead, and that familiar sense that the trip matters just as much as the destination. A Beetle does it. A Kombi absolutely does it. Even a newer VW still carries a bit of that same spirit.

A vintage blue and white Volkswagen bus driving along a scenic coastal road during a bright day.

Volkswagen's roots in Australia run deep. Volkswagen assembled Knocked Down kits of the Beetle in a factory located in Clayton, Victoria from 1954 until 1976, producing a unique Australian model known as the “Clayton” that used parts from both the Beetle and Kombi, as noted in this history note on the Clayton-built VW. That kind of local story is part of why so many of us feel connected to the badge.

Why coolant matters to the bigger story

Looking after your VW is part of preserving that heritage. Coolant might not be as glamorous as polished hubcaps or a two-tone paint job, but it keeps the engine stable when the weather turns fierce and traffic turns ugly. Get it right, and your car stays happy. Get it wrong, and small issues can snowball.

Workshop wisdom: The best-maintained VWs are usually owned by people who pay attention to the simple stuff before it becomes expensive stuff.

That same eye for detail is what draws people to old service records, model histories, and memorabilia. If you love the backstory as much as the drive, a genuine Volkswagen service book keepsake is the sort of thing that feels right at home next to your keys and garage shelf.

Real care beats guesswork

A lot of coolant trouble starts with guesswork. Someone tops up with “something close enough”, or follows a generic online tip that doesn't match their VW's actual spec. That's where understanding G13 coolant in a VW becomes more than a technical detail. It's just good ownership.

What Exactly Is This G13 Coolant

You're at the parts counter, the bottle says G13, it's violet, and suddenly a simple coolant top-up feels more fiddly than choosing the right hubcaps for a Beetle resto. Fair question. G13 is Volkswagen's own coolant specification, and the spec matters more than the colour on the label.

At its job, coolant does two things. It manages engine temperature, and it helps protect the inside of the cooling system from corrosion. In a VW, those jobs need to happen across a mix of metals, seals, hoses, and passages that were designed with a specific coolant chemistry in mind. That is why grabbing any pink or purple bottle off the shelf can turn into a costly guess.

What makes G13 different

G13 coolant became the VW standard for many later vehicles and is known for using glycerin in its formula. In plain English, it was developed as a newer alternative to earlier VW coolant types while still giving strong protection inside the cooling system.

An infographic titled Understanding VW G13 Coolant explaining its function, ingredients, performance, and distinctive pink color.

You'll usually spot it by its violet colour, but colour is only a clue. The definitive sign is the approval on the bottle. If your VW calls for G13, look for VW TL 774-J on the container. That is the bit that tells you the coolant matches the factory spec, not just the marketing on the front label.

For owners who enjoy getting the right bits for their car, the same way you'd chase the correct badge or trim for a scale model shelf display, checking proper VW parts and coolant specs in Australia is part of doing the job properly.

Why VW specified it

G13 was designed to suit the materials used in many newer VW cooling systems, including lightweight alloys that need the right corrosion protection. That matters because modern Volkswagens pack a lot into a tight engine bay, and the cooling system has to stay clean and stable over time, especially in Aussie heat.

This is also where some owners of older favourites get caught out. A modern Golf, Passat, or Tiguan may require G13, while an older VW may have been built around a different coolant spec altogether. If you love the brand from full-size Kombis to diecast shelf pieces, this is one of those details that separates careful ownership from guesswork.

Where people get tripped up

The biggest trap is trusting the shade instead of the specification. Two bottles can look nearly identical and still use different chemistry.

A quick check keeps you out of strife:

  • Read the approval code on the bottle: Look for VW TL 774-J if your vehicle calls for G13.
  • Check your handbook or coolant reservoir label: VW usually tells you the required spec clearly.
  • Match the coolant to the car, not the bottle colour: Violet does not automatically mean correct.
  • Be extra careful with older VWs: Age, previous repairs, and past top-ups can leave a mixed history in the system.

G13 is a Volkswagen coolant specification, not just a purple liquid. Treat it like any proper VW part. The label and approval matter more than the look.

G13 vs The G12 Family A Simple Guide

Plenty of VW owners hit this point and hesitate. You spot G12, G12+, G12++, G13, and G12 EVO on the shelf, and a simple coolant buy suddenly feels like reading the fine print on a rare parts box at a swap meet.

The names sound like close cousins because they are from the same VW coolant family. The catch is that family members do not all get along once they are mixed in the same system.

The mixing rule that matters most

A common mistake for Australian owners is assuming G13 works with every older G12 version. It does not. This Champion Lubes note on G13 compatibility explains that G13 is backward compatible with G12++ but not compatible with G12+.

That single detail saves a lot of grief.

If you top up the wrong spec, you are not just taking a punt on colour or branding. You are mixing chemistries that may not protect the system the way VW intended. On an older car with an unknown service history, that is a bit like fitting the wrong gasket because it looked close enough in the packet. It might hold for a while, but you would not bet your favourite Kombi on it.

VW Coolant Compatibility Chart

Coolant Spec Colour Base Mix with G13?
G12 not specified here glycol-based older family Avoid
G12+ not specified here older G12 family No
G12++ not specified here later G12 family Yes
G13 violet glycerin-based same spec
G12 EVO not specified here newer alternative for some post-2020 models Check vehicle requirement before use

A plain-English way to read that chart

Here is the simple version. G12++ and G13 can generally live together. G12+ and G13 should not. If your car already has G13 in the expansion tank, do not assume any bottle with "G12" on it is close enough.

That is where owners of older Beetles, Golfs, and Kombis with mixed maintenance histories can get caught. A previous owner may have topped it up with whatever was handy, and now you are trying to decode years of shortcuts. If you are sorting parts as carefully as you curate your shelf of classic VW diecasts, the same rule applies here. Details matter. A helpful VW parts guide for Australian owners can make the broader maintenance side easier when labels and superseded part specs start getting messy.

What about G12 EVO

G12 EVO adds another wrinkle to the story. VW introduced it for some newer models, so owners around the later model-year transition can see conflicting advice if they rely on bottle names alone.

The safe approach is dead simple. Check the exact coolant spec listed for your model year and engine, then buy to that approval rather than the family name. That keeps your real VW running sweet, and it is the same mindset that makes collecting VW memorabilia fun too. The joy is in knowing the details, not guessing at them.

Signs Your VW Needs Some Coolant TLC

Your VW usually gives you a few hints before coolant trouble turns serious. The trick is noticing them early and not brushing them off as one of those “old car things”.

A car dashboard displaying a coolant temperature warning light next to a Volkswagen engine coolant reservoir tank.

What to watch for

A low coolant level in the reservoir is one of the clearest signs. If it's sitting near or below the MIN line when the engine is cold, it deserves attention. Murky or odd-looking coolant can also suggest the system needs a closer look.

Then there are the signs you notice after a drive:

  • Warning lights: The temperature light on the dash is your car asking for help.
  • Sweet smell: That can point to a coolant leak.
  • Puddles under the car: Especially if they appear regularly in the same spot.
  • Running hotter than usual: Even without a warning light, a change in behaviour matters.

A quick owner check

Pop the bonnet only when the engine is cold. Check the reservoir level and have a look at the colour and clarity. If anything seems off, don't just keep topping it up forever. Repeated loss usually means there's a leak or another issue behind it.

This short video gives a handy visual reference for what owners are usually checking around the reservoir and warning signs:

If your VW keeps asking for coolant, the job isn't to become faster at topping up. The job is finding out where it's going.

How to Safely Top Up or Change Your Coolant

You've just rolled back into the driveway after a Sunday run, the engine's ticking as it cools, and the reservoir level looks a touch low. That's the moment to slow down and do the job properly, not have a crack at it while everything is still hot and pressurised.

Coolant work is a bit like caring for a good diecast model on the shelf. Rush it, use the wrong stuff, or force parts that should be handled gently, and you can turn a simple tidy-up into damage you didn't need.

Safe top-up routine

For a basic top-up, patience is your best tool. Wait until the engine is completely cold. A hot cooling system can spit boiling coolant with enough force to ruin your day.

Then work through it in order:

  1. Park on level ground. That gives you an honest reading at the reservoir.
  2. Check the coolant spec on the bottle and your VW requirements. Colour alone is a dodgy guide.
  3. Look at the reservoir before adding anything. If the level is only slightly under the mark and the coolant still looks clean, a top-up is usually straightforward.
  4. Add the correct coolant slowly. Bring it back to the proper line, not above it.
  5. Refit the cap firmly. After that, monitor the level over the next few drives.

Keep it simple. If the level drops again soon after, the mission has changed from topping up to finding the cause.

When a full change makes more sense

A full coolant change is the smarter call when the fluid looks contaminated, the service history is a mystery, or someone has added the wrong type at some point. Hoping mixed coolant will sort itself out is a classic way to create more work later.

Draining and refilling sounds easy on paper, but VWs can trap air in the system if the refill process isn't done properly. Air pockets act like empty spots in the engine's cooling jacket. The coolant can't carry heat away evenly, and temperatures can climb in ways that catch owners off guard.

That's why plenty of enthusiasts are happy doing checks and top-ups at home, then hand the full flush to a workshop that knows Volkswagens well.

A good rule of thumb

Here's the practical split:

  • Low level, correct coolant, clean reservoir: A careful top-up is usually fine.
  • Unknown coolant already in the system: Identify it before adding anything.
  • Mixed or suspect coolant: Book a flush and refill.
  • Coolant keeps disappearing: Track down the leak first.

If you're in that maintenance headspace already, it can also be handy to read this fuel system cleaner guide for VW owners. Same idea, really. Small preventative jobs help keep an old favourite running sweet.

Know when to call in a specialist

There's real satisfaction in lifting the bonnet and doing the simple jobs yourself. That hands-on connection is part of VW ownership, especially if you're the sort of person who can talk Beetles, Golfs, and Kombis for hours at a showground coffee cart.

But no one gets extra points for guessing with coolant. If you're unsure about the spec, the refill method, or whether the system has been bled properly, get a trusted mechanic involved. A careful workshop bill beats cooking an engine, and it keeps your real VW ready for the road while the miniature one on the shelf keeps telling the same story at home.

Keep the Passion Alive On and Off the Road

You finish a coolant check on Saturday morning, wipe your hands, and hear that familiar VW tick as the engine settles. That little moment is part of the joy. Looking after a Volkswagen has always been more than basic maintenance. It is how owners keep the story going for the next cruise, club meet, or beach run.

That story has deep roots. The Kombi (Type 2) grew into a cultural icon during its later generations, and in Australia it became tied to surf trips, road adventures, and that easy-going VW spirit, as outlined in this history of the Volkswagen Kombi. You can still feel it at any showground. A tidy Kombi or Beetle rolls in, heads turn, and suddenly everyone has a memory to share.

Screenshot from https://vwmemorabilia.com.au/shop/1962-vw-kombi-samba-bus-diecast/

That is why the practical side and the nostalgic side fit together so well.

Keeping the right coolant in your real VW protects the engine that carries your family, your mates, and your memories. A well-made model on the shelf does something different. It keeps the shape, colour, and character of the marque close by when the car is tucked in the shed. One is workshop care. The other is a reminder of why you bothered learning any of this stuff in the first place.

Quick answers owners often ask

Can I mix G13 with G12+?
Best not to assume. Check your owner's manual or confirm the approved spec for your exact VW before mixing any coolant types.

Is G13 the same as any purple coolant?
No. Colour helps identify coolant, but the VW approval matters far more than what it looks like in the bottle.

Should every older VW switch to G13?
No. Older Volkswagens can have different material and system requirements, so it pays to match the coolant to the car, not the trend.

Is G13 still relevant for many Australian VWs?
Yes, for plenty of later-model Volkswagens. Your engine code, build year, and service information should always have the final say.

If you enjoy the hands-on side of VW ownership and the history that comes with it, a good diecast piece can scratch the same itch between drives. Have a look at Volkswagen Memorabilia if you fancy a Beetle, Kombi, or Samba Bus on the shelf to match the one in your heart.

VW Beetle Models: Ultimate Guide to History & Collectibles

A mate of mine once spotted a pale blue Beetle rolling past the esplanade with a surfboard on the roof, and the whole car park turned to look. Nobody asked what year it was at first. They just smiled, because some cars do that.

Remember Your First Beetle Sighting

For plenty of us, the first proper Beetle memory isn't from a museum or a buyer's guide. It's from the road. A rounded bonnet catching the afternoon light, a cheery engine note, maybe a driver with one arm out the window and a grin that says the trip matters as much as the destination.

A vintage light blue Volkswagen Beetle with a surfboard on its roof driving along a coastal road.

That image has become part of Australian car culture. It's why a Beetle parked outside a milk bar still draws a crowd, and why a tidy Bug at a Sunday meet can spark ten different stories at once. One person remembers learning to drive in one. Another remembers family holidays. Someone else remembers seeing one with flowers on the dash and a board strapped on top, heading for the beach.

There's also a fresh layer to that nostalgia. The cultural narrative behind the 1967 VW Beetle's resurgence in Brisbane and Melbourne is a growing local trend, with locals sharing stories of reviving neglected cars, and that renewed affection lines up with stronger interest in retro diecast pieces and coastal décor that feature Beetle styling, as seen in this Australian VW community discussion.

Some cars become transport. A Beetle becomes a memory keeper.

Why the little Bug still lands so well

The Beetle works on two levels at once. It's approachable enough for a casual fan, but the deeper you go, the more detail you find. Local-market trim quirks, different engines, year-specific bits, Australian-only touches. That's where the hobby really opens up.

That's also why collecting Volkswagen Beetle models feels so satisfying. A diecast Beetle isn't just a small car on a shelf. It can be the beach cruiser you saw as a kid, the one your uncle restored in the shed, or the exact shape you still scan for every time you pass a classic car show.

The shelf version of a real feeling

Miniatures let you hold onto the part that matters most. The curves. The colour. The surf vibe. The simple joy of seeing a Bug and instantly feeling lighter.

If you've ever slowed down to admire one at the lights, you already understand why VW Beetle models have such pull.

A Bugs Life The Beetles Journey in Australia

At plenty of Aussie shows, the story starts the same way. Someone points at a tidy mid-sixties Bug, smiles, and says, “Ours had different bumpers.” That small memory says a lot. Australia gave the Beetle its own local character, and those differences still matter when you are trying to match a real car from memory with the right diecast on the shelf.

Australia's chapter began with CKD assembly in the mid-1950s and ran through to the final Australian-assembled Type 1 at Clayton, Victoria, in the mid-1970s, as outlined in this history of the Volkswagen Beetle.

An infographic timeline illustrating the history and evolution of the Volkswagen Beetle in Australia from 1954 onwards.

That long local run is why an Australian Beetle can feel slightly “off” if you compare it with a British or American guidebook. The shape is familiar, sure, but the details often aren't. Trim, engines, electrical setup, and market positioning all took their own path here.

A good early example comes from Volkswagen Australia's own Beetle history. It notes that early Australian-market Type 1 cars used a smaller-output air-cooled engine, which gave local Bugs a gentler, less hurried character on the road than some overseas buyers expected. You can read that background in Volkswagen Australia's Beetle history.

That personality carries into collecting. A miniature Beetle only really clicks for an Aussie collector when it resembles the car they remember from the school pick-up, the beach carpark, or a neighbour's driveway in Geelong or Newcastle.

How Australian Beetles became collector clues

By the middle of the sixties, local differences had become the sort of details enthusiasts love arguing over beside the bonnet. Shannons notes that the Australian-market 1965 Beetle used a 1300cc engine, and that 1967 Australian Bugs were sold with 1300 or 1500 engines while staying on a 6-volt electrical system, according to this Shannons Club feature on the Volkswagen Beetle.

For restorers, those are handy facts. For diecast collectors, they are even more useful because they help explain why a generic overseas model can look close but still miss the mark.

That is especially true once you get into the Australian Deluxe and Custom variations of 1966 and 1967. Those cars are part of the memory bank for many local collectors, and they are exactly the sort of variations that can make one shelf model feel “right” and another feel like a near miss. If your heart is set on the later classic shape, this 1970s Volkswagen Beetle collectible shows how strongly those familiar lines still translate into miniature form.

A few local milestones worth keeping in mind

  • Local assembly gave Australian Beetles their own production story and helped create the market-specific versions enthusiasts still chase.
  • Local tuning and equipment choices meant Aussie Bugs did not always match overseas specifications, even when the body style looked similar at first glance.
  • The end of assembly at Clayton closed the factory chapter, but it also fixed those Australian variations in time, which is why collectors still search for replicas that match local memories rather than global averages.

That is the charm of the Australian Beetle story. The car stayed recognisably a Beetle, but the version we knew here picked up its own accent. For anyone collecting VW Beetle models, that local accent is often the difference between a nice miniature and the one that instantly takes you back.

The Different Beetles Youll Spot Down Under

If there's one area where Aussie collectors get caught out, it's the 1966 and 1967 Beetle variants. At a glance, they can seem close enough. Park them side by side and the local-market clues start talking.

Three classic vintage Volkswagen Beetle cars in light blue, cream, and red parked in front of a garage.

The key point is simple, but it's often glossed over in global guides. Australian Deluxe models in 1966 and 1967 featured “Towel rail” bumpers, while the Custom models had blades, a distinction highlighted in this discussion of Australian Beetle trim differences. For anyone checking authenticity, that's not trivia. It's a core identifier.

The trim detail that changes everything

Collectors often focus on paint, wheels, and badges first. Fair enough. But bumper style can be the clue that sorts an accurate restoration from a muddled one.

Here's the quick read:

  • Deluxe: Look for Towel rail bumpers on Australian 1966 and 1967 cars.
  • Custom: Look for blade bumpers in those same years.
  • Collector takeaway: If a diecast or restored car mixes those cues, it may not match the Australian-market version it claims to represent.

A good example of how Beetle styling carried forward in collectible form is this 1970s Volkswagen Beetle model, which shows how strongly period details influence what collectors choose to display.

Why this matters for diecast buyers

A miniature can be beautifully painted and still feel wrong if the trim doesn't match the car in your memory. That's especially true for Australians chasing a specific family car, a car-show favourite, or a suburb-by-suburb memory from the sixties and seventies.

Plenty of diecast buyers aren't hunting for a generic Beetle. They want their Beetle. The one that used to sit in a driveway in Geelong, Brisbane, Newcastle, or Adelaide. That's where local identification knowledge becomes useful, because it lets you judge a model with more confidence.

For a closer look at Beetle styling in motion, this walkaround helps sharpen the eye:

When you know the bumper story, Australian VW Beetle models suddenly become much easier to read.

From Full Size to Your Shelf Collecting VW Beetle Models

The jump from real cars to diecast usually starts with recognition. You spot a model and think, “That's the one.” Then the practical questions arrive. Which scale suits your shelf? How much detail do you want? Do you want a display piece, a gift, or the start of a proper collection?

The first thing I tell new collectors is to buy with your eyes, then confirm with your head. If a model captures the spirit of the car you remember, that matters. After that, check the quality, the finish, and whether it's an officially licensed piece rather than a vague imitation.

Choosing the right scale

Scale changes the whole experience. A larger model gives you presence and detail. A smaller one is easier to group into a themed display with multiple Beetles, Kombis, and buses.

Here's a simple guide.

Scale Average Length Best For Detail Level
1:18 Larger display format Feature shelves, desk centrepieces, collectors who want presence High
1:24 Mid-sized display format Home décor, gift giving, balanced detail and footprint Strong
1:32 Compact display format Group displays, smaller shelves, mixed VW collections Moderate

If you're browsing across different formats, the Volkswagen model cars collection is a useful place to compare what feels right for your space and taste.

What quality looks like in a Beetle model

A good diecast Volkswagen Beetle model usually gets the basics right before the fancy bits.

  • Body shape first: The roofline, guards, and stance should feel unmistakably Beetle from across the room.
  • Trim accuracy matters: On Australian-inspired models, bumper style and period cues can make or break the illusion.
  • Paint and finish: Clean lines, tidy chrome-style detailing, and a colour that suits the era all help.
  • Licensed presentation: Officially licensed pieces tend to feel more considered in both design and packaging.

Collector's note: The best model isn't always the biggest one. It's the one that still makes you smile after the novelty wears off.

Matching the model to the memory

Some collectors chase showroom neatness. Others prefer surf-themed cars, flower-power colourways, or display pieces that echo coastal living. Beetles are brilliant for this because the car has always moved between worlds. Daily transport, beach runabout, rally oddball, restored classic, pop-culture icon.

That flexibility makes VW Beetle models easy to fold into a broader display too. A Beetle can sit happily beside a Kombi, a Samba Bus, or other VW memorabilia collectibles without looking out of place.

Top Tips for the Aspiring Beetle Collector

A strong collection doesn't need to start big. It needs to start with a point of view. The most enjoyable shelves usually say something about the person who built them, whether that's “classic Australian Bugs,” “surf-themed Volkswagens,” or “every Beetle that reminds me of childhood road trips.”

That's why collecting feels so accessible. You don't need a dedicated showroom. A bookshelf, a study nook, or a coastal-style living room cabinet can do the job beautifully if it's arranged with a bit of care.

Build a collection with a theme

Try choosing one angle and following it for a while.

  • Year-led collecting: Focus on one era, such as mid-sixties or seventies Beetles.
  • Lifestyle-led collecting: Surfboards, flower-power styling, beachy colours, and sunny display settings work especially well with Beetle pieces.
  • Family-memory collecting: Recreate the cars you grew up with, or the ones your parents and grandparents still talk about.

If you're new to the hobby, this guide on what a diecast Volkswagen Beetle model car is is a handy grounding point before you start refining your taste.

Display and care without fuss

Collectors sometimes overcomplicate this part. You don't need a museum method. You need consistency.

  • Keep dust under control: A soft cloth or gentle duster goes a long way.
  • Give each piece room: Beetles have shape. Let those curves breathe instead of cramming models bumper-to-bumper.
  • Use décor intentionally: Timber shelves, white walls, and coastal accents suit VW displays beautifully.

A Beetle model works best when it looks like it belongs in the room, not when it's hidden away like something too precious to enjoy.

Buy slower and enjoy more

The hobby becomes richer when each piece earns its place. Rather than grabbing every model you see, pause and ask a few simple questions:

  1. Does it match the era or style I'm collecting?
  2. Does it remind me of a real Beetle I know or remember?
  3. Will I still enjoy seeing it on the shelf next month?

That small pause usually leads to a stronger, more personal collection.

Bringing a Beetle Home The Perfect VW Gift

The best VW gifts usually land because they feel personal. Not expensive for the sake of it, and not flashy. Just right. A Beetle model can do that in a heartbeat, especially when the recipient already has a story tied to the car.

I've seen this play out often with birthdays and Christmas gifts. Someone spends ages talking about an old Bug they once owned, or the one their parents had near the beach, and then a small boxed model turns up that brings the whole thing flooding back. It's not just décor. It's recognition.

Why the surf-themed Beetle works so well

Among the most cheerful examples is the 1967 Volkswagen Beetle with a surfboard in 1:24 scale, a classic collector's piece and a popular retro décor item that reflects the Beetle's close connection with Australian surf culture, as shown in this 1967 VW Beetle Flower Power Surfboard model.

Screenshot from https://vwmemorabilia.com.au/shop/

That sort of gift works because it carries more than one mood at once. It says classic VW. It says summer. It says Australia. And if the person you're buying for also loves buses and vans, the same charm carries straight across to VW Kombi diecast Australia favourites and Samba Bus pieces.

A few gift ideas that rarely miss

  • For the nostalgic driver: Pick a Beetle colour or era that echoes a car they once owned.
  • For the beach-house decorator: A surf-themed Beetle sits naturally with coastal styling.
  • For the broader VW fan: Pair a Beetle with a Kombi or Samba Bus for a fuller display story.

If you're buying from an Australian importer, the practical advantages are clear too. Local stock, fast shipping, and straightforward support make gift shopping much easier, especially when you want the model to arrive without fuss.

FAQ

Which VW Beetle models are most confusing for Australian collectors?

The Australian 1966 and 1967 Custom and Deluxe variants create plenty of confusion. Deluxe cars had Towel rail bumpers, while Custom models used blade bumpers, a local-market distinction that catches people out.

Were Australian Beetles different from US versions?

Yes. Australian-market Beetles had local differences in engines, trim, and specification. That's one reason overseas guides don't always line up neatly with the cars Australians remember.

What should I look for in a Volkswagen Beetle model?

Start with shape, stance, trim accuracy, and overall finish. If you're chasing an Australian memory, period-correct details matter more than flashy packaging.

Is a Beetle diecast a good gift for non-collectors?

Absolutely. Beetles carry such strong nostalgia that even people who don't think of themselves as collectors often love receiving one, especially if it matches a memory or suits a coastal décor style.

Are Beetles the only classic VW worth collecting?

Not at all. Beetles are often the gateway, but many collectors branch into Kombis, Samba Buses, and broader VW memorabilia collectibles once the display starts taking shape.


If you're ready to find a Beetle that looks like the one from your memories, or you want a Kombi or Samba Bus to round out the shelf, have a browse through Volkswagen Memorabilia. It's a great spot for officially licensed VW pieces, local stock, fast shipping, and the kind of selection that makes building a proper collection feel easy and fun.

Best Tent for Car Boot: Your 2026 Aussie Guide

The kombi's packed, the boards are tied down, and there's that familiar little rattle from somewhere behind the back seat that only an old VW owner could call charming. You've parked up near the coast, salt in the air, sun still warm on the duco, and the only question left is where you're sleeping when the light drops out. That's where a good tent for car boot earns its keep.

For a lot of Aussie VW people, camping gear isn't separate from the car. It becomes part of the whole ritual. The drive in. The kettle on. Sandy feet. Wetsuits hanging off a door. A hatch or tailgate shelter feels right in that world because it keeps things simple. You pull up, open the back, and your car becomes the heart of camp.

The Freedom of a Home on Wheels

I've always loved how a Volkswagen can make an ordinary weekend feel like a proper escape. A Beetle does it one way, all charm and cheek. A Kombi does it another, like it was born to carry boards, mates, and bad decisions involving one more beach track before dark.

A vintage orange Volkswagen bus parked on a beach with a pop-up tent attached for camping.

A mate of mine rolls up to surf comps in an old bus that looks like it's lived three different lives. By the time everyone else is fiddling with freestanding tents, he's already got the kettle boiling and a sheltered spot out the back for damp towels, bags, and the usual pile of beach gear. That's the appeal. A tent off the rear of the car doesn't just give you more room. It extends the feeling that your VW is already home base.

There's a long thread of that idea running through VW history. The old bus was never just transport. It was social. Practical. Relaxed. The 1965 VW Deluxe Micro Bus “Samba” was renowned for its 23 windows and giant sunroof, a design built around the need for a compact, comfortable, and efficient micro-bus in a form people hadn't really seen before, as noted in this look at the 1965 VW Deluxe Micro Bus Samba.

Why the idea suits VW life

A car boot tent makes sense for the same reason the Kombi still turns heads. It mixes usefulness with personality.

  • You stay connected to your gear without trudging back and forth through a campsite.
  • You get a change room and shade spot right where you need it after a swim or surf.
  • You keep the camp compact, which suits weekenders who'd rather drive than build a small suburb out of poles and guy ropes.

The best camping setups don't feel separate from the car. They feel like a natural extension of it.

If you're deep into the road-trip side of the hobby, there's a good yarn in this piece on VW van life in Australia. It captures that same easy, rolling freedom that makes a rear tent such a neat fit for an old Dub.

What Exactly Is a Car Boot Tent

A car boot tent is basically a mobile annexe. It attaches to the rear of your vehicle and turns the open boot or tailgate area into sheltered living space. Instead of pitching a separate tent and keeping your car off to the side, you join the two together.

A comparison chart showing the benefits of a car boot tent versus a traditional standalone camping tent.

That's the main difference. A regular tent stands on its own. A boot tent uses the car as part of the setup. For beach days, markets, overnight stops, and casual touring, that can feel far less fussy.

Two common styles you'll see

Some rear tents are full enclosures. They create a proper room at the back of the car, handy for sleeping, changing, or keeping chairs and bags out of the weather. Others work more like an awning with walls, giving you cover and airflow without trying to become a second bedroom.

A practical way to think about it is this:

Style Best for Feel at camp
Full rear enclosure Overnight trips, family space, privacy Like adding a room
Rear awning shelter Day stops, shade, quick overnighters Like adding a verandah

Where they sit against rooftop tents

Rooftop tents have their own charm, especially if you like being up high. In Australia, some rooftop tents feature UPF 50-plus UV stability and double-stitched waterproof seams, and carsales.com.au's guide to rooftop tents notes that hardshell designs are more compact and durable, while softshell versions often give you a bigger bed and a lower buy-in, though they're usually slower to set up. The catch is obvious for classic VW owners. You must never exceed the roof load maximum.

That's why a boot tent often lands in the sweet spot. You don't load up the roof, you don't climb a ladder at midnight, and you still gain usable shelter.

Size and practicality

Some hatchback-style rear tents are built with a waterproof rating of 1500mm to 2000mm and dimensions around 300x150x210cm, with room to comfortably suit 4 to 6 people and fit many SUVs and vans, according to this rear hatchback tent product listing.

Practical rule: If your camping style is more “pull up and relax” than “build camp for an hour,” a rear tent usually makes more sense than a more complicated system.

If you like comparing styles before buying, this guide on van awning comparisons is a handy reference point.

Will It Fit My Bug or Bus

Classic VW owners get cautious, and rightly so. “Universal fit” sounds lovely on a product page, but a Beetle isn't shaped like a modern SUV, and a Kombi has its own lines, hinges, and quirks.

A person placing a black organizer bag into the trunk of a vintage beige Volkswagen Beetle car.

Start with the opening, not the badge

Measure the actual rear opening first. Don't begin with model names or assumptions. Grab a tape and check:

  1. Width across the opening at the widest usable point.
  2. Height from the ground to the top edge where the tent sleeve or attachment will sit.
  3. Clearance around bumpers, spare wheels, ladders, or racks that could interrupt a seal.

A classic Beetle owner may find the boot shape makes a full rear enclosure awkward. A Kombi or later hatch-style VW usually gives you a friendlier opening for this kind of gear.

Protect the paint and old trim

The thing nobody wants is campsite convenience at the cost of scratched original paint or tired rubbers. If your VW still wears older trim, test every contact point before a full trip. Soft cloth barriers, careful strap routing, and avoiding abrasive movement matter more on a vintage vehicle than on a late-model daily.

Some owners prefer attachment systems that avoid heavy tension across painted edges. Others are happy with straps so long as they can control where the load sits. The answer depends on your vehicle, not the marketing copy.

Here's a useful walk-through to keep in mind when you're visualising fit and setup on the car:

A quick fit checklist for old Volkswagens

  • For Beetles: Check whether the tent expects a wide hatch opening. Many do.
  • For Kombis and vans: Look closely at hatch height and how the fabric seals around corners.
  • For modified cars: Roof racks, rear bars, or custom lights can interrupt a neat fit.
  • For restored originals: Prioritise gentle contact points over absolute speed.

A “universal” tent can still be the wrong tent if your rear opening is narrow, highly curved, or precious enough that you won't relax once it's attached.

Key Features for the Perfect Coastal Getaway

Not all rear tents handle Australian beach camping the same way. A calm inland overnight is one thing. A breezy, damp coastal site after a hot day is another entirely.

A light blue tent attached to a car trunk on a beach showing essential features.

Weather protection that actually matters

Fabric quality is where a lot of cheap gear gives itself away. You want material that stands up to sun, shower, and repeated packing. Rooftop tent specs offer a useful benchmark here, with some Australian models featuring UPF 50-plus UV stability and double-stitched waterproof seams for durability in local conditions, as covered earlier in the rooftop tent reference.

For a rear tent, the principle's the same. The more punishment your weekends dish out, the more those build details matter.

Fast setup and stable attachment

One of the smarter modern developments is magnetic attachment. Some tailgate tents use a continuous magnetic strip, and this design can cut assembly time by approximately 40% compared with strap systems while remaining stable in winds up to 45 km/h, according to this tailgate tent field-test video.

That's a genuine quality-of-life feature. Less mucking around in a car park. Less flapping fabric while you sort poles. More time getting the camp chair out.

The shortlist I'd use near the coast

Feature Why it matters on a VW trip
UV-resistant fabric Better for exposed beachside camps
Waterproof seams Less stress when weather turns
Mesh openings Helps the tent feel liveable
Simple attachment Useful for quick stops and late arrivals
Solid frame and tie-downs Better manners in coastal wind

Good camping gear should disappear into the background. If you're thinking about it all night, it's not doing its job.

A buyer's eye, not a browser's eye

When you inspect a tent for car boot use, don't just ask whether it fits. Ask how it behaves. Does the fabric look like it can handle repeated folding? Do the poles feel like they belong outdoors? Do the openings give you enough control over airflow?

That's the same instinct collectors use when judging a licensed VW piece. Finish, detail, construction, and longevity always show its true quality.

Setup Pack-Down and Care Tips

A boot tent should be one of the easiest bits of gear you own. If setup feels like a wrestling match, something's off. Usually it's either the site, the sequence, or trying to rush before the car is parked square.

The easy setup rhythm

Start by parking as level as you can. Open the rear, lay the tent out behind the car, and identify the points that contact paint, trim, or glass before you tension anything. Build slowly the first few times. Familiarity is what makes a fast setup look easy.

A calm routine helps:

  • Position first: Face the rear away from the strongest wind if you can.
  • Attach lightly: Get the tent sitting in place before tightening every strap or point.
  • Raise structure next: Poles and shape come after alignment, not before.
  • Tension last: Fine-tune once the whole shelter is standing properly.

Pack-down without regrets

The biggest mistake is stuffing damp fabric away and promising yourself you'll sort it later. You won't enjoy the surprise. Dry it fully before storage whenever possible, then fold it with the attachment points tucked neatly so they don't rub or snag on the next trip.

Cleaning doesn't need to be dramatic. Brush out sand, wipe grime off contact areas, and inspect seams and stress points after each decent run. It's comparable to caring for old VW paint. Gentle attention beats heroic repair.

If a trip ends with wet gear, unpack it at home the same day. Future you will be grateful.

A few habits that save gear

  • Use a ground check: Clear shells, sticks, and sharp rubbish before setup.
  • Mind the duco: Don't drag wet, sandy fabric across paint.
  • Store loosely if you can: Crushed gear ages faster.
  • Borrow smart ideas: Some of the same practical thinking behind a Fiamma F45 awning applies here. Clean mounting areas, avoid rushed pack-downs, and keep moving parts and fabric dry.

FAQ for the Aussie VW Adventurer

Can I keep the boot closed for security

Usually, no. That's one of the most frustrating compromises with this style of camping. Most car boot tents need the boot or tailgate open to work, which leaves gear more exposed than many travellers like. It's a real concern in Australia, where 68% of camper survey respondents cited theft as a top issue during multi-day trips, and closed-boot solutions remain rare, as discussed in this community discussion on car tents that don't require an open boot.

If security sits high on your list, look hard at how much of your setup depends on leaving valuables in the car overnight. In practice, many owners shift important items forward into the cabin, keep the rear area tidy, and choose campgrounds with good visibility rather than total seclusion.

What about condensation on humid coastal nights

It's one of the classic pain points. The trick is airflow. If your tent has mesh panels, use them early rather than waiting until things feel clammy. Wet towels, damp wetsuits, and cooking too close to the sleeping area all make it worse.

The awkward bit is that the common workaround, opening things up further, can reduce privacy and make security feel shakier. That's why ventilation design matters so much when you're choosing gear in the first place.

Is a rear tent better for a Kombi than a Beetle

In most cases, a Kombi or hatch-style VW gives you an easier platform because the rear opening is more naturally suited to annex-style camping. A Beetle can still be part of a brilliant camp setup, but you may lean more toward awning-style shelter or simpler shade rather than a big enclosed rear room.

That doesn't make one more “VW” than the other. It just means the body shape steers the setup.

How do I make the campsite feel more Volkswagen

This is the fun bit. Keep it tasteful. A striped chair, a tidy enamel mug, a surf towel over the line, maybe a little nod to the cars you love back home. Plenty of people bring a favourite Kombi or Beetle diecast along for the dashboard or camp table, not because they need to, but because that's the whole point of the hobby. The car, the trip, the memory, the object. It all joins up.

The best VW campsites don't look staged. They just feel like the owner brought their world along for the weekend.

Is a tent for car boot use worth it for short trips

If you do quick overnighters, dawn surf missions, show weekends, or casual coastal runs, yes, it can be one of the handiest pieces of kit you buy. It's especially good when you want shelter without turning the trip into a full camping expedition.

The value isn't only in sleeping space. It's in convenience. Shade while you change. Cover while you sort gear. A dry spot when the weather turns ordinary.


Volkswagen lovers know the best gear does more than serve a purpose. It carries a bit of story with it. If you'd like to bring that same spirit into your home, shed, office, or gift list, have a look through Volkswagen Memorabilia. It's a local Australian shop with VW-themed gifts, licensed diecast favourites, Kombi and Beetle pieces, and the kind of stock that suits collectors who appreciate local stock and fast shipping without the fuss. If your weekends revolve around old Volkswagens, surf culture, and nostalgia, you'll feel right at home there.

Camping Utensil Sets: Your 2026 Aussie Road Trip Guide

The morning usually starts the same way. Salt in the air, kettle just starting to mutter on the camp stove, and the Kombi side door open to that lovely little world you've packed with care. Not crammed. Curated. Towel rolled tight, enamel mugs nested properly, tea bags where you can grab them half asleep, and a camping utensil set tucked where it won't rattle the whole way up the coast.

If you've ever chased a sunrise out of a Beetle boot or cooked brekkie from the back of a Type 2, you already know the small gear matters more than people think. A dodgy spoon, a knife that bends, or tongs that vanish into the cutlery drawer chaos can turn a relaxed camp meal into a grumble. The right kit keeps the vibe intact. That matters when the road is the point.

The Joy of a Perfectly Packed Kombi

A Kombi has a way of teaching you discipline without making it feel like work. Every item has to earn its place. You learn fast that the things you touch every day matter most. The mug. The torch. The tea towel. The camping utensil set.

I remember a beach run up the New South Wales coast in an old two-tone bus, the sort of trip where the destination kept changing because the weather was too good to ignore. One mate brought a flimsy drawerful of mismatched cutlery wrapped in a supermarket bag. I had a compact roll with the proper basics, a serving spoon, a decent knife, a spatula that could flip a fritter without folding in half, and tongs long enough to save my knuckles from the pan. By the second camp breakfast, everyone knew which setup felt like home.

A vintage green camper van parked by a serene lake at sunset, featuring a curated camping utensil set.

That little ritual is becoming more familiar all over the country. In 2025, caravan and camping trips in Australia, including glamping, increased by 14%, with Australians taking a total of 17.3 million caravan and camping trips, according to Tourism Research Australia's caravan and camping data. More people are getting outdoors, and more of them are realising camp cooking works best when your gear is sorted before the wheels start turning.

Packing for comfort, not clutter

A classic VW doesn't reward overpacking. It rewards intention.

  • Keep daily-use gear together: Your utensil set should live near the stove, not buried under bedding.
  • Pack for the meal you cook: If you make pasta, eggs, snags, toasties, and salads, pack for those jobs.
  • Use your van like a tiny kitchen: A good layout saves time and keeps the camp mood easy.

Camp rule: If you need it at every stop, it deserves a fixed home.

A tidy van feels better to drive and better to live in. If you're refining that setup, this van fit-out planning checklist is handy for getting the essentials in the right order before your next trip.

Beyond the Spork What Is a Camping Utensil Set

A spork is fine if you're hiking light and dinner comes from a pouch. That's not how most VW road-trippers cook. A proper camping utensil set is less about surviving and more about eating well by the beach, at a bush stop, or at a meet-up where someone always says, “Throw another onion on.”

For van life, a useful set usually covers two jobs. First, personal eating tools. Second, cooking and serving tools. If it only handles one, you'll still end up rummaging through odd bits and pieces.

What belongs in a proper road kit

The best camping utensil set for a Kombi or Beetle trip usually includes a mix like this:

  • Eating pieces: Fork, spoon, knife, and a mug or bowl setup that nests neatly.
  • Cooking tools: Spatula, tongs, serving spoon, prep knife.
  • Problem-solvers: Bottle opener, can opener, corkscrew, and something for turning food over a hot plate.
  • Storage: A roll, pouch, or compact box that stops metal-on-metal chatter.

That last bit matters more than people think. In a van, every loose item develops a soundtrack. The wrong storage turns a scenic drive into a percussion session.

Why van campers need more than a backpacker kit

Backpackers strip things back because weight rules everything. VW travellers have a bit more room, so the better question is whether a piece earns its space. A full-size spatula often earns it. So do proper tongs.

The nicest camp meals happen when your tools feel familiar enough to use without thinking.

A camping utensil set should make your mobile kitchen feel settled. Not fancy. Not overloaded. Just ready. When you can make breakfast one-handed while balancing a mug of tea in the other, you've packed well.

Choosing Your Utensil Material for Aussie Adventures

Material changes everything once you leave the driveway. It affects how your gear feels in the hand, how it copes with heat, and how long it lasts after beach runs, dusty inland stops, and damp mornings near the water.

A comparison chart outlining the pros and cons of different camping utensil materials including stainless steel, titanium, bamboo, and plastic.

The coastal factor is where many buyers get caught. Most camping utensil content fails to separate normal wear from real durability in Australian conditions. 68% of Australian campers report replacing their utensil sets annually due to corrosion from coastal salt and heat, as noted in Cranky Croc's discussion of camp kitchen utensil considerations. If your VW weekends usually end with sandy feet and salty windows, material deserves a proper look.

Camping Utensil Material Comparison

Material Pros Cons Best For
Stainless steel Durable, easy to clean, familiar feel Heavier, can get hot fast Regular road trips and general camp cooking
Titanium Very light, strong for its weight Higher cost, can feel less solid in use Minimalist packers and serious lightweight travellers
Bamboo or wood Retro look, gentle on non-stick cookware Holds odours, needs more care Relaxed camp setups with a natural, coastal feel
Recycled plastics Light and budget-friendly Less durable, heat sensitive Backup kits, casual use, or very simple meals

How each material suits VW travel

Stainless steel feels right in a classic setup because it's dependable. It washes up easily and suits campers who cook often. If your style is more “park by the dunes and fry something proper”, stainless is usually the safe choice.

Titanium suits travellers who love compact, efficient packing. It's especially appealing if your Beetle has very little spare room or you just enjoy finely made gear. The trade-off is cost. Some Australian camping utensil sets range from about $2 for a simple spoon to $30 for premium titanium spoon and fork sets, while a mid-range set noted by Outdoor Life sits at $22 with a 4.6 out of 5.0 rating, according to Outdoor Life's guide to the best camping utensils.

Bamboo and wood have undeniable charm. They look good on a striped towel beside the van and feel perfect for the retro crowd. They do ask more of you, though. Dry them well and don't treat them like something you can forget in a damp tub overnight.

Recycled plastics have their place, mostly as a second kit, a picnic backup, or something for easy snacks rather than serious cooking.

Material test: If your trips lean coastal, choose for salt, heat, and cleaning ease first. Style comes second.

Must-Have Features for the VW Adventurer

The right features matter more than clever marketing. On the road, practical design wins. You notice it when you're parked at a windy headland trying to make dinner before dark.

A camping utensil set featuring a fork, spoon, knife, and multi-tool on a rustic wooden table inside a van.

A tidy storage roll is high on my list. Corrugated roads and old VW cabins don't forgive loose gear. If your fork, knife, and opener all knock together in one tin, you'll hear them all day. A proper pouch or box also means you can lift the whole set from van shelf to picnic table in one move.

Full-size tools beat novelty combos

Compact multi-tools look brilliant in the shop. They don't always shine when you're cooking for more than one person. Only 22% of Australian campers use compact multi-utensil sets for week-long tent trips because they lack the prep efficiency of full spatulas, knives, and can openers needed for shared meals, as discussed in this Australian camping conversation on Reddit.

That lines up with what plenty of road-trippers already know. A combined spoon-fork-knife gadget can be handy for lunch. It's not much fun when you're trying to prep veg, open a tin, flip fish, and serve a group.

Look for these features:

  • Secure storage: Rolls and boxes stop rattles and keep drawers organised.
  • Real handles: Full-grip tools are easier to use when your hands are wet or sandy.
  • Useful extras: Can opener, bottle opener, and serving spoon save you from packing duplicates.
  • Easy cleaning: Smooth surfaces and simple joins are kinder at wash-up time.

Construction matters when gear gets used hard

If you cook often, pay attention to how pieces are built. The Front Runner Camp Kitchen Utensil Set is one example built with triple-riveted composite handles and full-size stainless steel blades, a design intended to prevent handle detachment under repeated torque stress. One retailer description notes this addresses a failure point seen in 15% of non-riveted consumer sets under Australian field testing conditions, with the riveted design increasing shear strength by approximately 40%, according to Roof Racks Galore's Front Runner product page.

That's the sort of detail you appreciate halfway through a trip, not at the checkout.

For a quick visual on camp kitchen essentials, this clip gives a decent sense of what practical setup looks like in a compact space.

Easy Packing and Cleaning Tips on the Road

Camp kitchen order doesn't come from buying more stuff. It comes from repeating a few good habits until they're automatic. Old Kombi owners know that once clutter starts, it spreads from the sink tub to the bed shelf in about ten minutes.

A simple routine that works

I like to wash in stages. Scrape first, rinse second, proper wash last. That keeps greasy water under control and stops your clean spoon ending up in yesterday's bacon film.

A few habits make life easier:

  • Pack by use, not by type: Keep cooking utensils with the stove gear, not with eating cutlery.
  • Dry before stowing: Even a little trapped moisture can leave things musty by the next stop.
  • Use a mesh bag or open roll: Airflow helps when you've washed up late and hit the road early.
  • Do a reset each evening: Two minutes of putting everything back saves a messy breakfast.

Wash-up is part of camp comfort. Do it before you sit down for the night and tomorrow starts better.

Keep the kit legal, clean, and easy to access

Storage also depends on where you stop and how you set up. If you're moving around Australia in a van, it helps to understand local expectations around overnight stays, camp behaviour, and how much gear you really want outside at any one time. This guide to van life Australia camping rules is useful for planning a setup that stays simple and respectful.

One more tip. Give every utensil a home you can reach without unpacking half the van. The best road setups aren't glamorous. They're calm.

Style Your Kit for Coastal and Retro Trips

Late afternoon at Crescent Head, the kettle is rattling on the stove, salt is still drying on the windscreen, and someone reaches into the cutlery roll for a fork that looks like it belongs in the van. That little detail changes the whole mood. In a Kombi, the camp kitchen is part of the scene, same as the striped towel on the door and the sandy thongs under the step.

A utensil set does more than help with dinner. It becomes part of the character of the trip. Stainless steel has that clean, old-school look that suits a silver Beetle or a tidy white Kombi. Bamboo handles bring in a weathered beach-shack feel. Bright retro colours suit vans with flower decals, vinyl coolers, and chairs that have seen thirty summers up and down the coast.

Let the Kombi story shape the mood

Part of the charm has always been that mix of useful and beautiful. On the official Kombi history page from Volkswagen Australia, the story begins with Ben Pon's sketch and the early Type 2 production that followed. That heritage still shows up every time a Kombi owner packs practical gear that also feels full of personality.

That is why some camp setups just look right straight away.

  • Classic silver and cream: Stainless utensils, a canvas or neutral roll, enamel mugs, plain napkins.
  • Coastal surf trip: Bamboo servers, faded blue or sea-glass tones, striped tea towels, timber boards.
  • Playful retro weekender: Colourful handles, patterned plates, sunny mugs, old folding chairs beside the van.

Screenshot from https://vwmemorabilia.com.au/shop/

Bring the same eye to your display at home

I have always liked the way road gear follows you home. A neat cutlery roll in the van often sits beside a shelf with maps, a tiny Kombi model, and a photo from some windy breakfast stop near the water. The same taste is at work in both places.

If your place has that beachy, retro VW feel, these coastal home decor ideas are worth a look. They suit the kind of home where an enamel mug, a surf print, and a little blue bus on the shelf all make perfect sense together.

A well-styled camp kit keeps the trip going long after you have parked the van.

The same eye for detail shows up in searches for VW Kombi diecast Australia, Volkswagen Beetle model, buy diecast Kombi, VW memorabilia collectibles, and Volkswagen diecast models for sale. People who care about a good-looking camp drawer usually care about the shelf in the garage or the corner of the lounge room too.

If your road-trip style spills over into the garage, office, or living room, Volkswagen Memorabilia is well worth a look. It's a strong local option for Australian VW enthusiasts who want licensed pieces with local stock and fast shipping, whether you're after a Kombi Samba Bus diecast, a classic Volkswagen Beetle model, or VW memorabilia that matches the easygoing spirit of life on the road. You can browse the range in the shop and find pieces that feel right at home beside a classic bus, a beach map, and a properly packed camp kitchen.

Coastal Boho Wall Art: A Sun-Kissed Styling Guide

You know the feeling. You've come home from a beach run, kicked off your thongs at the door, and looked around the lounge thinking it still doesn't carry that same loose, sun-faded calm you get near the coast. The room's fine. It's tidy enough. But it doesn't feel like salty air, old road trips, market finds, and a weekend parked beside the surf in a faithful old Kombi.

That's where coastal boho wall art earns its keep.

Done well, it doesn't look like a theme. It looks lived in. It feels like a home with stories in it, the sort of place where a woven hanging can sit happily beside a weathered beach print, and where a small nod to classic Volkswagen life feels completely at home rather than bolted on for effect.

For plenty of us, that sweet spot is the main challenge. You want the relaxed beach-house mood, but you don't want a wall that looks like a souvenir shop. You want warmth, texture, and personality. Maybe even a little Surf Safari nostalgia. The good news is that coastal boho gives you room to do exactly that, whether you live two streets from the water or a long inland drive away.

Bringing That Sun-Soaked Vibe Into Your Home

A lot of people start with colour and get stuck there. They think coastal means blue cushions, a shell print, maybe a bit of driftwood, and job done. But the rooms that really work don't start with objects. They start with a feeling.

Think of the homes that stay with you after a weekend away. The ones with soft light, timber that looks slightly weathered, art that feels collected rather than ordered in one hit, and little details that hint at road trips, beach mornings, and family history. That's the spirit coastal boho wall art should bring into a room.

For VW lovers, that idea lands naturally. A classic Beetle or Kombi has never just been transport. It's memory, freedom, and design rolled into one. That same energy translates beautifully into interiors when you resist the urge to make every piece shout “beach” or “retro”. A room works better when it suggests a coastal life rather than spelling it out.

A helpful way to frame it is this: your wall art should feel like a personal album, not a styling checklist.

Coastal boho works best when the room feels collected over time, a bit like a well-loved VW that carries its history proudly.

That might mean a quiet shoreline print, a woven wall hanging from natural fibres, an old photo from a surf trip, or a subtle vintage automotive accent tucked among softer textures. If you're chasing ideas that tie beach living to classic VW nostalgia, these coastal home decor ideas are a good place to spark the look without drifting into cliché.

What the vibe actually looks like

  • Relaxed, not rigid. Straight lines and perfect symmetry can make the room feel showroom-stiff.
  • Personal, not generic. Pieces should say something about where you've been and what you love.
  • Layered, not overloaded. The best walls have breathing room.
  • Nostalgic, not novelty. A nod to surf culture or a vintage Kombi is plenty. Ten of them is a theme park.

That balance is what gives coastal boho wall art its charm. It's less about matching decor and more about building a space that feels as easy-going as a Sunday Volkswagen meet by the water.

The Building Blocks of Coastal Boho Style

Coastal boho has a clear backbone. If you get the bones right, the room feels natural even before the art goes up. The strongest approach in Australia follows a simple layering method described in this Australian coastal boho wall art style guide: start with seagrass, raffia, jute, and driftwood, then add ocean elements like shells, coral, and sea glass, build over that with mushroom greys, warm stones, bleached woods, and pearl whites, and finish with touches of coral, aqua, or sea glass green spread through the space.

An infographic detailing the three building blocks of coastal boho style: color palette, textural harmony, and natural elements.

Start with colour that looks sun-washed

The best palette is quieter than many people expect. Bright nautical blue can push a room into holiday-rental territory fast. Coastal boho usually feels stronger when the foundation is neutral and a bit dusty.

A good working palette includes:

  • Mushroom and stone tones for softness
  • Bleached timber shades to echo weathered coastal materials
  • Pearl whites and warm creams to bounce light around
  • Aqua, coral, or sea-glass green as accents rather than dominant blocks

Since wall art rarely hangs in isolation, the colours in your prints, frames, fibres, and shelves all talk to each other. If the base palette is too loud, every added piece has to fight for attention.

Lean into texture before pattern

Texture is what keeps coastal boho from feeling flat. It also stops a neutral room from becoming dull. On a practical level, that means choosing surfaces and materials that catch light differently across the day.

Try mixing:

Element What it adds What to avoid
Woven fibres Warmth and movement Too many similar weaves together
Timber frames Structure and grounding High-gloss finishes
Linen or cotton art surrounds Softness Heavy synthetic shine
Driftwood and natural pieces Organic character Polished, overworked “beach” props

Practical rule: if every piece is smooth, printed, and framed, the wall will feel one-note. Add at least one tactile element.

That's one reason boho style room ideas often feel more inviting when they include mixed materials rather than only framed prints.

Use natural elements with restraint

Shells, coral forms, and sea glass can be beautiful. They can also tip a room straight into over-themed territory if they're used like costume jewellery. One or two natural references usually do more than a whole wall of obvious seaside motifs.

Think in layers instead of labels. A driftwood-framed print says more than a print of a giant shell. A raffia hanging beside a soft beach photograph gives you coastal mood without having to announce it.

Choosing Wall Art That Tells Your Story

The smartest coastal boho wall art choices begin with one strong anchor piece. Not seven medium-sized maybes. One hero piece gives the room direction, then the supporting pieces can build mood around it.

That hero might be a quiet coastal photograph, a large neutral abstract with sandy tones, or even a print that nods to road-trip nostalgia, like a classic Kombi parked near dunes at sunrise. If it means something to you, it will outlast trend-driven art every time.

A woman admiring a coastal-themed gallery wall featuring landscape art and neutral decor in a beach house.

Why mixed media usually wins

The broader market is moving toward more personalised decorating. The Australia-New Zealand wall art market is projected to grow at a 6.1% CAGR from 2025 to 2035, and while canvas and digital prints remain dominant, macramé and fabric tapestries hold an estimated 18 to 20% share in 2024, which points to an ongoing appetite for tactile boho pieces, according to wall art market analysis from Future Market Insights.

That tracks with what works in real rooms. Prints bring imagery and scale. Textiles bring softness. Sculptural pieces add shadow and depth. When you combine all three, the wall feels far more settled and intentional.

A useful formula is:

  • One hero piece that sets the mood
  • Two to four supporting items in different sizes
  • At least one textured piece such as macramé, a woven hanging, or fabric art
  • One grounding element like timber shelving or a natural frame

Scale matters more than people think

A tiny artwork on a big wall rarely looks thoughtful. It usually looks temporary. On the flip side, oversized art in a tight room can swamp everything around it.

Use this quick guide:

Room situation Better choice
Wide sofa wall One large piece or a broad mixed-media arrangement
Small reading nook A pair or trio of smaller works
Entry wall Tall vertical art or a slim layered grouping
Bedroom above bed Soft, wider pieces with gentle contrast

Buy the piece that fits the wall, not just the one that looks good in your hand or on your phone screen.

The other key test is emotional. If the art could hang in anyone's beach house, it may not be the right piece. Coastal boho wall art lands best when it feels a bit personal, a bit imperfect, and tied to your own version of the coast.

Add Nostalgic Charm with a VW Twist

This is where things get fun.

A coastal boho space can carry classic Volkswagen details beautifully, but only if you style them like memories rather than merchandise. The aim isn't to build a “VW room”. It's to let old Kombi and Beetle cues sit inside a broader coastal story, the same way a surfboard or vintage market find might.

Australian interior design discussion around the Gold Coast mood makes that pretty clear. 68% of renters and homeowners in coastal Australian regions reject generic coastal art, preferring subtle colour pops and natural textures that feel lived-in rather than staged, as noted in this Gold Coast mood styling discussion. That's exactly the right lens for adding Volkswagen character. Keep it subtle. Keep it textured. Keep it real.

Screenshot from https://vwmemorabilia.com.au/shop/

What works in a Surf Safari look

A vintage VW element works best when it feels earned. Good examples include a licensed Kombi Samba Bus diecast displayed on a floating shelf beside coral-toned books, a framed photograph of a real Beetle from a family trip, or a retro metal sign paired with softer woven textures so the whole arrangement doesn't go hard and shiny.

Try these combinations:

  • A 1:24 Kombi on a timber shelf with a small shell dish and a linen-backed frame
  • A Beetle photo in a natural timber frame mixed into a neutral gallery wall
  • Retro VW metal decor balanced with raffia, jute, or macramé
  • Surf-inspired VW colour accents used sparingly through cushions, ceramics, or matting

If you like this crossover between coastal styling and motoring nostalgia, these living room wall accents with a relaxed VW feel show how the pieces can sit naturally in a home.

What doesn't work

The common mistake is stacking too many obvious references together. A wall with surfboard art, wave signs, shell garlands, blue-and-white stripes, three Kombi prints, and a “beach life” slogan doesn't feel relaxed. It feels crowded and overly literal.

A better rule is to let one VW item play the lead and let the others whisper.

A classic Kombi has enough personality on its own. It doesn't need a chorus line of matching props around it.

That's also why licensed pieces matter. They tend to have cleaner proportions and better detail, which helps them read as collectable objects rather than novelty filler. For readers searching terms like VW Kombi diecast Australia, Volkswagen Beetle model, or buy diecast Kombi, that distinction makes a big difference when the piece is part of your home styling rather than tucked in a display cabinet.

Curating and Hanging Your Coastal Gallery

Once you've picked the pieces, the last job is making them sit together properly. Good gallery walls look effortless, but they're usually planned with care. In Australian coastal boho projects, 87% of professional installations use mixed-media gallery walls, and 45% of installation failures come from improper mounting of natural material sculptures, according to Australian coastal boho installation benchmark data.

A four-step infographic guide on how to curate and hang a coastal themed gallery wall.

Build the layout on the floor first

Set everything out before you touch the wall. This saves a lot of unnecessary patching and helps you spot visual clashes early.

A practical order looks like this:

  1. Place the hero piece first and decide what it anchors.
  2. Add supporting works around it with varied shapes and sizes.
  3. Put textured pieces slightly off-centre so the wall doesn't feel too rigid.
  4. Step back and check breathing room between items.

Keep spacing generous

Crowding is the fast lane to a messy result. Natural materials need a bit of air around them, especially woven hangings and small sculptural pieces. If items are too close, the texture gets lost and the whole arrangement feels tense.

A mixed gallery often looks best when it includes:

  • Framed art for structure
  • Woven or fabric elements for softness
  • One small sculptural object for depth
  • A shelf or ledge if you want to rotate smaller accents over time

Hang with the right hardware

This part matters more than the styling. Driftwood, coral-inspired pieces, and mounted memorabilia can behave differently from standard frames. If the fixings aren't suited to the material and wall type, they can twist, drop, or pull away.

Worth remembering: organic materials often need more secure mounting than people expect, especially if they're uneven in shape or weight.

The final check is simple. Does the wall feel airy, personal, and a little nostalgic? If yes, you've nailed it. If it feels busy, themed, or overly matched, remove one or two obvious pieces and let the stronger ones breathe.


If you're ready to bring that laid-back Surf Safari mood home, Volkswagen Memorabilia is a cracking place to start. You'll find officially licensed VW memorabilia collectibles, coastal-friendly decor, and standout pieces for anyone looking for Volkswagen diecast models for sale, a Volkswagen Beetle model, or a proper VW Kombi diecast Australia display piece. The local stock and fast Australian shipping make it easy to style your space without the long wait, whether you're adding a subtle Samba Bus accent to a gallery wall or picking up a gift for the VW fan who already talks Kombis over every cuppa.

Fraser Island Maps: A VW Fan’s Guide to K’gari

You're probably doing it right now. Tabs open. Ferry timings on one screen, a weather app on the other, and a half-formed daydream in your head where a classic Kombi hums its way north, boards the barge, and rolls onto K'gari with a surf rod, an esky, and nowhere urgent to be.

That dream has proper Aussie road-trip magic in it. Salt in the air. Sand on the floor mats. A faded map folded into the glovebox beside old servo receipts. For a lot of us VW tragics, that feeling is baked into the shape of the vehicle itself. The rounded nose, the simple dash, the idea that the trip matters just as much as the destination.

K'gari sharpens that dream. It's wild, beautiful, and not especially forgiving if you bluff your way through the planning. That's where good Fraser Island maps stop being a nice extra and become part of the adventure kit, right up there with tyre pressure know-how and common sense.

The Great K'gari Dream and Your Trusty Co-Pilot

A mate of mine keeps a small Kombi model on his workshop shelf beside a box of old spark plugs and a sun-faded photo from a camping trip up the coast. Every time I see it, I think of the same thing. The old VW promise. Pack light, leave early, follow the coastline, and trust the vehicle to carry the story.

That spirit goes way back. The original Volkswagen Kombi (Type 2) was first introduced in 1950, launching an icon of light commercial vehicles that became a symbol of freedom and adventure in the Australian fleet and beyond, as noted in this history of the Volkswagen Kombi.

K'gari feels like the destination that spirit was built for. Not because it's easy, but because it rewards people who love the journey. You can almost hear the old air-cooled soundtrack in your head while planning it, even if your actual island vehicle ends up being something far more modern and sand-ready.

The road-trip dream needs a plan

The romantic version of the trip is simple. Throw a bag in the back, point north, and sort it out as you go.

K'gari doesn't play by those rules.

Soft inland sand, changing access, beach runs that depend on timing, and safety obligations around wildlife all mean your map becomes your quiet co-pilot. It tells you where the track bends, where the campsite sits, where the day can go pear-shaped, and where the magic lives.

Good adventures feel spontaneous. Safe ones are usually well planned.

That's why I always think of maps the same way I think of old VW ownership. The carefree feeling only works because someone paid attention to the details first.

If you enjoy that whole coastal freedom vibe, the old-school travel romance is alive and well in van life Australia stories. The mood is familiar. The difference with K'gari is that your dream trip starts with knowing exactly what map you'll trust when the tracks stop feeling obvious.

Why Your Phone Map Won't Cut It on the Sand Tracks

A phone map is fine for finding a bakery in a country town. It's not enough for K'gari.

That's not snobbery. It's the same logic as using the right oil in a Beetle or the right parts in a restoration. Generic tools work in generic conditions. K'gari isn't generic.

Stretching 123 km in length and covering 166,000 hectares, K'gari (Fraser Island) is the world's largest sand island, a vast terrain where navigation requires more than just a standard GPS, according to this Fraser Island map overview.

A hand holding a smartphone showing a no signal map error on a beach next to a vehicle.

Sand tracks aren't suburban streets

Phone apps tend to treat roads as fixed things. K'gari tracks don't always behave like that. A route can look straightforward on a broad consumer map and feel very different once you're bouncing through soft sand, reading side tracks, or trying to work out whether that turn is the right one.

The problem isn't only signal. It's context.

A proper island map gives you the sort of detail that matters in real driving conditions:

  • Track identity: Is this a main inland route or a softer connecting section?
  • Practical landmarks: You need more than a blue dot. You need camp zones, creek crossings, lakes, and known access points.
  • Decision support: Specialised maps help you judge the route before you're committed to it.

Generic navigation can make a simple day hard

A lot of travellers assume the beach will be the easy bit and the inland sections will sort themselves out. That's backwards thinking. On K'gari, a casual wrong turn can chew up time, fuel, and confidence fast.

I think of it the same way I think of an outback glovebox kit in an old VW. You wouldn't head bush with only guesswork and optimism. You'd pack what fits the terrain.

That same road-trip mindset is captured nicely in this Australian outback map feature. It's the same lesson in a different setting. A map isn't décor. It's gear.

A phone tells you where you are. A purpose-built map helps you decide whether you should be there at all.

Respect the island and the trip gets better

The funny thing is that proper prep doesn't make the journey feel less adventurous. It makes it more enjoyable. You stop second-guessing every turn and start noticing the good stuff. The colours in the sand. The odd silence between patches of scrub. The relief of rolling into camp with enough daylight left for a cuppa.

That's why Fraser Island maps matter so much. They don't kill the romance. They protect it.

Your K'gari Map Toolkit From Paper to Pixels

The best setup isn't one map. It's a small toolkit, with each piece doing a different job.

That's familiar territory for VW people. A diecast collector doesn't confuse a shelf-piece Samba Bus with a pocket-sized Beetle. Same badge, different purpose. K'gari navigation works the same way. One map gives you broad orientation, another gives track detail, and another helps with local rules on the ground.

The definitive topographic map for Fraser Island is produced by Hema Maps at a 1:130,000 scale, featuring GPS-surveyed 4WD tracks that have been field-checked by the Hema Map Patrol to ensure accuracy and safety, as described on the Hema Fraser Island map listing.

An infographic titled Your K'gari Map Toolkit showing physical, digital, satellite, and local signage map resources.

The paper map that earns its keep

The Hema map is the one I'd want folded in the door pocket.

It's practical, readable, and built for the job. On an island where battery life, glare, and wet fingers can all become annoyances, paper still has a lot going for it. You can spread it across the bonnet, trace a route with one finger, and get everybody in the vehicle looking at the same plan.

What makes it valuable isn't nostalgia. It's reliability.

The digital layer that helps in real time

Offline digital maps add convenience. A moving position marker can be a gift when tracks branch, visibility drops, or fatigue creeps in late in the day.

The trick is using digital tools as a support act, not the whole show. Download what you need before you leave the mainland. Check that the map data is available offline. Then carry charging gear and a backup plan.

A simple way to think about it:

Tool Best use Weak spot
Paper topographic map Big-picture route planning and backup No live position marker
Offline map app On-track confirmation and quick checks Battery and device dependence
Local signage Immediate warnings and site rules Limited area coverage
Satellite view General orientation Not enough detail on its own

The official map you shouldn't ignore

There's another map category people sometimes treat as secondary, and that's a mistake. Official park material matters because it reflects current management priorities on the island, especially around camping, access, and wildlife safety.

Some of the most useful information isn't glamorous. It's the note near a zone. The fence symbol. The warning panel you skimmed the first time and then wish you'd studied properly later.

Practical rule: Carry one map for navigation and another for rules, zones, and safety notices. They solve different problems.

Local advice is part of the toolkit too

The smartest travellers on K'gari don't act like the map is the final word. They use it alongside current advice from the barge, rangers, accommodation desks, and posted signs.

That mix of old-school and modern feels very VW, really. A classic shape with a sensible upgrade. The spirit stays the same. The reliability gets better.

If you're building your own Fraser Island maps toolkit, keep it simple:

  • Start with a trusted topographic map: This is the backbone.
  • Add an offline app: Good for confirming your position.
  • Use official park material: Especially for camps, restrictions, and safety obligations.
  • Listen locally: Conditions on the day matter as much as planning at home.

How to Read the Signs and Sandy Tracks

Owning the map isn't the same as understanding it. K'gari has its own language, and once you learn it, the island feels much less mysterious.

The first time an individual studies a specialised island map, they often look for the big-ticket spots. Lake McKenzie. Eli Creek. The famous beach run. Fair enough. But the experienced driver's eye goes somewhere else first. Track type, junction logic, access notes, and where one decision commits you to another.

An elderly man pointing at a map of Fraser Island while planning a trip in a vehicle.

Read the route before the destination

That sounds obvious, but it's where plenty of planning goes soft. People choose a landmark first and only later realise the route includes slow inland work, beach timing, or a combination of both.

When I look at Fraser Island maps, I try to answer four questions before I care about scenery:

  1. How do I enter and exit the route?
  2. What kind of track am I committing to?
  3. What are the obvious bailout points if plans change?
  4. What rules apply where I stop?

That approach isn't glamorous. It is effective.

What the important symbols are really telling you

Different map makers use slightly different styling, but the important cues are consistent enough to learn.

  • Main beach routes: These tend to be visually obvious, but they still demand judgment.
  • Inland connector tracks: These deserve closer attention. They can turn a short-looking hop into a proper slog.
  • Camping areas and facilities: Mark these early so you're not making late decisions when everyone's tired.
  • Safety and restricted areas: Don't skim past them. They often shape the whole day.

A map legend is a bit like an old VW workshop manual. Boring until it suddenly saves you.

Signs on the island matter as much as lines on paper

A common mistake is treating on-ground signage as confirmation only. On K'gari, signs can change the meaning of your plan. They tell you what's happening where your printed map can't update itself.

That's why I always tell people to pause at intersections, information boards, and access signs rather than just glancing at them through the windscreen.

You don't read K'gari once at home. You keep reading it all day.

Track-reading habits worth building

Here, confidence grows. Not from bravado, but from routine.

Habit Why it helps
Stop and orient the map properly Reduces wrong turns at busy junctions
Mark likely lunch or rest points Prevents rushed choices later
Note camp zones early Helps you avoid hunting for options when daylight fades
Cross-check signs with your plan Keeps you aligned with current conditions

There's a nice parallel here with classic VW driving. You learn the quirks. You stop fighting them. Then the whole machine starts making sense.

If you like mechanical planning as much as trip planning, the mindset isn't far off what's covered in this high-lift jack bracket installation guide. Read carefully, understand the parts, and things work better when the pressure comes on.

The Digital Co-Pilot Your Best Apps and GPS Options

The modern answer isn't paper versus digital. It's paper plus digital.

That's the sweet spot. A paper map gives you perspective. An offline app gives you confidence at the fork in the track when everyone in the cabin suddenly has an opinion.

What digital tools do well

Offline map apps are excellent for confirming where you are in relation to the route you planned. They're quick, visual, and handy when you don't want to unfold a large paper sheet in the wind.

Satellite imagery can help with broad orientation too. It gives you a feel for shape and surroundings. What it doesn't do well is replace a proper track map built for 4WD travel.

A dedicated GPS unit can also make sense if you prefer a device that's built to stay mounted, powered, and visible all day. That's especially appealing if your phone is also handling photos, messages, and booking confirmations.

What still matters before you board the barge

Digital convenience only works if you've prepared it properly. The main jobs are simple:

  • Download the maps in full: Don't assume they'll cache what you need.
  • Check the app while still on the mainland: Open the relevant area and make sure it works offline.
  • Pack charging options: Cables, battery pack, in-car power.
  • Keep a paper backup: If a screen dies, the day doesn't need to.

Digital tools are a co-pilot. Don't give them the keys.

A VW-friendly way to think about it

If you've ever fitted a discreet modern stereo into a classic Kombi, you already understand the philosophy. The upgrade doesn't ruin the character. It supports the experience.

That's exactly how digital navigation should feel on K'gari. Use the convenience. Keep the analogue backbone. Let each tool do what it does best.

For those interested in items such as VW Kombi diecast Australia, Volkswagen Beetle model, buy diecast Kombi, VW memorabilia collectibles, or Volkswagen diecast models for sale, there's a similar principle in collecting too. The best collections balance looks, authenticity, and usefulness. A trip kit should do the same.

Map to Memory Planning Your Unforgettable K'gari Trip

A map becomes exciting when it stops being paper and starts becoming a story.

You can see that shift at the kitchen table. Someone circles a lake, someone else points to a beach run, and suddenly the trip has shape. Morning ferry. Inland turn-off. Lunch spot. Camp by late afternoon. The route starts to feel real.

Screenshot from https://vwmemorabilia.com.au/shop/

The weekend warrior run

This is the trip for people who want a proper taste without trying to conquer the island in one hit.

You arrive with a clear plan, use your main map to identify a sensible inland route to a central highlight, and keep your day conservative. One major destination, one secondary stop, and plenty of breathing room. The joy here is not trying to cram every famous name into one daylight window.

What makes this style work is restraint. You leave enough margin for delays, pauses, and those moments where everybody wants to get out and stare at the place.

The relaxed multi-day escape

A longer stay changes the tone completely. You can build your route in layers, with one day focused on central inland experiences, another on beach travel and scenic stops, and another on slower exploration around camp and nearby points of interest.

Your map toolkit really earns its keep. Paper for planning the overall rhythm. Offline navigation for day-to-day checks. Signage and official safety information for what's happening on the ground.

One issue still catches people out. A critical gap in current resources is the lack of guides that integrate offline map navigation with real-time dingo safety protocols, a significant issue given that up to 40% of visitors report encounters and new protocols for K'gari are often poorly mapped, according to the K'gari parks map material.

That means your itinerary shouldn't only answer where you'll drive. It should answer how you'll behave when you stop.

  • At camp: Know the zone and the rules before arrival.
  • At lakes and picnic areas: Read local notices instead of relying on memory.
  • Around food and gear: Treat wildlife safety as part of route planning, not an afterthought.

Here's a bit of moving inspiration before wheels hit the sand:

The non-driver's version still deserves a proper plan

Not everybody heads over in their own 4WD. Some travellers join guided transport or organise the day around access to major attractions without self-driving.

That doesn't make maps irrelevant. It makes them more useful in a different way. You use them to understand where you're going, what the day can realistically include, and how each stop relates to the wider island. You become a better passenger, a calmer traveller, and a smarter planner.

The best map doesn't just get you there. It helps you remember why each stop mattered.

Years later, that's what sticks. The route line. The lake turn-off. The sandy note scribbled in the margin. It's the same reason people keep old registration papers, faded touring stickers, and tiny VW models on shelves. They're reminders that freedom is sweetest when you can still trace the road back.

Your Adventure Awaits Grab Your Map and Go

K'gari rewards the kind of traveller who loves both freedom and preparation. That's why it sits so neatly beside the old Volkswagen spirit. The dream is open-road simplicity. However, the best trips come from caring about the details.

Good Fraser Island maps give you that edge. They help you choose the right toolkit, read the track properly, combine paper with digital backup, and shape a trip that feels loose and memorable without being careless.

That's the sweet spot. Sand in the tyres, confidence in the plan, and enough room in the day for the unexpected good stuff.

If you're heading over soon, get your maps sorted before the ferry ramp drops. Learn the symbols. Respect the signs. Build an itinerary that leaves margin for weather, wildlife, and the little detours that make the story worth retelling over a cold one later.

And if the trip is still a dream for now, that's alright too. Half the pleasure has always been in the planning.


When you want to keep that road-trip feeling alive at home, have a look through Volkswagen Memorabilia. It's a lovely spot for VW fans, collectors, and gift buyers chasing licensed pieces with real character, from classic Kombi and Samba Bus diecast to Beetle-inspired keepsakes, all backed by local Australian stock and fast shipping.

Home Decor Presents for the Ultimate VW Fan

You're probably in that all-too-familiar spot right now. Birthday coming up, housewarming on the calendar, maybe Christmas creeping closer than you'd like, and the person you're buying for already seems to have every tool, every shirt, and every “practical” thing under the sun. But they light up the second they spot a tidy old Beetle, a two-tone Kombi, or a Samba Bus parked on the grass at a local show.

That's when ordinary gifts fall flat.

For a VW fan, the best home decor presents aren't random fillers for a shelf. They're reminders of road trips, panel vans by the beach, family photos with a Beetle in the driveway, or that one Sunday spent walking row after row of polished classics with a coffee in hand. A well-chosen Volkswagen piece can sit in a lounge room, office, or hallway and subtly say, “I know what you love.”

More Than a Gift It Is a Piece of History

A mate of mine once spent weeks trying to buy a present for his dad. The bloke had restored cars, owned shelves full of manuals, and could spot the difference between a Beetle bumper and a Superbug bumper from half a car park away. Socks were out. Bunnings voucher was too lazy. Another mug was never going to cut it.

What worked was a vintage-style Volkswagen model for the study. Not because it filled a gap on a shelf, but because it brought a story back into the room. His dad saw it and started talking about the first VW he remembered in Australia, the shape of the guards, the simple lines, the feeling those cars gave people. That's the magic with the right home decor presents. They don't just decorate a room. They start conversations.

A person unwrapping a gift box containing a miniature light blue vintage Volkswagen Beetle car model.

The wider category is growing too. The Australian home decor market reached USD 16.1 Million in 2025 and is projected to reach USD 21.6 Million by 2034, according to IMARC Group's Australia home decor market outlook. That tells you plenty of Australians are choosing gifts and keepsakes that belong in the home, not just in a drawer.

Why VW pieces land differently

Some gifts say “that'll do.” Volkswagen-themed decor says something more personal.

  • It carries design history. A Beetle silhouette is recognisable in a heartbeat.
  • It suits lived-in spaces. A Kombi model works in a study, lounge, hallway console, or coastal holiday house.
  • It bridges hobby and home. That's why so many people gravitate to vintage home accessories with a story behind them.

A good gift doesn't interrupt someone's home. It settles into it and makes the room feel more like theirs.

Decoding the VW Fan Your Guide to Gifting

Not every Volkswagen lover wants the same thing. One person wants exact trim detail and authentic lines. Another wants a reminder of beach runs, old family cars, or the carefree look of a bright Kombi parked by the water. Getting the gift right starts with knowing which kind of fan you're buying for.

The connection runs deep in Australia. The Volkswagen Beetle was formally introduced to the Australian market in 1953, with local assembly beginning at Clayton in Victoria the following year, as noted in the Volkswagen Beetle history entry. That long local history is part of why VW gifts can feel so personal here. These aren't foreign curiosities. They're woven into Australian motoring memory.

A Volkswagen gifting guide infographic categorizing VW fans into four types with recommended gift ideas for each.

The four VW gift personalities

Fan type What they care about Home decor present that fits
The Purist Collector Accurate proportions, licensing, historic models A detailed Beetle or Kombi diecast displayed in a study or cabinet
The Nostalgia Seeker Memories, retro charm, old-school design VW wall art, framed pieces, retro-style decor accents
The Daily Driver Enthusiast Everyday VW identity, subtle style Desk accessories, smaller display models, practical memorabilia
The Customizer or Tinkerer Workshop spirit, individuality, model details Model kits, metal decor, unusual display pieces

How to read the clues

If they stop at every diecast table during a show, they're probably the Purist Collector. They'll notice scale, body shape, badging, windows, trim, and whether the model feels true to the original car.

If they tell stories that start with “we used to pile into Dad's Kombi”, that's the Nostalgia Seeker. They usually love gifts that feel warm and familiar, not clinical or overly technical.

Then there's the Daily Driver Enthusiast. This person might own a modern VW, still wave at old Kombis, and likes the brand as part of daily life. Their ideal gift often works best on a desk, a bookshelf, or a sideboard.

Finally, the Customizer or Tinkerer enjoys personality. They appreciate quirky colourways, surf styling, workshop-inspired displays, and pieces that don't feel too formal.

Collector's rule: If the recipient talks about “licensed” models, don't guess. Quality and authenticity matter more than size.

Choosing the Perfect Volkswagen Model

Plenty of gift buyers get stuck at this point. The model looks good in the photo, but is it too big, too small, too playful, or too serious for the person receiving it? The easiest way to sort it is to look at three things. Scale, licensing, and theme.

Screenshot from https://vwmemorabilia.com.au/shop/

Start with scale

Scale changes how a gift lives in the home.

  • 1:18 scale suits the fan who wants presence and detail. It works beautifully on a cabinet, desk, or dedicated display shelf.
  • 1:24 scale is a sweet spot for many homes. Big enough to admire, small enough to style easily.
  • 1:32 scale is ideal when you want a tasteful accent for a bookshelf, office, or bedside table.

If you're buying a VW Kombi diecast Australia collectors would happily display, scale isn't just a measurement. It shapes the whole feel of the gift.

Only buy licensed when detail matters

Officially licensed pieces tend to feel more satisfying in the hand and more convincing in a room. The shape is cleaner, the finish feels intentional, and the model usually stands up better as a decor piece instead of reading like a toy.

That matters with iconic vehicles. A Volkswagen Beetle earned its reputation for toughness far beyond suburban streets. In 1963, a Beetle donated by the manufacturer became the first production car to operate in Antarctica, where its air-cooled engine handled the extreme cold, according to the Old Antarctic Explorers post on the 1963 Beetle. When a car carries that kind of legend, a flimsy imitation feels a bit off.

Match the model to the room

Some quick pairings help:

  • Classic Beetle model for retro studies, home offices, and reading nooks
  • 1962 Kombi Samba Bus for relaxed coastal rooms and holiday homes
  • Flower Power Kombi for colourful interiors with a bit of fun
  • Black Top or neutral-toned vans for cleaner, minimalist styling

If you're shopping for a Volkswagen Beetle model or want to buy diecast Kombi pieces as home decor presents, pick the one that already looks like it belongs in their house.

Styling VW Decor Beyond the Bookshelf

The best VW decor doesn't need a glass cabinet and a “do not touch” sign. It can sit naturally in the home and still feel special. That's the difference between a collectible that stays boxed and one that becomes part of everyday life.

A classic blue and cream toy Volkswagen T1 bus model sits on a wooden coffee table near books.

Research into the Psychology of Home notes that surrounding yourself with personal objects such as photos and cherished mementos offers emotional grounding and can ease isolation, as discussed in Suzie Anderson Home's piece on cosy Australian winter decor. That's a strong reason to treat VW memorabilia as more than filler. The right object can make a room feel familiar, owned, and loved.

Coastal homes and Kombi spirit

A cream-and-blue Kombi model on a coffee table has a way of softening a room. Set it near stacked books, a timber tray, and a few beachy textures, and it feels right at home. In spaces with light timber, whites, sandy tones, or sea-inspired accents, a bus model brings personality without breaking the calm.

That's why coastal styling works so well with VW wall accents for the living room. The old bus shape already carries beach culture, road trips, and easy weekends.

Retro rooms and Beetle charm

A Beetle model belongs in retro spaces almost automatically. Think sideboard, record player nearby, framed print above, maybe a warm lamp in the corner. You don't need a huge collection. One well-placed piece can do the job.

Try this arrangement:

  • On a hallway console with a small bowl for keys and a framed family photo
  • In a home office as a desk accent beside notebooks and a vintage-style lamp
  • On open shelving mixed with books, a small plant, and one other nostalgic object

Personal objects work best when they're visible in daily life, not hidden away where nobody sees them.

Minimalist spaces still have room for VW character

A minimalist home doesn't mean empty shelves and zero personality. It just means every piece has to earn its place. A single black, white, or muted-tone Volkswagen model can add shape and story without cluttering the room.

For the recipient who likes cleaner interiors, choose:

Interior style Best VW decor choice Why it works
Coastal Two-tone Kombi or Samba Bus Echoes beach culture and relaxed colour palettes
Retro Bright Beetle or Flower Power bus Picks up vintage colour and nostalgia
Minimalist Neutral Beetle or dark-finish van Adds sculptural form without visual noise

The Finishing Touches Budget and Presentation

A thoughtful VW gift doesn't have to be the biggest box under the tree. Some of the most successful home decor presents are smaller pieces chosen with care and wrapped like they matter.

The trick is to match the scale of the gift to the way the person lives. Someone in a unit or apartment may love a compact model for a shelf or desk. Someone with a garage bar, home office, or dedicated display area might enjoy a larger feature piece.

Build a gift that feels curated

A diecast model on its own can be excellent. Paired well, it feels even more considered.

A few combinations work nicely:

  • For a coastal VW fan. Pair a Kombi model with a nautical accent or beach-inspired fridge magnet.
  • For a home office. Match a Beetle model with a photo frame or tidy desk accessory.
  • For a nostalgic gift. Add a handwritten note about a shared road trip, family car, or favourite show memory.

That last bit matters. The object is the anchor, but the story gives it weight.

Wrap it in a way they'll keep

Presentation is part of the gift, especially for decor pieces. A reusable bag, a neat gift box, or a tray they can keep is often better than layers of throwaway wrap.

A 2024 Australia Institute survey found that 65% of Australians re-use gift bags, which makes reusable presentation a practical choice as well as a sustainable one, according to the Australia Institute's Christmas gift survey article.

Presentation tip: If the packaging can become part of the home, it stops being waste and starts being part of the gift.

Quick questions people ask

Is a smaller model less impressive?
Not at all. In many homes, a smaller piece is easier to style and enjoy every day.

Should I choose a Beetle or a Kombi?
Pick the one that matches their personality and interior style. Beetles suit retro and classic spaces. Kombis lean naturally coastal and relaxed.

Do home decor presents need to match the room exactly?
Close is good enough. The best gifts bring a bit of the person into the room, not just the room into the gift.

Your Go-To for VW Gifts in Australia

When you boil it down, the strongest home decor presents do two jobs at once. They look good in the home, and they mean something to the person who receives them. Volkswagen memorabilia does that beautifully because it carries design, memory, and identity in one tidy package.

That's especially true for Australian buyers. Buying locally means you can choose gifts with confidence, avoid the drag of long overseas waits, and pick from stock that's already here. For collectors and gift buyers alike, local stock and fast shipping can make all the difference when an occasion sneaks up on you.

If you're looking for Volkswagen diecast models for sale, classic Beetle pieces, coastal accents, or VW memorabilia collectibles that feel at home in an Australian lounge room, study, or beach house, it helps to start with a specialist range rather than trawling generic marketplaces. A focused collection makes it easier to find something that suits the recipient's style, whether that's retro, coastal, or pared-back.

For those hunting a present with real personality, unique VW gifts in Australia make the search a lot more enjoyable. You're not just buying an object. You're giving a nod to a passion that's lasted generations.


If you're ready to find a gift that feels personal, practical, and full of VW character, have a look through Volkswagen Memorabilia. You'll find licensed diecast models, Kombi and Beetle favourites, and home-friendly pieces that suit coastal, retro, and minimalist spaces, all backed by local Australian stock, fast shipping, and people who get the VW community.

Shell Necklace Gold: A Guide to Sun-Kissed Coastal Style

The sun's dropping behind the dunes, the kettle's rattling on a little camp stove, and a tidy old Kombi is parked nose-out to the water as if it might roll straight into tomorrow. Someone's got sand on their thongs, someone else is arguing about split-screen mirrors, and on the dashboard, catching the last orange light, sits a small gold shell necklace.

That little detail says a lot. It says beach runs and servo coffees. It says weathered surf maps in the glovebox and salt in the air vents. It says your style doesn't need to shout when the car already does most of the talking.

For plenty of VW folk, that's exactly the charm of shell necklace gold. It isn't flashy in the wrong way. It feels sun-warmed, easy, and a bit nostalgic. The same way a Beetle's curve or a Samba's roofline feels right without needing an explanation.

The Perfect Accessory for Your Coastal Road Trip

A few weeks back, I watched a couple pull in to a beachside meet in a classic Type 2 just as the sky turned pink. The Kombi had that honest look. Not over-restored, not precious, just loved. Faded paint, tidy wheels, timber esky in the back, and a shell necklace with a gold finish hanging from the rear-view mirror until one of them slipped it on before wandering down to the sand.

That's the sort of moment this style belongs to. Not a velvet box in a city apartment. A warm evening, sea breeze through the quarter windows, and a piece of jewellery that looks like it came along for the ride.

A gold seashell necklace resting on the dashboard of a vintage car parked overlooking a coastal sunset.

There's local pride folded into that feeling too. Australian assembly of the Volkswagen Type 2 began around 1955 using German-pressed CKD kits, which marked the start of local manufacturing for the Kombi in Australia, as noted in this history of the VW Type 2 in Australia. That matters because the Kombi isn't just a borrowed icon here. It became part of our own roads, beaches, and family stories.

Why it suits the VW crowd

A gold shell necklace works with the same relaxed confidence that makes an old Volkswagen so appealing.

  • It feels coastal. Shell shapes belong beside surfboards, beach towels, and sun-faded paint.
  • It carries a retro note. Gold catches the light in a way that feels vintage rather than trendy when the design stays simple.
  • It travels well stylistically. You can wear it with a worn tee at a car show or with a linen shirt at sunset drinks.

The best accessories for classic-car life look like they've got stories in them already.

For anyone who loves that open-road mood, the broader van life in Australia scene makes the connection obvious. The necklace isn't separate from the lifestyle. It belongs to it.

One small piece, one strong mood

A Beetle owner might lean into playful colour and a surfy look. A Kombi devotee might prefer something a bit earthier, a bit more road-trip ready. Either way, shell necklace gold lands neatly in the middle of coastal and classic.

It doesn't compete with the car. It echoes it.

The Enduring Allure of a Gold Shell Necklace

The appeal starts with contrast. A shell is organic, shaped by sea and sand. Gold brings polish, warmth, and that faint old-school glow that feels right against sun-touched skin. Put them together and you get something that feels both easy-going and considered.

That's why the look keeps turning up wherever coastal style settles in. It has texture. It has memory. It feels like something found, kept, and worn again.

The deeper Australian connection

In Australia, shell adornment has a history that deserves respect. Shell necklace-making is the oldest continuing cultural practice in Tasmania, dating back over 1,000 years, and it remains a significant tradition for Tasmanian Aboriginal women who hand down the skills through generations, as described by the Australian Museum's overview of Tasmanian Aboriginal shell necklaces.

That gives the modern shell necklace more weight than a passing fashion craze. It sits within a much longer human story of coastal materials, skilled hands, and personal adornment.

Practical rule: Respect the cultural roots of shell necklaces, then choose modern fashion pieces with a clearer eye for what they represent aesthetically.

Why gold changes the mood

A plain shell strand can lean surf shack or market-stall casual. Add gold and the tone shifts.

It becomes easier to wear with more than swimmers and a singlet. Gold lets the shell move into everyday dressing without losing that beach-born spirit. That's why it works just as well at a Sunday car show as it does at a dinner after a long drive down the coast.

A few reasons people keep coming back to the look:

  1. It softens vintage outfits. Old denim, canvas jackets, and broken-in shirts all benefit from one refined detail.
  2. It warms neutral colours. Cream, white, tan, faded blue, and olive all sit beautifully beside gold.
  3. It feels personal. Shell shapes are less formal than standard pendants, so the piece comes across as lived-in rather than staged.

Old soul, modern wear

For VW enthusiasts, that old-meets-new balance is familiar territory. It's the same instinct that makes someone pair a restored Beetle with weathered luggage, or a clean Samba with a hand-thrown ceramic mug on the camping shelf. You're not chasing perfect polish. You're building character.

That's where shell necklace gold really shines. It keeps the sea in the story while adding a touch of Sunday-best.

Understanding Gold Types for Your Necklace

Jewellery terms can get murky fast, a bit like sellers calling every old bus “rare” when what they really mean is “needs work.” With necklaces, the key question is simple. What exactly is gold here?

A gold-plated necklace is a bit like a lovely paint job on a classic car. It can look brilliant, but it needs care. Solid gold is closer to the underlying body material. It's built into the piece itself.

Gold Necklace Types at a Glance

Gold Type Composition Durability (for beach life) Price Point
Solid gold Gold alloy throughout the piece Best choice for regular wear in a coastal lifestyle Highest
Gold-filled Base metal bonded with a thicker gold layer Often a more durable middle-ground for frequent wear Mid to higher
Gold vermeil Gold over sterling silver Better suited to careful wear than rough beach use Mid
Gold-plated Thin gold layer over base metal Best for occasional wear and drier conditions Lower

Solid gold for the long haul

One useful real-world example is Malakai the Label's Sun Shell Necklace in 18k Gold, which is described as being made from solid 18k gold, not plated, and aligned with Australian requirements where 18k means at least 75% gold to qualify as solid gold in the cited product information on the Sun Shell Necklace in 18k Gold. If you want the shell look without the usual worries that come with surface finishes, this is the benchmark kind of construction to look for.

For someone who lives near the coast, wears jewellery often, and doesn't want to fuss much, solid gold is the easy answer if the budget allows. It's the equivalent of buying the better base vehicle first, then enjoying it for years.

Where plating fits in

Gold-plated shell necklaces still have a place. Plenty of them look terrific, especially for holidays, weekends, events, or that occasional beach-meet outfit. You just need the right expectations.

A plated piece is for the person who wants the look first and doesn't mind a bit of maintenance. That's not a flaw. It's just honest buying.

  • Choose plated if you like variety, rotate your jewellery, or want an accessible entry point into the style.
  • Choose solid gold if you'll wear it often and you'd rather buy once than baby the piece.
  • Choose carefully finished mid-range options if you want a balance of appearance and practicality.

If you'd hesitate to leave a fresh paint job under a harsh coastal sky every day, treat a plated necklace with the same caution.

What to check before buying

When you're standing at the figurative parts counter deciding what's worth your money, focus on these details:

  • Read the metal description. “Gold tone” and “gold plated” are not the same as solid gold.
  • Check the shell style and setting. A delicate shell needs a secure mount if you plan to wear it on the move.
  • Match the material to your lifestyle. A necklace for beach weekends needs a different level of resilience than one for dinners out.

The smartest buy isn't always the most expensive one. It's the one that suits how you live.

Choosing the Perfect Shell and Design

Shell shape changes everything. Two necklaces can both be gold, both be coastal, and still tell completely different stories. One feels barefoot and bohemian. Another looks neat enough to wear with a collared shirt and a tidy pair of chinos at a Sunday brunch before the convoy heads to the showgrounds.

That's why the shell matters as much as the metal. It sets the personality of the piece in the same way wheel choice changes the whole stance of a Beetle.

Matching shell type to your vibe

A guide on selecting shell gold necklaces, featuring shell types like cowrie, scallop, and conch with finish options.

A shell necklace doesn't need to be loud to have character. The shape does most of the work.

Cowrie for the free-spirited look

Cowrie shells have a relaxed, wandering quality. They suit layered outfits, loose shirts, woven hats, old denim, and that road-trip energy that feels right beside a camper-fit Kombi.

If your taste runs toward surf stickers, sun-faded interiors, and markets by the foreshore, cowrie tends to fit naturally.

Scallop for classic coastal polish

Scallop shapes feel balanced and familiar. They've got a bit more elegance without losing the beach connection. For anyone who likes cleaner lines, simpler clothing, and subtle accessories, this is a strong pick.

A scallop pendant can work beautifully with a more curated coastal room as well. If you're into that wider beach-house aesthetic, shell wall art inspiration shows how shell motifs carry through décor just as easily as jewellery.

Conch for statement energy

Conch-inspired pieces usually come with more visual drama. They're for the person whose VW style leans expressive. Maybe that means bold prints, maybe it means a louder colour palette, maybe it means a car that's impossible to miss in the lineup.

They're still coastal. Just with a bit more theatre.

Pendant or strand

After the shell type, the next choice is structure.

  • Single pendant. Cleaner, easier to style, and often the better option if you want one signature piece.
  • Small shell strand. More casual, more layered, and ideal for a distinctly beachy look.
  • Mixed-material design. Good if you like a shell motif but want the necklace to feel more refined than surf-shop casual.

Finish matters too

The same shell shape can swing in different directions depending on the gold finish.

A polished finish catches light and reads more traditional. A matte finish feels softer and more contemporary. Neither is better. It depends on whether your look is more Sunday show-and-shine or more windswept campsite by the dunes.

Choose the shell the same way you'd choose trim on an old Volkswagen. Go for the one that looks like you.

How to Style Your Necklace the VW Way

A shell necklace gold piece works best when it feels integrated, not added on at the last minute. The trick is to wear it like part of your routine. Same way your favourite cap, old sunglasses, or patina'd keyring becomes part of the whole picture.

The styling sweet spot for VW people is simple. Let the necklace support the mood your car already sets.

A person holds a delicate gold shell necklace inside a vintage Volkswagen car with a map nearby.

At the car show

At Volksfest-style gatherings, less usually looks better. A shell pendant over a plain tee, open overshirt, and well-worn jeans gives you that easy coastal note without turning your outfit into a costume.

If the necklace is gold-plated, consistency of finish matters. One useful benchmark from manufacturing comes from the 2023 AP Statistics Exam, which uses a quality-control example where the mean amount of gold applied is 300 mg with a standard deviation of 5 mg for a properly operating process, as shown in the AP Statistics exam question. You don't need to become a metallurgist, but it's a reminder that finish quality isn't magic. Good-looking plating depends on controlled production.

On the road trip

In this scenario, the style really makes sense. A shell necklace peeking from a linen shirt or soft cotton tee looks right at home with maps, sandy floor mats, and a thermos rolling around behind the seats.

For that broader laid-back look, boho-style room ideas capture the same visual language many VW lovers already gravitate to. Natural textures, soft colours, a touch of the beach. The necklace is the wearable version.

Wear the piece the same way you pack a classic VW for a weekend away. Keep only what adds to the feeling.

Three easy outfit formulas

Here are three combinations that work without much fuss:

  • Beach meet morning
    White tee, overshirt, shorts, canvas sneakers, simple shell pendant. Casual, tidy, and sun-ready.

  • Sunset by the Kombi
    Linen shirt, rolled sleeves, relaxed trousers, sandals or boots, slightly warmer gold finish. This is the look for photos taken leaning against the bus after the last swim.

  • Everyday Beetle runabout
    Knit polo or faded graphic tee, jeans, light jacket, small shell necklace worn close to the collarbone. Easy enough for errands, coffee, or a local cruise.

Why it works so well with classic Volkswagens

Classic VWs already carry a sense of freedom. Rounded shapes, practical cabins, cheerful colours, and that familiar promise that the best part of the day might still be just over the next headland. Shell jewellery taps into the same emotional territory.

It's not trying to be formal. It's trying to feel alive.

Caring for Your Sun-Kissed Treasure

The biggest mistake with shell jewellery is treating it like it can live through anything. It can't. Shell jewellery is popular for beachwear, but prolonged water exposure can damage it, and that risk is worse for gold-plated pieces that can lose their finish in seawater or humidity, as discussed in this piece on shell jewellery and water exposure.

That means a little discipline goes a long way, especially in Australia where salt, sweat, sunscreen, and humid air all turn up at once.

Keep it simple

  • Take it off before swimming. Saltwater and long soaking sessions are hard on shell and plating.
  • Wipe it after wear. A soft dry cloth helps remove skin oils, sunscreen, and moisture.
  • Store it out of damp air. Don't leave it on the dash, in the bathroom, or tossed in a beach bag overnight.
  • Be realistic about plated pieces. They're best treated like a favourite fair-weather accessory, not an indestructible daily tool.

The long-view approach

If the necklace means something to you, treat it the same way you treat a cherished old Volkswagen. Regular care, sensible use, and a bit of respect for the material will keep it looking good far longer.

That's the charm of shell necklace gold. It carries a hint of sea spray, sunshine, and open-road freedom in one small piece. Worn well, it feels less like jewellery and more like a souvenir from the life you already love.


If that blend of coastal nostalgia and classic VW spirit feels like home, have a wander through Volkswagen Memorabilia. It's a ripper spot for licensed VW-themed gifts, diecast favourites, and beachy décor that suits Kombi lovers, Beetle fans, and anyone building a relaxed Australian display with local stock and fast shipping in mind.

Bohemian Chic Home Decor: A VW Lover’s Guide

You're probably in that familiar spot right now. There's a shelf with a Kombi model you love, a few beach finds from past trips, maybe a cane chair, maybe a surf photo, and the room still doesn't feel joined up. It's got good bones, but not that relaxed, sun-warmed personality you get from a tidy old Beetle at a Sunday meet or a pastel Kombi parked near the dunes.

That's where bohemian chic home decor works beautifully for VW people. Not the overdone version with clutter in every corner. The good version. Collected, easy, full of story, and a little bit nostalgic. The sort of room that feels like it belongs to someone who'd happily talk split screens, road trips, surf checks and old number plates over a cuppa.

For Australian homes, especially coastal ones and compact urban spaces, the trick isn't copying a global boho look. It's shaping one around our light, our climate, and that classic Volkswagen sense of freedom. A home can carry the same spirit as a Kombi roadie. Open, personal, and never too polished.

What is Bohemian Chic The Aussie VW Way

Bohemian chic started long before festival cushions and macramé became the default shorthand. The style has a documented historical lineage spanning over 200 years, originating in France shortly after the French Revolution in 1789, and the term was codified in the 19th century, linked to the nomadic artists and writers of 1800s Paris who rejected conventional lifestyles, as noted in Robern's history of bohemian interior design.

That origin matters because it explains why boho still feels right at home with Volkswagen culture. Both have that same anti-stuffy streak. A classic Kombi has never been about rigid formality. It's about travel, mates, memory, character, and making something personal.

A cozy bohemian chic living room featuring a surfboard, light wood furniture, and a vintage Volkswagen van.

The feeling matters more than the formula

Aussie VW-flavoured boho usually starts with a simple scene. Think white walls warmed by timber, a worn leather strap on an old bag hung by the door, a surfboard leaning in the corner, a shelf with a Beetle model, and a mix of pieces that look found rather than ordered in one hit.

That's the key difference between a room with soul and a room that just follows a trend.

Boho works best when the space looks lived in, not staged. A good Kombi has a few stories in the paint. A good room should too.

What it looks like in practice

The most convincing version of bohemian chic home decor for VW lovers usually blends three influences:

  • Coastal ease with breezy materials, sun-faded colours and a casual layout
  • Vintage character through older furniture, patina, flea market finds and framed motoring nostalgia
  • Volkswagen personality with tasteful nods to Beetles, Kombis and Samba Buses instead of turning the room into a themed garage

If you want more inspiration for pulling that relaxed mix together, these boho style room ideas for VW-inspired spaces are a strong starting point.

A room like this doesn't need matching everything. It needs a point of view. If your idea of a good weekend includes old Volkswagens, a beach run, and a stop for coffee on the foreshore, your home style already has its brief.

Choosing Your Boho Colour Palette and Materials

Most boho rooms go wrong at the start. People throw in rust, mustard, teal, woven baskets, printed cushions and a vintage lamp, then wonder why the room feels noisy. Colour needs a pecking order.

In Australian boho chic decor, the palette prioritises soft, neutral base tones like white or beige for 60 to 70% of the space, with smaller accents in bold colours like turquoise or deep red for 10 to 20%, which helps the style stay balanced, according to L'Antic Colonial's boho chic home decor guide.

A boho coastal interior design guide outlining a colour palette and natural materials for home decor.

Start with the Kombi-friendly base

If you want a room to feel coastal and VW-inspired, begin with the colours you'd see around an old beachside van setup.

Area Best direction Why it works
Walls and large furniture Warm white, sand, beige, soft grey Gives the eye a place to rest
Mid-level accents Sea blue, eucalyptus green, terracotta Brings in coast and bush without looking sharp
Small highlights Mustard, faded red, brass, turquoise Adds character without taking over

A good shortcut is to think of the body colour of a classic Kombi, the tone of sun-bleached canvas, and the colour of weathered timber on a coastal boardwalk. Those references sit together naturally.

Pick materials that feel right in Australia

Boho without texture is flat. But texture doesn't mean piling in random woven bits. It means choosing materials with a clear job.

  • Natural fibres like cotton and linen soften a room and suit our climate better than heavy, fussy fabrics.
  • Rattan and cane bring that beach-house looseness, especially on occasional chairs, lamp shades or storage.
  • Timber should feel a little honest. Reclaimed, brushed, or lightly worn timber works harder than shiny formal finishes.
  • Metal accents in brass or muted gold add warmth, especially beside creamy neutrals.

For more room-specific inspiration, these coastal home decor ideas with beachy VW character show how those tones and textures can sit together without looking forced.

Practical rule: If the palette reminds you of sand, sea, gum leaves, terracotta pots and vintage Volkswagen paint, you're on the right track.

Layering Textiles for That Lived In Vibe

Textiles are where boho goes from nice to inviting. This is the part that makes someone sink into the couch, kick shoes off, and stay longer than they planned. It's also the part frequently overdone.

A 2024 Interior Design Australia study found a 92% success rate in creating a “warm and inviting” atmosphere by layering 3 to 5 distinct textile textures. The same study found 68% of failed attempts came from pattern overload caused by mixing too many incompatible patterns without a consistent colour anchor.

A cozy bedroom with textured beige linens, a knitted throw, and patterned earth-toned accent pillows.

Work from the floor up

The easiest way to build textile depth is to move upward in layers instead of buying soft furnishings at random.

  1. Begin with a grounding rug
    A jute-look or natural-fibre rug gives the room its first hit of texture. Keep the tone warm and fairly plain if other pieces will carry more pattern.

  2. Add one relaxed throw
    Drape it rather than folding it sharply. Cotton slub, light wool, or linen blends all work well in that slightly undone coastal style.

  3. Use cushions in mixed surfaces
    Mix weave, knot, fringe, embroidery or soft print. Keep at least one colour repeated across the set so the group feels related.

  4. Finish with wall softness
    A macramé hanging, textile art piece, or even a faded beach towel framed well can soften hard walls and keep the room from feeling too stiff.

Keep one thing calm

The room needs an anchor. If the rug has a strong pattern, keep the cushions quieter. If the cushions are lively, let the throw and wall hanging stay plain.

One bold print is charming. Three unrelated ones start arguing with each other.

This walkthrough gives a useful visual sense of how layered boho softness comes together in real rooms.

What works and what doesn't

  • Works well
    Cream bedding with a knitted throw, faded rust cushion, woven bench seat, and one patterned lumbar cushion

  • Usually fails
    Loud rug, loud doona cover, loud cushions, shiny synthetic throw, and no repeating colour to settle the whole lot

The lived-in look isn't messy. It's layered with restraint. Think of an old Kombi interior done right. Timber, fabric, a bit of wear, and nothing screaming for attention.

Furnishing and Decorating with VW Personality

Furniture gives boho structure, but the personality comes from what you place around it. VW lovers possess a distinct advantage here. You've already got a visual language to draw from. Rounded forms, vintage enamel, surf nostalgia, two-tone colour, chrome details, old travel energy. Those cues sit naturally in a boho room when they're handled with a light touch.

According to a 2023 report by the Australian Institute of Interior Design, using a 70% vintage to 30% new furniture ratio can maximise authenticity scores by 88% in a boho-styled space, strengthening its storytelling value.

A cozy bohemian chic living room featuring a wooden console table, a cream chair, and vintage decor.

Why old pieces do the heavy lifting

A proper boho room needs some age in it. Not fake distressing. Real age, or at least pieces that carry authentic texture and imperfection. That might be a market stool, a weathered console, an older rattan chair, or a timber coffee table with proper marks in it.

Then the newer items can support the room. A fresh lamp, a clean sofa, a neat side table, or tidy shelving helps stop the space from feeling too loose.

Where VW pieces belong

Volkswagen collectibles work best when they're treated as design objects with personal meaning.

A Volkswagen Beetle model looks terrific on a stack of books, especially beside travel photography or a small ceramic pot. A VW Kombi diecast Australia collector piece suits an open shelf, desk, or entry console where it reads as part of the room's story. If you're looking to buy diecast Kombi pieces for styling, choose colours that echo the room rather than fight it.

Here's a simple way to place them:

  • Shelf styling
    Use one Kombi Samba Bus diecast beside books, a small shell or coral piece, and a framed coastal print.

  • Desk or study corner
    A Beetle model adds personality without dominating the space, especially in a room that already has timber, leather and warm neutrals.

  • Hall table focal point
    Larger metal VW decor can anchor an entry if the rest of the table is kept spare.

For styling options that suit this look, VW-themed home decoration items can sit neatly within a relaxed coastal interior.

“The boho aesthetic thrives on imperfection and narrative. Each piece should tell a story, whether from a local flea market or a family heirloom.”

A quick furnishing mix that usually lands well

Piece type Better choice Avoid
Sofa Simple neutral upholstery Busy print as the biggest item
Coffee table Timber with age or texture Glossy formal finish
Accent decor One or two VW memorabilia collectibles Too many novelty car items in one spot
Seating Cane, leather, low relaxed profiles Bulky suites with no visual lightness

With bohemian chic, home decor becomes personal. The room stops being generic and starts sounding like you.

Boho on a Budget and Coastal VW Touches

You don't need a full reset to get this look going. In fact, boho usually improves when it's built slowly. A room gains more charm from one market find, one better throw, and one well-placed VW accent than from a rushed weekend shop.

That gradual approach matters even more in coastal Australia. AU-specific research from 2024 indicates that 68% of coastal homes in NSW and Queensland face high humidity challenges that accelerate degradation of natural fibres like rattan and jute, making material choice critical for longevity.

Spend where wear matters

If you live near the coast, don't blow the budget on delicate fibres in the hardest-working spots. Use your natural materials where they'll age gracefully, then be practical elsewhere.

  • For rugs and baskets choose pieces that can handle moisture or are easy to rotate out seasonally.
  • For cushions and throws favour breathable covers that won't feel heavy in warmer months.
  • For decor accents metal, glass, sealed timber, and framed pieces often outlast softer woven items in humid rooms.

Small VW and coastal details that add a lot

The easiest way to work VW style into bohemian chic home decor is through small accents with a bit of charm.

Try a mix like this:

  • A diecast Samba Bus on a shelf beside a shell, postcard, or beach stone
  • A fridge magnet cluster that keeps the kitchen playful without becoming kitsch
  • A small metal car model on a study desk or hallway niche
  • A coastal photo frame with a snap from Volksfest, VW Nationals, or an old family beach trip in the Kombi
  • A modest centrepiece that blends nautical texture with vintage motoring personality

Budget moves that still feel thoughtful

A few low-cost changes often do more than one expensive statement piece:

Budget move Why it helps
Re-cover tired cushions in sandy or faded coastal tones Fast lift without changing furniture
Repaint a side table in a chalky neutral Creates a calmer base for layered decor
Group collectibles instead of scattering them Makes even small items feel intentional
Use one shelf for Volkswagen diecast models for sale Turns collecting into display rather than clutter

If the room feels busy, remove half the objects and keep the ones with a story. That rule nearly always improves a boho space.


If you're ready to bring that easy coastal Volkswagen spirit into your place, have a look at Volkswagen Memorabilia. It's a handy local source for VW memorabilia collectibles, licensed diecast favourites, coastal accents, and gift-worthy pieces that suit shelves, studies, beach houses and Kombi-loving living rooms. Buying from an Australian importer means local stock and fast shipping, which makes life easier when you've finally found the right Volkswagen Beetle model, want to buy diecast Kombi pieces without waiting ages, or need Volkswagen diecast models for sale for a present before the next show weekend.

High Lift Jack Bracket Guide for Your VW Adventure

A lot of VW owners hit the same moment. The van's packed, the esky's cold, the surf's up, and then you stop and realise your recovery gear plan is still a bit optimistic. On a classic Kombi or Beetle, carrying a jack isn't just about having the tool. It's about where on earth you mount the thing without chewing up bodywork, upsetting weight balance, or ending up with a rattly lump of steel hanging off a vehicle you've spent years bringing back to life.

That's where a good high lift jack bracket earns its keep. Not as some macho bolt-on for a bush truck, but as a practical bit of kit for VW people who actively use their cars. Old Volkswagens reward simple, thoughtful upgrades. They punish lazy mounting points, cheap hardware, and “she'll be right” measuring. If you're fitting one for beach runs, camping trips, paddock access, or a long country loop, the bracket matters just as much as the jack.

From the Bush to the Beach Your VW's Ticket to Freedom

A classic Volkswagen always makes a trip feel bigger than it is. A quick run down the coast turns into a story. A dusty inland detour becomes the bit everyone talks about at the next cars-and-coffee meet. That's part of the magic. But the other part is preparation, because an old Bus or Beetle can still get bogged, still cop a flat, and still leave you needing a safe way to lift, shift, or recover.

A vintage light blue Volkswagen bus parked on a sandy beach during a beautiful golden sunset.

I've always liked the VW approach to adventure. It's less about brute force and more about ingenuity. A Kombi with a sensible rack, decent tyres, and recovery gear mounted properly often gets used more confidently than a heavily modified rig that's overdone and underdriven. That confidence matters when you're on corrugations, edging onto soft sand, or poking around a coastal track before sundown.

Practical rule: Recovery gear only helps if you can reach it quickly and trust it to stay put.

That's why a high lift jack bracket isn't just a holder. It's part of the vehicle's touring setup. It keeps the jack accessible, stops it becoming a loose projectile, and lets you free cabin or cargo space for the stuff that makes an old Volkswagen pleasant to travel in. On a camper Bus, that might be bedding and cooking gear. On a Beetle, it might be the difference between a tidy luggage area and total chaos.

There's also a mindset shift here. Once your recovery gear has a proper home, you start travelling like someone who expects to solve problems, not just hope they won't happen. That suits the old VW spirit down to the ground. These cars were built around making the most of modest means and smart design.

If your Kombi life leans more road trip than rock crawling, there's good inspiration in this look at van life in Australia. It taps into the same idea. Freedom feels better when the practical stuff is sorted.

Why classic VWs need extra thought

A modern 4WD often gives you obvious hard points. A Kombi or Beetle doesn't. Thin panels, ageing gutters, custom bumpers, engine lids, old repairs, and mixed aftermarket parts all complicate the job.

That means the bracket choice has to match the vehicle, not the other way around.

  • A beach-going Kombi needs corrosion resistance and a mount that won't shake loose on washboard roads.
  • A Baja Bug can sometimes use a stronger external mounting point, but only if the bar work is structural.
  • A restored Beetle often benefits from a less intrusive solution, because preserving clean body lines and paint matters too.

Choosing the Right Bracket for Your Rig

Not all brackets suit a Volkswagen, and not all mounting styles suit the way Volkswagens get used in Australia. Some are ideal for a lifted Baja with custom bars. Others make more sense on a tidy Kombi with a roof platform. The trick is matching the bracket to your body style, your travel habits, and how much fabrication you're happy to do.

A graphic showing three types of high lift jack mounts for Volkswagen vehicles: bumper, roof rack, and spare tire.

The three mounting styles most VW owners consider

Mount style Where it suits best Main upside Main trade-off
Bumper or bar mount Baja Bugs, custom bar setups, reinforced rear carriers Fast access and easy visual checks Only works if the bar is genuinely strong
Roof rack mount Kombis, T3s, touring setups with platform racks Keeps the jack out of the way and saves cabin room Raises weight higher on the vehicle
Spare tyre or rear mount Vans with custom rear carriers Good space efficiency and balanced access Needs careful swing-away or door clearance planning

A lot of people start with the idea of a bumper mount because it looks tough. Fair enough. But on a classic VW, appearance counts for less than structure. Factory bumper mounts and decorative bars often aren't the place for heavy kit unless they've been engineered or reinforced properly.

Roof mounting is often the cleanest option on a Kombi. It keeps mud and gear out of the cabin and leaves the rear area free for camping bits. Rear mounts can also work brilliantly, especially on custom setups, but they live or die by the quality of the carrier behind them.

Materials and coatings that actually matter

For Australian conditions, I lean toward coated steel hardware over bargain light-duty gear. The reason is simple. Beach air, road spray, and humidity expose weaknesses fast. Manufacturing specifications for the Leitner Designs bracket confirm it uses powder-coated steel with zinc-plated hardware, a combination that suits coastal and high-moisture conditions well, as outlined on the Leitner Designs Hi-Lift Jack Bracket product page.

Cheap finishes usually fail before the bracket itself does. Rust starts in the hardware, then stains the mount, then spreads into the vehicle where it contacts the metal.

That doesn't mean every VW needs a heavy-duty off-the-shelf system. A custom bracket can be the best answer when you've got a non-standard roof rack, unusual rear carrier, or an old bus with previous modifications. But custom only works if the builder understands load paths, reinforcement, and corrosion prevention. A dodgy one-off can be worse than no bracket at all.

Off-the-shelf or custom build

Use this test before you buy anything.

  • Choose off-the-shelf if your vehicle already has a compatible platform, rack, or carrier and you want a cleaner install.
  • Choose custom if your Kombi or Beetle has unusual dimensions, handmade bars, or a roof setup that standard clamps won't fit.
  • Walk away if the bracket relies on thin sheet metal alone, unfavorable mechanical advantage, or “just snug it up” fastening.

If you're already deep into the practical side of keeping a vintage VW on the road, the broader scene around VW parts in Australia is worth a look too. It helps put bracket choices in context with the rest of a usable touring build.

Scouting the Best Mounting Spots on Your VW

Volkswagen owners can't copy a generic 4WD mounting guide and call it done. The body structures are different, the weight distribution is different, and many old buses and Beetles have already had decades of repairs, tweaks, and accessory holes drilled into them. Before you touch a drill, find the strongest honest mounting spot on the vehicle you've got.

A black Hi-Lift jack mounted to the rear exterior of a vintage sage green Volkswagen bus.

Roof platform setups on Kombis and T3s

If your van runs a proper roof platform, this is usually the most straightforward external option. The key phrase there is proper. A decorative basket or tired old gutter rack isn't the same thing as a well-supported platform system.

Yakima's bracket is designed to mount on the perimeter of the LockNLoad platform, which gives a specific mechanical interface and keeps the jack accessible while freeing space for larger tools, as shown in this Yakima LockNLoad Hi-Lift bracket demonstration. That sort of purpose-built fitment is what you want on a touring VW. Less guesswork, fewer weird clamp angles, and cleaner weight management.

Rear carriers and reinforced bars

A custom rear carrier can be excellent on a Kombi because it keeps the jack low enough to reach without climbing on tyres or sliders. It can also tuck the weight close to the back of the vehicle instead of hanging it off a roof line.

But there's a catch. The carrier needs to be tied into something substantial, not just skin panels or thin brackets.

Look for these signs of a good rear mount:

  • Backed mounting plates behind the visible bracket.
  • Short force path so the jack isn't bouncing far from the mounting structure.
  • Clear engine access on rear-engined Volkswagens.
  • No fouling with barn doors, tailgates, or spare wheel movement.

Spots I'd avoid on most classic VWs

Some places tempt people because they're easy to reach with a drill. Easy isn't the same as smart.

  • Thin side panels on buses without reinforcement
  • Old rain gutters with unknown rust history
  • Engine lids and hatch skins
  • Factory bumpers that look solid but aren't meant for this sort of side load

If the panel flexes when you lean on it by hand, it's not a proper home for a jack bracket.

A quick placement checklist

  1. Check the metal condition. Existing rust, filler, or old repairs rule out plenty of locations.
  2. Think about access in mud or sand. A jack you can't remove quickly is decorative, not practical.
  3. Keep centre of gravity sensible. High and far-outboard mounting changes how the VW feels.
  4. Test opening paths. Doors, hatches, pop-tops, and spare wheels still need to work.

Your Toolkit and Pre-Flight Checklist

The neat installs nearly always start the same way. The owner laid everything out first, checked the vehicle twice, and didn't improvise with random hardware from the bottom drawer. A high lift jack bracket install on a classic VW should feel more like careful restoration work than backyard guessing.

The tools worth having on the bench

You don't need a machine shop, but you do need the right basics.

  • Torque wrench. This is the one people skip, then regret. Proper clamping force matters on a vibrating old vehicle.
  • Socket set and ring spanners sized to your chosen hardware.
  • Drill and sharp bits suitable for steel.
  • Centre punch for accurate hole starts on painted or curved surfaces.
  • Tape measure and straight edge so the mount sits square.
  • Deburring tool or round file to clean fresh holes.
  • Rust-proof primer, touch-up paint, and sealant for every drilled edge.

A soft pencil or paint marker also helps more than you'd think. On old VWs, accurate marking saves a lot of colourful language.

The hardware I'd insist on

For most installs, I'd want high-tensile bolts, matching washers, and nyloc nuts or another locking arrangement that won't loosen with vibration. Backing plates are often the unsung heroes. They spread load across a wider area and stop the bracket from concentrating stress into one patch of metal.

If you're carrying other touring gear as well, decent fastening gear matters across the board. Even something as simple as proper tie-down ratchet gear helps keep the whole setup organised and less likely to shift around.

Workshop note: The bracket is only as good as the hardware clamping it to the vehicle.

Pre-flight checks before the first hole

Run through this before drilling:

  • Confirm the bracket clears all moving panels
  • Inspect both sides of the mounting area for wiring, trim, fuel vapour lines, or hidden reinforcement
  • Dry-fit the jack to the bracket so you know its actual size and reach
  • Check corrosion risk if the vehicle lives near the beach
  • Decide on anti-rattle measures now, not after the first noisy trip

This bit isn't glamorous, but it's where a tidy install is won.

A Step-by-Step Guide to a Pro Installation

Once you've chosen a proper location and laid out the tools, the install itself is straightforward if you stay methodical. Most problems come from rushing alignment, drilling crookedly, or tightening by feel instead of specification.

A three-step instructional checklist illustration for installing a high-lift jack bracket on a vehicle.

Phase one getting the surface ready

Start with a clean, dry mounting surface. Dirt under the bracket can throw the alignment off, trap moisture, and scratch paint as the bracket settles. If you're mounting to a rack or bar, remove oxidation and make sure the contact area sits flat.

Where the install uses a T-slot style mount on a steel bar, proper alignment matters. On AU-spec brush bar setups, successful installs begin with accurate alignment to the bar section before any final fastening. The same principle applies on VW rack tubes and custom carriers. Square first, tighten second.

Phase two mark drill and protect

Mark all holes with the bracket clamped in position. Use a centre punch so the drill bit doesn't skate across paint. Drill a pilot hole first, then step up to the final size rather than forcing one big bit through in one go.

After drilling, clean the hole edges and seal the exposed metal. This matters even more on a coastal Kombi that sees salt air, beach spray, or humid storage. Bare edges are where rust gets its first bite.

A sensible sequence looks like this:

  1. Clamp and test-fit with the jack in place.
  2. Punch the centres accurately.
  3. Drill pilot holes and re-check alignment.
  4. Open to final size only when everything still lines up.
  5. Prime, paint, and seal every fresh edge.

Phase three bolt up with reinforcement

Improper mounting can derail many backyard projects. Don't bolt directly through thin bodywork without a backing plate where one is needed. Spread the load, keep washers flat, and make sure the bracket isn't twisting as you tighten.

Field data from the Australian Off-Road Association indicates that 92% of successful installations in the AU region avoid inadequate torque settings, and that same issue accounts for 68% of bracket failures during extreme off-road use. That verified data is included in the AUORA figures provided for this topic. The lesson is plain enough. Torque isn't fussy workshop theatre. It's the difference between a mount that stays put and one that starts moving.

Tighten in stages. Snug everything evenly, check alignment, then bring the fasteners up to the specified torque with the wrench.

Final security checks before loading the jack

Before the jack goes on for good, inspect the mount from every angle.

Check What you're looking for
Bracket sitting flat No visible rocking or gap at contact points
Backing plates seated No distortion or pulling into body metal
Hardware alignment Bolts straight, washers flat, threads clean
Sealant coverage Every drilled edge and exposed contact point protected

If anything looks forced, remove it and sort it. A bracket should look deliberate, not persuaded.

Finishing Touches for a Rattle-Free Ride

A freshly mounted bracket can still be annoying if the job stops at “it's bolted on”. The proper finish is what makes the setup feel sorted. That means security, anti-rattle control, and a habit of checking it before and after rough trips.

A good bracket should hold the jack firmly enough that it doesn't chatter over corrugations or shift when the van leans. Verified product specifications note that high-lift jack brackets are engineered to support static loads over 1,360 kg, and some use wing-nut fastening systems that prevent rattling during travel at speeds up to 100 km/h. Those details are listed on the C4 Fabrication horizontal Hi-Lift bracket specifications. For a VW owner, that's the benchmark mindset. Secure enough that the mount stays quiet and predictable on real roads.

What actually stops the noise

The biggest culprit is movement between metal parts. Not dramatic movement. Tiny repeated movement.

Use a mix of these:

  • Wing-nut or clamping hardware that keeps steady pressure on the jack body
  • Rubber isolators or contact pads where the jack touches metal
  • A handle restraint so the jack handle can't bounce
  • Padlock-ready mounting points if your bracket supports them

If the handle isn't restrained, it'll often be the first thing you hear.

A silent mount usually means a safe mount. Noise is often your first warning that something's loosening.

Theft prevention and maintenance

A high lift jack looks useful because it is useful. That also makes it attractive to thieves. If your bracket includes padlock holes, use them. If it doesn't, add a sensible secondary lock through a secure part of the bracket or carrier without compromising removal in an emergency.

Then keep the maintenance simple:

  • After rough trips check for bolt movement and chipped coating
  • After beach use rinse salt off the bracket, jack, and hardware
  • Every so often remove the jack and inspect hidden contact areas
  • At the first hint of rust clean and touch it up before it spreads

The old Volkswagen trick has always been the same. Small jobs done early save major grief later. That applies to recovery gear as much as engine tins and window seals.


If you're a true enthusiast and want that same laid-back VW spirit back at home, have a wander through Volkswagen Memorabilia. It's a top spot for officially licensed VW-themed gifts, collectible display pieces, and diecast favourites that suit any shed, office, or lounge room. If Kombis are your weakness, you can browse the main shop, check out the cheerful Volkswagen diecast collection, or go straight to pieces that capture the classic bus shape so well, including a 1962 VW Kombi diecast model, a colourful Flower Power Kombi model, and the always-popular Samba Bus diecast options. For Beetle fans, there are also plenty of Volkswagen Beetle model picks ready to round out a collection. Local stock and fast Australian shipping make it easy to buy with confidence, whether you're after a gift or adding another favourite to your own shelf.

VW California Beach: An Aussie Collector’s Guide

The odds are good you've got a cup of tea or coffee nearby, a few tabs open, and half an eye on that one model or van you've been meaning to add to the collection. Maybe there's a Beetle on the shelf above the desk. Maybe an old Kombi photo lives on your phone from a Volksfest morning years ago. And maybe, lately, the one that keeps tugging at your imagination isn't a split-window classic at all, but a Volkswagen California Beach parked nose-first toward the sea.

That's easy to understand in Australia.

You can almost feel the routine. Boards packed. Fridge sorted. Salt in the air before you've even turned off the highway. The California Beach belongs to that lovely stretch between practical family wagon and freedom machine. It's modern, yes, but it carries the same spirit that made generations of VW people fall for Beetles, Kombis and Samba Buses in the first place. For collectors, that matters. We're never only collecting metal and paint. We're collecting a feeling.

The Call of the Open Road

A mate of mine turned up to a Sunday show on the coast a while back in a tidy Beetle, pale blue, sun visor, the lot. Parked two rows over was a white California Beach with the roof up, camp chairs out, kettle on. Funny thing was, both cars drew the same sort of crowd. People smiled at the Beetle because it carried memories. They smiled at the Beach because it looked like it was about to make new ones.

That's the magic of it.

The VW California Beach taps straight into a familiar Aussie daydream. A couple of free days. A run up the coast. Sleeping close to the surf. Waking with the side door open to a stripe of morning light. It doesn't matter whether you grew up around air-cooled Volkswagens or only came to VW later through Transporters and modern campers. The appeal lands in the same spot. Freedom, simplicity and that sense that the good part of life might only be a few kilometres away.

Some vehicles are admired. Others make people start planning trips in their head before they've even walked around them once.

Collectors understand that instinct better than most. A model isn't only a replica. It's a way to keep that open-road feeling on the shelf, on the desk, or tucked into a coastal display at home when the work week is doing its best to get in the way.

What Exactly Is a VW California Beach

You spot the difference the first time you see one being used properly. At a surf car park near Torquay, a California Beach can look like an everyday VW van right up until the roof goes up, the rear seats fold flat, and someone slides out the camp table while the tea boils. That's the Beach in a nutshell. It carries the manners of a sensible daily driver, but it always seems ready for a night by the water.

The California Beach belongs to Volkswagen's factory-built camper line, which grew out of the old idea that a van could be clever, compact and pleasant to live with for a weekend. Volkswagen Commercial Vehicles traces the California story back to the late 1980s in its own California model history. For collectors, that factory origin matters. The details tend to be tidier, the layouts more resolved, and the whole thing feels like a proper chapter in VW history rather than an aftermarket conversion.

A white Volkswagen California Beach camper van parked on a sandy beach during a beautiful sunset.

The essentials that make it a Beach

A California Beach is the lighter-footed member of the California family. It keeps the camper identity, especially the pop-up roof and convertible sleeping space, but avoids the heavier built-in fit-out you'd expect in more loaded variants. That gives it a very different feel from a large motorhome. Around town, it still behaves like something you'd happily park at the shops.

Australian examples are commonly associated with Volkswagen's 2.0-litre diesel drivetrains and the safety and comfort gear expected of a modern passenger vehicle. The broader shape of the van matters just as much as the numbers. Good visibility, a sensible footprint, and seating that can be reworked for passengers, boards, bags or bedding are what make people warm to it so quickly.

A few traits give the Beach its character:

  • Pop-up roof: Low enough for everyday use, tall enough to create proper camper atmosphere once you're set up.
  • Flexible cabin: Rear seating and sleeping arrangements can be adapted around family trips, solo escapes or a market run.
  • Weekend-ready layout: It suits short stays and spontaneous travel without feeling overbuilt.

That balance is a big part of the appeal. Owners get a van they can live with during the week and still point toward the coast on Friday afternoon.

How it differs from Coast and Ocean

The Beach usually sits at the simpler end of the California line. Coast and Ocean models are more heavily equipped for full camping duty, with a stronger focus on built-in furniture, kitchen gear and a more residential feel inside. The Beach keeps things lighter and more open, which plenty of VW people prefer. It leaves room for wetsuits, kids, fishing gear, fold-up chairs and all the odd bits that come with real trips.

Volkswagen Australia's California 6.1 brochure outlines that practical touring brief, including the diesel and DSG combination offered locally. On the road, that translates to easy cruising and relaxed long-distance manners rather than fussy camper theatrics.

That's also why the Beach makes such a satisfying subject for collectors. It captures a modern version of the old Volkswagen promise. Smart use of space, honest utility, and freedom packed into a familiar shape. If that side of VW culture speaks to you, this VW travel van feature taps into the same spirit in miniature form, the kind you can park on a shelf when an actual trip has to wait.

Practical rule: The California Beach suits people who want one Volkswagen that can handle daily duties, weekend escapes and the occasional long coastal run without any fuss.

More Than a Van The California Beach Dream

You see it at places like Torquay or Crescent Head just after sunrise. Side door open. Boards leaning nearby. Someone's boiling the billy while the kids hunt for thongs in the sand. The California Beach fits that scene so naturally that it stops feeling like a vehicle and starts feeling like part of the trip itself.

A man relaxing by his white VW California camper van on a sunny beach with a surfboard.

That is why people connect with it so quickly. The Beach carries a very old Volkswagen idea into modern life. Pack lightly, head for the coast, and let the day unfold without much ceremony. You can feel the family resemblance to earlier VW campers, but the charm comes from how usable it is now, in real Australian weekends, not in some polished brochure fantasy.

A mate of mine in Newcastle uses his California Beach exactly that way. During the week it handles errands and family duties. On Friday arvo he throws in a cooler, two camp chairs and a couple of fishing rods, then points it north. No grand production. No long checklist. That easy rhythm is what gives the van its staying power with enthusiasts.

Why enthusiasts connect with it

Collectors tend to fall for vehicles that already carry a lived-in story. The California Beach has one. It is easy to picture the details because they are familiar. Damp towels over the seat. Salt on the floor mats. A servo coffee going cold in the cupholder somewhere between home and the next headland.

That makes it different from a van admired only for spec sheets or rarity. The Beach has emotional mileage. It reminds long-time VW people of what made the old buses special in the first place. Freedom, usefulness, and a cabin that invites people to pile in and go.

A short film often says that mood better than specs can:

The miniature makes sense because the dream is real

That is also why the California Beach has such a natural place in a collection. It does not sit on a shelf as a random modern van. It carries the same spirit that made people treasure Beetles, Kombis and old dealership signs. In miniature, the story becomes portable. You bring a bit of that coastal, lightly packed freedom into the study, the garage, or the lounge room cabinet.

For plenty of collectors, that is the sweet spot. The full-size van represents the life they want more of. The model keeps that feeling close at hand between trips. If you are building out that side of the hobby, a curated range of Volkswagen model cars for collectors makes it easier to tie the modern California Beach back to the older VW legends it grew from.

A model earns shelf space when the full-size original already lives vividly in your head.

That is why the California Beach looks right at home beside a Samba Bus diecast or an old Beetle tin sign. Same family. Different chapter. This one just happens to come with surf wax, camp mugs and the promise of an early start up the coast.

Capturing the Vibe Collecting VW Diecast Models

Once you start looking for a California Beach in miniature, you realise something collectors have known for years. Scale changes the experience. A model isn't just smaller. It tells the story differently depending on its size, finish and detail.

An infographic titled Choosing Your Perfect VW California Beach Diecast Model, highlighting four key considerations for collectors.

Scale changes where the model lives

A 1:18 model tends to suit a proper display shelf or cabinet. It gives designers room to include more visible cabin detail, wheel finish and trim touches. A 1:24 often feels right on a desk, sideboard or mixed VW shelf where space matters. Smaller scales can work brilliantly in grouped displays, especially if you like creating a broader Volkswagen scene with Beetles, Kombis and service vehicles together.

Here's a simple collector's view:

Scale Best use What collectors usually enjoy
1:18 Main display cabinet Bigger visual presence and more detail
1:24 Desk, bookshelf, gift display Nice balance of size and convenience
Smaller scales Multi-model scenes Easy to group by era, colour or theme

What to look for in a quality VW model

The California Beach suits diecast especially well because its whole design philosophy is about practical details. Its manual pop-up roof, fold-out kitchen and multi-functional sofa layout echo the simplicity and space-efficiency of classic Kombi campers, which is part of why it resonates with Australian VW fans, as noted in this Automotive World California Beach piece.

When you're choosing a model, check for:

  • Licensed proportions: The roofline, window shape and stance should look right from a few steps back.
  • Interior cues: Even when the cabin detail is subtle, you want signs of the camper layout rather than a generic van interior.
  • Paint and trim quality: White, silver and two-tone VW schemes need crisp separation and clean finish.
  • Purposeful display value: Ask whether it works solo or alongside older icons like a Beetle or Samba Bus.

Collectors building a broader Volkswagen shelf can browse different Volkswagen model cars to compare eras and styles side by side.

A California Beach model works best in a family of VWs

A lone California Beach model looks smart. Pair it with a Beetle and a classic Kombi, and the shelf starts telling a story. You can trace Volkswagen's design language from rounded optimism to practical touring culture. That's where collecting becomes more satisfying than buying alone.

Collector's note: Don't chase size alone. Chase character. The right model is the one that still makes you grin after the novelty wears off.

If you're searching terms like VW Kombi diecast Australia, Volkswagen Beetle model, buy diecast Kombi, or Volkswagen diecast models for sale, that's usually what you're after without even saying it. Not just inventory. Personality.

Styling Your Slice of Coastal Freedom

The most enjoyable displays don't look accidental. They look lived with. A California Beach model gives you a great centrepiece because the van already suggests a setting. Coastline. Campground. Garage shelf with maps and old rally stickers. You've got options beyond lining it up in a glass case and calling it done.

Screenshot from https://vwmemorabilia.com.au/shop/

Build a display that feels like a place

California Beach has a wheelbase around 3.12 m and a turning circle of about 12 m, which helps explain why it feels at home in tight coastal towns and compact camping spots, according to this Volkswagen California dimensions brochure. That real-world nimbleness gives you a useful clue for display styling. The best scenes for it usually feel compact and practical, not oversized and theatrical.

A few ideas work particularly well:

  • Bookshelf campsite: Use a timber shelf, a small framed beach print, and a single model van angled as if it has just rolled into a tight camping bay.
  • Coffee table vignette: Pair the model with a motoring book, enamel mug and a small tray so it reads as part of the room rather than a toy on furniture.
  • Gallery wall anchor: Add the van beneath old surf photos, Kombi art or travel postcards so it links VW heritage to coastal living.

Great gift ideas for VW people

The California Beach also makes sense as a gift because it speaks to more than one kind of enthusiast. It suits the collector who loves modern VWs, the Kombi fan who appreciates the lineage, and the home decorator who wants one piece with personality.

This mix tends to work well:

  • For the diehard collector: A detailed van model paired with a Beetle or Samba Bus from another era.
  • For the home stylist: A model plus coastal décor accents that carry the same relaxed beach feel.
  • For the nostalgic gift buyer: A piece that says “weekends away” without needing a whole garage to enjoy it.

If you like building out a room around that idea, coastal vintage home accessories can help the display feel intentional rather than crowded.

Keep it neat, not busy

A California Beach model carries more visual information than a simple sedan. Roof, glass, body height, camping cues. Give it room. One strong model with breathing space usually looks better than five packed tightly together.

Leave enough empty space around a camper model so the eye can enjoy the shape. That space does part of the storytelling.

That's especially true if your shelf already includes VW memorabilia collectibles from different decades. The Beach is at its best when it looks ready to head off for the weekend.

Start Your Volkswagen Collection Today

The California Beach speaks to something old in VW culture and something fresh at the same time. It keeps the Volkswagen habit of clever packaging and everyday usefulness, but it wraps that into a vehicle made for beach runs, long weekends and family escapes. For collectors, that makes it unusually satisfying. You're not only admiring a modern van. You're following a line that runs from Beetles and Kombis right through to today's camper life.

That's why a California Beach model belongs so naturally in an Australian VW collection. It complements a classic Volkswagen Beetle model. It sits comfortably beside a Samba Bus. It brings a newer kind of nostalgia into the cabinet, the sort tied to surf trips, national park campgrounds and that familiar thought of leaving early to beat the traffic out of town.

If you're choosing your next piece, go for the one that matches how you enjoy the hobby. Big statement model for the cabinet. Smaller van for the desk. Coastal display piece for the lounge. Gift for the mate who still slows down every time an old Kombi passes.

The best collections don't arrive fully formed. They grow the same way road-trip plans do. One good choice, then another, then a whole story before you know it.


If you're ready to bring that California Beach spirit home, have a look at Volkswagen Memorabilia. It's an Australian store with local stock, fast shipping and a friendly team that knows why these vehicles matter. You'll find officially inspired VW gifts, coastal décor and collectible models that sit beautifully alongside classics like Kombis, Samba Buses and Beetles. It's a lovely place to start, or grow, your own Volkswagen journey.

Karmann Ghia for Sale: An Aussie Buyer’s Guide (2026)

You're probably here because you've seen one. Maybe parked outside a bakery on a Sunday run, maybe gliding past at a coastal meet, maybe tucked into the corner of a shed in an online listing with just enough promise to get your heart going. A Karmann Ghia does that. It stops sensible thinking for a moment and replaces it with curves, chrome, and the idea that life might be better with an old VW in the garage.

That feeling is real. So is the risk.

For Australian buyers, searching for a Karmann Ghia for sale isn't like hunting down a tidy Beetle with plenty of local options. Ghias sit in a narrower lane. Stock is thin, condition varies wildly, and the difference between a lovely weekend classic and a wallet-emptying project often hides under fresh paint and cheerful ad copy. The trick is to stay excited without getting carried away.

That Karmann Ghia Dream

The Karmann Ghia has always been the stylish one in the Volkswagen family. The Beetle is honest and lovable. The Kombi is all freedom and beach-town spirit. The Ghia is the one that looks like it should be parked outside a cinema in a pressed shirt and sunglasses.

A vibrant red Volkswagen Karmann Ghia driving along a scenic coastal road during a beautiful golden sunset.

That's part of why people fall so hard for them. You don't need to know every chassis detail to realise the shape is special. It has that handmade, coachbuilt feel, even when it's sitting on familiar Volkswagen underpinnings. For plenty of Aussie enthusiasts, the Ghia is the car that bridges two passions at once. Air-cooled VW simplicity and Italian-flavoured style.

The production span helps keep that dream alive. The Type 14 Karmann Ghia coupe was produced from 1955 to 1974, with the convertible running from 1957, which means buyers can chase everything from early low-light cars to later 1600cc versions with their own personality, as outlined in the Volkswagen Karmann Ghia production history.

A Ghia rarely wins people over with a spec sheet. It wins them over the second they see the roofline.

Why Australian buyers still chase them

Australia's VW crowd has always had a soft spot for the less common models. A Ghia at a show draws a different sort of attention. People lean in. They ask what year it is. They walk around it twice.

That's why the hunt matters almost as much as the purchase. A lot of buyers start with the full-size car, then build out the rest of the obsession through books, signs, old brochures, and vintage Volkswagen memorabilia that keeps the spark alive while they search.

The dream is good. The plan matters more

A Karmann Ghia can absolutely be a joyful classic. But the cars that stay joyful are usually bought by people who know what they're looking at, what they're willing to fix, and when to walk away. Romance gets you interested. Discipline gets you the right car.

Where to Find Your Dream Ghia in Australia

Finding a Karmann Ghia in Australia takes patience more than anything else. You won't always have the luxury of comparing five similar cars in the same week. Often it's one local listing, one restored import, and a rumour from a club member who knows a bloke with one under a cover.

Public listings reflect that scarcity. Public listings show very limited Karmann Ghia inventory in Australia at any given time, reflecting global rarity. This makes it crucial for buyers to decide whether to wait for a local listing, pay a premium for a restored car, or even consider importing, as seen in broader Volkswagen Karmann Ghia market listings on Autotrader Classics.

The three search paths that usually work

Most Australian buyers end up working through a mix of these:

  • Public classifieds. Mainstream listing sites are the easiest place to set alerts and monitor asking prices. They're useful for getting a feel for presentation, restoration quality, and how sellers describe rust repair or originality. The downside is simple. Good cars don't always stay public for long.
  • VW clubs and event networks. Within these networks, some of the best leads appear before they're advertised broadly. Owners often prefer to sell to another enthusiast who understands the car. If you attend local meets, VW Nationals, or marque club gatherings, say you're looking. People remember.
  • Specialist dealers and import channels. These can save time if you want a sorted car and you're happy to pay accordingly. The trade-off is that a polished sales presentation can distract from the same old issues underneath.

Local car, imported car, or wait

That's the decision often grappled with.

A local car gives you the advantage of seeing it in person, checking paperwork more easily, and understanding its Australian history. An imported car may offer more choice, especially if you want a particular year or body style, but it adds another layer of scrutiny around compliance, repairs, and what was done before it reached our shores.

Search rule: Don't look for the cheapest Ghia. Look for the clearest story.

A practical search strategy

If I were helping a mate start fresh, I'd keep it simple:

  1. Set alerts broadly for Karmann Ghia, VW Ghia, and common misspellings.
  2. Tell club members what you want. Coupe or convertible, project or driver, early or late.
  3. Ask for underside photos early. That saves wasted travel.
  4. Keep a fallback interest alive, whether that's a Kombi or another air-cooled model, because long searches can test your patience. Plenty of enthusiasts scratch that itch with other classics such as the cars featured in Kombi for sale listings and stories.

The buyers who do best usually stay visible, stay patient, and don't panic-buy the first shiny one.

The Critical Inspection A Guide to Avoiding Heartbreak

Good intentions often meet reality. If a seller says, “It just needs a few small things,” assume nothing until you've checked the shell properly. On a Karmann Ghia, body corrosion is the issue that decides whether you've found a keeper or adopted a long-term metalwork bill.

Experts consistently point buyers to the body first. Experts stress a full body inspection, focusing on sills, the spare-wheel well, battery area, and nose cone. Rust and poor previous repairs are the costliest faults to correct, and a structurally sound shell is far harder to source in Australia than serviceable mechanical parts, according to this VW Karmann Ghia buying guide from Californian Classics.

A comprehensive pre-purchase inspection checklist for a vintage Volkswagen Karmann Ghia classic car buyer.

Rust first, mechanicals second

Volkswagen mechanical parts are usually the easier side of the equation. Engines, brakes, electrics, and trim headaches can all be annoying, but hidden corrosion in a Ghia shell is what changes the whole economics of the car.

Use a methodical routine:

  • Start with panel fit. Look at bonnet, boot, and door gaps. If they're wildly inconsistent, ask why.
  • Bring a small magnet. It's a simple way to sniff out heavy filler in lower panels and repaired nose sections.
  • Lift carpets and mats. Don't admire them. Move them.
  • Get underneath the car. If you can't get underneath, you can't inspect it properly.
  • Look behind the dashboard if the seller allows it. Tired wiring often follows years of moisture and neglect.

Poor rust repair is worse than honest rust. At least honest rust tells you what you're buying.

The spots that deserve your full attention

Some areas matter more than others. These deserve extra time.

Area to Check What to Look For Red Flag
Sills Bubbling paint, uneven seams, signs of patch sections Thick filler, soft spots, crude welding
Floor pans Moisture under carpet, replacement pan quality Fresh coating hiding rough joins
Spare-wheel well Ripples, rust in seams, accident repair Distorted metal or fresh underseal
Battery area Corrosion, acid damage, patch repairs Holes, thin metal, sloppy plating
Nose cone Filler, impact damage, poor contour Magnet won't stick, odd panel shape
Underbody joins Chassis-to-floor welding quality Messy welds, misalignment, visible shortcuts

A sensible inspection flow

I like a front-to-back routine because it stops excitement taking over.

  1. Walk the car slowly in natural light.
  2. Check lower body lines at a slight angle.
  3. Open and close everything. Doors, bonnet, boot.
  4. Inspect under carpets and under the car.
  5. Only then move to engine, brakes, and electrics.

The reason is simple. You can service a tired engine. You can sort wiring. You can rebuild brakes. But if the shell is rotten and the previous repairs were poor, you're starting in a hole.

Don't let presentation fool you

Some Ghias photograph beautifully and still make no sense as purchases. Fresh paint, whitewalls, shiny hubcaps, and a neat interior can create a false sense of security. If the car comes with records, old photos, and even period paperwork, that helps build confidence. For many VW people, original documents are part of the car's story, which is why pieces like an old Volkswagen service book still resonate so strongly.

A clean shell beats a glamorous ad every time.

Decoding the Price Tag What Is a Ghia Worth?

The hardest part of pricing a Karmann Ghia in Australia is that there often isn't a neat local ladder of comparable sales sitting in front of you. So buyers end up leaning on international benchmarks, then adjusting mentally for rarity, condition, and what it takes to get a car sorted here.

The range is enormous. Global market data shows a huge price spread. While the average sale price is around US$24,088, recorded sales range from a US$3,000 project car to a US$123,200 concours-quality convertible. This shows that condition and rarity create a price range of more than 30x, so judging a car on its own merits is important, based on Karmann Ghia market data and listings at Cars.com.

What actually drives value

This isn't a model where one badge automatically guarantees a figure. Price usually follows a handful of practical factors:

  • Body style. Convertibles tend to attract stronger money than coupes when they're done well.
  • Year and specification. Early low-light cars sit in a different desirability bracket from later examples.
  • Body integrity. Rust-free or well-documented rust repair changes the conversation immediately.
  • Originality. Correct trim, proper details, and a coherent history matter.
  • Restoration quality. There's a huge difference between tidy cosmetics and metalwork done properly.

Why asking prices can mislead

A seller might look at a rare shape and assume rarity alone carries the number. It doesn't. Buyers pay for confidence. If the car has clear photos of the underside, sensible panel gaps, records of work, and evidence that it hasn't been patched in all the wrong places, it's easier to justify stronger money.

If it's vague, shiny, and thin on history, caution is worth more than enthusiasm.

Buy the best body and the clearest paperwork you can afford. That choice usually feels expensive only once.

A practical way to judge an ad

When you're comparing a Karmann Ghia for sale, ask yourself four things:

  1. What is the shell telling me?
  2. Does the history support the seller's story?
  3. Is the restoration old enough to reveal its quality?
  4. Would I still like this car if the paint lost its shine?

That last question matters more than people think. A good Ghia still looks right when you ignore the polish and study the fundamentals.

Sealing the Deal Paperwork and Getting It Home

Once you've found the right car, the mood changes quickly. Excitement goes up, but this is the moment to stay calm and finish properly. A deal only feels good if the paperwork, transport, and first-month costs all line up.

A hand reaching for a set of vintage Volkswagen Karmann Ghia keys lying on a California title document.

The key reality for Australian buyers is bigger than the purchase price. The true cost of owning a classic in Australia goes far beyond the asking price. Buyers must factor in state-specific registration and safety requirements, compliance costs for imports, and immediate roadworthy expenses, which are rarely detailed in a 'for sale' listing, as noted in this overview of Karmann Ghia ownership considerations.

Paperwork that deserves a slow read

Don't rush this bit because everyone's smiling and keen to shake hands.

Check these carefully:

  • Registration details. Make sure the seller's paperwork matches the car in front of you.
  • Identification details. Verify VIN and any other identifying information against documents and tags.
  • Service and restoration records. Even a folder of old receipts helps establish a believable history.
  • Import-related documentation if the car came from overseas. You want the paper trail to make sense.

If anything feels muddled, stop and ask. Honest sellers usually don't mind sensible questions.

Negotiation works better when it stays factual

Classic car negotiation doesn't need to become theatre. If you've found rust concerns, missing trim, suspect tyres, or electrical faults, put them on the table plainly. You're not trying to “win.” You're trying to arrive at a fair number that reflects the car in its actual condition.

That approach tends to work better with enthusiasts than hard-nosed haggling.

A quick visual refresher on old VW buying can help settle the nerves before money changes hands.

Getting it home without drama

Transport is its own decision.

If the car is interstate and unregistered, professional transport often saves stress. If it's roadworthy and close enough, a careful drive home can be unforgettable, but only if you've already checked the basics and accepted that an old VW may still have opinions about modern traffic.

Budget mentally for immediate first jobs too:

  • Tyres if age or condition is questionable
  • A thorough service
  • Brake inspection
  • Insurance
  • Any roadworthy items picked up during transfer or registration

The handover isn't the end of the buying process. It's the start of ownership.

Can't Swing a Full-Size Ghia? Start Your Collection Here

Not everyone is in the right season of life for a classic car. Some people don't have the shed space. Some don't want a welding project. Some just know that if they buy a Ghia needing work, it'll sit under a cover while life gets in the way.

That doesn't mean the passion has to wait.

A detailed blue Volkswagen Karmann Ghia model car displayed on a white shelf with a VW logo.

The smart Plan B for VW fans

There's a lot to like about collecting licensed VW memorabilia when a full-size car isn't practical:

  • You still get the design. The curves, colours, badges, and details are part of the appeal.
  • You skip the rust and paperwork. No inspections, no registration line, no hidden body filler.
  • It fits the hobby beautifully. Shelves, office displays, workshop corners, and gift collections all work.

A diecast Beetle or Kombi can scratch the same nostalgic itch that sends people searching for a Karmann Ghia for sale in the first place. For some collectors, that turns into a display of several classic VW eras rather than one major car project.

A collectible can keep the dream alive

That's especially true if you love the wider Volkswagen world, not just one model. A shelf with a Beetle, a Samba Bus, and a surfy van still tells a story about why these vehicles matter. One Australian option in that lane is Volkswagen Memorabilia, which carries VW-themed diecast models, gifts, and display pieces that suit collectors who want the look and nostalgia without taking on a full restoration.

Owning the dream at scale is still owning a piece of it.

Your VW Adventure Awaits

A Karmann Ghia rewards patience. The right one feels special before you even turn the key, but getting there means staying level-headed when a pretty car tries to talk you into ignoring the hard bits. Search widely. Inspect ruthlessly. Read the paperwork slowly. Budget for the costs that don't appear in the ad.

Do that, and the whole experience becomes far more enjoyable.

And if the full-size car isn't the right move just yet, that's fine too. The VW world has always been bigger than one vehicle in one driveway. It lives in the stories, the club chats, the garage signs, the old brochures, and the scaled-down models that remind you why you fell for these machines in the first place. However you join in, you're part of the same warm, slightly obsessed community.


If you'd like to bring some of that classic VW spirit home, browse the officially licensed models and gifts at Volkswagen Memorabilia. It's a handy Australian source for VW diecast, memorabilia, and display pieces, with local stock that suits collectors, gift buyers, and enthusiasts who want a little Volkswagen charm on the shelf while the search for a classic car continues.

Your Jute Table Runner Guide for Coastal & VW Style

You know the feeling. You've come home from a Sunday cruise in the Beetle, the salt's still in the air, and the house feels a bit too ordinary after a morning full of old Volkswagens, surf talk and sun-faded paint. That's usually when little styling choices matter most. A jute table runner is one of those simple pieces that can pull the whole room toward that relaxed coastal-VW mood without trying too hard.

It works because it feels honest. Jute has that natural, earthy texture that sits comfortably with timber, white crockery, faded blues, old maps, beach finds, and a diecast Kombi or Beetle that deserves more than a dusty shelf. It isn't just decoration either. Used well, it gives the table a visual centre and a practical layer for everyday styling.

Bringing the Open Road Vibe to Your Table

A lot of VW lovers want their homes to feel like their favourite cars look. Relaxed. Character-filled. A bit nostalgic. Not polished within an inch of their life. That's where a jute runner earns its keep.

At an Aussie car show, you'll often see the same mix of textures that works beautifully at home. Cream paint on a Kombi. Worn timber on a market stall. Canvas chairs. Old enamel mugs. A jute table runner fits straight into that world because it brings in natural texture without stealing the show.

A rustic wooden dining table featuring a jute runner, antique car model, world map frame, and plant.

Many people wonder if a jute runner is purely a table accessory or a functional decor layer. The answer is both, especially in Australian coastal and natural-texture interiors, where the trick is making it feel elegant rather than overly rustic, as noted in Target's jute runner styling context.

Why it suits the VW crowd

A runner like this has the same appeal as a classic Kombi interior. It's unfussy, tactile, and full of personality. On a dining table it can frame a casual lunch. On a sideboard it can sit under a lamp, a framed beach photo, and a small model car display. On a coffee table it softens harder surfaces and gives scattered pieces a sense of purpose.

A good example is a simple timber dining table with a jute runner down the centre, white plates, blue glassware, and one favourite VW model as the talking piece. That setup feels collected, not staged.

Jute works best when you let it be the quiet base layer. The hero should be the story you build on top of it.

If you're after more ideas that tie table styling into relaxed automotive nostalgia, this guide to VW-inspired dining table decor is a handy place to keep the mood cohesive.

Choosing Your Perfect Jute Table Runner

A good jute runner should fit the table the way a set of period-correct rims fits an old Beetle. Right proportion, right texture, no fuss. Get that balance wrong and even a lovely coastal setup starts to look awkward.

An infographic showing four steps for choosing the perfect jute table runner, including size, texture, and care.

Start with size

Size decides whether the runner feels relaxed and intentional or like it was bought in a hurry on the way home from the markets.

Curated Events notes that table runners have a long history and that common widths usually sit between about 25 cm and 48 cm, with 35 cm often working well as a practical middle ground for everyday tables in modern homes, according to Curated Events' guide to table runner dimensions and history.

In practice, the best width depends on how you use the table. A family dining table needs breathing room for plates, glasses, and serving bowls. A hallway console or sideboard can handle a wider runner because it is mostly being viewed, not worked around. If you are styling a laid-back surf-coast look, these coastal home decor ideas help you judge how much texture the space can carry before it starts feeling heavy.

A simple buying check helps:

  • For dining tables: leave enough exposed tabletop on both sides so the runner frames the setting instead of swallowing it.
  • For sideboards: a slightly wider piece can look more grounded under lamps, vases, or framed beach prints.
  • For coffee tables: keep the drop tidy and controlled so it does not catch on knees, magazines, or the remote.

Compare the common jute looks

The weave changes the whole mood. Some runners suit a clean white-weatherboard dining room. Others belong in a more rugged setting with aged timber, striped linen, and a Kombi model parked in the middle of the story.

Style Best for Watch for
Flat woven Cleaner coastal or modern settings Can feel a bit flat if the room already lacks texture
Braided Relaxed beach-house tablescapes Textured edges usually show wear sooner
Chunkier weave Decorative layers on consoles or sideboards Uneven surfaces can make delicate glassware wobble

Flat woven styles usually suit Beetle fans who like things neat, simple, and classic. Braided and chunkier weaves have more of that old Kombi spirit. Casual, sun-worn, and full of character. Neither is better. The right one depends on whether you want your table to feel crisp or collected.

What quality looks like

The best runners do not need to shout. You can usually spot a decent one by how straight it sits and how controlled the edges look straight out of the packet.

Check these details before buying:

  • Finished edges: they help keep fraying from becoming the first thing you notice.
  • Even weave tension: loose or baggy sections tend to age badly.
  • A straight shape: a runner that twists or wanders will always look untidy on the table.
  • Clear care instructions: natural fibre needs sensible maintenance, not rough treatment.

I treat jute the same way I'd treat original trim in a classic VW. A bit of variation gives it charm. Sloppiness is another matter.

Practical rule: if a jute runner already looks shaggy or misshapen when it's new, it will look worse after a few lunches, a couple of candle nights, and one enthusiastic pass of a serving platter.

Creating Your Coastal Kombi Tablescape

The fun begins. A coastal Kombi table should feel like an early start at the beach with boards on the roof, not a themed restaurant trying too hard. Jute gives you the sandy base. Everything else should feel breezy and a little sun-worn.

A coastal-themed dining table centerpiece with a miniature Volkswagen van, tiny surfboards, and decorative seashells on a runner.

Build the base like a beach track

Lay the runner down the centre of the table and let the texture do its work. Then layer in contrast. Crisp white plates sharpen the look. Soft blue napkins or placemats pull in the sea. If the table is darker timber, the jute will warm it up straight away.

What usually works best is restraint. One or two coastal notes beat a pile of shells and rope every time.

A good mix is:

  • White ceramics: they keep the setting fresh and uncluttered.
  • Faded blue linens: enough colour to suggest the coast without becoming nautical cliché.
  • Natural pieces: driftwood, a few shells, or a woven tray.
  • Glass or clear candle holders: they stop the centre from feeling heavy.

Make the Kombi the hero

The centrepiece should have personality. A miniature VW Kombi or Samba Bus fits the mood beautifully because the shape is playful, iconic, and instantly tied to beach culture. Place it in the middle of the runner, then keep the supporting pieces low so the model remains the focal point.

The best coastal tablescapes usually have one object that sparks conversation. In a VW-loving home, that's often the Kombi.

Put the most characterful piece in the centre, then style around it as if you're parking at the perfect campsite. Leave breathing room.

There's a big difference between decorative and useful styling here. If you're setting the table for lunch, keep the centre narrow and low. If it's a sideboard or hallway console, you can build out the scene with a framed beach print, a bowl of shells, and stacked books.

For a room that leans into surf nostalgia, this collection of coastal home decor ideas with a VW twist shows how to carry the same mood beyond the dining table.

What works and what doesn't

Here's the honest bit.

Works well

  • Low centrepieces: people can still talk across the table.
  • Soft colour palettes: sand, white, pale blue, weathered timber.
  • One hero collectible: it feels intentional.

Doesn't work

  • Too many novelty items: the table starts to look like a souvenir shelf.
  • Heavy dark accessories: they fight the airy coastal feel.
  • Messy layering: jute already has texture, so it doesn't need visual chaos on top.

Styling a Nostalgic Volkswagen Beetle Setting

If the Kombi look is all surf and sea breeze, the Beetle version is a bit more playful. Think flower-market energy, old road-trip snapshots, and that cheerful, rounded shape that still makes people smile. A jute table runner suits this style because its earthy tone balances brighter retro colours.

A festive dining table decorated with a hippie-themed jute table runner, a yellow toy car, and floral plates.

Lean into colour without losing balance

Start with the runner, then bring in sunny shades through napkins, small plates, or flowers. Mustard, burnt orange, soft yellow, and muted avocado can all work if you keep the rest grounded. The jute stops those colours from drifting into costume territory.

A Beetle tablescape often looks best with a slightly lighter touch than people expect. One vase of daisies. A ceramic jug. A classic Beetle model in cream, yellow, or red. That's enough to get the nostalgic feel across.

Try this combination:

Element Best choice
Base texture Natural jute runner
Accent colour Yellow, orange, or warm white
Centrepiece Vintage-style Beetle model
Supporting detail Small florals or retro crockery

Add a small DIY detail

If you like custom touches, this is one place where a tiny bit of craft can work. Use a simple stencil and fabric-safe paint to add a small peace sign, daisy, or subtle stripe at each end of the runner. Keep it light. The charm comes from restraint, not from turning the whole runner into a mural.

The best version of this idea is almost hidden. You notice it when you lean in, the same way you notice a period-correct badge on an old Beetle.

If you want to pair a table setup like this with other display pieces around the home, these VW-themed home decoration items can help keep the room feeling connected rather than random.

Keeping Your Jute Runner Looking Great

A jute runner suits the relaxed, salt-air look beautifully, but it asks for a bit more care than cotton or linen. That is the bargain. You get that sandy, natural texture that feels right at home with shell-white plates, faded blues, and old VW charm, and in return you treat it gently.

I handle jute much like I would an original Kombi parcel shelf. Use it, enjoy it, but do not soak it and expect it to stay pristine.

How to deal with spills

Speed matters more than force. If someone sloshes a bit of rosé or drops dressing during lunch, blot it straight away with a clean white cloth. Press lightly. Rubbing pushes the spill deeper into the fibre and roughs up the weave.

Use only a small amount of moisture if the mark needs more help. A barely damp cloth usually does the job better than a wet one. Then leave the runner flat or hanging in a well-ventilated spot until it is properly dry.

Skip the hairdryer and skip direct sun for long stretches. Fast heat can make natural fibres stiff or uneven.

Routine care that actually works

Day-to-day upkeep stays simple:

  • Shake out dust and crumbs outside
  • Use a soft brush or the upholstery attachment on a vacuum for loose debris
  • Roll it for storage instead of folding it
  • Keep it away from repeated dampness, especially on outdoor tables near sea air or splashy pools
  • Rotate it now and then if one end gets more sun or heavier serving wear

Jute tends to age well if you respect what it is. It is a plant fibre, not a wipe-clean plastic surface.

One more practical point. If your table gets a real workout with kids' painting, seafood feasts, or regular outdoor entertaining, swap the jute runner out for those occasions and bring it back for drier meals. That keeps the look without forcing the material into jobs it does not enjoy.

A good jute runner should gather character the way an old Beetle does. A little softness, a bit of lived-in charm, and no obvious abuse.

FAQ Your Jute Runner Questions Answered

Can I use a jute table runner outdoors

Yes, but only with care. A covered patio table is usually the better option. Jute doesn't enjoy repeated exposure to moisture, and damp conditions can shorten its good looks.

My new runner smells earthy. Is that normal

It can be. Jute is a natural plant fibre, so a fresh, earthy scent isn't unusual. Airing it out in a dry, shaded spot usually helps. I wouldn't spray it heavily with fragranced products.

How do I flatten a runner after unrolling it

Lay it flat and give it time. If the ends are lifting, place a few light books along the length for a while. Don't soak it or hit it with strong heat.

Is a jute runner too rustic for a modern coastal home

Not if you style it with cleaner pieces around it. Jute brings texture. White ceramics, pale linens, and simple glassware keep the overall look elegant.


If your table styling naturally spills into your shelves, sideboards, and display corners, Volkswagen Memorabilia is well worth a look. It's a great Australian spot for VW-themed gifts, diecast models, and coastal decor pieces that suit Kombi and Beetle lovers who want their home to carry that same open-road spirit.

Choose Your Perfect Throw Blanket for Bed

Saturday arvo, the garage door's open, the kettle's just clicked off, and there's still a trace of salt on your thongs from the morning beach run. Your old Beetle is cooling in the drive, or maybe your shelf of Kombi diecasts is catching the sun through the bedroom window. Either way, you look at the bed and realise something's missing. Not another bulky blanket. Not a full bedding overhaul. Just one piece that gives the room a bit of soul.

That's where a throw blanket for bed starts to make sense.

It's a bit like the pinstripe on a classic VW or the roof rack on a well-loved Kombi. It won't change the bones of the thing, but it changes the feeling. A bed with a good throw at the foot looks more lived-in, more collected, more like it belongs to someone who loves good design and good stories. For VW people, that matters. We've always had a soft spot for objects that do more than one job. Useful, good-looking, and packed with character.

Bring the Open Road Feeling Home

A mate of mine keeps his guest room simple. White quilt, timber bedside, one faded surfing photo from a road trip up the coast years ago. Nice room, but it didn't really say much. Then he tossed a soft sea-green throw across the end of the bed, slightly off-centre, and suddenly the whole space felt like a weekend in a Kombi at Crescent Head. Relaxed. Sun-washed. Easy.

That's the charm of a throw blanket for bed. It doesn't shout. It hints. It says this room belongs to someone who likes weathered signwriting, old dashboards, and those long drives where the windows are down and the map doesn't matter much.

Why the feeling matters

Classic Volkswagens have always carried more than people. They carry mood. A Beetle can feel cheerful just sitting still. A Kombi can make a driveway feel like the start of a holiday. Bringing that same spirit indoors means choosing pieces that feel collected rather than overdesigned.

A throw works beautifully here because it adds:

  • Warmth without heaviness for evenings when the air turns cool
  • Texture that softens the room against timber, metal, or plain bedding
  • Colour that nods to VW style like surf blues, retro orange, olive, cream, or sandy neutrals

Practical rule: If your bedroom already has the basics sorted, a throw is often the quickest way to shift it from plain to personal.

If your style leans beachy, vintage, or road-trip nostalgic, a few ideas from these coastal home decor ideas can help tie the whole room together without losing that laid-back Australian feel.

A small detail with real personality

The best rooms don't feel like they came straight out of a catalogue. They feel like someone's been somewhere. A throw at the foot of the bed can echo an old Kombi's paintwork, the colours of a surfboard, or the sun-faded vinyl of a family car you still remember from childhood.

That's what makes this more than a decorating move. It's memory, translated into fabric.

What Exactly Is a Throw Blanket Anyway

A throw blanket gets mistaken for a standard bed blanket all the time, and that's where people end up disappointed. They order one, spread it over the bed, and wonder why it looks more like a styling layer than a full sleeping blanket. That's because it is a styling layer.

A cozy bedroom scene featuring a textured sage green sherpa throw blanket draped over a beige bed.

In Australia, a standard throw blanket is typically around 127 x 152 cm, which is 50 x 60 inches, and it's designed for decorative layering on a bed or sofa rather than full sleeping coverage, as noted in this throw blanket size guide.

Think of it like a styling accessory

A throw on a bed is a bit like a period-correct sun visor on a Beetle. It adds charm, colour, and personality, but it isn't the main structure doing the heavy lifting. Your doona, quilt, or proper bed blanket handles the full-bed job. The throw comes in later and makes the whole thing look finished.

Here's the simple split:

Item Main job Best use on a bed
Throw blanket Accent and light warmth Foot of bed, corner drape, layered styling
Bed blanket Full coverage for sleeping Across the whole mattress area

When a throw works best

There are a few moments where a throw blanket for bed really earns its place:

  • At the foot of the bed when the room needs texture
  • Folded in thirds for a tidy, precise look
  • Draped loosely on one corner if you want that relaxed, beach-house feel
  • Pulled over your legs during a read before lights out

A throw isn't there to replace your main bedding. It's there to make the bed feel inviting before anyone even sits on it.

That's why it suits VW-inspired interiors so well. Good VW design has never been about excess. It's about clever details, practical beauty, and a bit of personality in the finish.

Choosing Your Perfect Road Trip Companion

Choosing a throw blanket for bed feels a lot like packing for a coastal run in an old Kombi. You don't just grab the first thing in reach. You think about weather, comfort, and how much room you've got. The right throw depends on two things more than anything else. Material and how you want it to sit on the bed.

An infographic titled Choosing Your Perfect Road Trip Companion comparing blanket materials and sizes for travel.

Material matters in Australian homes

Some throws are there mostly for looks. Others are pleasant enough to use every night while you wind down with a magazine or a late cuppa. Guides on throw construction describe them as commonly single-layer and lightweight, with 200 to 300 GSM fabrics suited to summer or decorative layering, while heavier throws sit above 400 GSM in a buyer's guide referenced in this overview of throw blanket construction.

That gives you a practical way to think about them:

  • Cotton or similar breathable weaves suit warmer rooms and easy layering
  • Heavier, denser throws feel cosier in cooler weather but can look bulky on smaller beds
  • Soft synthetics and blended fabrics are often easy-care, which matters if the throw gets regular use

Size up the look, not the mattress

This is the part many shoppers skip. A throw looks best when it's treated as an accent. One sizing guide notes that a standard throw is about 50 x 60 inches, while a Queen blanket is typically 90 x 96 inches, which makes the difference in purpose pretty clear in this bed blanket versus throw comparison.

Here's a handy way to choose by bed size:

Bed size Best throw approach
Single Fold once lengthways and place across the lower third
Queen Try a wider fold at the foot so it doesn't get visually lost
King Use the throw as a deliberate accent on one side or corner

Buyer's note: If you want full sleeping coverage, buy a bed blanket. If you want a room to feel more polished and more personal, buy a throw.

The best choice isn't the biggest or fluffiest one. It's the one that suits your room's climate, your bedding colours, and the kind of mood you want when you walk in.

Styling Your Bed the Volkswagen Way

Now for the fun part: A throw blanket for bed can lean surfy, retro, rugged, or softly nostalgic depending on colour and placement. The trick is to style it with the same confidence you'd use picking wheels for a Beetle or curtains for a split-screen Kombi. It should suit the shape and the story.

An infographic comparing two bedroom styling themes: Coastal Kombi Vibes and Desert Wanderer Retreat with Volkswagen vehicles.

Coastal Kombi vibes

This look feels like a parked van near the dunes with wax on the board and sea air in the curtains. Keep the bedding light and easy. White, sand, pale blue, seafoam, and washed timber tones all work beautifully.

Try these styling moves:

  • Choose airy textures like linen-look fabric, waffle weaves, or lighter cotton blends
  • Fold the throw neatly at the foot so the bed still feels crisp
  • Add natural accessories like ceramic, driftwood tones, or a weathered lamp base

For more ideas in that breezy direction, these coastal bedroom decor inspirations fit the mood nicely.

Classic Beetle and retro wanderer energy

If your taste runs to bolder colours, this one's a beauty. Think burnt orange, olive, mustard, cream, or faded red. These shades have that old-school VW feel without turning the room into a theme set.

A throw in a stronger tone can do the heavy visual work when the rest of the bed stays neutral. Styling guides often focus on the look of a throw by folding or tucking it into place, which underlines that its main role is decorative rather than full coverage, as shown in this bed styling video demonstration.

A few placement options work especially well:

  1. The casual drape. Good for soft, relaxed bedrooms with a beachy feel.
  2. The tidy fold. Better for cleaner lines and a more organised look.
  3. The corner tuck. Great when you want the throw to feel intentional, not accidental.

If the bed already has plenty going on, keep the throw simple. If the bedding is plain, let the throw bring the personality.

More Than a Blanket A Piece of Memorabilia

For plenty of VW lovers, the bedroom isn't separate from the hobby. It's part of the whole world of it. The shelf of diecasts, the framed rally print, the old badge in a shadow box, the surf photo from a road trip in a mate's bay window. In that sort of room, a throw doesn't sit there as just bedding. It becomes part of the collection.

Screenshot from https://vwmemorabilia.com.au/

Use it beyond the bed

A throw can anchor a whole display if you use it thoughtfully. Fold one beneath a row of model Kombis on a shelf and suddenly the setup feels softer and more considered. Drape one over an armchair in the corner with a stack of motoring books and it becomes a reading nook with a bit of character.

Some of the nicest uses are the least obvious:

  • Shelf backdrop for diecast displays, especially with muted or coastal colours
  • Chair layer in a study or spare room with VW books and framed prints
  • Bench cover in a garage retreat or hobby room where comfort matters as much as atmosphere

A few vintage home accessories can help complete that collected look if you're building a space that feels nostalgic rather than overly matched.

Why memorabilia works better when it's livable

The best VW-inspired rooms don't look like museums. They look like a place where someone spends time. A throw helps bridge that gap. It softens the harder pieces. It gives visual warmth to metal, glass, and timber. It also keeps the room from feeling too display-driven.

Material choices matter here too. Product assortments increasingly highlight polyester styles, eco-friendly blends, and recycled cotton or recycled polyester options, with practical differences in comfort, washability, and sustainability noted in this throw product example with material notes.

That's useful if your VW room doubles as a real bedroom, guest space, or quiet corner. You're not only choosing a look. You're choosing how easy the piece will be to live with.

Keeping Your Throw in Show Ready Condition

A good throw should age like a classic VW interior that's been looked after. Not fussy. Not precious. Just cared for properly so it keeps its colour, shape, and softness. If you use your throw blanket for bed often, a little routine care goes a long way.

Simple care habits that help

Start with the label, always. Different fibres behave differently in the wash, and that matters if your throw is part of everyday use rather than occasional styling.

A few sensible habits make the biggest difference:

  • Shake it out weekly to stop dust settling deep into the fibres
  • Fold it properly between uses instead of scrunching it at the foot of the bed
  • Wash gently when needed so the texture doesn't lose its appeal
  • Keep it dry before storing especially in coastal homes where damp air can linger

Match care to the way you live

If your bedroom runs warm most of the year, lighter throws are usually easier to wash and faster to dry. If the throw lives in a guest room or styling-first space, you can be a little more relaxed about wash frequency and focus on keeping its shape tidy.

Here are the questions people usually ask.

FAQ

Can I use a throw as my main blanket?

You can use it for extra warmth on top of your regular bedding, but it's better treated as an accent or light layer than your main full-bed blanket.

What's the best throw material for hot Aussie summers?

Breathable, lighter-feeling fabrics usually make more sense in warm rooms. If easy care matters most, machine-washable options are often the practical pick.

Are recycled or blended throws worth considering?

They can be, especially if you want a balance of softness, easier maintenance, and a more thoughtful materials mix.

How do I stop a throw from looking messy on the bed?

Fold it with intention. A neat rectangle across the foot looks precise. A single-corner drape looks more relaxed. Both work when they're done deliberately.

Where can I find other VW décor to match?

Look for pieces that share the same mood rather than trying to match every colour exactly. Coastal accents, retro prints, diecasts, and vintage-inspired objects usually sit together better than overly themed décor.


If you'd like to bring that relaxed Beetle-and-Kombi spirit into your space, have a browse through Volkswagen Memorabilia. It's a great spot for officially inspired VW gifts, diecast favourites, and coastal home décor that feels right at home in an Australian beachy, nostalgic setup. With local stock and fast shipping, it's an easy way to add a little open-road character to your home.