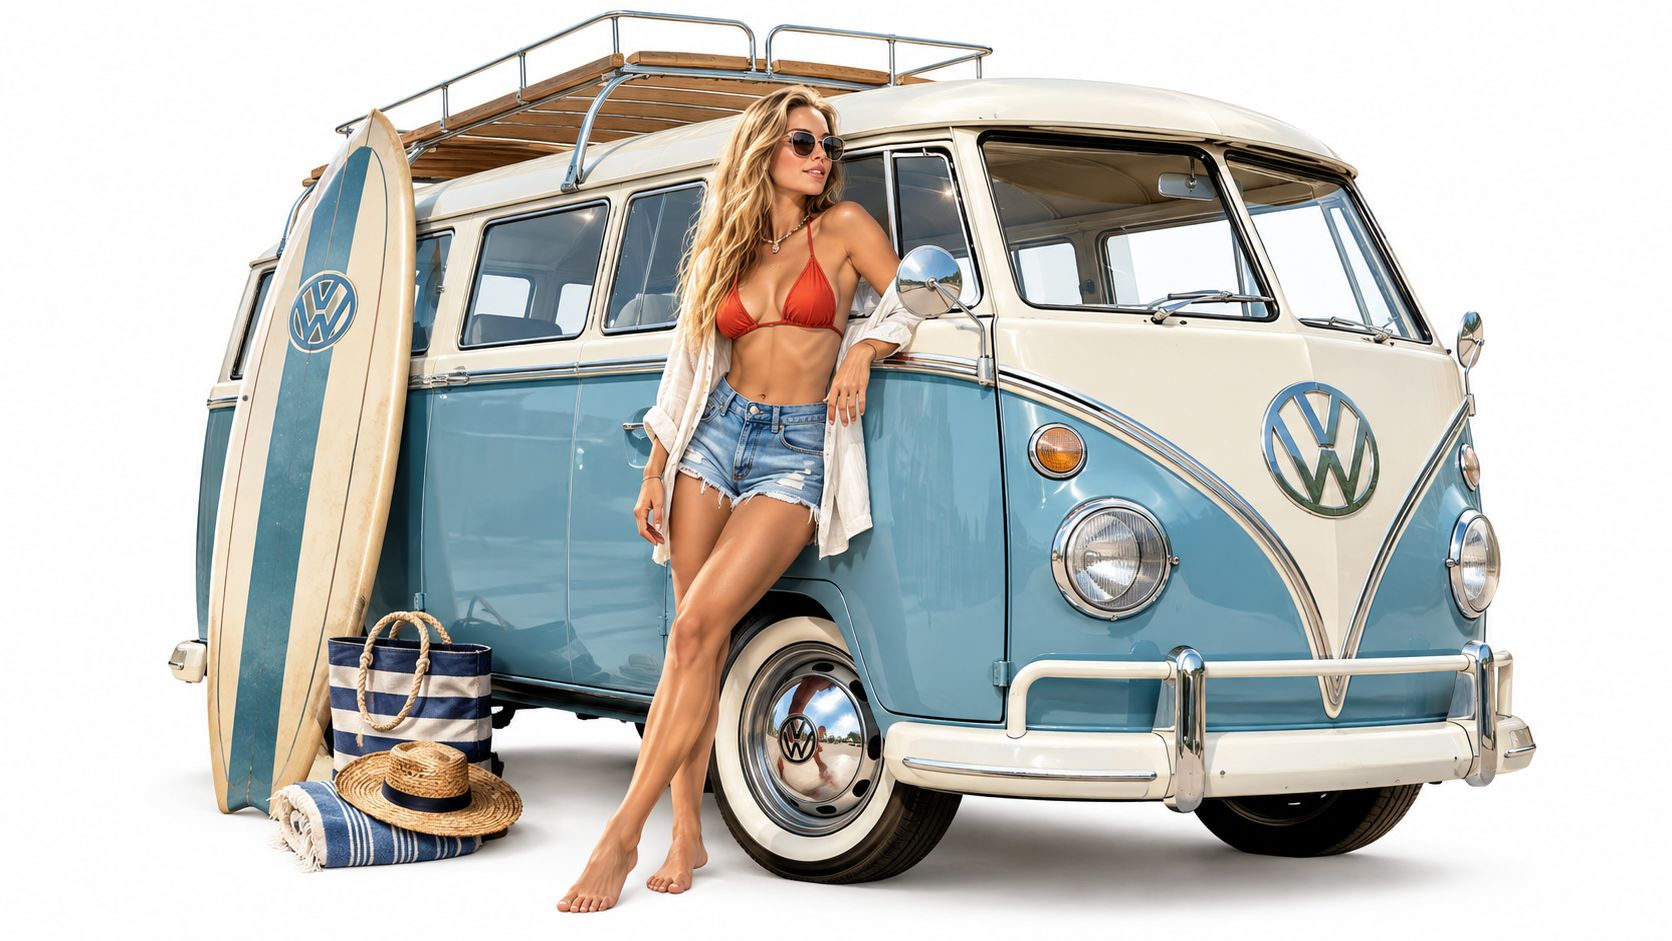

Vw Crafter Van Camper: Build Your Dream Aussie Adventure

A late afternoon run along the Australian coast has a familiar soundtrack: tyres on bitumen, surfboards secured behind the seats, and the promise of a quiet campsite near the water. For many VW enthusiasts, that dream began with a Beetle or Kombi. Today, the VW Crafter van camper offers the same sense of escape with far more room, load capacity and off-grid potential.

The appeal isn't only practical. It's the meeting point between modern touring and the heritage that made the Volkswagen name special here, from the Kombi's surf culture to the Beetle's unmistakable shape. Before you choose a layout or order cabinetry, though, you need to understand what makes an Australian Crafter conversion work, and where the compromises appear.

Why the VW Crafter is the Ultimate Aussie Camper Base

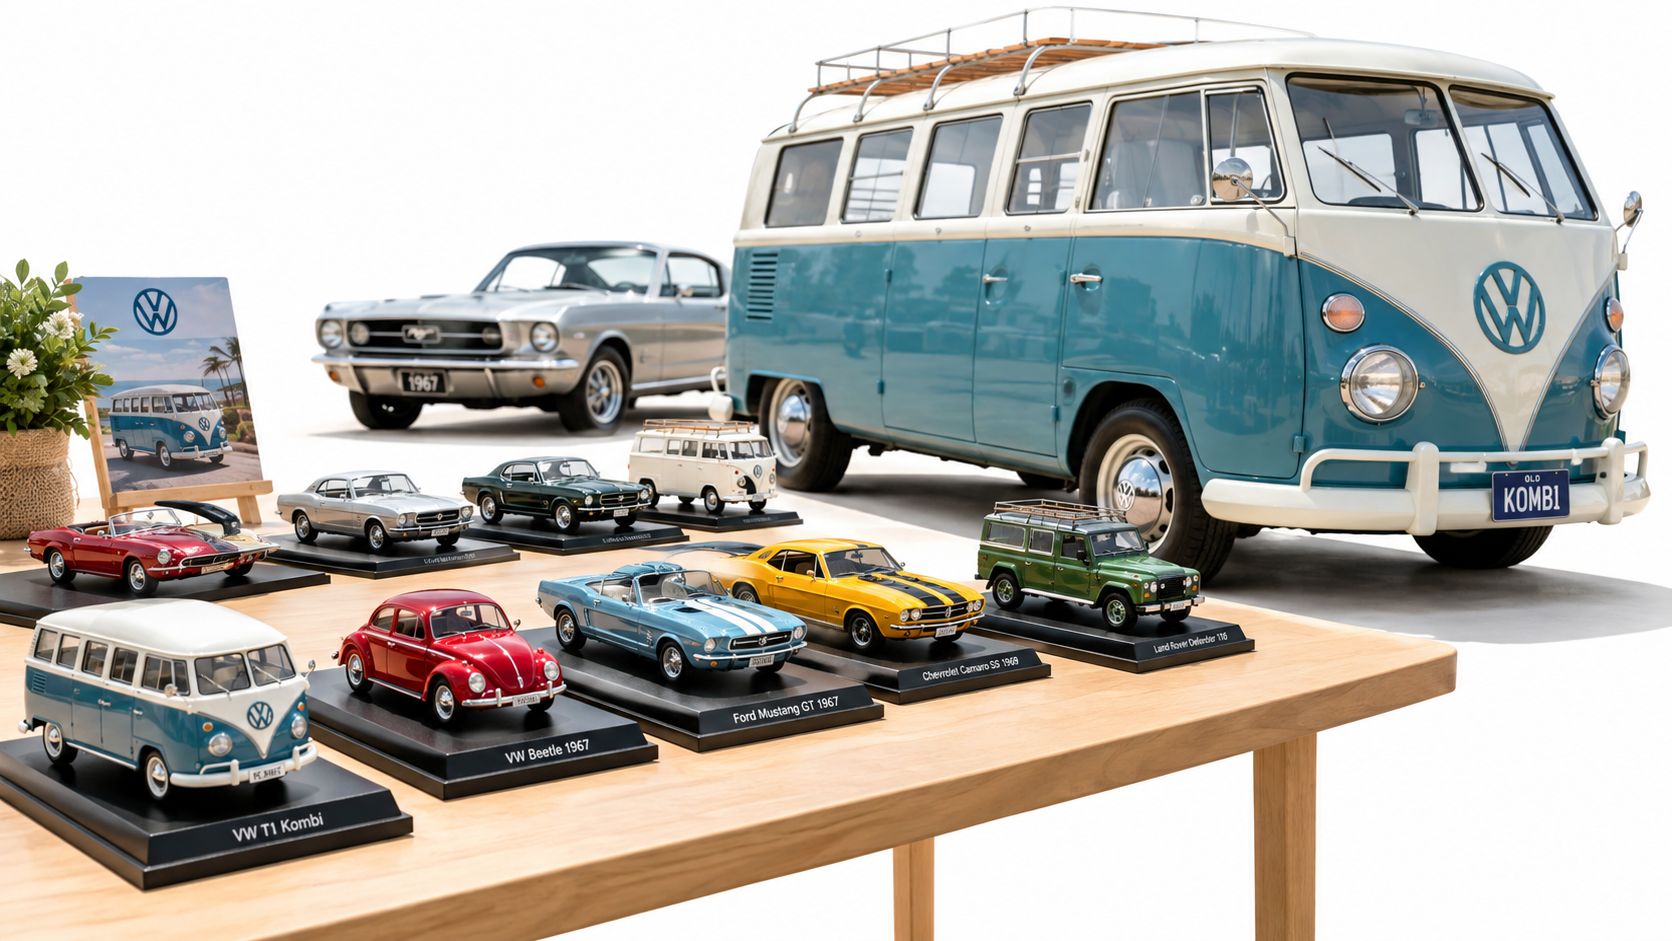
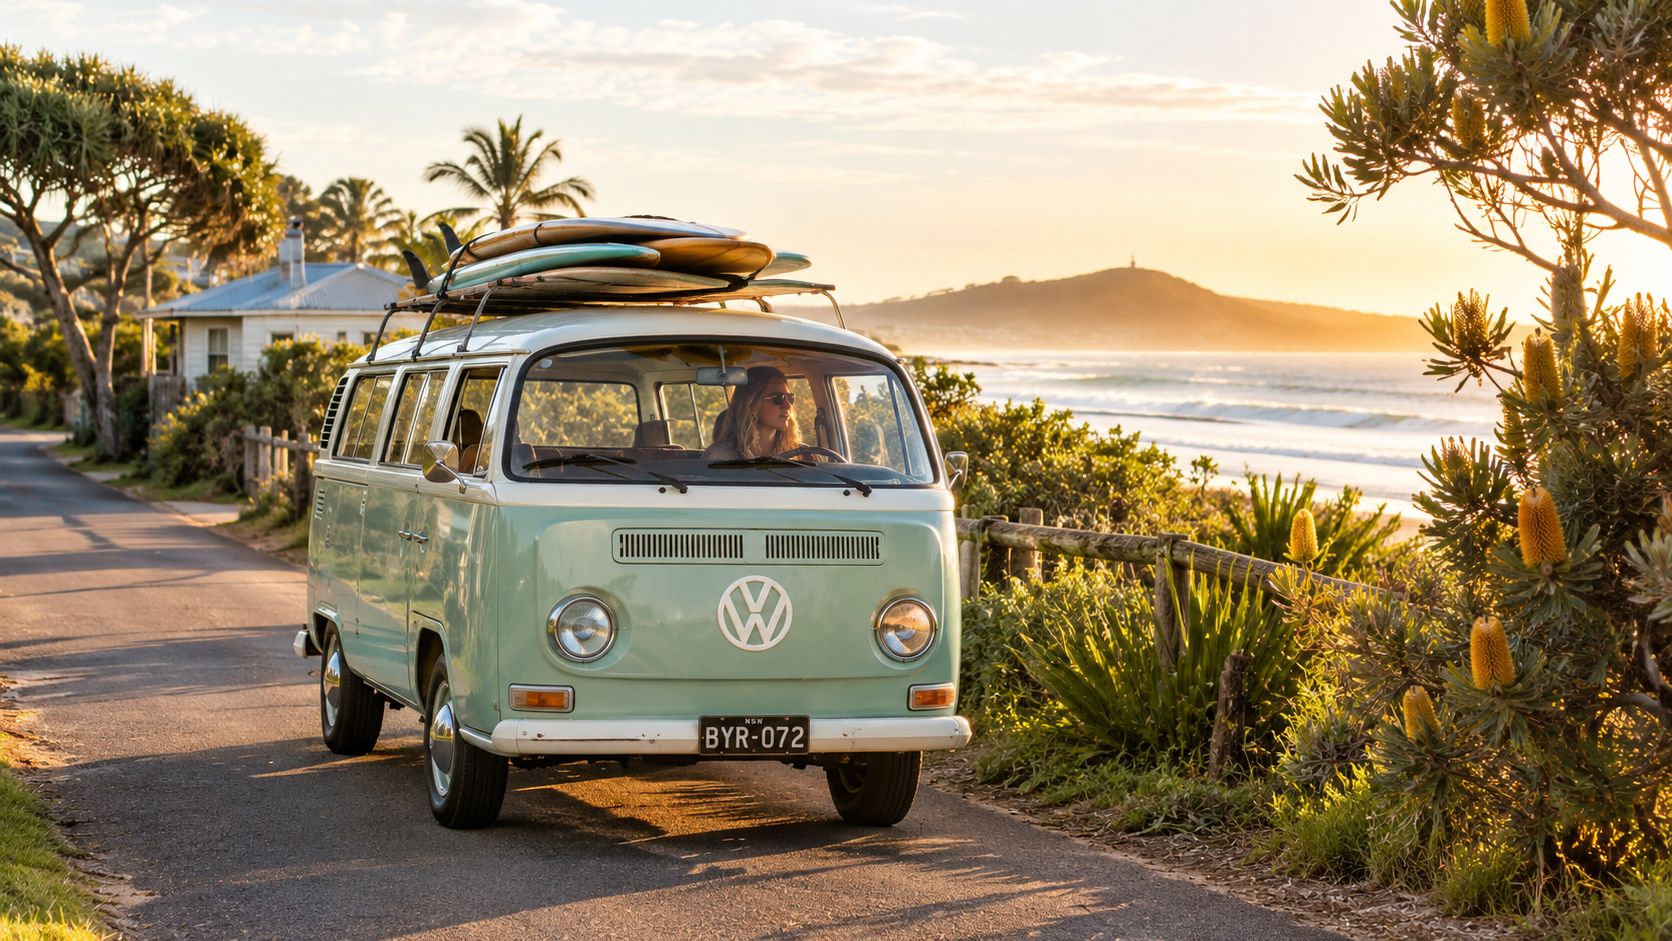
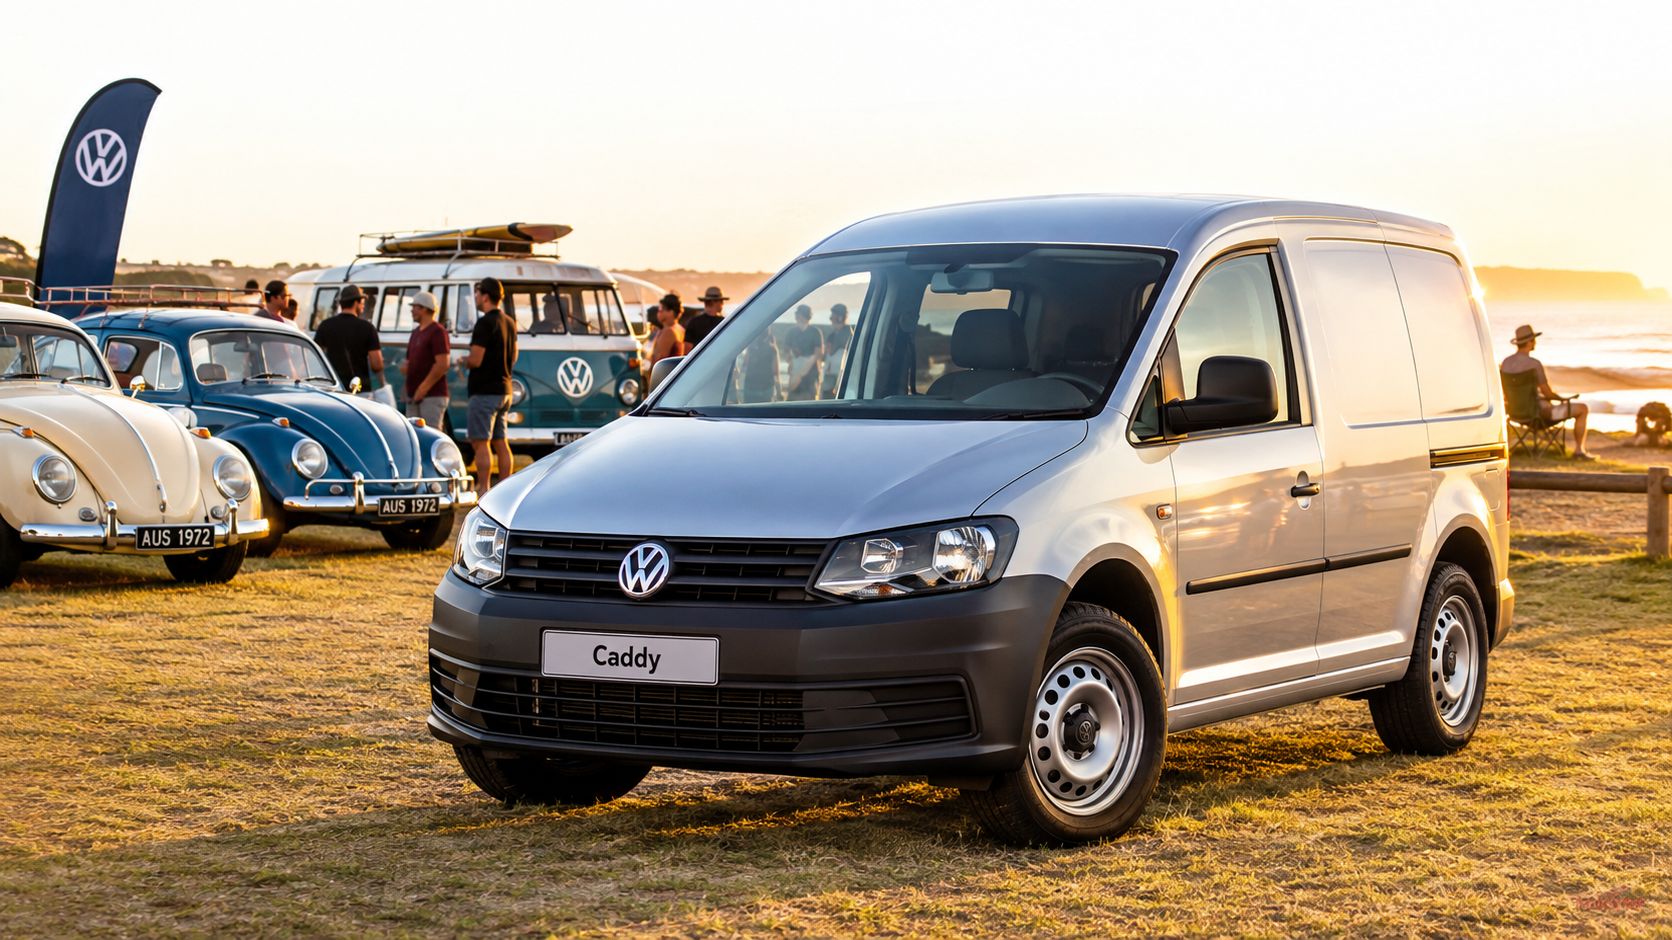
A classic Kombi parked near a beach still draws a crowd because it represents freedom in its purest form. Volkswagen Australia traces the Type 2 concept back to a sketch made by Dutch businessman Ben Pon in 1949, with the Kombi later becoming part of Australian music festival and surf culture in the 1960s and 1970s. That history gives the modern Crafter an emotional head start. It may be larger and more technical, but it belongs to the same family of road-trip ideas. Volkswagen's Kombi heritage story captures that local connection well.

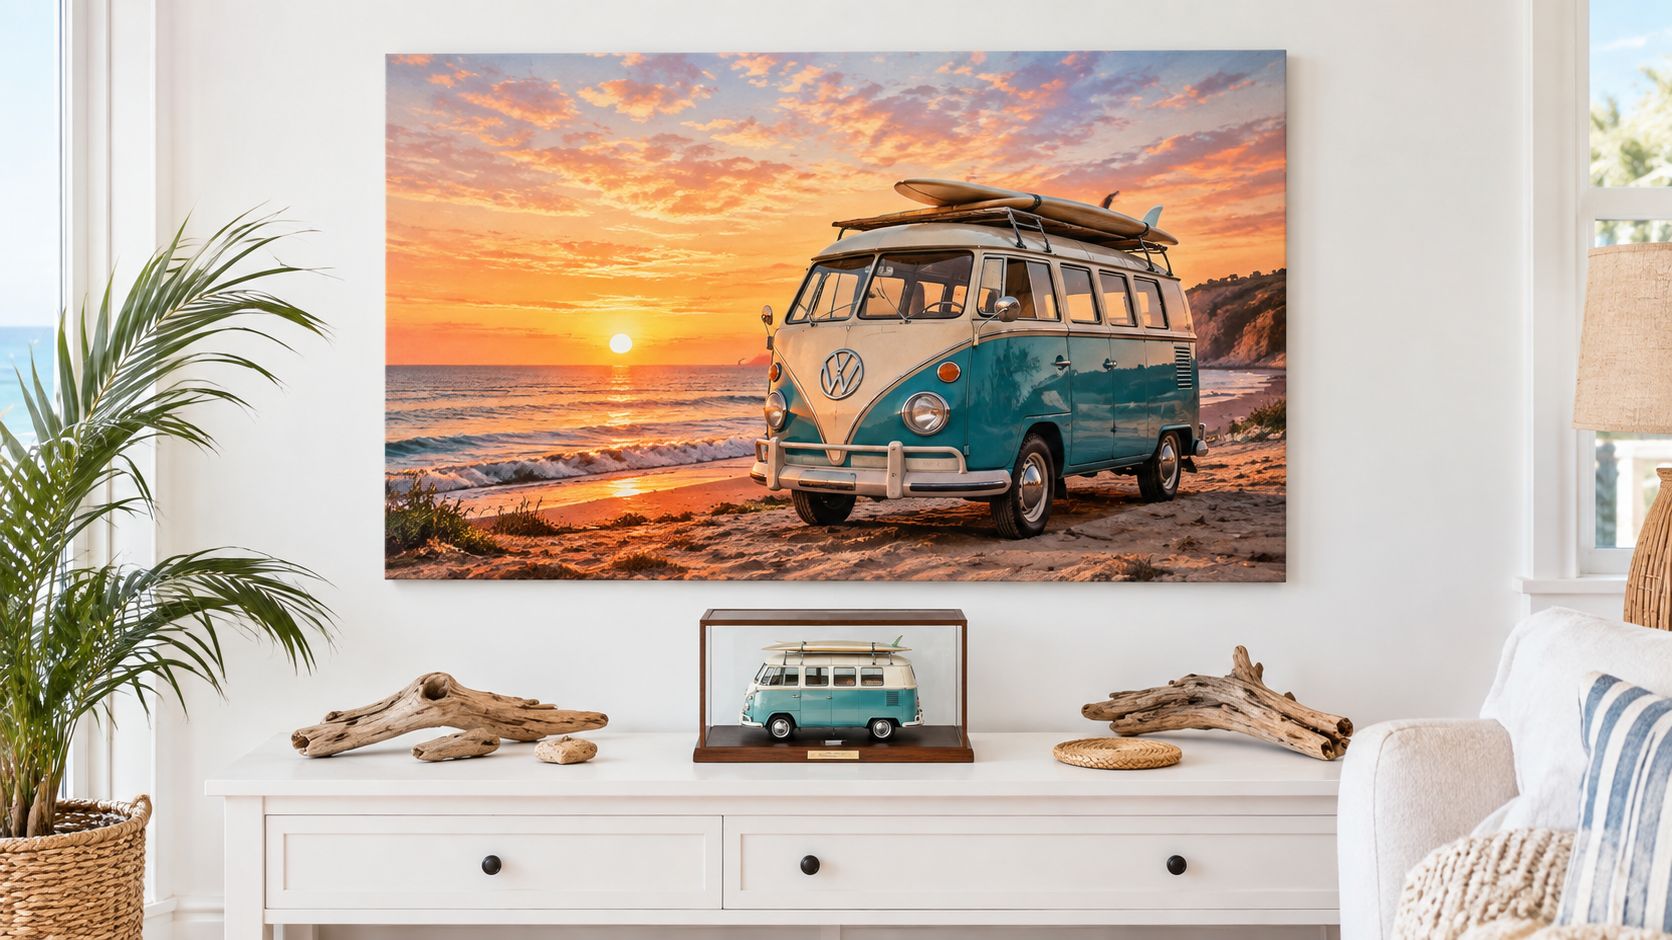
A white Volkswagen Crafter van parked on a sandy beach during a beautiful golden sunset.

The difference is that a Crafter can support a proper touring interior rather than a clever compromise. Volkswagen Australia lists cargo volumes reaching approximately 18.4m³, depending on wheelbase and roof height, while the Australian Kampervan uses a long-wheelbase Crafter 35 all-wheel-drive platform. That gives builders room to consider a fixed bed, internal storage, a kitchen module, larger electrical equipment and space for wet-weather living. Volkswagen's Crafter specifications show why the platform attracts professional converters.

The powertrain also suits the Australian touring brief. The Kampervan brochure specifies a 2.0L bi-turbo TDI 410 producing 130kW at 3,600rpm and 410Nm at 2,000rpm, paired with 4MOTION all-wheel drive and an eight-speed automatic. That combination isn't a promise that the van will float over every track. It is a useful foundation for gravel roads, wet campsites and access routes where traction matters more than outright speed.

The size brings genuine benefits

A Crafter works best for owners who want to spend meaningful time inside the vehicle, not just sleep in it between drives. The flat load floor helps designers create practical furniture runs, while the available wheelbase and roof choices make the interior feel more like a compact motorhome than a packed-out people mover.

It also gives you room to carry the equipment that defines an Australian escape:

  • Surf equipment: Boards, wetsuits and drying space need careful separation from bedding and food.
  • Touring hardware: Recovery equipment, outdoor chairs and spare supplies occupy more room than a weekend checklist suggests.
  • Off-grid systems: Batteries, inverters, water equipment and solar hardware all add mass as well as capability.

The large body isn't effortless, though. A long-wheelbase build can be around 6.8 metres long, and a finished camper is less convenient in tight urban parking areas than a Transporter or smaller van. The reward is a more comfortable base for extended travel. The cost is that you need to drive, park and plan it like a sizeable motorhome.

Practical rule: Choose the Crafter because you'll use its interior volume, not because a bigger van sounds impressive in a showroom.

For anyone who wants to connect modern travel with classic VW culture, a Crafter camper conversion makes a satisfying centrepiece. It carries the spirit of the old Kombi into a vehicle designed for contemporary Australian distances.

Navigating the Factory Conversion Pathway

A legal Australian camper build is decided before the first cabinet is cut. The vehicle must be assessed as one finished package, including furniture, water, batteries, appliances, passengers and touring equipment. Treating the commercial van and living fit-out as separate projects is a reliable way to create payload trouble.

The factory pathway begins with a Volkswagen Crafter TDI410 4MOTION delivery van. It is prepared for the weight and electrical demands of its final role before travelling to Jayco's Dandenong, Victoria factory for the turn-key camper fit-out. That staged process gives the build a clearer compliance trail than adding equipment piece by piece.
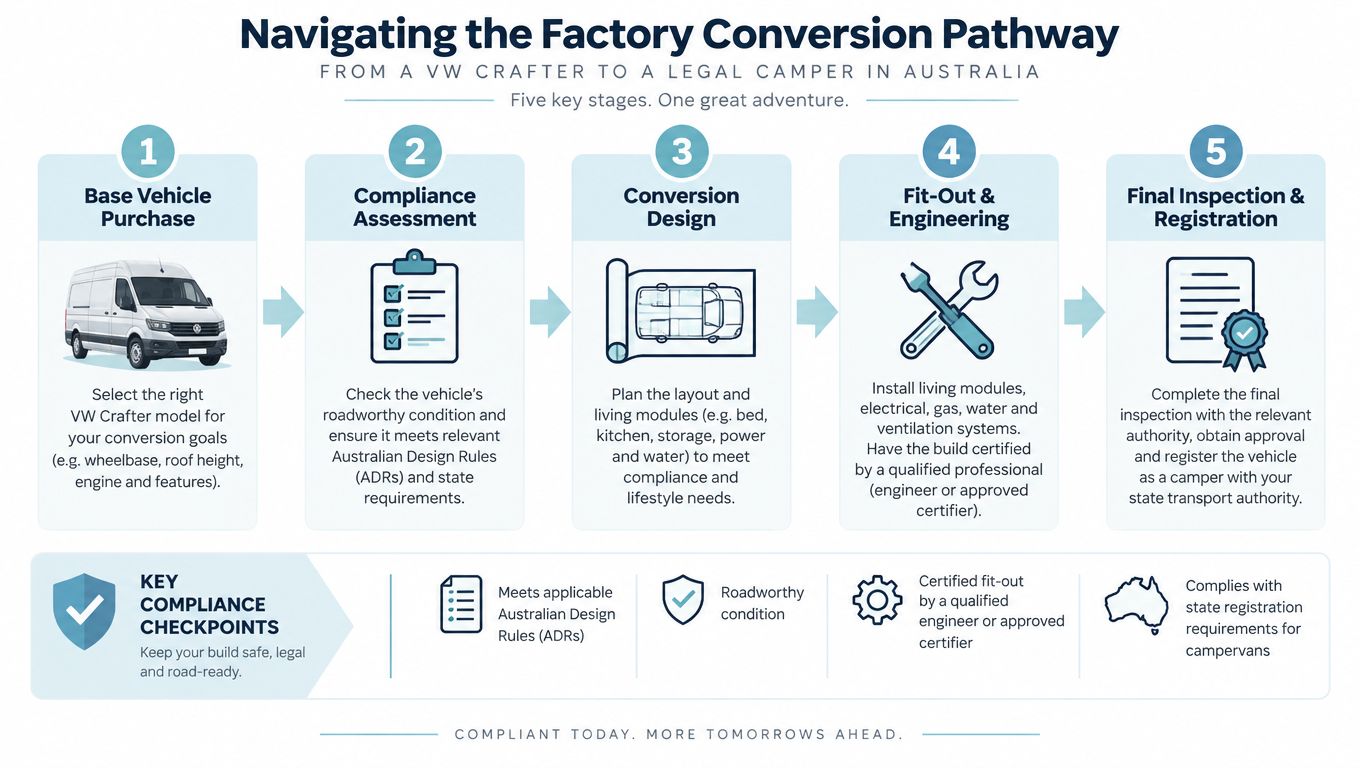
A flowchart showing five steps to convert a VW Crafter van into a legal Australian camper vehicle.

Start with the mass and electrical foundations

The base vehicle is upgraded to a 4300kg GVM, then receives a second vehicle battery and a 250A alternator before the habitation conversion starts. The sequence matters. Load-carrying capacity and charging provision are established before cabinets, tanks and appliances add weight. The Australian Crafter review explains this factory workflow and its purpose.

A practical build sequence is:

  1. Select the base vehicle. Confirm the wheelbase, drivetrain and roof configuration before drawing the furniture plan.
  2. Assess compliance needs. Identify roadworthiness, Australian Design Rules, electrical, gas and engineering requirements for the completed vehicle. Review the full van-for-conversion pathway before construction begins.
  3. Plan the interior around mass. Keep batteries, water tanks and kitchen equipment low, secure and sensibly positioned.
  4. Complete the professional fit-out. Use appropriately licensed trades for living modules, wiring, appliances and safety systems.
  5. Inspect the completed camper. Check the vehicle, supporting documents and registration requirements before a long tour.

This order addresses the common payload trap: an empty Crafter can appear to have plenty in reserve, while the completed camper has much less capacity for useful touring load. Water, bicycles, recovery equipment and personal belongings can consume the remaining allowance quickly.

Compliance isn't a paperwork afterthought

Australian conversion businesses commonly assess roadworthiness, ADR compliance, licensed electrical and gas work where applicable, plus engineering certification. Requirements vary between states and territories and depend on the work performed. Confirm the applicable registration pathway before construction, not when the van is already finished.

Fuel use also changes with the loaded vehicle and the route. Australian testing recorded 10.2L/100km for the Style and 12.1L/100km for the All-Terrain, while another test recorded 9.9L/100km and 12.9L/100km in comparable conditions. Those figures support a touring budget based on the finished van, terrain and drivetrain, rather than an empty commercial-van estimate. The Gen 2 Australian review provides the relevant launch and model context.

A weighbridge visit with the camper packed for a real trip is one of the best final checks. Weigh it with water, passengers, bikes and the gear you load for a typical trip. The diecast-Crafter appeal may start with a miniature on a shelf, but the full-size van earns its place on Australian roads only when its legal margin survives the load.

Planning Layout and Insulation for Australian Climates

Good insulation does more than keep a van warm in a southern winter. It slows heat entering through the roof and body during a hot northern afternoon, reduces condensation and makes the interior easier to live in when the weather turns. The right approach starts with treating the Crafter as a metal shell that needs careful thermal and moisture management.

Build the shell before the furniture

Use insulation materials suited to vehicle applications and install them without blocking drainage paths, service access or factory safety systems. Pay close attention to roof panels, sliding-door cavities, rear doors and the floor. A partial treatment can still help, but gaps around metal sections become uncomfortable hot or cold spots.

The floor deserves particular attention because it affects both comfort and storage. A durable insulated floor can make the cabin feel less harsh underfoot, but it also adds material and therefore weight. That mass needs to be included in the finished build calculation, just like cabinetry and battery equipment. A proper van insulation approach should balance thermal performance, moisture control, durability and payload.

Ventilation belongs in the same conversation. Insulation without airflow can trap moisture from cooking, wet clothing and sleeping. Plan controlled ventilation, window coverings and cooking extraction together, rather than adding a fan only after condensation appears.

Let the flat floor guide the layout

The Crafter's flat load floor and substantial cargo volume give designers more freedom than a compact camper, but extra space can encourage oversized furniture. The most successful layouts leave clear access through the cabin and give every major item a job.

A useful planning sequence is:

  • Mark the bed first. Decide whether it runs lengthways, converts from a dinette or sits above a storage garage.
  • Reserve service zones. Keep batteries, fuses, water systems and chargers accessible for inspection and repair.
  • Protect the central walkway. A narrow but usable path is more valuable than an extra cabinet that makes daily movement awkward.
  • Separate wet and dry gear. Give wetsuits, muddy boots and recovery equipment a ventilated zone away from bedding.
  • Sketch realistic body movement. Tape the proposed furniture footprint on the floor and test how two people cook, dress and pass each other.

The Functional Control Unit is important here. Volkswagen describes it as supporting safe integration of additional electrical systems by professional converters. That doesn't remove the need for sound electrical design, correct protection or service access, but it gives a qualified builder a better base for integrating camper equipment.

A good Australian layout feels calm when the weather is poor. You can make breakfast without moving half the van, dry clothing without soaking the bed, and reach the electrical system without dismantling a cupboard. Those everyday details matter more than a long equipment list.

Evaluating Factory Options Versus Independent Builds

The factory-backed Kampervan and an independent Crafter conversion suit different owners. The factory route brings a coordinated vehicle, conversion and support pathway. An independent build offers more personal control, while the owner manages the base van, trades, engineering, compliance and final documentation.

The Australian pricing spread makes this a practical decision, not only a styling choice. Factory-backed 2026 listings place the Kampervan Style at around $174,990 and the All-Terrain at around $184,990, while some 2026 showrooms list a base commercial Crafter from about $68,600 before conversion costs. The Australian Crafter market overview shows the broad gap between a commercial base vehicle and a finished factory-backed camper.

VW Crafter Camper Build Paths Comparison

Build Path Pros Cons Price Range AUD
Factory-backed Style Coordinated turn-key package, professional conversion pathway and clear starting specification Less freedom to alter the layout and equipment Around $174,990 (2026 listings)
Factory-backed All-Terrain 4MOTION touring focus, finished interior and factory-backed presentation Higher purchase price and limited personalisation compared with a ground-up build Around $184,990 (2026 listings)
Independent conversion Custom bed height, kitchen, storage, power system and finish Owner manages compliance, trades, quality control and budget discipline Base commercial Crafter from about $68,600 in some 2026 showrooms, before conversion work

A commercial base price is not a finished-camper comparison. Engineering, insulation, furniture, batteries, water systems, appliances, suspension work, registration and insurance all affect the final figure. The result depends on the build's scope and quality, but the payload calculation matters just as much as the purchase price. Heavy fit-outs can leave less capacity for passengers, water, bikes and touring equipment, so every mass calculation and certification needs checking before the van reaches Australian roads.

The factory route suits owners who value compliance certainty, an integrated handover and less project management. An independent builder suits owners with a specific surf, work or long-stay layout that standard options cannot provide, provided they are ready to verify certification, axle limits and the finished mass. That hands-on choice also fits the community's diecast nostalgia: the familiar VW shape can be the starting point for a full-size van with a genuinely personal purpose.

Mastering Storage and Sleeping Solutions

A Crafter can carry plenty, but that doesn't mean it should be packed without a system. Rough tracks turn loose objects into projectiles, while an overloaded rear garage can easily compromise handling and legal payload. The best storage plan keeps heavy equipment low, restrained and close to the vehicle's central mass.
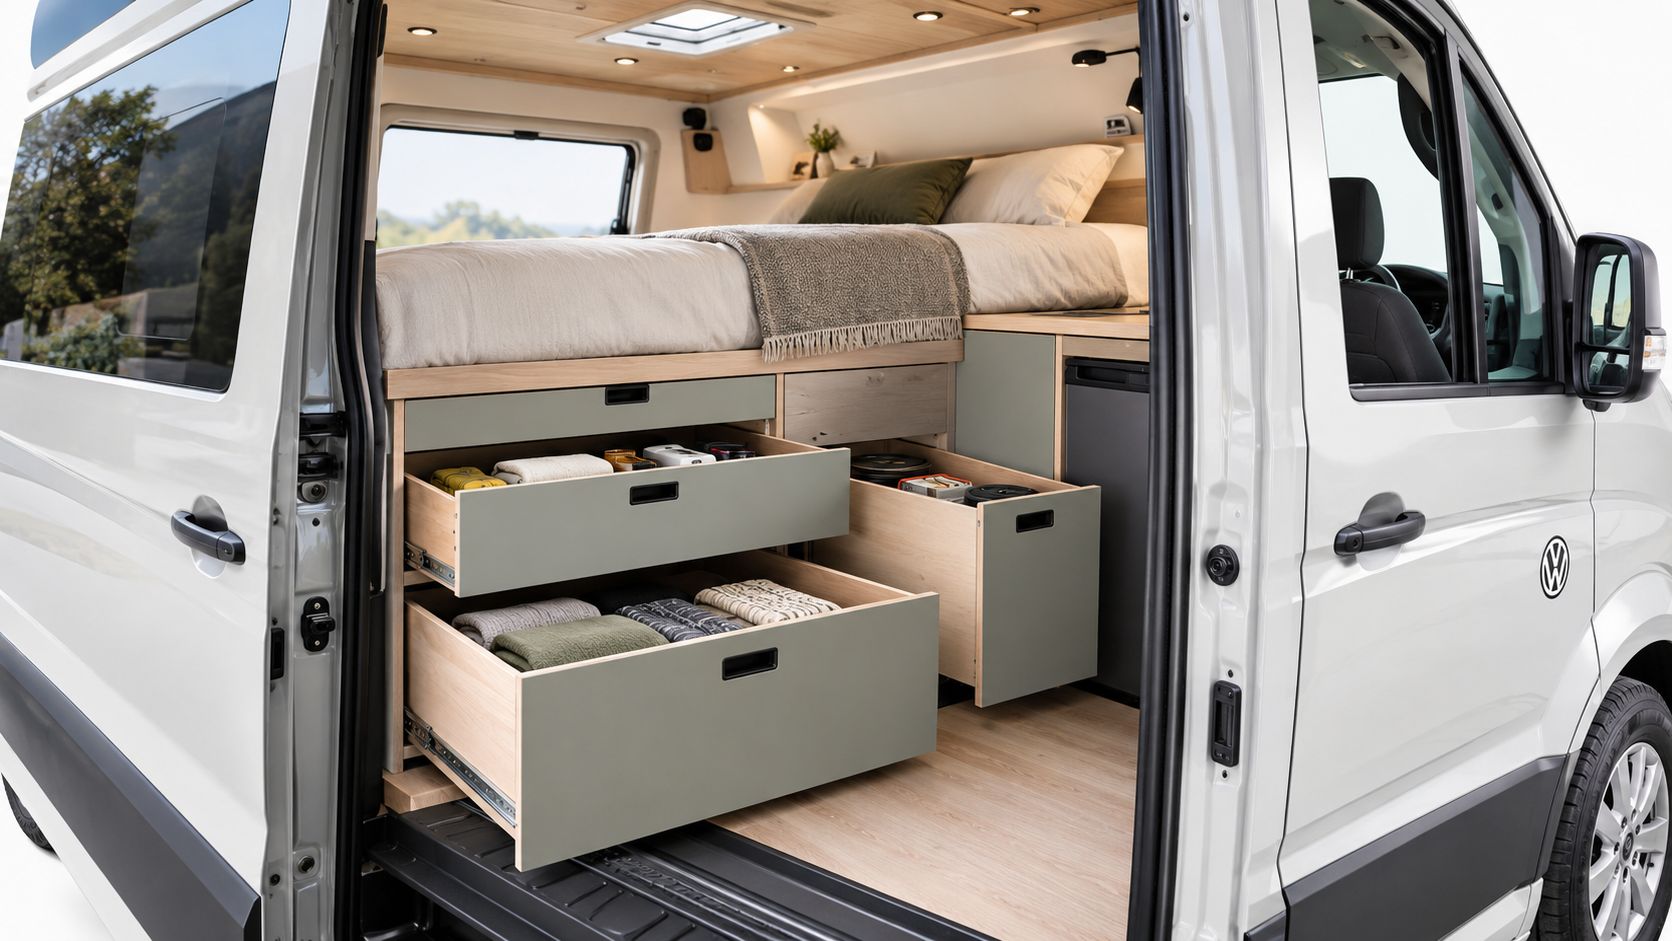
A modern, custom-built VW Crafter camper van interior featuring an organized wooden drawer system under a bed.

Give every item a fixed home

Deep drawers under a fixed bed are useful for camping tables, tools and clothing, but they become frustrating if the bed has to be cleared before every item is reached. Use shallow, labelled zones for daily supplies and reserve the least accessible compartments for equipment used only at camp.

Surf-focused owners should separate wet and dry storage. A ventilated compartment for wetsuits and towels can protect the living area, while board storage needs proper restraint and clearance from electrical equipment. Bikes deserve the same thought. They can be carried inside or outside, but either approach affects access, security, dust and the amount of room left for other touring gear.

A practical arrangement might include:

  • Under-bed garage: Recovery gear, chairs, tools and bulky outdoor equipment.
  • Kitchen drawers: Cooking items grouped by task, rather than by object type.
  • Overhead lockers: Light clothing and bedding, with positive latches for corrugated roads.
  • Entry-side storage: Shoes, wet-weather items and frequently used accessories.
  • Small personal zones: One dedicated place per traveller for keys, phones and daily essentials.

Choose the bed around your routine

A fixed bed is comfortable and quick, especially for longer touring. A raised bed can create a generous garage, but lifting height and accessibility become part of daily life. A convertible dinette saves space during the day, although making the bed each night becomes a repeated chore.

Test the proposed bed with real bedding before construction. Check headroom, access to storage and whether one person can get up without disturbing the other. If you plan remote travel, allow space for food, water and spares without using the bed as a packing shelf.

The Australian Kampervan platform is upgraded to a 4300kg GVM, but that figure remains a legal ceiling, not a target to fill casually. Confirm the completed vehicle against its upgraded GVM with water, passengers, bikes and personal equipment. The Australian Kampervan review highlights why accessories and stored gear need to be included in the final assessment.

Packing advice: Weigh the van as you travel, not as it looked at handover. Your holiday load is the build that matters.

Embracing the VW Lifestyle and Community

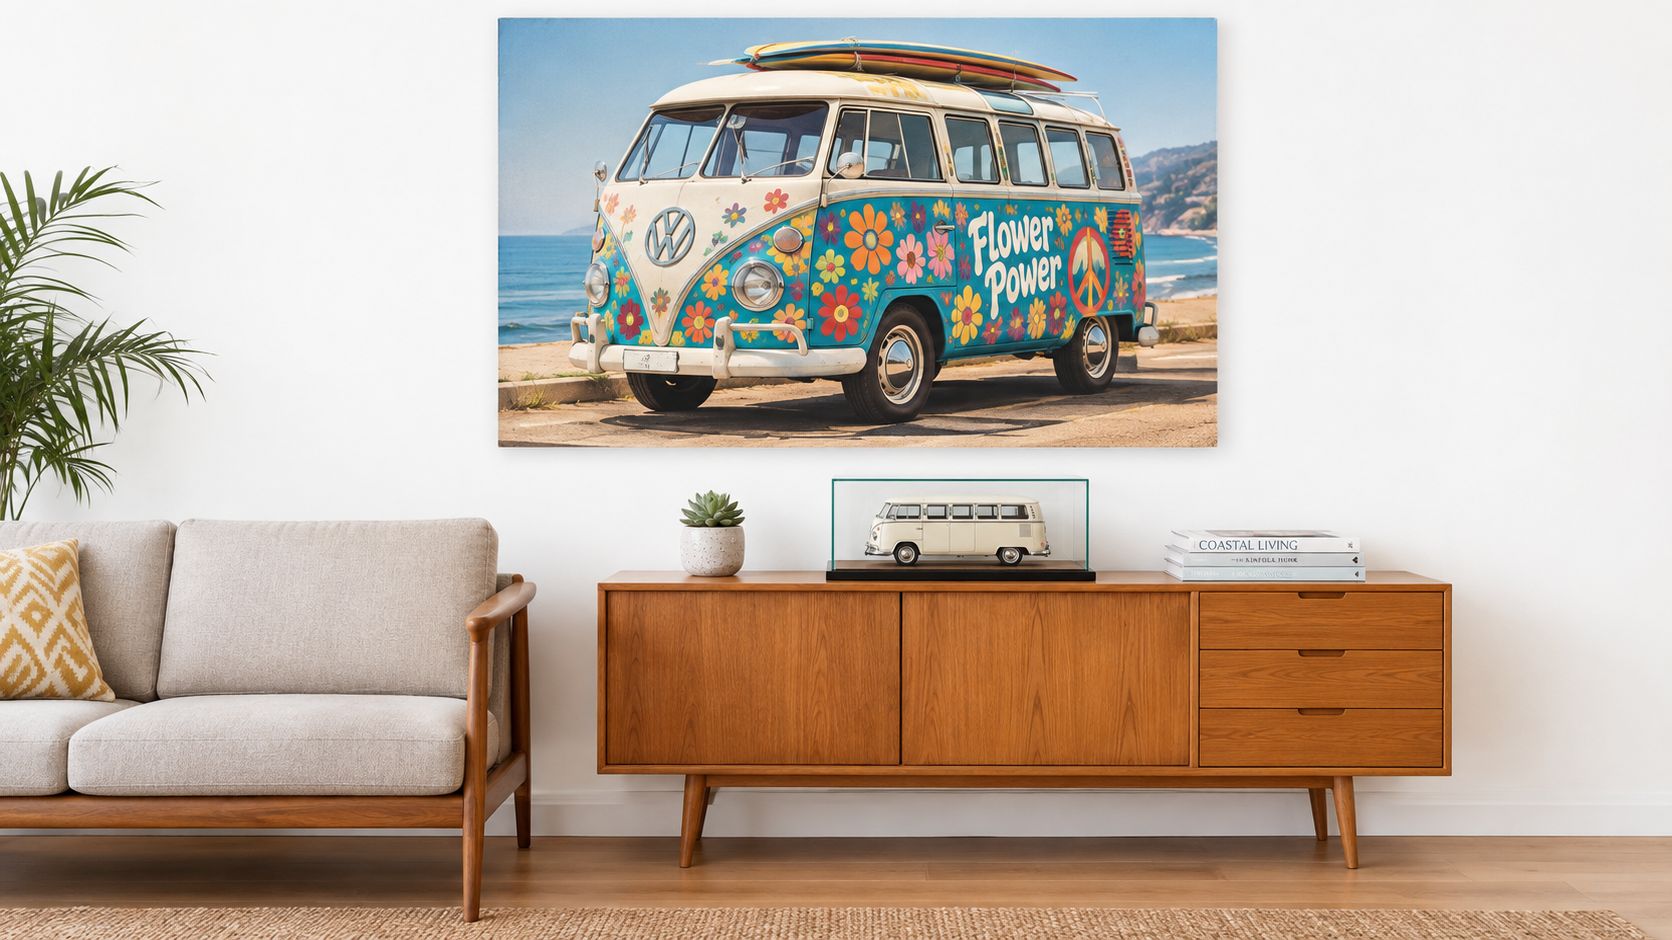
A modern Crafter doesn't replace the romance of a Kombi. It gives that romance more space to breathe. The old vans still carry the visual language of Australian beach trips, flower power and roadside friendships, while the Crafter brings standing room, serious storage and a more capable platform for long-distance travel.
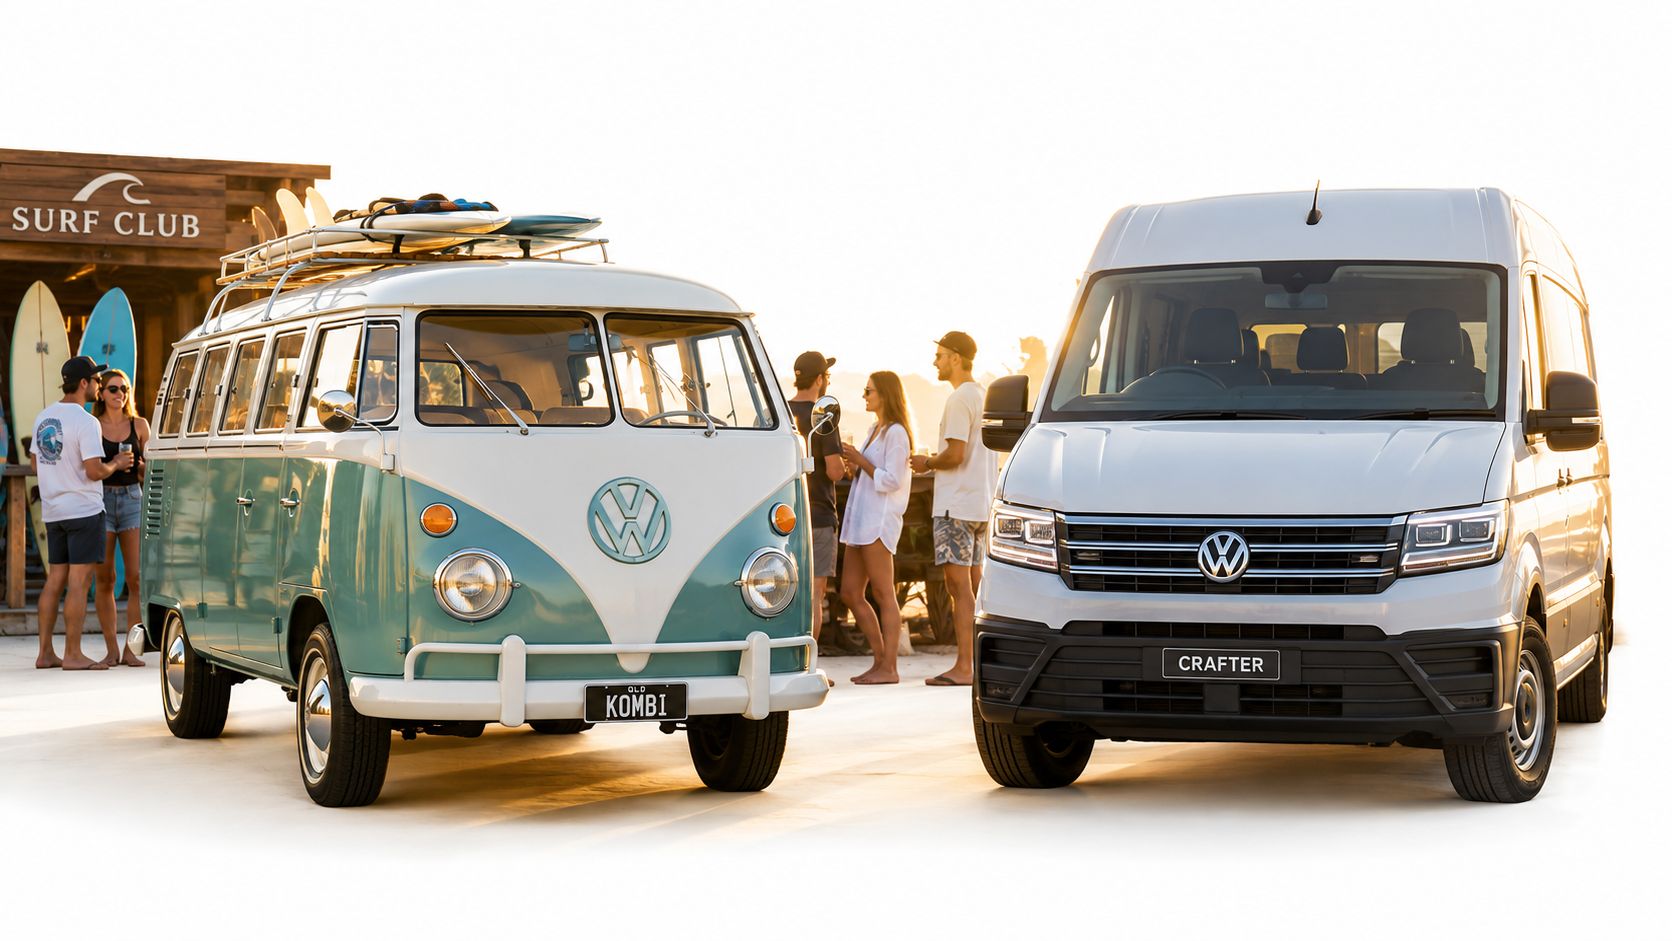
A classic vintage Volkswagen Kombi van parked next to a modern white Volkswagen Crafter van near a beach.

That connection is part of why a camper build feels different from an ordinary commercial vehicle project. You're not only selecting batteries and cabinetry. You're choosing how you want to arrive at a beach, a showground or a country campsite, and what story the van will tell when people gather around it.

Australian VW events keep that shared enthusiasm visible. Volksfest Australia's 2025 event included market stalls, a beer hall, live music, food trucks, cruises, a display day, show and shine and swap meet activities, with hundreds of Volkswagens on display. The Volksfest Australia event programme reflects the community spirit that makes the marque more than a badge.

A Crafter can sit beside a Beetle, a Samba Bus or a weathered Kombi and still feel at home. The shapes and technology differ, but the purpose is familiar: carry people towards a good day out.

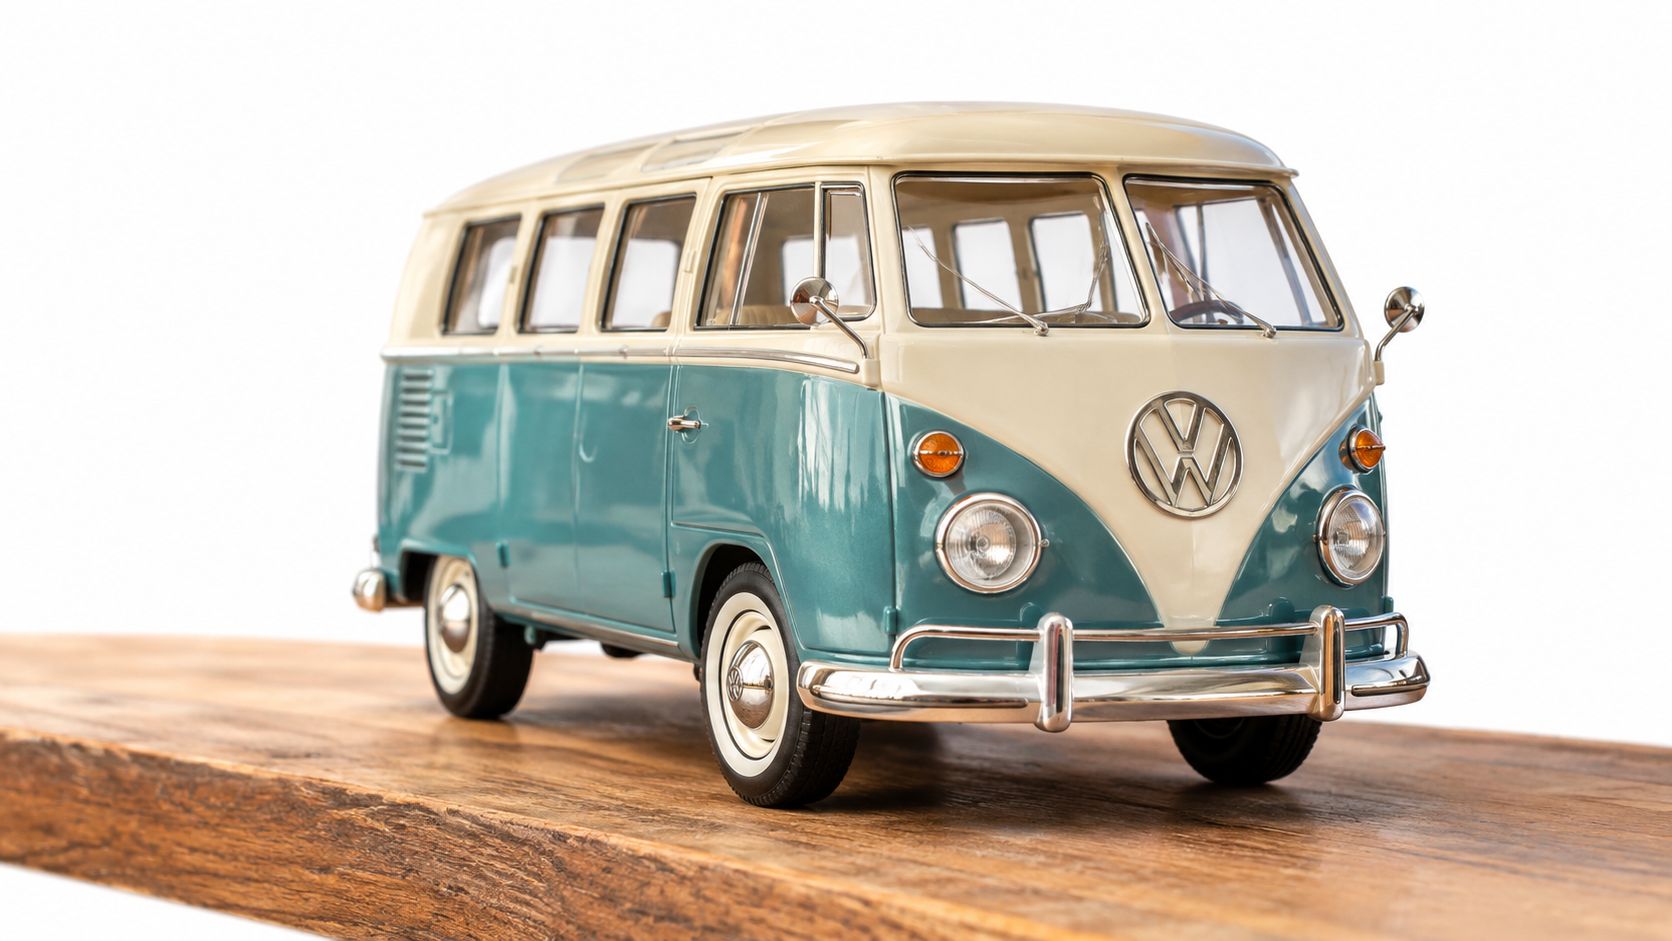
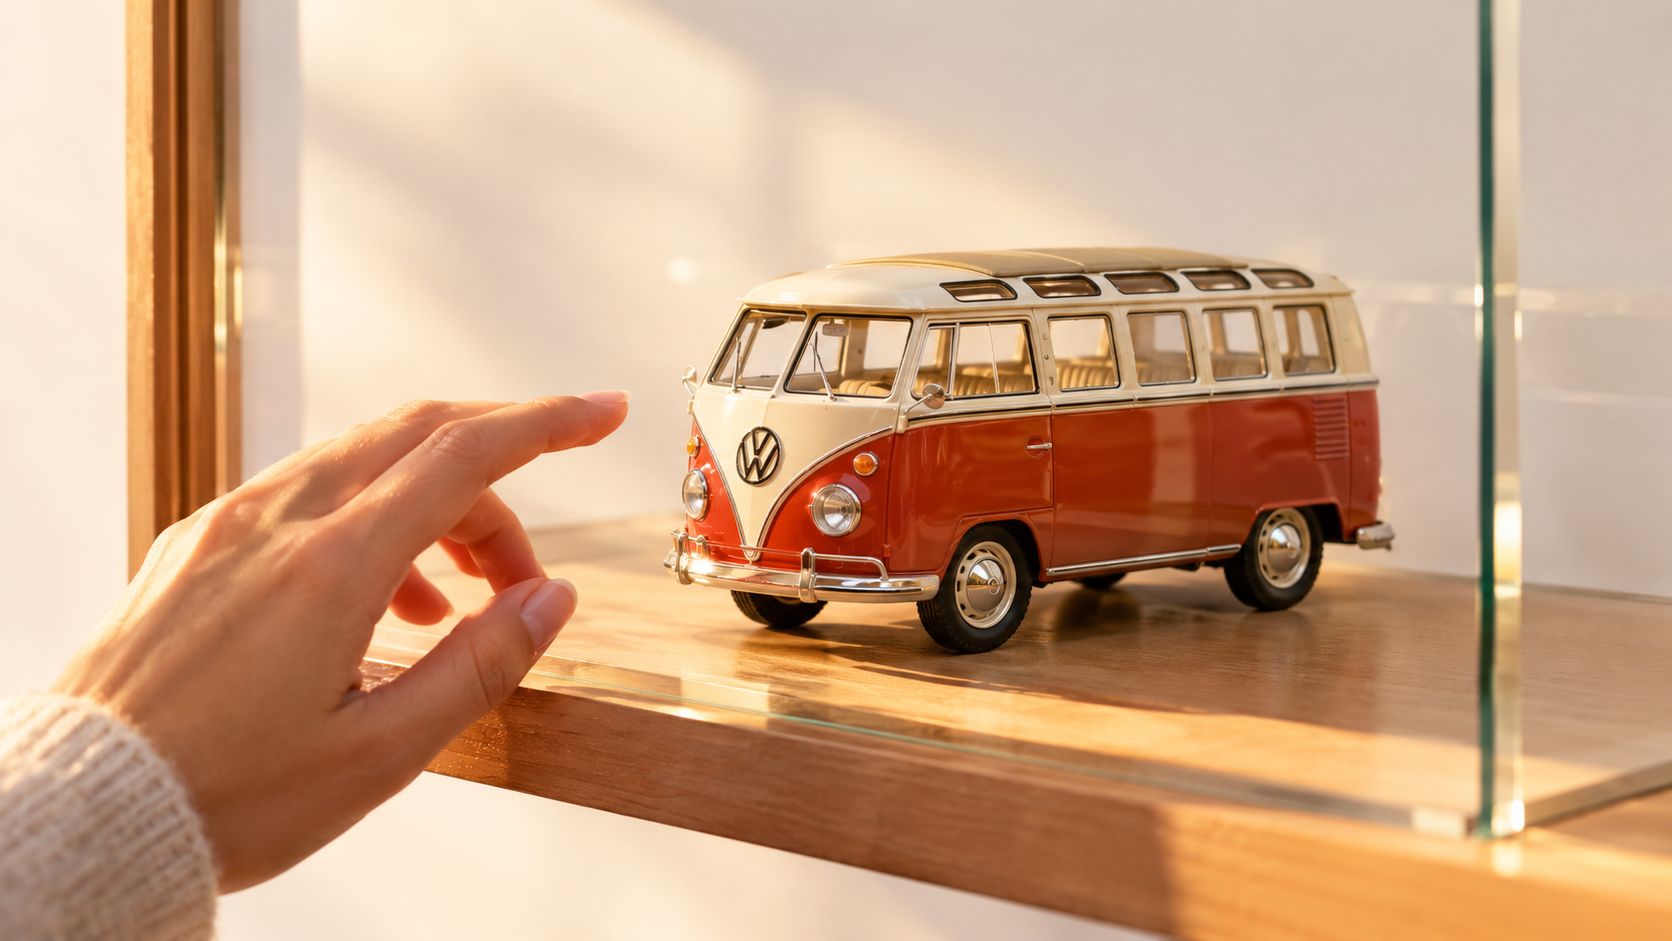
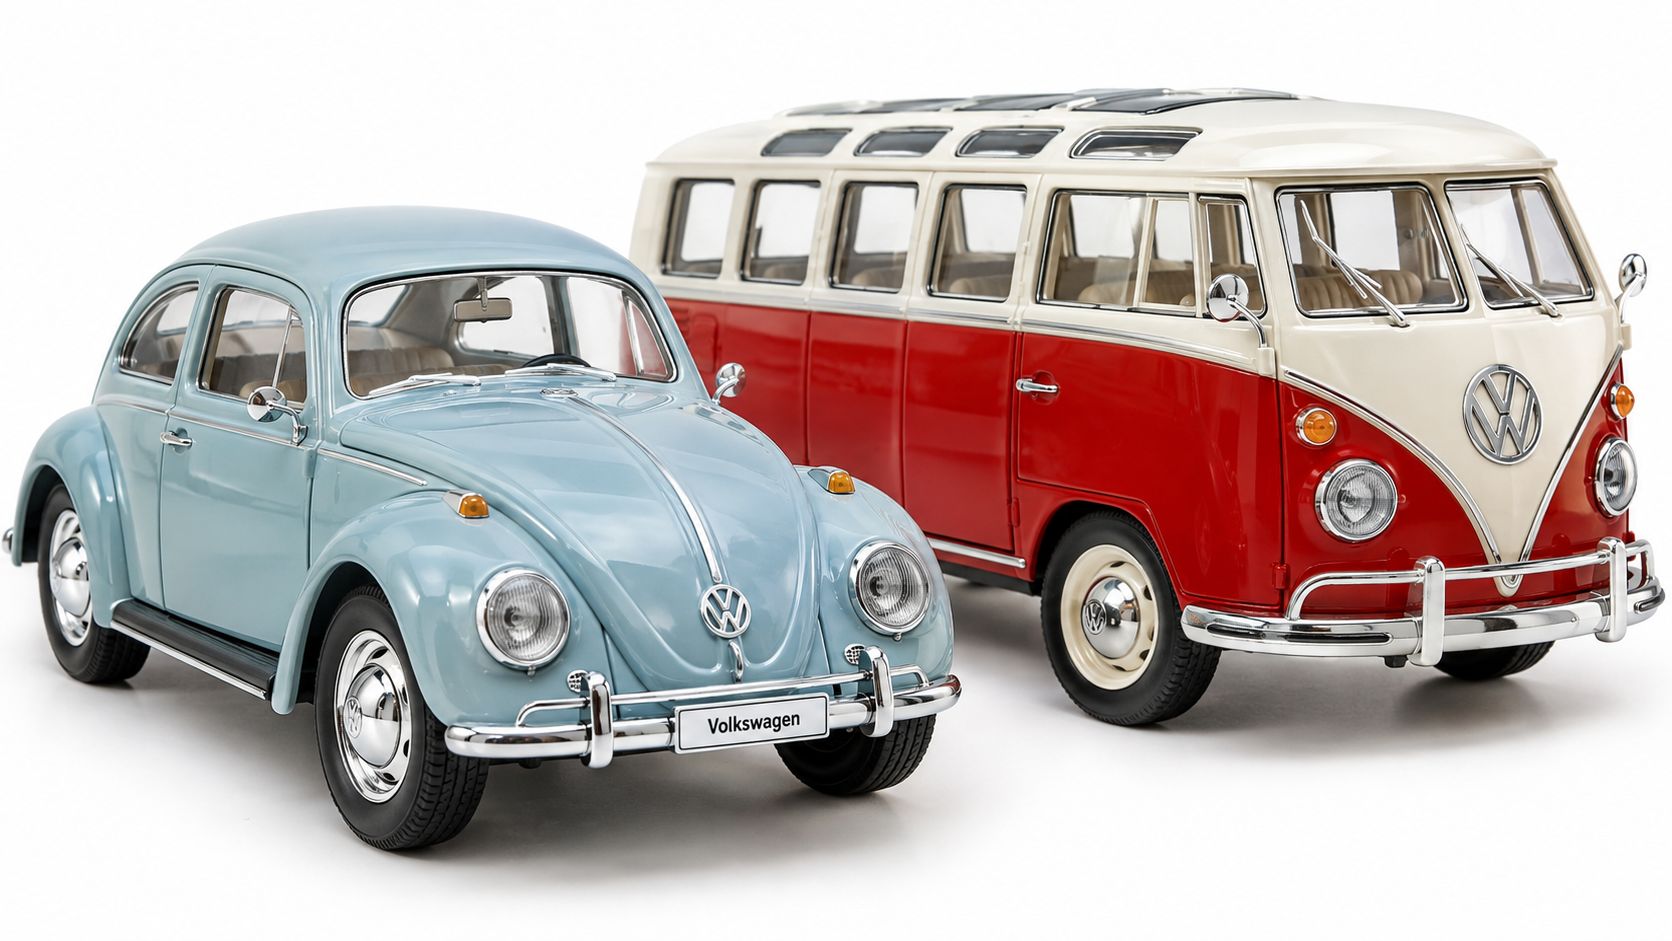
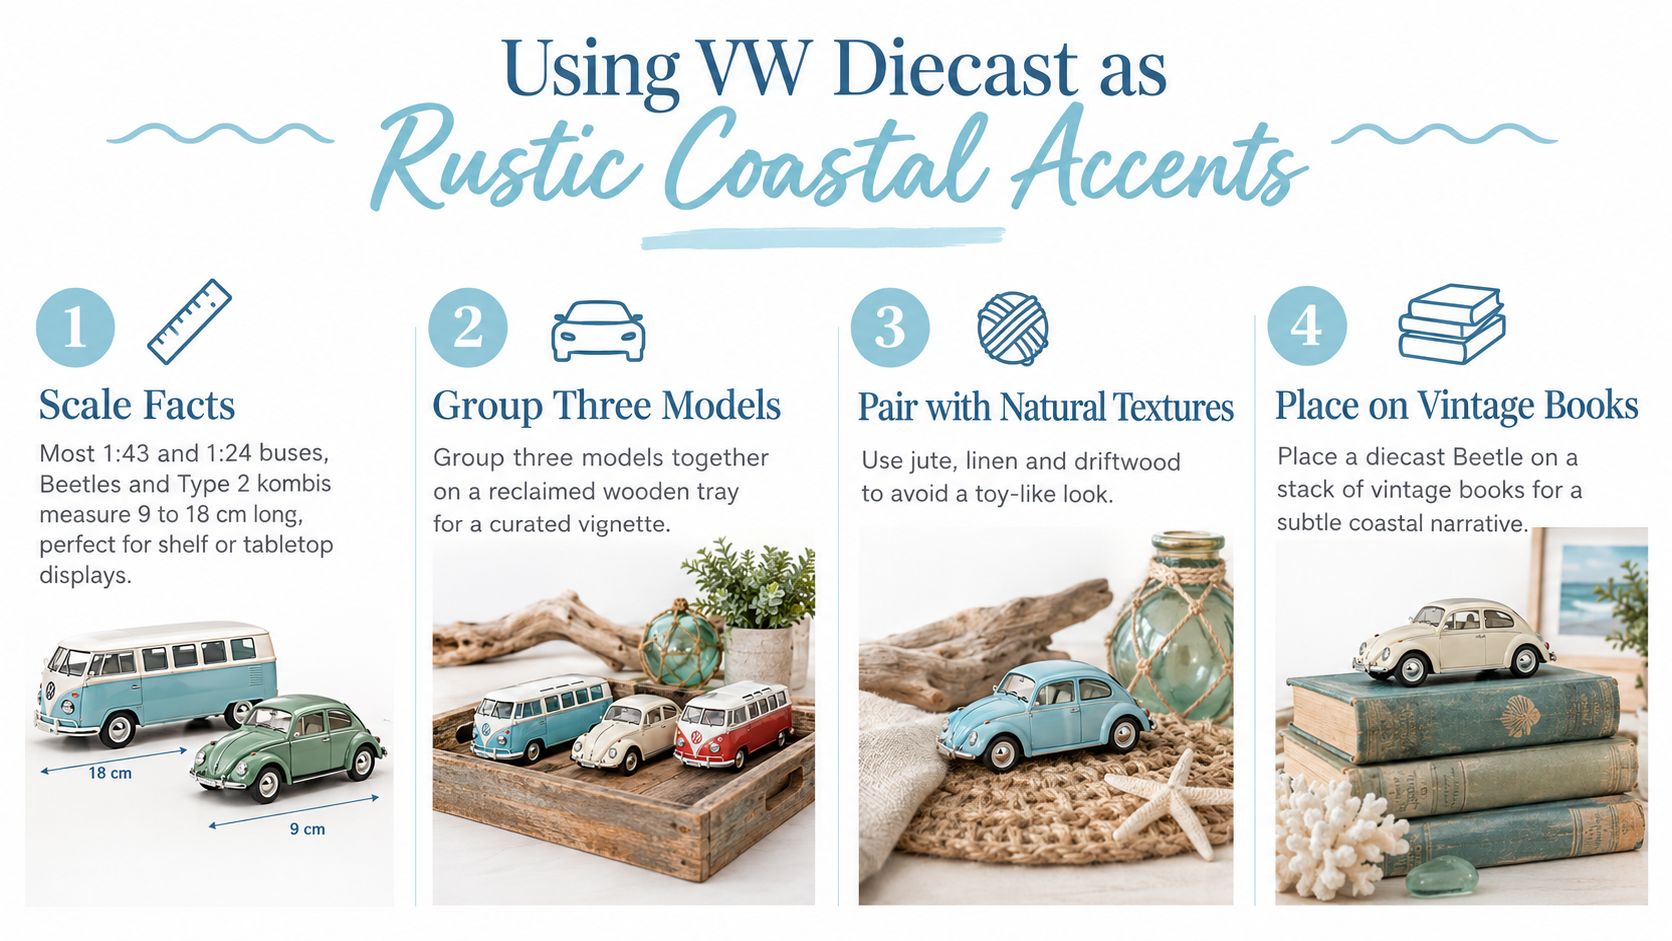
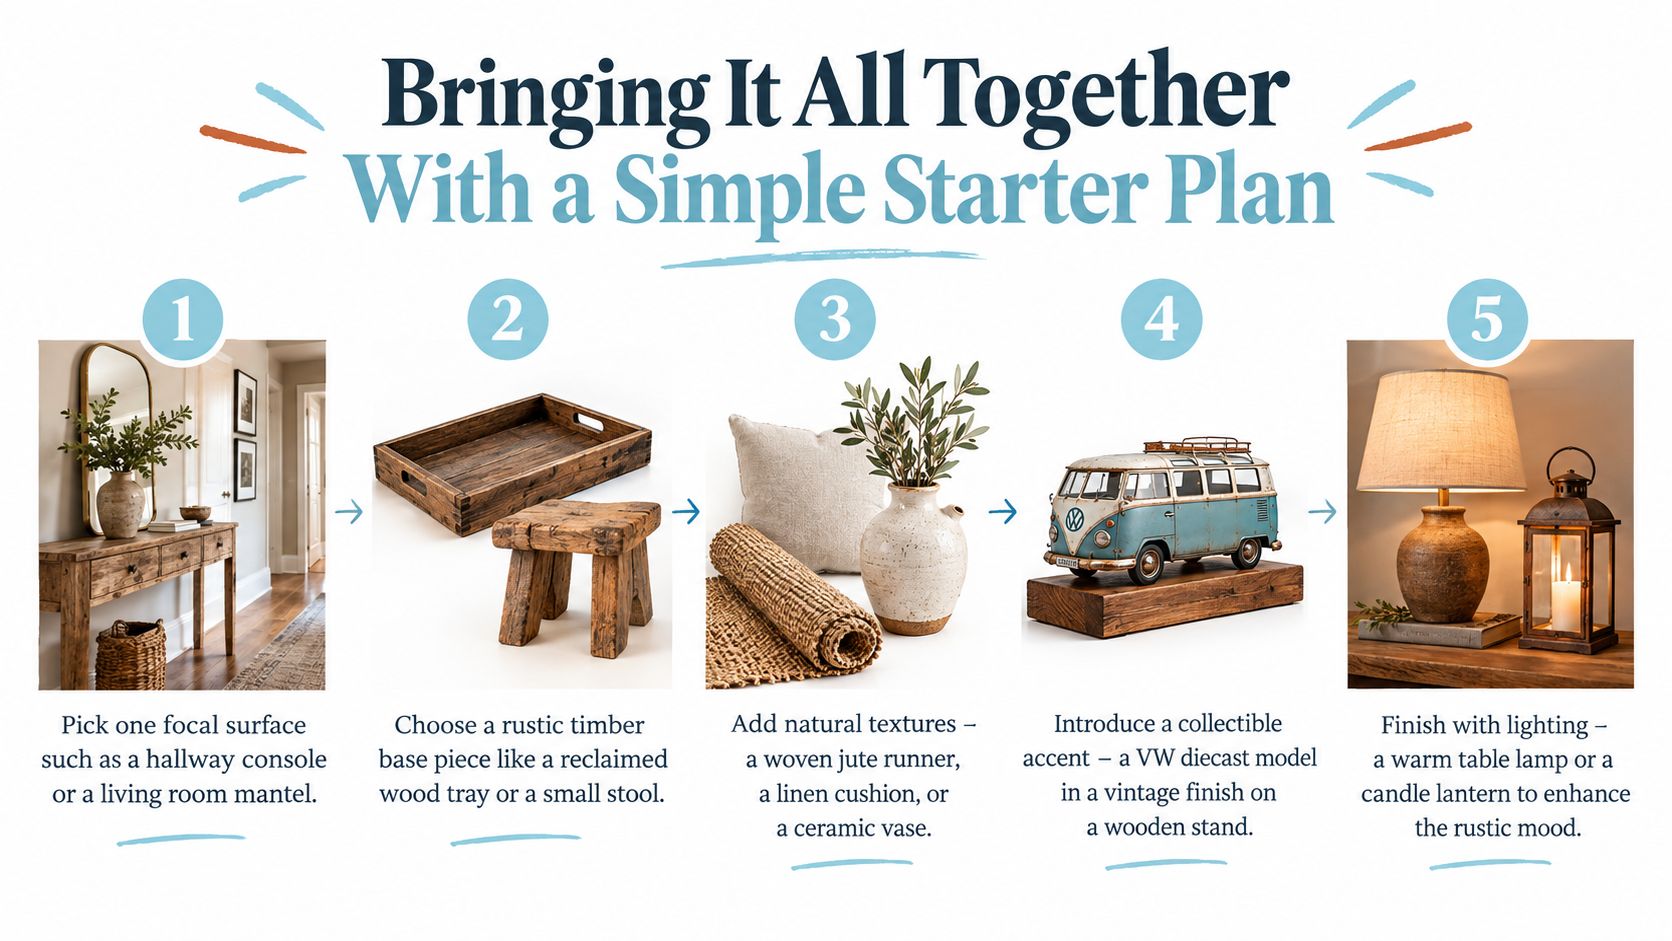
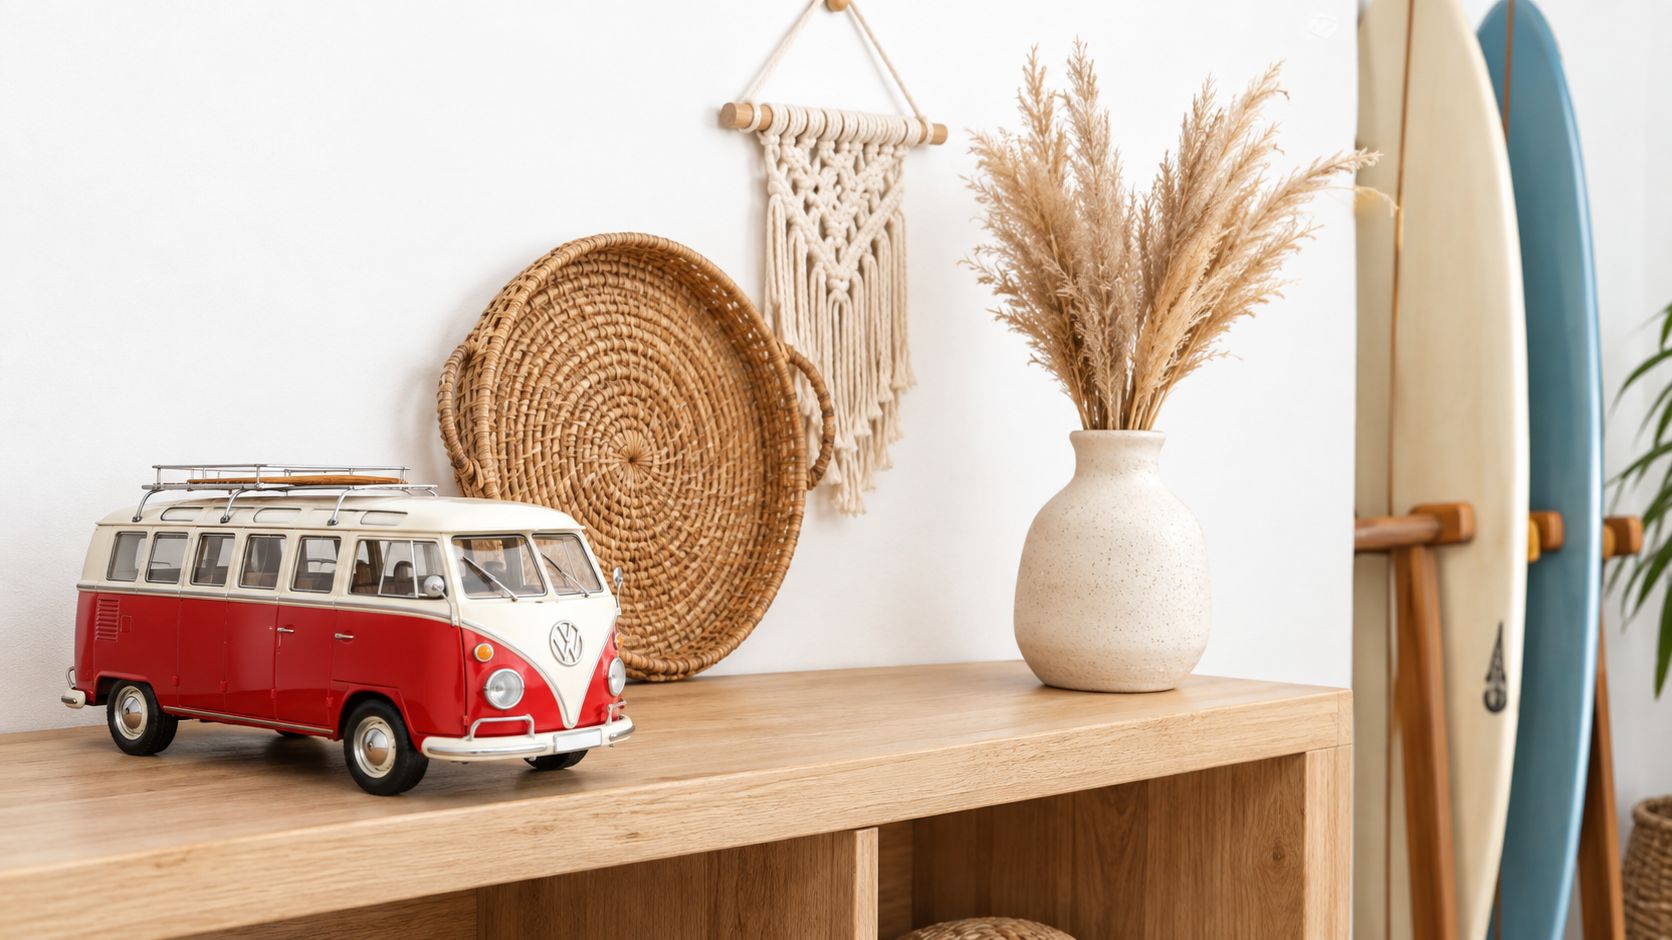
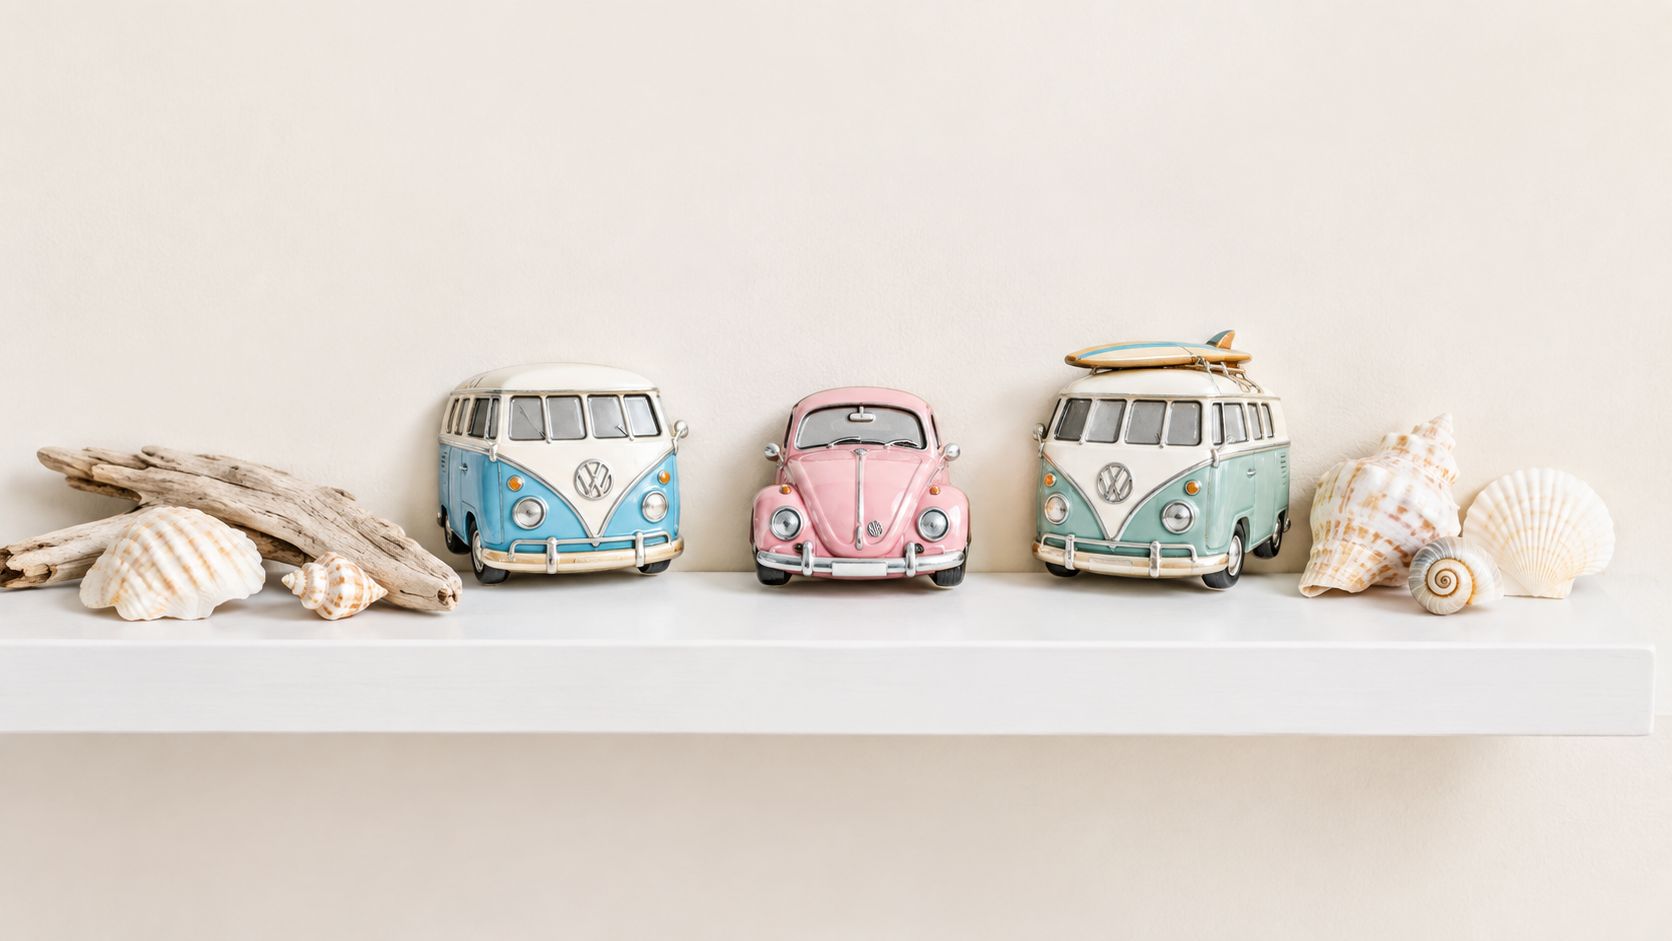
The best way to keep that feeling around after the trip is to bring a little of it into your home, workshop or display cabinet. A licensed model can preserve the look of a favourite vehicle without asking you to find room for another full-size project.

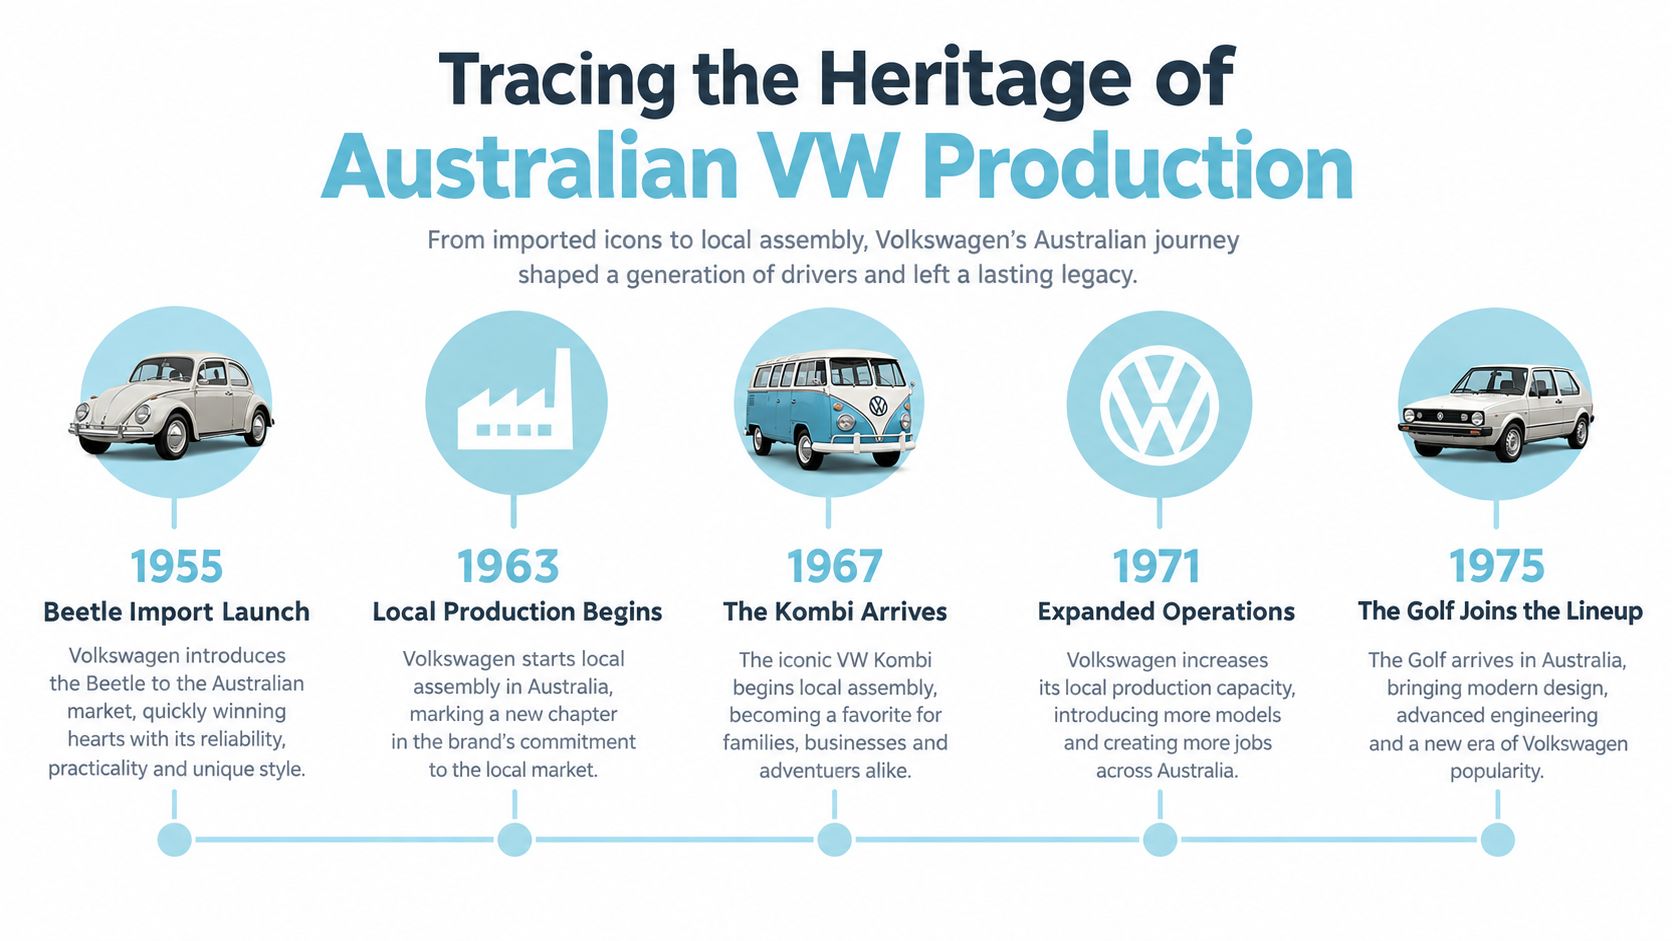
The story also reaches back to the Beetle's distinctly Australian history. Volkswagen Australia says the first Beetles arrived with the Australian military in 1945, and Australian Beetle manufacture at Clayton ended in 1976. Volkswagen's Australian Beetle history gives collectors a strong local thread to follow, whether their passion is restoration, memorabilia or family nostalgia.

Here's a closer look at the kind of community atmosphere that keeps VW culture lively beyond the workshop.

Whether you build a full off-grid camper or just keep a classic model on the shelf, the appeal comes from the same place. Volkswagen has always made room for memories, from coastal weekends in a Kombi to a carefully planned Crafter tour across the country.


Volkswagen Memorabilia brings together licensed VW diecast models, including classic Kombi and Samba Bus pieces, Beetle models, Flower Power variants and surf-inspired vans. Visit Volkswagen Memorabilia to find a warm, nostalgic addition to your display, choose a thoughtful gift for a VW fan, and keep a little Australian road-trip spirit close at home.

Tissue Small Box Guide for VW Décor Lovers in Australia

You're at a sunny coastal VW meet, one hand on a coffee and the other reaching for a tissue after a smear of sunscreen finds its way onto the Kombi's polished dash. A little cardboard box sits beside the shell dish and picnic thermos, far less clumsy than a bulky household pack and somehow right at home among the chrome, canvas and surfboards.

That's the charm of a tissue small box. It solves an ordinary problem while adding a small decorative note to a bathroom, beach house, campervan or diecast display. For a VW lover, the best version doesn't need to shout. A tidy coastal colour, a tasteful bus illustration or a licensed Volkswagen motif can do the job with the same relaxed confidence as a well-kept Beetle.

Why a Tissue Small Box Belongs in a Coastal VW Home

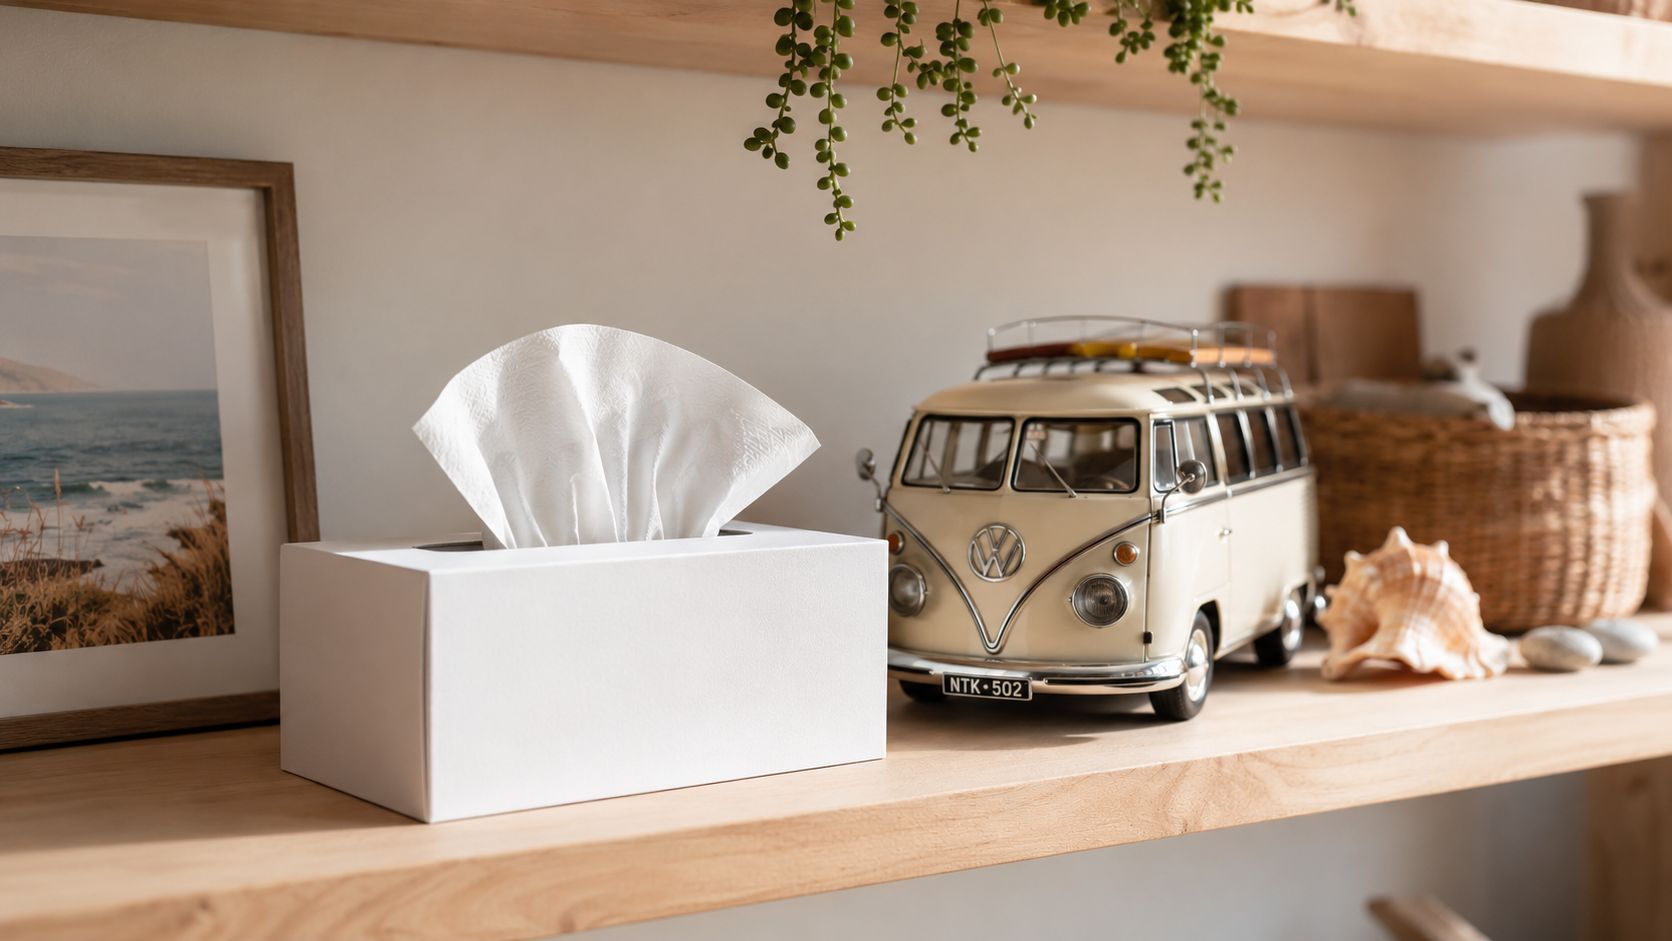
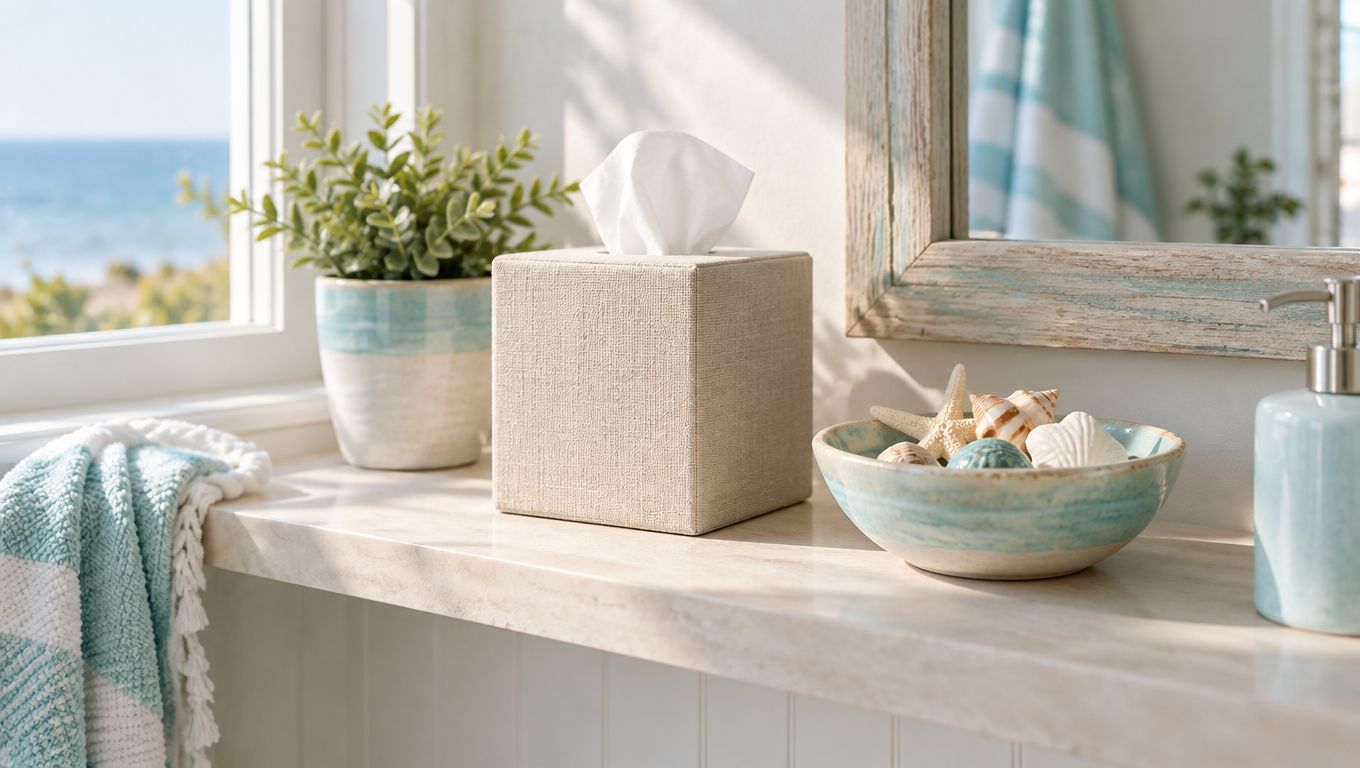
A beige tissue box on a white bathroom vanity can look surprisingly considered when it's placed beside a potted plant, a ceramic shell and a stack of folded linen. The box fills a practical role, but its compact shape leaves breathing room around the basin. That matters in a coastal room, where the mood depends on light surfaces, open space and a few well-chosen objects rather than clutter.

A beige square tissue box sits on a bathroom vanity with a potted plant and seashells.

At a car show, the same idea works on a Kombi dashboard. A small box tucked near the split windscreen can echo the van's friendly proportions without competing with the steering wheel, flower vase or period accessories. At home, it might sit on a bathroom shelf, inside a guest room or beside a cabinet holding a Volkswagen Beetle model.

Scale creates the relaxed look

A large tissue pack can dominate a narrow shelf. A small box feels more deliberate, especially when its width suits the vanity, bedside table or coffee table beneath it. The finish matters just as much. Chalky white, warm beige and soft blue sit comfortably with sea grass, bleached timber and ceramic pieces collected on coastal drives.

The printed design should support the room rather than turn it into a novelty display. A simple bus silhouette, a restrained surf graphic or a white box with a small badge can connect with VW memorabilia while keeping the space calm. Browse ideas for combining those elements in these coastal home décor ideas.

Practical rule: Choose the box for its footprint and finish first, then decide whether the artwork belongs in the room.

The humble tissue small box becomes more than a disposable object. It gives a guest bathroom a welcoming touch, adds character to a campervan-themed office and makes a thoughtful companion to a Samba Bus display. In a relaxed Australian home, useful things can still have a bit of soul.

Standard Australian Tissue Small Box Dimensions and Pack Counts

Before buying a cover or styling a shelf, measure the space where the box will live. Don't measure only the visible opening. Check the full width, depth and clearance above the box, especially if the tissue pulls through a lid or fitted slot.

Australian commercial facial tissues use familiar sheet proportions. Kimberly-Clark Professional lists facial tissue sheets at about 19.5 cm by 20.5 cm, with formats including 24 boxes per case and 200 tissues per box, or 48 boxes with 100 tissues per box. Those figures describe sheet and pack configurations, not a universal outer-box size, so the product label remains the final authority. See the Australian commercial facial tissue specifications before committing to a tight dispenser or cover.

Use the table as a measuring prompt

The safest approach is to record the actual product dimensions before ordering. A boutique or licensed VW-themed box may leave extra room for a printed panel, a reinforced edge or a decorative sleeve.

Format Width (mm) Depth (mm) Height (mm) Sheets per Box
Commercial flat box Check pack label Check pack label Check pack label 100 or 200 examples are listed in the AU catalogue
Large case configuration Check outer carton Check outer carton Check outer carton 24 boxes with 200 tissues each
Alternate case configuration Check outer carton Check outer carton Check outer carton 48 boxes with 100 tissues each
Decorative tissue small box Measure before purchase Measure before purchase Measure before purchase Depends on the inner pack

Ply also changes the feel of a box. A thicker tissue can make a pack sit higher or pull differently through a narrow opening, even when the outer carton appears similar. If you're fitting a timber cover, leave enough tolerance for the inner pack to slide in and out without catching.

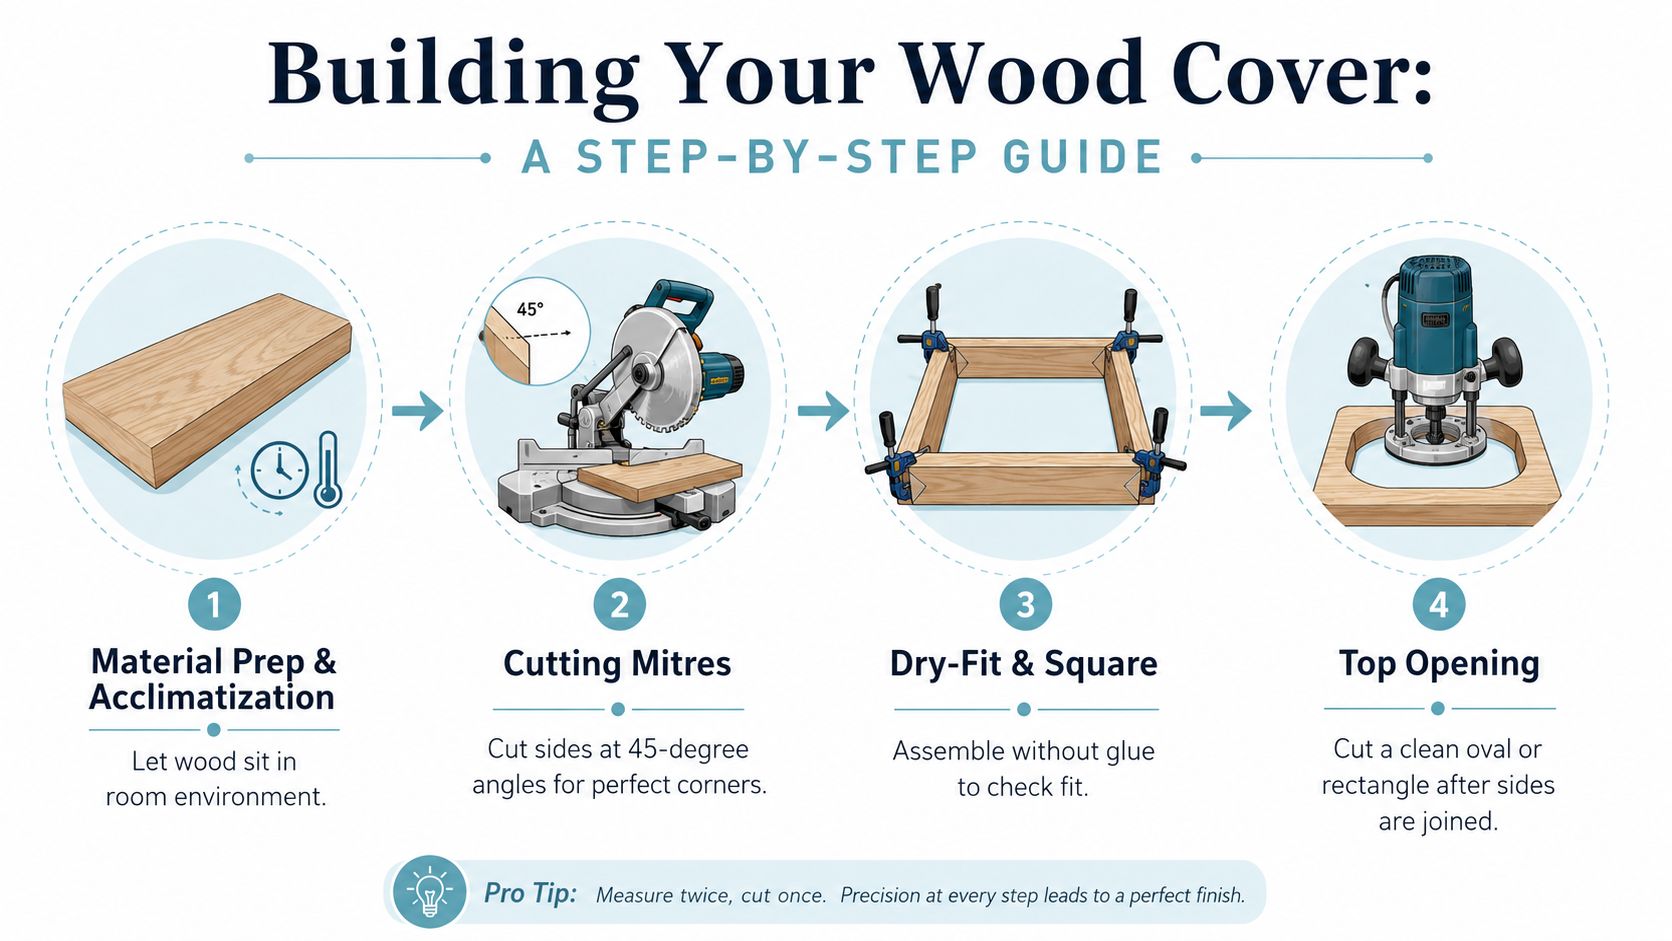
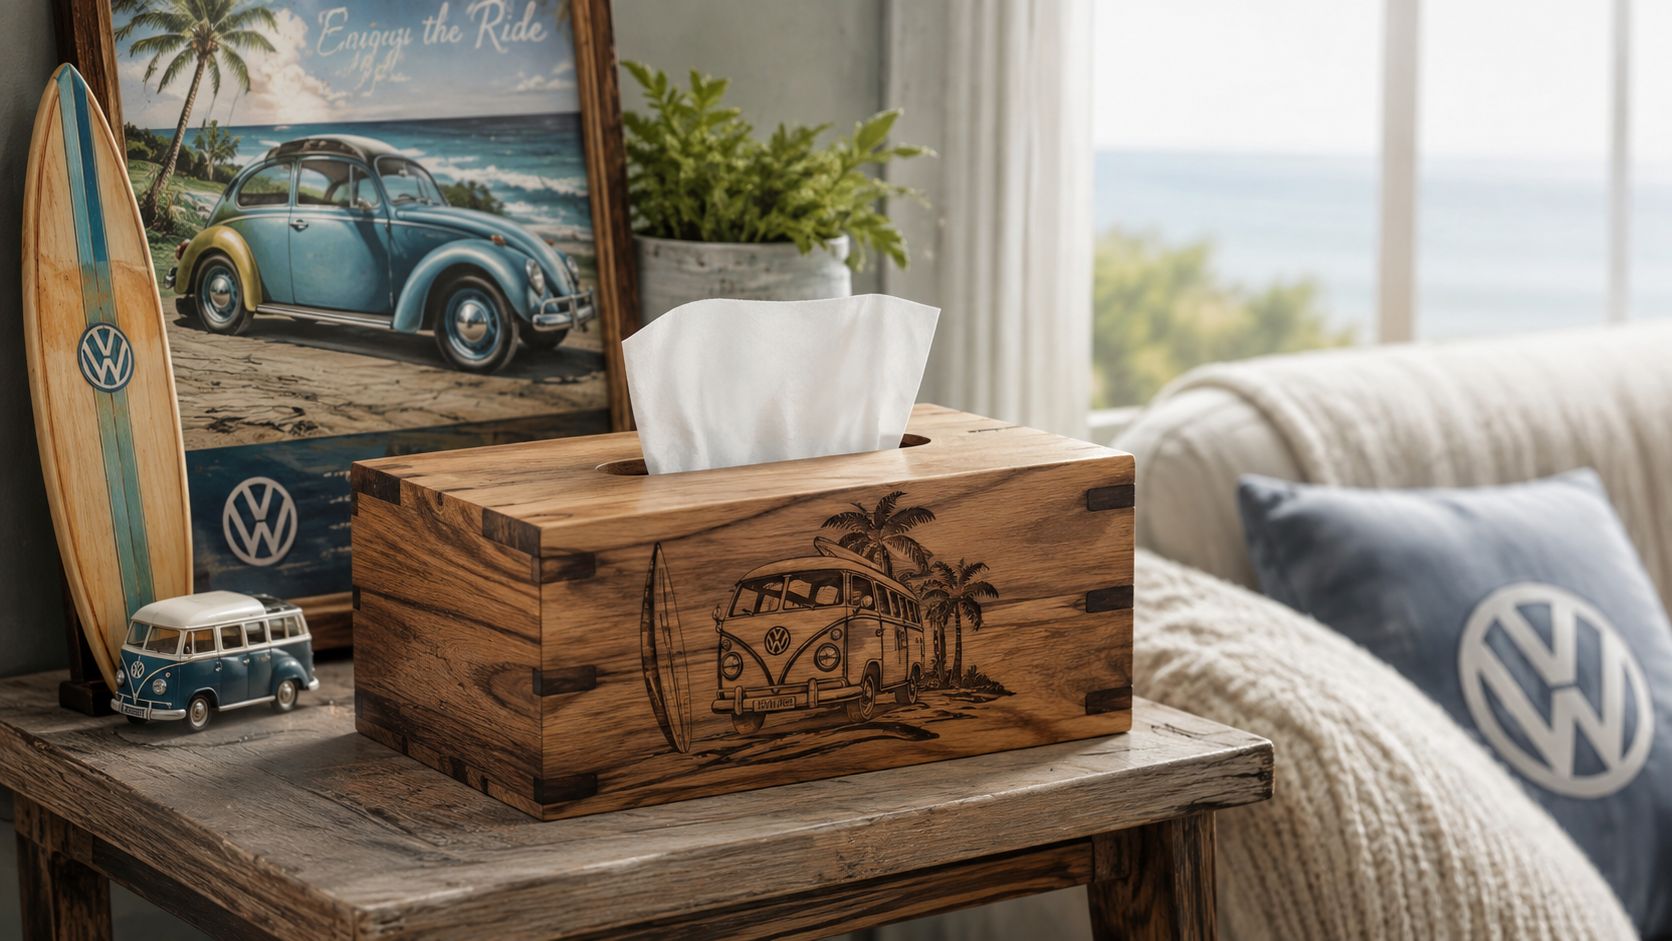
A fitted wood tissue box cover can give a plain pack the warm, crafted appearance of a small piece of furniture. Just confirm the internal measurements rather than relying on the name “small”.

Refill Options Versus Single-Use Small Boxes

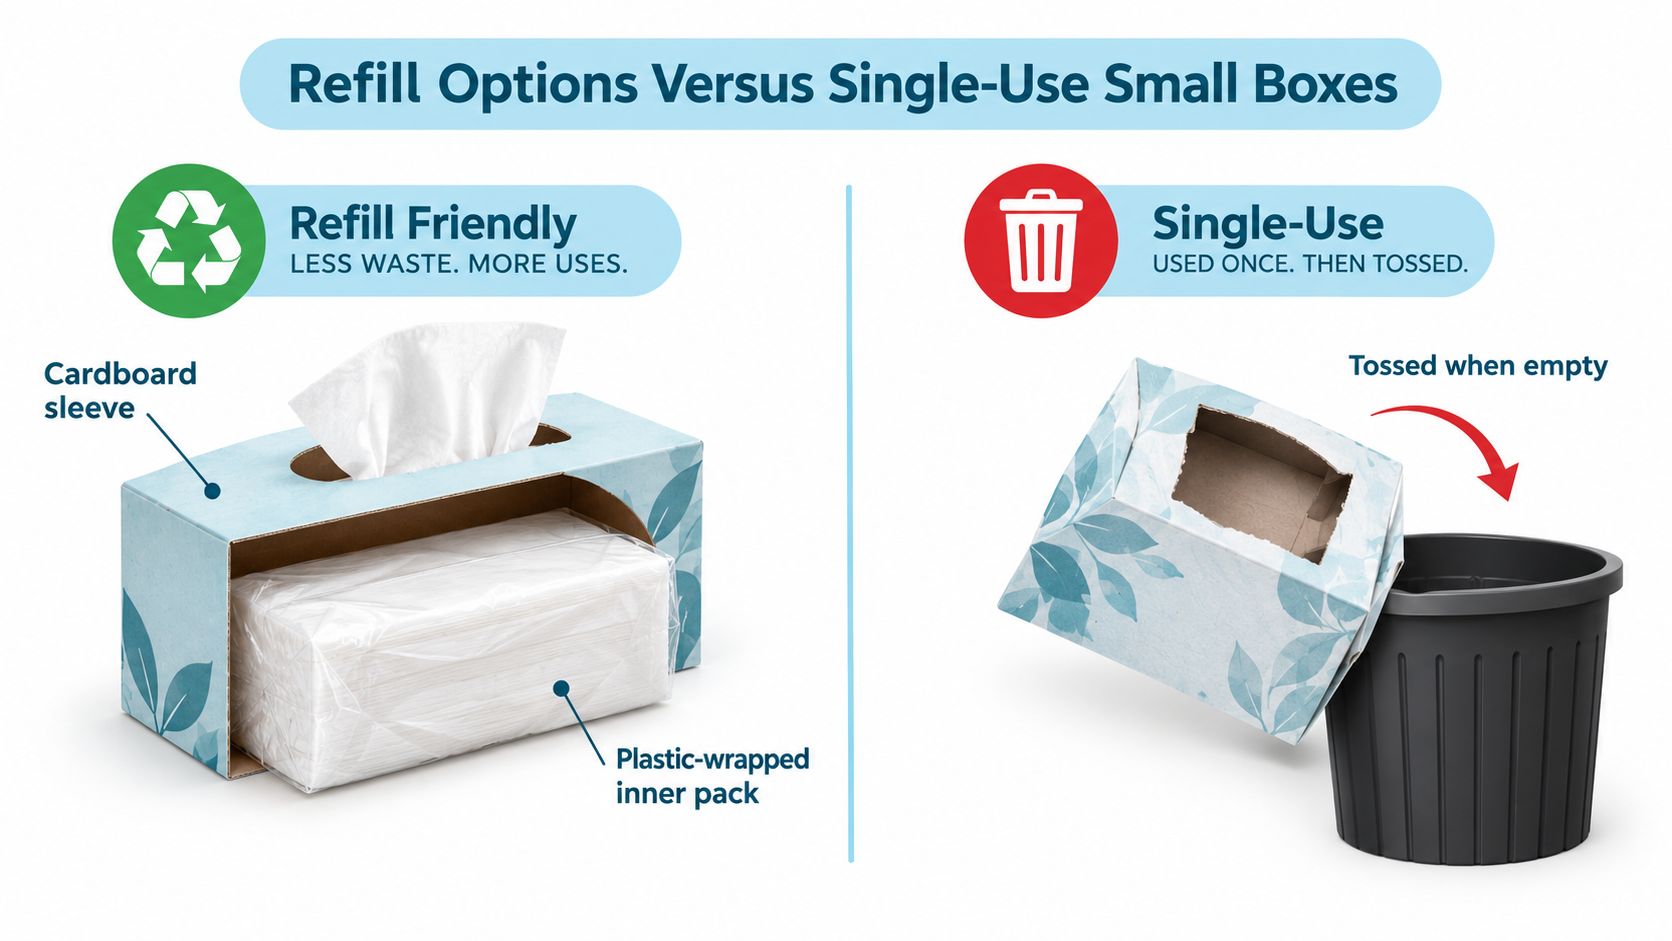
A refillable tissue box works like a well-organised Kombi boot. The outer sleeve or acrylic shell stays in place, while a wrapped inner pack is replaced when empty. That arrangement suits a busy bathroom, office or family room because the decorative object remains consistent and the refill process is straightforward.

A single-use box takes the opposite approach. Its printed surface does more of the visual work, so it can be ideal for a guest room, a car, a picnic table or a gift bundle where the artwork is part of the experience. You won't need to store a separate sleeve, but you'll discard the outer carton when the tissues are gone.

Compare the trade-offs honestly

Refill packs can make more sense for regular use because the holder remains part of the décor. Single-use themed boxes can justify their place when presentation matters, particularly beside a gift, a diecast vehicle or a coastal welcome basket.

Consideration Refillable sleeve Single-use themed box
Presentation Consistent holder with replaceable inner pack Artwork arrives on the box itself
Convenience Requires compatible refills Open, use and replace
Best location High-traffic bathroom or office Guest room, car, display or gift
Waste profile Outer holder stays in use Carton is discarded when empty
Style flexibility Change the inner tissues, retain the look Change the entire design

Packaging choices are changing in Australia. Commentary connected with the Australian Packaging Covenant Organisation describes mandatory compliance measures beginning in 2026, alongside a move away from plastic windows towards cardboard-only construction and clearer recycling expectations. Read the Australian tissue packaging discussion when sustainability is part of your buying decision.

A comparison graphic showing a refillable cardboard tissue box sleeve versus a traditional single-use tissue box being discarded.

Look for plain cardboard where possible, and check your local council guidance for coated board, laminates and plastic components. The prettiest box isn't automatically the easiest one to recycle.

Materials, Finishes and Coastal White Décor Choices

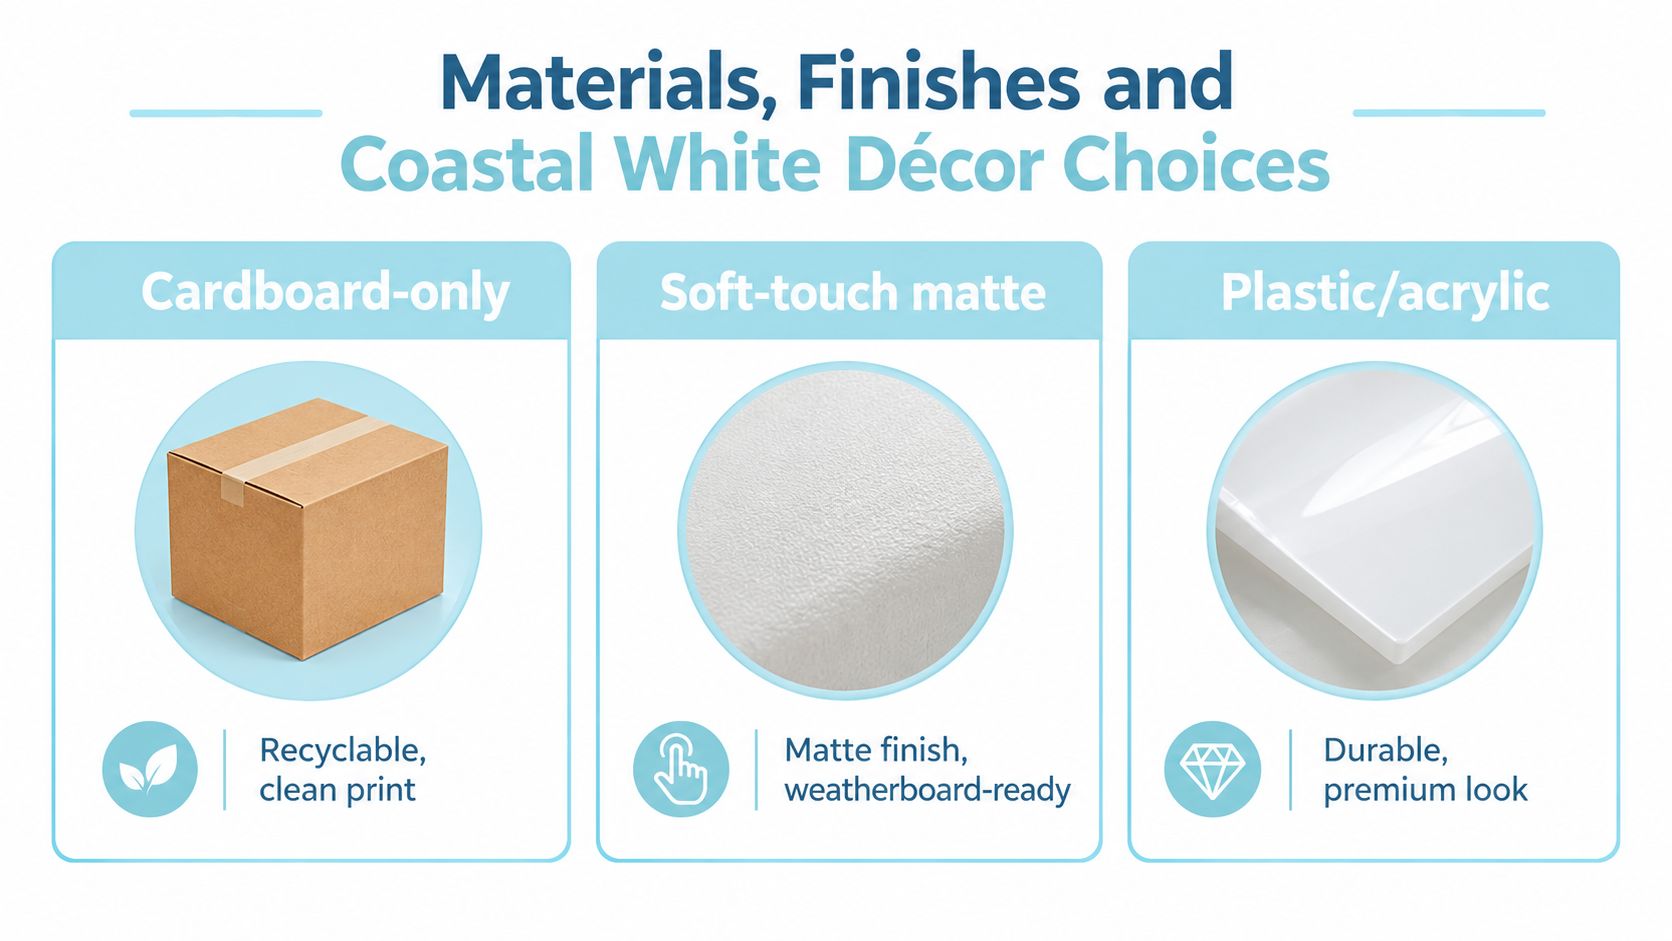
Material changes the personality of a tissue small box. Cardboard-only feels light and informal, which suits a living room with weatherboard walls, linen cushions and a shelf of small VW models. A soft-touch matte surface reduces glare and lets a printed panel sit calmly against white or pale timber.

A plastic or acrylic shell has a different role. It resists the everyday bumps of a bathroom and can hide a less attractive refill pack. The glossy surface feels more like a hotel amenity, while a clear or frosted window can make the tissue level easy to check.

Match the surface to the room

Use matte cardboard in dry living zones, bedrooms and display areas. It works particularly well with chalky eggshell, crisp linen and bleached driftwood tones. Add a sea-grass basket nearby and the box becomes part of a collected coastal arrangement rather than a standalone household item.

Choose a plastic or acrylic cover for a room where splashes and humidity are common. Keep it away from harsh cleaners, which can cloud some surfaces. In a display cabinet beside diecast shelves, a foil-stamped or carefully printed licensed Volkswagen panel can provide a small flash of colour without overwhelming the models.

Licensed and unlicensed artwork also deserve a closer look. A licensed design should use authorised Volkswagen branding and a considered representation of the vehicle. Generic bus artwork may still look cheerful, but muddy printing, inaccurate badges and uneven colour can weaken the connection for collectors who know their Split Window from their Bay Window.

Collector's eye: If the box is meant to sit beside a licensed model, the artwork should show the same care in its badge, body shape and colour balance.

Salt air and direct sun are less forgiving than a climate-controlled cabinet. Keep paperboard away from damp ledges, use felt feet on stone benchtops and wipe matte surfaces with a barely damp microfibre cloth. These small precautions help a coastal display stay crisp.

A product selection chart comparing materials: cardboard, soft-touch matte finish, and plastic or acrylic surfaces.

For a more structured look, a cover tissue box can turn an everyday pack into a proper décor accent. Let the room decide whether that accent should disappear into the palette or stand out as a conversation piece.

VW-Themed Small Boxes, Diecast Pairings and Gift Ideas

The strongest pairing uses repetition without copying. A small box carrying a restrained Kombi illustration can sit beside a diecast van, while the model supplies the detail and the tissue box supplies the everyday usefulness. The result feels more like a styled vignette than a pile of branded objects.

Australian VW history gives those pairings plenty of warmth. Type 2 Kombis first went on sale in Australia in 1954, with early examples assembled from imported German kits at Martin & King in Clayton South before Volkswagen took over local assembly four years later. That local connection makes a Kombi theme especially fitting in an Australian coastal home. The Australian Kombi history and buyer background adds useful context for anyone choosing a heritage-inspired display.

A Beetle theme carries its own local story. Volkswagen sold roughly 31 Beetles in Sydney in 1953, Volkswagen Australia formed in 1959, and the Beetle was withdrawn from Australian sale in January 1976, according to this Australian Volkswagen manufacturing history. Those milestones turn a small gift into a prompt for stories about family cars, road trips and the first VW someone remembers.

Pair the mood, not just the vehicle

Box Theme Diecast Pairing Best Occasion
Coastal bus print Samba Bus or Kombi model Housewarming
Soft white sleeve Sea Blue van model Beach house styling
Flower Power artwork Bright Beetle model Birthday present
Panel van design Utility-style VW model Father's Day
Retro surf motif Kombi and accessories VW club meet or gift bundle

Collectors choosing a larger display piece often compare 1:18 models, about 24 to 30 cm long, with 1:24 models, about 16 to 20 cm long. A diecast collecting scale guide explains why 1:18 suits detail-led displays while 1:24 offers a practical middle ground. Leave enough space around either scale so the tissue box doesn't crowd the model.

Portable tissue formats are also worth considering for cars and handbags. Australian market coverage describes pocket-size packs as growing faster than bulk boxed tissues, while boxed formats remain important for presentation and home use. That makes a themed small box a useful bridge between portability, décor and the familiar hospitality of a club gathering. For model inspiration, browse the Volkswagen diecast collection.

Buying Checklist, Care Notes and Quick Answers

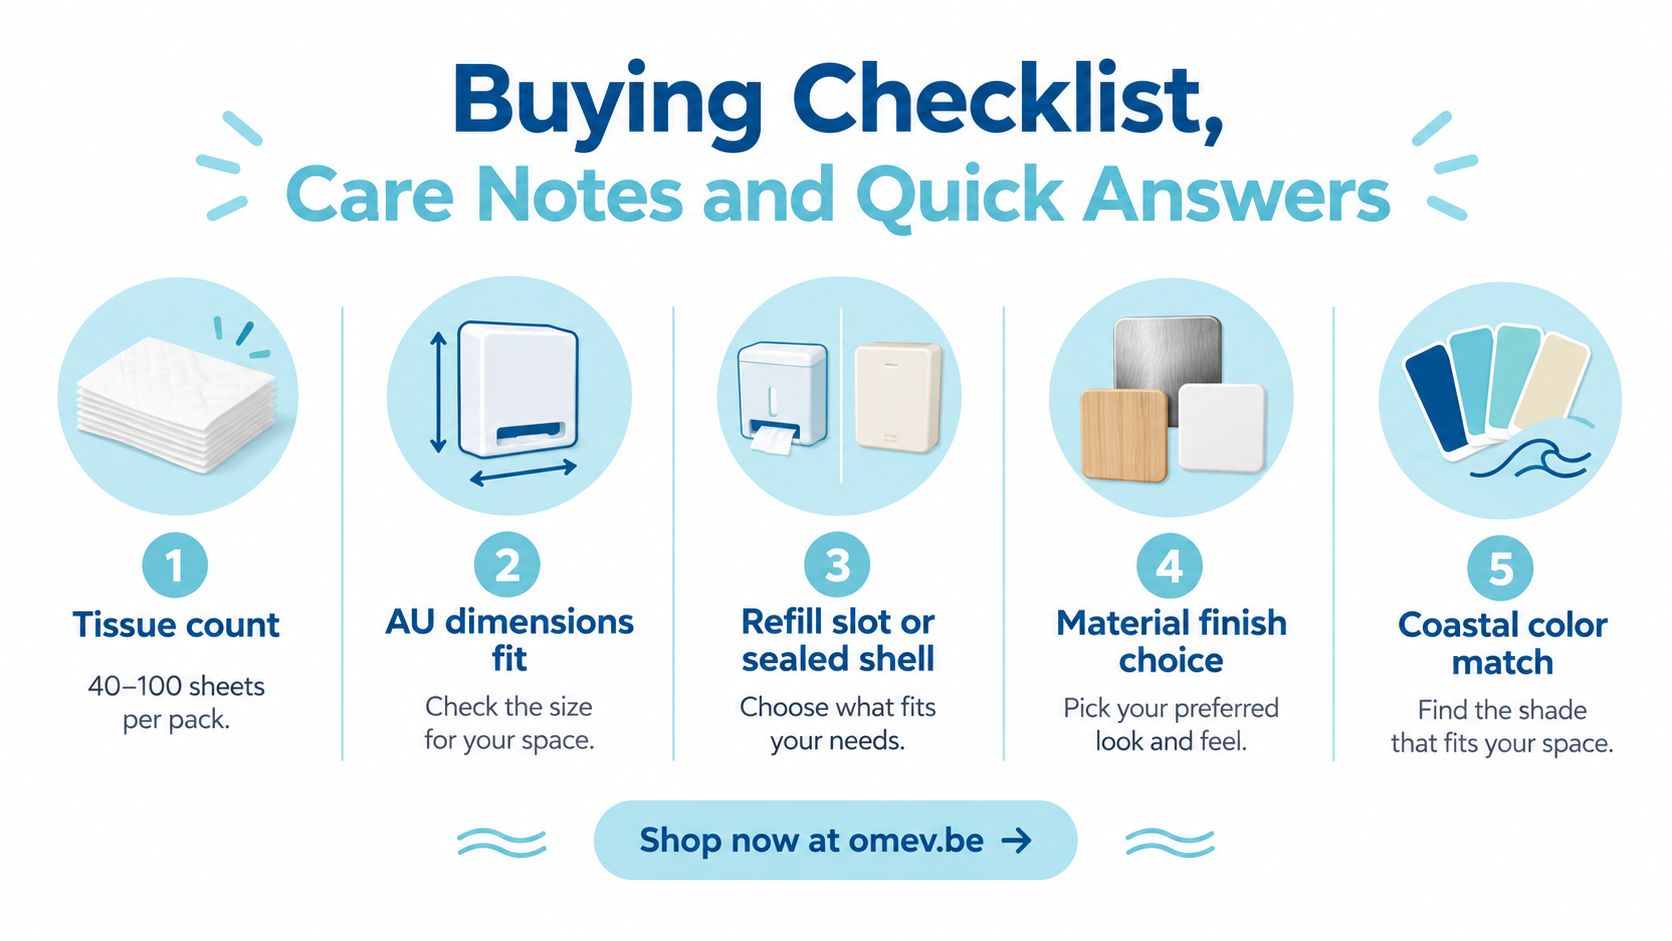
A good tissue small box should earn its place every day, not just look smart in a photograph. Check the opening, the inner pack and the surface before you commit to a style.

  • Tissue count: Confirm the pack quantity suits the room and the refill routine.
  • AU dimensions: Measure the shelf, cover or dispenser rather than guessing from “small”.
  • Refill method: Decide between a refill slot, removable sleeve or sealed single-use box.
  • Finish: Match matte cardboard, acrylic or printed board to the room's moisture and light.
  • Colour: Choose coastal white, driftwood, sea blue or a stronger VW accent.
  • Licensing: Look for authorised Volkswagen branding when authenticity matters.
  • Pairing potential: Check whether the design complements a Beetle, Kombi or Samba Bus model.
  • Gift presentation: Consider whether the box works alone or alongside a keyring or diecast piece.

Keep the box out of direct sun, especially near a bright window or windscreen, to reduce fading and coastal yellowing. Wipe printed surfaces gently, avoid bleach near inks and store spare cardboard sleeves flat so their edges don't curl.

A checklist graphic providing five tips for buying tissue holders, including count, dimensions, style, and material.

Quick answers

What tissue count suits a small box?
Choose by location and refill frequency. A guest room can use a smaller pack, while a busy bathroom needs more capacity.

Will printed designs survive a bathroom?
They can, if the box stays away from direct splashes and condensation. An acrylic or plastic cover is safer for wet zones.

How can I check licensing?
Look for clear Volkswagen branding, accurate vehicle details and seller information. Be cautious with vague bus artwork presented as official.

How long does postage take from a local Australian diecast store?
Check the store's current dispatch and delivery guidance before ordering, as stock location and destination affect the timing.


Volkswagen Memorabilia brings together licensed VW diecast models, Kombi and Samba Bus pieces, Beetle gifts and coastal home décor for displays that feel collected rather than cluttered. Visit Volkswagen Memorabilia to find a tissue-box companion for your shelf, bathroom or next sunny VW gathering.

VW Beetle Diecast Model Cars: A Collector’s Guide

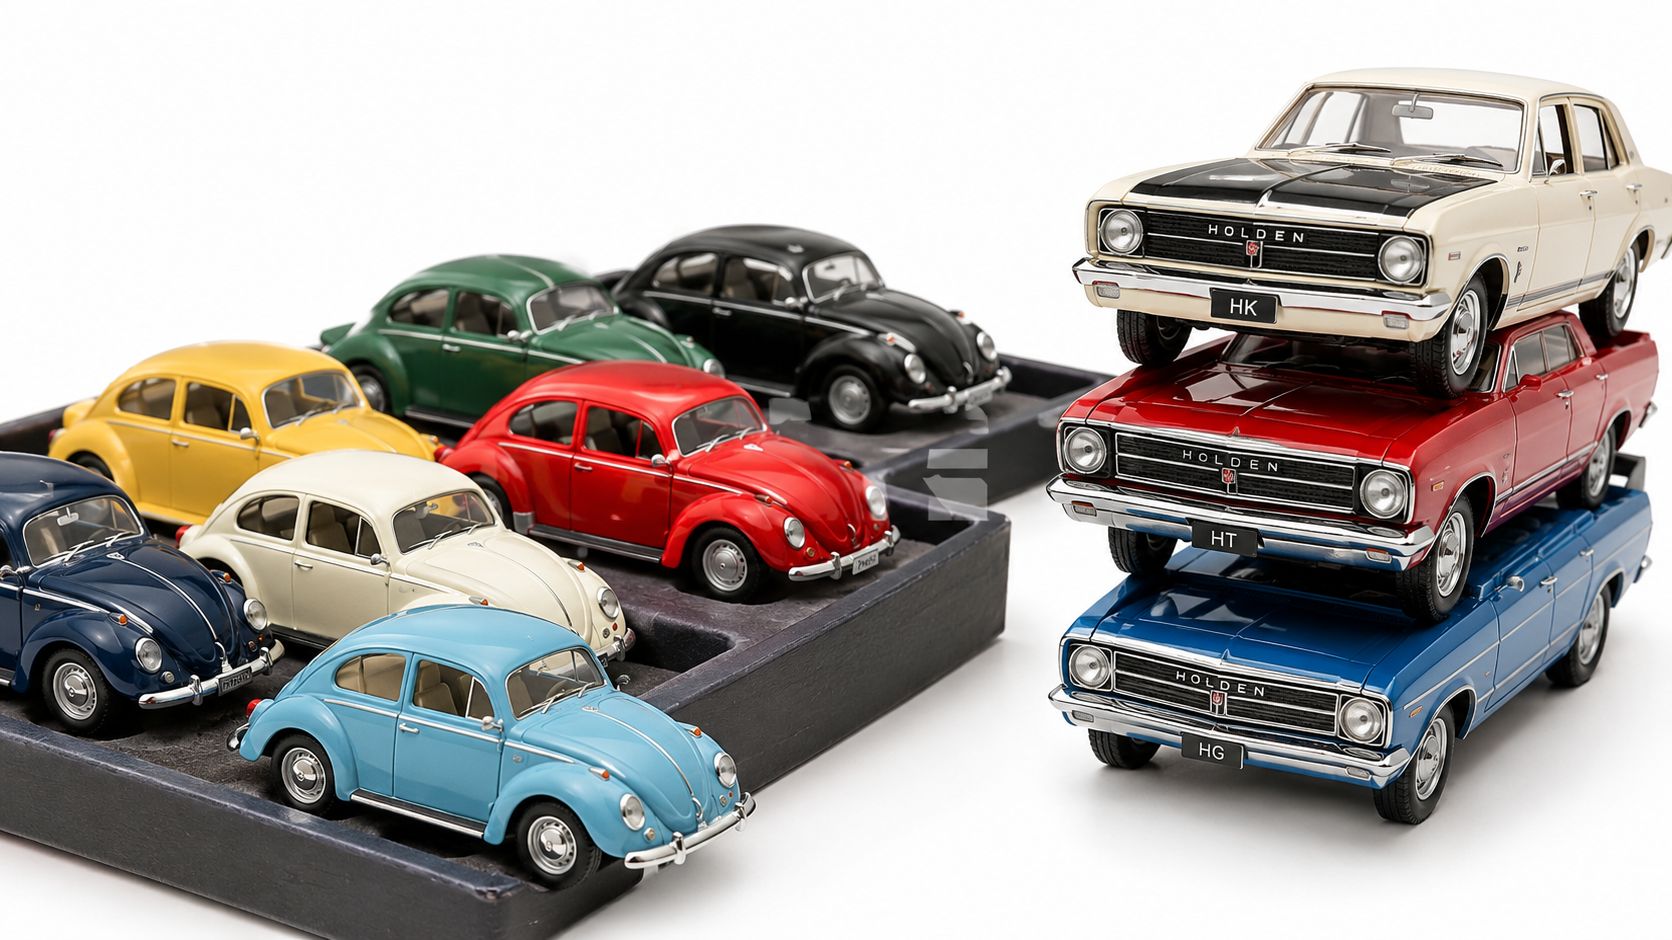
You're standing at a weekend swap meet, coffee in one hand and a tray of VW Beetle diecast model cars in the other. Beside the Beetles sits a stack of classic Holdens, yet your eye keeps returning to the little Volkswagen with its round roof, upright windscreen and cheeky stance. That reaction is familiar to Australian collectors. A Beetle doesn't need a racing pedigree or a massive engine to earn shelf space. It carries memories of family trips, coastal roads, old school car parks and sunny Volksfests.

The best model isn't always the biggest or most expensive one. For Australian buyers, scale, steering position, body era, trim and local history matter just as much as a glossy finish. Here's how to choose a Volkswagen Beetle model that feels right on the shelf, whether you're starting with a single 1:32 replica or building a display around a detailed 1:18.

Why the VW Beetle Still Lives on Aussie Shelves

A collection of diecast model cars, including multiple Volkswagen Beetles and a stack of three classic Holden sedans.

A Beetle still earns shelf space in Australia because its local story is unusually strong. The military brought the first Beetles here in 1945, formal market availability followed in 1953, and local assembly began in 1954. Volkswagen Australia formed in 1957, locally manufactured body panels were in use by 1960, and Australian Beetle production continued until 1976, according to Volkswagen Australia's Beetle history.

For collectors, those milestones create several worthwhile Australian references. An early imported car, a Clayton-assembled Beetle and a later locally adapted version can differ in badges, trim, body details and steering position. A diecast that reflects those distinctions has genuine shelf appeal. It represents the cars Australians saw and drove, rather than a generic export-market replica.

The local story adds real character

The Beetle became a familiar part of Australian motoring. In 1960, 24,388 VW 1200 Beetles were sold in Australia, putting it behind the FB Holden as the country's second-best-selling individual car model. Museum Victoria's Australian Volkswagen history also records the local production story, including Melbourne-based Regent Motors importing the first Beetles in late 1953 and Volkswagen Australia later assembling CKD kits at Clayton.

Clayton production began in 1959 and ended in 1968, with just over 260,000 Beetles made in Australia. That history gives Australian buyers a practical collecting filter. Look for a right-hand-drive Sedan, locally familiar colours and trim associated with the cars sold here. Those details matter more than a shiny finish on a model with no Australian connection.

Collector's rule: Choose the Australian-delivered character first. A faithful right-hand-drive model beats a bland replica every time.

An early oval-window style can also add interest, especially beside a later Sedan. The same approach works with Kombi and Samba Bus models. Place a cheerful Type 2 beside the Beetle and the display immediately feels tied to Australian Volkswagen culture, from everyday family transport to the cars seen at local shows.

Understanding Beetle Diecast Scales and Sizes

Scale is the first decision to make because it controls almost everything else, from display space to detail and price. A 1:18 Beetle is a substantial centrepiece, typically around 25 to 30 centimetres long, while a 1:24 model is generally around 16 to 20 centimetres, according to Australian diecast scale guidance.

A 1:18 suits a cabinet, office shelf or dedicated display plinth. It has room for features such as opening doors, a bonnet, an engine lid and more carefully rendered interior trim. It also needs breathing space around it. Push too many large models together and the details disappear into a crowded row.

A 1:24 is the practical middle ground. It still looks substantial, but it's easier to fit alongside a Kombi, a Holden or a small diorama. For many collectors, this is the ideal first serious Volkswagen diecast model because it offers visual presence without taking over the room.

Match the scale to the way you collect

Scale Approx. Length Detail Level Best For
1:18 About 25–30 cm High, often with opening features Display centrepieces
1:24 About 16–20 cm Strong detail with manageable size General collecting and gifts
1:32 Compact Useful detail in a smaller footprint Growing a varied shelf
1:50 Compact More limited, often suited to themed displays Small collections and scenes
1:64 Small Basic to moderate, depending on maker Dioramas and budget collecting
1:87 Very small Best for scene-building Layouts and miniature displays

Australian listings show Beetles across 1:18, 1:24 and 1:64, including a 1966 Beetle in 1:24 and a 1953 Beetle Deluxe USA model in 1:64, as seen in the Australian Volkswagen memorabilia market. The variety is useful because you can build a coherent display without committing every model to the same footprint.

For a first purchase, I'd choose 1:24 for a balanced shelf or 1:18 if the Beetle is the star of the cabinet. Choose 1:64 or 1:87 when you're building a broader scene, adding a Beetle to a Kombi display or collecting several eras without needing a larger cabinet. Browse the Volkswagen model car range with that decision already made.

Popular Beetle Variants Worth Collecting

A collection of five different vintage Volkswagen Beetle diecast model cars displayed against a white background.

Not every Beetle model tells the same story. A plain Sedan is the strongest starting point for an authenticity-led collection, while a Herbie or Flower Power edition brings instant personality. Australian buyers should decide whether they're collecting history, styling, film nostalgia or a bit of everything.

The standard Sedan is the dependable foundation. Look for a clean body profile, correctly shaped guards and a period-appropriate interior. A 1300-style car works especially well in a local collection because it reflects the familiar family Beetle rather than an exaggerated custom interpretation.

The 1303 Super Beetle has a different presence, with its curved windscreen and revised front-end design. It's a good choice when you want a clear visual contrast beside an earlier rounded-window car. The Cabriolet adds open-air charm and usually becomes the attention-grabber in a mixed display.

Authenticity versus fun

Early oval-window Beetles appeal to collectors who enjoy subtle historical differences. Australian collector guidance also highlights the appeal of earlier Beetles and oval-window examples, while local listings point to interest in right-hand-drive cars and themed executions. You can explore period-focused options in the 1970s Volkswagen Beetle collection.

For a useful shelf lineup, I'd rank the choices this way:

  • Best first buy: A well-proportioned Sedan in a restrained factory-style colour.
  • Best Australian angle: A right-hand-drive Beetle with convincing steering position and local-market trim.
  • Best display contrast: A Cabriolet or Super Beetle beside a standard Sedan.
  • Best nostalgia piece: Herbie, Hippie Peace & Love, Pink/White, Mooneyes or a taxi-themed model.
  • Best novelty addition: A Baja Bug, especially if your display already includes stock-bodied cars.

AU retail listings show detailed 1:18 and 1:32 Beetles, including right-hand-drive 1967 variants and colour-led editions such as Pink/White and Hippie Peace & Love, as documented in Australian Volkswagen diecast listings. That mix tells you something important. Collectors aren't choosing only one definition of authenticity. They want correct local details, but they also enjoy the playful side of VW culture.

The video below is useful for collectors comparing the visual character of different Beetle shapes and finishes.

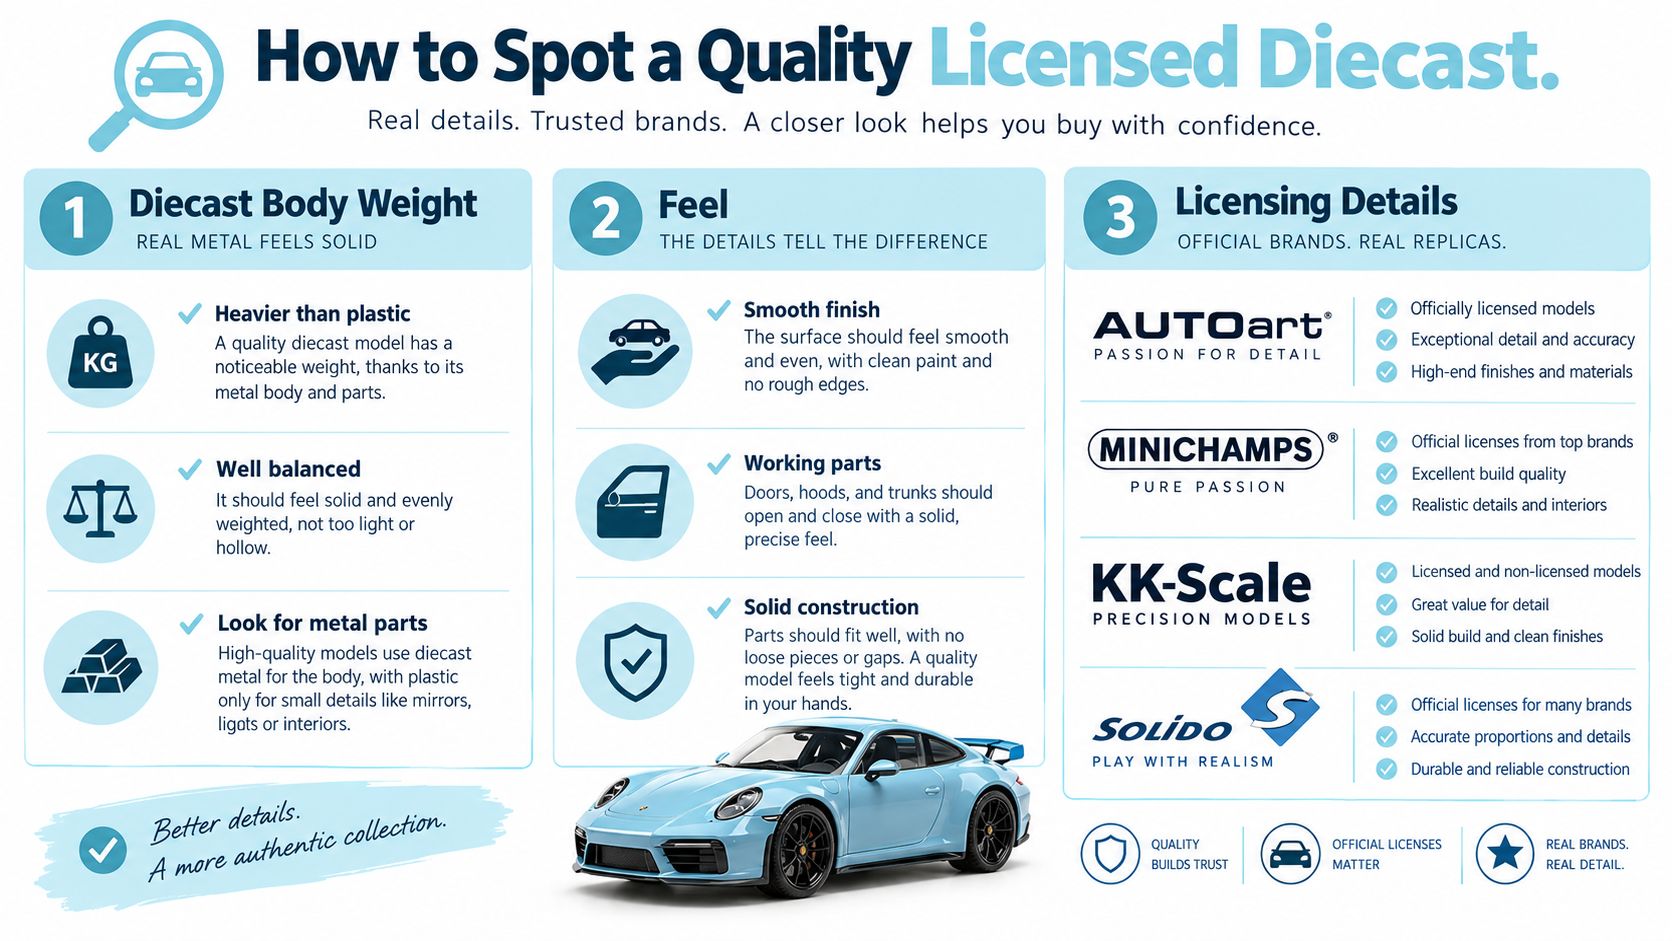
How to Spot a Quality Licensed Diecast

An infographic titled How to Spot a Quality Licensed Diecast showing features like weight, finish, and trusted brands.

A good licensed model feels right before you inspect it closely. Pick it up, compare the weight with a similar-sized replica and look at the stance from several angles. Brands such as AUTOart, Minichamps, KK-Scale and Solido are familiar names among collectors, but the badge on the box isn't enough by itself. The model must also show careful execution.

Run this quick shelf-side checklist

  • Body and proportions: The roof should have the right arch, the guards should look balanced and the wheels shouldn't appear lost inside the arches.
  • Opening features: On a larger model, opening doors, bonnet and rear engine lid should sit cleanly and close without awkward gaps.
  • Steering detail: A 1:18 right-hand-drive Beetle should place the steering wheel correctly and represent the dashboard in a believable way.
  • Badges and trim: VW roundels, Wolfsburg crests, bumpers and lights should look crisp rather than blurred or crudely painted.
  • Interior finish: Ribbed seats, dashboard knobs and headlight treatment add more realism than a shiny exterior alone.
  • Chassis work: Turn the model over. A detailed underside and properly seated wheels usually indicate a more considered replica.

Cheap unlicensed copies often give themselves away with squashed proportions, uneven wheel placement, painted-on chrome and a hollow plastic feel. The most obvious flaw may only appear when you place two models side by side. One will have clean shut lines and a convincing stance. The other will look like a Beetle from memory rather than a carefully measured car.

Put two models next to each other and inspect the roofline, wheel arches and windscreen. The quality gap usually appears before you notice the tiny details.

Licensing matters because it signals that the manufacturer has worked from the Volkswagen design rather than producing a loose interpretation. Still, don't buy blindly. Check the body, interior, trim and packaging together, then choose the model that looks right from normal viewing distance.

Caring for Your Collection in Australian Conditions

An infographic titled Caring for Your Collection in Australian Conditions, outlining how to protect collectibles from UV, heat, and humidity.

Australian display conditions can be rough on diecast. Direct sunlight fades paint and decals, summer heat can soften plastic bases and tyres, and coastal humidity can encourage corrosion or diecast rash on exposed metal. The safest display is a stable, shaded cabinet away from windows and heating sources.

UV-filtering glass or acrylic is a sensible upgrade for a collection you plan to keep on display. In humid coastal areas, place silica gel packs inside the cabinet, but keep them away from loose parts and replace them when they're no longer effective.

Dust carefully. A soft makeup brush works well around window frames, vents and engine grilles, while a wet cloth can push moisture into joints and seams. Household polishes are a poor choice because they may strip or haze the model's lacquer.

For 1:18 models with opening panels, use only a tiny amount of light silicone lubricant on stiff hinges. Don't force a bonnet or engine lid that feels stuck. The hinge is easier to protect than to replace. A proper display case for model cars also keeps handling and dust under control.

Practical rule: If the sun can reach it, move it.

Value, Rarity, and Building a Smart Collection

Value comes from the combination of desirability, condition and scarcity, not age alone. A limited, factory-licensed model in a discontinued colour is more interesting to serious collectors than a common replica that has been handled heavily. Right-hand-drive Beetles, early styling, Cabriolets in original-looking colours and liveries connected to local events or dealers can add extra appeal in an Australian collection.

Keep the packaging if you can. The box, paperwork and clean presentation help establish what the model is and how it was originally sold. A model with a cracked blister, missing mirror or faded paint should be treated as a display piece rather than a pristine investment.

Factor Low Impact High Impact
Rarity Common colour and widely available body style Limited or out-of-production variant
Local relevance Generic left-hand-drive execution Convincing right-hand-drive Australian-market detail
Condition Dust, paint marks or missing parts Clean model with intact trim
Packaging Damaged or incomplete box Original box and paperwork
Theme Plain stock version Strongly recognised livery or special edition

My preferred collection has three layers. Start with a couple of premium display pieces, add mid-range models that fill out different Beetle eras, then keep a few affordable daily-handlers that you can pick up without worry. That mix makes the hobby enjoyable now, rather than turning every model into something you're afraid to touch.

Start or Grow Your Beetle Collection

Choose the model that gives your shelf a clear direction. A 1:32 Herbie brings instant character, a 1:18 right-hand-drive Australian-spec Beetle becomes the centrepiece, and a small 1:87 Beetle can finish a diorama without competing with larger cars.

Before buying, check the scale, body era, steering position, opening features and box condition. Then browse the Volkswagen diecast shop and compare the available Beetle models with the Kombi and Samba Bus pieces that might sit beside them.

An Australian importer is worth using when you want local stock, faster shipping and practical advice about a particular variant. A quick conversation can save you from ordering the wrong scale or a left-hand-drive version when your display is built around Australian cars. Follow new arrivals and restocks, keep your collection organised and leave room for the next Beetle that catches your eye at Volksfest.


Volkswagen Memorabilia offers VW diecast models, including Beetles and Kombi Samba Bus pieces, alongside other VW memorabilia collectibles for enthusiasts and gift buyers. Visit Volkswagen Memorabilia to browse the range, find local stock and choose the next Volkswagen diecast model for your shelf.

Beach Wall Art for Bathroom: What Actually Survives Humidity

The most popular advice about beach wall art for bathroom styling is also the advice that causes the most disappointment: choose a beautiful coastal print, frame it, and hang it near the shower. That works in a showroom photograph. In a real Australian bathroom, where hot showers meet cool tiles and ventilation varies wildly, the print may curl, stain or develop mould before the coastal mood has had time to settle.

The better question isn't, “Does this look beachy?” It's, “Can this material survive a wet room?” Australian coastal bathrooms are a well-established style, with local design publications describing them as “popular” and among Australia's most popular bathroom approaches. Their familiar ingredients include crisp white surfaces, blue and green accents, sandy neutrals, timber, textured tiles and wall-mounted beach imagery, as outlined in Australian bathroom design coverage. The artwork should finish that scheme, not become the first thing ruined by it.

Why Most Beach Wall Art Fails in Bathrooms

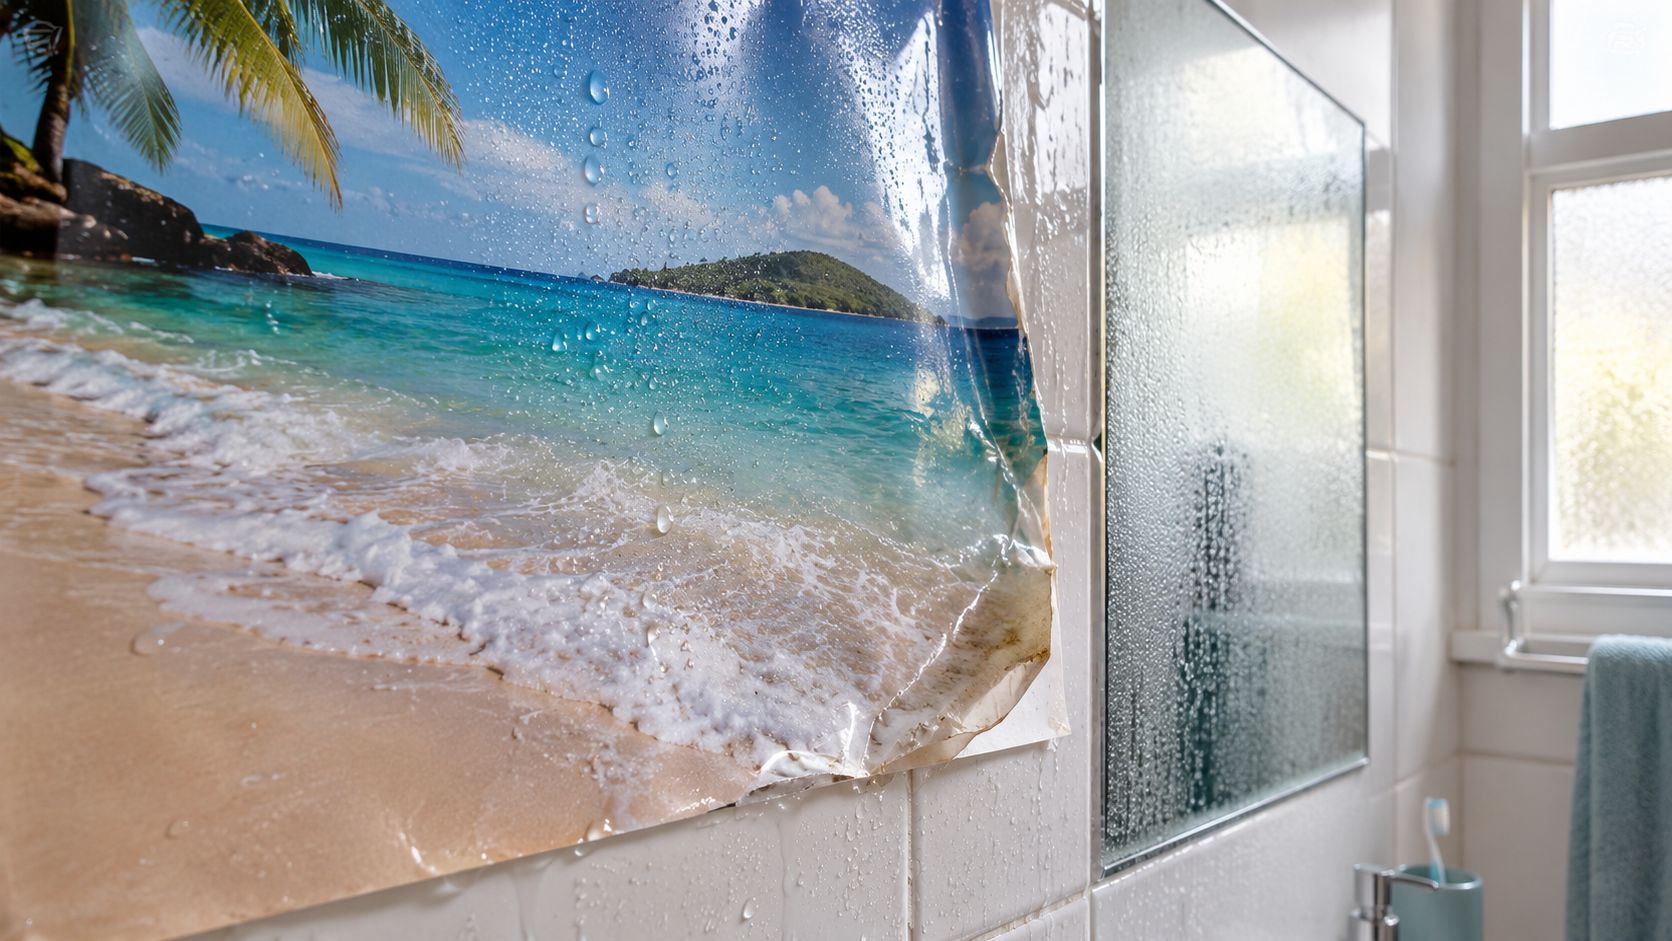
A standard beach print isn't automatically bathroom art. Paper, canvas, cardboard backing and ordinary timber frames all respond to moisture, and bathrooms create plenty of it. Steam settles on cooler surfaces, condensation gathers behind frames, and repeated changes in temperature can leave materials expanding and contracting in ways they weren't designed to handle.

Paper fibres swell when they absorb moisture. As the sheet dries, it can buckle or pull against the frame. If a frame has a sealed back with nowhere for damp air to escape, moisture can remain trapped between the artwork and the glazing. That's when a calm ocean scene becomes a rippled rectangle with tide marks around the edges.

The room matters more than the picture

A large online marketplace image usually shows art in a bright, dry room. It won't tell you whether the print is protected by acrylic, whether the backing board resists swelling, or whether the frame has been sealed properly. Those details matter more than whether the image features a turquoise lagoon, a surf break or a beautifully weathered jetty.

Unsealed canvas is another common trap. A gallery-wrapped canvas may appear casual and coastal, but humidity can soften the fibres, distort the stretcher structure and encourage staining. A coating can improve performance, particularly when it is designed for moisture exposure, but no coating turns a splash-zone wall into a safe location.

The practical rule: Choose the substrate and sealing system before you choose the beach scene.

A tropical beach poster is peeling off a wet tiled bathroom wall next to a misty mirror.

Australian bathroom guidance consistently identifies steam, trapped moisture and poor ventilation as the main risks for paper, canvas and framed works, as discussed in this Australian guide to bathroom art prints in humid conditions. Light exposure can fade an image over time, but humidity usually causes the more immediate failure.

That changes the buying process. Start with exposure, then select a material, then choose a size and style. A modest ceramic panel in a sensible location will outperform an expensive paper print hung directly above a shower. The most attractive artwork is still a poor purchase if it curls after a few weeks.

Moisture-Resistant Materials That Actually Work

Material selection is where bathroom art succeeds or fails. There isn't one perfect option for every Australian bathroom, so weigh appearance, installation, maintenance and exposure together.

Material Bathroom Suitability Expected Lifespan Cost Range Best For
Giclée print on archival cotton rag paper Suitable only behind glass or acrylic, away from splash Can remain presentable when properly protected and ventilated Varies by print, glazing and frame Low-exposure walls and carefully sealed frames
Adhesive vinyl panel Robust for humid areas when correctly installed Designed for repeated moisture exposure, with performance depending on preparation Varies by panel size and finish Compact bathrooms and practical feature walls
Ceramic, marble or enamel-based piece Highly suitable for humid areas Durable when securely mounted and kept out of direct splash Varies by material, artwork and installation Long-term installations and premium finishes
Sealed canvas with a moisture or UV-resistant coating Suitable in low-exposure, well-ventilated rooms Can perform well when sealed and correctly positioned Varies by coating, size and frame Softer, textured coastal styling away from steam
Conventional paper, linen or unsealed canvas Poor choice Likely to warp, stain or deteriorate in humid conditions Often inexpensive, but replacement risk is high Dry rooms, not bathrooms

Giclée printing on archival cotton rag paper can look superb, but it needs proper protection behind glass or acrylic glazing. The print itself isn't the moisture barrier. The frame, sealed back and placement do the hard work. For a bathroom with weak extraction, I'd choose a more resilient substrate rather than relying on a paper print to behave.

Adhesive vinyl is less romantic, but it earns its place. It's wipeable, comparatively light and useful where a traditional frame would take up too much room. Ceramic, marble and enamel-based pieces are the premium choices for wet-area durability, although they need sound mounting and a wall that can carry the load. If you're comparing a coastal wall accent with a more decorative shell-based option, consider the finish and cleaning requirements before buying something such as this capiz shell wall art.

Match the material to exposure

AS 3740:2021 sets minimum waterproofing requirements for domestic wet areas in Australia, as specified by Standards Australia's AS 3740:2021 listing. That standard isn't a product approval for artwork. The useful takeaway is that artwork should sit outside the waterproofing and splash-zone interfaces around showers and baths, with moisture-resistant finishes and suitable hardware taking priority.

For a low-exposure powder room, a glazed print may be perfectly sensible. A steamy family bathroom needs a more forgiving substrate. A wall inside the shower's direct spray should be treated as unsuitable for ordinary artwork, regardless of how well the image matches the tiles.

Australian wall décor coverage also identifies wall art, including paintings, prints and digital artwork, as a popular part of the local wall décor market, supported by renovation activity and demand for personalised interiors. That makes it easier to find coastal imagery in different formats, but it also means you need to read the material specification rather than assume every product is bathroom-ready.

Where to Hang Beach Wall Art Without Risk

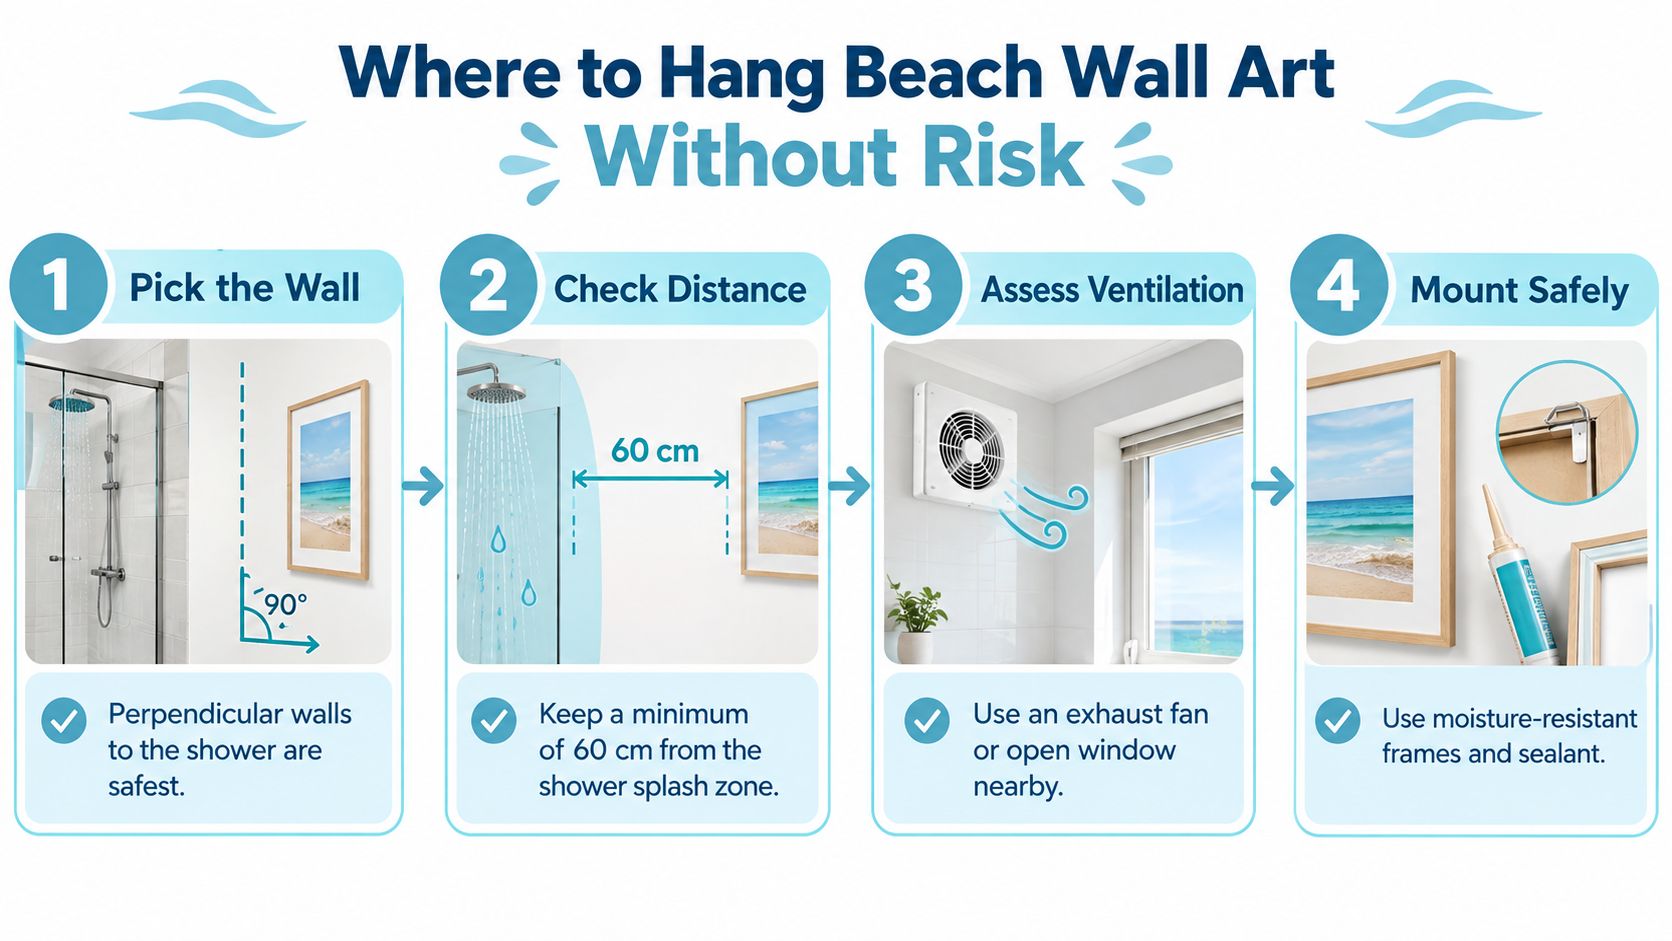
The safest location is usually boring, which is precisely why it works. Place artwork on a wall perpendicular to the shower, or above the toilet, rather than in the direct path of spray. A wall opposite the shower can still receive a lot of steam, so distance alone doesn't remove the need for ventilation and moisture-tolerant construction.

The wall above the toilet is often a useful visual zone because it sits outside the main splash area. Beside a vanity can work too, provided the piece isn't exposed to water from the basin and the frame won't interfere with cleaning. Avoid the temptation to fill every empty wall. One well-positioned piece is safer and usually looks more considered than several vulnerable prints.

An infographic showing four essential steps for safely hanging beach wall art in a bathroom setting.

Use a simple placement test

Before drilling, stand in the shower and identify where water and steam travel. Then check the proposed wall during and after a normal shower. If condensation repeatedly forms on the surface, move the artwork farther away or choose a substrate made for higher humidity.

  • Pick a low-exposure wall: Perpendicular walls to the shower are safer than direct splash paths.
  • Keep clear of spray: The supplied Australian infographic uses a 60 cm minimum from the shower splash zone as a practical checking point. Treat that as a cautious benchmark, not permission to install ordinary paper art in a wet area.
  • Improve extraction: Run the exhaust fan during showering and afterwards. A humidity-sensor extraction fan that activates at 60% relative humidity can help reduce moisture spikes, as noted in the Australian guidance above.
  • Allow wet work to settle: After painting or tiling, let the room cure and stabilise before mounting artwork. One Australian framing source recommends waiting at least 48 hours after wet works are fully cured, rather than hanging art immediately.

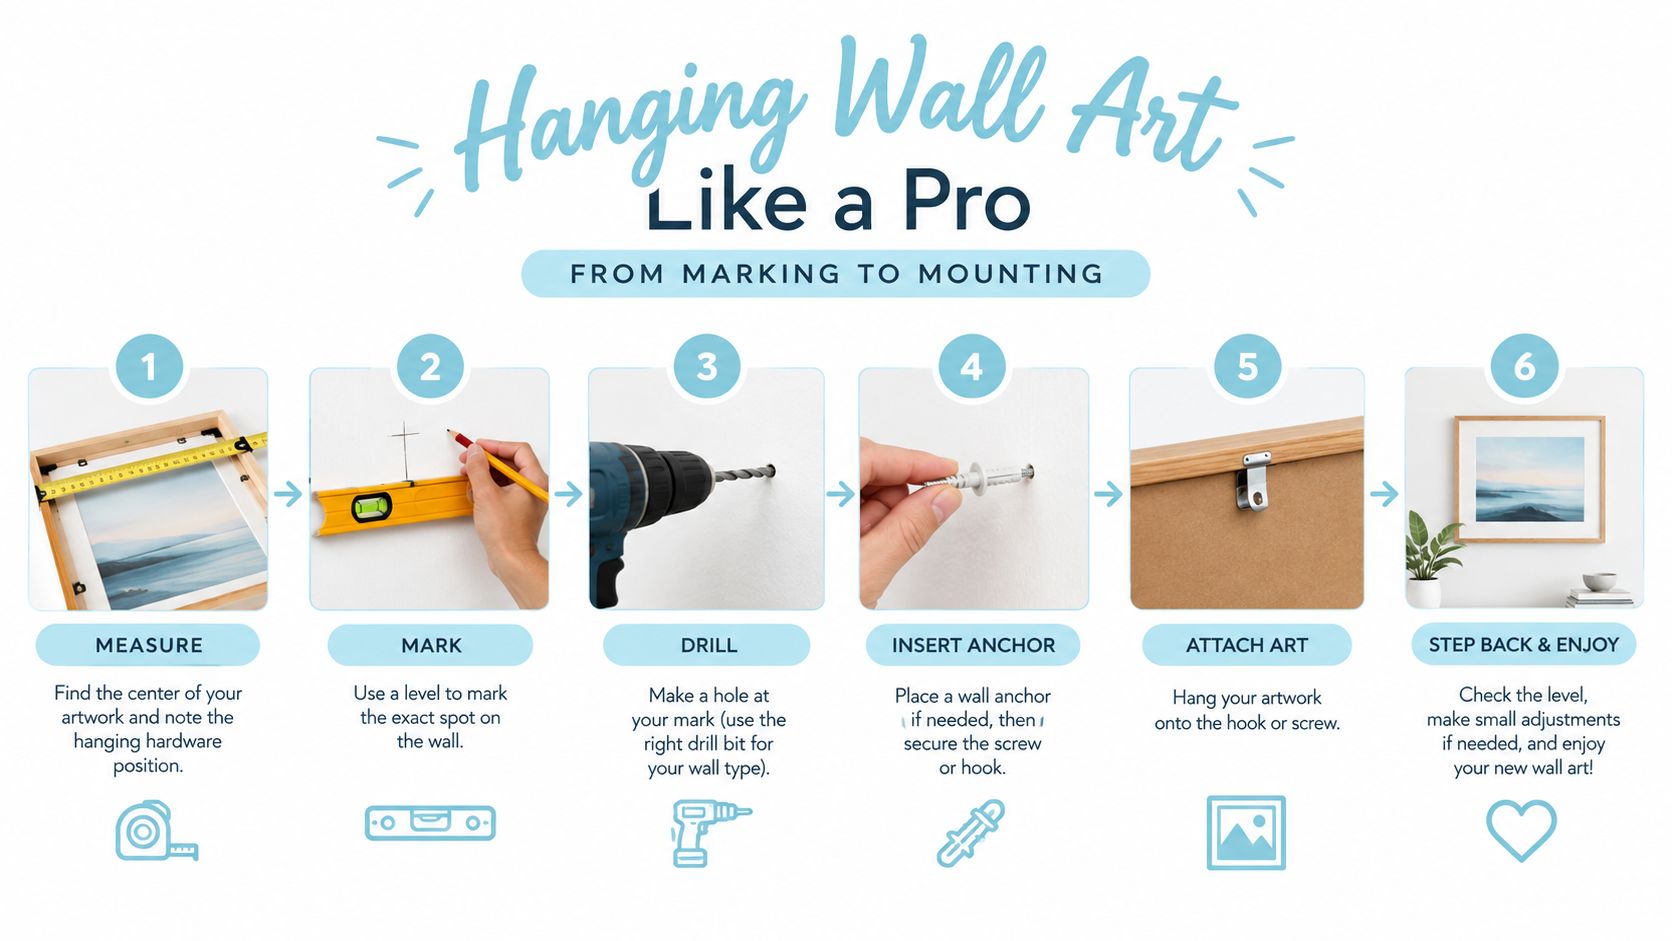
For mounting advice, use corrosion-resistant fixings and a frame with a properly sealed back. A practical wall-art hanging guide can help with positioning and hardware, but the bathroom itself still determines whether the chosen material is suitable.

A beautiful unsealed print above the shower screen is a predictable failure. A glazed print above the toilet, with the fan running and the frame kept away from condensation, is a much more sensible installation.

Styling Beach Wall Art in Small Aussie Bathrooms

Beach wall art often fails in small bathrooms before the styling does. Humidity, condensation and weak ventilation will warp paper, lift edges and stain poorly finished frames, so choose the bathroom-safe construction first. In a compact ensuite, the artwork needs to survive the room's wet conditions before it earns a place in the colour scheme.

Current Australian coastal styling favours abstract references, warm neutrals, pale timbers and organic texture, rather than a literal collection of anchors, shells and rope. Australian coastal home trend coverage describes a more restrained direction, while coastal design guidance from Castlery Australia supports softer, more livable interpretations.

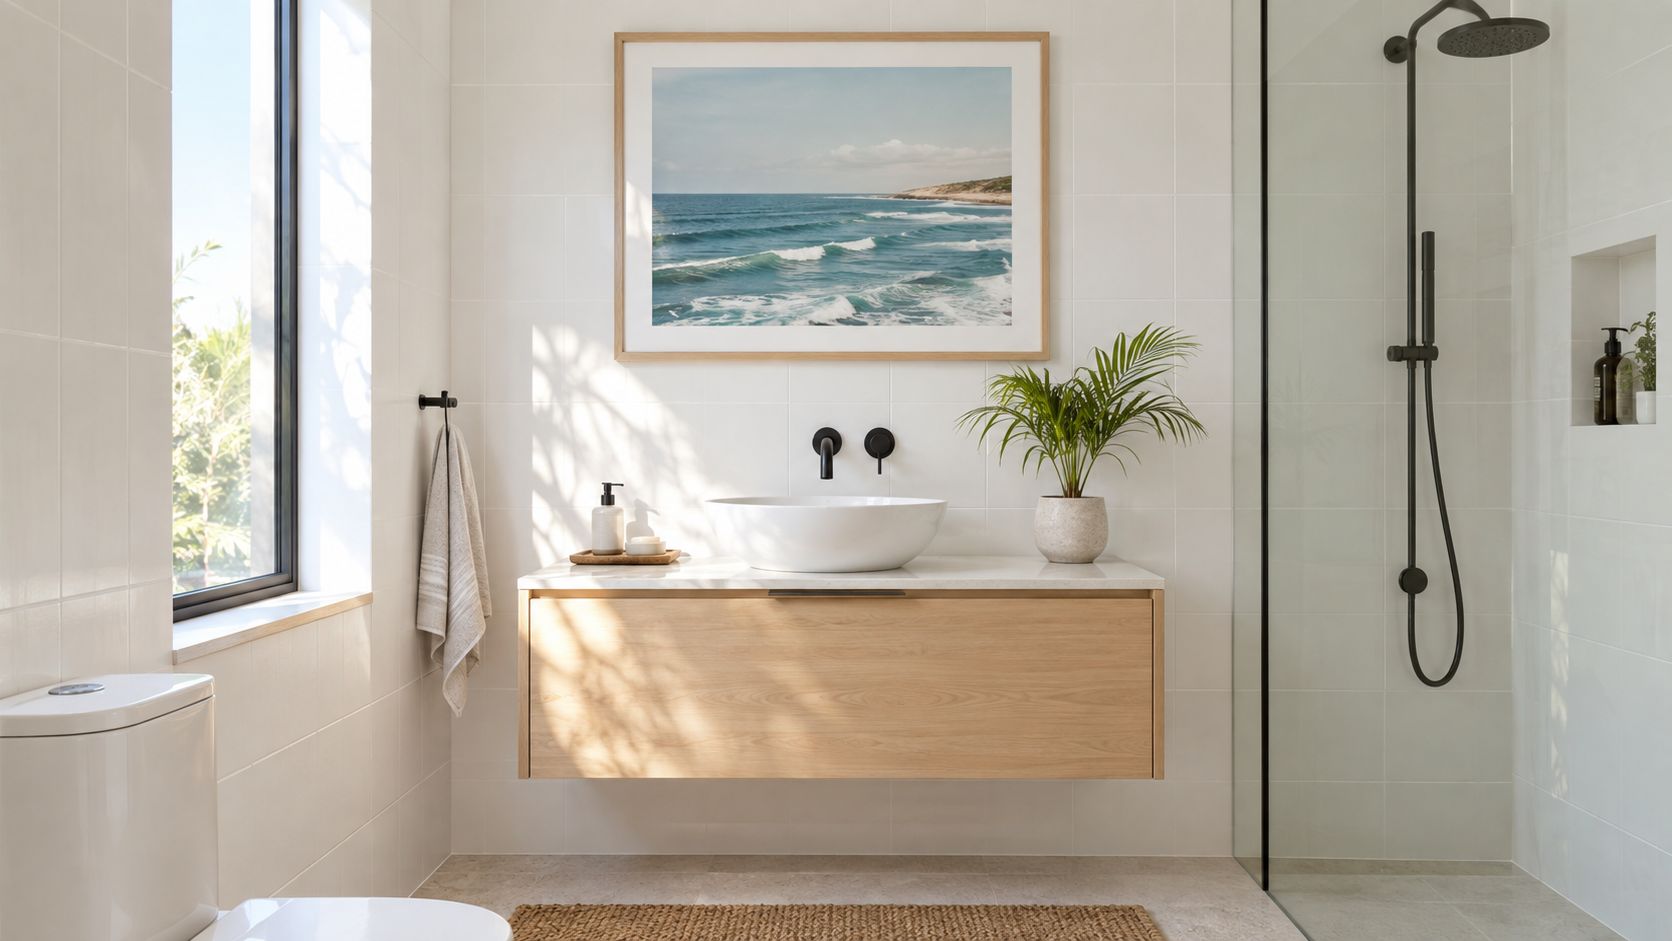
A modern bathroom vanity featuring a round white vessel sink, wooden cabinet, and beach wall art.

Start with one moisture-resistant piece, then build the room around it. An abstract horizon, softened wave forms, muted aerial beach pattern or restrained marine study can sit comfortably with white sanitaryware, textured tile and pale timber. In a bathroom with limited extraction, choose the vinyl or ceramic option first, then match its blue-grey, sandy or warm-white tones rather than selecting a vulnerable print for its colour.

For a moisture-tolerant coastal-boho finish, consider a sealed coastal boho wall art panel for humid bathrooms outside the splash zone. Check that the finish covers the edges and that the backing remains stable. A decorative surface alone does not make an artwork suitable for a wet room.

Give a small room one clear focal point

In a narrow ensuite, a wide panel can echo the vanity's width. In a tiny powder room, a vertical piece can make better use of the wall above the toilet. Keep the frame visually light. Deep mouldings collect dust and make a compact room feel crowded, especially beside a mirror and tapware.

A driftwood-inspired frame brings natural texture, provided its finish is sealed and its backing is moisture tolerant. Pair one artwork with a timber vanity, a simple round mirror and textured accessories. The result feels relaxed and Australian, rather than themed.

The video below offers another visual reference for combining coastal texture with a clean bathroom scheme.

Building Your Beach Wall Art Selection Strategy

Assess the room before browsing images. Start with three questions: how effectively does the bathroom ventilate, how close is the proposed wall to shower spray, and how much visual space is available? Those answers narrow the material choice faster than searching by colour.

Use this decision path:

  1. Small and steamy: Choose ceramic, enamel or adhesive vinyl, then place it above the toilet or on a perpendicular wall.
  2. Moderately ventilated: Consider a sealed canvas or glazed giclée print, provided the location stays outside direct splash.
  3. Large and well ventilated: You have more flexibility with a protected paper print, a coordinated pair or a larger statement piece.

Ask the retailer direct questions before paying. What is the substrate? Is the artwork sealed, and on which surfaces? Does the frame have glass or acrylic glazing? Is the backing board moisture tolerant? What hardware is supplied, and does the warranty address humidity damage or only manufacturing faults?

Ask for the specification, not the mood board. A photograph can show you the style. It can't prove the artwork belongs in a bathroom.

Current coastal styling may favour subtlety, but performance comes first. Choose the strongest material your room requires, then find an image that works with the tiles, vanity and fittings. That order prevents an expensive mistake and usually produces a more coherent result.

Quick Checklist Before You Buy

  • Check the material: Confirm that it's moisture resistant or protected by a sealed system.
  • Check the location: Keep it away from direct shower spray and favour a perpendicular wall or the area above the toilet.
  • Check ventilation: Make sure extraction or natural airflow can clear steam.
  • Check the scale: Select one considered piece rather than cluttering a compact wall.
  • Check the mounting: Look for sealed backing and corrosion-resistant hardware.
  • Check the warranty: Ask specifically whether humidity-related damage is covered.

Volkswagen Memorabilia brings together coastal décor and distinctive VW-themed pieces for relaxed, nostalgic interiors, including wall art and beach-inspired accents that can complement a well-planned bathroom scheme. Visit Volkswagen Memorabilia to browse the collection and choose a piece that brings genuine Australian beach character into your home.

Beach Wall Art for Living Room: VW-Inspired Coastal Style

You've got the pale sofa, a bit of rattan, perhaps a weathered timber coffee table, and one stubborn blank wall that still looks like the removalists only left yesterday. A generic shell print might fill it, but it won't say much about you. Beach wall art for a living room can do better when it brings together two proper Australian loves, the coast and classic Volkswagens.

A well-chosen Kombi or Beetle scene adds the relaxed feeling of a coastal drive, a surf check before work, or a sunny car show where everyone has a story about their old VW. The trick is keeping the room breezy rather than turning it into a souvenir shop. Choose one strong memory, give it room to breathe, and let the car carry the personality.

Why Beach-Style VW Art Nails That Coastal Vibe

The strongest coastal rooms don't rely on a pile of obvious nautical symbols. They use light, texture and a sense of escape, then add a few objects with genuine meaning. A faded blue Kombi parked near the sand works because it brings a whole scene with it. You can almost hear the sliding door, smell the salt air and see a board strapped to the roof.

That story matters. A plain ocean horizon creates calm, while a VW in the frame adds movement and nostalgia. The result feels more personal than a mass-produced beach slogan, particularly for owners, collectors and anyone who grew up seeing Beetles and Kombis on Australian roads.

A canvas wall art of a blue Volkswagen bus on a beach displayed in a bright living room.

The room should feel lived in

A coastal VW print suits a lounge with natural fibres, white walls, pale timber and ocean blues, but it doesn't need to match every cushion. In fact, matching everything too closely can make the space feel staged. A canvas showing a weathered Kombi can soften a polished modern room, while a crisp illustrated Beetle can bring some fun to a more restrained palette.

Australia's renovation culture gives this style plenty of room to work. One market source describes Australia as having one of the highest renovation rates per capita among OECD countries, with one in three homeowners undertaking significant home-improvement projects annually, and projects the broader home décor market to reach USD 12.29 billion by 2031. The Australia home décor market overview also identifies wall art as the most popular wall décor category and highlights large coastal scene pieces as a recurring demand driver.

The useful test: if the artwork reminds you of a place, a car or a day you'd happily repeat, it will usually outlast a print chosen only because it matches the rug.

For a more personal starting point, browse this guide to coastal living room ideas with VW character. Keep the supporting décor quiet, then let the bus, Beetle or Samba take centre stage.

Picking the Right VW Motif and Scale

Start with the room, not the model catalogue. Look at the wall's available width, the furniture beneath it and the colours already doing the heavy lifting. A pale blue Samba Bus suits soft whites and sandy beige, while a Flower Power Beetle needs a little more visual confidence around it.

Match the motif to the mood

A Samba Bus brings holiday nostalgia and works especially well where the room already has timber, woven baskets or relaxed surf styling. A classic black-top Kombi feels slightly more graphic and can anchor a room with navy cushions or charcoal joinery. A Flower Power Beetle, particularly one shown with a surfboard, adds playful colour and suits a family lounge or collector's corner.

The car's finish matters as much as its colour. A distressed, vintage-looking image belongs with linen and raw timber. A clean, sharply rendered print looks better beside contemporary furniture. Don't place a busy floral Beetle against a wall already crowded with patterned cushions, framed photos and ornaments. The eye needs one obvious place to land.

VW Motif Best For Colour Pairing
Pastel Samba Bus Calm, airy lounges White, sand and powder blue
Flower Power Beetle Playful family rooms Cream, coral, aqua and soft green
Black-top Kombi More graphic coastal interiors Navy, charcoal, timber and off-white
Surf-themed Beetle Collector displays and relaxed beach rooms Ocean blue, faded yellow and natural wood

Get the scale right

A small print can disappear above a generous sofa, while an oversized piece can dominate a compact lounge. Horizontal artwork normally suits the long line of a sofa or console, especially when the image shows a Kombi travelling along a beach road. Vertical art can work beside a bookcase, doorway or tall cabinet, where it fills height rather than competing with furniture width.

Collectors often make the mistake of treating wall art and diecast models as separate themes. They work better when the wall image establishes the setting and the model provides the detail. A framed beach scene with a Samba Bus can sit above a shelf displaying a matching VW Kombi diecast Australia collectors' piece.

For a Beetle-led room, compare the available VW Beetle wall art with your existing display. A Volkswagen Beetle model on a shelf below the print creates a visual link without making the room feel like a showroom.

Focal Piece or Full Gallery Wall

A single focal piece is the safer option when the living room already has plenty happening. One broad Kombi canvas above a white settee can make the wall feel finished without adding another collection of competing shapes. It also gives the artwork enough space for the beach, sky and vehicle to read as one scene.

A gallery wall offers more personality, but it demands discipline. Three smaller surf-themed Beetle prints can look excellent when they share a frame style, visual weight or colour family. Mix too many scales, borders and unrelated images, though, and the coastal calm disappears under clutter.

A living room interior featuring a wall art print of a vintage Volkswagen bus parked near the beach.

Choose one statement when the room needs calm

A large Flower Power Samba above a neutral sofa suits an open-plan area where the artwork needs to be seen from across the room. Keep the rest of the wall fairly clear. A low timber console, one ceramic vase and a small model Kombi are enough support.

This approach also works when the art is detailed. A large print gives the viewer time to notice the roof rack, surf gear, faded paint and coastal scenery rather than forcing all those details into a tiny frame.

Build a gallery when the collection has a story

A gallery makes sense when you already own several related pieces or want to show different sides of VW culture. Pair a beach Kombi with a Beetle road scene and a small detail print, but give the group a common thread. That might be a shared blue-and-cream palette, matching frames or a consistent vintage illustration style.

Lay the arrangement out on the floor before touching the wall. This lets you test whether the strongest image sits in the middle, whether the outer edges feel balanced and whether the group relates properly to the sofa below.

A gallery wall should look collected, not accumulated. If one piece only remains because you paid for it, it probably doesn't belong in the final arrangement.

Use living room wall accents to find the supporting shapes, but resist filling every gap. Negative space is what keeps a group of nostalgic images feeling considered.

Hanging Rules that Keep Your Beach Art Aligned

Good artwork can look wrong when it's hung too small, too high or slightly crooked. Coastal interiors depend on visual calm, so uneven spacing stands out quickly. Measure first, mark lightly and use a spirit level before committing to the wall.

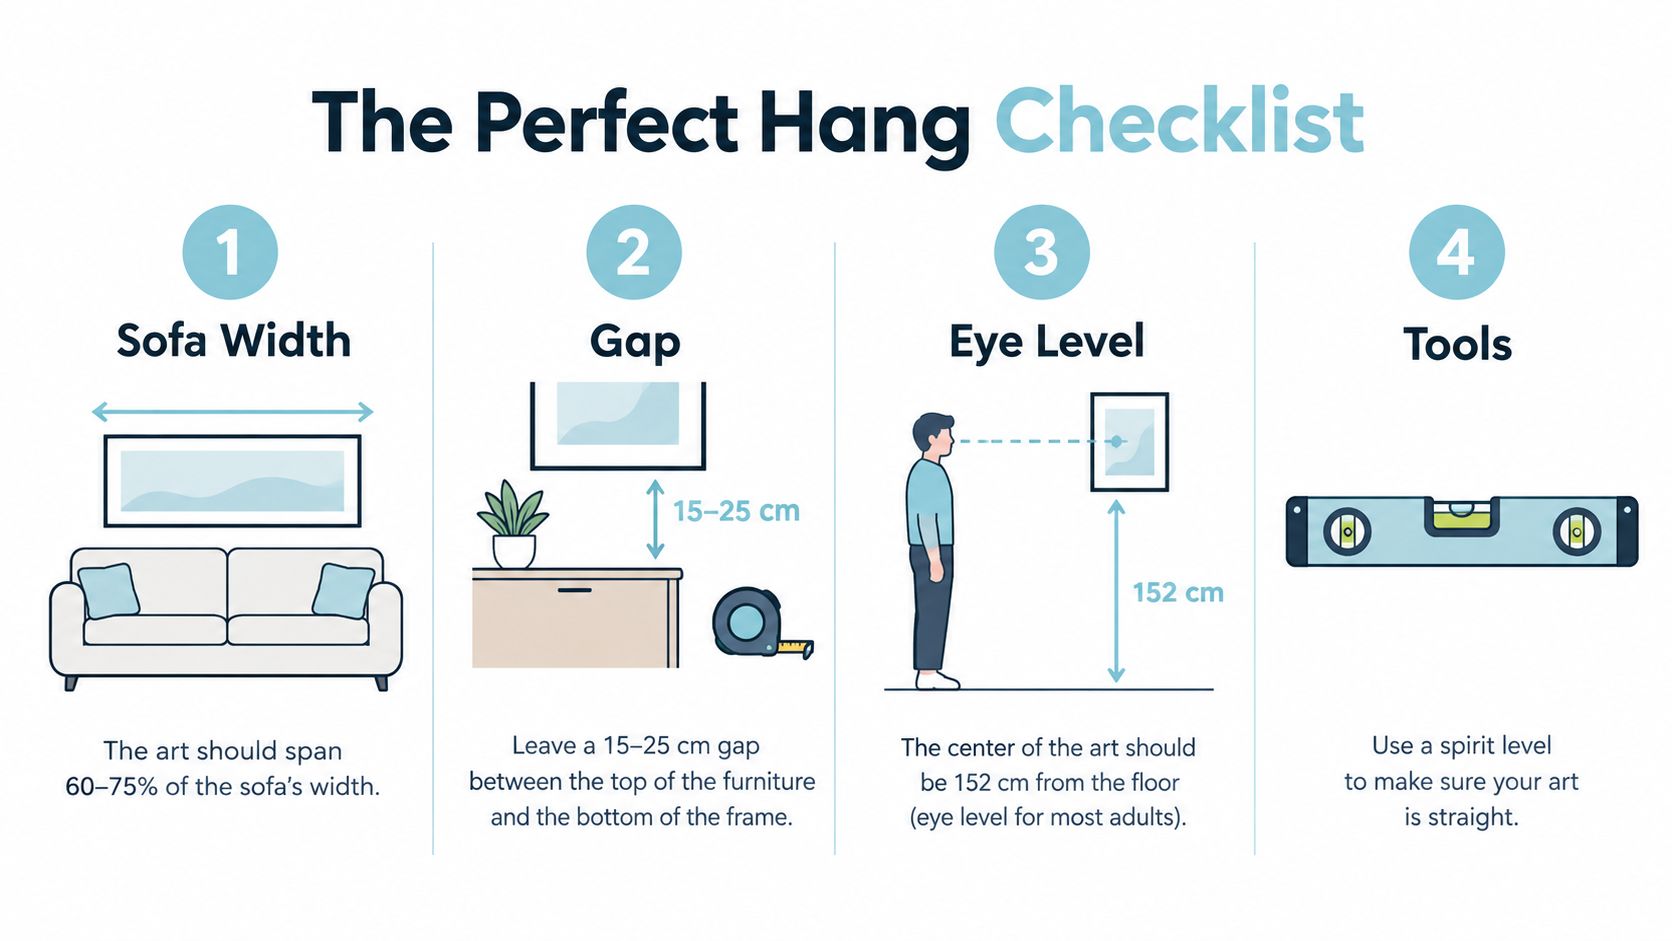
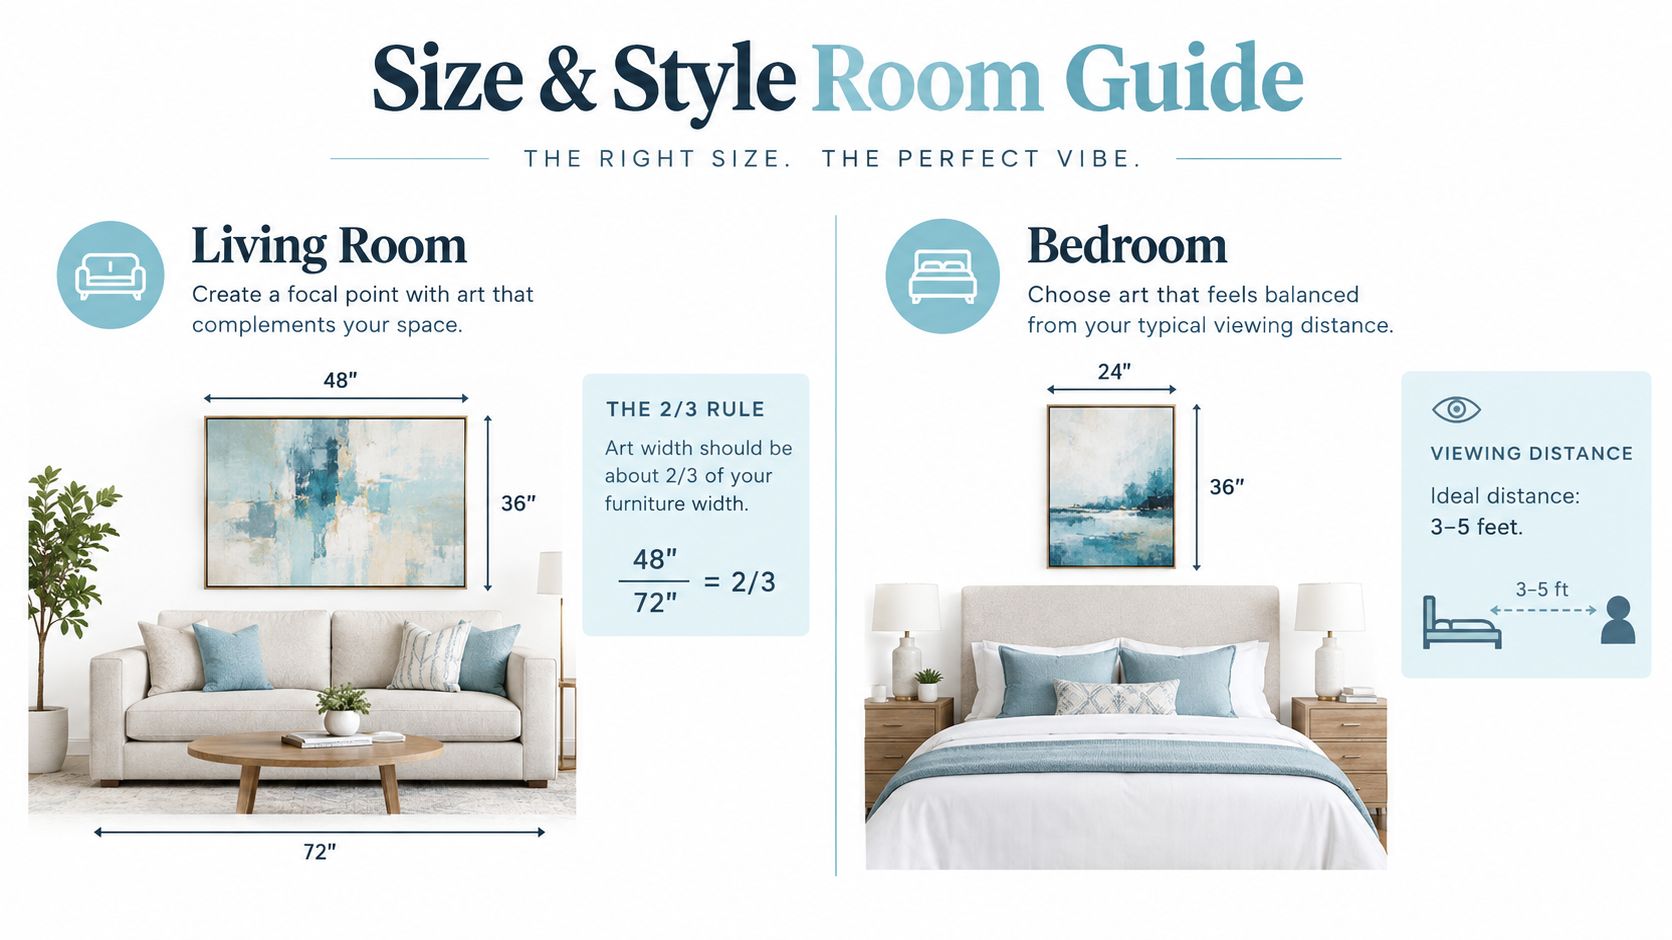
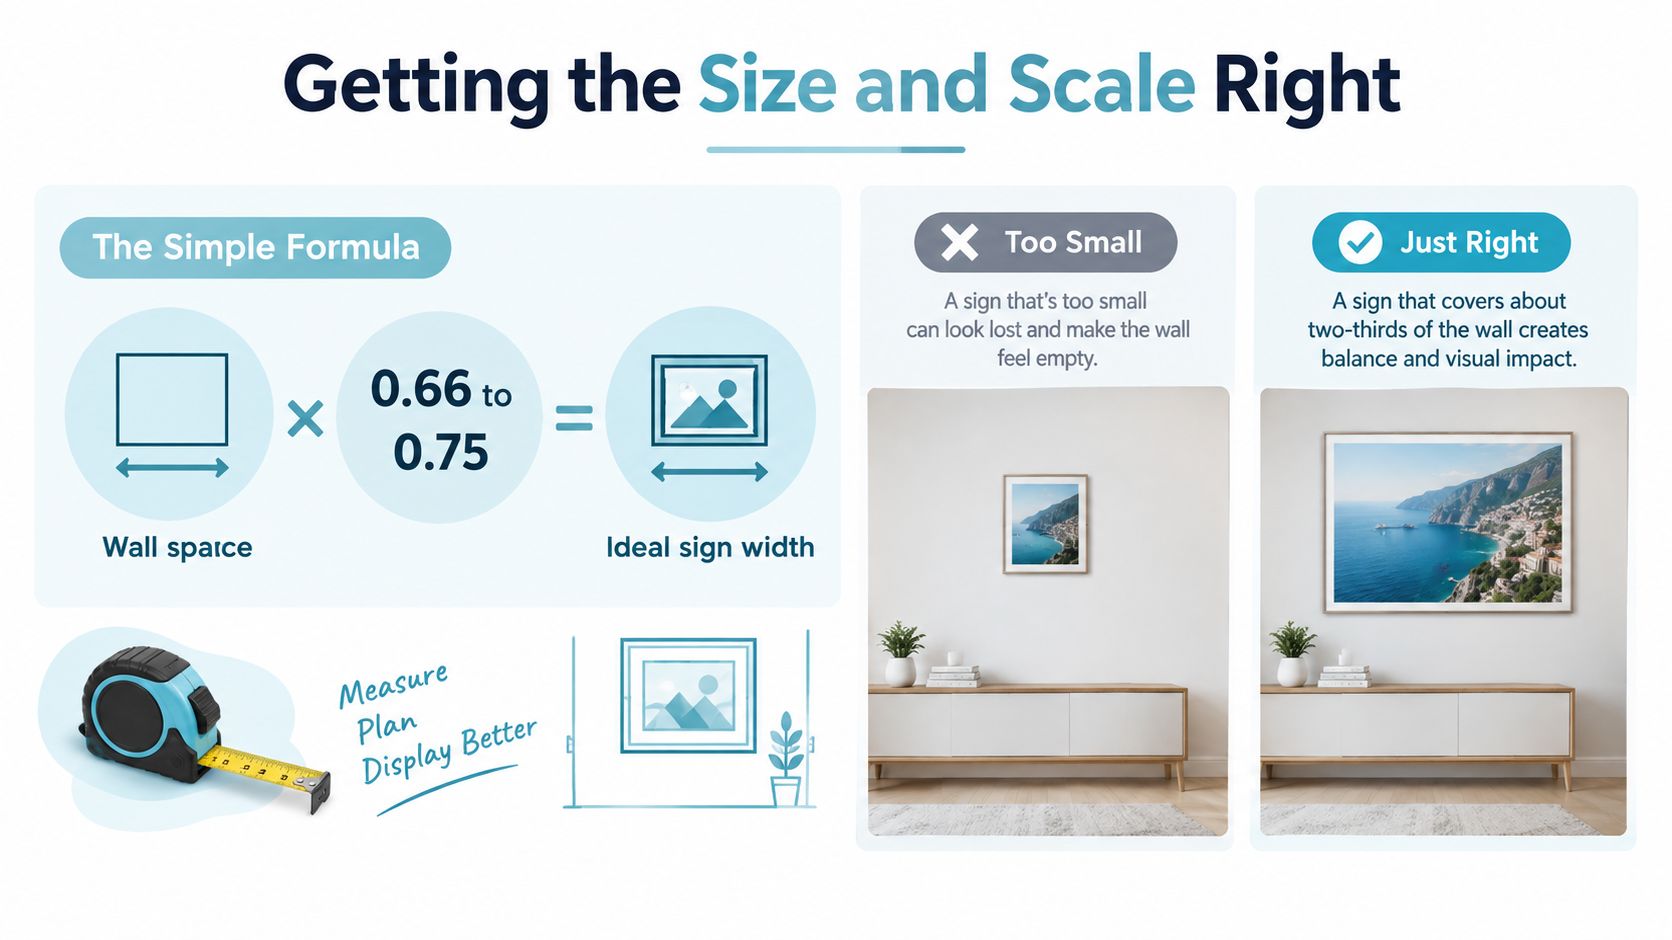
A practical installation method is to size the artwork so it spans 60–75% of the furniture width, leave 15–25 cm between the furniture and the art, and place the artwork centre at roughly 152 cm from the floor. For a triptych, allow 5–8 cm between panels so the image reads as a connected scene rather than three unrelated slices. These measurements come from this Australian wall-art installation guide.

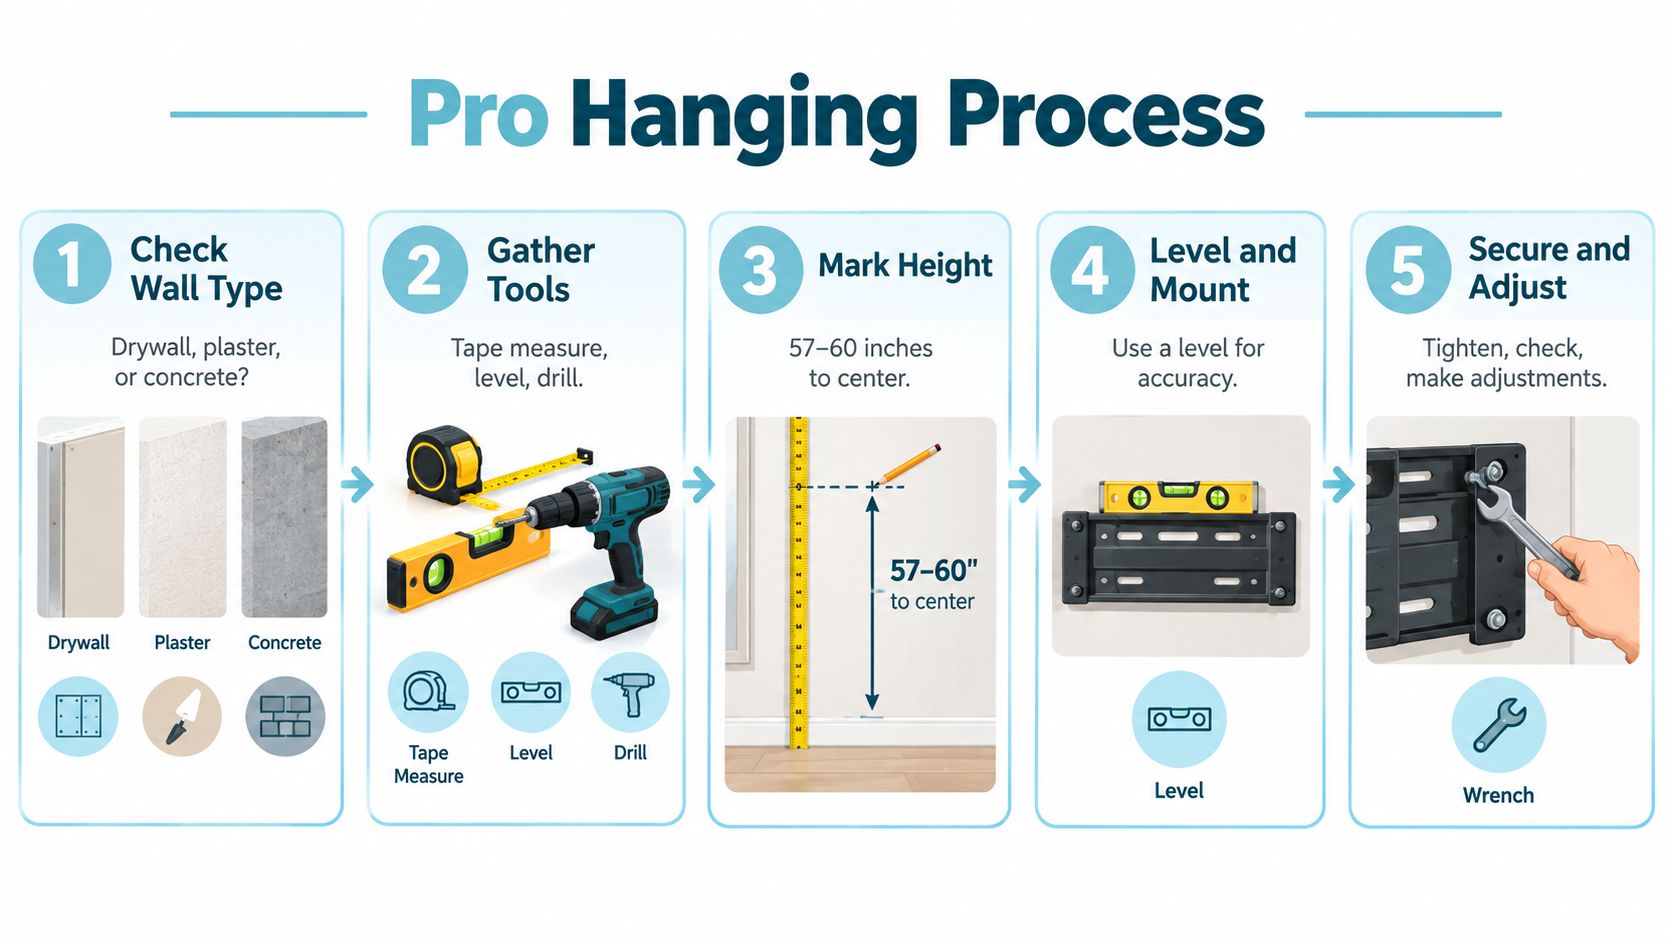
An instructional graphic showing four steps for hanging artwork, including measurements for sofa width, gaps, and eye level.

Measure the furniture relationship

Measure the sofa, sideboard or console beneath the artwork, then calculate the useful visual span rather than choosing a frame by guesswork. A very narrow image can float above a wide sofa. A frame that runs nearly wall to wall can make the furniture look undersized.

Use painter's tape to mark the proposed outer edges. Step into the room, sit on the sofa and view the shape from the places you use. The tape outline often reveals a scale problem before you drill a hole.

Treat the wall as part of the installation

Plasterboard needs more care than brick or masonry. Heavier framed beach prints may need a stud fixing or a specialist plasterboard anchor, and pieces above 5 kg should ideally be fixed into a stud or with a load-distributing plasterboard anchor, according to Australian hanging guidance from Emma Street Studio.

Lay a gallery composition on the floor first, then transfer the positions carefully. The same source notes that Australian picture-hanging services quote $30–$50 per frame, with minimum call-out fees of $80–$150, so batching several pieces together can make more sense than arranging a visit for one frame.

Number the backs of panels if you're working with a triptych, check the hanging hardware, and keep the spirit level handy. A beach scene should feel effortless once it's on the wall, not like it survived a rushed Saturday job.

Sourcing Authentic VW Memorabilia Locally

The coastal look works best when the VW element has proper character. Look for officially licensed Volkswagen diecast models, clear model identification and a finish that reflects the vehicle rather than a generic van shape. Collectors usually notice the small things first, including the badge treatment, body proportions, glazing, wheels and paint quality.

Australia's wall décor market is also shaped by imported finished products. One Australian market report estimates that 70–80% of finished modern framed wall art products are sourced from China and Vietnam, while framed canvas prints and multi-panel sets account for 55–65% of unit volume. The report projects market growth at a 4–6% compound annual rate from 2026 to 2035. Its Australia wall décor market analysis helps explain why shoppers see broad choices in ready-to-hang formats, sizes and finishes.

That variety is useful, but provenance still matters. A licensed Kombi Samba Bus diecast has a place beside coastal wall art because it connects the picture's relaxed road-trip mood with a real collector's object. A Flower Power Beetle can bring colour to a shelf, while a restrained beach print keeps the overall room from becoming too loud.

Screenshot from https://vwmemorabilia.com.au

Why local stock makes collecting easier

Buying from an Australian importer or stockist gives you a practical advantage when you're styling a room for a birthday, house move or upcoming show. Local stock and fast shipping reduce the uncertainty that comes with waiting on an overseas parcel, while local support makes it easier to ask about finishes, model variations and availability.

A curated range also helps you build a collection with a proper thread. Start with one wall piece, add a matching Kombi, then look at Beetle models, metal décor or beach accents only when they earn their place. That approach keeps your VW memorabilia collectibles meaningful rather than turning the lounge into a parts bin.


Volkswagen Memorabilia brings together licensed VW diecast models, Kombi Samba Bus and Beetle pieces, plus coastal home décor for collectors and gift buyers. Visit Volkswagen Memorabilia to find a beach-ready wall accent and a diecast companion that give your living room a relaxed Australian VW story.

Coastal Wall Art for Living Room Styling

The sofa is in, the coffee table's found its spot, and there's still one broad, stubbornly blank wall staring back at you. You want the room to feel like a breezy beach house, but the last thing you need is a neon “Beach” sign beside a shelf packed with novelty shells. For a VW enthusiast, the better answer is a room with the calm of the coast and the character of a sunny surf trip in an old Kombi.

The right coastal wall art for living room styling can make that happen. Think soft horizons, weathered timber, ocean blues, and enough breathing room for a carefully chosen Volkswagen diecast model to tell its own story. The result feels less like a themed display and more like a relaxed beachside garage, collected over time by someone who knows the difference between genuine nostalgia and clutter.

Embracing the Modern Coastal Aesthetic

A classic Kombi parked near the water never needs much explaining. Its rounded silhouette, split windscreen, and cheerful paintwork already suggest open roads, salty air, and a weekend with nowhere urgent to be. Your living room can capture that mood without turning into a souvenir shop.

Modern coastal interiors favour quiet visual cues. A broad abstract seascape above the sofa can suggest the ocean through a soft horizon and layered tones, while pale timber, linen upholstery, and a single weathered accessory carry the beachside feeling through the rest of the room. A small Beetle print or restrained surf photograph can add personality without competing with the main artwork.

Australia's wall décor market is projected to grow at more than 5.6% CAGR from 2026 to 2031, with wall art identified as the most popular category and a shift towards softer coastal looks, neutral palettes, and abstract seascapes, as outlined in this Australian wall décor market overview. That direction suits VW memorabilia beautifully because both styles rely on shape, memory, and atmosphere rather than loud decoration.

Start with the feeling, not the theme

Choose art that gives you the same calm pause as looking across a beach at first light. Gentle horizon lines, sandy neutrals, faded blue, and generous negative space will sit comfortably beside a vintage-style Kombi model. Nautical details can appear as small accents, not a marching parade of anchors and ship wheels.

A floating shelf beneath the art gives your display a natural centre. Place the model slightly off-centre, leave clear space around it, and let the wall do some of the talking. More ideas for blending relaxed interiors and enthusiast pieces appear in these coastal home décor ideas.

Choosing Durable Art for Australian Climates

A beautiful print needs the right home. Australian coastal rooms can expose artwork to damp air, salt-laden conditions, and strong sunlight, so selecting the surface and frame should happen before you start drilling holes.

In coastal Queensland, sustained humidity above 70% can damage cheap canvas. In north-facing coastal homes in NSW and Victoria, UV exposure can fade dye-based inks within about 18 months, making pigment inks the preferred longevity benchmark, according to this Australian guide to surfing and seascape wall art.

A comparative graphic showing durable versus standard wall art designed for harsh Australian climates and weather conditions.

Match the material to the wall

Use the room's exposure as your starting point.

  • Humid coastal zones: Look for pigment-ink canvas printed on 380gsm or heavier poly-cotton, paired with kiln-dried pine framing. The substantial canvas and stable timber frame provide a more sensible foundation than bargain materials in damp conditions.
  • Bright, north-facing walls: Framed prints with acrylic glazing are a practical choice where direct sun reaches the artwork. Acrylic can help create a protective barrier while keeping the piece light enough for straightforward installation.
  • Shelves near windows: Keep diecast models away from persistent direct sun. A shaded wall, floating shelf, or enclosed cabinet will help protect paint finishes and small details from unnecessary exposure.
  • High-moisture rooms: In Queensland homes with heavier humidity, metal prints or moisture-resistant framed works can offer a more durable alternative.

The same thinking applies to a treasured Volkswagen Beetle model. It doesn't belong on a windowsill where afternoon sun hits it every day. Place it where you can enjoy the chrome, curves, and colour without asking the finish to battle the climate.

Mastering Layout and Colour Palettes

A large blank wall can make even a seasoned home mechanic hesitate. The trick is to give the wall one clear job. In an open-plan room, a broad seascape can anchor the sofa zone, while smaller pieces and a diecast display create a visual trail towards the dining or reading area.

A useful Australian sizing benchmark combines one statement piece at 1500 mm or more in width for open-plan spaces with 2–3 smaller supporting pieces. The recommendation also suggests a palette of roughly 60% neutral, 30% blue or sand, and 10% contrast, as described in this coastal wall art sizing and colour guide.

Build the wall in layers

Start with the dominant work above the sofa or console. A horizontal piece usually feels settled there because its shape echoes the furniture below. Stand in the doorway, then sit in the position you typically use. If the artwork disappears against the wall, it needs more presence. If it overwhelms the furniture, choose a calmer scale or simplify the surrounding pieces.

Use the colour balance as a visual guardrail rather than a strict decorating law:

Element Role in the room
Neutral tones Walls, upholstery, light timber, and the quiet background of the artwork
Blue or sand Ocean references, cushions, ceramics, and smaller coastal prints
Contrast A dark frame, rust-toned detail, red Beetle, or strong typographic accent

For a gallery wall, keep the major seascape as the visual anchor. Add supporting pieces with related tones, then position the model shelf below or beside the grouping rather than squeezing everything into one tight cluster. The eye should be able to rest between each element.

Blending VW Heritage with Beachside Vibes

A cream Kombi on a timber shelf, an abstract seascape above it, and a few pale ceramics can make a living room feel like a tidy beachside garage. The room carries memories of surf trips, coastal roads, and sunny servo stops, while the artwork keeps the finish calm and considered. The trick is editing the collection so each piece has a clear job.

A blonde woman in a bikini and shorts posing next to a vintage Volkswagen surf van.

A Samba Bus diecast model sits neatly beside an abstract ocean print because both create a strong horizontal rhythm. The bus adds colour, character, and nostalgia; the artwork gives the arrangement air and a quieter coastal mood. You can find more combinations in this wall accents for living room guide. A vintage Beetle can take a gentler role on a bookcase beside travel books, a framed photograph, or a small shell piece.

Give every collectible some breathing room

In diecast collecting, 1:24 scale models are usually about 6–8 inches long and offer a useful balance of detail and display size. This makes them well suited to living-room shelves, as explained in this diecast scale guide. The model has enough presence for its body shape, wheels, windows, and paintwork to be appreciated without taking over the room.

A simple arrangement might include:

  • One coastal artwork: Choose a soft abstract ocean piece as the backdrop.
  • One 1:24 Kombi: Set it on a floating shelf, with the nose angled slightly into the room.
  • One natural accent: Add a small shell, piece of driftwood, or pale ceramic form.
  • One practical object: Use a book, framed photograph, or low planter to make the display feel lived-in.

Practical rule: Let the model be the story, not the entire sentence.

A Flower Power Kombi can add a bright, playful note to a restrained wall. A cream or muted blue model will sit more within a polished coastal palette. Leave space around the vehicle, repeat one or two tones from the artwork, and keep the overall arrangement closer to an enthusiast's home than a crowded souvenir display.

Avoiding Common Coastal Styling Mistakes

Coastal styling goes off course when every object repeats the same message. A beach sign, anchor, rope detail, shell garland, surfboard print, and nautical clock may each look appealing on their own, but together they leave no room for interpretation. The viewer sees a theme before they see your personality.

The same problem affects VW displays. A shelf crowded with several bright vehicles, signs, badges, and unrelated trinkets can bury the charm of each model. A single Kombi with a clean backdrop often feels more special than a convoy squeezed shoulder to shoulder.

An infographic titled Avoiding Common Coastal Styling Mistakes comparing the pros and cons of coastal interior design.

Fix the display before buying more

Use this quick check when the room starts to feel busy:

  • Too many literal beach references: Remove the weakest sign or ornament and keep the pieces with texture, memory, or craftsmanship.
  • A model in direct sunlight: Move it to a shaded shelf or rotate the arrangement so the window no longer hits it.
  • Art competing with the television: Choose quieter tones or move the focal artwork to the wall opposite the seating.
  • Small pieces floating alone: Group them with a shared frame colour, shelf, or tonal connection.
  • No negative space: Clear one object from each surface and reassess the room from the doorway.

Framing also changes the conversation. A casual surf photograph can look more considered in a simple timber or white frame. Likewise, a bright Volkswagen model gains sophistication when the shelf beneath it is clean, the wall art has room around it, and the rest of the décor supports rather than copies its colour.

Bringing Your Coastal Vision to Life

A great living room display should remind you why you chose each piece. Perhaps the broad ocean print recalls early mornings near the beach. Perhaps the Kombi brings back family camping trips, a first surf holiday, or the day you finally spotted the right project vehicle at a car show. Those memories give the room its character, while the coastal palette keeps the overall result calm.

Start with the wall you notice most often from the sofa. Choose the artwork that makes you want to look up, then build around it slowly. A floating shelf, a licensed Volkswagen model, and one or two natural accents can create a convincing beachside garage feeling without overwhelming the architecture.

Let the collection grow naturally

A modern display doesn't need to be finished in one afternoon. You can begin with a statement seascape, add a Kombi when the right model appears, then introduce a smaller Beetle or a framed photograph later. This approach gives the room the collected quality that makes nostalgic interiors feel genuine.

Shells and starfish work best as punctuation. A modest shell wall art accent can echo the coastal artwork without turning the wall into a literal beach scene. Keep the frames and shelf finishes related, but don't force every colour to match. A little contrast makes the display feel assembled by a person, not generated from a catalogue.

Whether you're styling a new apartment, refreshing a long-empty sofa wall, or creating a gift-worthy display for a fellow VW fan, the strongest choices combine atmosphere with meaning. Coastal wall art sets the horizon. Volkswagen memorabilia adds the open-road memory. Together, they create a room that feels relaxed, personal, and unmistakably Australian.


Volkswagen Memorabilia offers licensed VW diecast models, including Kombi Samba Bus and Beetle pieces, alongside coastal home décor for relaxed beachside displays. Visit Volkswagen Memorabilia to find a model or coastal accent that gives your living room its own sunny road-trip story.

Beach Wall Art for Bedroom: A Practical Styling Guide

You've made the bed, fluffed the cushions and added the woven throw, but the wall above the headboard still feels unfinished. A small print disappears, a loud nautical sign takes over, and suddenly the room feels more like a holiday rental than a restful Australian bedroom. The fix isn't finding a more obvious beach picture. It's choosing the right scale, palette and mood.

The best beach wall art for bedroom spaces nods to the coast without turning the room into a theme. Think soft horizons, dune colours, weathered texture and one confident focal point. That approach also leaves room for personal details, whether that's a coastal photograph from a favourite trip, a subtle surf reference or a small VW-inspired accent that recalls relaxed beach culture.

Picture the Bedroom You Actually Want

Walk into the room after a long day. The curtains are half-drawn, the bed is made and your eye settles on one broad artwork above the headboard. Instead of competing with the bedding, it pulls together the sand-coloured throw, pale timber and sea-glass cushion. That's the feeling to design towards.

Before browsing prints, make three decisions:

  • Choose the mood: Calm suits pale horizons and soft watercolour. Airy works with white space and washed blues. Nostalgic can include an old surf photograph or a faded coastal palette.
  • Read the existing palette: Note the colours already doing the work. White linen, warm timber and rattan need a different artwork from deep navy bedding or charcoal walls.
  • Identify the anchor wall: The bed usually dominates the room, so the wall behind it should guide the artwork's proportions.

Take a clear photograph of the bed wall in daylight. On your phone or tablet, place two rough test shapes over the image, one modest and one generously scaled. You'll quickly see whether the wall needs a single statement piece, a pair of panels or a smaller arrangement balanced by bedside lighting.

Practical rule: Choose beach wall art for bedroom projects by palette first and subject second. A quiet coastal print in the right colours will feel more considered than a technically beautiful image that clashes with the room.

Australian home décor sits inside a substantial and expanding market. It generated USD 8,708.0 million in 2024 and is projected to reach USD 17,654.8 million by 2030, with a projected 12.7% CAGR from 2025 to 2030, according to Grand View Research's Australia home décor market outlook. Furniture led revenue in 2024, while textiles were the fastest-growing segment, a useful reminder that wall art works best as part of a layered bedroom rather than as an isolated purchase.

For a little inspiration beyond literal beach scenes, browse these coastal home décor ideas and look for the combination that feels most like your home.

What Modern Australian Coastal Wall Art Looks Like

Australian coastal style has grown up. The older version leaned heavily on shells, anchors, fish and bright surf slogans. The more refined interpretation keeps the seaside reference but removes the visual shouting, using muted horizons, abstract water, dune colours and natural materials instead.

A 2026 Australian guide to coastal interior design describes the style as rooted in the natural beauty of the seaside and Australia's beach culture. It also distinguishes current coastal interiors from earlier kitschy, seashell-heavy rooms. That shift explains why today's bedroom artwork often feels calmer and more architectural.

Look for:

  • Oat, dune and oyster: These tones settle easily beside white linen and pale timber.
  • Sage and seafoam: They bring colour without the sharpness of saturated turquoise.
  • Washed navy: Use it as a small visual anchor, especially with darker bedheads.
  • Cloud grey: This works beautifully with silvered driftwood and cool daylight.
  • Soft horizons: A clear line gives the eye somewhere to rest.
  • Visible texture: Brushstrokes, raw canvas, handmade paper and softly bleached timber add depth without clutter.

The strongest pieces suggest the coast rather than depict it directly. An abstract seascape can capture movement and openness while leaving the room feeling like a bedroom. A slow-wave photograph can bring memory and atmosphere without introducing a collection of matching nautical objects.

The bedroom should feel like a quiet coastal morning, not a shop window filled with beach souvenirs.

That distinction matters in Australian homes, where coastal interiors have long been connected with beach culture but now favour a more layered, liveable look. Filter artwork by the colours already in your room, then assess the subject. If the palette is right, the print can carry a coastal feeling even when it contains no obvious shell, boat or anchor.

Sizing Art to the Bed Wall That Dominates the Room

A correctly sized artwork makes the whole bedroom look more organised. An undersized print creates visual fragments, while an oversized piece can feel heavy if it crowds the ceiling or bedside lights. Measure the bed and headboard before you fall in love with a picture.

For practical Australian coastal wall art, 60 to 90 cm pieces work above many beds, while 40 to 50 cm pieces suit gallery walls. For a broader wall span, artwork of 100 cm or more can create a stronger anchor, as outlined in this Australian coastal art sizing guide. The bed remains the starting point, not the artwork's advertised dimensions.

Measure in the right order

  1. Measure the headboard or bed width.
  2. Aim for artwork that occupies roughly two-thirds to three-quarters of that width.
  3. Leave enough space for lamps, sconces and curtains.
  4. Position the art so its centreline feels connected to the bed, not floating near the ceiling.
  5. Step back from the doorway before making the final decision.

The table below turns that method into a useful starting point. Treat the headboard measurements as common planning examples, then measure your own furniture because bed frames vary.

Bed Size Headboard Width Single Piece Width Diptych Total Width Centre Height from Floor
Queen 153 cm 90 to 120 cm 140 to 160 cm 145 to 155 cm
King 180 cm or more 120 to 150 cm 140 to 180 cm 145 to 155 cm

For a queen, one horizontal seascape usually looks cleaner than several small prints. For a king, choose a generous canvas, a wide framed photograph or a diptych with a deliberate gap. Two stacked pieces can work in a room with ceilings above 2.7 m, but a standard-height bedroom usually benefits from one confident shape.

Hang the centre of the work around 145 to 155 cm from the floor, or roughly 15 to 25 cm above the tallest pillow line when the headboard is unusually tall. Use the wall art hangings collection for visual references, but let your actual bed wall determine the final proportion.

Materials and Frames That Handle Damp Coastal Air

Salt-laden air, humidity and regular air-conditioning cycles can expose weak framing quickly. Cheap poster paper curls, unsealed timber changes appearance and ordinary glazing can create distracting reflections near a bright window. Match the construction to the room instead of paying for the same specification everywhere.

A giclée print on 310gsm cotton rag or archival canvas is a strong choice when colour and surface quality matter. Metal or aluminium prints suit rooms with more moisture because the surface handles damp conditions well. Acrylic face-mounted prints give a crisp, contemporary finish, although seafront rooms still need a properly sealed backing.

Compare the main options

Exposure Level Best Art Surface Recommended Frame Glazing
High, close to open windows or seafront air Aluminium, sealed canvas or archival cotton rag Sealed oak, teak or marine-grade finish UV acrylic or museum glazing
Moderate, coastal suburb with air-conditioning Archival canvas or giclée cotton rag Sealed timber or float frame UV acrylic is preferable
Low, inland bedroom Framed print, canvas or paper artwork Finished timber or painted frame Regular glass can be suitable

Raw timber looks attractive, but don't use it near a bathroom-adjacent bedroom unless it has a durable seal. Sealed oak, teak or a marine-grade polyurethane finish gives you the warmth of timber without leaving the frame vulnerable.

Glass remains a good option away from direct moisture, though it adds weight and can reflect windows. Museum glass or Tru Vue UV acrylic is a better investment for artwork exposed to strong daylight. Canvas has another advantage: a float frame in stained pine keeps the artwork visually lifted from the wall and lets the piece breathe.

Choose the protection level according to exposure. An east-facing artwork near a coastal window deserves archival treatment. An inland guest room can be simpler. The frame should support the calm coastal feeling, not become the most noticeable object in the arrangement.

Lighting and Layering Around the Art

Lighting determines whether beach wall art feels rich at night or vanishes after sunset. Start with the artwork in position, then add the light. This prevents the common mistake of placing a fitting first and discovering that its beam lands on the pillows rather than the image.

An instructional graphic showing tips for lighting and layering beach wall art above a bedroom bed.

For a single piece, use a slim picture light centred above the frame. For a wider bed wall, two narrow picture lights can sit about one-third in from each edge. Mount the fitting 150 to 300 mm above the top of the frame, then check the beam from the pillow line, as recommended in this Australian wall-lighting guide.

Build the evening layer

  • Picture light: Position it close enough to wash the artwork evenly, but not so close that the top edge becomes overexposed.
  • Bedside lighting: Use warm 2700K light to protect the softness of sand, cream and seafoam tones.
  • Ambient light: Dim the ceiling fixture so the room retains depth rather than becoming brightly uniform.
  • Opposite-wall glow: A gentle uplight or low lamp helps prevent the artwork from becoming a floating island of brightness.

Bedroom sconces generally sit around 500 to 600 mm above the mattress, with at least 400 mm horizontal clearance from the pillow edge. Fixture bodies are commonly positioned around 1.5 to 1.8 m from the floor for a balanced eye-level relationship. Confirm the fitting's beam spread and keep glare out of your direct sightline.

Leave roughly 8 to 10 cm between the headboard and the bottom of the frame when the furniture allows. In a rental, cord covers and removable hooks can keep plug-in picture lights tidy without drilling. Layer sheer and linen curtains to soften harsh daylight, then use the warm evening setting to make the artwork read as atmosphere rather than decoration.

Layering Beach Art With VW and Surf Accents

A coastal bedroom becomes personal when the wall includes a story, not just a colour scheme. The trick is restraint. Let one beach artwork carry the visual weight, then add a few three-dimensional objects that connect with travel, surf culture or old beach-road memories.

A small VW Kombi ornament on a low ledge can work brilliantly beside a framed coastal photograph. The vehicle brings movement and nostalgia, while the artwork keeps the mood grown-up. A single rusted surfboard fin, a glass vessel filled with black sand from a meaningful trip or a framed surf pass from Bells or Noosa can add a personal note without making the room look staged.

Keep the vignette edited

Use a tight palette of bone, bleached teak, sea-glass green and one warm rust accent. Group objects in threes, vary their heights and leave generous negative space around the hero artwork.

The Australian Beetle story gives this kind of nostalgia real local depth. Volkswagen says German migrant Karl Regel and his family brought a right-hand-drive Beetle to Sydney, making it one of the first Volkswagens registered in New South Wales. Volkswagen also records that full Beetle manufacture in Australia ceased after 6 years at the Clayton plant in suburban Melbourne, as explained on the Volkswagen Australian heritage page.

Museum Victoria adds that the first Beetles arrived in Australia in late 1953, production at Clayton began in 1959, local production ended in 1968, and just over 260,000 were made there. Those details make a locally minded Beetle model more than a random retro object. It can represent Australian motoring history while the beach artwork recalls the places where many of us associate these cars with freedom.

Keep the coastal bedroom décor ideas focused on editing rather than accumulation. Rotate the small accents seasonally. If the shelf starts competing with the wall art, remove objects first. Don't add another print to solve a display problem caused by too many accessories.

Your Beach Bedroom Styling Checklist

Use this list before ordering anything. It's deliberately practical because proportion matters more than the exact beach scene you choose.

  • Measure the bed first: Choose art around two-thirds to three-quarters of the bed or headboard width.
  • Set the vertical position: Centre the artwork approximately 150 to 200 mm above the headboard where the furniture allows.
  • Plan a pair carefully: Choose one large piece or a coordinated diptych, with a 40 to 60 mm gap between panels.
  • Select a calm subject: A soft horizon, abstract seascape or restrained beach photograph will age better than a loud nautical slogan.
  • Limit the palette: Pull colours from sand, seafoam, soft white, driftwood and cloud grey.
  • Match the light to the frame: Add picture lights roughly 150 to 200 mm above the artwork, then check the beam from the bed.
  • Soften daylight: Layer sheer and linen curtains to reduce glare and keep the room gentle during the day.
  • Add one natural texture: Rattan, woven fibre or sealed timber is enough to warm the wall.
  • Edit the accents: Cap VW or surf-related objects at three, so the display feels collected rather than themed.
  • Perform the doorway test: Walk back to the entrance and check that the art remains the first calm focal point.

An infographic titled Your Beach Bedroom Styling Checklist showing ten design tips for coastal bedroom decor.

The right starting point is one anchor piece, not a full wall set. Correct sizing will make a modest print feel intentional, while an expensive artwork in the wrong proportion will still look lost. If you're bringing VW or surf memories into the room, let one object carry that story and keep the rest of the styling quiet.

Volkswagen Memorabilia brings together VW-themed gifts, diecast models and coastal home décor for relaxed, nostalgic interiors, including beach-inspired wall pieces and VW accents that suit a carefully styled bedroom. Visit Volkswagen Memorabilia to find one anchor piece for your coastal wall, then build the room around its colour, scale and story.

Vintage Diecast Cars: An Aussie Collector’s Guide

You're standing beside a sunny oval, coffee in hand, while a freshly polished Beetle rolls past and a Kombi catches the light near the Show & Shine. Then, at a swap-meet table, you spot a tiny version of the same car. The paint is bright, the wheels sit just right, and suddenly you're remembering road trips, surfboards, family holidays and the particular charm of an old Volkswagen.

That's the magic of vintage diecast cars. They're small enough for a shelf, yet packed with design history and personal meaning. For Australian collectors, the story becomes even richer because Beetles, Kombis and locally made toys all belong to our own motoring past.

The Timeless Appeal of Vintage Diecast Cars

At a sunny car show, a blue-and-cream microbus model can draw a crowd before the full-size classics do. One collector spots the split windscreen; another recalls a Kombi packed with camping gear. A tiny licensed model turns into an easy yarn between strangers, linking display shelves with Australian road memories.

A classic blue and cream colored Volkswagen microbus diecast model sits on a rustic wooden board.

The charm reaches beyond nostalgia. A miniature Volkswagen holds shape, colour and character in a way a photograph cannot. The Beetle's rounded roof, the Kombi's upright body and the Samba Bus's bright windows remain recognisable in the palm of your hand. Each model records a piece of automotive design, while its scale makes it practical for a home display.

Australian collectors add another layer to the story. The Museum of Brisbane records that Melbourne toy maker Brentoy traded in the 1940s and produced diecast vehicles by the 1950s. It also identifies an Australian-made diecast Buick and a rare Planet die-cast toy made in Melbourne during that decade, described as one of only three ray guns known to have been produced in Australia. That early manufacturing story lives on in today's vintage Volkswagen memorabilia, where the same design heritage is preserved in miniature. For a detailed look at Australian diecast manufacturing history, see Australian diecast history and memorabilia.

More than a miniature car

Many collections start with one Beetle model, bought as a present or spotted at a local market. Then the search grows. A collector begins comparing body colours, wheel designs, packaging and scale, gradually building a personal timeline of Australian motoring memories.

A thoughtful gift can carry that same meaning. A licensed Kombi Samba Bus diecast might suit a long-time VW owner, a surf fan or anyone drawn to retro design. On a larger shelf, it can anchor a display devoted to Australian travel, coastal living, factory history or family holidays.

The best buying decisions usually begin with the story behind the model. Check whether its Volkswagen details, finish and markings match the version being represented, then choose a display spot that lets those details be seen. A good piece should look right from across the room and reward a closer look at the bonnet, windows and cabin.

Identifying Hallmarks and Choosing the Right Scale

Before buying, handle the model like a small piece of engineering rather than a novelty. Weight is the first clue, because a substantial metal body usually feels different from a lightweight plastic replica. It isn't proof of quality on its own, but it tells you to inspect the rest of the model closely.

Look along the roof, guards and doors for clean paint separation. On a Beetle, the curve of the front bonnet and the placement of the headlights should look balanced from both sides. On a Kombi, check the window surrounds, roofline and panel joins. Uneven paint, blurred badges or crooked wheels can reduce visual appeal, even when the model is otherwise sound.

A practical inspection routine

  • Check the body: Look for chips, bubbling paint, corrosion and repairs that don't match the surrounding finish.
  • Study the base: Manufacturer markings, scale information and licensing details can help distinguish a considered replica from an unmarked novelty.
  • Test moving parts gently: Opening doors, bonnets and tailgates should move without scraping. Don't force a stiff hinge, particularly on an older piece.
  • Inspect the cabin: Dashboard layout, seat shape and steering-wheel position should suit the actual Volkswagen being represented.
  • Look at the wheels: Tyres should sit evenly, and the wheel design should match the model's period or stated version.

A specialist explanation of what makes a diecast model car useful can help new collectors understand the difference between construction, finish and scale.

Popular Diecast Scales for VW Collectors

Scale Approximate Size Best For
1:64 Small, pocket-sized format Dense shelves, play displays and mixed vehicle scenes
1:43 About 11 cm long, 3.5 cm wide and 3 cm high on average Australian collectors seeking a balance of detail and display space
1:18 Larger presentation model Close inspection of interiors, engines, wheels and opening features

In Australia, 1:43 is described as the most popular diecast model car size. It's 43 times smaller than the actual vehicle, making it a practical benchmark for collectors who want clear proportions without giving an entire shelf to one model. Smaller scales generally sacrifice interior and chassis detail, while 1:43 can still show trim, body lines and paint separation accurately. These Australian scale dimensions and comparisons are outlined by Vintage and Classic Reproductions.

For vintage cars, 1:18 often reveals more engineering nuance. Australian diecast sellers note that old-school cars are commonly produced in 1:18, while racing cars are more often seen in 1:43. Larger models may include fabric seat belts, carpeted interiors and identifiable engine components, which helps when you're checking dashboard layout, wheel design and under-bonnet details. Muscle Car Magazine Australia provides local scale guidance for collectors comparing these formats.

Tracing the Heritage of Australian VW Production

A tiny Beetle on a shelf can carry a surprisingly local story. The Volkswagen Beetle was formally introduced to the Australian market in 1953, and local assembly began at Clayton, Victoria, in 1954. By the mid-1960s, Australian content had risen to about 95%, and the final Australian-assembled Beetle left the line in July 1976, according to the Volkswagen Beetle production history.

Museum Victoria adds another layer to the account. Australia's first Beetles arrived through military and early import channels, with the first locally imported examples documented in late 1953. Production later began at the Martin & King factory in Clayton in 1959, and just over 260,000 Australian Beetles were made before local production ceased in 1968. Those differing milestones reflect the complicated transition between imported vehicles, assembly operations and local manufacture, which is exactly why provenance matters to collectors. The museum's account appears in The Volkswagen Beetle in Australia.

A timeline infographic titled Tracing the Heritage of Australian VW Production showing key Volkswagen milestones from 1955-1975.

From Beetle to Kombi

The Kombi's story began in 1949, when Dutch businessman Ben Pon sketched the idea that led to Volkswagen's practical van. Volkswagen Australia records Australian assembly at Clayton from 1964 to 1977, giving local collectors another strong connection between the vehicle and Australian industry. The official Australian Kombi history is useful when matching a model's styling to its claimed era.

That history changes how a collector sees a Samba Bus. The model isn't merely a cheerful van with windows and bright paint. It represents a vehicle that carried families, tradespeople, travellers and surfers, while the Beetle became one of the most recognisable cars on Australian streets.

Local toy production developed alongside that motoring culture. Brentoy's Melbourne diecast work during the 1950s shows that Australian children were already encountering miniature metal vehicles made close to home. A vintage model therefore links two histories, the full-size Volkswagen's Australian journey and the country's own tradition of making small vehicles for curious hands.

Collectors who enjoy the broader wagon and van story can explore this heritage through station wagon Volkswagen memorabilia, especially when building a display around family travel and utility vehicles.

Valuation Basics and Navigating the Local Market

A swap-meet price is an asking price, not an automatic valuation. Australian listings show why collectors need to slow down and inspect the details. Current marketplace examples range from roughly AU$30 for generic vintage diecast cars on eBay Australia to about AU$180 for metal vintage Matchbox-style models, while Gumtree postings start from around AU$5. These figures come from scattered listings, not a market-wide benchmark, so treat them as orientation rather than a guaranteed price guide. See the available Australian vintage diecast listings before making comparisons.

What changes the price

Condition usually matters more than age alone. A well-preserved model with clean paint, straight axles and an intact interior will generally attract more interest than a supposedly rare piece with heavy corrosion or missing parts. Original packaging can also help, especially when it remains clean and clearly belongs to the model.

Rarity is more complicated than a bright colour. A Flower Power finish, Samba Bus styling or unusual Australian-market packaging may catch attention, but collectors should verify the manufacturer, licensing and production information before paying a premium. A familiar model with excellent condition can be a smarter purchase than an obscure one with an uncertain history.

Practical rule: Compare like with like. Match the scale, brand, condition, packaging and exact decoration before comparing prices.

For online buying, ask for clear photos of the roof, base, interior, wheels and any damage. Confirm whether the model is complete, whether the packaging is included and whether postage is separate. For local pickup, bring a small torch and inspect the underside without rushing. A bargain only works if the model suits your collection and won't require expensive restoration.

Australian hobby retail remains broad rather than forgotten. One major Australian retailer lists 27 Volkswagen diecast items, with scales from 1:64 to 1:18, and describes model cars as miniature replicas made through diecasting. Its catalogue also identifies limited editions as part of the market, showing how ordinary shelf pieces and more focused collector releases sit side by side. Browse the local Volkswagen diecast catalogue to see how varied the category can be.

Conservation Tips for the Australian Climate

Australian sunlight can fade paint and weaken packaging surprisingly quickly. A model displayed near a bright window may look fine at first, then slowly lose the sharp colour separation that made it special. Stable conditions and gentle handling protect both appearance and enjoyment.

An infographic titled Conservation Tips for the Australian Climate offering advice on sun protection, humidity control, and cleaning.

A simple care routine

  1. Choose the display position carefully. Keep models away from direct sunlight, heaters, damp walls and strong airflow. A glass cabinet in a shaded room gives you visibility without exposing the finish to constant UV.
  2. Dust with restraint. Use a clean, soft microfibre cloth and support the model underneath. For grille openings and window surrounds, a very soft brush can lift dust without scratching the surface.
  3. Avoid household cleaners. Sprays may affect decals, clear plastic and painted trim. If a model needs more than dry dusting, test any mild cleaning method on an inconspicuous area first.
  4. Keep humidity steady. The supplied conservation guidance recommends stable humidity of 40 to 50% to help reduce corrosion risk. A small room monitor can show whether your cabinet area is fluctuating.
  5. Exercise moving parts sparingly. Open doors and bonnets only when needed, and stop if a hinge catches. Repeated force can do more harm than a little stiffness.

Don't polish an old finish until you know what you're removing. Original patina may be part of the model's character, while an aggressive clean can erase decals, lettering or surface detail. Photograph the model before any restoration work, keep loose parts labelled and store packaging flat where possible.

A collection kept out of harsh light, dusted regularly and handled with clean hands will remain far easier to enjoy. Conservation isn't about making every model look brand new. It's about preserving the evidence of what the model is.

Sourcing Authentic Models from Local Importers

Buying locally gives Australian collectors practical advantages that overseas marketplace listings can't always provide. Local stock, domestic shipping and responsive support make it easier to check availability, resolve a damaged delivery or ask about a model before ordering. You're also less exposed to unclear descriptions, surprise freight costs and packaging that wasn't designed for a long international journey.

A pair of hands carefully holding a small grey vintage Volkswagen Beetle diecast model car.

A dedicated Australian importer or specialist retailer should make licensing and product identity clear. Look for accurate Volkswagen branding, a named model variant, scale information and photographs that show the actual finish. If you're buying a Kombi Samba Bus diecast, check whether the description identifies the body style and whether the model arrives boxed, loose or as part of a mixed pack.

Local sourcing also supports a healthier community. Specialist sellers understand that a buyer might be choosing between a Beetle model for a birthday, a Samba Bus for a display cabinet or a surf-themed piece for a coastal room. That context leads to better advice than a generic listing with a single cropped photograph.

The following video offers another visual way to appreciate miniature Volkswagen design and presentation:

For Australian buyers searching VW Kombi diecast Australia, local availability can matter just as much as the exact colour. Fast shipping helps when a gift date is close, while local support gives collectors someone to contact if they need clarification. That's especially useful when building a themed group of Beetles, Kombis and Samba Buses rather than buying a one-off novelty.

Joining the Community and Showcasing Your Collection

A collection comes alive when it has a story to tell. Arrange a Beetle beside a Kombi, add a small surf-themed accent and leave enough space for each model's silhouette to stand out. A timber shelf can create a warm garage feel, while a glass cabinet gives detailed 1:43 and 1:18 pieces a clean display without inviting dust.

Australian VW events provide the perfect backdrop for that shared enthusiasm. Volksfest Australia describes its family-friendly festival as including a Show & Shine, market stalls, live music, food trucks, cruises, a display day and a VW swap meet. Its 2025 event was scheduled for 19–21 September, with awards announced for exceptional vehicles, according to the Volksfest Australia event information.

Collectors swap more than parts and prices at these gatherings. They trade stories about first cars, road trips, restoration jobs and the model that started it all. That community spirit is why a licensed Volkswagen diecast model makes such a thoughtful gift. It carries the look of the actual car, but it also leaves room for the owner's own memories.


Volkswagen Memorabilia offers licensed VW diecast models and memorabilia for collectors, gift buyers and fans of relaxed coastal style. Browse the curated range, including Kombi Samba Bus and Beetle pieces, at Volkswagen Memorabilia, and find a miniature Volkswagen with a proper place in your story.

How to Build a Diecast Car Collection You’ll Love

You spot it in a shop window, a red-and-white Samba Bus no longer than your hand, sitting beneath the warm lights like it's waiting for a trip down the coast. You stop, lean closer and notice the little details, the split windscreen, bright paintwork and familiar rounded roof. Then comes the dangerous thought: “That would look good beside the Beetle.”

That's often how a diecast car collection begins. Not with a spreadsheet or a cabinet, but with one model that brings back a road trip, a family car, a surf break or the smell of an old garage. A good collection isn't about owning everything. It's about choosing pieces that tell a story, whether that story is Volkswagen heritage, Australian motorsport or relaxed beach-house nostalgia.

Australia has a long model-car tradition. ABC reported in 2024 that collecting here stretches back to the 1930s, with model cars available across brands, scales and price points from about $2 to $200. The same report describes adults returning to Matchbox collecting in the 1980s, now with more disposable income and an appetite for limited-edition diecast made for serious collectors. Read the history in ABC's report on Australian model-car collecting.

A close-up view of a hand reaching toward a miniature red and white Volkswagen bus model.

The trick is to turn that first spark into a collection you'll still enjoy years from now. That means setting a theme, choosing a budget, understanding scale, checking quality, buying through the right channels, keeping useful records and creating a display that feels like your own little car show.

Why Every Great Collection Starts With One Special Model

A first model usually carries more meaning than its price suggests. Perhaps it's a Volkswagen Beetle model that reminds you of the car parked outside your grandparents' house. Maybe it's a Kombi that takes you back to beach holidays, or a Samba Bus that feels like a miniature version of the one you still hope to own.

That emotional connection matters because collecting works best when each purchase has a reason. A shelf of unrelated cars can look busy, while a carefully chosen line-up can feel like a visual biography. A row of classic Volkswagens in complementary colours tells one story. A display of Australian racing icons tells another. Neither approach is wrong, but a theme helps you decide what belongs and what can wait.

Start with the story, not the shopping cart

Before buying a second or third model, ask what you want the collection to say. “Volkswagen” is a broad starting point, so you might narrow it to air-cooled classics, Beetles and Kombis, split-window vans, surf culture or one consistent scale. You could even build around colour, such as cream, red and blue models that work with your home décor.

The Australian tradition supports both casual nostalgia and serious collecting. The Powerhouse Collection, for example, includes a Franklin Mint set of 41 precision model cars, assembled by Queensland collectors Michael and Jan Whiffen from 1983 to 2009 and donated in 2010. That collection shows how childhood memories can grow into a considered adult hobby.

A focused collection also makes events more rewarding. At a VW show, a small display of Kombis can start conversations with owners who know the difference between a standard Transporter and a Samba Bus. At home, a themed shelf gives every model a place instead of leaving new arrivals scattered across the desk.

A focused collection always beats a scattered one.

Setting Goals and a Budget That Keeps the Fun Alive

A collection stays enjoyable when the spending feels deliberate. The simplest system is to choose a theme, set a fixed monthly budget and keep a short list of target pieces. An Australia-based collector guide recommends this approach, along with watching sales, second-hand lots and local collector events before expanding. It also suggests using online communities and swap meets to reduce impulse buying, as outlined in this Australian guide to starting a diecast collection without overspending.

A four step infographic titled Collection Goals and Budget Blueprint about starting a diecast car collection.

Choose a theme that gives every purchase a job

A useful theme has boundaries. “Classic Volkswagens” gives you room for Beetles, Kombis and related variants, while “1:24 Samba Buses” creates a much tighter display. You might collect:

  • One marque: Focus on Volkswagen heritage, from Beetles to Kombis.
  • One body style: Build around vans, convertibles or racing cars.
  • One scale: Keep every model visually consistent on the same shelf.
  • One mood: Choose surf, Flower Power, motorsport or nostalgic family cars.
  • One colour story: Select models that sit naturally together in your home.

A narrow theme doesn't make a collection smaller in spirit. It makes each new purchase easier to assess. If a model doesn't fit, you can enjoy it without automatically adding it to the main display.

Use a wishlist before you use your wallet

Write down the model, scale, colour, condition you'll accept and the maximum you're comfortable paying. That last point matters at swap meets, where a seller's enthusiasm can make an ordinary model feel like a once-only opportunity.

One collector I know learned this after spending three months of planned collecting money on impulse buys at separate events. None of the models was terrible, but they didn't form a coherent display, and the pieces he really wanted had to wait. His solution was simple: a short wishlist, a spending log and a cooling-off period before buying anything outside the theme.

The goal isn't to remove spontaneity. It's to make room for the occasional surprise without letting every shiny model take over the plan.

Ask yourself these questions before you buy:

  1. What story am I building? A marque, era, colour or lifestyle theme?
  2. Where will this model live? Measure the shelf before choosing a larger scale.
  3. Does it fit my budget? Use collecting money, not money needed for essentials.
  4. What condition is acceptable? Decide whether opened or imperfect examples belong.
  5. Will I still want it tomorrow? A pause can separate a genuine target from an impulse.

Choosing the Right Scale and Spotting Quality

Scale tells you how a model compares with the full-size vehicle. A 1:18 model is 18 times smaller than the full-size car, while a larger denominator produces a smaller miniature. That sounds straightforward, but scale affects everything from shelf depth to how clearly you can see hinges, badges, interiors and wheel details.

The popular collector scales each suit a different type of display. 1:18 models make a strong centrepiece and reveal plenty of detail, but they need generous space. 1:24 offers an appealing balance, while smaller formats let you build a broader scene without giving up an entire cabinet.

The 1:18 Volkswagen diecast range is useful for collectors who want a prominent display model and have room to show it properly.

Compare the practical trade-offs

Scale Approx. Length Detail Level Best For
1:18 About 11 inches Highest visual impact and strong detail Feature models and dedicated cabinets
1:24 About 8 inches Can carry detail comparable to 1:18 Balanced shelves and themed displays
1:32 Smaller than 1:24 Good detail in a compact format Limited space and broader collections

The measurements and storage trade-offs are covered in the diecast scale information on the Volkswagen Beetle page. A 1:24 model can deliver a surprisingly satisfying display without the storage demands of a larger piece. A 1:18 Kombi, on the other hand, has the presence of a proper centrepiece and gives you more room to appreciate the cabin and exterior trim.

Condition deserves an honest look

Collector grading commonly separates model and box condition into 1.0 to 5.0 tiers. Near-mint or mint examples may still show minor casting marks, small chips or minimal edge wear, so don't confuse a grading scale with the promise of absolute perfection. The Hobbyco collector glossary explains the condition language used in the hobby.

Before buying second-hand, inspect photographs closely and ask direct questions. Look for:

  • Touch-ins: Poorly described paint repairs can be obvious under bright light.
  • Broken parts: Check mirrors, aerials, wheels, doors and glazing.
  • Repaints: A fresh colour may hide an altered or modified model.
  • Residue: Tape, adhesive and grime can reduce presentation quality.
  • Graffiti or marks: These may be permanent rather than removable.
  • Packaging damage: Crushed corners and torn windows affect boxed displays.

Official licensing also matters. Licensed models are made with permission to reproduce the marque and its design details, which gives buyers greater confidence in authenticity. It doesn't guarantee that every model will become valuable, but it does help you build a collection based on genuine Volkswagen identity rather than a vague lookalike.

Where to Buy Your Diecast Models in Australia

Australian collectors have plenty of ways to find models, and each channel has a different balance of price, convenience and certainty. Online specialist retailers are usually the easiest choice when you want local stock, fast shipping and clear product information. Buying from an Australian importer can also mean avoiding customs delays, dealing with straightforward local returns and speaking to someone during Australian business hours if a question comes up.

A specialist catalogue is especially useful for a VW Kombi diecast Australia search because it lets you compare related models without wading through unrelated listings. Browse the Australian diecast models collection when you want a local starting point.

Know what each buying channel does best

Specialist retailers suit collectors who want predictable condition, product photographs and licensed ranges. You'll often pay for that certainty, but the trade-off is less risk and less time spent checking vague descriptions.

eBay Australia offers enormous choice. Its Australian marketplace lists over 4.1 million contemporary diecast results and over 1,000 Australian diecast-car results, according to the Australian diecast listings page on eBay. That scale gives you access to discontinued pieces and unusual variants, though listing quality varies sharply.

Local classifieds can be worthwhile for mixed collections and inexpensive starter models, with listings from about A$5 upward. The bargain may be genuine, but you'll need to check condition, completeness and whether the seller has described the model accurately.

Swap meets and VW events offer something online can't. At Volksfest, the VW Nationals or a local Show & Shine, you can handle the model, inspect the box and talk with people who understand the subject. The downside is that choice is unpredictable, and enthusiasm can make it easy to buy outside your plan.

Wherever you shop, check the scale, licensing, condition, return terms and delivery details. A clear photograph of the base, packaging and model markings is worth more than a long sales description.

Cataloguing Your Collection and Display Ideas Worth Showing Off

A catalogue doesn't need to feel like office work. A simple notebook works, but a spreadsheet makes it easier to sort by scale, model type, colour, purchase date or display location. Record the model name, item number, brand, scale, purchase price, condition and shelf position. Add photographs of the model and box, especially for pieces you may later insure, trade or sell.

That small habit prevents the common collector problem of buying a model twice because the packaging looks different. It also gives you a clear picture of the collection's direction, which is helpful when a new release tempts you away from the theme.

An infographic showing four steps for managing a diecast car collection, including logging, digital tracking, display, and rotation.

Build a display with a point of view

A strong display has a centrepiece, supporting models and a little breathing room. A 1962 Kombi Samba Bus in 1:24 works beautifully as the star of a VW shelf because that scale is about 8 inches long and can carry detail comparable to a 1:18 model. You can place smaller related cars around it, then use a simple background colour to let the paintwork stand out.

For a more relaxed coastal arrangement, pair surfy vans with starfish, shells, nautical décor or a pale timber shelf. The result feels like a beach house rather than a toy cupboard. Keep the decorative pieces subordinate to the cars, and repeat a colour from the models in the surrounding objects.

Mixed packs can help create a themed display without hunting for every model separately. They're particularly useful when you want a small scene, such as several colourful vans gathered around one larger Samba Bus.

Protect the view as well as the model

The best display position is away from direct sunlight, heaters, damp areas and heavy household traffic. Sun can fade paint and decals over time, while dust settles into trim and glazing. A glass-fronted cabinet or purpose-built display case for model cars makes cleaning easier and protects models from curious fingers.

Leave space between vehicles so each one can be seen from the front and side. If the shelf becomes crowded, rotate the display rather than adding another layer in front. A seasonal beach scene in summer and a more heritage-focused VW line-up later keeps familiar models feeling fresh.

Display less, but display it better.

Keeping Your Models Pristine and Growing With Purpose

Use a soft brush or microfibre cloth for routine dusting. Avoid harsh chemicals, which can affect paint, decals and plastic parts, and handle models with clean hands or suitable gloves when you're working on delicate areas. Keep spare pieces in their original boxes and store them in a stable, dry place rather than a hot shed or damp garage.

Direct sunlight is the enemy of a bright display. Position cabinets away from strong windows, and check models occasionally for dust, loose parts or colour changes. If a model has moving components, don't force them. A gentle inspection is safer than turning a small fault into a broken hinge.

Growing with purpose means revisiting your theme when it starts to drift. You might decide to complete a Samba Bus colour set, add only Australian-market icons or concentrate on one scale for a new cabinet. Sharing the collection at a show, swap meet or online community can be just as rewarding as finding the next model.

The Beetle offers a powerful collecting story. Volkswagen's official history records an 80-year run, series production beginning in 1945, and more than 23 million Beetles sold worldwide, making it the most-produced car on a single platform. Explore that heritage through Volkswagen's official Beetle history.


Browse the licensed Volkswagen diecast range at Volkswagen Memorabilia to find Kombi Samba Bus models, Beetles and themed VW memorabilia for your collection or a thoughtful gift. With local stock and friendly weekday support, it's a practical place to choose a model that fits your story, your shelf and your love of classic Volkswagens.

Best Diecast Models: Top Picks for VW Lovers in 2026

At a sunny Australian car show, the hard part isn't spotting a gorgeous Beetle or Kombi. It's choosing the miniature version that deserves a place beside your books, tools or treasured VW memorabilia. One collector might reach for a large, highly detailed display piece, while another needs a compact model that fits neatly on a desk. The best diecast models aren't just the biggest or most expensive. They're the ones that match your space, your taste and the Volkswagen story you want to keep close.

Introduction to the Best Diecast Models

Classic Volkswagens still start conversations. A Beetle's curved roof, a Samba Bus's bright paint and a Kombi's split-window profile bring the character of Volksfest or the VW Nationals to a display shelf.

The appeal has history as well as nostalgia. Diecasting as a manufacturing process emerged in the early 19th century, and toy makers adapted it to miniature cars in the early 20th century. The diecast boom gathered pace during the post-war 1950s and 1960s, before a quieter period through the 1970s and 1980s. The category enjoyed a renaissance in the mid-1990s, helped by major brand relaunches. Diecast Toyz Australia now advertises 3,000+ model race cars, showing how established collecting has become locally.

For Australian VW collectors, licensed replicas carry meaning beyond their badges. A well-made Volkswagen Beetle or Kombi model can recall a family road trip, a surf memory or a real car you still hope to own. It can also suit a particular display: a compact licensed model for a crowded cabinet, or a larger piece where body lines and period details deserve attention.

Choose by scale utility and display value first, then check authenticity, construction and finish. That approach helps separate a handsome shelf piece from a model that will genuinely earn its place.

Choosing the Right Diecast Scale

Scale affects nearly everything, from the shelf you'll need to the amount of detail you can enjoy. Australian collector guidance describes 1:43 as a global standard and a popular local choice, while 1:18 and 1:24 suit collectors who prioritise detail and have more display room. 1:64 works well for compact or larger themed collections. Hearn's Hobbies explains the common scale options, including approximate lengths for several formats.

An infographic comparing the sizes and features of 1:18, 1:24, and 1:32 scale model cars.

Scale Approx. Length Detail Level Best For
1:18 25–30 cm Highest display detail Feature shelving and serious centrepieces
1:24 16–20 cm Strong detail with manageable size Balanced collections and gift displays
1:32 Approx. 14–16 cm Compact, practical detail Smaller shelves, desks and limited spaces

A 1:18 Kombi gives the bodywork, cabin and graphics more visual presence. Larger models are also more likely to include opening doors, bonnets or other functional features, although the exact specification depends on the manufacturer. The trade-off is straightforward: one large model can occupy the space of several smaller cars.

A 1:24 Volkswagen Beetle model often hits the sweet spot for collectors who want recognisable detail without giving an entire shelf to one car. It's large enough to appreciate the roofline, bumpers and interior treatment, yet easier to combine with another classic VW.

For a tighter display, 1:32 offers a sensible compromise. It won't provide the same feature fidelity as a large collector-grade replica, but it can work beautifully in a themed arrangement with a Beetle, Kombi and Samba Bus. If you're comparing more options, this guide to 1:18 diecast models provides a useful starting point for matching size with your available room.

Practical rule: Choose the largest scale your display can comfortably handle, not the largest model your enthusiasm can justify on the day.

The Allure of VW Kombi and Beetle Models

The Beetle and Kombi have earned their place in miniature because their shapes are instantly recognisable. A sports car can impress with speed and stance, but a classic Volkswagen often carries a more personal story. It suggests family holidays, coastal weekends, flower-power colour schemes and the easy-going freedom associated with the air-cooled VW scene.

A miniature model of a vintage light blue Volkswagen Beetle next to a two-tone Volkswagen bus.

The Kombi's Australian history adds another layer. Volkswagen's first Type 2 vehicles arrived in Australia in 1954 as CKD kits delivered to Martin & King in Clayton South. Local assembly used Australian upholstery, tyres, paint and some mechanical components, and Volkswagen took over local assembly four years later. Retro Rides Australia covers this local history in its Kombi buying guide.

Globally, Volkswagen sold 4.5 million Kombis since 1950, and the first Type 2 pickups were made in September 1952 before sales began in Australia in 1954. Club VeeDub Australia records the Kombi's production and arrival story. Those details help explain why a Kombi diecast Australia collector isn't just buying a colourful van. They're choosing a small representation of a vehicle with genuine local heritage.

Why these shapes work so well in a collection

A Beetle makes a strong single display because its silhouette reads clearly from across a room. A Samba Bus adds more visual drama through its split-window styling, roof details and two-tone paint possibilities. Together, the two create an instant period display, especially when the models share a scale and complementary colours.

That's also why these replicas make reliable gifts. You don't need to know every technical detail of the recipient's collection. If they love classic Volkswagens, a carefully licensed Beetle or Kombi usually connects with the memory first and the specification second.

What Makes a Diecast Model Collectible

A collectible model needs more than a familiar badge. Strong buying decisions combine official licensing, transparent construction and accurate proportions. Australian specialist retailers describe collector-grade replicas as authorised by vehicle manufacturers, based on production designs and finished with detailed paint and graphics. Australian Car Collection outlines these qualities in its licensed model range.

Start with authenticity

Check that the listing identifies the model as officially licensed. Licensing indicates that the maker has worked from approved design references rather than adding a familiar-looking badge to a generic body. For an Australian Volkswagen collection, inspect the front emblem, body shape, wheel design, trim and graphics. Those details decide whether a Beetle or Kombi feels convincing at its chosen scale.

Look beyond the word metal

Many diecast models combine diecast metal with plastic components. Plastic suits glazing, bumpers, interiors and fine trim, while a metal body supplies weight and structure. The practical test is clear product information. The seller should state the materials, dimensions and scale without leaving buyers to guess. An Etsy Australia search for rare diecast shows scale-specific dimensions and mixed material construction in current listings.

Match quality to the role

A cabinet centrepiece deserves closer inspection than a small gift model. Check the paint, graphics, wheel alignment, glazing and packaging. Opening doors or bonnets can add enjoyment, though fixed parts may be the better choice for a tidy, durable display.

Rarity may support resale interest, but it is a poor sole reason to buy. Australian collectables coverage notes that rare diecast pieces can exceed AUD 1,000 on eBay Australia, while die-cast models commonly sit in the AUD 80–150 range, with premium replicas priced considerably higher. Hobbyco discusses Australia's collector market and rare items. Treat those figures as market context, not a promise of future value. Condition, packaging, authenticity and demand still shape what a model is worth.

Display and Storage Tips for Collectors

A beautiful model can lose its impact when dust gathers in the window frames or sunlight fades the paint. Displaying diecast well is mostly about controlling the environment and making the model easy to enjoy without handling it constantly.

Build the display around the car

Use a stable shelf or enclosed cabinet, and leave enough room to remove a model without catching its mirrors or aerials. Glass or acrylic protection helps keep dust away, while a simple backing board can make light-coloured Beetles and Kombis stand out.

A hand placing a silver Porsche 911 GT3 RS diecast model into a three-tiered glass display case.

Protect the finish

Keep models away from direct sunlight. UV exposure can fade paint and affect clear plastic over time. Dust with a soft brush or clean microfibre cloth, and support the model from its base rather than lifting it by a mirror, roof rack or other fine detail.

Organise with intention

A collection looks more considered when you choose a simple organising principle:

  • By scale: Keep 1:18, 1:24 and smaller models together so the display feels visually consistent.
  • By story: Pair a Beetle with a Kombi or Samba Bus to create a classic road-trip theme.
  • By colour: Group pastel, two-tone or Flower Power-inspired finishes for a lively shelf.
  • By era: Arrange models around the heritage of the actual vehicles rather than only their brand.

For collectors expanding beyond a basic shelf, these display cases for models can help create a cleaner, more protected presentation. Keep original boxes and paperwork in a dry place, even if you prefer displaying the cars outside their packaging.

Where to Buy Quality VW Diecast Models in Australia

At a sunny car show, a small Beetle can attract just as much attention as a larger display model. Buying locally makes that choice easier. Local stock, faster shipping and accessible support let Australian collectors check scale, dimensions and delivery details before committing to an overseas listing with limited information.

Start with a retailer that understands the difference between a novelty car and a licensed collector piece. Check the stated scale, product dimensions, manufacturer, materials and photographs from several angles. A 1:18 Kombi offers stronger shelf presence, while a smaller Beetle may suit a tighter display or a growing collection.

The range should also match the way you collect. A single Samba Bus can work as a nostalgic gift, while a Beetle, Kombi and surf-inspired van create a more personal scene. Mixed packs suit families, small retailers and collectors who enjoy variety. Buyers building a focused display may get more satisfaction from one carefully selected model with the right colour, body style and scale.

Australia also has an active resale market, giving collectors more ways to find older or harder-to-source pieces. Search classified listings for condition, missing parts, original packaging and seller photographs. Ask about postage protection before buying, especially for models with delicate mirrors, aerials or roof accessories. Browse diecast models in Australia to compare licensed Kombi, Samba Bus and Beetle options by scale, finish and intended display location.

That comparison is more useful than a generic brand ranking. The best model is the one that fits your shelf, budget and collecting story, then still makes you smile each time you walk past it.

Volkswagen Memorabilia brings together licensed VW diecast, including classic Kombi and Samba Bus replicas, Beetle models and colourful surf-inspired pieces, with local support for Australian collectors and gift buyers. Visit Volkswagen Memorabilia to find a miniature Volkswagen suited to your collection, display and the memories behind these cars.

Banksia Coastal Cushions: Your Guide to Aussie Garden Gems

A coastal garden can be a tough place to earn your keep. Sandy soil dries quickly, salt-laden winds batter exposed foliage, and plants that look excellent at the nursery can struggle once they meet the full force of an Australian shoreline. Banksia spinulosa ‘Coastal Cushion’ offers a more practical answer, combining a low, spreading form with the flowers and wildlife value gardeners love about banksias.

This isn't a tall feature tree competing with the view. It's a compact native for borders, slopes, path edges and open coastal beds, where horizontal coverage matters more than height. Choose the right position, give it sharp drainage and establish it carefully, and this banksia can become one of the most useful plants in a difficult garden.

Why Banksia Coastal Cushions Are Perfect for Aussie Gardens

A coastal garden can look finished at the nursery, then expose every weakness once salt-laden wind and free-draining sand arrive. The right plant needs to handle those conditions while still earning its space in the design.

Banksia spinulosa ‘Coastal Cushion’ suits that job because its low, spreading growth habit covers ground without creating a tall wind-catching feature. The Australian Plants Society notes that Banksia spinulosa occurs through coastal heath, shrubland, sandstone outcrops and sandy soils across eastern Australia, including parts of New South Wales and Queensland, in its guide to eastern Australian coastal banksias.

A coastal landscape featuring vibrant banksia flowers in the foreground overlooking a sandy beach and ocean waves.

That habit gives it several practical uses. It can soften exposed borders, settle visually into sandy beds and provide low foliage where an upright shrub would block a view. Its dense cover also makes a planted area look more deliberate than scattered, widely spaced specimens.

Flowering brings the recognisable banksia character, with golden blooms adding colour and wildlife interest without requiring the footprint of a large shrub. Use it around paths, on gentle slopes, beside driveways or through open coastal planting schemes.

Treat it as a coastal groundcover-style shrub. It performs best with free drainage and good light, and it still needs sensible establishment care before it can cope confidently with a demanding site.

Understanding Banksia Coastal Cushion Growth and Size

A “small banksia” label can be misleading if you plan only for height. Allow about 0.5–0.8 metres in height and 1–1.5 metres in width, as recorded in Kuranga Nursery's plant reference. The width often determines whether it fits comfortably beside a path, wall or neighbouring shrub.

Coastal Cushion develops a dense, spreading cushion of foliage held close to the ground. At maturity, it usually sits around knee to lower-thigh height for many adults, while spreading across a substantial part of a border. Measure the planting space for the full mature width, not just the size of the pot.

An infographic detailing the growth characteristics of the Banksia Coastal Cushion plant, including height, width, and habit.

Why the spreading form matters

The rounded, low canopy presents less upright surface than a tall shrub, helping it sit neatly in open coastal gardens. Its foliage also keeps visual coverage across the soil, making it useful for exposed borders, sandy beds and gentle slopes. It softens an edge without blocking windows, views or driveway sightlines.

Use the mature footprint when planning:

  • Border spacing: Leave room for the mound to broaden without narrowing a path.
  • Slope coverage: Plant across the contour to create a connected sweep of foliage.
  • Low screening: Group several plants for texture and definition. Choose a taller species when privacy is the main goal.
  • Mixed beds: Set lower companions in front and taller banksias behind to build layers.

This compact scale is a practical advantage. Coastal Cushion brings banksia flowers and native character to smaller gardens while remaining manageable where planting space is limited. Its broad, low habit also suits the open structure common in Australian coastal planting, provided the soil drains freely and the plant receives good light.

Comparing Banksia Coastal Cushion to Other Coastal Banksias

Coastal Cushion suits planting plans that need banksia character without a tall shrub taking over the view. The broader Banksia spinulosa offers more height and stronger upright structure, while Banksia integrifolia is better suited to feature planting, shelter or screening. Choose the compact cultivar for low texture, sideways spread and coverage along exposed edges.

Variety Height Spread Best For
Banksia spinulosa ‘Coastal Cushion' About 0.5–0.8 m About 1–1.5 m Low borders, groundcover-style planting and exposed edges
Banksia spinulosa Typically 1–3 m, depending on form Typically 1–3 m, depending on form A larger native shrub with upright flower displays
Banksia integrifolia prostrate form Low-growing Broad-spreading Wide banks, sandy areas and large-scale groundcover
Banksia integrifolia Taller shrub or tree form Broad canopy Feature planting, shelter and screening

The Coastal Cushion measurements are supported by Australian native plant nursery guidance. The Australian Plants Society outlines the species' eastern distribution and coastal habitat. Flowering time still depends on climate, exposure and plant maturity, so local nursery advice is more useful than a fixed calendar.

The practical trade-off is scale. Coastal Cushion gives you a lower, wider planting that keeps sightlines open and works along paths, sandy beds and garden edges. A standard Banksia spinulosa brings greater height and presence, but needs more room and can overpower a small border.

Choose Coastal Cushion where lateral coverage matters. Choose a taller banksia for a backdrop, visual anchor or shelter. Combining them works well when the compact cultivar sits in front, allowing its flowers and rounded form to remain visible.

Where and How to Plant Banksia Coastal Cushions

Start with the site, not the planting hole. Coastal Cushion performs best in full sun to partial shade, with strong light encouraging a dense shape and better flowering. Well-drained sandy soil is ideal, and a raised or gently sloping position is safer than a low pocket where water can linger after heavy rain.

A reliable planting sequence

  1. Mark the mature spread. Use the expected width of 1–1.5 metres to judge spacing from paths, walls and other shrubs.
  2. Prepare a broad hole. Loosen the surrounding soil so new roots can move outward, but don't create a rich, water-holding pocket in otherwise sandy ground.
  3. Set the root ball at the correct level. The top of the root ball should sit level with the surrounding soil, never buried beneath it.
  4. Backfill with the excavated soil. Firm it gently around the roots, removing large air gaps without compacting the bed.
  5. Water thoroughly. A deep drink settles the soil around the root ball and gives the plant a proper start.
  6. Protect the establishment period. A temporary screen or nearby windbreak can reduce stress while the plant develops roots.

Avoid placing it in a frost hollow just because it's labelled hardy. Cold air collects in low areas, and a well-drained upper position usually gives a young plant a better chance. For a relaxed coastal styling touch around the garden, coastal home accessories can echo the colours and atmosphere of the planting without competing with it.

A gardener wearing gloves planting a small, lush green coastal cushion shrub into sandy garden soil.

Care and Maintenance for Healthy Coastal Cushion Banksias

The first stage needs the most attention. Water thoroughly when the plant is establishing, then allow the soil to drain rather than keeping it constantly wet. Mature plants are more self-reliant, but prolonged dry weather, reflected heat and wind exposure can still increase demand.

Feed cautiously. Banksias are adapted to relatively lean soils, so heavy fertilising can produce soft, excessive foliage at the expense of a balanced plant. If feeding is needed, use a product specifically suited to Australian natives and follow its label rather than applying general-purpose fertiliser generously.

Practical rule: Improve drainage before reaching for fertiliser. A healthy root environment matters more than lush, forced growth.

Prune lightly after flowering or when the plant needs reshaping. Remove damaged stems and shorten uneven growth back to a healthy point, while avoiding harsh cuts into old, leafless wood. Leggy growth usually points to insufficient light, excessive competition or a position that's too sheltered and fertile for the plant's natural habit.

Watch for foliage changes, pest activity and sudden dieback, particularly after periods of wet weather. Good air movement, restrained watering and clean garden hygiene prevent many problems. Keep mulch away from the stem, and refresh it carefully so it protects the root zone without creating a damp collar.

Design Ideas and Garden Applications for Banksia Coastal Cushions

The strongest use for Coastal Cushion is to let it occupy the space that taller shrubs leave exposed. Along a sandy slope, several plants can create a broad green rhythm. Beside a path, the rounded foliage softens the edge without forming a wall. In a mass planting, repeated cushions produce texture while the flowers add warm yellow accents above the foliage.

A scenic garden path lined with vibrant Banksia bushes and coastal plants on a sandy trail.

Combinations that feel at home

Pair the cultivar with plants that share its preference for light and free drainage. Telopeas can provide a stronger vertical flower statement, grevilleas add varied foliage and nectar-rich colour, and coastal wattles contribute a lighter, more open texture. Silver, grey-green and deep green foliage create a convincing coastal palette, especially when set against sandy mulch or stone.

Containers are another option for patios and exposed decks, provided the pot drains freely and the plant isn't left sitting in a saucer of water. Use a quality native-friendly mix, give the root ball room to develop and expect container plants to need closer monitoring during hot, windy spells. A few dried palm leaves can complement a coastal display indoors, while the banksia remains the living focal point outside.

The flowers do more than decorate the bed. Banksias provide nectar that can draw native birds and pollinating insects, giving a small garden a stronger connection to the surrounding area.

A short visual guide can help when you're planning the relationship between path, foliage and flower height:

Where to Buy Banksia Coastal Cushions in Australia

Buy from a nursery that regularly handles Australian natives, especially if you're planting in a coastal or exposed district. Local availability changes by region and season, but Banksia spinulosa ‘Coastal Cushion' is widely propagated, so a reputable native plant nursery may be able to source it even when it isn't on the bench that day.

Inspect the plant before you commit. Look for:

  • Healthy foliage: Leaves should be firm and evenly coloured, without widespread browning, spotting or obvious pest damage.
  • A stable root ball: The plant should hold together when removed from its pot, but roots shouldn't be tightly circling the container.
  • Clean potting media: Avoid stock sitting in sour, waterlogged or persistently saturated mix.
  • Balanced growth: A compact, branched plant is generally a better starting point than one that's tall, weak and stretched towards limited light.
  • Accurate labelling: Confirm that the label identifies Banksia spinulosa ‘Coastal Cushion', not just a generic dwarf banksia.

Ask the nursery about the plant's growing conditions before taking it home. A specimen raised in bright light and free-draining media will usually transition more smoothly than one moved abruptly from a protected bench into salt wind. If you're buying during a hot or windy spell, transport it upright, keep the foliage protected and plant it promptly rather than leaving it in a sealed vehicle.

There's a particular satisfaction in watching a modest plant settle into a difficult coastal bed, then broaden into the cushion that first attracted you. Choose carefully, plant for drainage and give the roots time to establish. The reward is a durable native with flowers, texture and a genuine eastern-Australian story.


If you enjoy the relaxed coastal character of banksias, explore Volkswagen Memorabilia for VW-themed gifts, diecast models and beach-inspired home décor. It's a friendly place to find a small piece of classic Australian surf culture to complement your garden and coastal living space.

Diecast Model Cars: The Collector’s Guide to VW Models

You're standing beside a sunny Australian show field, eucalyptus in the air, while a restored Kombi burbles past and collectors compare paintwork, wheels and trim. On a nearby table, a little Samba Bus catches the light. It's small enough to hold in one hand, yet it carries the same sense of travel, freedom and character as the full-size Volkswagen beside it.

That's the appeal of diecast model cars. They're not merely toys. A well-made model preserves the shape, colours and details that make a Beetle, Kombi or Samba Bus memorable, while giving you a practical way to enjoy VW history at home. Whether you're building a display around a real car, choosing a birthday present or starting a collection from scratch, the right model should feel connected to the story behind the vehicle.

Welcome to the World of Diecast Model Cars

A good collection usually starts with a personal memory. Perhaps you rode in a Kombi during family holidays, owned a Beetle, or spent show day admiring a lowered Type 2 with polished trim. The model you take home doesn't need to be rare to matter. It needs to remind you why the vehicle has stayed with you.

A collection of assorted diecast model cars displayed on a wooden table next to a large model van.

Australian collecting has a strong practical side. Display space is rarely unlimited, shipping can become awkward with larger boxes, and imported stock may involve uncertainty around availability, delivery and final cost. That's why scale, construction and licensing deserve attention before colour or packaging.

A useful collecting rule: buy the model you'll enjoy seeing every day, not simply the one that looks impressive in an online listing.

The local scene has depth behind it. Diecast Distributors Australia says it began in 1998 as the Australian distributor for Matchbox Collectibles, added Hot Wheels Elite within 12 months, and later expanded beyond 1,500 individual SKUs. Its DDA Collectibles brand now holds more than 150 tooling sets across scales from 1:64 to 1:18, evidence of a sector that has grown from importing branded products into broad wholesale distribution and local product development. Diecast Distributors Australia's market history puts that progress into perspective.

For a VW enthusiast, the best collection often mixes nostalgia with discipline. Choose a theme such as air-cooled Volkswagens, Australian heritage, surf culture or favourite show colours. Then let each addition earn its place.

Understanding Diecast Scales and Sizes

Scale tells you how large the model is compared with the actual vehicle. A 1:18 model is one-eighteenth the size of the original, while a 1:24 model is one-twenty-fourth. Collector guides generally place 1:18 models at about 9 to 12 inches long and 1:24 models at roughly 6.5 to 8 inches, with the larger format allowing more elaborate interior and engine-bay treatment. This scale guide explains the practical difference between the two formats.

The familiar Australian favourite is 1:43. Local hobby guidance describes it as the country's most popular diecast size, usually around 11 cm long, although the finished length depends on the actual vehicle. A compact 4.2 metre hatchback becomes about 9.8 cm at 1:43, while an 11 metre bus becomes about 25.6 cm. Anthony's Diecasts' model car size guide provides those comparisons and explains why the same scale can create very different shelf footprints.

An infographic comparing the sizes, details, and dimensions of 1:18, 1:24, and 1:43 scale diecast model cars.

Choosing the right format

Scale Best suited to Main advantage Main compromise
1:18 A statement display or detailed premium piece Strong presence and room for fine features Takes more shelf and storage space
1:24 A balanced display with several larger models Useful middle ground between detail and footprint Less expansive than 1:18
1:43 Themed collections, gifts and compact shelving Efficient storage with convincing detail Smaller parts need careful handling

A 1:43 Beetle works beautifully on a bookcase, desk or cabinet where you want several vehicles together. A 1:18 Kombi, by contrast, becomes the centrepiece. Before buying, measure the shelf depth, allow room for the packaging and remember that a long-wheelbase vehicle or bus can occupy considerably more space than a small car in the same nominal scale.

For a VW display, consistency matters more than chasing one “best” size. A row of 1:43 Volkswagens feels organised, while a single large Samba Bus can anchor a mixed arrangement. Explore the 1:18 diecast scale range when you want a feature model, and choose smaller formats when the collection itself is the visual story.

Materials and Build Quality in Diecast Models

The alloy beneath the paint affects how a model feels, holds detail and ages. Australian diecast and die-casting sources identify zinc and aluminium as core metal families. Zinc alloys generally produce heavier-feeling body shells with good dimensional stability, while aluminium is often selected where strength-to-weight, corrosion resistance and thermal conductivity are important. The Australian die-casting market overview also reports that aluminium die castings held a 50% share of the local components market in 2025.

Collectors should inspect more than the word “diecast” on the box. A zinc-die-cast body can support crisp grille lines, sturdy panels and a reassuring weight in the hand. Aluminium-based or mixed-material construction may reduce weight, but thin sections and surface finish can behave differently during production.

What to check before buying

  1. Body material: Look for clear information about zinc-die-cast bodywork, lighter alloy construction or mixed materials.
  2. Paint finish: Check whether colour sits evenly around door edges, roof gutters and wheel arches. Uneven coverage is more distracting on a bright Kombi.
  3. Glazing and trim: Clear windows, separate mirrors and cleanly fitted bumpers add realism, especially at 1:43.
  4. Tooling detail: Grilles, hubcaps, headlights and chassis features should look sharp rather than soft or moulded into a single flat surface.
  5. Licensing: Official Volkswagen branding supports authenticity and makes the model a stronger choice for a heritage-focused collection.

The practical takeaway is simple. Scale alone doesn't determine quality. Alloy selection, tooling complexity, paint application and assembly all matter, so compare the actual finish rather than assuming a larger model is automatically better.

The Heart of the Collection, Volkswagen Diecast Models

A VW model earns its place through character. The Beetle's rounded roof and friendly face are instantly recognisable, while the Kombi's upright body, split-window heritage and open-road associations invite a different kind of nostalgia. A Samba Bus adds another layer, with its bright colour schemes and holiday feeling making it a natural centrepiece for a display.

Volkswagen's Australian story gives these shapes extra meaning. Beetle assembly began at Clayton, Victoria, in 1954, using CKD kits, and Australian Beetle kit assembly ended in 1976. This Australian assembly history makes a Volkswagen Beetle model more than a generic classic car souvenir for local collectors. It connects the miniature vehicle to a real production chapter close to home.

The Type 2 entered production in March 1950, and Volkswagen had sold 4.5 million Kombis worldwide by the time the Australian club history was written. Australian assembly began in the 1950s, while Clayton-built Kombis were later produced largely from local parts between 1959 and 1968. Club VeeDub's Type 2 history provides valuable context for collectors drawn to Australian Kombi heritage.

A light blue Volkswagen Beetle next to a red and white Volkswagen Type 2 bus diecast model.

Collecting with VW culture in mind

At Volksfest, VW Nationals or a local Surf Show and Shine, authenticity matters. Enthusiasts notice whether the badge, body line, wheel style and colour belong to the vehicle's era. Officially licensed models are therefore a sensible foundation, particularly when the collection celebrates a specific Volkswagen rather than just a general retro look.

The Kombi also has a distinctly Australian emotional register. Local enthusiasts assembled and used these vehicles for work, holidays and surf trips, helping the Type 2 become part of the country's motoring identity. CarsGuide's look at Australian Kombi culture captures why the model continues to turn heads at community events.

A good display might pair a Volkswagen Beetle model with a Samba Bus, then add a colour or theme that reflects your own car. The result feels curated rather than crowded.

Top Brands and Where to Buy in Australia

Brand reputation helps narrow the field, but inspection still matters. A respected manufacturer may offer different finish levels across its range, while a smaller licensed release can reproduce a particular Volkswagen variant with surprising accuracy. Choose the vehicle and scale first, then compare construction, paint, glazing, wheels and packaging.

Australian collectors benefit from established local distribution. Diecast Distributors Australia began in 1998 and now lists more than 1,500 SKUs alongside over 150 DDA Collectibles tooling sets. Its range covers formats from 1:64 to 1:18, although 1:43 remains a practical choice for many Australian VW displays because it balances detail with shelf space.

Local buying versus imported stock

Buying route Where it works well Watch carefully
Australian retailer Local stock, domestic dispatch and easier support Popular colours may sell through
Imported listing Unusual variants and harder-to-find releases Shipping, packaging damage and final landed cost
Mixed pack Gifts, starter collections and variety Less control over every colour or model
Single premium model Focused displays and special occasions Higher entry price and greater expectation of finish

Domestic stock usually means quicker delivery, simpler returns and fewer surprises when a parcel arrives. Imported listings can fill gaps in a collection, especially for uncommon Kombi, Beetle or limited-edition variants. Check the seller's measurements, packaging method and total delivered cost before comparing prices. Currency conversion and international postage can change the apparent bargain.

Australian Etsy listings show Volkswagen die-cast items around AU$60.81 to AU$67.76, while rare listings range from roughly AU$22.84 to AU$110.80. The Australian Volkswagen die-cast marketplace demonstrates why condition, licensing, rarity, scale and local availability belong in the same decision.

For a wider comparison of manufacturers and finish levels, consult the best diecast car brands. The strongest purchase has clear provenance, sound packaging and details that still matter after the initial excitement fades.

Caring for and Displaying Your Diecast Collection

Australian conditions can be hard on a display. Strong sunlight may fade paint, humidity can affect metal and plastic components, and temperature swings can stress packaging and adhesives. A model doesn't need elaborate museum treatment, but it does benefit from a stable, clean environment.

Keep the main display away from direct windows, heaters and damp areas. A cabinet with doors reduces dust, while a shallow riser lets rear vehicles remain visible without forcing you to pack the shelf tightly. For open shelving, use a soft detailing brush and a clean microfibre cloth. Don't spray cleaner directly onto the model, especially near glazing, decals or moving parts.

Display habit: rotate the models you handle most, and keep scarce or fragile pieces behind a closed door.

Retain boxes, inserts and any paperwork. Original packaging helps protect mirrors, aerials and delicate trim during a move, and it preserves the model's identity if you later sell or trade it. Store boxed models flat where possible, without placing heavy items on top.

For a more polished setup, consider display cases for models. The best case isn't necessarily the largest. It's the one that gives each Kombi, Beetle or bus enough breathing room to be seen clearly.

Start Your Diecast Journey Today

A meaningful collection doesn't need to begin with a rare release or a full cabinet. Start with the Volkswagen that means something to you, whether that's a Kombi Samba Bus, a classic Beetle or a bright Flower Power variant, then build around its story. Australian collectors can also choose local stock and fast shipping, which makes it easier to buy thoughtfully, find gifts and avoid unnecessary import uncertainty.

Licensed Volkswagen diecast models turn familiar shapes into lasting display pieces. They suit a show enthusiast, a classic car owner, a nostalgic traveller or anyone who still believes a Kombi makes an ordinary day feel like a holiday.


Volkswagen Memorabilia brings together licensed Volkswagen diecast models, Kombi Samba Bus pieces, Beetle designs and VW memorabilia collectibles for displays and thoughtful gifts. Browse the curated range and visit Volkswagen Memorabilia to find the model that belongs on your shelf.

Volkswagen Roof Bars Fitment and Buying Guide Australia

You've packed the boards, bags and camping gear, then opened the boot and realised the holiday still needs more room. That's a familiar moment for Australian VW owners, whether the vehicle is a modern Golf heading down the coast or a much-loved Kombi carrying the relaxed spirit of a surf trip.

A woman and a man loading surfboards and bags onto their blue and grey Volkswagen vehicles parked outdoors.

Introduction to Volkswagen Roof Bars and Why They Matter

You're at a sunny weekend show, admiring a Beetle and a Kombi, when your own Volkswagen needs room for bikes, boards or holiday luggage. Volkswagen roof bars turn unused roof space into a practical part of the vehicle. They also form the starting point for a wider transport system, supporting a roof box, bicycle holder, or ski and snowboard carrier. Volkswagen Australia describes roof bars as a base for these additional attachments.

The bars are only one part of that system. Fittings, attachments and cargo must suit one another, just as a trailer and towball need matching specifications. A setup designed for a Tiguan with raised rails may not suit a Golf with fixed mounting points or another roof arrangement. Choosing poorly can mean wind noise, extra height, incompatible accessories, or an unsafe load.

This guide helps everyday drivers, touring families, adventurers and VW enthusiasts make a sound choice. It explains the base system, mounting styles, vehicle compatibility, load limits, installation options and safety checks. It also connects practical ownership with Volkswagen heritage. The affection people have for a real Kombi or Beetle often appears in a carefully displayed diecast model, where scale, shape and period details matter. The same eye for authenticity helps when checking fitment on a full-size car.

Your needs should guide the system. A driver carrying bikes each weekend needs different attachments from someone using a roof box for an annual holiday. A classic Volkswagen owner may prioritise period appearance and paint protection, while a modern VW driver may prefer a quiet, low-profile aluminium design.

Work through five checks in order: roof type, exact fitment, approved rating, compatible attachments, then who fits them.

How Volkswagen Roof Bars Work as a Base System

Think of roof bars as a power board for transport accessories. The power board doesn't perform every job itself. It provides organised connection points so different devices can work from one dependable base. Roof bars do something similar across the roof of a Volkswagen.

A diagram illustrating how Volkswagen roof bars act as a base system for various roof attachments.

The basic arrangement has several parts:

  • Feet or towers connect the system to the vehicle's roof points, rails or gutters.
  • Cross bars run from side to side and provide the load-bearing platform.
  • T-slots in some aluminium profiles allow compatible accessories to slide into an enclosed channel.
  • Attachment hardware joins a roof box, bike holder or other carrier to the bars.

The mounting point determines which feet and fittings you need. A vehicle with fixed points beneath small covers requires a different arrangement from one with raised roof rails. Flush rails also need their own compatible feet because the bar must grip the rail without relying on a visible gap beneath it.

The key idea: roof bars create the foundation, but the vehicle's approved roof load remains the governing limit.

That means you can't judge capacity by looking at the bar alone. The total working load includes the bars, their feet, the attachment and the items being carried. If a roof box is already heavy, the amount left for luggage will be lower than the vehicle's maximum roof rating.

The same principle applies to a bicycle holder. The bar may accept the holder, but the holder must be suitable for the bicycle, and the complete assembly must remain within the vehicle's approved limit. Every connection should be locked, tightened and checked before travel.

Volkswagen Australia positions its genuine cross bars as part of this broader system, with support for roof boxes, bicycle holders and ski or snowboard holders. That gives owners a useful way to think about an upgrade. You're not buying a single-purpose accessory. You're choosing a platform that may need to support different travel, sporting or touring equipment over time.

Types of Volkswagen Roof Bars and Mounting Styles

The roof on your Volkswagen determines the starting point. Once you know whether it has fixed points, raised rails, flush rails or another approved mounting arrangement, you can compare bar profiles and appearance with far less guesswork.

Fixed-point systems attach to designated points in the roof, often beneath small covers. They can give a tidy factory-style appearance when removed, but the feet and spacing must match the vehicle exactly. Raised-rail systems grip the rails that stand above the roof, offering flexible positioning within the manufacturer's limits. Flush-rail systems attach to rails that sit close to the roof and usually require dedicated low-clearance feet.

Mounting Style Best For Height and Aero Benefit
Fixed points Vehicles with dedicated mounting locations Neat appearance, with height determined by the approved feet and bar profile
Raised rails Vehicles with visible rails and varied accessory needs Flexible positioning, though the complete setup may sit higher
Flush rails Modern vehicles where a close-fitting look matters Lower visual height and a streamlined installation
Integrated or factory-style rails Owners seeking a matched appearance Designed around the vehicle's roof architecture, subject to exact fitment

The bar itself also affects daily use. Aluminium aerodynamic profiles often have shaped surfaces intended to reduce turbulence and present a cleaner finish. Steel bars can offer a traditional, sturdy appearance, while an enclosed T-slot can make accessory fitting less fiddly by accepting compatible sliding hardware.

A low-profile design illustrates why height deserves attention. An Australian retailer lists a Vortex StealthBar system that sits 35 mm above factory raised rails, a detail that helps explain the appeal of close-fitting aerodynamic bars in everyday driving. See the Australian Volkswagen roof-rack listings and the StealthBar detail.

Lower height may help with garage clearance and visual neatness, but it doesn't automatically make a system suitable. You still need enough space for the attachment clamps, the load and the vehicle's roof shape. A roof box can add substantial height even when the bars themselves are compact.

A sleek profile is a useful preference, not a substitute for verified fitment.

If your VW carries specialist equipment, check the attachment before choosing the bars. Some accessories fit around the bar, while others connect through a T-slot. The right combination will be secure, compatible and easy enough to use that you won't avoid fitting it when the next coastal weekend arrives. For owners considering other vehicle-mounted equipment, a practical example of planning around vehicle structure appears in this Fiamma F45 awning installation guide.

Model Compatibility and Load Limits You Must Check

A roof-bar search starts with the exact Volkswagen, not simply the badge on the grille. Confirm the model, year, body style and roof type before comparing products. A Golf, Tiguan, Touareg, Amarok, Caddy or Transporter can require different mounting hardware, spacing and approved limits. The same careful identification helps collectors too: a diecast Kombi may share the family story, but its scale and display accessories tell you nothing about a real vehicle's load rating.

Australian roof-bar listings cover models including Amarok, Caddy, Golf, Tiguan, Touareg, Transporter and Kombi. That broad range reflects Volkswagen's wider transport ecosystem, from family cars and work utes to the vans that carried surfboards, camping gear and show equipment. It does not mean one bar set can move between every model. Australian Volkswagen roof-bar listings show the range of model-specific applications.

Match the system to the vehicle

Begin with the roof architecture. Identify raised rails, flush rails, fixed points or another specified mounting position. Then check the product listing for the exact model and year. A product photograph or a broad description such as “VW roof rack” cannot confirm fitment.

One Australian Genuine Accessories listing describes a T-slot aluminium system with a 1,440 mm overall length, 140 mm width and 245 mm height. It also identifies a city-crash-tested design. Those measurements apply to that specified product, rather than every Volkswagen roof-bar system. Review the Australian Genuine Accessories roof-bar specifications.

Calculate the usable load

The figure printed on a bar or carrier is only one part of the calculation. Start with the vehicle's approved roof rating, then subtract the weight of the bars and attachment before adding luggage.

Usable cargo = approved vehicle roof load minus bars minus attachment

Australian accessory information lists an 80 kg load rating for an Amarok roof-bar set and 95.5 kg for VW supporting rods. These examples show why capacity belongs to a particular accessory and vehicle platform. Do not transfer either figure to another Volkswagen without checking its documentation.

Amarok owners should confirm the vehicle-specific limit with a dealer where the documentation is unclear. The governing rule remains simple: the vehicle's approved roof rating governs the complete arrangement. That includes the bars, carrier, roof box, straps and cargo, rather than the luggage alone.

An infographic showing Volkswagen vehicle models and guidance to check roof load limits and bar compatibility.

Before ordering, run through this list:

  • Vehicle details: Record the exact model, year and body configuration.
  • Roof structure: Confirm the mounting style and measure only at permitted points.
  • System specification: Compare bar length, profile, feet, locks and accessory compatibility.
  • Load calculation: Include the bar set, carrier, roof box, straps and cargo.
  • Dealer confirmation: Ask a Volkswagen dealer when the roof rating or fitment remains uncertain.

A spacious roof box can encourage extra packing. Keep heavy items low, distribute the load evenly and secure everything against forward, backward and sideways movement. Owners planning a wider touring setup can also review tie-down rail installation as part of a complete load-management approach.

This video provides a visual reference for the fitting process and accessory arrangement:

Professional vs DIY Installation and Safety Tips

A confident home mechanic may be comfortable fitting roof bars, but confidence should come with the correct tools and a willingness to follow the supplied instructions precisely. A professional fitter makes sense when the roof is unfamiliar, the vehicle has unusual trim, or you'd rather have someone verify alignment and fastening.

Choose the fitting route

DIY fitting usually requires the correct feet, pads, bolts and covers, along with a suitable torque wrench. The bars need to sit squarely, the feet must contact their intended points and the fasteners must be tightened to the manufacturer's specification. Guessing torque by feel can leave a fitting loose or place excessive pressure on the roof.

Professional installation is the safer choice when the system is complicated, the vehicle has been modified or you're unsure how the roof points are accessed. Ask the fitter to explain the load rating, demonstrate the locks and provide any relevant fitting information for your vehicle.

Volkswagen Australia states that genuine accessories fitted at first delivery are backed by a 5-year, unlimited-kilometre warranty from the delivery date. The Australian accessories pages were updated in 2026, showing that roof bars remain an active part of Volkswagen's local ownership offering. Check Volkswagen Australia's current roof-bar and accessory guidance.

A warranty supports the accessory, but it doesn't remove the need to follow the vehicle's load limit and fitting instructions.

Use a repeatable safety check

Before loading:

  • Inspect the contact points: Look for dirt, paint damage, corrosion or displaced pads.
  • Check the locks: Make sure covers and locking mechanisms close properly.
  • Confirm alignment: View the bars from the front and rear to ensure they sit evenly.
  • Recheck fasteners: Use the specified torque rather than relying on hand tightness.
  • Distribute the load: Keep heavier items low and central, then restrain every item.
  • Measure clearance: Remember the new overall height before entering a garage or car park.

Wind changes the way a roof box, surfboard or bundle of luggage behaves. Loose straps can flap against the paint, while a broad load can shift even when it feels secure at the kerb. Drive conservatively, stop soon after setting off to inspect the arrangement, and repeat the check during longer trips.

Remove the bars when you don't need them if the manufacturer permits removal and refitting. Clean trapped road grime, inspect pads and hardware, and store the components where they won't be bent or misplaced. Owners carrying recovery equipment should also consider the fitting details in this high-lift jack bracket installation guide, because every roof and vehicle-mounted accessory deserves the same careful approach.

An infographic illustrating professional and DIY safety guidelines for installing vehicle roof bar accessories.

Volkswagen Heritage From Real Kombis to Diecast Displays

Roof bars belong to the practical side of Volkswagen ownership, but VW culture has always joined utility with character. In Australia, the Type 2 story carries a distinction that collectors often enjoy discussing at shows. The passenger van was marketed as the VW Kombi, while the utes and commercial carriers were known as the VW Transporter. Type 2 vehicles were also assembled from CKD kits with local content in Melbourne from the 1950s through the late 1970s. Read the Australian history of the Volkswagen Kombi and Transporter.

The original-shape Kombi became a worldwide symbol of open-road travel. One Australian automotive source records more than 2.6 million built during its 18-year lifespan, including 725,000 for export markets, while another notes that Volkswagen sold 4.5 million Kombis worldwide since 1950. Explore the production history of the original Kombi.

The Beetle has its own Australian chapter. Volkswagen introduced it locally in 1953, began assembly at Clayton, Victoria, the following year, established Volkswagen Australia Ltd in 1957, and produced the final Australian-assembled Beetle in July 1976. Review the documented Australian Beetle milestones.

That history translates beautifully into a display cabinet. A 1:18 model measures about 25 to 30 cm, while a 1:24 model measures about 16 to 20 cm. Smaller formats include 1:32 at about 12 to 15 cm, 1:50 at about 10 to 12 cm, 1:64 at about 7 to 8 cm and 1:87 at about 5 to 6 cm. Use this diecast scale guide to plan shelf space.

A 1962 Samba Bus model can anchor a coastal-themed shelf beside surf décor, while a Volkswagen Beetle model suits a smaller desk or bedside display. Matching scale across a scene helps the collection feel intentional, even when each piece recalls a different chapter of VW life.

Choosing Your Volkswagen Roof Bars and Next Steps

A good buying decision follows a clear order.

  1. Identify the roof type. Check for fixed points, raised rails, flush rails or the mounting arrangement specified for your VW.
  2. Confirm model-specific fitment. Use the exact model, year and body details.
  3. Check the vehicle roof rating. Treat the approved vehicle limit as the boundary for the complete system.
  4. Choose the profile. Compare aerodynamic aluminium, steel and low-profile options according to height, appearance and attachment needs.
  5. Select compatible accessories. Make sure the roof box, bike holder or other carrier suits the bar profile.
  6. Decide on installation. Fit it yourself only if you have the right hardware, torque information and confidence, otherwise use a qualified installer.

Avoid the common traps. Don't select bars from a photograph alone, don't assume a bar rating applies to another Volkswagen, and don't load the system without including the weight of the bars and attachment. A neat-looking setup is only a good setup when it fits correctly, stays within the approved limit and can be checked easily before every journey.

Once the practical job is done, the enthusiast side can continue at home. A licensed diecast Kombi Samba Bus or Beetle model captures the same touring spirit in a format that fits a shelf, study or coastal display. It's a lovely way to keep the VW story close between club runs, show days and weekend drives.


Volkswagen Memorabilia offers licensed Volkswagen diecast models, including Kombi Samba Bus and Beetle pieces, alongside VW gifts and relaxed coastal décor. Browse the collection, enjoy local stock and fast Australian shipping, and visit Volkswagen Memorabilia to find a display piece that keeps your own VW adventures rolling.

VW Kombi Retro Style Guide for Aussie Collectors

A seafoam Kombi glides past a beach car park, surfboards strapped to the roof and a little salt haze hanging in the morning air. You're standing beside your own display shelf, perhaps dusting a diecast bus or deciding whether that empty wall deserves a framed surf print, and the connection feels obvious. The VW Kombi retro look belongs just as naturally beside weathered timber and linen as it does in a workshop full of polished chrome.

That appeal comes from more than nostalgia. The Kombi carries real Australian working history, coastal travel memories and a design language that still reads clearly at miniature scale. This guide looks at the heritage behind the shape, the details that make a model convincing, and practical ways to build a collection or lived-in room around it.

Rolling Into the Retro Vibe

Byron Bay is waking slowly. A vintage light-green Kombi rolls along the coastal road, surf racks silhouetted against the sky, while fibro shacks, peeling decals and salty timber textures give the scene its familiar Australian character. The chrome bumper catches a flash of sun, then disappears around the bend towards the beach.

A vintage light green VW kombi van driving along a coastal road with surfboards on the roof.

That's the magic of the Kombi. It can look purposeful outside a surf club, hardworking beside a tradesman's shed, or perfectly at home on a modern living-room shelf. The rounded roof, upright windscreen, bright paint and friendly nose don't need much explanation. Even a small Kombi Samba Bus diecast can carry the atmosphere of a long coastal drive.

The strongest retro styling doesn't rely on covering every surface with novelty pieces. It chooses a few recognisable cues and gives them room to breathe.

  • Use colour with restraint: Seafoam, cream, faded blue and warm orange create the period feeling without making a room look like a theme park.
  • Let texture do some work: Weathered timber, rope, linen, driftwood and aged brass provide the relaxed coastal setting that suits the van.
  • Choose meaningful scale: A detailed model bus can become a focal point, while smaller vehicles work as supporting pieces on bookshelves or sideboards.

Practical rule: A good retro display should look like someone lives with it, not like a shop window was tipped into the lounge room.

The same principle applies whether you're restoring a full-size bus, buying a licensed miniature or adding a single accent to a beach house. Look for the design DNA first. Peeling period-style graphics, a bright bumper, split windows and a strong two-tone line will usually say more than a pile of unrelated decorations.

How the Kombi Earned Its Retro Crown

Australia's affection for the Kombi has a solid local foundation. Volkswagen assembled Kombis at the Clayton factory in Melbourne from 1964 to 1977, with most vehicles produced from CKD kits, while the company also used mostly local parts between 1959 and 1968, as recorded in this Australian Volkswagen history of the Kombi. That production story gives Australian collectors a useful starting point. A locally assembled vehicle carries a different connection from a later German import.

The model was never merely a counterculture prop. In Australia, it worked as a commercial van, family vehicle, people-mover and camper base. The 1970s cemented that broad appeal. Surf trips, holiday runs and improvised camper interiors made the Kombi part of everyday leisure culture, while clubs and restoration communities kept the details alive.

The Australian milestones that matter

A few dates help separate genuine heritage from general retro styling.

  • Local assembly: Clayton production connected the Kombi with Australian manufacturing and local motoring culture.
  • Peak mainstream success: In 1975, 8,974 Kombis were sold in Australia, including Microbuses, making it the model's biggest-selling year in Australian history. The same year, it held 43% of the Australian 1-tonne van market, according to the Club VW Australian history record.
  • Production transition: From 1977 to 1979, Volkswagens were fully imported from Germany rather than assembled in Melbourne, and Kombi sales ended in 1980–81 as stock ran out, according to CarsGuide's Australian Kombi history.
  • Imported continuation: The T3 Kombi was first imported into Australia in 1982, marking a new chapter after the classic local era.

Volkswagen says the Kombi originated in 1949 and that the model line later reached 11 million units overall, details included in the same CarsGuide history feature. Those milestones explain why collectors care about body style, assembly history, trim and delivery colours. A Split Screen, Bay Window and T3 may share the family name, but they don't tell the same Australian story.

For diecast buyers, heritage knowledge helps you choose deliberately. You might want a Split Screen because it represents the earliest visual language, or a Bay Window because its shape recalls a particular family holiday or surf trip. The best collection usually has a reason behind each vehicle.

Design Motifs That Scream Vintage Kombi

The retro Kombi works because its design is unusually legible. You can reduce it to a few strong shapes and still recognise the vehicle immediately. Early models bring the two-piece split windscreen, round headlights and upright front, while later buses retain the tall cabin, slab-sided body and cheerful, almost toy-like proportions.

Close-up front view of a vintage Volkswagen Kombi bus featuring signature white and teal paint colors.

The details collectors notice first

Paint does much of the emotional work. Pastel blue, cream, orange and green immediately suggest an earlier era, especially when a darker or brighter colour forms a clean belt line across the body. Two-tone schemes suit Microbuses and campers particularly well because they emphasise the horizontal shape and make a miniature look more substantial.

Chrome is the next signal. Bumpers, hubcaps and trim lines add small highlights that separate a carefully finished licensed model from a generic van. Look closely at the VW crest, grille treatment, mirrors and lamp surrounds. On a real vehicle, these parts catch changing light. On a diecast model, accurate placement and crisp moulding create the same effect.

Other motifs translate beautifully into home styling:

  • Safari-style front windows: These introduce a sense of ventilation, travel and old-school adventure.
  • Side stripes and decals: Keep them aligned and period-appropriate rather than mixing graphics from unrelated eras.
  • Roof flags and surf racks: Use these as playful accents, but check that they're securely fitted on display models.
  • Interior colour: Plaid upholstery, white steering wheels and bakelite-style knobs bring warmth without needing a full vehicle restoration.

A model can be charming without reproducing every detail, but quality becomes clear when you compare the face, wheels, glazing and graphics. Licensed products should have consistent branding and a finish that respects the original proportions. Generic replicas often simplify the windscreen, flatten the body sides or apply decals that feel too modern.

The video below offers another visual look at the cues that make the classic bus so recognisable.

For a coastal room, echo one or two of these motifs rather than copying the entire van. A cream wall, pale-blue model, striped cushion and aged timber shelf can suggest the same world with much more confidence than a room packed with matching logos.

Collecting the Retro Look in Diecast Form

Scale changes the collecting experience more than many first-time buyers expect. A small 1:87 Kombi can sit among books, plants and framed photographs, while a large 1:18 bus demands its own display position. Australian diecast guidance lists typical lengths of 5–6 cm for 1:87, 7–8 cm for 1:64, 10–12 cm for 1:50, 12–15 cm for 1:32, 16–20 cm for 1:24, and 25–30 cm for 1:18 models in this Australian diecast scale guide.

Scale Typical size Detail level Price range AUD Best for
1:87 5–6 cm Shelf-level detail Qualitative budget range Small displays and mixed scenes
1:64 7–8 cm Compact detail Qualitative budget range Casual collecting and gifts
1:50 10–12 cm Strong detail in a compact footprint Qualitative mid-range Mixed displays
1:32 12–15 cm Noticeable body and trim detail Qualitative mid-range Desks and cabinets
1:24 16–20 cm Display-focused detail Qualitative premium range Feature shelves
1:18 25–30 cm Highest visual impact Qualitative premium range Serious display pieces

The same guide notes that 1:50 is popular because it balances detail with compact display size, which makes it a useful middle ground for collectors building a mixed scene. A 1:24 Bay Window has enough presence to show paint separation and surf accessories, while a 1:18 Samba Bus becomes a centrepiece rather than a supporting object.

You'll also see differences in construction. Die-cast metal gives a satisfying weight and usually stands up well to careful handling. Resin can reproduce fine shapes, but it may be better treated as a display object. Opening doors, movable wheels and removable accessories add interest, although moving parts also create more places for dust and accidental damage.

A sensible buying checklist

Before you buy diecast Kombi models, check:

  1. Scale marking: Look for the scale on the chassis or product documentation, not only the seller's title.
  2. Licensing: Confirm Volkswagen branding and manufacturer information on the packaging.
  3. Finish: Inspect glazing, paint edges, wheel alignment and decal placement.
  4. Display plan: Measure the shelf before choosing a larger model.
  5. Light exposure: Keep strong sun off painted surfaces to reduce fading.

For Australian collectors, Volkswagen model cars provide a useful category to browse when comparing body styles and display sizes. Local stock also matters. An Australian importer can offer faster domestic shipping and simpler support than an overseas listing, especially when packaging damage or a missing accessory needs attention.

Styling Coastal and Vintage Spaces With Kombi Charm

A coastal Kombi room works best when it feels collected over time. Start with a calm base, such as white walls, pale timber and natural linen, then introduce the bus through colour and shape. A pastel-painted model on weathered timber shelving can become the small flash of personality that stops the room feeling too polished.

A coastal living room features a blue Volkswagen van coffee table, white sofa, and rattan furniture.

Build the room from large elements to small ones

Hamptons-meets-surf-shack styling gives the Kombi plenty of breathing space. Navy and white striped cushions can echo a bus livery without repeating a logo, while a rattan pendant or warm Edison bulb adds the amber glow associated with old workshop lighting.

Try this sequence:

  • Choose the anchor: A framed vintage-style Kombi poster, a large model or a distinctive piece of metal wall decor can establish the room's direction.
  • Add natural texture: Pair the display with rope, driftwood, woven baskets, linen and aged brass.
  • Repeat one colour: Pull the model's blue, cream or orange into a cushion, vase or small artwork.
  • Create variation: Mix a bus shape with surf photography, shells, maps or timber objects rather than using only Volkswagen pieces.
  • Leave negative space: A crowded shelf hides the very details that make a model special.

A gallery wall is particularly effective. Place a diecast model in a shadow box beside surf photography, a road map and a small period-style sign. The different formats create movement, while the shared coastal palette keeps the arrangement organised.

The vintage home accessories collection can help when you're looking for complementary pieces rather than another vehicle. The useful question isn't whether every item is officially from the same year. It's whether the materials, colour and mood belong together.

Protect the collection near the coast

Salt air and humidity deserve practical attention. Don't put valuable metal models directly beside an open window, on a balcony, or in a spot exposed to sea spray. A glass cabinet with a soft, dry microfibre cloth nearby is safer than an uncovered shelf in a damp room.

Dust the model gently, holding delicate accessories rather than dragging the cloth across them. Avoid harsh household cleaners, which can mark clear plastic and soften printed graphics. If the room gets strong afternoon sun, use a blind or rotate the display so one side doesn't carry all the exposure.

Mixing Models, Memorabilia and Surf Culture

A convincing Kombi display tells a story instead of just presenting objects. The strongest combinations usually bring together three layers: a vehicle, something from travel culture and a surface with visible age.

A 1:24 Bay Window might sit beside a vintage surf poster, a weathered road map and a tin lunch box. Add a small board-rack sign or surf club badge and the scene starts to suggest a destination, even if the display is in a suburban study. The objects don't need to be rare. They need to feel connected.

Give each vignette a clear setting

A Byron Bay-inspired arrangement could use faded blue, sand, cream and timber. A road-trip shelf might lean into maps, enamel signage and luggage textures. A family holiday display could combine a bright Microbus, old-style picnic pieces and a framed beach photograph.

The trick is to balance authentic finds with good reproductions. Estate sales and weekend markets can turn up genuine-era signage, lunch boxes and badges, but condition varies and provenance isn't always clear. Reproduction pieces are often the practical choice for everyday decorating, especially when you want a clean finish or a matching size.

Surf culture also gives collectors room to personalise a display. Australian artists, local printmakers and beach brands often explore van shapes, travel decals and board culture in their own visual language. Keep those pieces alongside the model, not over it. The Kombi should remain the visual anchor.

For a gift, combine a small bus with a tin sign, a travel-themed accessory or a compact coastal decoration. That feels more thoughtful than giving a random miniature with no connection to the recipient's interests. A collector who already owns several buses may appreciate a themed object that expands the story.

A Volkswagen travel van can work as the starting point for a shelf, office nook or gift bundle. Australian collectors' forums and local VW club communities are useful places to compare casting quality, identify body styles and learn which details enthusiasts value. Just remember that a seller's confidence doesn't replace checking the model, markings and condition yourself.

Retro Kombi Questions Worth Answering

How can I confirm a model's scale?

Check the chassis, underside or manufacturer documentation. A box may say 1:18, but the physical model should also match the expected proportions and length for that scale. The Australian diecast guide's size ranges are useful for a quick sense check, from 5–6 cm at 1:87 to 25–30 cm at 1:18 according to the collector scale guide.

Why do collectors like the 1972 Bay Window?

The Bay Window shape has a strong visual balance. Its broad front, large windscreen and practical camper associations make it instantly readable, while its Australian holiday and surf connections give it emotional weight. Collectors often seek it because it sits comfortably between early Split Screen charm and later practical van styling. That doesn't make every 1972 release more valuable than every other Kombi. Condition, licensing, finish, rarity and personal meaning still matter.

Are licensed Hot Wheels or Matchbox models better than bootleg replicas?

Licensing is an important starting point, not the only test. Licensed models generally give you clearer manufacturer accountability, accurate branding and packaging information. Compare the chassis markings, body proportions, glazing, wheel design and graphics. A cheap generic replica might look appealing in a photograph but often loses the small details that create the retro character.

What makes a thoughtful gift pairing?

Pair the model with something that supports its story. A compact bus can sit alongside a tin surf-rack sign, a coastal print, a travel accessory or a small piece of vintage-style decor. Match the gift to the recipient's space. Someone in an apartment may prefer a smaller scale, while a dedicated collector might welcome a larger feature piece.

Should a display cabinet be insured?

If your collection becomes financially significant, speak with your insurer about how collectibles are covered. Keep purchase records, photographs, packaging and model details organised. The relevant threshold depends on your policy, so don't assume household contents insurance automatically covers a cabinet or collection valued above A$2,000.

Can I restore yellowed plastic windows with Retr0bright?

Retr0bright baths are discussed in restoration circles, but they can produce uneven results and may affect surrounding paint, decals or trim. Remove the glazing only if you understand how it's secured, test on an inconspicuous area and avoid experimenting on a valuable licensed model. For a miniature, gentle cleaning and careful storage are usually safer than aggressive restoration.

Keep the finish honest: A clean, well-preserved model with original graphics is usually more appealing than a heavily modified piece that loses its period character.

Use a soft microfibre cloth for dust, keep models away from direct coastal sunlight and rotate seasonal displays so the same paintwork isn't exposed continuously. For metal pieces near the coast, enclosed storage offers better protection than an open shelf beside a window.


If you're ready to build a display with genuine retro character, explore the licensed VW memorabilia collectibles, Kombi Samba Bus diecast models, Beetle miniatures and coastal decor at Volkswagen Memorabilia. Browse the Australian shop for local stock, faster domestic shipping and friendly help choosing a piece that suits your shelf, gift list or beach-house style.

VW Samba Bus Price Guide for Australian Buyers

Exceptional Australian-delivered 23-window Samba buses have sold for around A$202,000, while condition-adjusted Australian market bands typically sit between A$85,000 and A$135,000, and ordinary restored Kombis can start well below A$30,000. That's the shape of the VW Samba Bus price conversation in Australia. Not every split-screen bus with nice paint is a six-figure Samba, and that's exactly where many buyers get tripped up.

At VW shows around Australia, you'll hear the same thing every few rows. Someone points at a lovely two-tone bus and says, “That'd be worth a fortune.” Sometimes they're right. Often, they're mixing up a standard Kombi, a Microbus, a deluxe conversion, and a genuine 23-window Samba.

That confusion matters, because VW Samba Bus price isn't one number. It's a ladder. Rarity, originality, provenance, and specification all change where a bus lands. The Australian market adds another wrinkle too. Local delivery, right-hand-drive history, and the thin supply of genuine top-tier examples can shift values in ways overseas guides often gloss over.

What a VW Samba Bus Actually Costs in Australia

One Australian Samba sale hit A$202,000 at auction. That figure grabs attention fast, but it can also skew expectations if you treat it as the standard rather than the exception.

For a local buyer, VW Samba Bus price works more like a property market than a fixed price tag. The penthouse sale makes the news. The broader market still runs on condition, paperwork, originality, and how many comparable vehicles are available here in right-hand-drive form. That matters in Australia, where genuine top-spec split-window buses are thin on the ground and overseas asking prices do not always translate neatly to local deals.

A strong reference point for the realistic end of the market comes from Trade Unique Cars, which lists a Kombi Samba (1960-66) at A$85,000 in condition 2 and A$135,000 in condition 1, while a Kombi Microbus (1957-61) sits lower at A$55,000 and A$95,000 respectively (Trade Unique Cars market watch). That gap is the useful bit. It shows why Australian buyers need to separate a genuine Samba from a well-restored non-Samba bus before getting carried away by glossy photos or auction chatter.

A practical Australian pricing guide

Buyer tier Typical AU position What to verify before you call it fair value
Tidy non-Samba split bus Often below true Samba money by a wide margin Confirm it is not being advertised with loose “Samba-style” language, and check whether the trim, windows, and roof features are factory-correct or later additions
Genuine Samba in the normal collector market Usually sits in the realistic Australian buying zone for authentic examples Check chassis and M-code details, restoration receipts, rust repairs, and whether the bus presents as a genuine deluxe model rather than a tribute build
Top-tier Australian-delivered or standout provenance car Can stretch far beyond the normal band when rarity and story line up Verify local-delivery history, old registration or ownership records, auction-grade presentation, and whether originality is driving the premium rather than hype

That table is the budgeting shortcut many Australian enthusiasts need. The headline sale tells you how high the ceiling can go. The condition guide helps you work out where the floor and middle of the room are.

What “Samba” should mean in a sale listing

A genuine Samba is the deluxe version buyers chase, not just a split-screen bus in cheerful two-tone paint. If you are standing at a show field and comparing buses row by row, the difference is a bit like comparing a proper factory GT car with a tidy replica. Both can look terrific. Only one carries the full collector premium.

So if a seller says “Samba”, ask for the evidence, not just the vibe.

Practical rule: If the seller cannot clearly show why the bus is a genuine Samba rather than a Samba-style build, treat the price as optimistic until the history and specification stack up.

Why the Samba Bus Stands Apart from Other Kombis

The Samba has always been the show pony of the Type 2 family. Even parked beside a beautiful panel van or a clean Microbus, it has more theatre. More glass. More trim. More of that carefree holiday feel that made generations of VW people smile.

You can spot the appeal straight away. A genuine Samba carries the deluxe visual package enthusiasts chase. Think split safari windscreen, panoramic side windows along the cabin, the big opening sunroof, two-tone paint, and bright trim that gives the whole bus a lighter, more celebratory character than a workaday Kombi.

It isn't just a bus. It's the top-spec story

Collectors pay a premium because a Samba sits at the fancy end of the early VW bus range. Standard Kombis were practical. Sambas were aspirational. They captured the same engineering bones, but wrapped them in a more glamorous body style that was meant to carry families, tourists, and dreamers in style.

That story still matters in Australia. Local VW history helps explain why. Club VW Australia notes that Volkswagen sold 4.5 million Kombis worldwide since 1950, that the Kombi dominated Australia's light-commercial market in the 1960s and 1970s, and that it held over 60% of the one-tonne market in 1975 (Club VW Australia history). The broader Kombi legend is huge here. The Samba sits at the glamorous, scarce tip of that legend.

Australian scarcity changes the mood

Australian-delivered examples carry extra cachet because local buyers know how thin the pool is. That's why the little details matter so much. Delivery history. Factory trim. Right-hand-drive correctness. Old registration records. The difference between “looks like a Samba” and “is a Samba” can be enormous.

For a fun nod to the shape and spirit that made these buses icons, have a look at this green Samba model feature. Even in miniature, the Samba's extra windows and cheerful stance jump out straight away.

The Australian Value Ladder by Condition

A Samba's value in Australia works more like a staircase than a single sticker price. The guide bands mentioned earlier are useful, but they only make sense once you know what separates a very good bus from a top-shelf one when you are standing beside it at a show or auction.

An infographic titled The Australian Value Ladder by Condition showing price tiers for classic Volkswagen buses.

Entry point versus true Samba money

Plenty of Australian buyers get tripped up. A split-window Kombi can look charming, tidy, and expensive, yet still sit well below genuine Samba territory because the market is paying for more than shape alone. It is paying for the deluxe body, the rarity, and the confidence that the bus is what it claims to be.

That means the question in this section is not the number itself. It is what condition 1 and condition 2 look like in the metal.

A practical reading of the ladder

Condition 2 is the honest sweet spot for many enthusiasts. These buses usually present well from ten paces, drive properly, and have the sort of finish that makes owners happy to park on the grass at a club day without apologising for anything. Panel gaps should look tidy and consistent. Doors should shut cleanly rather than needing a shove. Brightwork should suit the age and style of the bus, even if a concours judge could still find a few things to pick at.

Condition 1 is a different level of scrutiny. The paint, trim, hardware, and fit all need to feel deliberate and correct, not just fresh. Window seals sit neatly. Interior materials look right for the period. The underside does not tell a rougher story than the topside. A bus at this end of the ladder stands up to close inspection from people who know where early Volkswagens usually hide their sins.

A good way to judge the gap is to compare it to buying a coastal weatherboard cottage. From the street, both houses can look lovely. Under the floorboards, one may be solid old timber and careful restoration, while the other is patchwork held together for sale day. Sambas are exactly like that.

Here's what experienced Australian buyers usually check first:

  • Panel fit and body lines
    Look along the flanks, around the cargo doors, and across the nose. Wavy reflections, uneven gaps, or thick seams often point to old rust repairs or replacement panels that were made to look better in photos than in person.

  • Underside honesty
    Get underneath if you can. Chassis rails, jacking points, outriggers, and floors matter because repairs there are expensive and easy to hide with fresh underbody coating.

  • Trim correctness
    Deluxe trim, badges, lights, and interior pieces should make sense for the year and specification. A shiny bus with mixed-era parts can still be enjoyable, but collectors will price in the compromise.

  • Roof and window details
    On a Samba, the extra glass and roof structure are part of the appeal. Check the sunroof opening, window fit, seals, and headliner finish carefully. Sloppy work here stands out quickly.

Buy the bus whose details stay convincing after ten minutes of close inspection, not just the one that wins the first glance.

When a bus rises above the guide

Top auction results still matter because they show what happens when condition, rarity, and buyer confidence all line up on the same day. The well-known Shannons example is useful for that reason. Its pre-sale estimate sat at A$120,000 to A$140,000, before bidding pushed beyond expectations (Shannons pre-sale estimate report).

For an Australian buyer or seller, that is the lesson. Headline results set the mood, but condition decides where an actual bus belongs on the ladder. In a small local market, where genuine Sambas are thin on the ground, that judgement can shift the outcome by a very large margin.

What Really Moves the Price Up or Down

Two buses can look broadly similar in photos and still sit worlds apart in value once you inspect them properly. That's where the VW Samba Bus price puzzle lives.

An infographic detailing four main factors influencing the market value of a classic VW Samba bus.

Four multipliers that matter

  1. Scarcity
    Australian supply is thin, and that matters. Coverage of rare VW values in this part of the world has highlighted asking prices such as A$140,000 for a 1953 Barndoor 23 Window Deluxe and A$240,000 for a 1954 RHD Barndoor Deluxe, which reinforces how scarce genuine top-end buses remain in this market (Driven Car Guide coverage). Buyers often pay more when the bus has the right local-market story attached.

  2. Originality
    Original panels, original-style trim, and factory-correct details matter far more than shiny paint alone. A bus can be beautifully restored and still lose enthusiast confidence if too many key pieces have been substituted or modernised.

  3. Condition and restoration quality
    Rust repairs, panel fit, underside integrity, interior correctness, and finish quality all shape confidence. A neat restoration done with care can support value. A quick cosmetic job often can't.

  4. Provenance
    Old paperwork, long-term ownership, restoration files, and known auction history help a bus feel “safe” to serious buyers. If someone can show where the vehicle has been and how it's been cared for, the conversation changes immediately.

After the reading, this walkaround video is worth a look because it helps train your eye for the details that make these buses so desirable.

What pushes a bus down

A bus can lose value quickly if the fundamentals aren't right.

  • Rust and structural issues can turn a charming project into an expensive lesson.
  • Non-original colour schemes may look fun but won't always please collectors.
  • Missing or incorrect trim chips away at authenticity.
  • Unclear identity is a major warning sign, especially with Samba-style conversions.

A genuine Samba with honest flaws usually interests enthusiasts more than a glossy bus with a fuzzy backstory.

Samba Bus Diecast Models Versus the Full-Size Bus

Auction headlines can make a Samba feel distant, but the model-car side of the hobby brings that same roofline, window count, and colour charm onto an ordinary shelf. For plenty of Australian VW fans, that is not a compromise. It is a different way to enjoy the shape without stepping into restoration bills, storage worries, or a thin local market.

The easiest way to understand it is to treat the two categories like two versions of the same song. The full-size bus gives you the whole live performance. A diecast gives you the melody in miniature. Both can be collectible, but the money logic is very different.

Category Typical AU Price What collectors usually focus on
Full-size Samba Bus As noted earlier, values sit in condition-based bands rather than one fixed headline number Original features, overall presentation, documentation, and how convincingly the bus fits the Australian market
Other classic Kombis Usually lower than genuine Samba territory Usability, body condition, presentation, and whether it is a standard bus rather than a top-spec window bus
Licensed diecast Samba Varies by scale, maker, finish, and packaging Box condition, detail quality, paint accuracy, and brand reputation

That last row matters more than newcomers often expect.

A diecast Samba does not need to mimic full-size prices to make sense as a collectible. A scarce colour, tidy box, or well-executed licensed release can be the difference between a model you glance at and one you keep picking up for a closer look. It works a bit like judging a real bus from ten paces, then walking closer to inspect the details. Proportions, trim lines, two-tone paint breaks, and window layout all start to matter.

Collectors usually sort diecast pieces using a few simple checks:

  • Scale
    Smaller scales suit a row of buses on a study shelf. Larger scales show off the skylight windows, split-screen front, and interior detail more clearly.

  • Packaging
    Serious model collectors care about the box because it affects completeness, presentation, and resale appeal.

  • Brand and licensing
    Official VW-licensed models often get the shape and badging right, which makes them more satisfying for enthusiasts who know these buses well.

  • Colour and era feel
    Period-looking paint combinations and correct brightwork tend to feel more faithful to what makes a Samba special.

If you want a quick feel for what enthusiasts in Australia buy and display, this range of VW bus diecast models in Australia is a useful place to start. It helps bridge the gap between the six-figure chatter around headline Sambas and the much more approachable collecting lane that still celebrates the same design.

Where to Buy, Sell, or Appraise a Samba in Australia

Buying or selling one of these buses in Australia takes patience. The market is thin, and that's why rushed decisions tend to cost money.

An infographic detailing five ways to buy, sell, or appraise a VW Samba bus in Australia.

Best places to look

Specialist auction houses are still one of the clearest windows into public values. Shannons is the obvious Australian reference point for early VW auction history, and classic-focused auction houses regularly give buyers a way to compare presentation, catalogue language, and final results.

VW clubs matter too. Club circles often know which buses are well regarded, which restorations were done properly, and which sellers have a strong name in the scene. If you spend time at club events, you'll often hear about a bus before it ever reaches a public listing.

Smart buying habits

Before money changes hands, slow down and check the bones.

  • Independent inspection
    Use a mechanic who understands old Volkswagens, not just old cars in general.

  • Paper trail
    Ask for restoration invoices, old registration documents, and any identification records the seller has retained.

  • Clear transaction method
    Cleared funds and written terms make life calmer for both sides.

  • Registration and identity checks
    Make sure the bus's paperwork, numbers, and claimed specification all align.

The best Samba purchase often happens after a very unglamorous afternoon of crawling underneath it with a torch.

For people shopping the broader van side of the hobby, this Kombi for sale guide is a useful starting point for seeing how these vehicles are commonly presented to Australian buyers.

A quick note on historical context

Part of the charm here is how ordinary these vehicles once seemed. Australian coverage of Kombi pricing in the 1970s recorded the basic 1600 Kombi at $4,513, the 1800 Kombi at $4,912, and the 1800 Microbus at $5,396 (Club VW historical pricing). It's a lovely reminder that today's cherished classics began life as usable family and work vehicles, not museum pieces.

Bringing the Samba Story Home to Your Collection

Auction headlines can make Samba ownership feel like a six-figure club. For plenty of Australian VW fans, the smarter comparison is between the dream car on the show field and the version of that story you can live with, whether that is a real bus, a project, or a licensed model on the shelf.

An infographic titled Bringing the Samba Story Home to Your Collection showcasing tips for collecting VW Samba buses.

A Samba keeps its pull because it does two jobs at once. It is a collectible with serious scarcity in Australia, especially in correct right-hand-drive and well-documented form. It is also a mood machine. Park one at a coastal meet and even people who do not know the model code will stop for the skylight windows, the roofline, and that unmistakable holiday feel.

That gap between global headline prices and local reality matters. The wild sales get the attention, and fair enough, because they are fun to talk about over a coffee and a sausage sizzle. But an Australian buyer usually needs a calmer question. What version of the Samba story fits my budget, space, and appetite for maintenance?

For some, the answer is the full-size bus. For others, it is a carefully chosen diecast that scratches the same itch without the storage bill, rust repairs, or parts hunt. That is not a lesser choice. It is the collecting equivalent of owning the framed concert poster when the original stage guitar is out of reach.

A more reachable way to collect

If you want the character of a Samba in your life without chasing a rare bus across the country, these habits make the hobby more satisfying:

  • Buy the best version of your chosen format
    A tidy, licensed diecast with crisp detailing often gives more long-term enjoyment than a cheap model with vague proportions and generic badging.

  • Collect with a theme
    Australian-delivery colours, surf-era displays, or a split-screen lineup with Beetles beside it gives the collection a story instead of just filling shelf space.

  • Keep the packaging and paperwork
    Model collectors care about complete presentation in much the same way vehicle buyers care about books, invoices, and old rego history.

  • Match ambition to upkeep
    A real Samba needs space, specialist knowledge, and ongoing spend. A model needs careful storage and a dust-free display. Both reward owners who are realistic from the start.

FAQ

How can I tell if a Samba diecast model is properly licensed and accurate

Check the box and base first. Officially licensed models usually state Volkswagen licensing clearly, and better examples list the scale, manufacturer, and model name rather than just “classic van.” Then compare the window count, roof window layout, trim, and proportions with photos of genuine Sambas. If the skylights look oversized, the beltline is off, or the badging is vague, treat it as a decorative piece rather than a collector-grade replica.

Why does Australian delivery matter so much

Collectors here often pay closer attention to local history, right-hand-drive correctness, and documented provenance because strong examples are thin on the ground in Australia. Two buses can look similar from ten metres away, but local-market history can separate them sharply once serious buyers start checking details.

Is diecast a serious collecting category

Yes. Plenty of VW enthusiasts collect models with the same care others bring to full-size cars. The attraction is simple. You get the design, the nostalgia, and the display value without workshop bills or insurance paperwork.

Should I buy based on shiny paint alone

Start underneath the shine. Fresh paint can hide expensive problems, whether you are looking at a bus or a model with a respray-style finish. Identity, correctness, restoration quality, and supporting paperwork are what hold up once the excitement settles.


If you'd like the Samba look without chasing auction paddles and restoration invoices, Volkswagen Memorabilia has a warm, well-curated range of licensed VW diecast models, Kombi favourites, Beetle pieces, and giftable collectibles for Australian enthusiasts. It's a lovely place to find a shelf-worthy Samba, a Volkswagen Beetle model, or a thoughtful VW-themed present, with local stock and easy browsing for anyone wanting to buy diecast Kombi and other Volkswagen diecast models for sale.

Cover Tissue Box Styles, Materials, and Sizing Guide

You're standing in the lounge, coffee in hand, and everything feels nicely pulled together. Soft whites, sandy tones, maybe a hint of pale blue. Then your eyes land on that bright supermarket tissue carton on the side table. It works, of course, but it doesn't belong.

That's the little decorating problem a cover tissue box solves. It's one of those small home upgrades that can make a room feel calmer, more considered, and a lot less cluttered without asking for a full styling reset. If you've already spent time choosing cushions, trays, lamps, or even a favourite retro print, a bare tissue carton can stick out more than you'd expect.

Australian shoppers are also buying tissues in a strong, long-running market. Industry data shows apparent tissue consumption rose from 274.1 thousand tonnes in 2014 to 314.8 thousand tonnes in 2019 and 335.1 thousand tonnes in 2024, while 2023–24 total tissue and tissue-products consumption reached about 470.0 thousand tonnes. Australians also consumed 13.0 kg of tissue per person annually, with decade-long per-capita growth averaging 2.1% a year, according to IndustryEdge's Australian tissue market overview.

That means the cover tissue box isn't some niche styling extra. It's a practical object in a home item most of us use every day. The trick is choosing one that fits your carton, suits the room, and won't become annoying to clean.

Why a Tissue Box Cover Matters in Your Home

A cover tissue box earns its place because it tidies up one of the most visible everyday items in the house. You don't notice a tissue carton much in the supermarket aisle, but at home it can interrupt the whole look of a bedside table, bathroom vanity, or coffee table.

The first win is visual. A cover hides branding, loud colours, and whatever random pattern came on the carton that week. Instead of a disposable box shouting for attention, you get something that blends into the room and feels like it was chosen on purpose.

The second win is practical. You keep buying the tissues you already like, then slip them inside a better-looking shell. That's usually easier than hunting for a carton design that happens to suit your home.

Why this small swap works

  • It smooths out colour clashes. A neutral cover can settle down a busy room.
  • It helps with seasonal styling. Swap linen in summer for a darker or warmer texture in winter.
  • It protects the carton a bit. In family spaces, a cover can help stop the cardboard from looking squashed too quickly.

A good cover tissue box doesn't need to stand out. Its job is to help the room feel finished.

Three decisions matter most. Get the size right so tissues pull smoothly, choose a material that suits the room, then pick a style that supports your décor instead of fighting it.

What a Tissue Box Cover Actually Does

At its simplest, a cover tissue box is a rigid or semi-rigid shell that slips over a tissue carton. Most are open at the bottom or have a removable base or lid, and they leave the dispensing opening exposed at the top so the tissues still pull through normally.

An infographic showing the benefits of using a decorative tissue box cover, including protection and style.

That sounds straightforward, but the better ones do more than hide cardboard. They also add a light layer of protection. If the cover is sturdy, it helps shield the carton from bumps, splashes, and the usual rough treatment that happens in bathrooms, cars, and homes with kids or pets.

Details buyers often miss

Some features make daily use much better:

  • Weighted bases help stop the cover lifting when you pull a tissue.
  • Non-slip pads keep it steady on polished timber, tiles, or stone.
  • Removable lids make refilling easier, especially with snug designs.
  • Smooth inner walls help the carton slide in and out without tearing.

Material matters here more than many shoppers realise. In Australia, tissue box covers made from textiles, plastic-coated fabrics, or related household furnishing materials can fall under the mandatory care-labelling regime, which means manufacturers and importers need durable care instructions that match the material and cleaning method, as outlined in the Australian mandatory standard for care labelling for clothing and textiles.

Why sturdiness changes the experience

A flimsy cover can warp, hold dampness against the carton, or start looking tired quickly. A sturdier option tends to keep its shape, feel better in the hand, and last through plenty of refill cycles.

Practical rule: If a cover looks lovely but seems awkward to refill or hard to clean, it won't stay lovely for long.

Comparing Popular Cover Materials

Material is where function and style finally meet. In Australian homewares, you'll commonly see multi-material constructions chosen for durability and moisture resistance, such as powder-coated metal bases with anti-rust coating paired with timber or veneer lids finished with polyurethane, along with solid plastic housings, as shown in Designstuff's tissue box specifications. Those choices matter because they help reduce corrosion, improve wipe-clean hygiene, and cope better in humid spots.

Some buyers want softness and texture. Others want something they can wipe in seconds. Neither approach is wrong. It just depends on where the cover will live.

Cover Tissue Box Materials at a Glance

Material Feel & Look Durability Humidity Response Cleaning Best Room
Linen or cotton blend Soft, relaxed, coastal Moderate Better in drier areas unless cared for well Spot clean or gentle wash if designed for it Bedroom, lounge
Seagrass or rattan Textured, beachy, warm Good Handles general humidity well but dislikes soaking Soft brush, light wipe Lounge, sunroom
Coated metal Crisp, modern, tidy Strong, though can dent Suits humid rooms well if properly finished Wipe clean Bathroom, kitchen, office
Acrylic Clean, light, minimal Good for light everyday use Generally fine if kept dry and clean Wipe with soft cloth Small spaces, desk
PU leather Tailored, retro, slightly dressy Good for everyday use Better than plain fabric in touch-heavy zones Damp microfibre wipe Car, study, living room

Quick room matching

If you want a simple rule of thumb, use fabric for softness, woven fibres for texture, and metal or acrylic for easy cleaning. PU leather sits nicely in the middle. It has a more polished look than linen and a more relaxed feel than glossy acrylic.

Australian shoppers often get stuck between appearance and practicality. That gap is real. Local product ranges run from seagrass and linen to coated metal, acrylic, ceramic, and PU leather, but cleaning and durability guidance is often thin, as seen across Australian decorative tissue box listings at French Knot.

Matching the Right Cover to Your Carton Size

Most buying mistakes happen. A cover can look perfect online and still be completely wrong once it arrives if the carton shape doesn't match.

Start with a tape measure. Measure the length, width, and height of the tissue carton you already use. Then look at the opening on top. If the carton has a raised plastic oval or a wide slit, make sure the cover opening lines up comfortably and doesn't pinch the tissues.

The three measurements that matter

  1. Length and width decide whether the carton will slide in at all.
  2. Height affects whether the top opening sits flush or sinks too low.
  3. Opening shape affects how easily the tissues dispense.

A frequent gap in Australian product coverage is sizing guidance. Listings show multiple formats and dimensions, including 13 x 12 cm linen covers, 13 x 17 x 13 cm cube covers, and 26 x 14 x 10 cm seagrass holders, but many pages don't clearly explain which tissue carton each one suits, as seen on Nanahuchy's Australian tissue box collection.

Common Australian Tissue Carton and Cover Sizes

Carton Format Typical Carton Size (cm) Matching Cover Type Best Room Placement
Slim rectangular carton 13 x 12 cm Narrow rectangular cover Bedside table, guest room
Cube boutique carton 13 x 17 x 13 cm Cube cover Lounge, powder room
Family-size rectangular carton 26 x 14 x 10 cm Longer seagrass-style holder Family room, kitchen

Measure the inside space of the cover, not just the outside dimensions. A pretty shell with thick walls can lose more room than you expect.

Leave a little breathing room so the carton slides in without force and the tissues pull up cleanly. If it's too tight, the cardboard buckles. If it's too loose, the whole thing can shuffle around the table.

Choosing a Style That Suits Your Décor

Once the fit is sorted, decorating gets fun. A cover tissue box can either disappear into the room or add a bit of personality, depending on what you want.

Coastal, farmhouse, minimalist, or retro

A coastal room usually suits bleached seagrass, whitewashed rattan, pale timber, or soft linen. Those finishes echo driftwood, sand, and relaxed beach-house textures. If you already gravitate toward shells, woven baskets, and chalky whites, this choice tends to feel effortless.

A farmhouse kitchen leans warmer. Distressed wood, gingham wraps, enamel-style finishes, and simple woven textures feel homely rather than staged.

For a minimalist space, powder-coated metal works beautifully. Matte black, soft grey, and warm taupe can settle into the background and keep the bench looking organised.

A vintage VW-inspired corner can handle a little more fun. Powder-blue finishes, retro prints, or a ceramic holder with a playful old-school feel can nod to surf culture and road-trip nostalgia without taking over the room. If you love bright but breezy styling, the tones in white home accessories show how calm neutrals can support quirky statement pieces elsewhere.

An easy styling trick

Pick one finish family and repeat it in small doses. If your tissue cover is woven, bring in one more woven note through a tray or basket. If it's matte metal, echo that finish with a lamp base or picture frame.

Choose a cover that sounds like the room around it. Soft rooms want texture. crisp rooms want cleaner lines.

Caring for Your Cover So It Lasts

A tissue box cover lasts longer when you treat it like any other useful décor piece. Dust, bathroom steam, and a bit of accidental splash are usually the culprits, not dramatic wear.

An infographic showing instructions for caring for linen or cotton tissue box covers to ensure durability.

Simple care by material

  • Linen and cotton covers like a gentle once-over with an upholstery brush or soft vacuum attachment. If the maker allows washing, use a mild cycle and let the cover dry fully before refitting it.
  • Seagrass and rattan need a soft brush and only a barely damp cloth. Too much water can leave the fibres unhappy.
  • Coated metal and acrylic are the easiest. Wipe with mild soapy water and dry straight away.
  • PU leather usually responds well to a damp microfibre cloth and light routine care.

A quick weekly clean is usually enough. In humid rooms, let the cover air out now and then so moisture doesn't linger around the carton.

Quick decision checklist

  • Bathroom or coastal humidity: choose something wipe-clean or moisture-tolerant.
  • Bedside comfort: softer textures usually feel nicer.
  • High-touch family areas: go for surfaces that won't trap marks.

Easy DIY and Customisation Ideas

A plain cardboard sleeve is a perfectly good starting point if you'd rather customise than buy. DIY works especially well when you're matching a very specific colour palette or using leftover materials from curtains, wallpaper, or craft projects.

An infographic showing three easy DIY and customization ideas for crafting including painting, fabric wrapping, and framing.

One option is the quickest. Acrylic paint gives you a fast makeover on a plain sleeve or timber shell. You'll want sandpaper if the surface is glossy, a primer if needed, acrylic paint, a small brush or roller, and optional stencils. The finish can look cheerful and crisp, though corners may chip over time if the cover gets knocked around.

Decoupage sits in the middle. Fabric scraps, wallpaper offcuts, wrapping paper, and a sealant can create something full of character. It's especially nice for guest rooms or craft corners. In humid bathrooms, though, the topcoat matters. Without it, edges can lift.

Here's a useful visual if you want to see a craft approach before choosing your method.

Three realistic DIY paths

  • Painted finish
    Best for beginners. Quick setup, low mess if you plan well, and easy colour matching.

  • Decoupage wrap
    Great for pattern lovers. More forgiving than it looks, but you'll need patience around openings and corners.

  • Full fabric wrap
    Usually the most polished-looking homemade result. A single piece of linen or cotton, neatly pulled and fixed underneath, can look surprisingly refined.

If you prefer the warmth of timber but don't want to build from scratch, a ready-made wood tissue box cover can give you the same natural feel with far less weekend effort.

DIY versus ready-made

DIY is best when you want personality, exact colour control, or the fun of making. Ready-made wins when fit, durability, and low maintenance matter most. If the cover is heading into a steamy bathroom or busy family room, store-bought materials often cope better day to day.

Pulling It All Together at Home

The best cover tissue box choice usually comes down to three things. Fit, material, and style. If one of those is off, you'll notice it every time you reach for a tissue.

A neat home example helps. Say you want one cover in the lounge, one in the bathroom, and one on the bedside table. In the lounge, you might choose a woven or linen finish that ties into cushions and baskets. In the bathroom, a wipe-clean cover makes more sense because steam and splashes are part of the deal. On the bedside table, a softer fabric or gentle timber look can feel calmer and warmer.

A simple home styling routine

Check that the tissue opening sits neatly under the cover slot. If tissues snag, the fit is wrong or the carton has dropped too low.

Give woven and fabric covers a quick fluff or brush after damp weather, especially in coastal homes. Small maintenance habits stop that tired, slightly musty look before it starts.

If you like to shift your styling through the year, rotate covers with the seasons. Light woven textures suit bright summer rooms. Richer tones and smoother finishes can feel cosier when the weather cools.

For homes with a breezy beach-house feel, the textures and tones in coastal home accessories show how easily a tissue cover can become part of a bigger, relaxed decorating story.

The right cover doesn't scream for attention. It just makes the tissue box feel like it belongs. And when that happens, the whole room feels more settled.


If you love home pieces that mix relaxed coastal style with a bit of classic Volkswagen character, Volkswagen Memorabilia is well worth a look. You'll find VW-themed gifts, diecast models, and home décor that can sit beautifully alongside thoughtful details like a well-chosen tissue box cover, with local Australian stock and fast shipping that make browsing feel easy.

Table Runner and Placemats Set Styling and Buying Guide

Saturday arvo, the table's nearly set, someone's rinsing salad greens, the sea breeze is drifting through the screen door, and you're standing there with that familiar little decorator's dilemma. Do I lay a runner? Use placemats? Mix both? Or have I just made this harder than it needs to be?

That's exactly where a table runner and placemats set earns its keep. Instead of pulling bits from three cupboards and hoping the colours get along, a coordinated set gives you a ready-made foundation that looks considered without feeling fussy. It's a bit like parking a tidy old Kombi beside a weathered beach shack. Different elements, same mood, and suddenly the whole scene makes sense.

For Australian homes, that matters more than people admit. We don't all entertain the same way. Some tables host fish tacos and kids' water glasses on a Tuesday. Others need to handle Christmas lunch, a coastal rental reset, or a relaxed dinner after a day at a VW show. There's also a genuine gap in practical advice around what works for local table sizes and entertaining styles, especially if you're weighing up crosswise runner styling or trying to choose between woven natural fibres and easy-care synthetics. That feels especially relevant while home styling trends lean towards layered texture and natural palettes, even as household goods retailing showed only modest growth, with household goods retailing up 2.3% in June 2025 and broader retail volume growth at 0.3% in the June quarter 2025 in reporting cited by Home Beautiful's entertaining and styling coverage.

Introduction to Table Runner and Placemats Sets

A good set takes the guesswork out of that last-minute table panic. You're not wondering whether the placemats clash with the runner, or whether the whole thing looks too formal for fish and chips wrapped in paper on the deck. The pieces already speak the same visual language.

A wooden dining table set for six with a linen table runner and rattan placemats

Why a matched set feels easier

Think of the runner as the road down the centre of the table, and the placemats as the neatly marked parking bays. One guides the eye. The other gives each person their own space. Together, they create order without making the table feel stiff.

That's why bundled sets appeal to both decorators and gift buyers. You get colour harmony, texture consistency, and a cleaner starting point for styling candles, serving bowls, shells, or even a cheerful retro touch if your home leans surfy and nostalgic.

Practical rule: If you want your table to look calm, start with pieces that already coordinate, then add only one or two accent ideas on top.

Why this category matters in Australia

It's also not some tiny niche. In Australia, the broader table linen market was valued at about $39 million in 2024, with imports at about 661 tons, up 13% year on year, and forecasts cited for the category point to continued growth through 2035, including projected volume of 1.7K tons and projected nominal value of $60 million according to IndexBox's Australia table linen market overview. Table runner and placemat sets sit within that same table-linen category.

That tells you two things. First, Australians are still buying these products. Second, choice matters, because there's plenty on the market and not all of it suits the way people live.

Here's where people usually get stuck:

  • Material confusion means a beautiful set may be annoying to clean.
  • Sizing mistakes leave the runner too stubby or the placemats hanging over the edge.
  • Styling overload makes the table feel crowded when all you wanted was relaxed and welcoming.
  • Care surprises show up after the first wash, when shrinkage or waviness turns up.

A little know-how fixes most of that.

What a Table Runner and Placemats Set Includes

A coordinated set usually has two jobs. The runner anchors the middle of the table, and the placemats frame each seat. If you think of a framed vintage Kombi print on the wall, the image draws attention, but the frame makes it feel finished. Same story here.

An infographic illustrating the components of a coordinated table setting with runners, placemats, and styling benefits.

The basic pieces

Most shoppers will come across a few common combinations:

Set element What it does Best for
Table runner Adds a central line of colour or texture Long dining tables, console tables, buffet styling
Placemats Protect the surface and define each setting Everyday meals, family dining, casual entertaining
Matching finish or weave Ties the pieces together visually Cohesive styling with less effort
Optional extras like napkins or rings Add polish if you want a fuller look Celebrations or gift sets

Some sets are fully bundled. Others are “matched separates”, where the runner and placemats are sold individually but designed to work together. Bundled options are simpler. Matched separates can help if you need more flexibility around seat numbers.

How the pieces work together

The runner usually sits lengthways through the centre. It softens a bare tabletop and gives your serving pieces a home base. The placemats sit at each place setting and create little islands for plates, cutlery, and glasses.

That combination solves a common decorating problem. A runner alone can look lovely but unfinished once people sit down. Placemats alone can feel practical but a bit scattered. Used together, they balance the centre and the edges.

The runner gives the table direction. The placemats give it rhythm.

What to check before you buy

Don't just look at the colour first. Check these details:

  • Piece count matters if your dining table seats more people than the set covers.
  • Material consistency matters because a cotton runner with stiff synthetic placemats can feel mismatched even if the colours match.
  • Edge finish tells you a lot. Neat hems, binding, braiding, or clean woven borders usually age better than flimsy glued finishes.
  • Intended use matters. Everyday family dining asks for something different from a styled spare-room table.

This is also where practical shopping in Australia comes in. Table linen is recognised as its own textile category in trade and customs, and in the Australia and Oceania cotton table-linen market, Australia consumed about 2.4K tons or 71% of regional volume and produced about 1.5K tons or 61% of regional output in 2024, while import value sat at about $11 million versus only $150K in exports, according to IndexBox's Australia and Oceania cotton table-linen market analysis. In plain English, Australians buy a lot of table-linen products, and many of them come in from elsewhere, so quality can vary widely.

Choosing Materials That Suit Australian Homes

Material choice changes everything. It affects how the set feels in your hands, how it sits on the table, how forgiving it is after a spilt drink, and whether it suits a beach house, a busy family kitchen, or a more dressed-up dining room.

A visual material guide for Australian table linens, showcasing cotton, linen, natural fibres, and synthetic fabric options.

Everyday ease versus relaxed texture

If you want an easy starter option, woven cotton is usually the least intimidating. It feels soft, folds neatly, and often works for both weekday meals and casual entertaining. Cotton also tends to suit homes where the table gets used properly, not just admired from across the room.

Linen blends bring more texture and a softer, sun-washed look. They fit beautifully with coastal interiors because they don't need to look crisp to look good. A crease in linen often reads as character, not failure, which is handy if your home has that barefoot, salty-air energy.

Natural fibres and low-fuss synthetics

Then you've got natural fibres such as seagrass, maize, or rattan. These give a table instant warmth and a lovely layered look, especially if your style sits somewhere between beach cottage and old surf club charm. They're often brilliant for placemats because they add shape and structure.

That said, natural fibres come with trade-offs. They can be less forgiving around oily splashes, strong dyes, or long damp spells if they're stored carelessly. If your entertaining style includes lots of saucy family dinners or younger kids, you might prefer a more forgiving material for everyday use.

For lower maintenance, synthetics and synthetic blends can be the sensible pick. They often cope better with frequent wipe-downs and can feel less precious during busy meals.

A quick material comparison

Material Look and feel Everyday practicality Best fit
Woven cotton Soft, familiar, casual Easy-going for regular use Family tables, simple styling
Linen blend Relaxed, textured, airy Good if you don't mind a lived-in finish Coastal homes, long lunches
Seagrass or rattan Organic, structured, tactile Better for dry use and lighter mess Outdoor settings, beachy interiors
Synthetics Smooth or woven-look, often more uniform Often easiest to live with High-use dining, low-fuss households

For shoppers drawn to earthy texture, a jute table runner shows the kind of grounded, natural look many coastal homes are after.

Material shortcut: Choose the set that suits the mess and maintenance you actually live with, not the fantasy version of your dining room.

One more point matters here. Australian shoppers often want sustainable-looking pieces, but the trade-offs don't always get explained well. Natural and tactile materials have strong appeal, yet online decor categories can still be patchy and trend-driven. Reporting from eCommerceDB's Australia decorations market page notes the decorations eCommerce market is projected to decline at a -1.0% CAGR from 2025 to 2029, which is a useful reminder not to buy for trend alone. Buy for use, feel, and how your home really functions.

Sizing Your Set for Every Table Shape and Length

Sizing is where plenty of lovely purchases go wrong. A runner can be the right colour and the wrong length. Placemats can look great online, then swallow a small table or crowd everyone's elbows once dinner is served.

A guide showing how to correctly size and arrange table runners and placemats for different table shapes.

A simple way to test before you buy

Grab a tape measure and some painter's tape. Mark out the footprint of the runner down the centre of the table, then tape out each placemat where a person would sit. You'll spot problems quickly.

Look for three things:

  • Centre breathing room so serving dishes can still land without wobbling on edges
  • Comfort at each seat, especially near table legs or armchairs
  • Clear table edge lines, so nothing hangs awkwardly or looks cramped

This sizing walkthrough is handy if you'd like to see a visual example in action.

What works on common Australian tables

Rectangular tables are the easiest. A runner usually looks best when it extends past the tabletop at both ends rather than stopping short in the middle. That little overhang gives the table a more settled look.

Round or square tables are different. Sometimes placemats alone are enough. If you still want a runner effect, a shorter runner or folded textile used as a centre feature can work better than a long strip trying to force a shape that isn't there.

Extension tables need honest measuring. Don't buy for the compact version if you regularly open it up for guests. Measure it in the size you use when entertaining.

The overlooked crosswise runner idea

This is the part many shoppers don't get explained. A runner doesn't always have to run lengthways. On a smaller table, placing a runner crosswise can create two dramatic place settings opposite each other, almost like oversized placemats with extra flair.

That works especially well for:

  • Breakfast tables for two where you want a bit of polish without filling the middle
  • Narrow apartment dining tables where full placemats feel crowded
  • Styled occasional tables in beach homes or holiday rentals

Use crosswise styling when you want intimacy, not volume. It suits two-person settings and keeps the centre open for a bowl, lantern, or simple vase.

Common mistakes to avoid

A few sizing errors come up again and again:

  • Too-short runners look accidental, like they've shrunk or been borrowed from another room.
  • Oversized placemats can push glasses and cutlery too close to the edge.
  • Ignoring chair count leads to sets that work in photos but not when everyone sits down.
  • Forgetting serving space leaves nowhere for dishes, breadboards, or shared plates.

If your table hosts real meals, not just styling moments, always test with plates and glasses in place.

Styling Ideas for Coastal and VW Inspired Tables

A table runner and placemats set gives you the base note. The styling around it creates the personality. For coastal homes with a VW-soft spot, the sweet spot is usually relaxed texture with one or two nostalgic touches, not a full theme park.

The coastal base that always works

Start with a calm foundation. Sand, white, oat, faded blue, driftwood, or sea-glass tones are easy companions. Add texture before you add colour. Linen-look runners, woven placemats, ceramic plates, and a bit of timber do a lot of heavy lifting.

Then keep the centre low. A shallow bowl of shells, a small cluster of candles, or a simple vase works better than anything too tall or too busy.

If you like beachy decorating details beyond the dining table, dining table decor ideas can help you think about how the whole setting connects with your room.

Adding a VW note without making it kitschy

The classic Volkswagen mood is freedom, road trips, surfboards, and cheerful old-school colour. You can nod to that without plastering logos everywhere. A table can feel VW-inspired through palette and spirit alone.

Try combinations like these:

  • Surf club casual with a neutral runner, woven mats, white plates, and a soft pop of turquoise or sun-faded red
  • Flower Power retro with a plain natural base and one brighter accent, such as orange napkins or a playful bud vase
  • Samba Sunday lunch with crisp placemats, polished cutlery, and a tidy centrepiece that feels celebratory but still easy-going

The trick is restraint. One nostalgic object on a sideboard, a retro photo frame nearby, or colours borrowed from classic Kombi paintwork can carry the theme.

A VW-inspired table should feel like a road trip memory, not a merchandise shelf.

Three easy styling formulas

Here are three reliable mixes that suit real Australian entertaining:

  1. Family weeknight
    Use wipeable or low-fuss placemats, a simple runner, and no centrepiece beyond a serving bowl. This keeps things practical and still pulled together.

  2. Outdoor coastal lunch
    Choose textured placemats, a runner with movement, and sturdy tableware. Let the natural fibres do the decorating so the setting still works if the breeze picks up.

  3. Festive catch-up with friends
    Keep the base neutral, then bring in a brighter accent through napkins, glassware, or a few low candles. That way the set remains useful year-round.

Negative space matters, too. Leave some breathing room. A table looks more inviting when not every centimetre is trying to perform.

Care Instructions That Keep Your Set Looking New

A pretty set isn't much use if it goes wavy, stiff, or patchy after one wash. Care starts before the first spill. It starts with reading the label and buying a material whose care routine suits your real life.

What Australian care labels need to tell you

In Australia, textile household goods such as table runner and placemats sets should carry durable care labelling that follows the Consumer Goods (Care Labelling) Information Standard 2023. For washable items, the label must identify the appropriate wash process, and if an item can't be washed or dry-cleaned, the label must clearly warn you and state the correct care treatment, as outlined by the Australian mandatory care labelling standard.

That's not admin for admin's sake. Care instructions affect shape retention, finish, and service life. Wrong laundering can lead to shrinkage, edge waviness, and print or coating failure.

Damage often comes from heat, not dirt

A lot of table sets look sturdy until heat gets involved. Laminated backs, water-repellent finishes, embroidered borders, and bonded layers can all react badly to harsh washing, bleach, or aggressive tumble drying.

Australian guidance also allows care instructions to be given in English or recognised symbols, with standard symbols covering washing, bleaching, drying, ironing, and professional care according to the ACCC care labelling guide for clothing and textiles. If you're not used to reading symbols, it's worth learning the basics once. It saves ruined finishes later.

A practical care routine

  • For spills, blot first. Don't grind the stain in with a wet cloth.
  • For washable fabric runners, follow the stated wash method rather than guessing a gentle cycle will be fine.
  • For woven natural-fibre placemats, spot clean carefully and let them dry flat and fully before stacking.
  • For ironing, use only the heat level the label supports, especially on coated or decorated finishes.
  • For storage, keep pieces flat or gently rolled where possible, and don't trap dampness between stacked mats.

Store your set as carefully as you style it. Most shape problems start in the laundry or the cupboard, not on the dining table.

If you hate ironing, don't buy a set that demands crisp pressing to look good. Linen blends and textured weaves can be much more forgiving.

Gifting and Shopping Smart for Bundled Sets

A table runner and placemats set makes a strong gift because it feels useful and thoughtful at the same time. It suits housewarmings, birthdays, holiday gifting, coastal rental refreshes, and even collector households where the person already has “enough stuff” but still enjoys pieces with character.

What smart buyers look for

Good bundled sets usually reveal their quality in small details. Check whether the edges are neatly finished, whether the weave sits flat, and whether the materials make sense for the recipient's lifestyle. A beach-house owner may love natural texture. A family with younger kids may thank you for something easier to wipe down.

If you're shopping with a nostalgic VW eye, look for details that complement that world rather than competing with it. A set doesn't need a giant graphic print to feel on-brand with a surfy, retro, road-trip home. Often the better gift is something textural and versatile that sits beautifully alongside Beetle, Kombi, or Samba-inspired decor already in the home.

Why local buying helps

For Australians, local stock has obvious advantages. Faster shipping is handy when the gift date is close, and it's easier to ask practical questions about materials, colour, or styling if support is local. That matters even more for gifts, because returns and replacements are always more pleasant when you're not chasing answers across time zones.

Presentation helps too. Add a note about where the set might work best, such as weekend breakfasts, outdoor lunches, or summer entertaining. It makes the gift feel considered rather than generic.

A short gift guide by occasion

Occasion Best set style
Housewarming Neutral runner with versatile placemats
Beach house gift Natural-fibre or coastal-texture set
Family entertainer Low-fuss, easy-care materials
Retro decor lover Relaxed tones that pair with VW-inspired pieces

If you're pairing home styling with a broader beachy or nostalgic gift, beach house gifts are a natural companion category to browse.

For the best buy, think like a collector for a moment. Be specific about what you want. Colour, texture, finish, and use case matter. That mindset mirrors advice from Australian diecast collecting guides, which recommend being precise about the exact details you're after rather than buying vaguely and regretting it later. It's surprisingly good advice for home decor too.


If you love the easygoing mix of coastal styling and classic VW nostalgia, Volkswagen Memorabilia brings those worlds together with VW-themed gifts, diecast models, and beach-inspired decor that sit beautifully in relaxed Australian homes. From surfy accents to collectible Kombi and Beetle pieces that add character near the dining space, it's a lovely spot to find something personal, practical, and full of heritage.

Wall Art Hangings Guide to Style Size and Display

You're standing in the lounge with a new canvas under one arm, a small Beetle model on the shelf and a blank wall that still feels like it belongs to someone else. The sofa is in place, the coastal cushions look cheerful, yet the room hasn't found its story. That's where wall art hangings can change everything. A woven textile adds softness, a framed print brings focus, and a carefully placed Kombi or Beetle display gives the space that familiar sense of freedom, travel and sunny Australian weekends.

Wall art hangings include far more than framed paper prints. You can work with canvas, timber, metal, woven fibres, textile pieces and mixed-media arrangements, then balance them with shelves, diecast models and beach-inspired accents. The trick is to choose the right material, get the scale comfortable and use fixings that suit the wall behind it.

A man standing in a modern living room looking at a large woven bohemian tapestry wall hanging.

This guide will help you move from a bare wall to a relaxed, cohesive display. You'll learn how each material behaves, how to measure above furniture, how to hang art safely on plasterboard or brick, and how to combine retro Volkswagen character with coastal colour. For more inspiration before you pick up the tape measure, browse these wall decoration ideas, then return to the practical details that make a display work in everyday life.

Introduction to Wall Art Hangings That Transform Your Space

A blank wall can feel oddly loud. It catches your eye every time you walk past, especially in an open-plan Australian home where the lounge, dining area and entry need to feel connected. Many people leave art leaning against the wall because choosing the first piece feels permanent. In reality, a good display can evolve just like a well-loved Kombi, with small changes that add character rather than erase it.

Think of a wall as the backdrop behind a favourite story. A large canvas might recall a coastal drive, a woven hanging can soften a room filled with timber and glass, and a metal sign can bring the cheerful garage-and-beach feeling associated with classic Volkswagens. A licensed diecast model on a nearby shelf then works like a tiny piece of sculpture. It doesn't need to dominate the room. It gives the eye a detail worth discovering.

A useful starting point: choose one anchor piece, then let the surrounding objects support its colour, shape or mood.

Australia has a long relationship with decorative wall hangings. The National Museum of Australia's collection holds 250,000 objects, while Museum Victoria's textile collection documents 1970s wall hangings as part of post-war domestic design. The Australian Bureau of Statistics also recorded that over 80% of purchased art items were Australian-made, worth $137.9 million, with paintings accounting for $84.2 million, a useful reminder that locally made art has held an important place in Australian decorative buying. Those figures come from the historical context provided by the museum and ABS material, not from a rule about how your own home should look.

The best result usually feels collected, not assembled in one afternoon. Start with the wall's size and the furniture below it. Add a material that suits the room, leave enough breathing space around the art, and bring in VW memorabilia or coastal touches where they feel natural. A bright Samba Bus, a muted Beetle model or a woven piece in sandy tones can all belong in the same room when the palette and spacing are doing the quiet organising.

Understanding Wall Art Hangings Types and Materials

Material changes the mood of a room before you've considered the picture itself. Canvas feels relaxed and forgiving, metal adds a sharper graphic note, while woven pieces introduce texture that flat artwork can't provide. Australian industry reporting describes the market as structurally import-dependent, with 70–80% of finished products sourced from China and Vietnam, and estimates that framed canvas prints and multi-panel sets account for 55–65% of unit volume. The same industry market analysis projects nominal Australian-dollar growth of roughly 4–6% annually from 2026 to 2035, so ready-to-hang formats are likely to remain familiar choices for homes and hospitality spaces.

Canvas and framed prints

Canvas prints suit a casual lounge, hallway or beach-house bedroom because their surfaces soften an image and avoid the reflective glare that can come from glass. They work particularly well beside timber furniture, linen upholstery and a small row of diecast vans. A multi-panel canvas can stretch across a broad wall, but treat the panels as one composition when measuring the overall width.

Framed prints bring clearer edges and a more finished feel. Black frames can echo tyres, window seals and steel trim on a Volkswagen, while light timber frames sit comfortably with rattan, pale floors and coastal accessories. Glass adds weight and requires careful handling, so don't choose the fixing by looking only at the print size.

Metal and timber

Metal wall art has a natural connection with motoring spaces. It can look at home above a workbench, in a games room or near a display cabinet, especially when the design references a Kombi, Beetle, surfboard or old service station. Metal often has a crisp silhouette, so pair it with a softer woven item or canvas rather than filling the whole wall with hard surfaces.

Timber signs and carved pieces bring warmth and depth. They're useful for a narrow entry or a wall that already contains polished metal, because wood stops the arrangement feeling too cold. Check the back of the piece before mounting. A keyhole slot, sawtooth hanger or D-ring each calls for a slightly different positioning method.

Woven and mixed media

Woven wall hangings include macramé, tapestry, fibre art and textile panels. They're excellent for bedrooms, reading corners and relaxed coastal interiors, where movement and texture matter as much as colour. Keep them away from areas where they'll brush against lamps, fans or busy walkways.

Mixed-media walls combine materials rather than asking one item to do all the work. Try a canvas painting, a small metal VW sign, a timber piece and a textile accent, then repeat one or two colours across the group. This gives a display the variety of a car show lineup without making the wall look like a storage area.

An infographic showing guidelines for sizing and hanging wall art above a living room sofa and bedroom bed.

How to Choose the Right Size and Style for Every Room

A wall can feel unfinished when a small print floats above a generous sofa. The opposite happens in a narrow passage, where an oversized canvas makes the walkway feel tight. Start with the furniture, then choose artwork that belongs to its available wall area. Measure the sofa, console, bedhead or sideboard, along with the clear space above it.

For everyday placement, centre the artwork at 145–150 cm from the floor and leave 20–30 cm above furniture. Treat these as useful starting points, not strict rules. A low seat, tall sideboard or high ceiling may need a small adjustment. The centre should sit where people can enjoy the piece comfortably, without craning their necks.

Match the mood to the room

A lounge can carry a confident coastal photograph, a wide canvas or a gallery wall with one strong centrepiece. Bedrooms usually suit quieter contrast, tactile textiles and softer edges. In a hallway, narrow vertical pieces guide the eye along the space. A dining area may work well with graphic metal art that sits comfortably beside timber and warm lighting.

For a VW coastal room, settle the palette before adding the playful details. Sea blue, cream, sand, faded red and sun-washed yellow can connect a canvas with a Flower Power Kombi or classic Beetle display without making every object identical. Surfboard shapes, Australian scenery and old travel motifs bring the retro character naturally. A logo on every surface would make the room feel more like a showroom than a home.

Choose one large piece or a gallery wall

Decision Factor Single Oversized Canvas Gallery Wall Mix
Visual effect Creates one calm focal point with less visual noise. Builds a layered story from prints, textiles, signs and objects.
Best location Wide sofa walls, open dining areas and rooms needing a clear anchor. Stairwells, hallways and larger walls where varied shapes can fill space.
VW styling Pair with one carefully chosen Kombi or Beetle display nearby. Add a metal sign, coastal print and small diecast model within the group.
Installation Fewer fixing points, but the main piece needs solid support. More measuring, with each item aligned to the overall composition.
Future changes Easy to understand, but changing the focal image changes the whole mood. Flexible, because you can rotate smaller pieces over time.

A single oversized canvas suits a broad wall that needs one clear anchor. A gallery wall behaves more like a well-arranged VW meet, with each piece contributing to the full view. Mix a canvas, metal sign, woven accent and small diecast Kombi or Beetle, then repeat a colour so the display feels connected rather than crowded.

Lay the proposed gallery wall on the floor before making holes. Paper templates or masking tape can show the outer boundary, while a photograph lets you review the arrangement from a distance. Start with the largest piece, place the second substantial item away from it, and fill the remaining gaps with smaller vertical and horizontal works. Consistent colour usually matters more than identical frames.

A five-step infographic showing the pro hanging process for wall art including wall type, tools, height, mounting, and adjustment.

A short visual demonstration suits hands-on learners. Use it alongside your measurements, and still check the fixing instructions supplied with your hardware.

Hanging Wall Art Like a Pro From Marking to Mounting

The safest hanging job begins before the drill comes out. Identify the wall substrate, check the artwork's hanging points and consider how the piece will behave once it's on the wall. A wide canvas may be light but still rotate or wobble if it hangs from one off-centre point.

A six-step infographic guide demonstrating how to properly measure, mark, drill, and hang wall art.

Follow the wall before choosing the hook

Plasterboard is commonly the limiting surface in Australian homes. Practical guidance treats a single picture hook in plasterboard as suitable up to about 5 kg, while a dual-hook and wire setup can raise the working range to around 12 kg for a canvas measuring about 120 × 80 cm. On brick, red masonry plugs are cited at roughly 25 kg, which shows why the same frame can need different hardware in different rooms. See the Australian canvas hanging guidance for the substrate-specific examples.

Use a stud where practical, or select a fixing designed for the actual wall type. Don't rely on a generic nail for a framed print because the item feels manageable in your hands. Weight shifts when the artwork moves, and a failed fixing can damage both the wall and the piece.

Mark, mount and test

  1. Measure the artwork. Record its height, width and the distance from the top edge to the hanging wire or bracket.
  2. Mark the centre line. Use the intended centre height, then work backwards from the hanging point rather than guessing where the frame top will land.
  3. Check the fixing. Confirm the hook, plug, anchor or screw suits the wall and the load.
  4. Use two points for width. Two hangers spread the load and reduce rotation. Keep them level, then place the wire under gentle, even tension.
  5. Lift with care. Have another person help with large glass-fronted pieces or metal panels.
  6. Check the result. Step back, use a spirit level and press the lower corners gently to test for movement.

Practical rule: measure twice, make one mark, then test the wall fixing before trusting it with a treasured piece.

For specialist hanging systems, think in terms of the complete arrangement. One Australian supplier lists combinations as light under 10 kg, medium under 20 kg and heavy under 40 kg, while individual hook and wire pairings range from 5 kg on 1 mm Perlon wire to 20 kg on 2 mm wire. The hanging-system load guidance also recommends two hangers for better stability. That approach makes sense for a large wall display beside a prized Kombi model. The frame, wire, hooks and wall must work together.

For a VW-focused installation, this Volkswagen van wall-art hanging guide can sit alongside the general safety checks above. The cheerful part is choosing the position. The serious part is ensuring the artwork stays there.

Renter Friendly and Heavy Art Solutions for Australian Homes

Renters need to plan the wall before choosing the artwork. Check whether the lease permits hooks or adhesive products, whether the surface can support the fixing, and whether the wall can be returned to good condition. A rental-friendly VW coastal display might pair a lightweight canvas with a small woven piece and a diecast Kombi on a shelf, rather than placing heavy metal art above a sofa.

Australian renter guidance commonly discusses Command strips for canvases up to about 2 kg and picture hooks for frames around 5–7 kg. Suitability still depends on the product, wall finish and installation instructions. Read the bond-friendly renter guidance before applying anything to painted plasterboard or wallpaper.

A safer rental routine

  • Read the lease first. Some agreements set conditions for hooks, adhesive products and wall alterations.
  • Check the surface. Dust, fresh paint, textured finishes and wallpaper can change how adhesive behaves.
  • Keep the load modest. Adhesive products suit lighter canvases, not heavy glass frames or substantial metal pieces.
  • Photograph the wall. Take clear before-and-after photos to record its condition.
  • Plan the make-good. Keep the original packaging and follow removal instructions slowly, without pulling adhesive away from the paint.
  • Avoid risky locations. Do not place a poorly supported piece above a bed, cot, desk or busy walkway.

Heavy artwork needs a different plan. Australian trend reporting describes interest in oversized canvases, layered textures, woven hangings, metal art and mixed-media walls. One Australian source reports that its median order size moved from 60 × 80 cm to about 90 × 120 cm in 2026. Treat this as a market observation, not a rule for every Australian home. The Australian picture-hanging trends report also links current interest with Australian photography and Indigenous-owned or licensed works, where provenance deserves careful attention.

A broad canvas can wobble because its corners flex and its hanging point sits away from the wall. Two hangers reduce twisting, while suitable wire thickness helps carry the load. For heavier framed or metal work, choose a rated system instead of matching random hooks until one appears suitable. If the wall is uncertain or the piece is valuable, a professional installer is a sensible investment. In a retro-beach room, secure the artwork first, then let the canvas, metal and woven textures support the Kombi and Beetle display.

Creative Display Ideas for Gallery Walls and VW Coastal Mixes

A successful VW coastal wall feels like a memory board from a long road trip. It might combine a faded ocean photograph, a woven fibre panel, a small metal sign and a shelf holding a bright diecast Kombi. The collection works because each item shares a mood, not because every object comes from the same range.

Build around one travelling story

Start with a visual anchor. A framed Australian or surf image can establish the blue-and-sand palette, while a 1962 Kombi Samba Bus diecast model adds the unmistakable retro note on a shelf below or beside it. A Beetle model can sit slightly apart, giving the display a second shape and stopping the vans from forming a repetitive row.

Flower Power variants suit warmer palettes, especially cream, orange, yellow and faded red. A surfy van works with woven textures and pale timber. Keep the smaller models on a ledge or cabinet rather than attaching them to the wall, and give each one enough room to read as a miniature vehicle rather than a loose ornament.

Use a repeatable arrangement

Try one of these formulas:

  • Anchor and satellites: Hang one broad canvas, then place a small woven piece and metal accent on either side. Repeat one colour in the diecast display.
  • Tactile ladder: Arrange textile, canvas, timber and metal from largest to smallest as the eye travels up a narrow wall.
  • Shelf-backed gallery: Install a slim picture ledge, lean framed pieces against the wall and place a Kombi model in front. Secure items if the shelf is in a busy passage.
  • Asymmetrical cluster: Put the largest item slightly off-centre, then balance its visual weight with two smaller pieces, a circular object or a Beetle model below.

Leave comfortable gaps between pieces and keep the outer boundary deliberate. A gallery wall should look connected from a distance, then reward a closer look with details such as a licence-plate-style sign, woven knots or a tiny surfboard motif.

Lighting matters just as much as spacing. Avoid placing delicate textiles in harsh direct sun, and use warm, directional light to pick up the texture of canvas and metal. If your room already has several small objects, choose one stronger artwork instead of adding more pieces. The living-room wall accent ideas can inspire combinations, but your own collection should remain the deciding voice.

Caring for Your Wall Art and Styling Your Next Steps

Dust is the quiet enemy of a display. Use a soft, dry microfibre cloth on frames, timber and metal, and clean glass with the cloth rather than spraying liquid near the artwork. For canvas, brush gently with a clean, dry, soft brush. Don't press into the surface, especially if the print has raised texture.

Textile and woven pieces need a little breathing room. Keep them away from persistent humidity, steam and areas where they'll catch on bags or clothing. Coastal homes often have open windows and salty air, so inspect metal surfaces occasionally for residue and wipe them according to the maker's care guidance. Direct sunlight can fade prints and fabrics, so use blinds, curtains or a better position when the light is strong.

Keep the fixing part of the care routine

Check the top edge of every hanging when you dust. Look for a slipping wire, a hook that has shifted, a frame leaning forward or a canvas that has started to rotate. Large pieces deserve extra attention after moving furniture, cleaning walls or experiencing strong household vibration.

Let the collection evolve

A wall doesn't need to be finished forever. Rotate seasonal coastal accents, move a Beetle model from a shelf to a cabinet and let a new woven piece change the balance of an older gallery wall. Keep the main palette steady, then allow the details to carry the nostalgia.

Volkswagen's Australian story gives that styling a strong foundation. Volkswagen's official history describes German migrant Karl Regel arriving in Sydney with a right-hand-drive Beetle built in Stuttgart, which became one of the first Volkswagens registered in New South Wales. Full Beetle manufacture later ceased after a 6-year run at the Clayton plant, according to Volkswagen Australia's Beetle history. Museum Victoria records that the first Beetles were imported in late 1953, local production began at Martin & King in Clayton in 1959, and Australian production ended in 1968, with just over 260,000 Beetles made locally. Its collection history of the Australian Beetle preserves those details.

The story continued beyond the original car. Carsales records local content reaching 80% by 1962 and 95% in the mid-1960s, while Drive describes original Beetle production lasting 65 years from 1938 to 2003 and reports 9,848 new-generation Beetles sold in Australia from 2000 to 2017. Those Australian details are outlined in Carsales' Beetle history and Drive's account of the model's production. They're a lovely reminder that a small model on a shelf can carry a much bigger journey.

Visit Volkswagen Memorabilia to explore licensed Volkswagen diecast models, Kombi Samba Bus and Beetle collectibles, Vans and Cars Metal Decor, and coastal home accents that suit a thoughtfully hung display. With local stock, fast shipping and friendly Australian support, it's an easy place to find the next piece for your retro-beach wall or a gift for the VW fan who already has a favourite road-trip story.

Volkswagen Caddy Van History Specs and Collecting Guide

At an Australian VW gathering, the Beetles and Kombis usually draw the first wave of attention. Then a silver Caddy rolls in with camping gear, show supplies or a tradesman's tools aboard, proving that the Volkswagen family has always had room for a practical everyday hero.

Introduction to the Volkswagen Caddy Van Story

The Volkswagen Caddy van sits in an interesting corner of the VW story. It doesn't carry the instant nostalgia of a split-window Kombi or the rounded charm of a Beetle, yet it shares the same basic idea: make motoring useful, approachable and easy to live with. For Australian owners, the Caddy has become the compact workhorse that fits between a passenger car and a larger commercial van.

That middle ground matters. A city electrician may need room for tools without driving a large van through tight streets. A small delivery operator may want a flat load area but still appreciate car-like comfort. A weekend traveller may prefer the compact footprint of a Caddy California-style layout over a full-size camper. The appeal isn't about showing off. It's about choosing a vehicle that matches the job.

A silver Volkswagen Caddy van parked on a grassy field at sunset near other classic Volkswagen vehicles.

This guide follows the Caddy from its Australian arrival through its working life, then moves into the questions that matter to owners: how much it can carry, how its load space should be used, and what current running-cost clues tell us. It also connects the modern van to the wider VW enthusiast world, where history, local shows and diecast collecting all overlap.

A modern member of the VW family

Volkswagen heritage isn't limited to vehicles built for holidays. The Beetle carried families, the Kombi became a symbol of travel and community, and the Caddy has carried the less glamorous essentials that keep businesses moving. That makes it a natural subject for anyone who enjoys the complete VW story, not only the famous silhouettes.

Collectors can explore that story through licensed miniatures as well. A diecast Caddy can sit beside a Volkswagen Beetle model, a Samba Bus and other VW memorabilia, creating a display that shows how the brand moved from people's-car icon to practical commercial partner.

A useful way to view the Caddy: it's the working-age cousin of the Beetle and Kombi, less theatrical but just as connected to everyday Australian life.

What Makes the Volkswagen Caddy Van Different

The easiest way to understand the Caddy is to place it on a size ladder. A small hatchback is the city-friendly end, the Caddy is the compact van step above it, and a Transporter or Crafter occupies the larger commercial end. The Caddy gives you a dedicated load area without the bulk of a full-size van.

That shape creates its main advantage. You sit higher than in many passenger cars, the rear load area is more useful than a conventional boot, and the vehicle remains manageable in urban streets. It's a bit like replacing a deep household cupboard with a long, accessible workbench. The available space is shaped for boxes, cases, tools and equipment rather than soft luggage.

A promotional graphic explaining the key features of the Volkswagen Caddy van, including its car-like handling and practicality.

Volume isn't the same as payload

Two measurements often confuse first-time van buyers.

  • Load volume describes how much physical space is available, usually in cubic metres.
  • Payload describes how much total weight the vehicle can carry, including occupants, equipment and additions.

A van may have spare floor space but be too close to its weight limit for another heavy load. The reverse can also happen, where the weight allowance looks comfortable but bulky items won't fit through the doors or within the load length.

The Caddy is offered in Cargo form for work duties, while people-focused and lifestyle variants serve different priorities. Cargo buyers usually care about flooring, access and fit-out potential. A family or leisure buyer may value seating, comfort and flexible interior use more highly.

Why small vans earn their keep

A compact van can suit a business that makes frequent short trips, particularly where parking and access matter. Plumbers, florists, mobile repairers, caterers and local couriers may not need the capacity of a larger van for every job. The Caddy's car-derived feel also makes it less intimidating for drivers who spend part of the week in passenger vehicles.

The right question isn't, “Is the Caddy big enough?” Ask instead:

  1. Are your regular loads mainly bulky or heavy?
  2. Will shelving, drawers or refrigeration equipment be installed?
  3. Do passengers travel with the load?
  4. Does the vehicle need to fit into older car parks and narrow streets?

Those answers point towards the right variant more reliably than a brochure headline. The Caddy works best when the operator respects its compact role rather than treating it like a shrunken heavy-duty van.

History and Evolution of the Caddy in Australia

The Australian Caddy story moved quickly. The Volkswagen Caddy arrived in Australia in late 2004, and by 2007 it had captured a 42% share of the Australian small-van market, making it the segment leader, as recorded in the Volkswagen Caddy history reference. That's a significant early milestone because the model was competing with vans that already had established local reputations.

Australian buyers were introduced to 1.6-litre petrol and 1.9-litre turbo-diesel options, reflecting Volkswagen's effort to offer practical, fuel-conscious engines for commercial use. Those choices also helped define the Caddy's character. It wasn't presented as a stripped-back delivery appliance, but as a compact vehicle designed to combine sensible running with daily usability.

A timeline graphic showing the history and evolution of the Volkswagen Caddy van in Australia from 1979 to 2020.

From new arrival to established workhorse

The Caddy stayed central to Volkswagen's Australian commercial range through the 2010s and 2020s. A ClubVW Australia history summary identifies the Caddy as the biggest-selling small van on the Australian market in 2010. Independent Australian sales tracking recorded 1,142 sales in 2024, 1,113 in 2025 and 42 year to date in 2026, showing that demand continues even though the model now operates at a much smaller volume than during its early growth period.

That history gives the Caddy a place in VW heritage displays. It represents a different kind of nostalgia, the memory of workdays, family businesses, local deliveries and road trips rather than only beach holidays. At a show, a tidy Caddy can tell visitors what Volkswagen looked like when practicality became the main attraction.

The longer VW timeline

Volkswagen's heritage stretches much further back. German Beetle production ended in stages, with Wolfsburg stopping in July 1974 as production switched to the Golf, Emden continuing until noon on 19 January 1978, and Karmann's convertible line ending on 10 January 1980, according to this documented Beetle production history.

The Caddy belongs to that same pattern of evolution. VW kept the recognisable values of sensible packaging and approachable driving, then adapted them for modern commercial needs. That's why it deserves more than a footnote in a van catalogue.

Key Generations Variants and Specs Explained

Caddy generations make more sense through their jobs than through a string of engineering codes. Earlier Australian models established the compact-van formula. Later versions refined comfort, safety, connectivity and load management. Used-van shoppers should still check the exact model year and variant, because equipment can differ substantially.

The current Australian range includes work-focused Caddy Cargo models, longer-body Maxi variants and lifestyle-oriented versions such as California. Cargo suits tools and deliveries, while Maxi gives operators more room for longer items. California-style models use the same compact platform for leisure and travel, showing how the Caddy can shift from workhorse to weekend companion.

Current figures in plain English

Australian local Caddy Cargo documentation lists a 1,797 to 2,150 mm load length, a 3.1 to 3.7 m³ load area and a 722 to 792 kg payload range, according to the Australian Caddy model documentation. Combined fuel consumption is listed at 4.9 to 6.2 L/100 km, depending on the selected model and powertrain.

Spec Caddy Cargo Range
Load length 1,797 to 2,150 mm
Load area 3.1 to 3.7 m³
Payload 722 to 792 kg
Combined fuel consumption 4.9 to 6.2 L/100 km

These figures provide a useful starting point, much like measuring a garage before buying shelving. They do not replace the full variant specification. A longer load floor may suit timber or event gear, while dense tools can use the payload allowance before the cargo bay looks full. Permanent racking, drawers and other equipment also reduce what remains available for daily work.

What the MY25 refresh changes

The MY25 refresh added Digital Cockpit Pro, a 10-inch infotainment screen, parking sensors, keyless go and additional safety technology, as described in Australian Caddy coverage. These changes suit a van that spends its days in traffic, loading zones and tight worksites. Parking assistance can reduce stress in confined spaces, while clearer displays and connectivity make repeated driving tasks easier.

The current Caddy also gives collectors a clear marker of VW's practical heritage. A Volkswagen Caddy Maxi diecast model captures the long-body work-and-travel character in a smaller scale, ready to sit beside nostalgic Beetle and Kombi shapes. The van carries the gear. The model preserves the story.

Payload Practicality and Real World Work Use

At a car show, a tidy Caddy can look ready for any job. In daily work, its usefulness depends on payload management, not cargo-bay size alone. Volkswagen defines payload as GVM minus unladen weight, and that allowance covers occupants, cargo, added structures and tow-ball down weight. The figure on the specification sheet is the van's complete carrying budget, not a box-and-tools allowance.

As noted earlier, the Cargo's published volume and payload describe a compact work envelope. The practical question is how shelving, passengers and tow-ball weight reduce what remains available. Weight distribution also matters, because a van can look half-empty while carrying too much mass in one area.

An infographic showing the practical pros and cons of using a Volkswagen Caddy van for cargo.

How a fit-out changes the calculation

Start with the van as delivered, then count everything that becomes part of the working vehicle:

  • Shelving and drawers: Organisation adds permanent weight before the first tool is loaded.
  • Tools and materials: Dense items can consume the allowance faster than their size suggests.
  • Passengers: Every occupant counts, including the driver.
  • Tow-ball down weight: A trailer affects the vehicle's remaining payload as well as the trailer's own limits.
  • Accessories: Roof systems, barriers and protective equipment also belong in the calculation.

A tradie carrying ladders, power tools and fittings may reach the payload limit before the floor looks full. A florist may fill much of the available volume with lightweight arrangements while staying below the weight limit. The job profile decides which constraint arrives first.

Axles and load placement

The Caddy's specifications include separate front and rear axle load limits. Placing dense equipment at the very back can overload the rear axle even when the combined vehicle weight appears acceptable. Keep heavy items low, secure them properly and spread them across the load floor rather than stacking everything behind the rear axle.

Check the vehicle's compliance plate, handbook and variant-specific documentation before loading for work. A Caddy light commercial vehicle collection celebrates the van's working identity and its place in VW history, much like a diecast model preserves a familiar shape on a collector's shelf. Safe operation, however, depends on the actual vehicle, its fit-out and the load carried that day.

VW Culture Events and the Caddy Connection

Volkswagen culture in Australia has always been bigger than any single model. Beetles, Kombis, Samba Buses, Golfs and commercial vans share the same gathering space because owners value the stories attached to them. One car may recall a first road trip, another a family business, and another years spent restoring a tired classic in a home garage.

The VW Nationals, Australia's biggest Volkswagen show, offers a clear example. It's a club-run event with a documented history dating back to 1988, when the first Nationals formed part of the Australian Bicentennial celebrations, as recorded in the VW Nationals history archive. The event's continuing format includes a car show, swapmeet, raffle draws and trophy presentation at Fairfield Showgrounds.

Where the Caddy fits in

A Caddy may arrive carrying display stands, spare parts or picnic gear, but it can also become part of the display itself. Its appeal is quieter than that of a bright Flower Power Kombi, yet enthusiasts recognise the design language and the care that goes into presenting a clean, well-kept van.

The local event mechanics make the Nationals approachable for newcomers. The 2025 listing set general admission at $10, with children under 16 entering free, show-and-shine entry at $30 and swapmeet sites at $30. Gates opened at 7:30 am, car show entry closed at 10:30 am, peer judging closed at 12:30 pm, and the trophy presentation took place at 3:00 pm, according to the 2025 VW Nationals event details.

The best part of a VW show isn't only the polished paint. It's the conversation beside the car, where someone explains how they found it, fixed it or kept its story alive.

That same spirit leads naturally into memorabilia. A collector might choose a Beetle for its shape, a Samba Bus for its travel associations and a Caddy for the practical chapter of VW history.

Collecting the Caddy and VW Diecast Models You Will Love

A diecast model makes the Caddy story easy to keep close, even if a full-size van isn't practical. The strongest collections usually begin with a theme rather than an impulse purchase. You might build a timeline from Beetle to Kombi to Caddy, focus on commercial vehicles, or create a display around Australian surf and travel culture.

Look for officially licensed Volkswagen products, accurate badging, clean paint application, crisp glazing and a model that feels solid in the hand. Opening doors, detailed interiors and realistic wheels can add appeal, but the most important feature is consistency. A beautifully detailed model sits more comfortably in a collection when its scale and finish match the vehicles around it.

Choosing a scale

Scale affects both detail and shelf planning. A 1:18 model is typically about 23 to 30 cm long, while a 1:24 model is typically about 16.5 to 20 cm long, according to this diecast scale guide.

Scale Typical length Best suited to
1:18 23 to 30 cm Feature displays and collectors who want a larger model
1:24 16.5 to 20 cm Compact shelves and balanced collections

A 1:18 Caddy gives the body more visual presence and usually leaves more room for exterior and cabin detail. A 1:24 model takes less space, making it easier to display several vehicles together. Before buying, measure the shelf depth, allow room for dusting and check whether the model will sit beside a Beetle or Kombi without crowding the display.

Building a thoughtful display

  • Start with one anchor: A Kombi Samba Bus or Beetle can establish the collection's visual identity.
  • Add the working chapter: A Caddy model brings a useful contrast to classic people-movers.
  • Use height carefully: A riser can make smaller models visible without hiding the cars behind them.
  • Protect the finish: Keep models away from harsh direct sunlight and handle them with clean, dry hands.
  • Buy for the recipient: A Volkswagen Beetle model suits a nostalgic gift, while a Kombi or Caddy may appeal to someone who enjoys travel, work vehicles or Australian motoring culture.

Collectors looking for a broader selection can browse Volkswagen model cars and compare body styles before choosing. For VW Kombi diecast Australia, wanting to buy diecast Kombi, or comparing Volkswagen diecast models for sale, scale, licensing and display compatibility are more useful filters than choosing the largest box on the shelf.


Volkswagen Memorabilia offers licensed VW diecast pieces, including Kombi Samba Bus and Beetle models, for enthusiasts, collectors and thoughtful gift buyers. Visit Volkswagen Memorabilia to find a Caddy-inspired addition or start a display that brings the wider Volkswagen story home.

7 Black and White Coastal Decor Ideas

You've got a bright Australian room, plenty of natural light, and a clear preference for coastal ease. You just don't want another blue-and-beige scheme that looks like it came straight from a catalogue. Black and white coastal decor gives you a sharper starting point, but the contrast needs softening. Pair crisp artwork, clean-lined furniture and black accents with pale timber, linen, shells, rattan, jute and weathered maritime details, and the room feels relaxed rather than stark.

That balance suits Australia particularly well. The Australian Bureau of Statistics reported that 85% of Australians lived within 50 kilometres of the coastline in 2003, helping explain the lasting appeal of sea-inspired interiors. Here are seven room-by-room ways to get the look right, with practical Australian shopping options, scale guidance and finishing details that stop monochrome coastal styling from becoming cold or overly themed.

1. Temple & Webster for a graphic living room

A large black-and-white coastal photograph can anchor a living room faster than a collection of small accessories. Temple & Webster is a strong starting point for images of Australian beaches, surf scenes, jetties and shoreline settings, especially if you want a clean, graphic coastal-minimal look.

Choose the artwork before buying cushions or décor. A broad horizontal print suits the wall above a sofa, while a vertical photograph works neatly beside a bookcase, fireplace or tall console. Look for black, white or oak frames. Black creates definition, white keeps the wall airy, and oak introduces the warmth that monochrome rooms need.

Build softness around the artwork

The room shouldn't become a gallery of hard edges. Add a linen-look sofa throw, a woven basket beside the lounge and a pale timber coffee table. A small bowl of shells or a piece of weathered driftwood is enough to suggest the coast without turning the room into a souvenir shop.

Temple & Webster's broad range makes it easy to compare sizes and frame finishes before committing. Many pieces are printed or framed in Australia, and ready-to-hang options simplify installation. Stock rotates, so save the dimensions and frame colour of a favourite before choosing companion pieces.

Practical rule: Let one coastal photograph lead the room. Repeat its black through lamp bases, picture frames or a side table rather than adding black to every surface.

For a broader styling direction, explore these coastal home decor ideas and then browse the Temple & Webster homewares range.

2. Freedom for a statement above the sofa

Freedom works best when you want one substantial piece to carry the living room. Its coastal photographic canvases come with black or white frame options and are available in large formats, including examples up to 150 × 100 cm. That scale gives a sofa wall presence without requiring a busy gallery arrangement.

A large canvas looks particularly effective above a white or oatmeal sofa, a pale timber sideboard or a black-framed console. Pick a photograph with plenty of open sky, sand or water rather than a crowded scene. Negative space allows the room to breathe and keeps the black-and-white palette calm.

Match the room's visual weight

A generous artwork needs furniture with enough substance beneath it. A slender sideboard may look lost under a wide canvas, while a chunky timber piece can make the arrangement feel grounded. Keep the surrounding accessories low and tactile, such as a ceramic vessel, a folded cotton throw or a woven tray.

Freedom's predictable sizing helps when you're planning around existing furniture. National delivery and in-store advice can also be useful if you'd like to inspect frame finishes in person. Check whether an online-exclusive item qualifies for click and collect before assuming it can be picked up locally, and remember that framed canvas generally costs more than an unframed paper print.

A statement artwork should create calm, not compete with the furniture. Keep the rest of the wall quiet.

Freedom

See the current Freedom coastal wall-art selection, then measure the wall and sofa together before ordering.

3. Adairs for a layered bedroom

The bedroom is where black-and-white coastal decor needs its gentlest treatment. Adairs is useful for building a coordinated look because its wall art, timber frames and soft furnishings often sit within related in-house ranges. Start with a timber-framed coastal print above the bed, then echo its tones through bedding, bedside décor and a natural floor covering.

Strict black-and-white pieces aren't the only option. A photograph with warm sand tones, a faded charcoal shoreline or a softly weathered timber frame can sit comfortably within a monochrome scheme. The aim is a restful palette with variation, not a laboratory-clean split between two colours.

Use texture instead of extra pattern

Layer white linen-look bedding with a charcoal cushion and a textured throw. Add a rattan basket for spare blankets and choose bedside lamps with ceramic, timber or woven bases. If the artwork contains a shell, dune or beach-grass motif, repeat that shape in a small object rather than adding another matching image.

Adairs can be good value during promotions and clearance events, although stock can change quickly when a sale is running. Some pieces lean towards neutral or sepia rather than pure black and white, which is a benefit in a bedroom where stark contrast can feel too energetic.

  • Keep the wall simple: One framed work above the bed is often enough.
  • Warm the whites: Use linen, cotton, timber and woven fibres to break up smooth surfaces.
  • Repeat one dark note: A charcoal cushion or black lamp base gives the room structure without dominating it.

Browse Adairs coastal décor and wall art for pieces that can work with a softer, more textural bedroom scheme.

4. Pillow Talk for a relaxed outdoor room

Pillow Talk is a practical choice for a covered deck, alfresco area or bright family room where textiles need to do much of the styling work. Its coastal and Hamptons-influenced range includes monochrome-ready details such as black palm motifs, white textured wall pieces and black indoor or outdoor cushions.

Use a white base, then add black through cushions, a framed print or a slender side table. A black palm pattern gives the room a botanical coastal note without relying on navy stripes. White three-dimensional wall art adds shadow and texture while staying within the palette.

Make the outdoor scheme durable

Australian sunlight can be unforgiving, particularly in exposed coastal settings. Choose outdoor textiles and finishes designed for the intended location, and keep delicate artwork away from direct weather. A covered space still benefits from washable or easy-care cushions, especially where sandy feet, sunscreen and salt air are part of daily life.

Pillow Talk's large range makes coordinated shopping straightforward, and its styling content can help when you're combining cushions, wall art and occasional décor. Pure black-and-white options form only part of its coastal collection, so filter carefully if you want to avoid blue or beige. Larger artworks may also have different lead times or store availability.

For a lighter accent, pair the scheme with white home accessories. Then visit Pillow Talk to compare cushion textures and coastal wall pieces.

Pillow Talk

5. The Print Emporium for a considered entry

An entryway benefits from artwork that feels intentional from the moment guests walk through the door. The Print Emporium's dedicated Coastal and Black & White collections suit a more refined monochrome scheme, with photographic and hand-painted styles, framing choices and made-to-order production in Melbourne.

A narrow entry can take one tall print, while a wider console can support a pair of related works. Use the site's styling mockups or augmented-reality preview to test placement before ordering. That's especially helpful when you're deciding whether a black frame will sharpen the space or whether white framing will keep the passage visually open.

Add a coastal object with history

A black-and-white print looks more welcoming beside natural materials. Place a pale timber bowl on the console, add a woven catch-all for keys and keep one tactile maritime object nearby. A shell-inspired piece from the shell wall art collection can add coastal character without filling the entry with literal nautical symbols.

The Print Emporium uses archival inks and FSC-certified materials, with size options extending to A0 and beyond. That flexibility suits gallery walls and larger entries, but made-to-order lead times are longer than off-the-shelf retail. Framing also lifts the total cost, so decide whether the artwork, frame or overall composition matters most before selecting the final option.

Design note: A restrained entry works harder than a crowded one. Give the artwork room around it, then let texture provide the welcome.

See the available The Print Emporium collections for a polished starting point.

6. Desenio for a flexible home office

A home office can handle more repetition than a bedroom or entry, making Desenio useful for a coordinated wall of affordable posters. Its Australian site includes Black & White and Beaches categories with imagery such as palms, surfboards and aerial beaches. Choose three related prints, keep the frames consistent and arrange them above a desk or along a side wall.

The trick is to control the rhythm. Aerial beach photography brings organic lines, while a palm silhouette or surfboard image adds a stronger graphic shape. Keep one print more open and quiet so the arrangement doesn't become visually noisy during work.

Choose frames before filling the wall

Black frames create a clear grid and work well with black desk legs, lighting or shelving brackets. White frames recede against a pale wall and make the artwork feel softer. If you're renting, use a smaller grouping that can move easily rather than designing around one oversized piece.

Desenio's poster format keeps it accessible for filling broad spaces, and optional frames or mounts make the order easier to finish. Posters aren't the same as gallery-grade fine-art prints, and framing costs can accumulate when you buy several pieces. Check the paper size, frame availability and delivery details together.

  • For a calm office: Choose open beach views and limited visual detail.
  • For a creative workspace: Mix one surf image with two abstract shoreline prints.
  • For a rental: Use a compact group with matching frames that can move to another room.

Explore Desenio's black-and-white beach posters before deciding whether a single row or a larger arrangement suits your desk wall.

7. Coastal Vintage Noosa for a character-filled dining room

Mass-produced artwork gives you consistency. Coastal Vintage Noosa gives you character. Its collection of genuine vintage maritime wares includes glass floats, oars, brass pieces, shells, prints and hardware, so you can create a dining-room vignette that feels collected rather than colour-matched.

Start with one strong object, such as a weathered oar or dark maritime fitting, then build around it with white ceramics, pale timber and woven tableware. A glass float can catch Australian daylight beautifully, while aged brass adds warmth to a room that might otherwise lean too crisp. Keep the dining table clear enough for everyday use, and reserve the more sculptural pieces for a sideboard or open shelf.

Let patina do the decorating

Vintage pieces don't need to match. Their value in a black-and-white coastal room comes from surface variation, worn edges and evidence of use. A faded black frame beside white shells can feel more relaxed than a perfectly coordinated set of new accessories.

Coastal Vintage ships Australia-wide and has a showroom in Noosaville, Queensland. New finds are added weekly, but vintage stock is generally single-quantity, so a favourite may not be replaceable. Pricing varies by piece, and returns can be more limited than with large homewares retailers. Read condition notes carefully and decide where the object will live before buying.

Collector's approach: Buy the piece with the best texture first. You can build the colour story around it.

Browse Coastal Vintage Noosa for maritime pieces that bring depth to a monochrome dining room or coastal display.

Black & White Coastal Decor: 7-Store Comparison

Retailer Implementation complexity 🔄 Resources & efficiency ⚡ Expected quality & impact ⭐📊 Ideal use cases 💡 Key advantages ⭐
Temple & Webster Low, off‑the‑shelf selection, easy filters, ready‑to‑hang Moderate, many sizes/frames, fast AU delivery; oversized freight can increase cost High visual impact for clean coastal‑minimal gallery walls; consistent customer reviews Quick gallery walls, trade/staging, Australian shoppers Broad range, Australian‑made options, ready‑to‑hang
Freedom Low, curated range with predictable sizing and finishes Moderate, large formats available, national delivery and in‑store support Strong statement pieces in large formats; consistent fit across products Large focal art over sofas/sideboards, in‑store advice for sizing Predictable sizing, consistent quality, metro pickup
Adairs Low, coordinated in‑house ranges for easy styling Low–Moderate, value during promotions, free delivery thresholds Good coordinated look at attractive price points during sales Coordinated room styling and value buys Easy coordination across ranges, frequent promotions
Pillow Talk Low–Medium, mix of mono options and textured 3D pieces Moderate, broad textiles/decor range; some large items store‑dependent Textured, Hamptons‑influenced coastal looks; cohesive room styling Tone‑on‑tone texture, cushions/accents, styled room sets Extensive selection, strong styling guidance and inspiration
The Print Emporium Medium, made‑to‑order process with AR mockups and framing choices Higher, archival inks, bespoke framing, longer lead times Gallery‑quality, archival prints with high visual fidelity and flexibility Gallery walls, professional installs, collectors seeking quality Archival materials, AR previews, bespoke sizing options
Desenio Low, poster specialist, easy to mix and match Low, very competitive per‑piece pricing; frames extra cost Good coordinated impact at low cost but not gallery‑grade Budget gallery walls, renters, quick large‑scale coverage Very affordable, many matching prints, fast delivery
Coastal Vintage (Noosa) Medium, boutique sourcing of one‑off vintage items Variable, unique pieces, weekly stock updates, limited quantities Unique, textured vignettes with authentic patina; high uniqueness value One‑off statement pieces, layered vintage displays, feature styling One‑of‑a‑kind maritime finds, depth for textured layering

Keep the Contrast, Soften the Mood

The most successful black-and-white coastal decor in Australia isn't built from equal amounts of black and white. It starts with a warm, light foundation, then uses black to define the architecture. Think black picture frames, window details, lighting, handles and small furniture accents rather than black walls or large blocks of dark upholstery.

That approach reflects the direction of current Australian coastal styling. Recent Gold Coast staging guidance describes a move away from literal beach themes towards materials, tone and natural texture. The practical lesson is simple. Keep the contrast, but let linen, oak, jute, rattan, shells and weathered finishes carry the coastal feeling.

Use this simple plan:

  1. Choose one dominant artwork: Start with a framed photograph, canvas or vintage maritime object that establishes the room's scale.
  2. Repeat black in small structural details: Echo the dark tone through frames, lamp bases, hardware, cushions or a side table.
  3. Add white texture: Use linen, ribbed ceramics, textured wall art, cotton throws and softly finished upholstery.
  4. Bring in natural materials: Pale timber, woven fibres, shells and aged brass prevent the palette from feeling cold.
  5. Remove literal extras: You don't need anchors, ropes, shells and surf motifs all in one room. Choose one coastal reference and give it space.

Before ordering, check the artwork dimensions against the wall and nearby furniture. Confirm the frame finish, stock status, delivery timing and whether an item is made to order. In bright rooms, look at how black accents sit against direct sunlight, and use UV-conscious materials for exposed settings where appropriate.

Volkswagen Memorabilia also offers coastal décor, white accessories, nautical accents, wall art, shells and surf-inspired pieces that can finish a relaxed beach-house display. The range sits comfortably beside a more personal Australian coastal collection, particularly when you want to combine home styling with retro motoring character.


Volkswagen Memorabilia offers VW-themed coastal décor, white home accessories, wall art, seashell details and surf-inspired pieces for relaxed beach-house styling. Explore the collection at Volkswagen Memorabilia and choose an accent that brings a little more personality to your monochrome coastal room.

Rustic Home Accessories: Australian Style Guide 2026

You've got the weathered timber shelf, the woven basket and the stoneware vase, but the room still feels one enamel sign away from becoming a country-themed set. That's a familiar problem for Australian homes, especially when coastal light, vintage finds and a love of classic Volkswagens all meet in the same living space.

The good news is that rustic home accessories don't need to look dusty, overloaded or trapped in an old farmhouse catalogue. With a lighter palette, deliberate empty space and one or two retro collectibles, weathered timber can sit comfortably beside clean-lined furniture, coastal textures and a beautifully finished Volkswagen model.

Setting the Scene for Rustic Style in Australian Homes

A sunlit Brisbane living room can carry plenty of rustic character without looking like a mountain lodge. Faded rope baskets might sit beneath bleached timber shelves, while a hand-thrown stoneware vase holds banksia stems near the window. On the wall, a single enamel sign hints at a coastal road trip. The pieces feel personal, but the room still has breathing space.

That balance matters because many Australian buyers enjoy the warmth of rustic styling but worry that too much distressed timber, dark metal and vintage signage will make a room feel dated. Current local interiors favour natural texture, warm earthy neutrals and heritage details with a modern twist, while cold whites and greys are being pushed aside, as discussed in Australian interiors trend commentary.

Rustic, but not theme-heavy

The modern approach treats rustic pieces as accents rather than a complete costume. A reclaimed frame can soften a white wall. A linen runner can warm a clean timber console. A small VW Kombi diecast can add a story about surf trips, road holidays and Australian motoring culture without turning the room into a showroom.

Australian design coverage has kept rustic and country-inspired accessories visible for at least a decade. A 2017 Australian homewares feature linked rustic vintage styling with “rough edges and raw materials”, while showing that the category crossed coastal, industrial and French provincial looks in Sydney, Melbourne and regional New South Wales. Its examples ranged from a $149 desk lamp and $149 crate on wheels to an $1,089 industrial bookshelf, demonstrating that rustic accessories span small decorative purchases and substantial statement pieces. See the Australian homewares reference for that local context.

The result can work in a Sydney apartment, a Noosa beach house or a Queenslander. Let the room feel collected, not matched.

What Counts as a Rustic Home Accessory

A rustic accessory gets its character from material, texture and craft, rather than a glossy, perfectly uniform surface. Look for visible grain, knots, hammer marks, uneven glaze, woven fibres and finishes that feel comfortable in the hand.

The main material families are:

  • Timber: Solid wood, reclaimed boards, spotted gum offcuts, messmate, river red gum and pieces with visible saw marks or knots.
  • Metal: Forged iron, galvanised steel and hand-hammered surfaces, usually with a matte, aged or lightly oxidised appearance.
  • Ceramic and stone: Stoneware, terracotta, raw ceramic and organic forms that show subtle variation.
  • Natural fibres: Jute, seagrass, rattan, sisal, pandanus, linen, hemp and hand-loomed wool.
  • Leather: Natural leather that develops a patina rather than remaining perfectly smooth and uniform.

Read the finish first

Rustic finishes are usually matte, oiled, limewashed or lightly sealed. High gloss can work as a contrast, but a whole collection of shiny surfaces usually moves the room towards contemporary glamour rather than rustic ease.

Silhouette helps too. Chunky trays, imperfectly turned bowls, thick frames and practical storage pieces look more authentic than thin MDF objects with a printed “weathered” pattern. In humid coastal areas, genuine timber also gives you a better chance of repairing, sanding or refinishing the piece later.

Australiana adds another useful layer. Australian style commentary has connected natural-texture interiors with earthy palettes, timber, stone, linen, organic ceramics and native-inspired materials. Retail descriptions of Australiana décor also show how the look extends into practical giftware and everyday homewares, rather than stopping at furniture. Explore rustic and vintage Australian décor inspiration for examples of that wider design language.

Core Rustic Home Accessory Materials at a Glance

Material Typical Finish Where It Works Best in AU Homes Coastal Suitability
Solid timber Oiled, raw, limewashed or matte sealed Shelves, trays, frames and consoles Good indoors, with moisture care
Reclaimed timber Weathered, brushed or lightly sealed Feature shelves, stools and display risers Good when properly dry and sealed
Stoneware Speckled, raw or satin glaze Vases, canisters and bowls Very suitable indoors
Jute and seagrass Natural woven texture Baskets, rugs and storage Suitable in dry, ventilated spaces
Galvanised metal Matte, zinc-toned or lightly aged Planters, hooks and utility accents Useful, but protect from persistent salt
Linen and hemp Washed, soft and unstructured Cushions, runners and bedding Excellent for relaxed coastal rooms

Blending Rustic With Coastal and VW-Inspired Decor

The easiest way to make rustic styling feel current is to stop every object from shouting at the same time. Heavy timber, dark metal, distressed signs and antique-style ceramics can all be attractive individually, but together they may create a cabin theme.

A better layout lets one influence lead and the other support it. If a timber coffee table is the visual anchor, coastal details can arrive through linen, rope, pale ceramics and bleached wood. If the room already has a light coastal base, rustic character can come from one chunky tray, a woven basket and a small retro vehicle.

Practical rule: Choose one dominant texture, then use contrasting accessories to give the eye somewhere else to travel.

Three useful pairings

Let one style lead. Use larger pieces to establish the room's main mood, then keep the secondary style to smaller objects. A linen sofa and pale walls can handle a darker reclaimed shelf, while a deep timber cabinet needs lighter ceramics and soft textiles around it.

Share a colour family. Soft white, sand, seafoam, charcoal and warm honey timber create an easy bridge between rustic and coastal décor. Match a VW model to one of those tones instead of choosing a colour that competes with every other object.

Mix finishes and scale. Pair rough reclaimed wood with smooth stoneware, or matte black metal with a glazed ceramic bowl. The contrast makes the arrangement feel edited rather than assembled from one range.

VW memorabilia fits naturally because classic Beetles, Kombis and Samba Buses combine rounded silhouettes with enamel, chrome and rubber details. Those surfaces echo galvanised hooks and weathered steel, while the vehicle shapes bring an easy holiday association. Australian shoppers looking for that blend can browse coastal home accessories with VW-inspired character.

Room-by-Room Placement That Feels Current

Rustic accessories work best when each room has a clear job for them. Don't scatter baskets, signs and timber objects across every available surface. Give each piece a role, then leave enough empty space for the room to feel useful.

Living room

Start with a reclaimed-timber coffee table and an oversized linen sofa. Add a woven jute rug, then choose two or three smaller pieces, such as a lantern, stoneware vase or timber tray. Keep a generous section of the tabletop clear so drinks, books and feet can share the space.

Bedroom

A raw oak or messmate bedhead gives the room warmth without needing a collection of matching furniture. Washed linen bedding in neutral tones keeps the texture soft, while one enamel bedside lamp or a small botanical print is enough above the bed.

Kitchen

Group useful objects rather than spreading them across the bench. A timber cutting board, stoneware canister and olive-wood utensil jar form a practical cluster, especially when placed beside a clean section of benchtop.

Entryway and outdoor areas

An entry console benefits from a small tray for keys, one ceramic vessel and a reclaimed-wood frame. Outdoors, weatherproof timber stools can become plant stands, while galvanised trough planters and warm festoon lighting add function without excessive decoration.

An infographic showing rustic interior design tips for living rooms, bedrooms, entryways, and kitchens with illustrative photos.

The same principle applies to a display shelf. Vary heights, keep the tallest object towards the back and avoid filling every gap. A small potted grass or dried botanical stem can soften timber and metal without adding another hard-edged object.

Using VW Diecast as Rustic Coastal Accents

At a sunny coastal car show, a well-placed Kombi model feels like a tiny piece of the scene brought indoors. On a rustic shelf, it needs scale, context and breathing room so it reads as a considered collectible rather than stray clutter.

Measure the shelf before choosing the model. Our Kombi and Samba Bus listings show that a 1:18 diecast is typically about 24–30 cm long, while a 1:24 model is about 16–20 cm long, consistent with this Australian diecast scale guide. The larger scale suits a deeper bookcase or console, while the smaller model fits a narrow shelf or shadow box. For pieces that suit weathered timber, browse vintage home accessories that pair with reclaimed wood.

An infographic showing four steps to use Volkswagen diecast model cars as rustic coastal home decor accents.

Build a small story

A reclaimed-timber shelf might feature a Kombi, Beetle and one small supporting object. Place the largest model slightly off-centre, add driftwood or a small potted grass, then use a ceramic dish low down to anchor the arrangement. Leave some timber visible. That open space works like the water around a jetty, giving each piece room to register.

The history adds substance beyond appearance. The Kombi and Type 2 story began in 1950, with the first vehicles made in September 1952 and Australian sales beginning in 1954. The T2 arrived in Australia in 1968, followed by German-imported T3 models from 1982, as recorded in Australian Volkswagen history.

The original-shape Kombi had an 18-year production life, with over 2.6 million built, including 725,000 for export markets. Volkswagen's total Kombi and Transporter output later passed 11 million, helping explain why a licensed model can carry genuine collector interest. Read the Kombi production history for broader context.

Choose a bus colour that repeats a cushion, vase or artwork. The model then joins the room's palette and keeps the coastal look current, rather than turning the shelf into a themed display.

Sourcing and Budget Tips for Australian Buyers

Start with a short list before you browse. Choose three to five hero pieces, such as a timber tray, woven basket, ceramic vessel, wall frame and one VW collectible. This stops attractive market finds from taking over the room because they share a distressed finish.

Spend where touch and attention meet

Put more of the budget into objects people handle or notice first. A well-made timber stool, a repairable frame or a licensed diecast model can justify a higher price because the material, finish and construction remain visible over time. Use op-shop finds, weekend markets and clearance pieces for supporting texture, especially when you're happy to repaint, sand or reuse them.

Australian sourcing is also useful for practical reasons. Local stock, faster shipping within Australia and domestic returns can make a licensed Volkswagen model easier to buy and support than an uncertain overseas listing. Don't assume a low sticker price is the cheapest option, because international freight, taxes and difficult warranty arrangements can change the final cost.

The Australian Furniture Association's guidance on material transparency and lasting furniture choices also reflects a broader buyer interest in secondhand goods, local production, repairability and end-of-life reuse. Those questions suit rustic styling particularly well because many timber pieces can be sanded, repaired or refinished.

Sourcing channel Price Range (AUD) Authenticity Convenience
Local specialist retailer Varies by item Stronger product and licensing information Local stock and domestic support
Op shops and markets Varies widely Requires inspection Immediate purchase, unique finds
Overseas marketplace Varies widely Check carefully Shipping and returns may be complex
Large-chain clearance Varies by item Confirm materials and construction Easy access, less individual character

Use three simple rules: buy one signature item, repeat finishes rather than collecting identical objects, and check dimensions before checkout.

Caring for Timber Rustic Accessories in AU Climates

Timber is not a static material. It absorbs and releases moisture as indoor conditions change, so shelves, frames, trays and decorative objects can swell, shrink, crack or distort if they move between very different environments too quickly.

For typical Australian interiors, timber guidance places equilibrium moisture content around 8–14%, while sheltered exterior conditions sit around 12–18%. Prolonged moisture content above 20% creates conditions associated with fungal decay and mould growth, according to the Australian timber moisture guide.

Keep the room and object steady

Indoor furniture guidance commonly targets 40–60% relative humidity to limit shrink and swell movement. Solid timber intended for indoor objects is often specified near 6–9% moisture content, helping pieces settle into Australian interiors with less movement. See the wooden furniture care guidance for practical humidity and airflow advice.

An infographic titled Caring for Timber Rustic Accessories in AU Climates, showing four numbered maintenance tips.

Keep pieces away from condensation-prone walls, bathrooms and direct windows. In muggy weather, airflow and a dehumidifier can help. Near the coast, wipe salt residue with a barely damp cloth and dry the surface immediately. A soft microfibre cloth is safer for routine dusting than abrasive products, and silicone polishes can leave an unsuitable film.

Raw timber may benefit from a suitable hard-wax oil or tung oil, while high-touch pieces can use a matte protective coating. Test any finish on an unseen area first, and follow the product instructions rather than treating every timber species identically. For a practical timber accessory with a clean display function, consider how a wood tissue box cover can add warmth without demanding a large surface.

Metal details, including diecast models, need a dry cloth and a dry room. Bathrooms and persistently damp areas are poor display locations because moisture can encourage corrosion on exposed metal components.

Bringing It All Together With a Simple Starter Plan

Refresh one surface first. A hallway console, floating shelf or living-room mantel gives you a contained project, and it's easier to judge whether the rustic mood feels relaxed or overdone.

Use this sequence:

  1. Choose the focal surface. Pick one console, shelf or mantel that already has useful breathing room.
  2. Add a timber foundation. Use a reclaimed-wood frame, chunky tray or small stool as the visual base.
  3. Layer one coastal texture. Try a linen runner, bleached cane bowl, jute element or pale woven basket.
  4. Introduce one VW collectible. Place a licensed Beetle, Kombi or Samba Bus diecast on a small timber riser.
  5. Finish with softness. Add greenery and a single ceramic vessel, then stop before every gap disappears.

A five-step guide on how to decorate a room using various rustic home accessories and decor items.

Match the project to the room

For under $150, keep the vignette compact with one timber piece, one ceramic object and a smaller collectible. A $150 to $400 shelf refresh can add a stronger frame, woven texture and a more prominent VW model. A $400+ feature wall might combine substantial timber, lighting, wall art and several carefully spaced objects. These are useful planning brackets, not guarantees of what individual pieces will cost.

Care for the materials as you go. Keep timber stable, protect it from harsh sun and salt, and give diecast models a dust-free display position. The best rustic room doesn't look finished in a single afternoon. It gathers character through objects you enjoy seeing.


Volkswagen Memorabilia brings together licensed Volkswagen diecast models, Kombi and Samba Bus collectibles, Beetle-inspired pieces and relaxed coastal home décor for Australian collectors and gift buyers. Visit Volkswagen Memorabilia to find a display piece that adds genuine VW history to your rustic coastal styling, with local support and Australian shipping.

Boho Style Accessories: A Friendly Guide for VW Lovers

You're halfway through setting up a sunny display when the styling starts to feel a bit too polished. The little Kombi looks right on its timber shelf, but the scene needs something softer, more lived-in. A shell garland, a woven scarf and a handful of warm timber beads can do what another matching ornament can't. They bring the relaxed, road-trip spirit of an Australian beach day into the room.

That's where boho style accessories earn their place. They suit a VW enthusiast because both boho decorating and classic Volkswagen culture celebrate travel, character, handmade detail and the freedom to make a space your own. A carefully chosen shell necklace can sit beside a cream Beetle model, while a rattan tray gives a Kombi display the easy feel of a coastal holiday.

What Boho Style Accessories Actually Mean

On a quiet Saturday morning, a sage-green Kombi shelf can become a small coastal scene. A shell garland drapes across the roof rack of a diecast model, a fringed throw spills over the edge of a timber bookcase, and a little stack of aged-metal bangles rests beside a surfboard-shaped ornament. Nothing matches perfectly, yet the arrangement feels considered.

That's the heart of boho style accessories. They're layered, earthy and full of texture, with a handmade feeling that's more interesting than a perfectly coordinated set. Woven fibres, beads, shells, leather, feathers and aged metals can all work together when the colours share a common mood.

Boho accessories aren't limited to festival dressing or dramatic outfits. Wearable pieces include:

  • Jewellery: Layered necklaces, stacked bangles, shell earrings and beaded bracelets.
  • Textiles: Printed scarves, woven headbands, wraps and fringed bags.
  • Hair pieces: Bandanas, bead charms and relaxed fabric ties.

The same approach works around the home. Macramé, cushions, wall hangings, shell garlands and timber accents can soften a shelf of glossy diecast vehicles or make a vintage Beetle print feel less formal.

Practical rule: Choose pieces that look as though they've been collected during a life of beach trips, markets and open-road adventures.

The look has changed through repeated revivals, rather than coming from one single trend cycle. Its roots are commonly traced to the nineteenth century, then to the 1950s Beat movement, the 1960s Flower Power era, the 1990s “hippie chic” revival and the 2000s “boho-chic” period, as this Australian bohemian fashion history explains. That history helps explain why scarves, belts, jewellery and layered adornment still feel so central.

Core Categories and Materials to Know

Start by separating boho accessories into wearable layers and home accents. That simple distinction makes it easier to choose pieces for your wardrobe without losing sight of the display sitting in the lounge room.

Wearable options include layered necklaces, stacked bangles, tassel earrings, printed scarves and woven headbands. A timber-bead necklace brings warmth to a cream linen shirt, while a shell pendant adds a beach note without turning the outfit into festival costume. For a quieter result, use one strong piece, such as a hammered copper cuff, and keep the rest simple.

Home accessories create the same effect at a larger scale. Macramé wall hangings, beaded curtains, shell garlands, embroidered cushions and timber-trimmed mirrors add movement and touchable texture. A boho wall art collection can sit comfortably near a display of classic VW models when the colours are kept calm.

Materials that give the look character

Natural fibres do much of the visual work. Jute, rattan, cotton and raffia bring a dry, coastal texture, while leather and suede add depth. Ocean-inspired materials, including cowrie shells, paua, mother-of-pearl and sea glass, connect the style to Australian beach-house living.

Metals should look tactile rather than overly bright. Aged brass, hammered copper and oxidised silver pair well with glossy diecast paint because the contrast stops the display from looking flat. Turquoise, moonstone, agate and howlite can add colour through small details, while beads, feathers and leather work as accent textures.

A VW-friendly palette makes the pairing easier:

  • Sage green and seafoam: Natural beside a Split Window or camper display.
  • Mustard and terracotta: Warm against cream, orange or sun-faded paint.
  • Cream and sky blue: Light enough for a beach-house shelf or Beetle vignette.

A graphic illustration highlighting boho style accessories, home textiles, and natural materials for interior and fashion design.

A Quick History From Beatniks to Beach Houses

Boho style carries a loose travel story. Its commonly recognised roots reach back to nineteenth-century Bohemianism, a French term associated with Romani-inspired dress. The look later resurfaced through the Beat movement and Flower Power, bringing scarves, layered jewellery and expressive adornment back into view.

Australia gave those details a particularly relaxed setting. The Australian Women's Weekly recorded a shift in the 1970s from the rigid geometry of the 1960s towards “flowing lines”, full-length gypsy gowns and matching headscarves, as documented in this fashion history feature. That matters because headscarves and flowing layers became part of the mainstream Australian fashion record, not just the wardrobe of a niche subculture.

The VW connection feels natural. Volkswagen says the Beetle arrived in Australia in 1953, local assembly began in 1954, and full Australian manufacture ended after 6 years at the Clayton plant in suburban Melbourne, according to the Volkswagen Beetle history. The Kombi's broader origin story began in 1949, after Dutch businessman Ben Pon sketched the idea that became the Type 2, first built in 1950, as described in the Volkswagen Kombi history.

A visual timeline infographic tracing the evolution of boho style from 1960s beatniks to modern coastal design.

The Australian Kombi chapter is especially rich. Volkswagen assembled Kombis at the Melbourne Clayton factory from 1964 to 1977, and the local history record notes that 1975 was the biggest-selling year, with 8,974 Kombis and Microbuses sold and a 43% share of the Australian 1-tonne van market, according to Club VeeDub's Australian Kombi history. Shell necklaces, woven wraps and macramé feel right beside that story because they share the same open-road, surf-coast mood.

Styling Boho Accessories in a Coastal or VW Inspired Home

Begin with a quick room audit. Find the surfaces that already carry personality, note where the afternoon light falls, then identify existing VW cues such as diecast shelves, Kombi posters, surfboard racks or a Beetle print. Boho pieces should support those details, not hide them.

A timber shelf usually needs contrast. Lay a jute runner beneath a timber-bead garland, place a small diecast Kombi in front, then add a shell cluster to one side. Grouping objects in odd numbers often gives the arrangement a more relaxed balance, especially when one object is clearly taller or more colourful than the others.

A miniature red and white Volkswagen van model on a wooden shelf next to decorative boho style accessories.

Build a display with texture

A 1:24 Split Window diorama works well as the centre of a coastal vignette because it leaves room for surrounding accessories. Let shells and driftwood breathe near a window rather than crowding them into a dark corner. A rattan pendant can soften a garage-style display, while a macramé wall hanging above a vintage Beetle print creates a clear focal point.

Woven scarves can drape over Kombi camper cushions, but keep fabric away from damp areas and direct contact with painted surfaces. Faded teal surf accents balance warm orange and cream tones, giving the shelf the feel of an old beach house rather than a themed retail display.

The short video below offers another visual reference for combining a miniature vehicle with relaxed decorative details.

For more ideas, browse these boho-style room ideas and adapt the scale to suit your own collection.

Two layouts you can copy

Lounge room shelf

  1. Place a cream or pastel VW model slightly off-centre.
  2. Add a low jute runner underneath.
  3. Stand a timber-bead garland in a loose curve.
  4. Finish with one shell ornament and a small framed print.

Beach-house mantle

  1. Use a rattan tray as the base.
  2. Put a Kombi model in the middle.
  3. Add a folded woven scarf on one side.
  4. Balance it with a shell cluster and a low candle holder.

DIY and Customisation Ideas for VW Fans

A weathered Kombi diorama can look tired until a few small details bring its story back. One relaxed afternoon in the shed, a hand-braided leather pull strap and tiny shell charms on the surfboard rack can turn a plain model into a personal beach-trip keepsake. Keep glue away from delicate paintwork, and test every material on an unseen area first.

Weekend projects with a VW twist

  • Pastel timber-bead garland: Use timber beads, cotton cord, acrylic paint and a small brush. Allow an afternoon for drying and restringing. This is beginner-friendly and suits a Beetle shelf.
  • Splitscreen macramé panel: Add subtle horizontal stripes with fabric paint to a ready-made macramé hanging. Use a flat brush and light coats. The project is easy, though masking takes patience.
  • Reclaimed timber key hook: Cut a small board, sand the edges, paint or stencil a VW-inspired logo shape, then add hooks. Basic hand tools are enough, but an adult should handle drilling.
  • Coastal scarf headband prop: Fold and twist a printed scarf around a headband or miniature camper display. No cutting is needed, so it's the simplest option for a quick styling change.

Name beads, miniature licence plates and locally sourced shells make each piece feel connected to its owner. Porous timber, leather and shells should be sealed before gluing near metal paintwork, because trapped moisture can weaken the bond and mark a surface.

Care Labelling and Everyday Care Tips

Textile tags deserve a proper look before a scarf, wrap or macramé piece goes into the wash. Hand wash, line dry and low-temperature ironing symbols help prevent avoidable shrinkage, colour loss and seam damage. In Australia, textile boho accessories covered by the Consumer Goods (Care Labelling) Information Standard 2023 must carry prescribed care instructions through English text, care symbols or both, as explained by Product Safety Australia's care-labelling guidance.

Breathable storage matters in humid conditions. Cotton bags are a better choice than sealed plastic for natural fibres, while a soft dry cloth is enough for shell jewellery after a beach outing. Wipe metal beads with microfibre, and use a light touch of beeswax on brass charms if you want to maintain their warm tone.

Wooden beads shouldn't live permanently on a sunny windowsill. Direct sunlight can dry and crack timber, so rotate display positions through the year.

For fibre-content claims such as cotton, linen, viscose or recycled blends, Australian suppliers use the defined methods in AS 2622:2019, described by Standards Australia's fibre-content standard.

  • Before summer: Clean and inspect.
  • During summer: Dust and wipe after beach use.
  • In autumn: Deep-condition suitable leather and timber.
  • During winter: Rewrap delicate pieces in acid-free tissue.

A soft textile layer can also add warmth to a display. This boho throw blanket is the sort of accent that works on a chair, camper-style cushion or reading nook.

Pairing Boho Accessories With VW Themed Displays and Gifts

The best pairings balance glossy model paint with raw, touchable texture. A shell earring or necklace can echo a cream Beetle keyring, while a timber-bead wrap feels at home beside a Kombi with a surf rack. Rattan trays create a visual base beneath a diecast cabinet and stop small accessories from looking scattered.

Colour coordination doesn't require an exact paint match. Pastel blue, seafoam and sand create a gentle coastal palette, while mustard, terracotta and cream bring more warmth around orange or red vehicles. Match undertones across a shelf, then let one contrasting piece provide the spark.

One statement boho piece per display cluster is usually enough. The model should remain the star, while the accessory supplies the atmosphere.

The comparison below gives a quick starting point for gifts, birthdays, Father's Day and housewarmings.

Boho Accessory and VW Display Pairings

Boho Accessory VW Item Best For Why It Works
Shell earrings or necklace Cream Beetle keyring Gift buyers and coastal fans The pale shell tones echo the Beetle's simple, friendly shape
Timber-bead wrap Surf-rack Kombi model Collectors styling a shelf Raw wood reinforces the surf and road-trip feeling
Woven scarf Bus-shaped cushion Housewarmings Soft fabric makes a vehicle-themed room feel comfortable
Rattan tray Diecast cabinet Organised collectors The tray adds a natural base and gathers smaller objects
Macramé hanging Beetle print Lounge rooms and offices Knotted texture softens a flat wall and frames the artwork
Shell cluster Samba Bus display Beach-house gifts Ocean texture supports the relaxed holiday character

For a compact collection, choose a 1:24 model. Australian model guides describe that scale as about 16 to 20 centimetres long, while a 1:18 model is about 24 to 30 centimetres long, making it the larger display option, as outlined in this Australian diecast size guide. Use one scale consistently on a narrow shelf, or separate scales by display zone so the arrangement feels intentional.

Wrapping Up and Where to Find More

Boho styling works best when it reflects the things you already love. Start with one shell necklace, a timber-bead wrap or a small woven accent, then let the colours and textures grow around your Beetles, Kombis and Samba Buses.

Australian VW events, local club gatherings and online forums are ideal places to swap display photos, restoration ideas and styling inspiration. You can also explore the shop's boho range, VW-themed catalogue and Kombi stories for more coastal decorating ideas and collecting guidance.

A small, well-loved display often says more than a crowded shelf. Give each model breathing space, add one natural texture, and let the nostalgia do the rest.


Volkswagen Memorabilia brings together licensed VW diecast models, Kombi and Samba Bus collectibles, Beetle gifts and coastal home décor for Australian enthusiasts. Visit Volkswagen Memorabilia to browse local-stock pieces for your next boho display, thoughtful gift or sunny beach-house corner.

Capiz Shell Wall Art: Coastal Decor Ideas for 2026

You're standing in front of a blank wall above a beachy console, holding a watery blue paint swatch in one hand and wondering whether seashell décor will look charming or straight out of a dated holiday unit. That hesitation makes sense. The best capiz shell wall art doesn't shout “beach theme”. It adds a soft glimmer, organic texture and a little movement, much like the polished details on a classic VW parked outside a coastal café.

Australian coastal interiors are heading towards warmer neutrals, natural textures and quieter references rather than literal nautical motifs, according to this Australian coastal style guide. That makes capiz a useful bridge between relaxed beach living and a more considered home, particularly when it sits beside timber, linen, rattan or a carefully chosen piece of Volkswagen memorabilia.

Why a Piece of Capiz Shell Wall Art Might Be the Coastal Touch Your Wall Is Missing

You have a blank wall above a console, a surf-coloured Beetle model nearby and a room that feels almost finished. A small shell sunburst can supply the missing detail, catching afternoon light and shifting as you move. It gives the wall depth without adding another strong pattern.

For a restrained result, choose one pearl-toned piece sized to roughly two-thirds of the console width. Keep the surrounding display to two supporting textures, such as timber and linen. Several brightly coloured shells beside anchors, ropes and oversized signs can push the room towards dated, theme-park beach style.

The useful test: If the artwork suggests the coast through texture and light, rather than spelling it out with obvious motifs, it's more likely to feel current.

That balance suits the VW-and-coastal-living mix especially well. Pair one luminous shell design with a vintage-style enamel sign and a small Beetle or Kombi model. The arrangement recalls road trips, beach towns and open-air weekends, while the warmer, quieter direction of Australian coastal design keeps the room contemporary.

Capiz also suits renters and collectors who regularly refresh a display. Its light visual presence helps a room feel open, while a round design can soften a boxy console or echo a Kombi wheel. Check the wall measurements, artwork proportions and hanging method before buying, then consider how daylight will pass across the shell.

What Capiz Shell Actually Is and Why It Shows Up on So Many Walls

Capiz shell comes from the windowpane oyster, Placuna placenta, a translucent shell associated with the Philippines. Its thin, layered structure allows light to pass through softly, which is why artisans have long used it for decorative objects that benefit from a gentle glow.

A historical IUCN review of capiz shell trade records its use as a glass substitute and names lampshades, wind chimes, boxes and other ornamental articles among its established applications. The review also notes that exports of worked capiz shells rose from just over 1 million units in 1976 to nearly 3.5 million in 1979, showing how quickly shellcraft expanded during the late 1970s.

That history explains the material's familiar look. Craftspeople press and overlap thin shell pieces to create panels, petals, rays and layered motifs. The result is a pearl-like lustre that can look milky in shade, warm in lamplight and almost watery when daylight moves across it.

Why designers keep coming back to it

Capiz offers a useful mix of qualities:

  • Filtered translucency: Light reaches the shell layers without making the artwork look harsh.
  • Natural variation: Subtle shifts in tone stop a pale piece from feeling completely flat or manufactured.
  • Low mass: Thin shell layers can cover plenty of visual area without the density of heavy framed décor.
  • Flexible colour: Pearl, cream, champagne and softly tinted finishes sit comfortably with sand, warm white, timber and sea tones.

If responsible sourcing matters to you, ask how the shell was obtained, whether it's a food-industry by-product and how the maker handles production. You can also compare the material with other coastal craft options through this guide to seashells for crafts.

Popular Styles, Shapes and Finishes to Know Before You Browse

Shopping becomes much easier once you know what each format does to a wall. A sunburst creates direction and a clear focal point. A panel behaves more like abstract art. A mobile introduces movement rather than a fixed visual block.

Style Common Finishes Best Wall or Room
Sunburst or starburst Natural pearl, champagne, gold-backed Above a console, bedhead or round mirror
Floral or blossom cluster Pale shell, blush, silver-backed Bedroom, Hamptons-style room or soft coastal nook
Panel or framed tile Matte white, charcoal, navy, metallic backing Minimalist living room, hallway or dining area
Lantern or mobile Natural pearl, high-gloss, mixed tones Covered outdoor area, entryway or room needing movement

Radial shapes for a strong centre

Sunbursts and starbursts send the eye outwards, so they're handy above furniture that already has a clear centre. A round design can soften a rectangular buffet, square artwork or straight-lined bench. It also pairs naturally with a circular mirror, tray or clock.

Softer designs for relaxed rooms

Floral and blossom clusters feel less architectural. Their irregular edges work well where you want a bedroom or reading corner to feel gentle rather than formal. Pale finishes keep the look quiet, while blush or muted colour can pick up cushions and ceramics.

Panels for a cleaner interior

Framed tiles and geometric panels suit a minimalist wall because their boundaries are easy to align. Matte shell tends to look calmer in bright rooms. High-gloss shell throws more light around, which can help a darker wall feel livelier, although it may compete with other reflective surfaces.

Lanterns and mobiles are a different proposition. They add a little motion and, where the design includes lighting, a filtered glow. Treat them as a feature rather than stacking them with several other statement objects.

Choosing the Right Size and Shape for Your Wall

Size can make a beautiful piece look intentional or stranded. Start by measuring the available wall above the sofa, bed or console, then consider artwork that occupies roughly two-thirds to three-quarters of that width. This proportion usually gives the furniture and artwork a visual relationship without making the wall feel crowded.

A petite sunburst may disappear above a large sofa or on a tall stairwell wall. In contrast, a broad floral panel can overwhelm a narrow hallway. The same design may feel perfectly balanced above a low entry table, so judge the piece against the furniture beneath it, not the wall alone.

A sizing guide infographic showing how to select the perfect capiz shell wall art for various rooms.

Match the geometry to the room

Use a rounded sunburst where the furniture feels angular or where a nearby mirror already introduces circular forms. Choose a rectangular panel for a buffet, a long console or a narrow section between windows, where its edges can reinforce the architecture.

For a wide wall, an asymmetrical cluster of two or three smaller pieces can feel more relaxed than one oversized design. Keep a consistent visual thread, such as the same shell colour or backing finish, so the arrangement looks deliberate rather than collected by accident.

Colour matters as much as dimensions. Whitewashed shells can blend into a bright white wall, while champagne, mother-of-pearl or bronze backing gives a pale room clearer definition. Hold a sample, cushion or timber finish nearby before ordering. Capiz changes character with daylight, so a colour that looks subtle online may become more noticeable beside a window.

Hanging and Caring for Capiz Shell Wall Art the Easy Way

Capiz may look fragile, but a well-mounted piece can be surprisingly practical. The important detail is the backing and hanging hardware, not just the shell. Check the artwork's weight, inspect the fixing point and choose an anchor suited to the wall beneath it.

Plasterboard needs a suitable wall plug or rated hollow-wall anchor. Masonry generally calls for a solid screw and rawlplug. Larger or heavier panels may benefit from a French cleat, particularly if the backing has a broad, stable surface.

A simple hanging routine

  1. Check the artwork: Look for the fixing point, backing condition and stated weight.
  2. Choose the anchor: Match the hook, screw, plug or cleat to the wall type and load.
  3. Mark the centre: Hang the piece around eye level, with the centre commonly sitting near 145 to 155 centimetres from the floor.
  4. Check the line: Use a small spirit level before tightening everything.

For lightweight pieces, some makers recommend a tiny nail on suitable walls, while smaller capiz decorations may suit removable options such as 3M Velcro or blue tack. Jones & Co describes its Australian capiz pieces as light, supplied with a rear hook and suitable for simple mounting methods where the wall allows it. Their maker notes on capiz shell construction explain how pressed and overlapped shell layers preserve translucency while keeping the hanging load down.

A four-step instructional infographic detailing how to safely hang and care for capiz shell wall art.

Dust monthly with a soft feather duster or a hairdryer on its cool setting, held well away from the surface. If grime builds up, use a barely damp microfibre cloth and a light touch. Avoid soaking, ammonia, harsh sprays, steamy bathrooms, direct sun and exposed outdoor positions. For more shell-focused display ideas, browse shell wall art.

Styling Capiz Shell Wall Art in a 2026 Coastal or VW-Inspired Home

A VW-inspired coastal room works best when the references feel collected, not staged. For 2026, Australian coastal design is moving towards warm whites, sand, soft clay, deep ocean blue and muted sage. Rattan, bleached timber and brushed brass add character, while capiz brings a fine, shifting glow. Use those elements as a backdrop for the car culture and coastal memories already at home.
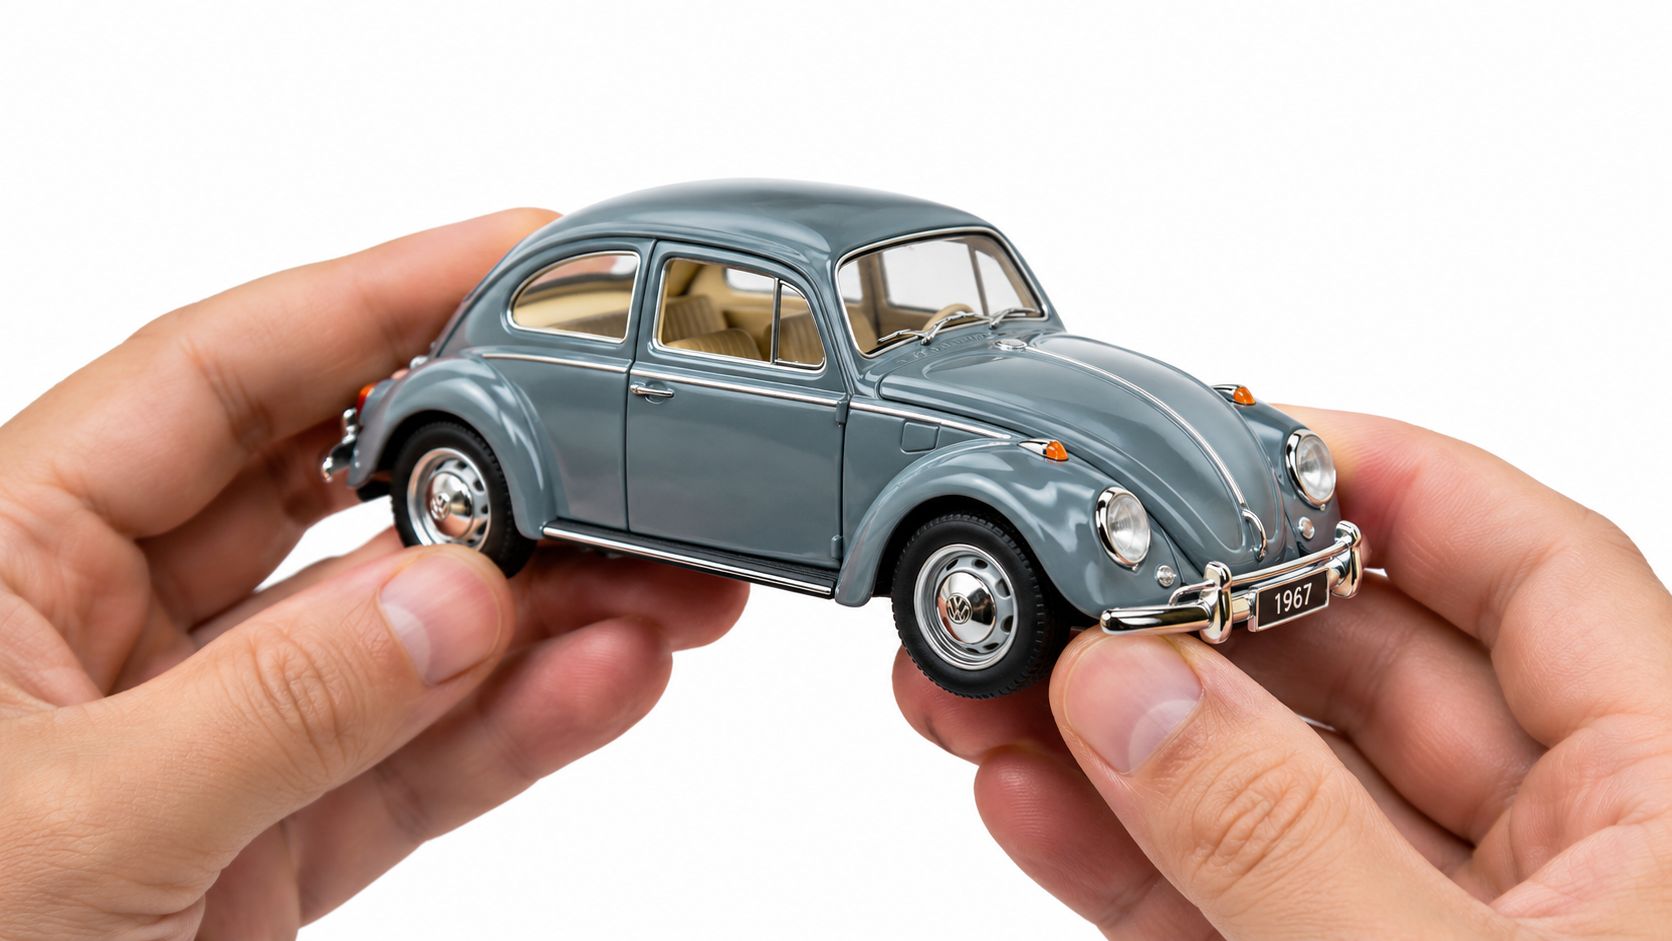
A pearl capiz sunburst above a low timber console can act as the quiet hero. Below it, place a compact VW model in a surf-inspired colour, a small ceramic bowl and one woven object. The car carries the nostalgia and personality. The shell contributes light and texture without competing for attention.

An infographic illustrating four coastal styling tips for capiz art, featuring color palettes and home decor.

Keep the palette confident but easy

Warm white walls suit natural pearl and pale champagne finishes. Clay-coloured cushions stop white shell from feeling too cool, while deep ocean blue gives it a clean point of contrast. Muted sage pairs with bleached timber and aged brass, creating an earthy room rather than a collection of nautical props.

Use the same restraint with VW details. A capiz panel can sit beside a vintage-style sign, provided the wall still has open space. One statement shell piece per wall is usually enough. Repeat its rounded or organic shape with a rattan tray, curved lamp or circular mirror, much like matching the curve of a classic Kombi with softer furnishings.

Layering rule: Let the capiz provide shimmer, let timber provide warmth and let the VW piece provide the story.

A boucle cushion, linen curtain or woven basket can continue the textural conversation without introducing another shell motif. The result feels like a genuine home shaped by road trips and coastal living, rather than a themed display. For more ways to combine these references, explore these coastal home décor ideas.

Buying Checklist and Smart Questions to Ask Before You Click Add to Cart

A good listing should help you understand what you're buying before the parcel arrives. Look closely at the shell clarity, thickness and consistency. Natural variation is part of the appeal, but obvious gaps, sharp edges, loose pieces or heavy reliance on surface glue can signal poor construction.

Inspect the frame and backing as carefully as the visible shell. A neat rear surface, secure fixing point and clearly stated indoor-use guidance tell you more than a glossy product photograph. If you're considering a humid room, check whether the piece is suitable for that environment rather than assuming all shell décor handles moisture well.

Questions worth asking the seller

  • What is the mounting method? Confirm whether a hook, wire, cleat or other fixing is included.
  • How much does it weigh? Match the load to your wall anchor, especially on plasterboard.
  • Where can it be installed? Ask whether the artwork is indoor-only, suitable for a covered outdoor area or appropriate for a humid room.
  • How was the shell sourced? Look for clear information about origin, responsible collection and whether the shell is a food-industry by-product.
  • How is it packed? Fragile shell needs protective packaging, internal padding and a sensible returns process.
  • What care instructions come with it? The seller should explain dusting, cleaning and light exposure.
  • What happens if it arrives damaged? Read the return and replacement policy before committing.

Capiz is also used beyond small decorative pieces. An Australian Baresque-listed capiz wallcovering reports testing to AS ISO 9705:2003 and achieved Group 2 classification, with specific extinction less than 250 m²/kg. The listing gives a 110 cm width and lineal-metre supply format, showing that shell can appear in wider decorative lining systems where substrate preparation, seams and installation method matter. Read the Capiz Bakbak product listing for the stated technical details, and don't treat a wallcovering rating as automatic approval for a separate piece of wall art.

An infographic titled Capiz Shell Art Purchase Checklist showing five key steps for buyers.

Classic VW design and capiz shell share an appealing quality. Both reward close looking. The curves, translucent layers and hand-finished details of shell décor can sit comfortably alongside the rounded optimism of a Beetle or the relaxed utility of a Kombi, provided the room has enough restraint to let each object breathe.

If you're building that atmosphere, Volkswagen Memorabilia offers licensed Volkswagen diecast models, Kombi Samba Bus pieces, Beetle models and coastal home décor for a display with genuine character. Visit the shop to find a considered addition for your console, shelf or VW collection, with Australian support and local shopping convenience.

What to Do with Fridge Magnets: 10 VW Ideas

The morning sun is catching the chrome on your favourite Kombi magnet, while a Beetle and a Samba Bus keep the shopping list from sliding down the fridge. Perhaps the same little collection has travelled into a campervan cupboard, a beach-house kitchen or a coastal display beside shells and driftwood. These small pieces carry more character than their size suggests. They recall road trips, surf culture, family holidays and the easy-going spirit of Volkswagen ownership.

The best answer to what to do with fridge magnets balances three things, practical use, protection for the collection and a display that feels like your own VW story. The ideas below range from magnetic feature walls and recipe holders to memory timelines, gifts, seasonal rotations and carefully secured outdoor displays. Licensed VW magnets and related memorabilia can give a collection genuine character, while local stock and fast shipping from an Australian importer make it easier to source pieces without waiting on overseas delivery.

1. Vintage VW Kombi Fridge Magnet Display Wall

A dedicated magnetic wall can turn a plain kitchen corner into a cheerful rolling gallery. Choose a visible area above the fridge, beside a breakfast nook or on a feature wall, then arrange licensed Kombi and Samba Bus magnets in a tidy grid or a looser pattern inspired by a retro road map.

Magnetic paint works best over a properly primed surface, applied in thin, even coats according to the product instructions. Test one magnet before committing to the whole arrangement. A painted wall won't necessarily hold heavier objects securely, so keep the display to lightweight magnets and use proper wall hardware for any separate metal décor.

Practical rule: Leave breathing room around each magnet. A little negative space helps the shapes and colours read clearly, especially when Beetles, Kombis and Flower Power designs share one wall.

Group pieces by colour, model or mood. Pastel Flower Power variants suit a relaxed coastal kitchen, while metallic Beetles and classic Kombis can create a more restrained vintage display. Photograph a layout before changing it, so favourite arrangements are easy to recreate when new pieces arrive.

For a larger automotive statement, pair the magnet wall with metal car wall décor rather than trying to make every item magnetic. That combination gives the display height and texture without overcrowding the fridge.

An infographic comparing the benefits of a magnetic paint display wall versus using a standard fridge door.

2. Personalised VW Fridge Magnet Recipe Holder

A good recipe holder should be useful first and decorative second. Place a Beetle or Kombi magnet at eye level, then add a small metal clip or hook nearby for recipe cards, camping meal notes, takeaway menus or handwritten family favourites. The result feels personal without turning the cooking area into a cluttered noticeboard.

Cream, pastel or lightly textured cardstock gives the arrangement a heritage look. Laminate cards that are handled often, particularly if the holder sits near a sink or stovetop, but keep paper and magnets away from direct heat and splashes. A magnet designed for display shouldn't be treated as heatproof kitchen hardware.

One simple system is to keep only a few active cards visible and store the rest in a labelled tin or recipe box. Match the subject to the vehicle:

  • Kombi cards: Use them for camp meals, picnic ideas and road-trip stops.
  • Beetle cards: Reserve them for everyday cooking, baking and family recipes.
  • Samba Bus cards: Pair them with weekend brunches, beach lunches or entertaining.

A personalised set also makes a thoughtful present for a VW enthusiast who enjoys cooking. The write-on fridge magnet range can add a practical note-taking element while keeping the display tied to Volkswagen style.

A small recipe card for vanilla cupcakes is clipped to a white refrigerator with a toy bus magnet.

3. Custom VW Magnet Memory Timeline

Collectors who love the story behind the badge can arrange magnets as a visual history lesson. A kitchen wall, hallway or home office becomes a miniature museum when pieces are ordered by model generation, body style, colour or Australian ownership memories.

The Beetle has a particularly rich local story. Volkswagen Australia records that the car arrived in Australia in 1945 via the Australian military, while Museum Victoria states that the first Beetles were imported in late 1953. Volkswagen cars and commercial vehicles began production at Clayton in 1959, local Beetle manufacturing stopped in 1968 after just over 260,000 Beetles had been made, and the last new Australian-assembled Beetle appeared in 1976. Those details make a dated display more meaningful than a row of attractive shapes.

The Kombi timeline offers its own strong sequence. CarsGuide reports that Volkswagen began building the Type 2 in March 1950, with Kombi assembly at Clayton from 1964 to 1977. Australian enthusiasts can use that background to separate split-screen, bay-window and camper interpretations, while avoiding labels that claim more precision than the source material supports.

Build the timeline carefully

  • Start broadly: Arrange pieces by Beetle, Type 2, camper and special styling.
  • Add labels: Use small cards beneath each magnet, with model names and verified dates.
  • Check the wording: Don't call a magnet an Australian-built model unless its history supports that description.
  • Record the display: Photograph the finished timeline before rotating pieces into storage.

This approach works especially well after Volksfest or a VW Nationals visit, when new memories can join the historical line-up.

4. Coastal Cottage Magnet Gallery Ledge

A coastal ledge gives fridge magnets a more curated role. Instead of lining every piece across the refrigerator, display selected Beetles, Kombis and Samba Buses among driftwood, shells, framed surf art and nautical accents. The magnets become part of a room rather than just a kitchen accessory.

Shallow floating shelves suit this idea because they keep the display close to the wall. A ledge roughly the depth of a small décor shelf is usually easier to style than a deep bookcase, but choose the actual size around your wall and the objects you already own. Place heavier décor low and keep delicate magnets away from the edge where they could be knocked.

Odd-numbered groupings can create a relaxed, balanced arrangement, though the most important rule is visual variety. Set one Kombi upright, lean a small sign behind it and place a Beetle beside a shell cluster. A Samba Bus can act as the colourful focal point rather than being lost among similarly sized pieces.

“A coastal VW display works best when it feels collected, not crowded.”

For more room-by-room inspiration, browse these wall decoration ideas and look for a consistent palette. White décor, pale timber, faded aqua and warm red can echo beach-house styling without making the room look themed from floor to ceiling.

A minimalist shelf displaying miniature Volkswagen cars, driftwood pieces, and various seashells on a plain wall.

5. VW Magnet Advent Calendar

A VW advent calendar turns a collection into a shared ritual. Fill numbered envelopes, fabric pockets or small kraft pouches with a different magnet, sticker, charm or miniature surprise, then reveal one each day from December. A reusable backing board means the display can return every festive season with a new mix.

The best calendars don't rely on expensive contents. Variety creates the interest. Mix Beetle colours with Kombis, Samba Bus designs and a few Christmas-themed pieces, then add handwritten notes about a road trip, a favourite model or the reason a particular design matters to the recipient.

Use a backing that can support the contents without placing unnecessary pressure on the magnets. Felt, canvas or plywood can all work when securely mounted, while envelopes should be large enough to remove the surprise without bending it.

Make the calendar personal

  • Use vintage materials: Kraft paper, cream labels and hand lettering suit VW nostalgia.
  • Add small stories: Include a memory or clue with selected days.
  • Keep it reusable: Sew or buy pockets that can be refilled each year.
  • Protect the collection: Wrap painted or printed pieces so they don't rub against one another.

This makes a thoughtful gift for the enthusiast who already owns plenty of vehicle memorabilia. It also gives children and visitors a gentle introduction to the shapes and colours that make Beetles and Kombis so recognisable.

6. Industrial Metal Board Magnet Display

A steel board can solve two problems at once, display space and everyday organisation. Mount one in a kitchen, workshop, office or garage, then combine VW magnets with clips, small baskets and hooks for notes, keys or lightweight tools. The metal surface gives you the flexibility to rearrange the collection without repainting a wall.

Choose a finish that suits the room. Matte black and powder-coated steel feel industrial, stainless steel looks cleaner and a raw surface can complement timber, canvas and old workshop signs. Secure the board properly with suitable brackets and wall hardware, particularly if it will carry anything beyond lightweight magnets.

Keep part of the board empty. A modern arrangement needs space around the pieces, and a full surface can make even a carefully chosen collection look noisy. Put the most important magnet at eye level, then build outward with supporting colours and shapes.

  • Plan first: Lay the magnets on the floor before drilling.
  • Separate functions: Keep hooks and baskets away from fragile collector pieces.
  • Check the surface: Confirm that the board attracts the magnets before installation.
  • Use the board actively: Move reminders and display pieces as your needs change.

This is a stronger choice than a standard fridge door if the kitchen is already busy, or if you want your VW memorabilia visible in a dedicated work area.

7. Retro Campervan Interior Magnet Vignette

A Kombi interior has limited wall space, which makes a small magnet arrangement especially effective. Use the fridge door, a metal cupboard panel or another suitable ferrous surface to create a compact vignette that feels like part of the van's travel story.

Match the display to the vehicle's character. Flower Power pieces complement a retro camper atmosphere, while classic silver or restrained Beetle designs may suit an earlier restoration. Don't force historical accuracy if the van is a personal custom build. A display can celebrate the era without pretending every accessory belongs to the original factory fit-out.

Travel changes the practical rules. Vibrations, turns and repeated opening of cupboards can send loose pieces sliding or falling. Test the magnets while stationary, keep them away from moving catches and use small protective bumpers where they prevent scratching or movement. Remove particularly delicate pieces before a long trip.

Protect the van first. A charming interior display isn't worth scuffing original paint, timber or restored trim.

Create a rotating arrangement after each road trip. A magnet from a coastal weekend can sit beside a Samba Bus for the next outing, then return to a protected storage box when the van is used on rough roads. Photograph the interior before changing it, especially if you're preparing for a community event such as Volksfest Australia. The 2025 itinerary included market stalls, live music, food trucks, cruises, a display day and a VW swap meet, all useful settings for sharing thoughtful presentation ideas with fellow owners. Volksfest Australia's published itinerary provides the event details.

8. Themed Monthly VW Magnet Rotation Display

A rotation system lets a larger collection breathe. Rather than displaying every magnet at once, choose one theme for a month, photograph it, then return the pieces to an organised storage container before bringing out the next group.

The themes can follow the vehicles or the season. Beetles might lead one month, Kombis another and Samba Buses the next. Surf styling, Flower Power colours, coastal pieces and favourite show finds can each have their own turn. You can also rotate by collecting purpose, such as new acquisitions, best-preserved pieces or magnets connected to a particular trip.

A simple calendar keeps the system manageable. Store each group in a labelled sleeve or shallow archival-safe container, with a photo of the intended arrangement. That avoids the familiar collector's problem of remembering the look but not which pieces created it.

Keep each rotation deliberate

  • Choose a focal point: One standout magnet should anchor the display.
  • Limit the palette: Similar colours make mixed models feel intentional.
  • Record the date: A photo archive turns the rotation into a collecting journal.
  • Pair décor thoughtfully: Summer surf pieces and festive designs can change the surrounding room as well as the fridge.

The system also helps protect rarer or more delicate items from constant handling. Keep high-value or sentimental pieces in a display case or protected cabinet, and use sturdy everyday magnets for notes and shopping lists.

9. DIY Magnetic Bookmark and Note Card Set

Some magnets deserve a life away from the kitchen. A coordinated bookmark and note-card set can carry VW character into a reading chair, office or gift box, especially for someone who loves journals, travel writing or handwritten correspondence.

Use licensed imagery or artwork you have permission to reproduce. Photographing a magnet for personal inspiration is different from copying protected artwork for sale, so keep the project for private use or source approved designs. Mount the printed design on sturdy cardstock, protect it with a suitable laminate and attach small magnets so the bookmark grips the page without damaging it.

A Beetle, Kombi and Flower Power palette can make a cohesive set, while a Samba Bus theme suits a travel journal or camping notebook. Add a name, date or short personal message to the reverse side for gifting.

  • Choose durable card: Heavier cardstock feels better in the hand and resists curling.
  • Seal the surface: Lamination helps with handling and accidental moisture.
  • Round sharp corners: This protects pages and makes the set more comfortable to use.
  • Package with care: Kraft paper, a small sleeve or a reused gift box keeps the presentation warm.

This idea works best with lightweight components. Don't attach a heavy diecast model to a bookmark, and don't cut up a scarce collectible to make a craft piece. Keep the original magnet intact and create the stationery around a photograph or approved graphic instead.

10. Outdoor Patio Magnet Weather Station Display

An outdoor VW weather station can turn a patio corner into a daily ritual, but it needs more care than an indoor display. Start with an outdoor-rated steel or aluminium board in a sheltered position, then add durable weather indicators, temperature notes, rain markers and a few VW magnets.

The display suits a beach house, campsite or covered entertaining area. A Kombi can mark a sunny day, a Samba Bus can sit beside a rain note and a Beetle can identify the weekly forecast. The charm comes from updating it by hand, not from pretending a decorative magnet is a professional measuring instrument.

Protect every paper element with an exterior-safe coating, and keep the board away from direct wind and heavy rain. UV exposure can fade printed surfaces, while salt air near the coast can accelerate corrosion on unsuitable metal and hardware. Check the board and magnets regularly, then bring the collection indoors when severe weather is expected.

Outdoor display advice: Treat weather resistance as a location decision, not a product assumption. A covered patio is safer than an exposed fence or garden gate.

Use a removable board if you only need the station during holidays. At home, photograph it through the seasons and change the surrounding décor with shells, surf items or camping accessories. The result is practical, personal and unmistakably Australian.

Comparison of 10 Fridge Magnet Display Ideas

Item Implementation (🔄) Resources (⚡) Expected outcomes (📊) Ideal use cases (💡) Key advantages (⭐)
Vintage VW Kombi Fridge Magnet Display Wall 🔄 Medium, wall prep, priming, multiple paint coats and layout planning ⚡ Moderate–High, magnetic paint, primer, time; larger surfaces increase cost 📊 Expansive, rearrangeable gallery and kitchen focal point 💡 Kitchens, feature walls; collectors wanting a rotating visible collection ⭐ Maximises display area; protected, stylish centerpiece
Personalised VW Fridge Magnet Recipe Holder 🔄 Low, attach clips/hooks to magnets or fridge; simple mounting ⚡ Low, small clips, magnets, cardstock; minimal tools 📊 Functional recipe display that keeps favourites accessible 💡 Home cooks, gift idea, beach houses wanting practical nostalgia ⭐ Combines utility with collectible charm; space-efficient
Custom VW Magnet Memory Timeline 🔄 High, curation, research, precise chronological arrangement ⚡ High, wide-range era magnets, labels, substantial wall space 📊 Educational, museum‑style narrative of VW evolution 💡 Enthusiast collectors, educators, VW history displays ⭐ Tells a compelling historical story; strong conversation starter
Coastal Cottage Magnet Gallery Ledge 🔄 Medium, install floating shelves and arrange layered objects ⚡ Medium, shelves, mounting hardware, coastal décor and magnets 📊 Curated, textured display blending VW and seaside elements 💡 Beach houses, holiday rentals, entertaining spaces ⭐ Sophisticated curated aesthetic; blends décor and collection
VW Magnet Advent Calendar 🔄 Medium–High, sourcing 24+ items and assembling pouches/board ⚡ High, many small magnets/models and calendar materials 📊 Seasonal engagement and reusable festive tradition 💡 Holiday gifting, families, collectors building a themed set ⭐ Creates daily excitement; memorable, giftable experience
Industrial Metal Board Magnet Display 🔄 High, heavy mounting, hardware planning, integrated storage ⚡ High, metal board, brackets, accessories; possible professional install 📊 Durable, multifunctional organiser and bold feature wall 💡 Modern kitchens, offices, collectors needing organisation ⭐ Maximises display + storage; robust and highly customisable
Retro Campervan Interior Magnet Vignette 🔄 Low–Medium, selective placement inside compact vehicle spaces ⚡ Low, magnets, small stabilisers/adhesive bumpers 📊 Authentic interior personalisation; Instagram‑ready styling 💡 Campervan owners, restorers, road‑trip enthusiasts ⭐ Adds character with low-cost personalisation; authentic feel
Themed Monthly VW Magnet Rotation Display 🔄 Medium, planning calendar, regular swaps and inventory tracking ⚡ Medium, storage boxes, labels, documentation system 📊 Dynamic, ever‑fresh displays with ongoing engagement 💡 Collectors with diverse sets, social media content creators ⭐ Prevents display fatigue; ensures all pieces get spotlight time
DIY Magnetic Bookmark and Note Card Set 🔄 Low–Medium, print, assemble, affix small magnet strips ⚡ Low, cardstock, magnet strips, printing/lamination 📊 Practical stationery/gift sets; small-scale sales potential 💡 Crafters, market sellers, gift-givers, readers ⭐ Low-cost production; useful, giftable extension of collection
Outdoor Patio Magnet Weather Station Display 🔄 High, weatherproofing, secure outdoor mounting, protection measures ⚡ High, outdoor-rated board, coatings, sealed materials, maintenance 📊 Functional weather station that doubles as outdoor display 💡 Coastal patios, campsites, outdoor entertaining areas ⭐ Unique blend of utility and nostalgia; eye‑catching garden feature

Give Your Magnets a Life Beyond the Fridge

The right idea depends on what you want the magnets to do. If your kitchen needs order, choose the recipe holder or industrial metal board. If your collection is growing faster than your available wall space, a monthly rotation gives each piece attention without creating a crowded display. A coastal ledge suits a beach house, while a campervan vignette keeps the VW spirit close during travel.

Collectors should separate everyday utility pieces from sentimental or scarce items. Use sturdy magnets for shopping lists, notes and active displays, then store delicate pieces in clean, dry containers when they're not on show. Protect painted and printed surfaces from moisture, direct heat and rough contact. A magnet beside a sink or outdoor board may look cheerful, but it still needs a dry position and regular checks.

Travel requires another layer of care. Remove loose magnets before driving on rough roads, especially from restored cupboards or original trim. Use protective bumpers where a piece might slide, and never rely on a decorative magnet to hold a heavy object in a moving vehicle. For a permanent wall arrangement, secure the wall hardware separately and let the magnets remain decorative.

A historical timeline deserves the same care as a diecast collection. Check model names and dates before printing labels, particularly when you're connecting Australian Beetle or Kombi history to a display. Volkswagen Australia says the early local story included a right-hand-drive Beetle brought to Sydney by German migrant Karl Regel and his family, while Museum Victoria documents Clayton production and the end of Australian Beetle manufacturing. Those details can turn a pretty arrangement into a conversation starter with real substance.

Fridge magnets also deserve a responsible end-of-life plan. The ACT advises that reusable magnets can go to Goodies Junction or craft projects, while Glen Eira says souvenir magnets may be donated to op shops. Maribyrnong Valley City Council directs unwanted magnets to the red-lid bin, and Ku-ring-gai Council launched a 2026 upcycling trial for flexible fridge magnets because they're difficult to separate from mixed waste and don't have an established recycling pathway in Australia. Check your own council's current guidance before putting magnets in a kerbside recycling bin, because decorative magnets generally aren't accepted there.

That practical question matters in a country where the category has grown beyond simple shopping-list holders. A 2021 Australian parliamentary petition estimated that a household could receive 1–2 magnets per week and argued that, across more than 8 million Australian households, this could mean over 4 million kg entering landfill annually. The petition has an advocacy perspective, so treat the estimate as a warning about durability and over-supply rather than a precise household audit. Reuse, donation and thoughtful purchasing remain better choices than treating every promotional magnet as disposable.

For VW enthusiasts, the most satisfying approach is selective. Choose a licensed Kombi Samba Bus diecast model as the centrepiece of a larger display, add a Volkswagen Beetle model for contrast, then use smaller magnets for the everyday jobs. The same principle applies to gifts. A carefully chosen VW memorabilia collectible has more emotional value than a random novelty item, particularly when it connects with the recipient's car, travel memories or coastal style.

Australia's wider permanent-magnet supply chain also helps explain why these products remain accessible. Industry data estimated that Australia consumed about 4.1 thousand tons of permanent magnets in 2024, with imports at 4.3 thousand tons, and valued the broader permanent-magnet market at about US$59 million that year. These figures cover far more than decorative fridge magnets, but they show the material ecosystem behind products that are easy to source and customise. The Australian permanent-magnet market overview provides that broader context.

Choose a wall if you want a statement. Choose a ledge if styling matters most. Choose rotation if collecting is the pleasure, and choose a personalised project if the magnet needs to become a memorable gift. Whatever you select, let the display reflect the relaxed, practical and slightly adventurous character that makes Beetles, Kombis and Samba Buses so enduring.


Volkswagen Memorabilia brings together licensed VW memorabilia collectibles, fridge magnets, Kombi Samba Bus and Beetle models, coastal décor and gift ideas for Australian enthusiasts. Browse Volkswagen Memorabilia for local stock, fast shipping and friendly Australian support, then give your magnets a display that feels at home beside your favourite VW.

Metal Car Wall Decor: A Styling Guide for Aussie Homes

You've finished polishing the Kombi in the garage, stepped inside for a cold drink, and noticed the wall above the sofa is still completely bare. The car has character, the room has good bones, but the display stops at the driveway. Metal car wall decor closes that gap, bringing the curves, colours and memories of classic motoring into the everyday parts of an Australian home.

A well-chosen piece can feel like more than decoration. It might recall a first road trip, a family Beetle, a beach-bound Kombi or a sunny afternoon at Volksfest. The trick is choosing the right style, finish, scale and location, especially when Australian sun, humidity and salt air enter the picture.

Why Metal Car Wall Decor Is Having a Moment

Generic wall art can make a room look finished, but automotive pieces give it a point of view. A vintage Volkswagen sign above a workbench, a flat Kombi silhouette beside a record player or a layered Beetle panel in a hallway tells visitors what matters to you before anyone says a word.

The appeal also fits naturally with Australian interiors. Coastal rooms often use bleached timber, woven texture and relaxed colour, while retro and industrial spaces welcome painted steel, aged surfaces and strong graphic shapes. Reflective metals are returning to Australian decorating, but current styling favours balancing them with stone, texture and softer organic forms rather than filling a room with hard shine. Australian decor coverage on 2026 styling reflects that warmer approach.

Collector's view: The best wall piece should look at home in the room, but still make a VW fan stop mid-sentence.

The wider wall-art channel is healthy too. Australian wall-art imports increased 0.84% from 2023 to 2024, with a 2.49% CAGR from 2020 to 2024, according to Australia wall art market data. That doesn't make every metal sign a guaranteed investment, but it does show that decorative wall products sit inside an established homewares ecosystem, not an isolated collector niche.

For VW enthusiasts, the nostalgia has real Australian roots. Beetles first arrived here in 1953, local assembly began in 1954, Volkswagen Australia formed in 1957, and Clayton production continued until 1976, as documented by Museum Victoria's Beetle history. A wall display can therefore celebrate both the shape of the car and the story behind it.

The Main Types of Metal Car Wall Decor

Before buying, identify the kind of object you want on the wall. Most metal car wall decor falls into three useful groups, and each creates a different visual effect.

A graphic illustration detailing three different types of metal car wall decor including signs, silhouettes, and models.

Vintage signs

Tin and enamel-style signs reproduce the language of old petrol stations, garages and motoring brands. Their rolled edges, bold lettering and glossy faces bring instant period charm. A rectangular sign suits a garage, workshop or rumpus room, while a smaller plaque can sit comfortably in a hallway or beside a display cabinet.

These pieces work particularly well when you want nostalgia without adding much depth. They're easy to combine with timber shelving, framed photographs and restored tools.

Flat metal art

Laser-cut and plasma-cut silhouettes offer a cleaner, more contemporary look. A Beetle profile, Kombi outline or simplified wheel design can sit against a pale wall without overwhelming the furniture. Cut-out shapes also create changing shadows as daylight moves across the room, which gives a simple design extra life.

For a coastal interior, a muted blue, white or weathered finish can connect the car theme with surf culture. In a darker man cave, black steel creates a sharper workshop feel.

Dimensional displays

Embossed panels, layered cut-outs, relief designs and wall-mounted diecast arrangements project from the surface. They catch light from different angles and become stronger focal points than a flat sign.

A Kombi Samba Bus diecast displayed on a shallow floating shelf is a good example. It adds genuine three-dimensional detail while leaving the wall itself relatively uncluttered. For classic Beetle references, VW Beetle wall art can provide the visual anchor around which a larger display grows.

Choosing the Right Finish for Your Space

Finish affects appearance, cleaning and service life. A raw steel piece may develop a pleasing rust tone in a dry indoor garage, but that same finish needs more caution near the coast. Powder coating, chrome and printed surfaces each solve a different styling problem.

Australian conditions make the environment especially important. Guidance classifies atmospheric corrosivity from C1, very low, with less than 1.3 micrometres per year of mild-steel corrosion, through to C5 marine, very high, with 80 to 200 micrometres per year in sea-shore or surf exposure. The Australian powder-coating guidance explains why a piece indoors won't face the same conditions as one exposed to salty air.

Finish Durability Coastal suitability Best room
Raw steel Develops patina and needs protection Limited unless sealed and sheltered Indoor garage or industrial room
Powder coat Tough, wipeable and available in many colours Stronger choice when the coating system matches the environment Living room, garage or covered coastal area
Chrome Bright and reflective, but shows marks Better protected indoors, away from salt spray Retro lounge or display room
Printed metal Crisp graphics under a protective surface Depends on substrate and coating quality Kitchen, hallway, office or themed room

The technical detail matters more than a product description that says “rust resistant”. AS 4506-2005 covers powder-coating test procedures and performance requirements involving adhesion, gloss, impact, weathering, corrosion and chemical attack, as shown in the AS 4506-2005 standard preview.

Where to Hang Metal Car Wall Decor in Your Home

Start with the room's job. A living room needs balance and conversation, a garage needs clearance around tools and movement, and a coastal space needs protection from direct salty airflow.

In the living room, place a vintage VW sign above the sofa with its centre close to eye level. Floating shelves underneath can hold a few diecast models, while matching pieces on either side of a television or fireplace create a calm, symmetrical arrangement. Don't let every item compete for attention. One hero design should lead, and the smaller objects should support it.

An infographic showing three interior design zones for displaying vintage metal car and ocean themed wall decor.

A garage or man cave gives you more freedom. Cluster signs near the workbench, above tool cabinets or beside a parts-cleaning area, but check door swings, shelves and overhead lights before drilling. A large Volkswagen van wall-art display can provide a strong vertical or horizontal counterpoint to a workbench.

For coastal rooms, choose a sheltered interior wall rather than a position where sea breezes hit the surface. Weathered metal looks excellent with white-painted boards, bleached timber and woven baskets, but the harder material benefits from those softer companions.

Grouping without visual clutter

Odd-numbered groupings often feel more relaxed than rigid rows. Mix a flat sign with a dimensional piece or a small diecast shelf, and leave 5 to 10 centimetres between items so each shape can breathe. Keep the bottom edge clear of skirting boards, switches and furniture backs.

Placement rule: Hang the display where you can enjoy the story, not where passing traffic will catch a shoulder or knock a model.

Getting the Size and Scale Just Right

A wall piece can be beautifully made and still look wrong if it's undersized. Measure the usable wall area, not the entire wall, then compare that width with the sofa, bed, workbench or cabinet below it.

For a broad furniture run, aim for art covering roughly two-thirds to three-quarters of the available width. A simple guide is to multiply the usable wall width by 0.66 to 0.75. A larger statement sign in the 60 to 90 centimetre range can suit an open living area, while a 20 to 40 centimetre plaque may work better in a hallway or layered cluster.

An infographic showing a formula to determine the ideal size of wall decor for proper balance.

Centre the artwork around 145 to 155 centimetres from the floor to the middle of the piece, then adjust for seating and ceiling height. Horizontal signs echo the length of a sofa or bench. Vertical silhouettes suit narrow walls, corners and spaces beside doors.

Collectors also need to separate wall-art scale from diecast scale. Australian guidance places a 1:18 model at approximately 25 to 30 centimetres long, a 1:24 model at 16 to 20 centimetres, and a 1:43 model at 10 to 12 centimetres, with other comparisons available in this Australian diecast size guide. Tape a paper template to the wall first. It's far easier than filling an unnecessary drill hole.

A Quick Buying Checklist Before You Commit

A confident purchase starts before the checkout. Take a photo of the wall, mark the furniture below it and use paper templates to test the arrangement in daylight and evening light.

An infographic titled Quick Buying Checklist showing three steps to prepare for wall decor installation.

Run through these checks:

  • Measure the space: Record width, height and the distance to skirting boards, switches, door frames and furniture.
  • Check the viewing height: Centre the design around your normal eye line, then lower it slightly if people will mostly see it while seated.
  • Allow traffic clearance: Keep busy walkways clear, including the infographic's practical 1 metre clearance reminder.
  • Match the finish: Choose a protected coating for humid or coastal conditions, and reserve easily weathered raw steel for suitable indoor locations.
  • Confirm the mounting surface: Plasterboard, brick and masonry need different fixings, and the hardware must support the item's actual weight.
  • Check authenticity: Collectors seeking genuine VW memorabilia should look for officially licensed Volkswagen products rather than generic car imagery.

This short process prevents the common mistakes: a sign that's too small, a finish unsuited to the room or a display mounted where it gets bumped every day.

Caring for Metal Wall Art in Australian Conditions

Dust is the easy part. Salt air, humidity and strong UV exposure create the true test, especially for pieces displayed on verandas, in open garages or near coastal windows.

Indoors, wipe the surface with a clean microfibre cloth as part of your regular housework. If the piece needs more than dusting, use a mild solution and a soft cloth, then dry it thoroughly. Avoid abrasive pads, strong solvents and harsh chemical cleaners because they can dull printed surfaces or damage protective coatings.

Look closely at corners, mounting points and cut edges. Early pitting, bubbling or exposed steel is easier to manage than a large area of corrosion. Chrome needs particular attention because fingerprints and salt residue show quickly, while powder-coated surfaces should be checked for chips that expose the substrate.

A simple care rhythm

  • Every quarter indoors: Dust and wipe the surface, then inspect the face and edges.
  • Every six months: Check screws, brackets, shelves and wall anchors for movement.
  • Each year outdoors or semi-outdoors: Review the clear protective finish and refresh it only with a product compatible with the existing coating.

For coastal homes, a sheltered wall with good airflow is preferable to an exposed exterior facade. AS 4312 helps determine the corrosivity zone, while AS/NZS 2312.1 guides protective coating selection, as outlined in the Australian coating guidance linked earlier. In other words, a good finish starts with the location, not just the colour you like.

Start Your Collection with Volkswagen Memorabilia

A strong display doesn't need to arrive all at once. Start with one piece that carries the most meaning, perhaps a Beetle silhouette, a Kombi sign or a Samba Bus model, then add supporting items as the room reveals what it needs.

The Beetle has a particularly rich Australian story. Clayton-assembled cars reached 80 per cent local content by 1962 and about 95 per cent in the mid-1960s, while the model's market share rose from a little over 1 per cent in 1954 to second only to Holden by 1961, according to the Australian Beetle history recorded by Carsales. ClubVW records that 1960 was the Beetle's most successful Australian year, with 24,388 units sold, and that it ranked as Australia's second-best-selling individual car model behind the FB Holden that year, as detailed in the ClubVW reference timeline.

That heritage gives a wall display its emotional weight. A licensed Volkswagen sign or diecast model isn't just a colour match for the sofa. It connects the room with Australian roads, surf trips, family memories and the community spirit found at events such as Volksfest, VW Nationals and Surf Show & Shine.

For complementary pieces, browse vintage home accessories and build around a single hero item. The right finish, size and placement can turn a blank wall into a small personal museum, without making the room feel like a showroom.


Volkswagen Memorabilia offers licensed VW diecast models, Kombi Samba Bus collectibles, Beetle pieces and coastal-inspired metal decor for homes, garages and thoughtful gifts. Visit Volkswagen Memorabilia to choose a hero piece for your wall, then grow a display that celebrates the Volkswagen stories you've carried for years.

Fridge Magnets for Kids Safe Fun and Educational Ideas

The fridge door is often the busiest wall in the house. A child's latest drawing sits beside holiday photos, alphabet pieces, a shopping list and, if your family has a soft spot for Volkswagens, a cheerful little Kombi or Beetle. It's a warm, familiar display, but the best fridge magnets for kids can do more than brighten the kitchen. They can encourage conversation, imaginative play, early literacy and a shared love of classic car culture.

Safety still comes first, especially for toddlers. The right choice is usually a large, smooth, single-piece magnet with an enclosed, lower-strength magnetic component, rather than a tiny loose magnet or a design with detachable parts. This guide brings together practical selection advice, Australian safety information, age-based ideas and VW-inspired activities for families who like their learning with a little sunshine and surf culture.

A stainless steel refrigerator door decorated with colorful children's drawings, photos, and alphabet magnets.

Welcome to the Wonderful World of Fridge Magnets for Kids

A child placing a bright magnet on the fridge is doing more than decorating. They're reaching, grasping, choosing, naming and deciding where an object belongs. A simple Kombi magnet can become the van heading to the beach, while a Beetle can “drive” past a row of animal or letter magnets. For a parent, it's a small moment of play during the busy rhythm of breakfast, school preparation and dinner.

That's part of the charm of fridge magnets. They live in a shared family space, so adults can join in without setting up a separate activity table. A parent might ask where the Kombi is going, help sound out a word or invite a child to sort magnets by colour. The kitchen becomes a casual learning spot, not a classroom with a timetable.

VW designs add a lovely thread of nostalgia. The Beetle, Kombi and Samba Bus carry strong associations with road trips, beach days, freedom and Australian car-show culture. A child may not know the history yet, but a parent or grandparent can turn a magnet into a story about a family car, a restoration project or a memorable day at Volksfest or the VW Nationals.

A good family magnet should earn its place twice, first through safe construction, then through the stories and play it encourages.

The rest of this guide focuses on choosing thoughtfully. You'll find ways to judge materials and construction, understand Australian rules, match designs with age and learning goals, and care for a display that remains attractive and practical. The same principles apply whether you're buying a small gift, refreshing a play area or adding a touch of VW memorabilia to the family kitchen.

What Makes a Great Fridge Magnet for Kids

A child-friendly magnet should feel more like a sturdy wooden block than a fiddly novelty. Chunky shapes, smooth edges and single-piece construction make a design easier for small hands to hold and less likely to break into accessible components. A rounded Kombi, animal or letter can invite handling without presenting the same concerns as a thin piece with a brittle surface or a glued-on decoration.

Start with the outer material

Wood can give a magnet a warm, tactile feel, while soft rubber is comfortable to grip and less likely to chip like a hard coating. Acrylic and resin-encased designs can deliver bright colours and detailed artwork, provided the surface stays intact and the magnetic component remains securely enclosed. The material matters, but the construction matters just as much.

Look closely at the edges and joins. A quality piece shouldn't have sharp corners, a loose badge, a cracked coating or a back that flexes enough to expose the magnet. Smooth surfaces are also easier to wipe after little fingers have moved a magnet around the fridge.

An infographic titled What Makes a Great Fridge Magnet for Kids, showcasing four key features: material, durability, magnetic strength, and appeal.

Think about size and magnetic hold

A magnet needs enough grip to hold a drawing or note, but stronger isn't automatically better for a child's product. A large decorative face with an enclosed, lower-flux ferrous magnet can be a more sensible choice than a tiny high-energy magnet that's easy to separate or swallow.

Use this quick check before buying:

  • One solid piece: Prefer a design that doesn't separate into wheels, badges, beads or small magnetic parts.
  • Rounded and smooth: Run your fingers around the edges and inspect the finish for cracks, splinters or sharp points.
  • Secure backing: The magnetic element should be fixed inside or firmly behind the main body.
  • Readable design: Bold colours and recognisable shapes help children name, sort and use the magnet in play.
  • Practical grip: It should stay on the fridge without being so strong that a child must yank it free.

For a VW collector, detail is part of the fun. For a young child, a focus on simplicity and durability over tiny scale details is key. Save delicate collector pieces for an adult display and choose a broad, durable design for hands-on play.

Safety First and What Australian Parents Should Know

Australian guidance draws an important line between an ordinary household fridge magnet and a small, high-powered, loose or separable magnet. A permanent ban on small, high-powered magnets came into effect in Australia on 15 November 2012. It covers loose or separable magnets small enough to fit the Australian small-parts cylinder when their magnetic flux index is above 50 (kG)² mm², because swallowing them can cause severe internal injuries. The ACCC product safety bulletin explains the ban and its exclusions.

Many ordinary fridge magnets are excluded because the magnet is embedded in plastic or plaster, the item is sold singly rather than as a group of loose magnets, and the magnet is generally a weaker ferrous type. That doesn't make every decorative magnet suitable for a toddler. A cracked casing, detached backing or small removable ornament can still create a risk.

Understand the toy standard

The mandatory Australian standard for toys containing magnets applies to new toys intended for children under 14 years when magnets or magnetic components are present. It aligns with AS/NZS ISO 8124.1:2019 for mechanical and physical safety, and its design requirements aim to prevent children accessing small magnets. The product name isn't the deciding factor. If an item is supplied as a toy or clearly intended for play, the toy requirements can become relevant. The ACCC guide to toys containing magnets outlines the standard and its scope.

Queensland guidance describes a hazardous small magnet as having a magnetic flux index of 50 or more, and gives examples including a disc up to 26 mm in diameter and 5 mm thick. The mandatory-standard information provides these technical details. Parents don't need to perform laboratory testing at home, but they should treat a tiny, powerful, detachable magnet as unsuitable for children.

An infographic safety guide for Australian parents concerning the risks of high-powered versus household fridge magnets.

Choose, check and supervise

Kidsafe Victoria warns that swallowed magnets can lock together inside the body, causing blockages, bowel perforations, infection or death. Its practical advice is to choose fridge magnets large enough that they can't fit into a young child's mouth. Kidsafe Victoria's magnet safety guidance also explains why supervision remains important, even with familiar household products.

Before purchase, check the age guidance, warnings, materials and construction. For a toddler, favour a large, single-piece design that cannot be pulled apart. Keep loose magnet sets and experimental products away from young children. Australian rules allow the only loose, small high-powered magnets in experimental sets for children 8 years and over, so those products aren't a sensible choice for toddler play.

For a practical Australian reference, read the fridge magnet safety rules for families. If a magnet or component is swallowed, seek urgent medical help rather than waiting for symptoms.

Choosing the Right Style for Age and Learning Goals

A good magnet suits the child's hands, interests and stage of learning. A toddler may enjoy moving a broad vehicle shape, while an older child may be ready for alphabet play, sorting or storytelling. Age labels provide a useful starting point, though parents should also consider the child's habits, supervision needs and tendency to mouth objects.

Magnet Type Best Age Range Key Benefit Safety Tip
Chunky vehicle or animal shapes Toddlers with close supervision Grasping, naming and imaginative play Choose a large, single-piece design with no detachable parts
Large alphabet pieces Preschool years with supervision Letter recognition, sounds and early word building Check that each piece is sturdy and keep small parts away from younger children
Number and colour shapes Preschool and early school years Counting, sorting and matching Inspect edges and backing regularly
Story or scene pieces Older children with supervision Sequencing, vocabulary and creative storytelling Avoid sets containing loose, powerful magnetic components
VW Beetle and Kombi designs Family play across ages, matched to construction Heritage stories, travel themes and imaginative play Select broad, secure designs for hands-on use

A Volkswagen Beetle model can turn a simple game into a language activity. Ask the child to find the red car, move it beside a house or describe where it is travelling. A Kombi or Samba Bus can start a road-trip story, with stops at the beach, a market or a family picnic.

For early literacy, alphabet magnets work best when children use them with purpose. Build a name, make a short word or match a letter with a picture. Older children can arrange map-style or storytelling pieces in order, then ask questions about places, journeys and family memories.

VW designs also bring a useful connection to Australian motoring history. A Beetle or Kombi can prompt conversation about family cars, camping trips and the way people travelled in earlier generations. Choose a licensed piece with clear details, broad surfaces and a secure backing, so the theme adds learning value without making the magnet difficult for small hands to manage.

Match the magnet to the child's hands first, then match the theme to the child's imagination.

For a birthday or classroom reward, check whether the item is intended for play or decoration. A licensed VW piece with simple, secure construction can suit shared family use. A finely detailed collector design may be better displayed on a high shelf, where children can enjoy its shape and VW heritage without handling fragile parts.

Fun and Educational Ways to Use Fridge Magnets at Home

A fridge display works best when it changes with the child's interests. Start with a small group of large, safe pieces and give each one a job. Alphabet magnets can build simple words, while a Kombi, Beetle and a few scenic pieces can turn the door into a tiny Australian road trip.

A child placing colorful plastic letter magnets on a white refrigerator to spell out simple words.

Try these activities:

  • Build a travel story: Place a Kombi at the start of a pretend journey and ask where it should stop next. Encourage the child to name objects, describe movement and remember the order of events.
  • Sort by a visible feature: Group magnets by colour, vehicle type, shape or size. Then change the rule and ask the child to explain what moved.
  • Make a word garage: Use broad alphabet pieces to build a vehicle name, a family member's name or a simple place name. Say each sound together without turning the activity into a test.
  • Create a family route: Add a drawing or printed photo beside the magnets and talk about a real outing, beach visit or car show. The VW theme gives children a concrete starting point for questions about travel and history.
  • Play “where does it go?”: Move a Beetle above, below, beside or inside a pretend scene. These location words make ordinary play useful for language development.

Writing surfaces can add another layer for children who like drawing roads, signs and destinations. A dedicated write-on fridge magnet collection can help turn the display into a reusable message board, provided the product is used as directed and supervised appropriately.

Keep the activity fresh by rotating the display rather than adding more and more pieces. A tidy group is easier for a child to focus on and easier for an adult to inspect.

A short visual prompt can also get the whole family involved:

Caring for Your Magnets and Keeping the Fridge Safe

Good care protects both the child and the collection. Wipe smooth surfaces with a soft, slightly damp cloth, then dry them before returning them to the fridge. Avoid soaking wood or rubbing printed finishes aggressively, since moisture and friction can damage decorative surfaces.

Inspect magnets during ordinary kitchen clean-ups. Look for a split casing, chipped resin, exposed backing, loose trim or a magnet that has started to shift. Retire any piece that has become damaged or separable, particularly if a child uses the display independently.

A simple household routine

  • Keep play pieces accessible: Place approved, sturdy designs at a reachable height and keep delicate collector items higher up.
  • Store spare sets securely: Put unused magnets in a closed container where young children can't reach them.
  • Protect the appliance: Check that the backing is clean and free from grit, which can mark a fridge surface when a magnet slides.
  • Reduce the pull: Teach children to lift or slide magnets gently instead of dragging them across the door.
  • Review the display: Remove clutter so adults can see every piece and notice damage quickly.

A strong fridge surface doesn't remove the need for supervision. Children may test magnets on other household objects, move them near electronics or attempt to pull apart a design that looks interesting. Keep the activity in a defined area and explain that magnets stay on the fridge.

For collectors, a rotating display is a smart compromise. Show the sturdy family-friendly pieces at child height, while limited, finely detailed or fragile VW memorabilia stays protected from enthusiastic little hands.

Gift Ideas and Where to Find Quality VW Magnets in Australia

A thoughtful magnet gift can connect generations. For a young VW fan, choose a broad, colourful design that supports supervised play. For a collector or classic-car owner, a licensed piece with recognisable Beetle, Kombi or Samba Bus styling may work better as display memorabilia than as a toy.

A gift buyer can build a small themed bundle around a family interest:

  • For a road-trip family: Pair a sturdy VW magnet with a travel note board or a holiday photo display.
  • For a car-show regular: Choose a classic Volkswagen design that reflects the family's own Beetle, Kombi or restoration project.
  • For a young storyteller: Add vehicle-themed pieces that can support a beach, camping or family journey scene.
  • For an adult collector: Consider a Kombi Samba Bus diecast or a detailed Beetle model for a shelf display, not hands-on toddler play.
  • For a mixed-age household: Keep child-friendly magnets at the front of the fridge and place delicate diecast models in a separate display area.

Buying from an Australian importer can make the experience simpler. Local stock and fast shipping help with birthdays, Christmas gifts and last-minute car-show presents, while local support makes it easier to ask about product details before ordering. Look for clear descriptions, licensed branding and sensible construction rather than choosing a piece only because the artwork looks nostalgic.

A curated range of VW fridge magnets in Australia can sit comfortably alongside broader VW memorabilia collectibles, including diecast vans, cars and coastal-inspired décor. The key is to choose the right item for the right role. A safe, durable magnet can invite play, while a detailed VW Kombi diecast Australia collectors admire belongs in a protected display.


Volkswagen Memorabilia brings together licensed VW gifts, fridge magnets, Kombi Samba Bus diecast models, Beetle models and coastal décor for Australian enthusiasts and families. Visit Volkswagen Memorabilia to find a thoughtful piece that keeps Volkswagen heritage part of everyday life, from the family fridge to the collector's shelf.

Fridge Magnets You Can Write on: A Practical Guide

You're halfway through packing the shopping for a Sunday drive, the fridge is covered in school notices, and the old souvenir magnet holding the list has just slipped onto the floor. A marker that wipes clean would be handy, especially if the same door also has to manage meal plans, bin night reminders and a child's latest masterpiece.

Fridge magnets you can write on solve that small but familiar problem. They combine a magnetic backing with a surface designed for dry-erase ink, liquid chalk, or removable labels. Think of one as a tiny whiteboard, chalkboard, or sticky note that grips a steel fridge door instead of a wall.

The idea has a nice bit of everyday nostalgia to it. Like a well-loved Kombi at a sunny coastal show, a good magnet can be decorative, useful and ready for another trip around the block. The important part is choosing the right surface, backing and marker for your kitchen.

What a Fridge Magnet You Can Write On Actually Is

A writable fridge magnet usually has three parts. The rear layer is magnetic, the middle may provide structure, and the front carries a smooth, chalk-friendly, or label-ready coating. The writing surface is what makes the product reusable. The magnet keeps it in place on a suitable metal surface.

A dry-erase version behaves like a small whiteboard. You write a shopping item, appointment, or reminder with a compatible marker, then wipe it away when the job is done. A chalkboard-style panel gives you a softer matte appearance, while an adhesive label magnet is better suited to short labels that need to move around the fridge.

A young woman writing on a shopping list magnetic whiteboard attached to a stainless steel kitchen refrigerator.

The simple distinction

A plain decorative magnet has no special writing coating. You can sometimes write on it, but ordinary plastic, resin, or printed paper may stain, smear, or hold the ink permanently. A larger magnetic whiteboard offers more room, yet it can feel excessive if you only need a small list or label.

Australian products show that the writable surface and the magnetic backing are separate considerations. Some magnetic sheets combine a rewritable whiteboard face with a rear that sticks to steel, while other whiteboard sheets are merely magnetic-receptive, meaning they need adhesive backing before they'll attach to a fridge door. Australian whiteboard magnetic sheets explain this difference clearly.

Before buying, check three things:

  • Surface: Is it made for whiteboard markers, liquid chalk, traditional chalk, or labels?
  • Backing: Does it contain a magnet, or does it only stick with adhesive?
  • Fridge door: Will the door attract a magnet?

That last check prevents the classic kitchen surprise. A lovely writable panel is no use if it slides down the door like a runaway roof rack.

A Short Aussie History of Fridge Magnets

Fridge magnets sit at the intersection of household practicality and holiday nostalgia. Australian sources describe early fridge magnets as useful objects for holding shopping lists and children's artwork, before travel souvenirs helped turn them into familiar decorative pieces. By the 1980s and 1990s, souvenir magnets had become a popular reminder of places visited, from coastal escapes to overseas trips. Mister Magnets' Australian business history places the local custom-magnet category on firmer commercial ground by 1995, when a Melbourne magnet business began after a customer requested fridge magnets.

That progression matters. The same inexpensive magnetic backing and printable face that worked for a holiday image could also hold a note, label, menu, or reminder. Decorative magnets gave the fridge personality, while writable versions added a practical layer without needing a separate noticeboard.

A timeline illustration showing the history of Australian fridge magnets from the 1970s to today.

From souvenir to household control centre

The more recent Australian story is tied to reusable whiteboard products. One Australian company describes a Perth-born product launched in 2010, while tracing the underlying whiteboard idea back to the 1960s, when early whiteboards were made from enamelled steel. That shift from fixed display to reusable communication mirrors what happened with writable fridge magnets. Magic Whiteboard Australia's history describes the connection between whiteboard-style surfaces and everyday homes, schools and offices.

Local supply has also become established. An Australian supplier says it has been in the fridge magnet business since 2008 and has provided millions of magnets across the country, a sign that magnet-based promotional, household and retail products have a substantial local presence. Today's writable versions fit comfortably into Australian kitchens styled with coastal colours, retro appliances and the relaxed spirit of a Kombi parked near the beach.

The Three Main Types of Writeable Fridge Magnets

The best type depends on what you'll write, how often you'll erase it, and the look you want on the door. A weekly meal plan needs a different surface from a small pantry label.

A quick comparison

Type Surface Look Marker Used Best For
Dry-erase magnetic sheet or shape Smooth, bright, white or printed Standard whiteboard marker Shopping lists, meal plans and frequent updates
Chalkboard-style magnetic panel Matte, dark and decorative Liquid chalk marker or suitable chalk Menus, reminders and coastal-cafe styling
Adhesive label magnet Small blank label surface Product-compatible removable marker Pantry labels, lunch boxes and movable notes

Dry-erase sheets are the practical daily driver. Their smooth coated face is easy to read and usually quick to wipe, making it suitable for a list that changes every time someone opens the fridge. Look for a coated sheet rather than an ordinary printed magnet, because the coating determines whether ink releases cleanly.

Chalkboard panels bring more atmosphere. A black face can suit timber, white cabinetry and beach-house styling, but it may need liquid chalk rather than a regular whiteboard marker. Dark surfaces can also show residue or ghosting, so cleaning becomes part of the routine.

Adhesive label magnets are smaller and more targeted. They work well when you want to identify containers, mark a child's lunch box, or move a short note without dedicating a whole A4 panel to it. They're less suited to a constantly rewritten family planner.

For a broader look at decorative and practical options, browse this fridge magnet buying guide, then return to the writing surface before deciding.

Materials and Magnet Strength Explained Simply

A quality writable magnet balances two jobs. The front must accept and release ink, while the rear must stay attached without making the sheet so rigid that it struggles on a curved door.

Australian magnetic-sheet suppliers describe thin 0.4 mm magnetic sheet as highly flexible but with very little holding ability, making it suitable for lightweight fridge advertising, crafts and hobbies. Magnet.com.au's magnetic sheet information shows the basic trade-off. Thin sheet bends easily, but it isn't the right choice for a heavy laminated planner or a stack of notices.

What sits behind the writing

Flexible ferrite or rubberised magnetic sheet is common for lightweight products. A thicker or layered backing can hold more, while a steel-backed writable layer may provide a different balance between rigidity and magnetic attraction. Rare-earth magnets can be powerful, but loose high-powered pieces aren't appropriate for casual family products.

The front coating matters just as much. PET laminate and melamine-style faces are designed to handle whiteboard ink, while chalkboard coatings suit liquid chalk or chalk. Cheap PVC-faced products may smear or leave a shadow because the surface wasn't built for repeated erasing.

Backing Type Pull Strength Flexibility Best For
Thin flexible magnetic sheet Low High Paper notes, light labels and crafts
Thicker bonded magnetic sheet Moderate Moderate Writable cards and small planners
Steel-backed or layered sheet Depends on construction Lower Structured boards and larger surfaces
Loose high-powered magnet components Potentially very high Poor as a sheet system Not suitable for casual children's products

Reading a product listing

Look for sealed edges, a firmly bonded front, and clear information about the backing. If a supplier provides a pull-force description, treat it as a guide rather than a guarantee, because the result changes with the fridge's steel, paint, curvature and the weight of what you attach.

A flexible, lightweight note magnet may be perfect for a shopping list. A larger calendar needs more support. Much like choosing between a Beetle and a Kombi, the right answer depends on the load you expect it to carry.

Everyday Uses for Writeable Fridge Magnets

The fridge becomes the household's control centre because everyone passes it. A writable magnet makes that traffic useful without filling the bench with scraps of paper.

Start with a running shopping list. Give each household member permission to add items as they run out, then wipe the list after the supermarket trip. A larger panel works better than several tiny tiles if the list regularly includes produce, pantry goods and forgotten barbecue supplies.

A grid-style panel can handle a weekly meal plan. Write dinners across the top or divide the surface into days, then change meals without printing a new sheet. Smaller write-on magnets can mark bin night, school events, appointments or a countdown to the next family outing.

Useful family ideas

  • Meal planning: Keep the week visible beside the recipe cards so everyone knows what's for dinner.
  • School routines: Add reminders for library books, sports gear and lunch boxes.
  • Children's practice: Use compatible washable writing products for letters, sight words and simple drawings.
  • Household messages: Leave short notes that don't justify a text message, such as “back soon” or “please feed the dog”.
  • Event tracking: Mark birthdays, visitors and weekend jobs where the whole family can see them.

An infographic showing five creative ways to use writeable fridge magnets for household organization and planning.

Marker habits that prevent frustration

Use standard whiteboard markers on glossy dry-erase faces. Liquid chalk suits products specifically made for that medium, especially dark chalkboard surfaces. Don't use permanent pens unless you deliberately want the message to stay.

Australian product guidance also points out that dark or laminated surfaces may need a suitable cleaner to avoid staining or edge lift. This Australian guide to magnetic whiteboards treats markers as product-specific rather than interchangeable, which is the sensible approach.

For a visual demonstration of household organisation ideas, watch the short video below.

Safety, Surface Compatibility and Care

A magnet only works if the surface accepts it. Many stainless-steel fridge doors are non-magnetic, although the exact construction varies. Test a small ordinary magnet on the door before buying a magnetic board, and try the side panel if the front doesn't attract it.

If the door fails the test, an adhesive-backed board may be the practical answer. You can also use a suitable steel plate on another kitchen surface, provided it's securely installed and won't damage cabinetry. Product listings in Australia distinguish between true magnet-backed sheets and whiteboard material that needs sticky backing. One listing explicitly warns that its sheet is not a magnet, while another notes that a whiteboard magnet may stick to steel but not stainless steel. This Australian sticky whiteboard sheet listing illustrates why the product description deserves a close read.

Surface check: Clean and dry both the fridge and the magnetic product before testing. Dust, moisture, curves and coated finishes can reduce contact and make edges lift.

Magnet safety around children

In Australia, products containing magnets and intended for children under 14 must carry clear warnings and age grading, and loose or poorly secured magnets are specifically flagged as hazardous. The Australian product-safety guide for toys with magnets recommends careful attention to how magnets are fixed.

Australia also bans small high-powered magnets above a magnetic flux index of 50 [kG² mm²] when they fit the small-parts cylinder and are supplied in groups of two or more. Swallowed magnets can attract across intestinal tissue and cause severe internal injury. The small high-powered magnets ban makes the design implication clear. Choose bonded magnetic sheet or a permanently fixed magnetic layer, not loose rare-earth spheres or detachable multi-piece components.

Keep the surface usable

Wipe with a soft cloth and mild soapy water when needed. Avoid abrasive cleaners on melamine-style surfaces, and don't soak laminated edges. Store chalkboard panels flat so they don't warp, and replace any product with a peeling laminate, damaged backing or fading coating.

An infographic titled Safety, Surface Compatibility and Care, explaining how to use magnetic whiteboard products safely.

For a decorative Australian option that suits a retro kitchen or coastal display, explore fridge magnets in Australia, while keeping children and pets away from loose magnetic parts.

DIY Writeable Magnets with a Coastal VW Twist

A homemade writable magnet can fit neatly into a coastal kitchen without looking like office equipment. Start with flexible magnetic backing, cut simple tiles to roughly 6 x 9 cm, and apply chalkboard vinyl or dry-erase film to the face. Lightly sand the edges so the corners don't catch, then test the tile on the fridge before making a full set.

For a VW-inspired finish, keep the artwork simple. A horizon line, split-screen Kombi silhouette, or faded bus outline can sit at the top of the writing area without taking over the useful space. A white paint marker gives the design a weathered sign feel, while a clear matte spray can help protect the decoration once the artwork has dried.

A second handmade option

Blank terracotta discs make cheerful herb labels. Apply self-adhesive magnet to the back, paint the face with chalkboard paint, and write “basil”, “mint”, or “oregano” with a suitable chalk marker. Keep every coat thin and allow it to cure fully before putting the discs near heat, steam, or the espresso machine.

The finished set can sit alongside timber, white ceramics and surf-style accents. For more inspiration in that relaxed decorating direction, browse vintage home accessories. A small Kombi silhouette beside the weekly menu is enough to suggest the road without turning the kitchen into a showroom.

Your Writeable Magnet Questions Answered

Will a dry-erase magnet stick to stainless steel? Usually not, because many stainless-steel panels aren't magnetic. Test the door with a small magnet first, then consider an adhesive-backed board or another steel surface.

Which marker should I use? Choose a standard dry-erase marker for a glossy whiteboard face. Use a white chalkboard pen or liquid chalk on a surface designed for chalk products, and follow the product instructions rather than assuming every marker is interchangeable.

How can I remove ghosting? Start with a dry cloth and the recommended whiteboard cleaner. For a stubborn mark, use a tiny amount of methylated spirits on an appropriate cloth, then wipe the surface clean and test an inconspicuous area first.

Can children use writable magnets? They can, provided the magnetic layer is firmly bonded, the product is suitable for their age, and an adult supervises use around babies and pets. Keep loose magnets away from anyone who might swallow them, and store finished panels flat and away from heat.


Volkswagen Memorabilia offers VW-themed fridge magnets, coastal home décor and licensed diecast pieces that bring the same practical nostalgia into your kitchen, shelf or display cabinet. Visit Volkswagen Memorabilia to browse Kombi Samba Bus and Beetle models, surf-inspired accents and giftable VW memorabilia for your next relaxed home project.

7 Best Fridge Magnets for Every Australian Home

The best fridge magnets depend on how you'll use them: choose custom photo formats for memories, strong themed designs for collecting, and VW-inspired pieces for nostalgic décor or gifts. Australian options range from everyday souvenir magnets to premium keepsakes, with listed prices running from AU$1.89 and AU$3.95 to AU$43.66 for a pewter platypus-and-friends design. Australian retailer listings

Make Your Fridge Part of the Story

The kitchen fridge can be a little family archive. There's the travel photo from a coastal weekend, a colourful souvenir picked up after a school holiday, and perhaps a tiny Kombi waiting beside the shopping list. Add a few carefully chosen pieces and the door starts to feel less like an appliance and more like a sunny Australian car show in miniature.

That's the appeal of the best fridge magnets. They hold reminders, display personality and make easy gifts without demanding a huge amount of space. Australia also has a long-established local manufacturing base, with Ad-Mag producing fridge magnets and importing magnetic materials for more than 32 years, beginning in Smithfield, Sydney, with magnetic calendars before expanding into many fridge-magnet shapes and formats. Ad-Mag's company history

This roundup compares photo flexibility, construction, creative choice, dispatch expectations, collecting appeal and practical drawbacks. Before buying, check the magnet strength, material, dimensions, finish, small-part safety, delivery timing and intended use. A decorative Kombi might be perfect for display, while a photo magnet needs to hold a reminder securely through daily kitchen use.

1. Fridge Magnets Australia for Travel Memories and VW Décor

A resin Sydney Opera House can bring back a school trip, a tin Kombi can recall a Gold Coast meet, and a hand-painted kookaburra can keep a Mornington Peninsula weekend on display. The best Australian souvenir magnets combine practical reminders with small artworks and easy conversation starters. They suit a fridge covered in family notes just as well as a carefully edited memorabilia display.

The Fridge Magnets Australia guide is the right starting point for shoppers who want local character rather than a generic photo product. It brings together Australian motifs and VW-inspired designs, including Kombi and Samba themes, surf styling and Flower Power details. Choose this category for a coastal kitchen, a VW enthusiast's home or a gift basket built around road-trip nostalgia.

Best for themed collecting

This range works best when you are building a story instead of buying one random magnet. Pair beach colours with shells and coastal details, or create a dedicated VW corner with a Kombi, a Beetle motif and a surf-inspired piece. A small group feels intentional, while too many unrelated designs quickly make the fridge look crowded.

Prices run from about AU$2 for simple souvenir shapes to AU$40-plus for hand-painted wildlife designs, so compare material, finish and holding strength before assuming every magnet is equally durable. A lightweight decorative piece suits display, while a frequently handled reminder needs a dependable hold and a finish that resists everyday wear.

Practical rule: Buy for the surface and the story. Match decorative magnets to a curated display, and choose stronger construction for notes, photos or reminders that are moved often.

Pros

  • Local character: Australian places, wildlife and VW culture feel personal rather than mass-produced.
  • Collecting appeal: Small pieces are easy to group around travel memories or a themed display.
  • Gift flexibility: A Kombi or coastal design suits birthdays, housewarmings and road-trip souvenirs.
  • Specialist support: A focused local retailer can help identify specific VW-inspired designs.

Cons

  • Clutter risk: Many small magnets need curation or the fridge can look untidy.
  • Safety limits: Small parts and strong magnets may not suit young children, pacemakers or sensitive electronics.

Fridge Magnets Australia: The Complete Buying and Decor

2. Tinyme Photo Magnets for Flexible Family Gifts

Tinyme is the most versatile pick for family photos, pet portraits and gift sets that need more than one visual style. Its Australian photo-magnet range includes flexible magnets, MDF wooden pop-out designs and acrylic formats, all printed edge to edge. Buyers can choose from square, circle, hexagon, and portrait layouts, then build a mixed display rather than ordering every magnet in the same shape.

The online builder lets you upload different photos or use Tinyme's art library. That's handy for a family fridge where a wedding image, a child's drawing and a holiday photograph may all need to sit together without looking repetitive.

Best for creative layouts

The Mosaic format is the standout option for a statement display. It lets several pieces work as one larger visual arrangement, while individual shapes suit smaller gifts or a rotating set of family memories.

Tinyme also gives shoppers standard and rush delivery guidance, which makes planning easier when a personalised gift has a firm occasion attached. The trade-off is construction. Wooden magnets are better treated as decorative pieces because their holding strength is lighter than a flexible magnetic format. Shipping can also involve a small fee below the service's minimum free-shipping spend.

Choose Tinyme when you care most about material choice, shape variety and an easy design process. For a daily-use fridge, select a format with enough holding power for the paper or photograph you expect it to carry.

3. Custom Magnets for Promotional Runs and Branded Displays

Custom Magnets, based in Dandenong South, Victoria, is built for businesses, events, councils, real-estate campaigns and small retailers. Its custom fridge magnet service offers a large shape library, including business-card formats, calendars, die-cuts and industry-specific designs. Artwork assistance is available, and the ordering process supports volume discounts.

This is the right tool when the magnet needs to carry a brand, event identity or useful information. A calendar magnet can stay visible in an office, while a shaped design can reinforce a local business without looking like a plain rectangle. Free Australia-wide delivery is included, and dispatch is typically planned around proof approval and production rather than an instant retail purchase.

Best for consistent bulk orders

Businesses will appreciate the proofing process and the ability to repeat a design across a run. Retailers can also use a distinctive die-cut shape to create a more memorable counter item or small add-on product.

The main drawback is that the website is oriented towards promotional production, not one-off photo gifting. Final pricing depends on the selected size and quantity, so buyers need to configure an order before they can judge the total cost.

Custom Magnets (Dandenong South, VIC)

Choose this supplier for branded consistency, custom shapes and business-ready ordering. It's less suitable if you want a handful of family photographs or a single nostalgic keepsake.

4. Snapfish Australia for Budget-Friendly Photo Variety

Snapfish Australia suits shoppers who want a familiar photo-gift workflow and plenty of format choices. The Snapfish AU fridge-magnet range includes hardboard, acrylic and flexible styles, along with large, vintage and Mosaic formats. The online builder also supports text and art embellishments, so a simple photograph can become a birthday gift, event favour or family display.

The attraction is breadth. You can order a conventional photo magnet, then choose a different format for a holiday image without changing platforms. Clear displayed pricing and regular promotions also make it appealing for value-conscious shoppers comparing several gift ideas.

Best for mixed photo gifting

Snapfish works well when one order needs to cover different people. A grandparent might prefer a classic family image, a friend might like a vintage treatment, and a child's room could suit a colourful Mosaic arrangement. The platform's Australian presence makes the ordering experience feel familiar, although personalised production and delivery expectations should still be checked before a special date.

Quality can vary between materials and designs, and mixed user feedback means buyers who care about a particular finish may prefer to sample a product first. Don't judge every format by the performance of another. A hardboard piece, acrylic design and flexible magnet can feel quite different in the hand and on the fridge.

For a more tactile coastal gift, compare the photo idea with this shell photo-frame buying guide. Snapfish is the better choice for photo variety and promotional value, while a specialist décor piece brings more texture and display personality.

5. Redbubble for Artist-Designed Retro Collections

Redbubble suits shoppers who want a fridge door with personality. The Redbubble marketplace connects buyers with independent artists, including designers working across retro cars, surf culture, travel illustrations and other niche themes. It is a strong choice for collectors who want something more distinctive than a repeated souvenir style in an Australian kitchen.

Its die-cut vinyl magnets are flexible and available in three sizes. Product pages list a 20 mil, 0.5 mm vinyl thickness, giving buyers a useful way to compare the physical format before ordering. That detail matters when a small artist-designed piece needs to sit neatly beside larger travel souvenirs or a favourite VW keepsake.

Best for a distinctive theme

Build a retro road-trip collection around surf vans, coastal graphics and old-school motoring imagery. VW enthusiasts can use the format to add a playful nod to Kombi culture without turning the fridge into a perfectly matched display. Artist-designed gifts work well too, because the artwork carries most of the personality.

Redbubble periodically offers multi-buy discounts, while its returns support provides some reassurance across a broad marketplace. The trade-off is consistency. Colour and finish can vary with the artist's file and third-party fulfilment, and shipping for one small order may compare poorly with a local photo lab. Check the dimensions and reviews for the exact design, rather than judging the marketplace as a whole.

A design-led magnet can sit neatly beside boho wall art in a relaxed coastal or eclectic room. Choose Redbubble for original visual identity, not uniformity across a large matching set.

6. SoMagnetic for Handmade Photo Sets

SoMagnetic, a Gold Coast maker, takes a curated approach to photo gifting. Its handmade photo magnets use a fixed 5 × 5 cm format, with set-based options including the Heart Set and magnetic calendars. SoMagnetic's handmade photo magnets are listed with dispatch of about one business day, giving gift buyers a local option when an occasion is close.

Best for presentation-ready gifts

The set structure keeps the choice simple. Select a gallery pack for a family display, a heart-themed set for a sentimental present, or a calendar for practical organisation. Flat Australian shipping and clear set pricing also make the total easier to understand than a highly configurable order where every variation changes the cost.

These sets suit a curated fridge display, especially for family photos, anniversaries or a thoughtful housewarming gift. Their consistent squares can sit neatly beside travel souvenirs, VW memorabilia and other collected pieces without making the arrangement feel cluttered.

The fixed format is the main limitation. A panoramic travel photograph, large feature magnet or collection with mixed shapes will suit a larger photo lab better. Personalised items do not accept change-of-mind returns, so check names, images and cropping carefully before ordering.

Choose SoMagnetic for handmade production, quick dispatch and a gift-ready set. Look elsewhere if you are building a deliberately mismatched collection of materials and dimensions. A small square photo set can complement coastal home décor without overpowering shells, timber, white décor or beach-inspired accents.

7. Magnetic Memory for Neat Family and Learning Sets

Magnetic Memory focuses on simple packs that are easy to buy and easy to give. Its handcrafted photo magnet collection emphasises strong magnets, vivid printing and a lasting finish, with custom-photo packs alongside ready-made options such as A–Z alphabet sets.

That combination makes the range useful beyond sentimental gifting. A family can create a tidy photo group, a child can use an educational set, and a small retailer can select a pre-configured pack without managing individual designs. The “How it works” process and set-based pricing also keep the ordering path straightforward.

Best for practical bundles

Magnetic Memory is a good answer when the buyer wants a finished solution rather than a design project. A themed alphabet pack has a clear purpose, while a photo pack can mark a family milestone or become a thoughtful present for someone moving into a new home.

The compromise is choice. Larger photo platforms offer more materials, shapes and individual-unit control. Magnetic Memory concentrates on bundles, so it's not the first pick for a single oversized image or a carefully mixed collection of acrylic, wood and flexible pieces.

Strong magnets are useful, but the right choice still depends on the fridge finish and what the magnet needs to hold. Test placement before loading a decorative piece with several sheets of paper.

The range suits family gifting, educational displays and small retail collections. It's practical, neat and easy to understand, without the more involved configuration found on specialist promotional sites.

Fridge magnets also sit within a wider Australian market covering advertising, souvenirs and gifts, household use, educational tools and corporate branding. Formats include custom-printed, 3D, photo, character and artistic designs, which is why the best option depends so heavily on purpose. Australian fridge-magnet market segmentation

Top 7 Fridge Magnet Brands Comparison

Product Implementation Complexity 🔄 Resource Requirements ⚡ Expected Outcomes 📊 Ideal Use Cases 💡 Key Advantages ⭐
Fridge Magnets Australia: The Complete Buying and Decor Low, retail buying + simple curation Low, inexpensive units (~AUD 6), local support Decorative, collectible themed displays VW fans, coastal/home décor, souvenir collectors Strong local/theme appeal; specialist retailer support
Tinyme (Australia) Moderate, online builder + customisation Medium, multiple materials (flexible, MDF, acrylic) Highly personalised photo magnets, mosaic sets Families, gifts, statement displays Best variety of materials/formats; fast production windows
Custom Magnets (Dandenong South, VIC) Moderate, artwork/proof workflow for bulk runs High capacity, die‑cuts, artwork service, volume discounts Consistent branded promotional magnets at scale Businesses, events, real estate, councils Extensive shape library; free AU delivery; quick turnarounds
Snapfish Australia Low, simple online ordering and builder Low, clear pricing, frequent promotions Budget-friendly, varied consumer formats (variable quality) Value-conscious consumers, gifting, events Competitive pricing; widest consumer-friendly formats
Redbubble Low, marketplace purchase (artist‑driven) Variable, third‑party fulfilment, global shipping Unique, design-led die‑cut magnets; quality may vary Collectors, retailers seeking niche/retro designs Massive artist catalog; clear specs and return support
SoMagnetic (Gold Coast, QLD) Low, set-based ordering, artisan production Low, fixed 5×5 cm format, fast dispatch (~1 business day) Gift-ready, presentation-focused magnet sets Quick gifts, curated packs, themed gifts Fast handmade dispatch; clear set pricing
Magnetic Memory Low, set-based selection and ordering Low, handcrafted packs, simple bundle pricing Strong prints and magnets, durable family/learning sets Family gifts, learning A–Z sets, small retailers Straightforward bundles; emphasis on strong magnets and vivid prints

Choose a Magnet Worth Keeping

The best fridge magnet is the one that matches the story you want it to tell. For Australian souvenir collecting, VW nostalgia and themed coastal décor, start with Fridge Magnets Australia. It brings together local motifs and Volkswagen-inspired pieces, making it a natural fit for a fridge covered with road-trip memories, surf culture and classic car charm.

Choose Tinyme or Snapfish when flexible photo formats matter most. Tinyme offers a particularly broad mix of materials and shapes, while Snapfish works well for shoppers who want several consumer-friendly photo styles in one order. Pick SoMagnetic or Magnetic Memory for curated handmade sets, especially when the gift needs to arrive as a neat group rather than a one-off custom experiment.

For business, event or council orders, Custom Magnets is the clear choice because its process is designed around artwork, shapes and volume. Redbubble wins for independent artist designs and distinctive retro collections, though buyers should check the exact product specifications and fulfilment details.

Before ordering, run through this short practical check:

  • Dimensions: Make sure the magnet will suit the available fridge space and won't hide the image.
  • Finish: Compare flexible, acrylic, wooden, hardboard, vinyl and metal-style construction.
  • Holding strength: Match the magnet to the paper, card or object it needs to support.
  • Surface compatibility: Fridge finishes vary, so test a decorative or unfamiliar magnet before building a loaded display.
  • Delivery: Personalised products need production time, while local stock can be more convenient for a last-minute gift.
  • Safety: Keep small parts and strong magnets away from young children, pacemakers and sensitive electronics.
  • Returns: Read the conditions carefully, particularly for personalised items that may not qualify for change-of-mind returns.

VW fans have an especially good reason to make space on the fridge. The Kombi's history reaches back to its introduction in 1950, with Australian sales beginning in 1954. The T1 included five main body variants, and the T2 arrived in 1968 with a 1600 engine and panoramic windscreen. Club VeeDub's Type 2 history

That heritage pairs naturally with a small piece of memorabilia. A Kombi magnet can recall a Volksfest weekend, a Samba Bus model can anchor a display shelf, and a Beetle keeps the collection connected to Australia's own Volkswagen story. Volkswagen says full Beetle manufacture at Clayton, Melbourne, ended after six years, while its Australian brand history also records right-hand-drive imports brought in by German migrant Karl Regel and his family. Volkswagen Australia's Beetle history

For collectors building beyond fridge décor, scale matters too. A 1:18 diecast model is commonly about 25 to 30 cm long, while a 1:24 model is about 18 to 20 cm, making the former more display-focused and the latter easier to fit into a compact cabinet. Diecast scale guidance

Browse the fridge magnets first, then explore the Kombi Samba Bus, Beetle and coastal décor pieces that give the display a proper VW story. Local stock and Australian support are useful advantages, especially when you're choosing a gift or adding a new piece before the next car show.


Volkswagen Memorabilia offers VW-themed fridge magnets, Kombi and Samba Bus-inspired gifts, licensed diecast models and relaxed coastal décor for Australian homes. Visit the shop to find a small piece of Volkswagen nostalgia for your fridge, display shelf or the VW fan who already has everything.

Best Gifts for Men Who Have Everything: Unique Finds

The bloke who has everything usually has a garage full of gear, a drawer of gadgets, and a firm opinion about what he needs. Another pair of socks won't cut it. A novelty mug might earn a laugh, then disappear behind the coffee tins.

The best gifts for men who have everything carry a bit more character. Think a beautifully detailed Volkswagen Beetle model, a 1962 Kombi for his desk, a coastal accent for the rumpus room, or an experience that gets him out on the road. If he loves the rumble of an air-cooled engine, the freedom of a beach-bound Kombi and the unmistakable curves of a classic VW, these are the finds worth pulling over for.

1. Volkswagen Memorabilia

A sunny car show has its own rhythm. Chrome catches the light, old paint tells a few stories, and someone nearby is explaining why their Beetle's particular shade of blue is exactly right. A thoughtful piece of VW memorabilia brings that feeling home without asking the recipient to find room for another full-size project car.

Volkswagen Memorabilia is the standout choice for a VW lover who already owns the obvious gear. The shop's range centres on Volkswagen diecast models, including 1962 Kombi and Samba Bus variants, with single pieces and mixed packs that suit both individual gifts and collector displays. Flower Power designs, surf-inspired cars and vans add a relaxed coastal note, while nautical wall art, photo frames, fridge magnets, centrepieces, starfish, seashell pieces and Christmas decorations help build a whole vintage beach scene.

The history gives these models extra charm. Volkswagen introduced the Type 2, better known as the Kombi, in 1950. Australian sources record local sales from 1954, the arrival of the T2 in 1968, Australian-built Kombis continuing until 1977, and German imports running until 1979. The Beetle reached Australia in 1953, local assembly began in Clayton, Victoria, the following year, and Volkswagen Australia Ltd was established in 1957. (Club VeeDub Australia, Volkswagen Australia)

The gift that suits his space

A Kombi Samba Bus diecast works brilliantly on a bookshelf, office cabinet or display shelf beside travel books and old surf photographs. A Beetle model feels more personal for someone whose first car, family car or restoration dream involved the rounded little icon. Coastal décor makes a natural companion, especially in a home with timber, linen, maps or beach-colour accents.

For scale, a 1:18 model is generally about 25 to 30 centimetres long and is positioned as a premium collector piece, often with opening panels and a detailed interior. A 1:24 model is usually about 16 to 20 centimetres long, making it a practical mid-range gift-shop or shelf display option. (Model Car Planet)

Collector's rule: Choose the model that matches his story first, then think about scale, display space and whether he prefers a single hero piece or a growing themed collection.

Image suggestion: A detailed close-up of a 1962 VW Kombi Samba Bus diecast beside a real Australian beach scene, with visible paintwork, windows and interior details.

2. RedBalloon

Some men don't want more objects. They want a reason to get out of the house, fire up the car and enjoy a day that feels different from the usual Saturday errands. RedBalloon is a strong option for that recipient, with experiences ranging from supercar drives and scenic flights to food and wine outings, short breaks and wellness sessions.

Browse the RedBalloon experience marketplace when you want the gift to become a memory rather than another item on a shelf. The recipient can receive a specific experience or a flexible voucher, which takes the pressure off choosing a date before you know his calendar. Instant email delivery also helps when Father's Day, a birthday or a milestone has arrived sooner than expected.

The car-focused options deserve a close look for a VW enthusiast. A supercar drive won't recreate the gentle thrum of an air-cooled Beetle, but it can satisfy the same curiosity about steering feel, acceleration and the pleasure of being behind a special wheel. A scenic flight or food experience suits the man who loves travel and stories more than horsepower.

Where it fits

RedBalloon works best for the man who has a tidy home, a full shed and plenty of personal taste. It also suits families who'd rather share a day than hand over a present that might sit unopened.

Check the location and availability before buying. Experiences can depend on the recipient's city, weather, operating dates and booking demand. A flexible voucher offers more breathing room, while a specific event can feel more exciting if you already know what he enjoys.

3. Adrenaline

At a sunny car show, one bloke can spend an hour tracing the curves of a Beetle, then launch into a story about V8 braking points. For him, Adrenaline offers a gift with more engine noise and salt air than another object for the shed. Its Australian experience marketplace includes skydives, V8 hot laps, rally driving, jet boats, whale watching and other adventure outings.

The Adrenaline experience collection covers experiences across Australia, with options suited to different appetites for speed, height and open water. Instant e-vouchers keep the handover simple, while the stated five-year voucher validity gives the recipient time to choose a suitable date.

Rally driving is the natural match for a man who loves classic cars and mechanical character. Sliding through a course offers the same hands-on curiosity that draws people to an air-cooled Beetle, even though the vehicle is far removed from a split-window Kombi. V8 hot laps provide a sharper hit of speed. Whale watching brings a coastal twist for the VW fan who would happily swap tyre noise for sea spray.

Book the calendar, not just the voucher: Popular activities and peak dates can fill quickly, so check the region, season and redemption conditions before handing over the gift.

Why it beats another gadget

Adrenaline suits the man with quality tools, a dependable barbecue and plenty of electronic gear already taking up space. A day behind the wheel, on the water or above the coastline gives him a story for the next club meet, rather than another item competing for room in the shed.

Prices vary by activity, and high-demand adventures may cost more than quieter experiences. Compare the type of day you want to create before committing, then choose the outing that feels most like him.

4. The Hamper Emporium

A premium hamper is the automotive equivalent of a beautifully finished interior. Everything arrives together, it looks considered, and the recipient can enjoy it without wondering where to store it permanently. The Hamper Emporium combines gourmet food, wine or whisky with men's care items, creating a substantial present that feels generous without pretending you know which tool he needs next.

Explore The Hamper Emporium for a ready-made gift that takes the guesswork out of shopping. Its range suits a quiet evening at home, a barbecue with mates or a celebratory weekend. Some hampers combine savoury treats with wine or whisky, while others bring in grooming and care products for a more complete package.

Choose around his ritual

Think about how he spends a good evening. If he enjoys setting up a platter before a footy match, choose a food-led hamper. If he likes a slow drink after polishing the car, a whisky combination may land better. A men's care selection can work for someone who appreciates practical upgrades but doesn't want a novelty product.

National delivery and metro delivery options make the service useful when you're sending a gift across Australia. Alcohol-inclusive hampers may have delivery restrictions, and free standard delivery applies only when an order reaches the retailer's specified spend threshold, with exclusions. Check the delivery details before ordering, particularly for regional addresses or a fixed celebration date.

Image suggestion: A premium hamper arranged beside a vintage VW Beetle print, with cheese, glassware and a folded note visible in the frame.

5. Gifts Australia

At a sunny coastal car show, a monogrammed wallet might sit neatly beside a battered Beetle keyring, while a personalised bar accessory waits for the afternoon barbecue. That mix captures Gifts Australia well: a broad choice for men who already own the obvious gear but still enjoy a thoughtful finish.

The Gifts Australia range for him covers gadgets, personalised leather goods, BBQ and barware, books, novelty pieces and hampers. Its Personalised Gifts, Outdoor and Alcohol Gifts categories make it easier to narrow the search. A name, monogram or short message can give a familiar item more character, especially when he has already bought the standard version himself.

Free standard delivery applies over $99, and Sydney metro same-day delivery is available for orders placed before 11 am, subject to the retailer's listed service conditions.

A personalised wallet could suit the bloke who carries his essentials everywhere. An outdoor item may fit weekends by the coast, while barware belongs beside a stack of old VW club stories. For a stronger connection to his garage or road-trip memories, browse this curated gift for car lovers, with ideas tied to Beetles, Kombis, surf trips and classic motoring.

The practical catch

Same-day delivery is Sydney-focused, and regional orders may take longer. Personalised pieces also need planning, as engraving or monogramming generally takes more time than choosing an in-stock item. Check the service details before ordering, particularly if the gift is needed for a fixed celebration date.

6. Yellow Octopus

Yellow Octopus is the stop for the bloke who enjoys a present that starts a conversation. Its catalogue covers novelty gifts, tech toys, deskware, barware and games, with enough oddball options to suit someone who has already seen every standard gift list.

Visit Yellow Octopus when humour matters as much as usefulness. Digital gift cards let the recipient choose, while national shipping options help with quick purchases. The store also has strong customer ratings across review platforms, although individual product feedback and specifications still deserve a look before buying.

A quirky desk item can work for the man who spends his day in an office but fills his weekends with cars. Barware may suit the garage entertainer, while a game gives the family something to use together after a show or club cruise. For a more settled, coastal look, pair the idea with home décor presents that bring in surf, nautical or retro styling without making the room feel like a novelty shop.

Read beyond the joke: Gimmicky products can be fun, but check dimensions, materials and the actual use-case if you want the gift to last beyond the unwrapping laugh.

When to choose it

Yellow Octopus is a good fit when you know he likes playful design but don't know his exact collecting interests. It's less suitable for someone who prefers officially licensed memorabilia, restrained interiors or historically accurate models. In those cases, a detailed Volkswagen diecast model has more lasting weight.

7. The Whisky Club Australia

A whisky subscription suits the collector who enjoys the reveal as much as the drink. The Whisky Club offers member-only bottlings and special releases, giving the recipient access to bottles selected around the club's release schedule rather than a predictable supermarket shelf.

Membership is free, and members can opt in or skip months. When opting in, the typical bottle cost is around $120 to $150, based on the club's stated membership information. The service also lists partner-bar discounts, tastings and prize draws as member perks. (The Whisky Club)

A considered gift for collectors

This works beautifully for a man who likes provenance, limited availability and a story behind what he owns. It has the same appeal as choosing a special VW model rather than a generic car ornament. A bottle can mark a birthday, restoration milestone or long-awaited club event, then become part of an evening shared with friends.

The flexible structure reduces the risk of locking him into a subscription he doesn't want. Availability is release-driven, though, so styles and specific bottles can vary. Ask yourself whether he enjoys discovery or prefers a known whisky profile before choosing this over a carefully selected single bottle.

A handwritten note linking the whisky to a road trip, car show or garage session makes the gift feel more personal. Just remember that alcohol gifts need responsible handling, suitable delivery arrangements and a recipient who enjoys whisky.

Top 7 Gift Retailers for Men Who Have Everything

At a sunny coastal car show, one bloke is admiring a restored Beetle while another is comparing Kombi surfboards. The best gift depends on which side of that scene feels familiar. This shortlist groups seven Australian retailers by the kind of delight they create, from VW nostalgia and beach-house character to weekend thrills, gourmet boxes and rare whisky.

Item 🔄 Implementation complexity ⚡ Resource requirements & availability ⭐📊 Expected outcomes / Impact 💡 Ideal use cases ⭐ Key advantages
Volkswagen Memorabilia Moderate, niche catalogue; pricing may require contact Low–Moderate, affordable diecasts and décor; limited support hours and local focus ⭐⭐⭐, strong decorative and collector appeal; high thematic impact for VW or beach displays Collectors, beach-themed home décor, gift packs for VW fans Specialised blend of VW nostalgia and coastal décor; curated sets; inspirational blog
RedBalloon Low, buy a voucher or specific experience online Variable, wide price range; instant e-delivery and physical pack options ⭐⭐⭐⭐, memorable emotional impact through experience gifts Last-minute gifting; recipients who prefer experiences over possessions Huge experience range, flexible vouchers, instant delivery
Adrenaline Low–Moderate, straightforward booking; date availability matters Moderate–High, adventure costs vary; frequent promotions; five-year vouchers ⭐⭐⭐⭐, strong thrill and experience value for adventurous recipients Thrill-seekers; skydiving, driving and other adventure experiences Large national coverage, clear pricing, long voucher validity
The Hamper Emporium Low, turnkey ordering and corporate tools Moderate, premium contents; delivery thresholds may apply ⭐⭐⭐, high perceived value with impressive presentation Corporate gifts, premium ready-to-send presents, food and drink lovers Beautiful presentation, gourmet selections, reliable national delivery
Gifts Australia Low, browse and personalise; shipping options differ by region Variable, broad price range; personalisation adds cost; same-day Sydney delivery ⭐⭐⭐, useful for personalised and practical presents Personalised gifts, novelty to premium options, quick metro delivery Wide “for him” range, monogramming and personalisation, same-day metro option
Yellow Octopus Low, simple online ordering and a large catalogue Low, many affordable novelty items; fast shipping options ⭐⭐, strong novelty and fun value; usefulness and durability vary Quirky or humorous gifts, conversation starters Large novelty selection, strong reviews, fast national shipping
The Whisky Club (Australia) Low, free membership with subscription opt-in or skip Moderate, typical bottle $120–$150; release-driven availability ⭐⭐⭐⭐, strong appeal for collectors through unique or limited releases Whisky enthusiasts seeking exclusive bottles Member-exclusive releases, flexible skipping, member perks

A VW collector may treasure a diecast Kombi in seaside colours, while his adventure-loving mate would rather book a driving day. RedBalloon and Adrenaline suit men who would remember the roar of an engine or the rush of a new experience long after another object disappeared into the garage.

The Hamper Emporium and Gifts Australia cover more practical moments, especially when presentation matters. Yellow Octopus brings the laugh, the oddball desk ornament or the gift that starts a story at the next barbecue.

For a man with a full garage and a carefully chosen drinks shelf, The Whisky Club offers a different kind of discovery through member releases and flexible participation. These retailers make room for personality, whether his happy place is a Kombi by the coast, a workshop bench or a Saturday spent chasing the next memorable outing.

Cruise Towards the Perfect Present

The best gifts for men who have everything aren't defined by a huge price tag. They work because they recognise the person behind the shopping problem, the bloke who still remembers a family Kombi, keeps a Beetle photo on his phone, or talks about his next restoration as if it's already parked in the driveway.

Australian gifting data supports that shift towards considered presents. The Australian Retailers Association and Roy Morgan projected that 5.5 million Australians would buy Father's Day gifts in 2026, spending about A$730 million, with the average shopper planning A$135. The same projection contrasts with A$720 million from around 4.7 million buyers at A$145 each in 2025, while the event had reached A$820 million in 2024. (Retail World Magazine)

That scale matters, but the personal connection matters more. A Commonwealth Bank report recorded A$1.58 billion spent in the lead-up to Father's Day in 2018, compared with A$1.37 billion before Mother's Day, and found the average Father's Day gift spend was A$50. Tech and gadget spending reached A$52 million in 2017, up 32% from 2016 and 62% from 2015. (Commonwealth Bank)

For collectors, the opportunity is even clearer. eBay and Deloitte estimated that Australians hold about A$16.8 billion in collectables, with roughly 7.6 million adults, or 35% of the adult population, actively collecting. The median collection value was A$2,200, and collecting had an almost even gender split. (Mi3)

Choose the model that tells his story. A 1962 Kombi, a Samba Bus, a Volkswagen Beetle model or a small coastal display can give him character without adding clutter. Volkswagen Memorabilia's Australian focus also means local stock and fast shipping are practical advantages for shoppers who don't want an overseas delivery surprise.

For an event tie-in, the VW Nationals 2026 schedule lists the cruise on Saturday 25 May and the car show on Sunday 26 May. (Club VeeDub Australia) A diecast gift opened before a club weekend, then displayed beside show photos afterwards, becomes part of the enthusiast's own story.


Volkswagen Memorabilia offers licensed-feeling VW diecast gifts, including Kombi Samba Bus and Beetle models, alongside Flower Power designs and relaxed coastal décor. Visit Volkswagen Memorabilia to find a character-filled present for the VW fan who has everything except one more piece of Volkswagen history.

Ceramic Photo Frame: Styling, Care and VW Display Ideas

You've got the shelf sorted at last. A 1:24 Kombi Samba Bus sits beside a faded photo from your first Beetle meet, but the old plastic frame looks out of place against the model's bright paint and the shell collection from last summer's coastal trip. A ceramic photo frame changes the whole scene. It adds weight, texture and a little handmade character, turning a row of VW memorabilia into a story about family, road trips and relaxed Australian living.

That pairing feels especially natural in Australia, where the Type 2 carries local history as well as surf culture. The Kombi first reached Australian buyers in 1954, and Volkswagen assembled it at the Clayton factory in Melbourne from 1964 to 1977, according to Australian Kombi history documented by CarsGuide. A ceramic frame holding a show-day snapshot or beach photograph gives that heritage a place beside your diecast collection, rather than leaving it tucked away in a drawer.

Why Ceramic Photo Frames Belong on Every VW Display Shelf

A ceramic frame has the same appeal as a well-finished diecast model. You notice its weight when you lift it, the surface catches the light differently from plastic, and small variations in glaze can make the piece feel personal. Place one beside a red-and-white Kombi, and the display gains a tactile accent that echoes the rounded bodywork and cheerful colours of classic Volkswagen design.

A person placing a red and white Volkswagen T1 toy bus model on a rustic wooden shelf.

The frame also gives the eye somewhere to rest. A shelf filled only with models can look like a catalogue. Add a ceramic photo frame with a family road-trip image, a Volksfest moment or a coastal sunset, and the display starts to feel lived in. The Kombi becomes part of a memory rather than another object in a collection.

A natural fit for coastal styling

White, pale blue and sandy neutral finishes work beautifully with shells, timber, woven baskets and nautical accents. A glossy blue ceramic frame can pick up the colour of a Samba Bus, while a matte white frame lets a brightly painted Beetle remain the star. The result suits a beach house, a home office or a garage display without making the room feel like a showroom.

Practical rule: Give every model a companion object that explains why you collect it. A photo, ticket, map or small ceramic accent can tell the story better than another vehicle.

Ceramic also makes a thoughtful gift for someone who already owns plenty of Volkswagen diecast. A model celebrates the car, while the frame creates space for the owner's own memories. That combination is why ceramic photo frames sit comfortably between VW memorabilia collectibles and home décor.

Understanding Ceramic Frame Materials and Finishes

Ceramic photo frames usually begin with fired clay or porcelain. Clay tends to offer a more earthy, substantial appearance, while porcelain can produce a smoother, finer surface. Neither choice automatically guarantees quality. The frame's finish, edges, backing and firing quality matter just as much.

An infographic titled Understanding Ceramic Frame Materials and Finishes, detailing base materials, glazing techniques, and care instructions.

Read the surface before you buy

A gloss glaze reflects light and makes bold colours pop, which suits a colourful Flower Power Beetle or a display with polished metal details. Matte glaze feels quieter and more contemporary, particularly beside pale timber and linen. Crackle finishes introduce fine lines across the glaze for an aged, vintage look, while hand-painted surfaces can bring stronger personality through brush marks and irregular colour.

Kiln-firing hardens the ceramic body and fixes the glaze to the surface. For photo-ceramic imagery, the image can be glaze-sealed, which makes the finished surface highly durable and resistant to fading. Western Australian Museum conservation guidance still recommends limiting light exposure to 50 lux or less, excluding ultraviolet light where possible, and maintaining display conditions around 16 to 20 °C with 30 to 40% relative humidity for photographic materials.

Quality checks for online and market buying

Run through these checks before choosing a frame:

  • Glaze coverage: Look for an even surface without bare patches, unexpected pinholes or rough pools around the edges.
  • Edge finishing: The photo opening should feel smooth, with no sharp ceramic lip that could catch paper or fingertips.
  • Backing strength: The easel or wall fitting should sit firmly rather than wobble under the frame's weight.
  • Craft character: Hand-finished pieces may show small variations. Those differences can be attractive, but they shouldn't hide cracks or structural flaws.

Compared with a composite frame, ceramic feels more substantial and decorative. Timber brings warmth and grain, while metal offers a crisp industrial edge. Ceramic occupies the middle ground, with enough visual softness for a family photograph and enough presence to stand beside a carefully chosen Volkswagen diecast model.

Ceramic vs Timber vs Metal Frames for Collectors

Collectors usually make this decision with the shelf in mind. A light acrylic frame may be easy to move, but it can look less grounded beside a model. A heavy ceramic frame can anchor a small vignette, though you'll want to check the shelf depth and protect the surface underneath.

Criteria Ceramic Timber Metal Acrylic
Shelf stability Weighty and steady Usually stable, depending on construction Stable, often with a slim profile Light and easy to shift
Visual character Tactile, glazed, decorative Warm, natural and familiar Clean, industrial or modern Minimal and unobtrusive
Moisture considerations Glaze resists surface moisture, but protect the backing Can respond to damp conditions and finish wear May suit practical spaces, with attention to corrosion Handles casual wiping but can scratch
Customisation Glaze colour, shape and painted detail Stain, paint, carving and profile Powder coat, brushed or polished finishes Clear or coloured options
Sustainability conversation Durable object with long use potential Reclaimed or responsibly sourced timber can be appealing Longevity depends on construction and finish Material choice and lifespan need careful consideration

Match the material to the room

Choose ceramic for a display that needs a decorative focal point, especially in a coastal or retro setting. Timber suits a restoration-inspired garage, where natural grain complements tools, old signs and warm lighting. Metal works well with industrial shelving and larger vehicle displays, while acrylic is useful when the photograph should remain visually quiet.

Sustainability deserves a thoughtful answer rather than a blanket label. Australian and Asia-Pacific buyers are showing interest in FSC-certified timber, recycled materials, low-VOC finishes, bamboo and reclaimed wood, and some segments support a premium of roughly 10 to 20% for eco-friendly frame materials, as discussed in the Australia gallery-wall frame market analysis. Ceramic can be a sensible choice when you value durability and intend to keep the piece for years, but recycled or reclaimed alternatives may better suit buyers whose first priority is material sourcing.

How to Choose the Right Ceramic Photo Frame

Start with the photograph, not the décor. Australian print sizes commonly include 4×6, 5×7 and 8×10, so check the frame's stated image opening rather than relying only on its outside dimensions. A wide beach scene usually needs horizontal orientation, while a portrait of a family member or a front-on Beetle photograph often looks stronger vertically.

A five-step checklist infographic illustrating how to select the perfect ceramic photo frame for your pictures.

Work through the practical details

  1. Measure the print: Confirm the visible photo area and allow for any overlap beneath the frame lip.
  2. Choose the orientation: Check whether the backing supports portrait, horizontal, or both.
  3. Match the finish: Blue and white glazing suits coastal décor, while cream, red or distressed finishes can complement a retro garage.
  4. Inspect the backing: An easel stand suits shelves and mantelpieces. Wall fittings help with gallery arrangements. Dual-purpose designs give you both options.
  5. Check the packaging: Ceramic needs protective wrapping and a firm outer carton for safe Australian delivery.

Glazing affects how the photograph appears. A clear, even surface should preserve colour without creating distracting reflections from a nearby window or display light. If you're buying online, read the product description carefully for the photo opening, backing style and finish. If those details aren't listed, ask before ordering.

For a diecast shelf, the frame should also relate to the model's scale. A 1:18 model is typically around 25 to 30 centimetres long, while a 1:24 model is generally around 16 to 20 centimetres, according to this Australian diecast collecting guide. A compact frame can sit comfortably beside a 1:24 Kombi, while a larger frame may need more breathing room beside a 1:18 display.

If your shelf needs a more secure presentation, browse practical display cases for models and plan the frame as a separate visual layer rather than squeezing everything into one enclosure.

Styling Your Ceramic Frames with VW Diecast and Coastal Décor

A small shelf can carry a surprising amount of personality. Set a 1:24 Kombi Samba Bus at a slight angle, place a white ceramic frame behind its rear quarter, and fill the frame with a faded beach photograph. Add a small shell dish and a piece of driftwood, but leave enough open space for the model's silhouette to read clearly.

A coastal themed display with a white ceramic photo frame and a blue Volkswagen van model on a wooden table.

Build the display around one hero model

Start with the largest or most meaningful item. A Samba Bus, a Volkswagen Beetle model or a surf-themed van should hold the visual centre. Place the ceramic frame slightly behind or beside it, then add one low coastal object, such as a shell or small piece of pale timber, to balance the height.

A mantelpiece arrangement can tell a broader family story. Put a Beetle model at one end, two ceramic frames with road-trip photographs near the centre, and white shell décor at the other end. Vary portrait and horizontal images so the arrangement doesn't become a rigid row.

For more ideas involving shells, nautical accents and relaxed beach styling, explore coastal home décor ideas.

Let the memories change with the season

Swap the photograph when the display needs a fresh note. A summer surf image works with blue-and-white ceramic, while a family Christmas photograph can sit in a festive frame during December. The model doesn't need to change. A new photograph can make the familiar Kombi feel connected to a different chapter.

Keep colours linked rather than identical. A red detail in the photograph can echo a red Beetle, while sandy neutrals can soften a bright diecast van. The best displays feel collected over time, not assembled from one matching set.

Caring for and Cleaning Your Ceramic Photo Frame

Dust the frame with a soft, dry microfibre cloth. Support the piece from underneath as you wipe, especially when the frame has a projecting ornament, uneven base or delicate hand-painted detail.

For marks, use a lightly damp cloth with mild soap, then wipe away residue and dry the surface. Avoid abrasive powders, rough sponges and strong chemical cleaners, which can dull a glaze or damage painted areas. Don't spray liquid directly onto the frame because moisture can reach the backing, print or easel mechanism.

Remove the photograph carefully when changing images. Lay the frame face down on a folded towel, release the backing gently and keep fingers away from the ceramic opening. If the frame feels tight, don't force the print through. Trim or replace the photograph rather than risking a chipped edge.

Bright Australian sunlight deserves attention, particularly in coastal homes with large windows. Keep the frame away from direct sun, and in tropical regions avoid persistently damp areas where humidity can affect paper, backing materials and photographs. Glaze-sealed photo imagery is durable, but sensible light and moisture control will protect the whole display.

Gift Ideas and Sourcing Ceramic Frames in Australia

A ceramic frame makes a thoughtful present for a VW enthusiast who already has shelves full of models. Pair one with a 1962 Kombi Samba Bus or a Flower Power Beetle, then add a printed family photograph so the gift feels personal rather than generic. It works for birthdays, Father's Day and Christmas, especially when the recipient enjoys both classic cars and coastal décor.

A shell-themed design can suit someone who prefers beach styling, while a colourful retro finish belongs beside a garage sign or restored Beetle photograph. For a complementary option, consider a shell photo frame that carries the coastal theme through with a lighter, nautical feel.

Australian-based importers offer practical advantages for fragile décor and collector gifts, including local stock, faster shipping and support within Australian business hours. Australia's picture-frame market was valued at USD 268 million in 2025 and is projected to reach USD 285.42 million in 2026, then USD 472.37 million by 2034, with a projected 6.5% CAGR from 2026 to 2034, according to the Australia picture-frame market benchmark. Ceramic frames sit within that broader decorative framing category, alongside the diecast and gift pieces that make a VW display feel complete.


Browse Volkswagen Memorabilia for licensed Volkswagen diecast models, Kombi Samba Buses, Beetles, coastal décor and gift-ready photo frames. Choose a ceramic accent for your display, pair it with a favourite VW model, and give an old road-trip memory the shelf space it deserves.

7 Beach Theme Art Ideas for VW Coastal Homes

Sunlight falls across the living-room wall, a classic Kombi print brings in the colour of a long summer drive, and a small Volkswagen model sits nearby beside a shell-filled bowl. The room already feels relaxed, but the right beach theme art can give that feeling a stronger sense of place. The best choices don't show waves or sand. They create a mood, connect with VW heritage, and make space for the collecting, gifting and coastal memories that feel distinctly Australian.

This gallery compares seven approaches, from curated Volkswagen van wall art and accessible coastal prints to premium Australian photography. Each option is considered for its visual character, styling flexibility, presentation details, trade-offs and placement needs. You can then build around the art with licensed diecast models, metal décor, nautical accents and friendly local assistance from Volkswagen Memorabilia, without forcing every piece to match too closely.

1. Volkswagen Van Wall Art That Turns Any Room Into a Classic

A vintage Volkswagen Kombi or Beetle print gives a coastal room something an ocean photograph often can't, a personality with wheels. The Volkswagen Van Wall Art collection brings together retro VW silhouettes and surf-inspired imagery with a sun-washed character that suits beach houses, relaxed living rooms and nostalgic display corners.

These prints work especially well above a sofa, console or low cabinet. A single strong image can anchor the room, while a smaller print can join a gallery wall containing framed photographs, surf pieces and seaside objects. The visual language stays consistent across the range, so you don't need to spend hours hunting for artwork that sits comfortably beside a Kombi Samba Bus diecast or a small Beetle model.

Why VW imagery works so well beside coastal décor

The appeal isn't only decorative. Beach imagery became an important part of Australian identity during the twentieth century, with the beach increasingly rivaling the outback as a national icon during the 1930s. Charles Meere's Australian Beach Pattern, conceived and executed between 1938 and 1940, is identified by the Art Gallery of New South Wales as a 1940 work that helped mythologise the beach as a uniquely Australian social space. This history of the Australian beach image explains why coastal scenes carry such cultural weight.

A VW van adds another layer of movement, freedom and social memory. Use warm sand, faded blue, cream or red from the artwork elsewhere in the room, then leave enough wall around the print for the image to breathe.

Practical rule: Let the print provide the main story, then repeat only one or two colours through cushions, model cars or nautical accents.

Pros

  • Authentic VW nostalgia: Iconic Kombi and Beetle imagery speaks directly to enthusiasts and classic-car owners.
  • Easy coastal mood: Retro surf motifs bring relaxed beach-house character without needing a complete room makeover.
  • Cohesive styling: The designs pair naturally with living-room wall accents, diecast models, metal décor and nautical pieces.
  • Flexible placement: Use one as a statement or combine several pieces in a themed gallery wall.

Cons

  • Distinctive style: The retro VW look may not suit a strictly minimalist or highly contemporary interior.
  • Framing decisions: You'll need to consider size, frame style and wall position, while styling questions can be directed to the store during weekday support hours, Monday to Friday, 9 am to 2 pm.

Volkswagen Van Wall Art That Turns Any Room Into a Classic

2. The Print Emporium

The Print Emporium suits decorators who want Australian coastal scenery first and VW memorabilia as the nostalgic accent. Its coastal range includes Byron, Noosa and Wategos Beach imagery, with options spanning photo-realistic views and more painterly interpretations. That variety makes it easier to match a Hamptons room, a modern apartment or a timber-lined beach cottage.

Australian-made-to-order production is a useful consideration for buyers who care about presentation choices. Fine-art paper, stretched canvas, framed and unframed formats, timber frames and a broad range of sizes let you decide whether the work should sit behind a collection or command attention above it. Filters by theme, colour, room and location also make browsing less of a treasure hunt.

Pairing a real coastline with a classic car

A broad Australian shoreline photograph can give a room its sense of place, while a shell wall-art accent and a licensed Beetle model add texture and personality. Try placing the photograph behind a console, then position the model slightly to one side rather than directly in the centre. This creates an informal display that feels collected over time.

The University of Sydney's Coastline exhibition demonstrated how central shorelines have been to Australian art history, spanning colonial and regional works, Impressionism, Cubism and contemporary pieces across five continents and several generations. The exhibition background from the University of Sydney also names artists including Arthur Streeton, Rupert Bunny, Ethel Carrick Fox and Emanuel Phillips Fox, showing that coastal subjects have long been more than a décor trend.

Pros

  • Broad visual range: Photography and painterly designs can suit different interiors.
  • Clear specifications: Size and framing choices help you plan the wall before ordering.
  • Australian coastal focus: Byron, Noosa and Wategos themes bring a recognisable local feel.
  • Straightforward shopping: Filters, visible ratings and shipping information simplify selection.

Cons

  • Made-to-order timing: Production may take longer than buying an in-stock item.
  • Mixed provenance: Some designs come from international artists, so not every scene is uniquely Australian.

Visit The Print Emporium to explore the coastal collection.

3. Mark Gray Fine Art Landscape Photography

A wide Australian coastal scene can give a VW display its horizon. Choose Mark Gray Fine Art Photography when the wall needs scale, atmosphere and a collector-level finish. The photographs focus on shorelines, beaches, rocks and reefs, so the image can carry the room while a Kombi or Beetle model supplies the nostalgic detail.

The gallery offers limited-edition prints that are hand-signed and numbered. Edition-size control gives collectors clearer provenance, while Metallic Pearl printing and archival-life information help buyers consider presentation and longevity. Open-edition works provide a more accessible option when the picture should support, rather than compete with, a treasured Volkswagen collection.

A simple styling formula works well: let the photograph set the pace, then keep nearby objects quiet. Place a licensed Kombi diecast on a shelf beside the artwork rather than in front of it. Repeat one colour from the image in a ceramic vessel, cushion or seaside accent. The polished model against an open coastal scene creates the visual rhythm of a surf trip, especially beside pale timber or white walls.

The result feels considered without becoming too formal. Woven pieces and relaxed texture, such as coastal boho wall art, can soften the photographic finish and connect the display with casual coastal living.

Mark Gray has galleries in Victoria and Queensland, along with an online store. Where practical, viewing a work in person can help with scale, surface and framing. That option also gives gift buyers a more deliberate way to choose a premium piece.

Pros

  • Collector-grade presentation: Hand-signed and numbered editions offer a stronger sense of provenance.
  • Australian subject matter: Beaches, rocks and reefs connect the artwork to local coastal identity.
  • Format flexibility: Open editions provide an alternative to limited-edition collecting.
  • In-person viewing: Galleries support a more tactile buying decision.

Cons

  • Premium positioning: These works sit above mass-market prints in presentation and cost.
  • Careful delivery planning: Larger framed or acrylic pieces need thoughtful freight and installation arrangements.

Mark Gray Fine Art Landscape Photography

Explore the collection at Mark Gray Fine Art Photography.

4. Matt Lauder Gallery

A familiar stretch of coast can give a VW display its sense of place. Matt Lauder Gallery focuses strongly on New South Wales locations, including Bondi, Manly, Newcastle and the Central Coast, alongside other Australian coastal icons. The result feels more personal than a generic tropical image, especially for anyone whose beach memories belong to the east coast.

Production and framing are handled in-house, so the studio controls how each photograph reaches the wall. Buyers can select framed photographic prints, stretched canvas, acrylic facemounts or metallic photo paper. Each finish changes the mood. Canvas has a softer, relaxed character, while acrylic and metallic surfaces sharpen the effect of bright surf, sunlight and water.

Build the display around the finish

Use the room's existing style as your guide. A large acrylic facemount suits clean, contemporary furniture and can make a modern coastal room feel crisp. Canvas or a framed photographic print sits more comfortably with vintage timber, woven textures and classic Volkswagen memorabilia.

A small Samba Bus model on a timber shelf can warm the arrangement without competing with the photograph. The beach image supplies the view, while the licensed VW piece adds the social, road-trip feeling associated with coastal cruising. Seaside accents, such as a weathered sign or pale ceramic, can complete the display without turning it into a themed set.

The gallery also presents examples of shipped products and available formats. These examples help buyers understand the finished presentation before ordering. Larger framed works and acrylic pieces still need careful transport planning, suitable wall support and enough space around the artwork.

Matt Lauder Gallery

Best suited to

  • NSW beach memories: Recognisable local locations give the display a grounded identity.
  • Flexible styling: Canvas, framed paper, metallic paper and acrylic support different rooms.
  • VW-led collections: Coastal photography provides a calm backdrop for licensed diecast models.
  • Careful buyers: Fulfilment examples make the presentation easier to assess before purchase.

Large framed and acrylic works require extra freight care and may cost more to ship. For Australian surf photography with a distinctly local feel, browse Matt Lauder Gallery.

5. Scott Leggo Gallery

Scott Leggo Gallery suits a modern coastal room where the artwork should feel calm rather than heavily themed. Its Coastal Wall Art collection brings together ocean baths, open beaches and Australian seascapes, including Sydney ocean pools and rugged shorelines. The images can act like a wide window, giving a VW display a sense of place without competing with the vehicles.

Start with the room's existing colours. A blue-grey ocean photograph can steady a bright Flower Power Beetle model, while a pale beach scene leaves room for a small group of licensed diecast Volkswagens to provide the colour and personality. Add one seaside accent, such as a weathered sign or pale ceramic, and the arrangement feels connected without becoming a novelty set.

Scott Leggo is particularly useful when you want photography rather than illustration. Its consistent style works well above a sofa, sideboard or display cabinet, with framed prints, canvas and other finishes helping you match the artwork to the available wall space. Check the size and finish before ordering, especially where the piece must sit comfortably beside models or other coastal décor.

A hand-drawn surf graphic or bold retro poster may better suit a dedicated VW wall. Choose this gallery when visual calm, Australian scenery and a polished coastal finish matter more than comic-book colour.

A good fit for

  • Modern coastal rooms: Consistent photography supports clean, relaxed interiors.
  • Australian memories: Ocean pools, beaches and rugged shores give the display a local sense of place.
  • VW-inspired styling: Seascapes create a quiet backdrop for licensed diecast models and seaside accents.
  • Straightforward planning: Size and finish choices make it easier to coordinate the artwork with existing furniture.

Limited-edition and specialist finishes may cost more than generic prints, and the catalogue offers fewer painterly or illustrated choices. Browse Scott Leggo Gallery for Australian coastal wall art that can give a classic Volkswagen display a composed seaside setting.

6. Temple & Webster

A beach-themed display often starts with one artwork, then grows around the room. Temple & Webster suits that approach because its Nautical & Beach category brings canvases and prints together with mirrors, frames and other decorative pieces. You can compare styles, price points and customer ratings while considering how the artwork will sit beside a licensed diecast Volkswagen model, a pale ceramic or a weathered seaside accent.

Read each product specification before ordering. Details may cover framing materials and protective covers, including glass or Perspex. That information matters in a busy family room, rental property or display area where weight, glare and breakage affect the choice.

Let the catalogue support the display

The broad range is useful for testing a coastal colour palette. A soft ocean print can act as the background layer, while a more characterful VW image becomes the room anchor. Pairing both gives the display a relaxed rhythm, much like a seaside road trip where the van is the focal point and the view supplies the atmosphere.

Quality can vary between brands and manufacturers, so inspect image resolution, finish, dimensions, frame construction and customer photographs where available. A mass-market canvas may suit a casual holiday unit. A dedicated collector may instead choose a distinctive licensed print and give it more space beside a better-finished model display.

Nationwide delivery, promotions and local support add convenience, though the artwork should lead the decision rather than the discount.

Strengths

  • One-stop convenience: Art, mirrors, frames and décor can be considered together.
  • Broad price range: Options suit different budgets and room roles.
  • Useful specifications: Framing and glazing details make practical comparisons clearer.
  • Visible reviews: Customer feedback may reveal presentation or finish concerns.

Limitations

  • Variable quality: Marketplace ranges can differ between manufacturers.
  • Less gallery depth: Museum-grade finishes and limited-edition provenance are less central.

Explore Temple & Webster for broad nautical and beach décor options that can provide an accessible coastal setting for a classic Volkswagen display.

7. Print & Proper

Print & Proper suits a coastal display that needs to feel coordinated without becoming a formal gallery wall. Its Coastal collection brings together ocean, beach and tropical themes across framed prints, canvases and posters, including Australian-made ready-to-hang options in several sizes. The result is an approachable starting point for a VW-inspired room.

A framed beach print can set the mood, while the vehicle details provide the personality. For a renter or gift buyer, that might mean choosing a finished piece in a known size, then adding a licensed Volkswagen model, a small photograph or a shell-toned accessory. Waves and tropical foliage also balance the harder surfaces of metal signs and diecast cars, much like sea air softens the look of polished chrome.
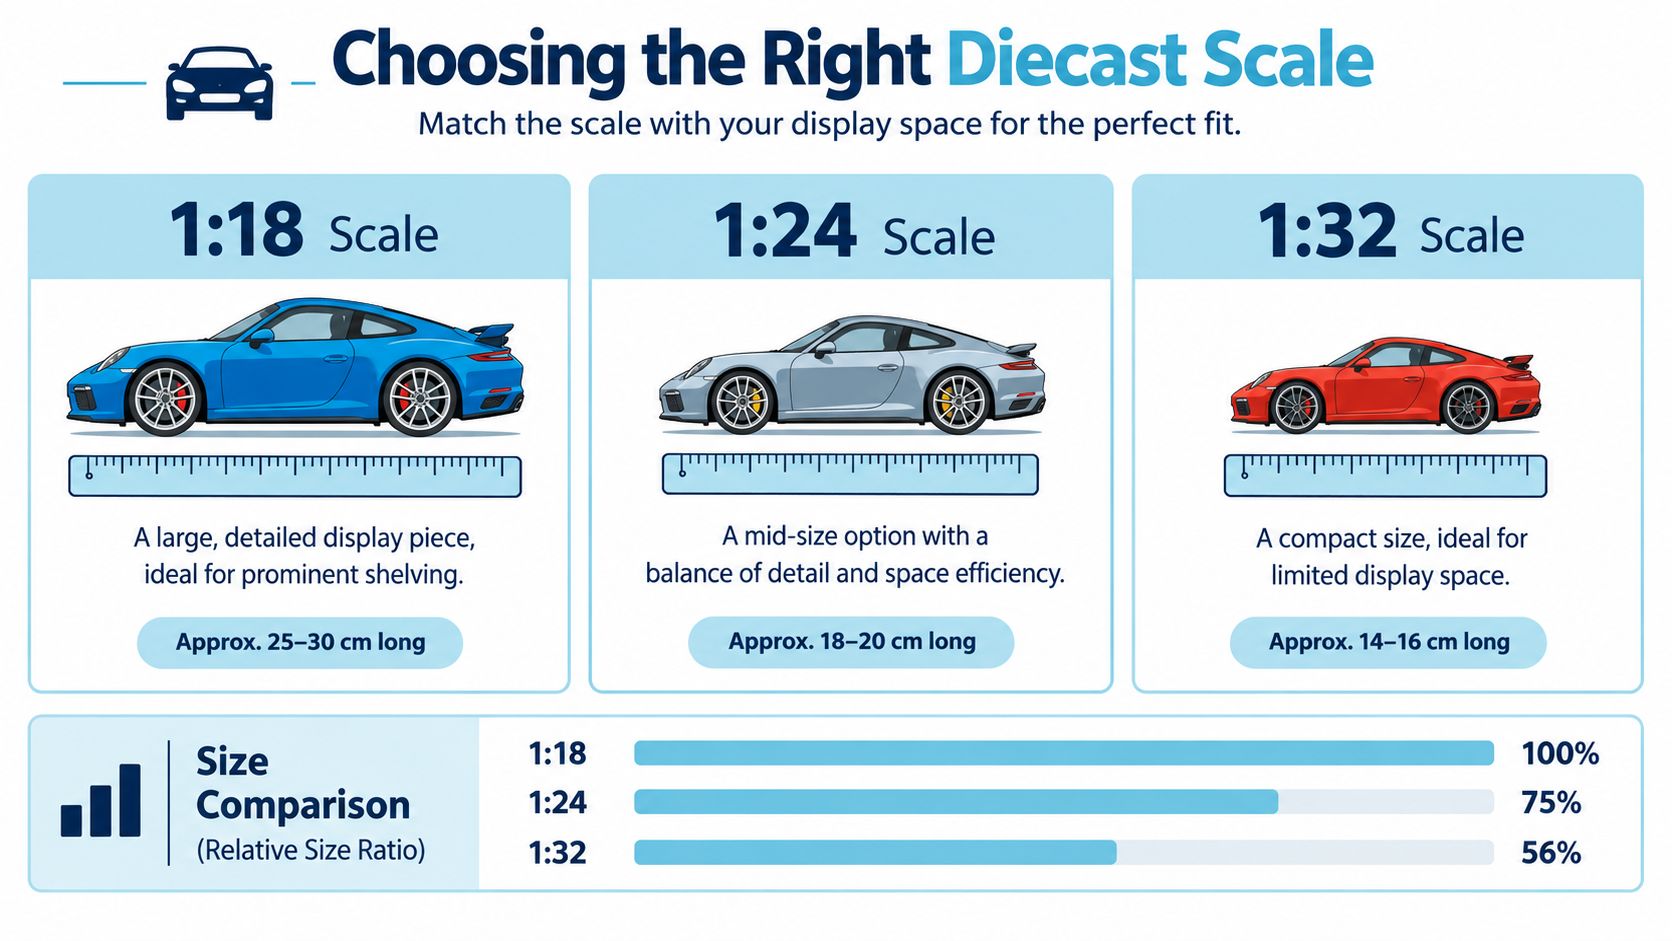
Give the wall a little breathing room

Choose one coastal artwork as the visual anchor. Rather than filling the wall, place a narrow shelf below it with a licensed Beetle or van model, a small framed photograph and one nautical object. Keep the shelf shallow so the model sits safely within the room, and leave clear space around the arrangement. That gap helps each item read properly, like windows between stops on a coastal drive.

Print & Proper offers a more directed décor range than a fine-art gallery. Buyers seeking highly specialised or limited-edition work will find fewer choices, while made-to-order framing may take longer than in-stock décor. For a ready-to-hang refresh, those compromises can make sense.

Pros

  • Focused coastal style: Waves, beach and tropical motifs work together.
  • Simple specification: Size and finish choices are easy to compare.
  • Ready-to-hang formats: Framed prints and canvases reduce installation work.
  • Australian-made options: Suitable for shoppers seeking locally produced décor.

Cons

  • Curated selection: Fewer specialised or limited-edition works.
  • Lead-time planning: Made-to-order framing may require patience.

Explore the range for a relaxed backdrop to classic Volkswagen character.

Beach Theme Art: 7-Vendor Comparison

Product Implementation Complexity 🔄 Resource Requirements & Speed ⚡ Expected Outcomes 📊⭐ Ideal Use Cases 💡 Key Advantages ⭐
Volkswagen Van Wall Art That Turns Any Room Into a Classic Low 🔄, curated prints, may need framing Moderate ⚡, in-stock styles; limited support hours ⭐⭐⭐ 📊, strong themed nostalgia, cohesive displays VW fans, beach‑house vibes, gallery walls ⭐ Curated VW theme; easy styling; versatile placement
The Print Emporium Medium 🔄, made‑to‑order framing/options Longer ⚡, production lead times; free shipping over threshold ⭐⭐⭐ 📊, wide coastal variety, tailored sizing Hamptons/coastal interiors, custom framing needs ⭐ Wide style range; clear size guide; Australian‑made
Mark Gray Fine Art Landscape Photography High 🔄, limited‑edition, provenance controls High ⚡, premium materials, careful freight and lead times ⭐⭐⭐⭐⭐ 📊, museum‑grade, archival longevity Collectors, high‑end interiors, investment pieces ⭐ Collector‑grade prints; Metallic Pearl substrate; signed editions
Matt Lauder Gallery Medium 🔄, in‑house printing and finishing Fast–Moderate ⚡, own print lab speeds turnaround; higher shipping for large pieces ⭐⭐⭐⭐ 📊, authentic local imagery, consistent quality Direct‑artist buyers, NSW coastal subjects, varied presentation formats ⭐ In‑house quality control; multiple formats; proven fulfillment
Scott Leggo Gallery Low–Medium 🔄, ready‑to‑hang prints and canvases Moderate ⚡, online ordering and AU delivery ⭐⭐⭐ 📊, consistent modern coastal aesthetic Modern coastal/Hamptons rooms, Australian shoppers ⭐ Consistent style; clear buying & shipping info
Temple & Webster Low 🔄, retailer convenience, marketplace mix Fast ⚡, large stock, frequent promotions, nationwide delivery ⭐⭐📊, broad selection, quality varies by brand One‑stop shopping, budget‑conscious buyers, bulk furnishing ⭐ Large selection; competitive pricing; easy returns
Print & Proper Medium 🔄, curated, made‑to‑order ready‑to‑hang Moderate ⚡, Australian production; possible framing lead times ⭐⭐⭐ 📊, cohesive coastal aesthetic, specialist quality Wall‑art specialists seeking cohesive coastal sets ⭐ Wall‑art specialist; clear size/finish choices; ready‑to‑hang options

Finish the Look With a Little VW Soul

The most successful coastal displays usually have one clear visual anchor. That might be a sweeping Australian photograph, a bold Volkswagen van print or a textured canvas above the sofa. Once you've chosen it, repeat a small colour or motif, perhaps faded turquoise in a Beetle model, rope detail in a nautical accent or warm timber around a framed print.

Scale matters just as much as colour. A large photograph needs breathing room, while a small wall print can sit comfortably above a shelf of memorabilia. A 1:18 scale diecast car is usually about 24 to 30 centimetres long, depending on the actual vehicle's size, so measure the shelf depth and available clearance before choosing a showcase model. This Australian diecast size guide provides a useful physical reference for planning.

Australian coastal photography works particularly well when a room needs a stronger sense of place. Volkswagen van wall art works better when the room needs personality and nostalgia. Combining both can be lovely, provided one remains dominant and the other supports it.

A practical styling and buying checklist

  • Choose the anchor: Decide whether the room's main story is Australian coastline, VW heritage or relaxed surf culture.
  • Check the finish: Compare paper, canvas, metallic surfaces, acrylic, frame materials and protective covers.
  • Measure first: Allow for the artwork, frame, shelf depth and the length of any diecast model.
  • Plan delivery: Made-to-order and premium framed pieces may need more preparation than locally stocked décor.
  • Match the collecting goal: Select a statement piece, collector-grade finish, flexible gallery-wall element or budget-friendly refresh.
  • Keep the display breathable: Leave open space around the main artwork instead of filling every available wall.

Volkswagen memorabilia gives the display its emotional centre. A licensed Kombi Samba Bus model recalls the classic Type 2, while a Volkswagen Beetle model brings the rounded silhouette that has charmed generations of owners. The Kombi's Australian story is especially rich. Volkswagen introduced the Beetle formally in Australia in 1953, local assembly began at Clayton in Victoria in 1954, and the final Australian-assembled Beetle left the line in July 1976, according to Museum Victoria's Australian Volkswagen history.

The Type 2 also offers plenty of collecting depth. Volkswagen first produced the Kombi in 1949, with T1 running from 1950 to 1967, T2 from 1967 to 1979, and T3 from 1979 to 1992. This Australian Kombi model guide explains the generation split and the change from split-window models to the larger bay-window version in 1967. Those details make a diecast model more than a decorative object. They give collectors a way to start conversations about design, travel and Australian motoring history.

For a coastal display, browse the Volkswagen Diecast range first, then add Vans & Cars Metal Decor, wall art, nautical pieces or giftable accents. Local stock and fast shipping can make the Australian importer experience more convenient, while weekday support from 9 am to 2 pm, Monday to Friday, gives collectors and gift buyers a useful point of contact. The aim isn't to create a showroom. It's to build a warm corner that feels like a favourite beach trip, a classic car show and a well-loved home all at once.


Volkswagen Memorabilia brings together licensed VW diecast models, Kombi Samba Bus and Beetle collectibles, wall art, metal décor and coastal home accents for relaxed Australian displays. Visit Volkswagen Memorabilia to find the piece that will give your beach theme art a little more VW soul, with local stock, fast shipping and friendly weekday support.

White Toss Pillows in Australia: A Practical Buyer Guide

You've just plumped a fresh white toss pillow into the corner of the sofa. For a few glorious seconds, the room looks calm, bright and beautifully finished. Then the dog launches onto it, a child drags it across the floor, or late western sun reveals a mark you hadn't noticed before. That's the white-pillow story in an Australian home. The colour is elegant, but the fabric, fill, size and location decide whether it stays elegant.
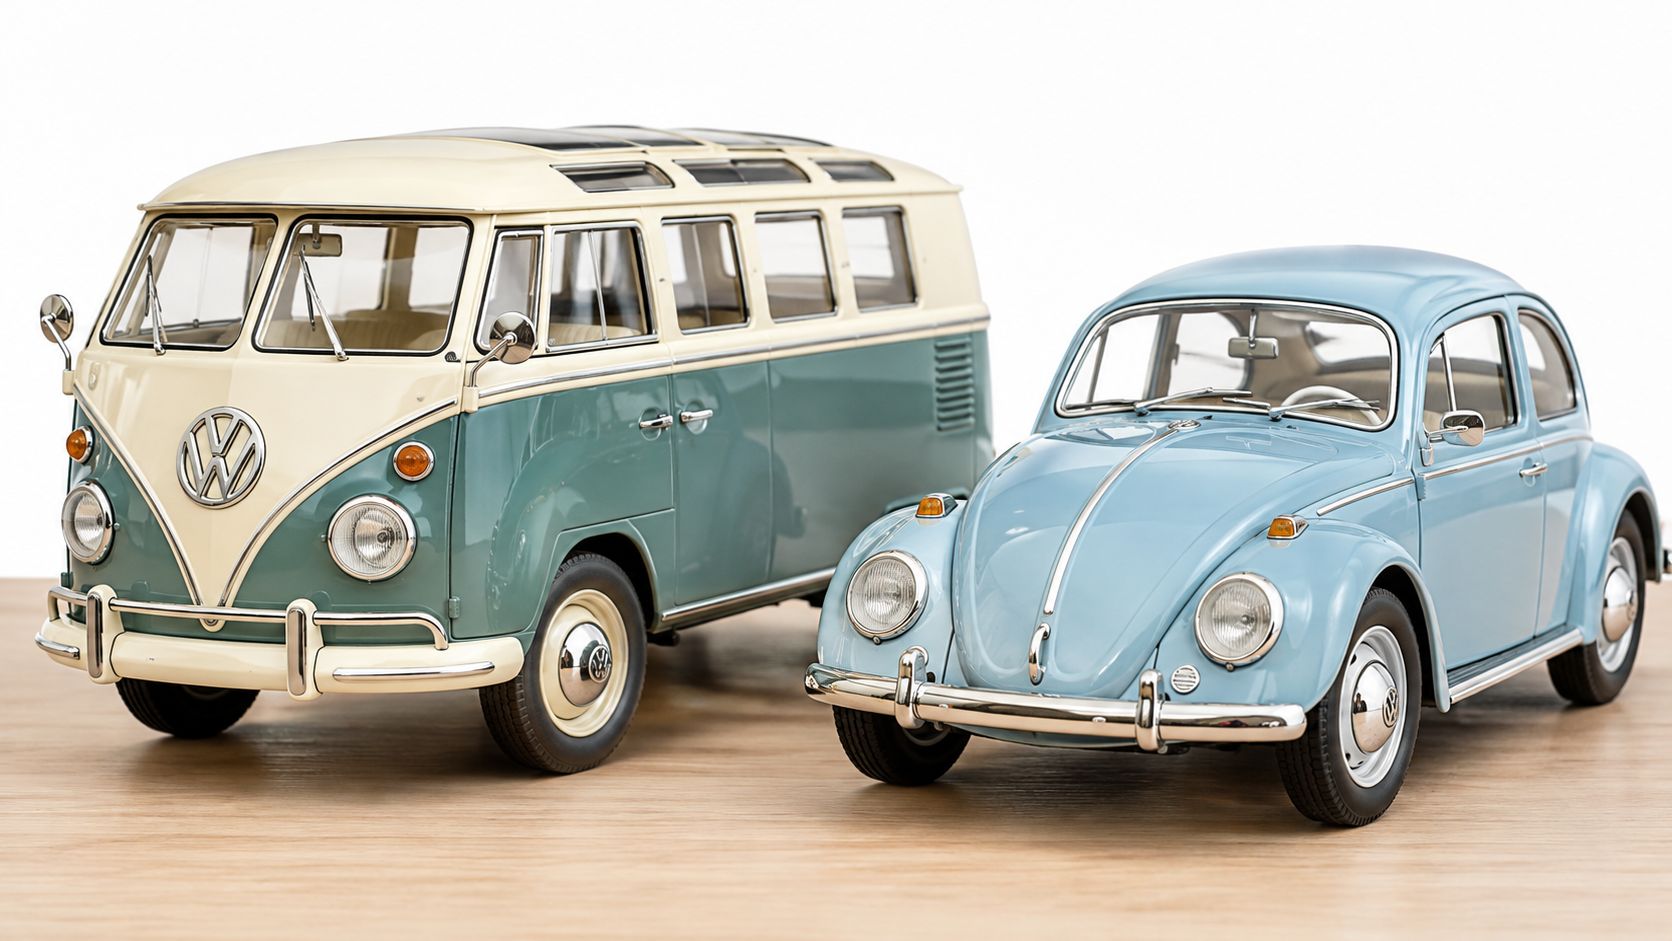
White toss pillows aren't a safe default neutral. They're a deliberate purchase, one that can make a coastal room feel lighter or turn a high-traffic family sofa into a daily cleaning project. Choose them with the same care you'd give a rug or upholstered chair, especially if pets, children, strong sunlight or sea air are part of the household.

Setting the Scene With White Toss Pillows

A white toss pillow can make a dark timber room feel lighter in seconds. On a neutral sofa, it adds the crisp, layered finish that suits Australian coastal, Hamptons and pared-back interiors. It also catches sunlight beautifully, which is why it appears so often in room inspiration.

Judge the pillow by its construction, not the colour label. Tightly woven cotton canvas handles daily contact differently from a loose linen blend. A removable cover gives you a practical response to coffee spills, while a fixed decorative cover belongs in a quieter spot. The insert matters too. Dense filling holds a square shape neatly; softer filling creates a relaxed slouch.

A minimalist living room featuring a cream-colored sofa with a plain white toss pillow by a sunny window.

The Australian reality check

A white pillow on a protected Melbourne sofa has an easier life than one on a Queensland verandah, coastal daybed or seat beside an open fireplace. Humidity, salt air, dust, pets and direct sun all increase cleaning, fading or fabric-wear concerns.
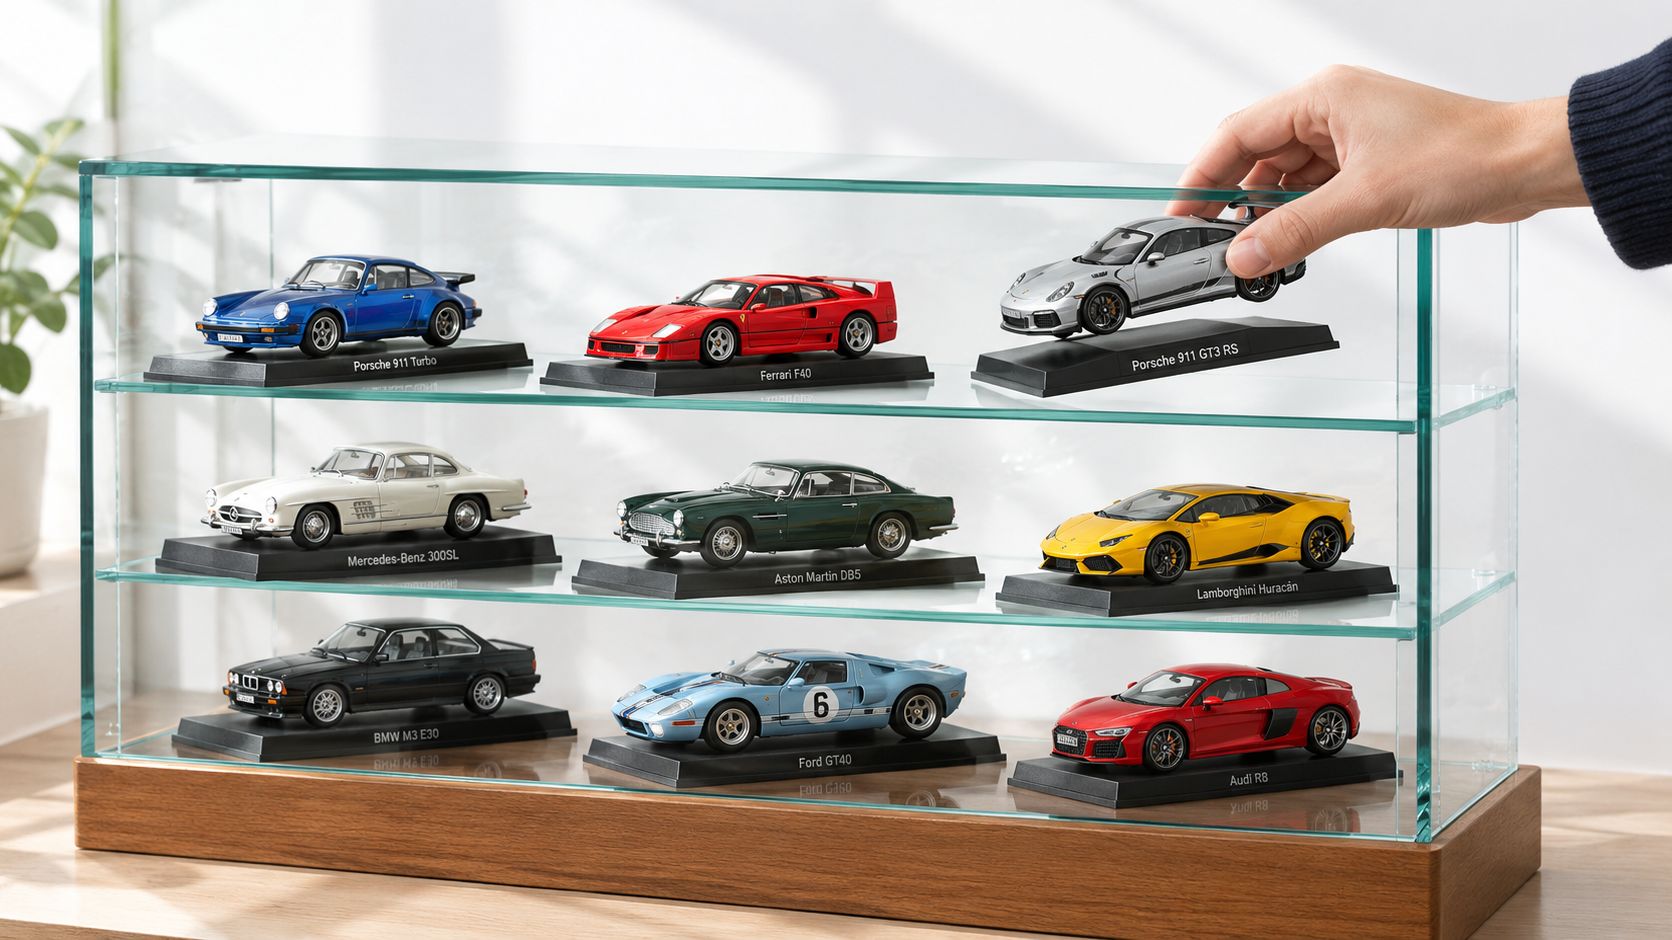
Australia's broad commodity group 94 imports, covering furniture, bedding, cushions and similar stuffed furnishings, reached US$5.08 billion in 2023 according to trade data for Australia. The breadth of that import market gives shoppers plenty of choice, but product descriptions and care labels still require close attention.

For styling ideas, browse white home accessories, then assess each pillow by its cover, insert and location. My recommendation is straightforward: use white indoors when you can wash the cover and control the sun. For outdoor settings, choose a product specifically rated for exterior use, especially near pets, salt air or frequent rain. A washable cover matters more than finding the perfect ivory tone in a busy Australian home.
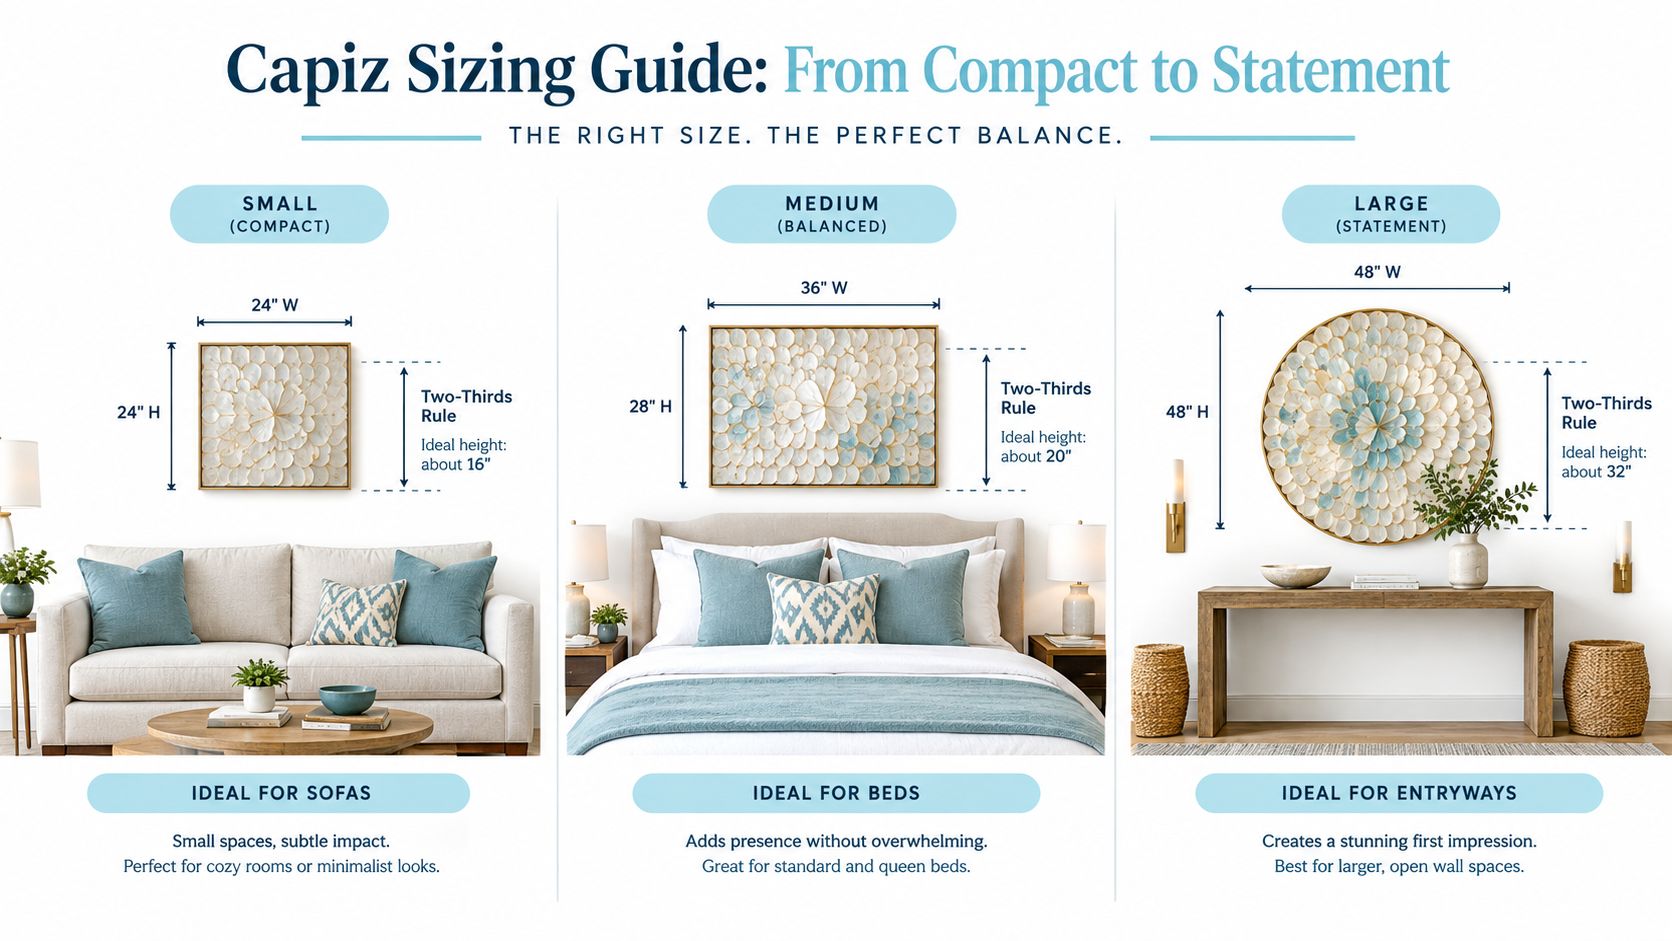
Choosing the Right Fabric and Fill

Start with the cover, not the colour swatch. A relaxed linen blend brings a coastal slub and breathable hand feel, but its natural texture can show creasing and absorb spills quickly. Cotton percale feels smoother and more tightly woven, while cotton canvas offers a sturdier face that suits everyday sofas and occasional spot cleaning.

Polyester and poly-linen blends make practical sense for budget-conscious rooms and some outdoor settings, provided the product is rated for outdoor use. They can resist casual wear better than delicate decorative fabrics, but “polyester” alone doesn't prove UV stability, mildew resistance or colourfastness. Ask for those specifications rather than assuming them.

Match the fill to the job

Feather and down give you the classic plump, mouldable cushion. They feel luxurious and can be reshaped by hand, but they need regular fluffing and aren't my first choice for a child's floor-level reading corner. Recycled PET fibre holds its shape neatly, suits vegan households and tends to dry faster after washing. High-resilience foam gives firm lumbar support, though it looks more structured and less sink-in than fibre or feather.

Material Feel and look Care and durability Best for
Linen blend cover Relaxed, breathable and textured Can crease and mark easily, check the care label Coastal lounges and low-fuss bedrooms
Cotton percale Smooth, cool and crisp Tighter weave can make spot cleaning easier Bedrooms and protected living areas
Cotton canvas Substantial and sturdy Better suited to regular handling, but still needs prompt stain care Family sofas and armchairs
Polyester or poly-linen Practical and often easy-going Good candidate for removable covers, outdoor claims need verification Covered alfresco areas and budget styling
Feather and down fill Soft, plump and mouldable Needs frequent reshaping Decorative sofas and beds
Recycled PET fibre Springy and relatively quick-drying Holds shape well, follow the label Homes wanting a vegan-friendly insert
High-resilience foam Firm and supportive Keeps a defined profile Lumbar support and upright seating

Australian homes also vary sharply by climate. Humid Queensland rooms need fabrics that can dry thoroughly, coastal properties need sensible salt-air care, and west-facing rooms need protection from prolonged sun. Air-conditioned interiors in Sydney and Melbourne may feel gentler, but dust still settles into pale fibres.

Sizing Up Australian Cushion Standards

In an Australian lounge room, the 50 cm x 50 cm square is the safest starting point for a white toss pillow. It suits most sofas and beds without swallowing the seating area. Australian size guidance also lists standard bed pillows at 48 cm x 73 cm, and king pillows at 51 cm x 91 cm in this local pillow size guide. Those proportions explain why a sleeping pillow rarely gives a sofa the neat, decorative shape of a square cushion.

For a fuller cover, choose an insert slightly larger than the cover. A 5 cm increase pushes filling into the corners and gives white cotton or linen a plumper face. Match the insert more closely to the cover for a softer, relaxed finish. Do not force a firm insert into a delicate zip, and check whether the cover has shrunk before refilling it.

An infographic showing various Australian cushion sizes, including cover dimensions, insert thicknesses, and recommended common usage scenarios.

Pick the shape by furniture

A 60 cm x 60 cm cushion creates a generous back layer on a deep sofa or bed. It is too dominant for a narrow armchair, where a smaller square or a 40 cm x 60 cm lumbar will sit better. The increasingly common 45 cm x 45 cm size works as a front accent, particularly beside a larger square.

A 65 cm x 65 cm European pillow can provide a substantial backrest on a deep sofa or add height to a bed. Give it enough furniture behind it so the scale looks deliberate. On a shallow seat, a large pillow removes usable space and makes the arrangement feel crowded.

Practical rule: Measure the cover, measure the insert and check the furniture depth before buying. A well-filled cushion still looks wrong when its scale fights the sofa.

White cushions also need regular plumping. Australian guidance recommends fluffing to help preserve shape and extend the cushion's useful life. Over-washing or incomplete drying can leave the fill flat or lumpy, as outlined in the local pillow size guide. Pale covers make every uneven bulge obvious, so air-dry them thoroughly and reshape the insert before putting the cushion back in place.

Layering White Toss Pillows in Coastal Spaces

White-on-white styling needs texture or it quickly looks like a showroom waiting for furniture. Start at the back with the deepest piece, perhaps oatmeal linen or soft boucle, then move forward through smaller cushions in chalky white, milky white and ivory. The shades should sit close together, not match perfectly.

Build contrast without clutter

A useful coastal arrangement has three kinds of contrast:

  • Surface contrast: Pair crisp cotton with a slubby linen, woven jute or chunky knit.
  • Shape contrast: Break a row of squares with a lumbar cushion or a subtly rounded form.
  • Colour contrast: Add one restrained anchor, such as a navy stripe, faded terracotta or a single black linear cushion.

A jute-backed floor cushion, woven seagrass ottoman or textured throw can do more for the room than another identical white square. These pieces give the eye somewhere to land and stop the sofa from dissolving into one pale block.

A luxurious bedroom featuring white toss pillows on a beige bed with a scenic ocean view.

Keep the coastal look Australian

I'd avoid turning the room into a theme set. Too many anchors, shells and bold nautical motifs can make a coastal space feel staged. Subtle contrast piping, hand-stitched edges, woven surfaces and sun-washed tones read as coastal through craft rather than costume.

A white toss pillow works particularly well when it repeats one existing light element, such as a pale rug, limewashed timber or a cream bedhead. Use coastal living room inspiration as a starting point, then edit hard. One tactile layer at the back, one clean white layer in front and one small accent is often enough.

Caring for White Toss Pillows the Right Way

Treat the cover and insert as separate jobs. The cover takes the visible abuse, while the insert loses loft when it's compressed, washed aggressively or stored damp. Australian retailer guidance for polyester inserts recommends cold or warm hand washing, gentle squeezing and thorough drip drying or flat drying. One Australian care guide specifically advises hand-washing polyester inserts and warns that some inserts aren't designed for repeated washing in its cushion care guide.

A workable routine

Vacuum the surface weekly on a low setting with an upholstery attachment, particularly if the cushion sits near a pet bed or open window. Rotate covers when direct sun reaches the sofa, and flip inserts regularly so one edge doesn't carry all the compression.

Spot clean spills immediately with cool water and a mild wool wash. Don't reach for chlorine bleach on linen or cotton, since it can yellow pale fibres over time. Polyester and poly-cotton covers may tolerate a gentle cold machine cycle inside a mesh bag, but the care label wins every time. Linen and heavy cotton blends often need a cool hand wash or dry cleaning.

The insert needs patience. Polyester fibre can clump or flatten under machine agitation and may suffer further damage from harsh tumble drying. Drip dry or dry flat until the centre is completely dry before putting the cover back on. Feather and down require reshaping and thorough airing, while foam should be cleaned according to its own manufacturer instructions.

An infographic detailing a care routine for white pillows, including weekly, monthly, and optional cleaning steps.

The short video below demonstrates the kind of gentle handling that helps preserve a cushion's form.

A white cushion looks better for longer when dust and spills are dealt with before they settle. Pair the arrangement with a washable throw blanket for a bed or sofa, and you'll protect the most exposed surfaces without making the room feel over-managed.

When White Works and When It Doesn't

White works best where the room gives it breathing space. A well-lit living room, coastal bedroom, Hamptons-style interior or sun-protected entertaining area can use a white cushion as a reflective, calming surface. It's also useful in a minimalist bedroom, a rental being styled for sale, or a room with dark timber floors that needs a lighter visual counterpoint.

It becomes a poor choice when the cushion sits in the path of predictable mess. Toddlers with sticky hands, dogs returning from a wet walk and family rooms built around floor play will test pale fabric constantly. An open fire adds another layer of risk, while kitchen and dining nooks invite coffee, spaghetti and red wine stains.

Use this room test

Ask yourself three questions before buying:

  1. Who uses the space? If people lounge, eat, nap and play on the same sofa, choose removable washable covers and a forgiving weave.
  2. What reaches the cushion? Direct western sunlight, salty air and damp outdoor conditions need a cover and insert designed for those exposures, not just a white colourway.
  3. What's the styling purpose? A decorative bed cushion can be more delicate than a lumbar pillow used every evening for back support.

Outdoor use needs its own decision. The Australian outdoor decorative cushions and pillows market is projected to grow from US$1.2 billion in 2024 to US$1.99 billion by 2033, according to the cited market projection for Australia's outdoor decorative cushions and pillows category. That demand doesn't make every white cushion outdoor-ready. Look for solution-dyed fabric, removable washable covers, quick-drying construction and explicit UV and mildew guidance.

White is strongest as a controlled accent, not an automatic answer for every seat in the house.

For a verandah or coastal patio, I'd choose white only when the cushion can be brought inside, rotated or washed without drama. In a permanently exposed position, a textured mid-tone often gives you the same relaxed effect with less anxiety.

Your Quick White Toss Pillow Buying Checklist

Use this checklist before buying a white toss pillow. The right choice depends on traffic, exposure and how much maintenance your home can handle.

  • Start with traffic: Match the cover to the room. Linen blend suits a relaxed, lower-contact setting, cotton canvas handles a busy sofa, and verified outdoor fabric belongs in an alfresco area.
  • Read the care label: With pets or children, choose a removable cover that suits your actual cleaning routine. “Easy care” says too little on its own.
  • Measure the cover: Confirm the finished cover dimensions before choosing the insert. A slightly larger insert gives a plumper, fitted face, while an equal-size insert keeps linen looking softer and more casual.
  • Select the fill by purpose: Choose firm high-resilience foam for lumbar support, recycled PET fibre for a resilient vegan-friendly decorative cushion, or feather and down for a mouldable, sink-in finish.
  • Check the sunlight: A west-facing room needs rotation and protection. Outdoor cushions need stated UV and mildew performance, not assumptions based on polyester content.
  • Create texture: Pair at least two contrasting surfaces, such as slubby linen with chunky knit. A woven ottoman or jute detail can ground an all-white arrangement.
  • Plan the recovery: Keep a spare cover or alternate cushion near food, pets or children. That small bit of organisation makes spills far easier to manage.
  • Separate indoor and outdoor use: A white pillow on a covered verandah still needs proper drying after damp weather and protection from salt air. Indoor-only construction should stay indoors.

White works best as a controlled accent rather than the default for every seat. For a permanently exposed position, choose a textured mid-tone if you want a relaxed look with less cleaning and fading anxiety.

Australia's cushion and pillow market was estimated at US$478.8 million in 2024, confirming that white toss pillows sit within a substantial homewares category in the Australia cushion and pillow market overview. Broad availability still demands careful comparison. Supplier concentration in relevant furnishing articles, furniture and cushion-cover imports also makes construction, care and fit more useful buying criteria than a low price or attractive showroom styling.

For inspiration, explore a coastal-style collection and study how texture, scale and restraint keep white looking relaxed rather than fragile.

White toss pillows can give an Australian room a fresh, collected finish when the fabric and care routine suit real life. For relaxed VW-inspired gifts, coastal accents and nostalgic home décor that pair naturally with a breezy interior, visit Volkswagen Memorabilia and browse the collection. You'll find licensed Volkswagen diecast models, including Kombi and Samba Bus pieces, alongside white and beach-inspired décor for a home with plenty of character.

Antique Home Decor Guide for Modern Australian Spaces

The afternoon light is bouncing off the sand outside, but your contemporary beachside living room feels a little too polished. The linen sofa, pale timber flooring and clean-lined coffee table look inviting, yet the room lacks the sense of history you love in an old Kombi parked beside a surf club. One well-chosen antique console, a weathered timber frame and a small piece of VW memorabilia can change that mood without turning your home into a museum.

That balance is the heart of antique home decor. You're not trying to recreate a Victorian parlour or fill every shelf with old objects. You're adding character, texture and stories to a modern Australian space. The scale of the local resale channel supports that approach, with the Australian Antique & Used Goods Retailing industry estimated at $4.9 billion in 2026 across 2,320 businesses by IBISWorld data discussed in this Australian antique furniture overview.

Bringing Antique Charm to Your Modern Home

A low coastal house near the water rarely needs more visual noise. It needs pieces that catch the eye, soften the newness of contemporary furniture and feel as though they belong to the people who live there.

Start with one anchor item. An antique console table in warm timber can sit behind a pale sofa or beneath a large mirror. Its marks, joins and uneven colour give the room a grounded quality that a brand-new flat-pack piece can't reproduce. Keep the surface edited, perhaps with a ceramic bowl, a small lamp and a framed photograph rather than a crowded collection.

Across the room, a VW Kombi metal wall sign can carry the same nostalgic energy as the console without competing with it. The Kombi's rounded silhouette works especially well against white walls, soft blue paint or natural timber. It brings the relaxed feeling of an Australian road trip into the room while the antique furniture supplies age and substance.

Practical rule: Let one antique piece and one nostalgic accent lead the room. Everything else should support them.

This pairing works because old and new play different roles. The contemporary sofa provides comfort, the antique console adds craftsmanship, and the VW detail gives the space personality. A few coastal materials, such as woven baskets, linen, rattan or driftwood, connect the pieces to the Australian setting.

The result feels collected rather than themed. It has the same appeal as a beautifully maintained Beetle or Samba Bus at a sunny show, original character alongside thoughtful updates.

Understanding Key Antique Styles in Australia

Australian antique home decor includes several visual languages, and recognising them helps you buy pieces that suit your home rather than choosing whatever looks old.

Victorian furniture is often associated with carved timber, dark finishes, turned legs and ornate detailing. A substantial cabinet or framed mirror can bring drama to a high-ceilinged home, but it may feel heavy in a compact beachside room. Look for one strong feature, then balance it with pale walls and open space.

Edwardian design generally feels lighter and more restrained. Inlaid timber, slimmer proportions and elegant lines make an Edwardian writing desk or occasional table easier to place beside contemporary furniture. Its decoration can echo the fine details found in a carefully restored classic car, refined rather than flashy.

Art Deco introduces geometry. Strong curves, stepped forms, contrasting veneers and polished surfaces suit rooms that already contain black accents, chrome or sculptural lighting. An Art Deco bar cart can become a useful serving station, while a geometric mirror can sharpen a relaxed coastal palette.

Mid-century modern is often the easiest period style to integrate. Simple steel frames, functional layouts and warm timber align naturally with modern Australian interiors. A 2023 review of Australian domestic interior design identifies 1945 to 1975 as a decisive period in the development of modern taste, which helps explain the continuing appeal of mid-century pieces in local homes. The historical context is outlined in this Australian antique-store industry review.

A timeline graphic showcasing four key Australian antique furniture styles from the Victorian era to Mid-Century Modern.

At markets and auctions, ask yourself three questions:

  • What is the visual weight? Dark carved timber needs more breathing room than a light sideboard.
  • What is the practical role? A desk, cabinet or table should still work in the way your household needs.
  • What belongs to the home? A mid-century piece may suit a modern coastal floorplan, while a richly ornate cabinet might work better as a single focal point.

For a useful distinction between older design periods and later reproductions, explore this guide to vintage and retro design.

Mixing Antique Decor with Coastal and Modern Elements

The safest way to combine antique pieces with contemporary coastal furnishings is to balance age, texture and visual weight. Don't place several dark, ornate objects together and expect the room to feel breezy. Give each piece a modern neighbour.

Start with the largest shapes

Choose the room's main furniture first. A sleek sofa, modern dining table or simple bed establishes the current framework. Add an antique item with a different silhouette, such as a narrow console beside a broad sofa or a rounded mirror above a rectangular sideboard.

A weathered Victorian mirror can work beautifully with airy linen curtains. The mirror supplies the driftwood quality, while the linen creates the feeling of sea mist and filtered sunlight. Neither item needs to match exactly. They share a natural, softened finish.

Build a restrained palette

Australian coastal light can make bright white feel stark and dark timber feel dramatic. Try a foundation of warm white, sand, chalky blue or muted green, then introduce aged brass, honey timber or a small amount of black.

A classic VW palette can help. Cream, soft aqua, muted red and charcoal appear naturally in Beetle and Kombi styling, but use them as accents rather than turning the whole room into a showroom. A small aqua diecast Kombi on a shelf may be enough to connect a wall sign with a blue cushion or ceramic vase.

Repeat materials, not matching objects

Repetition creates cohesion without making the room look staged. Pair an antique timber surface with a modern timber frame. Echo aged brass in a lamp base and a small decorative object. Add woven fibre through a basket or floor mat, then leave enough clear space for each texture to register.

Think of the room like a well-sorted parts collection. Every piece can be different, but the materials and proportions need a relationship.

Use the antique as a focal point

Keep walking routes clear and avoid hiding a beautiful piece behind oversized seating. In a small apartment or compact beach house, one narrow cabinet may do more work than a cluster of small accessories.

A practical formula is simple:

  1. Place one antique item where the eye naturally lands.
  2. Add a modern object with a contrasting shape.
  3. Repeat one material nearby.
  4. Remove anything that doesn't contribute to the story.

A coastal room should feel relaxed, not unfinished. For more ideas on combining surf culture, natural textures and nostalgic details, browse these coastal home decor ideas.

How to Authenticate and Buy Antique Pieces in Australia

A convincing patina isn't proof of age. Reproductions can borrow distressed finishes, while genuine older pieces may contain repairs, replaced hardware or altered surfaces. Treat every purchase as a combination of research, inspection and judgement.

Ask about the object's history

Start with provenance. Ask whether the seller knows where the piece came from, whether it has an era stamp or maker's mark, and whether any previous ownership or restoration has been recorded. A confident seller should explain what they know and identify what remains uncertain.

Don't treat a missing label as automatic proof that an item isn't genuine. Small household objects and locally made furniture may never have carried a clear mark. Instead, compare the object's construction, timber, hardware and wear as a group.

Inspect materials and construction

Look underneath, behind and inside the piece. Hand-cut joinery, varied timber colour and older fasteners may support an age assessment, but no single feature settles the question. Check whether the wood type suits the claimed period and whether the back, drawers and underside appear consistent with the front.

Pay close attention to:

  • Repairs: Look for replacement panels, fresh glue, mismatched stain or modern screws.
  • Woodworm signs: Inspect holes and surrounding timber, especially in stored or damp furniture.
  • Movement: Test doors, drawers and joints gently. A beautiful cabinet still needs to be stable.
  • Finish: Check for flaking paint, powdery surfaces or strong chemical odours before bringing an item indoors.
  • Safety: Painted vintage objects may contain lead and need careful handling until tested.

The practical buying gap in Australia is clear. Generic consumer checklists often skip local concerns, yet buyers need to assess age, provenance, timber type, repairs and safety in a market estimated at $4.9 billion. This buyer-focused context appears in Good Housekeeping's discussion of vintage decor questions.

A checklist of five essential steps to follow when authenticating antique home decor and collectibles.

Compare before negotiating

Search comparable pieces through reputable dealers, auction catalogues and regional fairs. Compare condition, documented history and materials, not just photographs. If the price reflects a famous maker or rare finish, ask what evidence supports that description.

For decorative additions that complement a carefully checked furniture purchase, see these vintage home accessories.

Caring for and Restoring Antique Home Decor

Antique furniture doesn't need constant polishing. It needs a stable environment, gentle handling and repairs that respect the original construction.

Wood responds to moisture in the air. Keep wooden antique home decor at a stable 40–60% relative humidity, because fluctuations can create shrink-swell cycles that loosen joints and lift veneer, as explained in this guide to humidity and antique furniture. In a coastal Australian home, place a calibrated hygrometer away from direct sun, air-conditioning outlets and heaters. Consistency matters more than chasing a perfect midpoint.

An infographic titled Caring for Your Antiques offering four steps for maintenance and preservation.

Use a soft cloth or natural-bristle brush to remove loose dust. Avoid aggressive household chemicals, soaking timber or scrubbing away a finish that may be part of the object's history. Test any cleaner on an unseen area first, and stop if colour transfers to the cloth.

Painted vintage surfaces require extra caution. Treat old paint as potentially lead-contaminated until tested, and don't dry-sand or scrape it. Wet methods and suitable test kits reduce hazardous dust, while major work should go to a conservator or restoration professional. Australian heritage guidance also favours matching traditional materials and methods and warns against over-restoration, as outlined by the National Trust's conservation guidance for heritage-home owners.

A sensible restoration order is:

  1. Stabilise first: Secure loose joints and stop active deterioration.
  2. Clean gently: Remove surface dirt without stripping character.
  3. Repair selectively: Match traditional materials where practical.
  4. Leave sound evidence alone: Old marks can contribute to value and meaning.

For collectors who enjoy the mechanical side of VW ownership, the principle is familiar. You preserve the original character, improve safety where necessary and avoid replacing every trace of age with a shiny new finish.

Room by Room Display Ideas for Antique Decor

The best displays feel lived in. They give each object a job, even when that job is just to remind you of a favourite road trip.

Entryway

A slim antique hall table can welcome visitors without narrowing the passage. Add a shallow bowl for keys, a framed coastal photograph and a small Beetle model. Keep the top mostly clear so the timber, edge profile and hardware remain visible.

A narrow wall sign above the table can introduce VW character without making the entry feel like a workshop. Choose one image or model, then repeat its colour in a cushion or vase farther inside the home.
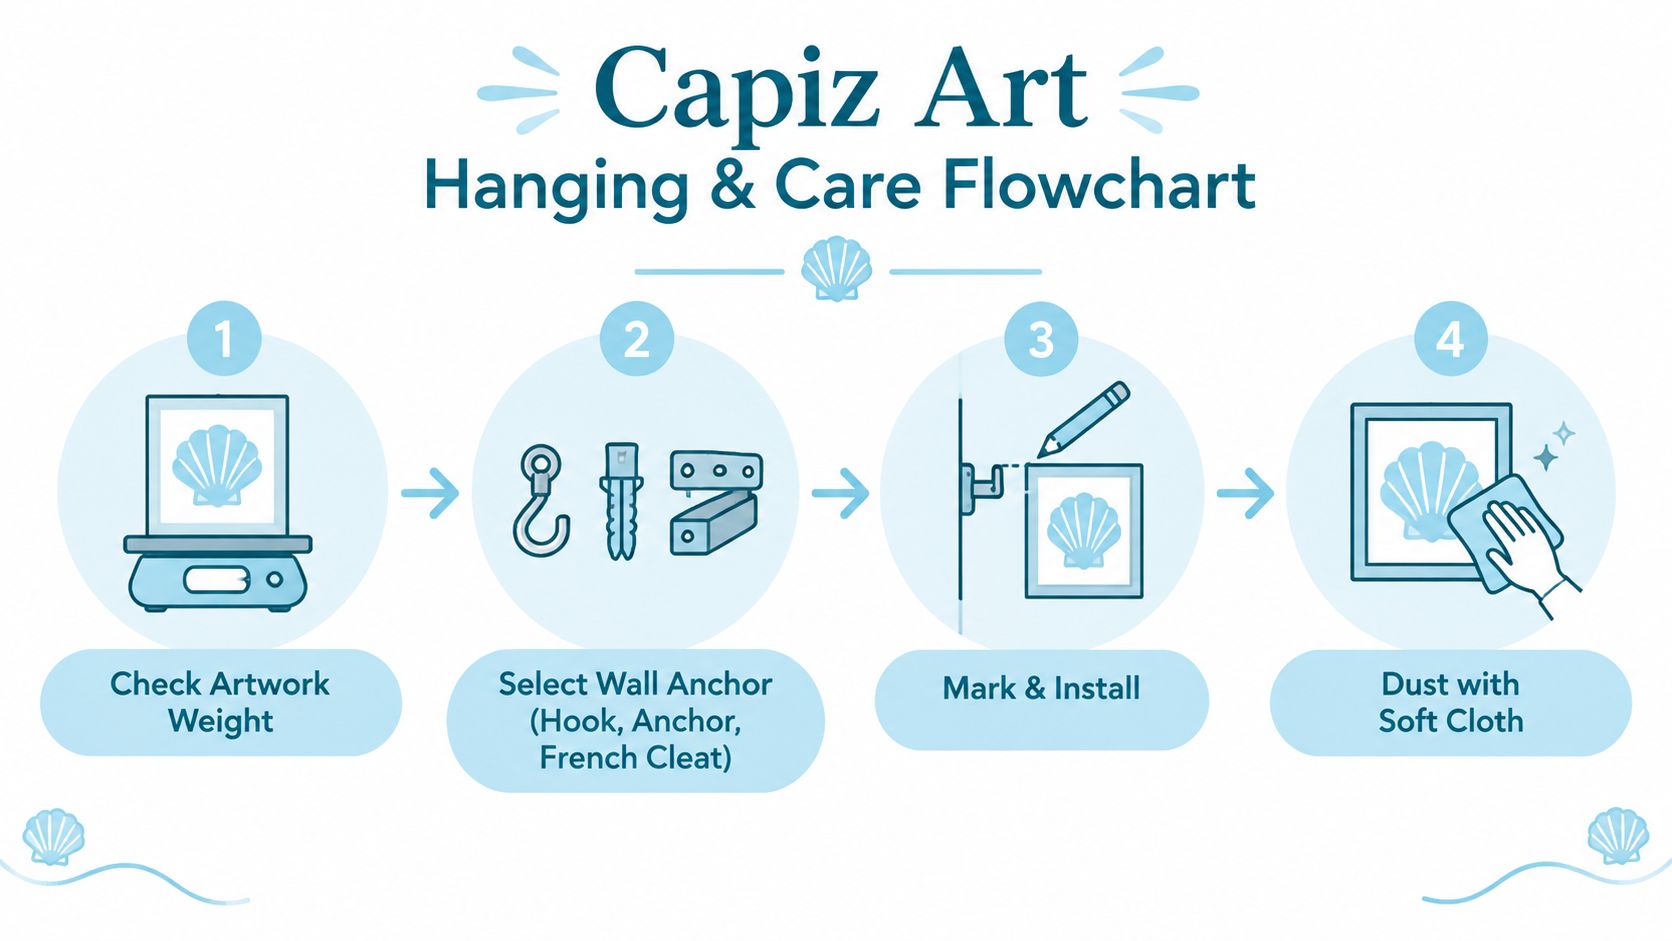
Living room

A mid-century sideboard is a natural bridge between antique home decor and contemporary seating. Place it against a light wall, then style it with a modern lamp, a few books and a single piece of maritime detail. The sideboard supplies warm timber, while surfboard-inspired art or a pale rug keeps the room open.

A Kombi Samba Bus diecast can become a small focal object. Set it on a shelf with space around it, rather than hiding it among unrelated trinkets. The model works like a miniature version of a full-size show car, its proportions and details deserve a clear viewing angle.

A wooden sideboard decorated with vintage brass nautical instruments sits in a bright, sunlit coastal living room.

Dining area

An old cabinet can serve as a drinks station if its structure is sound. Place glassware inside, add a contemporary tray on top and use aged metal hardware as the decorative link. Keep liquids away from unprotected timber, and don't overload shelves that weren't designed for heavy storage.

A small VW metal sign or framed print can sit nearby, not necessarily on the cabinet. That separation helps the room feel like a home shaped by travel and collecting, rather than a single themed display.

Bedroom and study

An antique desk can create a calm reading corner beside a modern chair. Pair it with a Volkswagen Beetle model in a restrained colour and a simple task lamp. The contrast between the desk's history and the lamp's current function makes the arrangement useful, not precious.

For diecast collectors, scale affects display planning. Common scales include 1:18 and 1:24. A 1:18 model is typically about 23–30 cm long, while a 1:24 model is about 16–20 cm long, according to this diecast model scale guide. The larger scale offers more detail, while the smaller format can suit a narrower shelf.

Covered patio

Keep valuable timber and painted pieces protected from direct weather, salt spray and strong sun. A covered patio can hold a durable metal sign, a weathered stool or a small display cabinet, provided the environment remains suitable.

Think of the arrangement as a relaxed show-and-shine corner. Add a woven throw, a potted plant and one model car, then stop before the display becomes busy.

Putting Antique Decor into Action

Antique home decor works best when it reflects how you already live. Choose the period style that suits your home's light and architecture, use one or two meaningful pieces as anchors, and balance them with linen, pale timber, modern silhouettes and relaxed coastal textures.

Buy with evidence rather than excitement alone. Check provenance, construction, repairs and safety, then care for timber through a stable environment and gentle maintenance. A carefully chosen Beetle model, Kombi Samba Bus diecast or VW wall accent can add the same warmth as an heirloom table, especially when you give it room to be seen.

Explore the shop's Volkswagen diecast models for sale alongside your next antique find, and build a display that feels unmistakably Australian, personal and ready for the next coastal drive.


Volkswagen Memorabilia offers licensed VW diecast models, Kombi and Samba Bus collectibles, metal decor and coastal home accents for collectors and gift buyers. Visit Volkswagen Memorabilia to find a nostalgic piece that brings classic Volkswagen character into your modern Australian home.
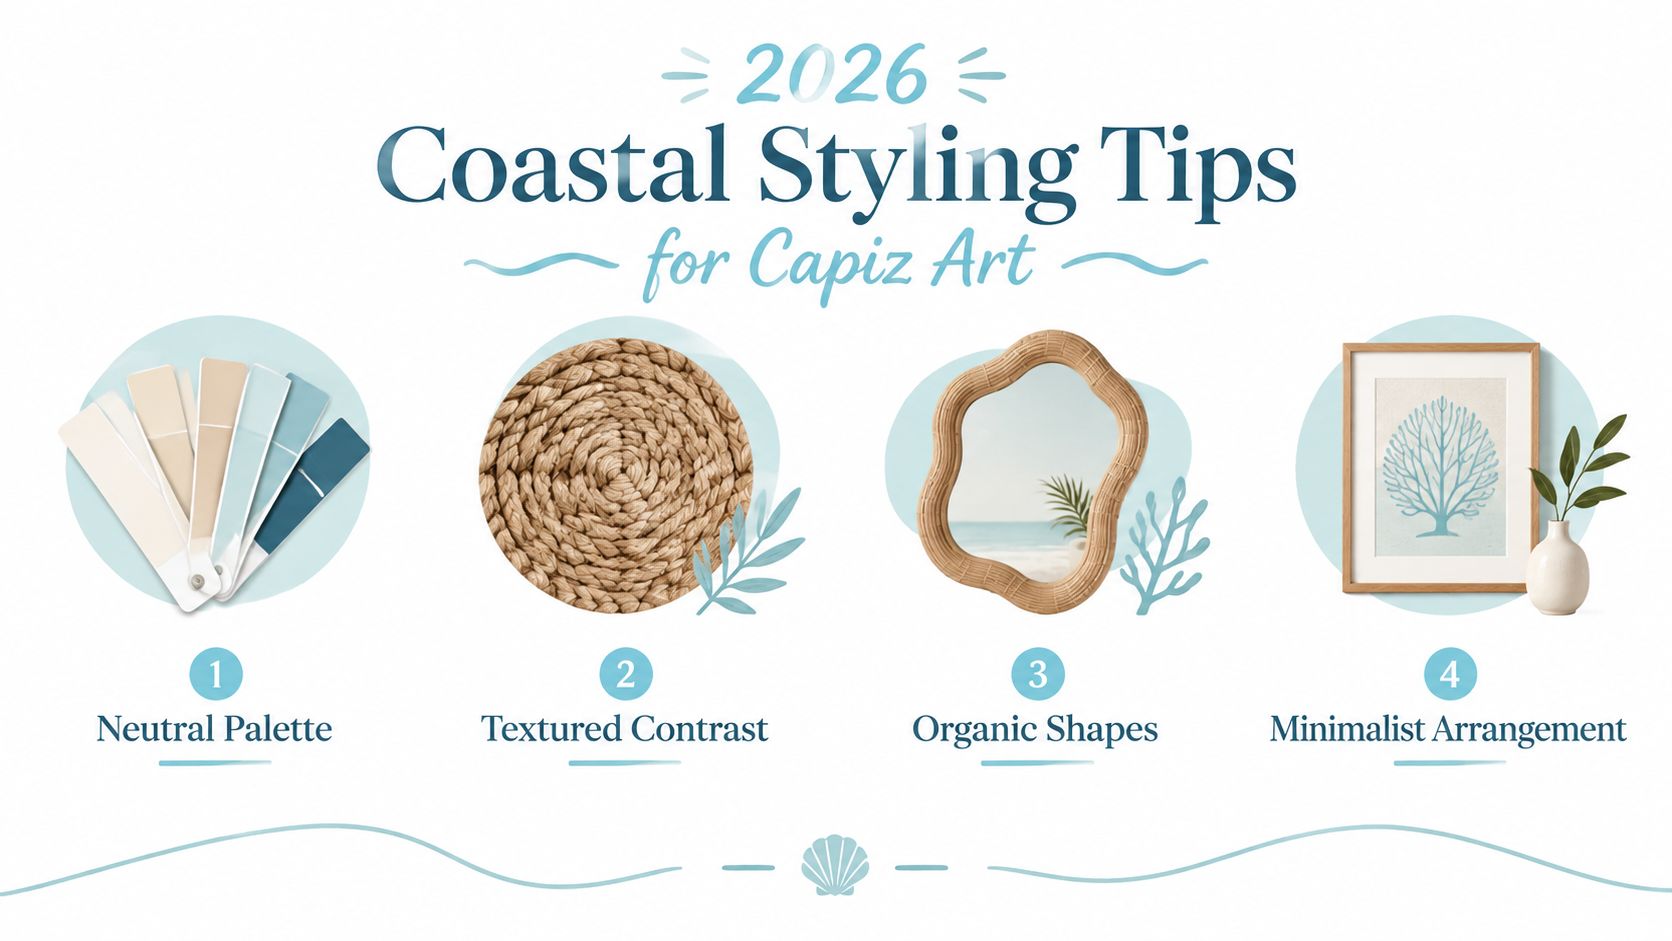
Wood Tissue Box Cover: DIY Build and Styling Guide

The tissue box is usually the last thing anyone thinks about on a carefully styled side table. There's a bright cardboard carton beside the coffee, a favourite Kombi diecast on the shelf, and perhaps a few coastal treasures gathered after a weekend by the water. The clash is small, but obvious.

A wood tissue box cover fixes that awkward detail while adding another tactile, handcrafted piece to the room. Built around the tissue boxes you buy in Australia, it can echo the warmth of timber dashboards, surf wagons and relaxed coastal interiors without competing with your Volkswagen collection.

Why a Wood Tissue Box Cover Belongs in Your VW Display

A tissue box cover earns its place when it makes an everyday object feel intentional. A plain carton can interrupt a display built around a Volkswagen Samba Bus, a Beetle replica and a few nautical accents. Timber softens that interruption. Its grain, weight and natural colour sit comfortably beside painted metal, glass, rope and weathered furniture.

The idea has plenty of retro history behind it. Tissue box covers became a significant gift and homeware category during the 1960s and 1970s, with wood among the common materials used, as described in this history of tissue packaging and decorative covers. That timing feels right for VW enthusiasts, because the decorative cover belongs to the same broad mid-century world as optimistic colours, practical design and homes styled around personality rather than uniformity.

A minimalist white tissue box sitting on a wooden shelf next to a vintage Volkswagen van model.

A small project with plenty of character

On a cluttered side table, a timber cover creates a visual bridge. A pale finish can pick up the cream of a classic Kombi, while a richer stain works with red Beetle paint or aged leather. Add a surfboard print, woven mat or small piece of nautical décor and the arrangement starts to feel collected rather than merely occupied.

Australian homewares retailers position tissue boxes within broader home organisation and storage ranges, not as a standalone household necessity. Marketplace listings also show a wide spread of tissue-box holder formats, which reinforces the practical point: shoppers are choosing these covers for convenience, styling and gift appeal as much as for concealment. The local market is small and fragmented, but wood tissue box covers clearly sit within Australian decorative homewares.

A handmade cover also gives collectors room to personalise. Leave the timber clear, add a discreet engraved VW motif, or paint a small panel in ocean blue. The best result doesn't look like a novelty prop. It looks like a useful piece of furniture that happens to share the same free-spirited outlook as your favourite Volkswagen.

Choosing Timber and Sizing Your Cover

Measure the tissue box before choosing timber. An external cover size of 24.5 cm × 13.5 cm × 11 cm provides a useful starting point for standard supermarket tissue boxes, as shown in this Australian marketplace sizing example. Confirm the dimensions of the box in your home, because packaging varies. Allow enough clearance for the cover to slide on and off without catching the carton.

Select stable, locally familiar timber

Tasmanian oak and Australian chestnut both suit a VW display or coastal-retro room. Tasmanian oak has a clean, adaptable surface for a clear finish or paint. Australian chestnut brings warmer grain and a more settled, nostalgic feel beside timber shelving, surf colours or a vintage Kombi model. Choose boards for straight grain, sound edges and consistent thickness, rather than colour alone.

Australian dressed-all-round stock commonly includes widths of 116 mm, 90 mm, 70 mm, 42 mm and 35 mm, according to this Australian timber sizing guide. Selecting stock close to the panel width reduces ripping and limits the small errors that accumulate across four walls.

Timber Width Best Use in Cover Build Notes
116 mm Taller side panels or broad outer walls Adds visual weight beside larger display pieces
90 mm Main side walls for many standard boxes A practical starting width for compact covers
70 mm Narrower side sections or trim Suits a lighter, less bulky profile
42 mm Rails, edging and small frame pieces Useful for a defined top frame
35 mm Fine trim and decorative details Creates a slim accent around a retro-style cover

Match the timber width to the display. Broader walls look grounded beside a scale VW bus, while narrower stock keeps a small shelf arrangement light and uncluttered.

Control moisture before cutting

Specify timber near an in-service equilibrium moisture content of about 8 to 14%, and install it within ±2% of that target to reduce warp, shrinkage and joint failure in Australian conditions, as explained in this Australian timber moisture guide. Store the boards in the room where the finished cover will live before machining. Measure the stock rather than trusting its appearance, since a dry-looking board may still move.

Moisture above 20% creates a fundamental risk of fungal decay and mould growth in construction-grade wood products. Wet stock is a poor choice for a small precision project, because the top opening and lid fit rely on stable dimensions.

Build slightly oversize where practical, then trim for the final fit. Corner thickness adds up quickly, and dressing tolerances can turn a seemingly generous cavity into a tight fit once all four walls meet. Leave enough internal space for easy removal, especially if the cover will be handled while rearranging VW memorabilia or coastal décor.

Building the Cover from Cut to Assembly

A tidy cover comes from the order of the work. Cut the panels, join the walls, check the fit, then cut the tissue opening. Cutting that aperture first can leave a polished cover that does not suit the actual tissue box or pack.

Prepare and cut the panels

Mill or buy dressed stock close to the required panel widths. Mark each piece before cutting. Mitred parts may look identical until the grain direction, colour or finish reveals a mismatch. Keep the best-looking grain for the front face, especially when the cover will sit beside a scale VW bus or a small coastal-retro display.

Cut the side walls with accurate mitres, generally aiming for 45-degree corners. Use a sharp blade, firm support and a test cut in scrap timber. Check panel thickness before cutting the final pieces, because one thicker edge can push the assembled cover out of square.

Dry-fit the walls without glue on a flat bench. A square and light clamps will show whether the corners close evenly and whether the internal cavity clears the tissue box. Correct a short panel or refine a mitre now, while the timber is still easy to adjust.

A four-step instructional infographic showing how to build a wood cover with material preparation and cutting.

Assemble before cutting the opening

Apply a suitable woodworking adhesive sparingly to the mitres. Excess glue makes clamping untidy and can spoil a crisp finish. A band clamp or several light clamps spread pressure around the box, while short pieces of masking tape help hold the mitres in line during assembly.

Once the sides are joined and square, mark the tissue opening from the actual box. Cutting it after assembly keeps the aperture aligned with the tissue pack rather than relying on nominal measurements. Allow enough room for tissues to pull through without catching, while retaining enough material for a firm top frame.
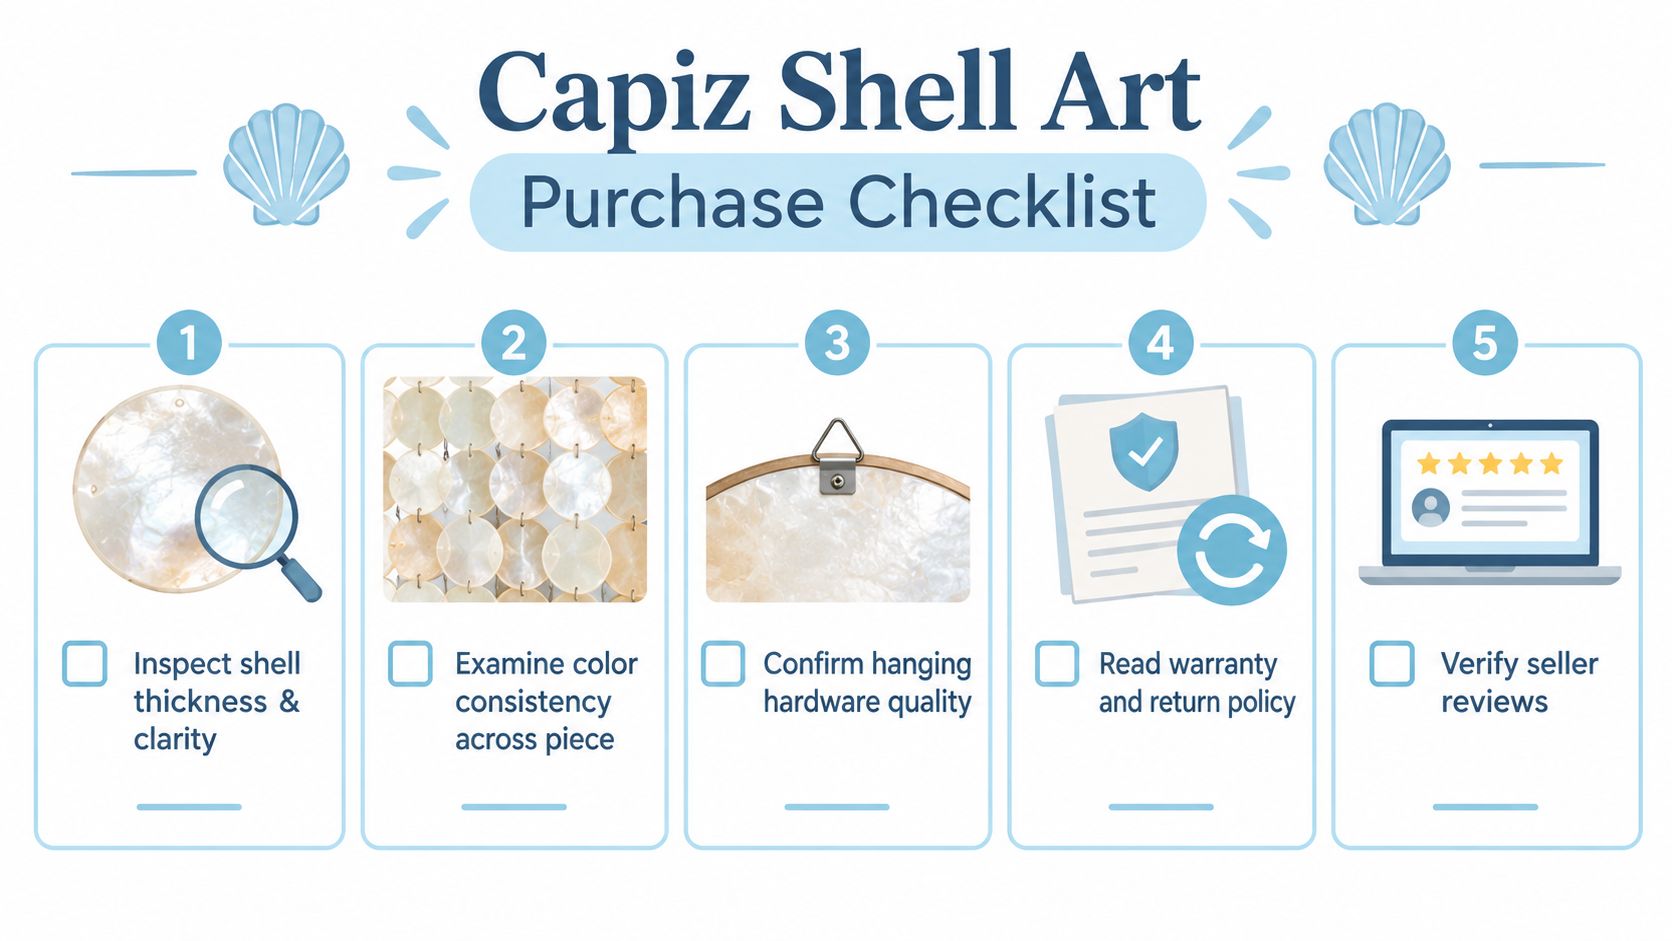
A router and template produce a clean opening. For a straightforward rectangle or softened oval, a jigsaw followed by careful sanding is suitable. Work slowly around the corners, where rough cuts can weaken the frame or remain visible beneath the finish.


Practical rule: Dry-fit the cover around the tissue box before applying glue, then test it again before finishing. Bare timber makes fit problems easier to solve.

Sand progressively, starting only as coarse as needed to remove saw marks. Move to a finer abrasive on the visible faces and edges, then ease the sharp corners slightly. A softened edge feels better in the hand and takes oil or paint more evenly.

For a display idea that connects timber craft with VW collecting, see this shadow box shelves woodworking project. Measure the featured object, protect the grain and leave breathing room around the piece. The same approach helps a tissue box cover sit naturally among model buses, badges and coastal décor rather than looking like a separate utility item.

Finishing Options for Coastal and Retro Interiors

The finish changes the personality of the cover more than many builders expect. Clear oil keeps the piece grounded in natural timber, while paint turns it into a deliberate colour accent. In a coastal home, avoid making every surface bright white. A little grain or muted colour gives a room the relaxed, collected feel that suits old Volkswagens and surf culture.

Australian marketplace listings show wood tissue box covers priced from around AU$34 to over AU$150, with premium finishes and native timbers appearing in the mid- to premium home-decor bracket, as shown in this Australian rustic tissue box cover marketplace. A DIY build lets you spend attention where it matters, on fit, touch and a finish that belongs in your room.

Finish Type Best For Durability Maintenance
Clear oil Natural timber and Scandinavian-coastal rooms Good for ordinary indoor handling Reapply when the surface looks dry
Whitewash Soft beach interiors and pale furniture Moderate, with visible grain retained Dust gently and touch up worn areas
Chalk paint Flower Power, retro and playful displays Moderate once properly sealed Clean with a soft damp cloth
Marine-grade varnish Humid rooms and stronger surface protection High, but more visibly coated Wipe clean and inspect edges over time

Match colour to the collection

Ocean blue works beside cream and white Kombi models. Surf cream keeps a darker shelf feeling open. Vintage red can echo a Beetle or a small retro sign, but use it as an accent rather than covering every surface.

A clear satin coat is often the safest compromise. It protects the timber while keeping the grain visible and doesn't introduce the heavy gloss that can make a handmade cover look like plastic. In salt-air environments, pay attention to the top opening and underside, where moisture and handling tend to collect.

For a broader styling reference, explore these coastal home décor ideas. The strongest rooms combine rough and smooth textures, rather than matching every item exactly.

Styling Your Cover with VW Memorabilia and Coastal Décor

Place the finished cover where tissues are used, then build the display around its height and visual weight. On a side table, the cover can sit behind a small Beetle model, with the car angled slightly towards the room. On a shelf, place it at one end and give a Kombi Samba Bus diecast the central position, so the practical object supports the display without stealing the story.

A rustic wooden tissue box cover featuring a Volkswagen van and surfboard engraving on a side table.

Build a relaxed display zone

Australian VW collectors and decorators often pair diecast models with coastal and natural-material décor. Wooden covers, nautical accents and surf-inspired pieces create a warm setting for metal models, especially when the room already includes woven baskets, pale linen or weathered boards.

Try one of these arrangements:

  • Side table pairing: Place the tissue cover beside a licensed Kombi model, then add a small dish for keys or a length of nautical rope below the display.
  • Shelf grouping: Keep the cover at one end, a Beetle replica in the centre and a smaller coastal accent at the opposite end. Vary height without crowding the cars.
  • Surf corner: Combine the cover with a surfboard motif, starfish or seashell detail and a Flower Power-inspired model for a cheerful retro arrangement.
  • Workshop-inspired display: Use a darker timber finish with a van model, framed garage artwork and restrained metal accessories.

The cover should remain easy to lift, clean and refill. Don't wedge it behind fragile models or place it where a tissue pull will knock into a prized vehicle. Collectors know that a display works best when it feels lived in, not sealed off from daily life.

Natural timber also balances the visual density of diecast metal. It adds warmth beneath a cool-painted vehicle and gives the eye a quiet resting point between brighter colours.

More ideas for mixing practical pieces with retro accents are collected in this guide to vintage home accessories.

Frequently Asked Questions

How should I clean a finished wood tissue box cover?

Dust it with a soft, dry cloth. For marks, use a lightly damp cloth and dry the surface straight away. Avoid soaking the timber, especially around the opening and mitred corners.

Will it fit cube-shaped or larger tissue boxes?

Only if you build the internal cavity around those dimensions. Measure the actual carton, allow clearance for easy removal and check the cover before applying a permanent finish. A cover made for standard supermarket tissue boxes won't automatically suit a cube-shaped pack.

How do I repair a small scratch?

Lightly sand the affected area in the direction of the grain, remove the dust and apply a compatible touch-up coat. Test the colour and sheen on an offcut first, particularly with whitewash or chalk paint.

Is it a good gift for a VW fan?

Yes, particularly when paired with a licensed model that reflects the recipient's taste. A Kombi Samba Bus suits a surf-loving collector, while a Volkswagen Beetle model works beautifully in a smaller office or bedside display. When buying diecast, check the scale, finish and licensing details. Australian model specialists describe licensed replicas and true-scale models as established categories in the local market, so authenticity is worth checking before purchase.

Can I display other VW models beside the cover?

Absolutely. Keep the timber finish and model colours connected, but don't make the arrangement too uniform. One hero vehicle, one useful homeware piece and a small coastal accent usually creates a more natural vignette than a crowded row of objects.


Volkswagen Memorabilia offers licensed Volkswagen diecast models, including Kombi Samba Bus and Beetle pieces, alongside coastal home décor for relaxed retro displays. Visit Volkswagen Memorabilia to find a memorable companion for your handmade wood tissue box cover and build a collection with genuine Aussie surf and VW spirit.

Dried Palm Leaves for Coastal Decor: A Practical Guide

You've brought home a bundle of dried palm leaves, set them in a vase, and wondered why the arrangement looks more like a florist's leftover stock than a relaxed beach-house feature. The fix usually isn't another decorative object. It's choosing the right frond, giving it enough breathing room, and placing it where Australian light and humidity won't undo the effect.

Dried palm leaves can bring the shape of the shoreline indoors, from the soft fan of a Livistona to the clean line of a palm spear. They're also a practical material, but they need more care than their easy-going appearance suggests. In bushfire-prone parts of Australia, fully dry palm material can act as fine fuel, so attractive styling and sensible handling must sit side by side.

Why Dried Palm Leaves Suit Coastal Homes

In a Noosa beach house, a dried palm display can quickly look too themed if every piece is pale, smooth and predictable. The better approach is to use the frond as a natural line, then balance it with materials that feel cooler, rougher or softer. For more ideas on combining coastal colour palettes, timber and textured ceramics, explore these coastal home decor ideas.

Palm leaves suit this setting because their dried structure brings both colour and shape. Straw, wheat and warm tan tones sit comfortably beside bleached timber, linen, cane and textured ceramics. Their forms also echo wind-shaped vegetation, giving a room an Australian coastal character without turning it into a beach souvenir display.

Start by choosing the outline. A broad fan spreads across a room like a small canopy, while a feathered frond creates movement from its central stem. A narrow spear draws the eye upward and gives a stronger vertical accent. Decide on that mood before choosing the vase, because the vessel should support the leaf rather than compete with it.

A dried palm leaf in a textured ceramic vase sits on a wooden table beside a sofa.

Let texture do the decorating

A coastal room can feel finished without heavy colour. The frond's surface provides the contrast. Smooth ceramic feels cooler beside a ribbed fan, while a feathery leaf softens the firm edge of a timber console.

Use this sequence:

  1. Choose the dominant silhouette: Select a fan for width, a feathered frond for movement, or a spear for height.
  2. Match the vessel to the texture: Rough stoneware keeps the arrangement relaxed. A slim neutral vase makes a spear look architectural.
  3. Leave visible air: Open space keeps the display breezy instead of crowded.
  4. Repeat one natural material: A jute runner, cane tray or linen cushion connects the arrangement with the room.

Australian horticultural advice has also treated fallen palm fronds as useful organic material. A Burke's Backyard landscaping example notes that dry fronds are easier to mulch, can be processed with a commercial chipper, and were used as a 50–60 mm mulch layer to support re-planting.

Decorative fronds still need sensible handling, particularly because fully dry plant material can burn readily in bushfire-prone areas. Once a leaf no longer suits the room, reuse or green-waste disposal gives it a practical second life instead of making it an instant throwaway.

The Main Types and What to Recognise

At a flower market, two bundles can both be labelled “dried palm” and still create completely different arrangements. One may open like a handheld fan, another may form a narrow spear, and a third may have a heavy, sculptural curve. The label matters less than the silhouette in your hand.

Areca fronds usually have a light, feathered appearance and a relaxed arch. They're useful when you want softness behind a sofa or in a tall floor vase. Fan palms, including Livistona and palmetto forms, make a broader statement, with segmented surfaces that catch light across the leaf.

Coconut palm material tends to feel more tropical and irregular. It can work beautifully in a breezy verandah, especially when paired with plain linen and pale timber, but too much of it may push a room towards a resort look. Date palm fronds often have a fuller, more structured texture and can bring deeper bronze or caramel notes into a neutral scheme.

Palm Type Shape & Length Dried Colour Best Use
Areca Feathered, arching frond with fine leaflets Straw to warm gold Tall vases, relaxed corners and layered arrangements
Fan, Livistona or palmetto Broad, segmented fan with a strong spread Pale wheat to bronze Wall accents, consoles and statement vessels
Coconut Long, curved and naturally irregular Golden tan to deeper brown Verandahs, entryways and tropical-coastal groupings
Date Fuller, denser frond with a pronounced central stem Honey, caramel or bronze Floor arrangements and textural focal points

Natural or treated

Naturally dried leaves usually show small variations in tone, edge shape and curl. Those irregularities are helpful in a beach-house interior because they prevent the arrangement from looking manufactured. Bleached leaves have a more uniform pale finish, while dyed spears can deliver stronger colour but may feel less connected to a calm neutral palette.

Look closely at the tips. An intact spear has a tight, pointed form, whereas segmented pieces may have been cut from a wider frond. Palm can also be confused with dried banana leaves or ferns. Banana leaves tend to look broader and more ribbon-like, while fern material usually has a finer, more delicate branching pattern.

For transport, choose fronds with firm stems, attached leaflets and minimal loose debris. A low-shed specimen will survive the trip from the market to your mantel more gracefully than a brittle bundle that leaves fragments across the car boot.

Sourcing and Preparing Your Fronds

The cheapest bundle isn't always the best value. A frond that snaps while you're arranging it costs more in frustration than a sound stem sourced from a florist, flower market, specialty wholesaler, sustainable plantation or established Australian online retailer.

Compare sellers by condition rather than by colour alone. Ask whether the leaves are naturally dried, bleached or dyed, and check how they're packaged for delivery. A long, open fan needs protection from crushing, while a narrow spear needs particular care around its tip.

An infographic showing four steps to source, inspect, clean, and condition dried palm leaves for home decoration.

What to inspect

When your order arrives, place the leaves on a clean surface and check them before putting them into a vase.

  • Tips: Avoid widespread splitting, crushed ends or powdery edges.
  • Colour: Natural variation is fine, but dark damp patches may indicate poor storage.
  • Stem flexibility: The stem should bend slightly rather than break instantly.
  • Surface condition: A little dust is normal. Webbing, mould or a musty smell isn't.
  • Shedding: Minor fragments can occur, but excessive leaf drop suggests brittleness.

Clean the bundle with a soft, dry brush or cloth. Don't soak it. If a stem is awkwardly long, trim the base at an angle with sharp secateurs so it sits securely in the vessel.

A very light mist can help a curled frond relax, but use restraint. The aim is gentle pliability, not saturation. If the leaf remains tightly folded, low-heat steam held at a safe distance may soften it, provided you keep the process brief and let the material dry fully afterwards.

Allow new fronds to settle in the room where they'll be displayed before you build the final arrangement. This gives the material time to adjust to local conditions and reduces surprises such as sudden curling or cracking. Keep leftover stems flat or upright in a dry, ventilated cupboard, separated with tissue or kraft paper rather than compressed in a plastic bag.

Care and Preservation That Lasts

Dried palm leaves suit a calm coastal room, yet Australian conditions can test them. Humid air, salt exposure, strong sunlight, and shifts between open windows and air conditioning all affect brittle plant material. Treat the fronds like timber near the sea: give them a dry, stable position and limit unnecessary exposure.

Start with placement. Keep arrangements away from bathrooms, wet kitchens, condensation, and steamy windows. The preservation checklist recommends 40–50% humidity, with a dehumidifier in humid climates. Use that range as a practical guide for a controlled interior, rather than placing the vase beside a moisture source.

A preservation checklist infographic offering five helpful tips to keep dried palm leaf decorations in perfect condition.

A gentle maintenance routine

Dust gathers in the ribs and folds of fan leaves. Rough cleaning can break those delicate structures, much like scrubbing woven straw can pull it out of shape.

  • Use a microfiber cloth: Sweep lightly along the surface instead of rubbing across the leaflets.
  • Try cool moving air: A hair dryer on its lowest, coolest setting can lift loose dust from a distance.
  • Shake outdoors: Hold the stems firmly and give the arrangement a gentle shake in a sheltered area.
  • Avoid wet washing: Water can soften, stain, or distort dried plant material.
  • Rotate the display: Move the arrangement occasionally so one side does not fade or curl faster.

A matte sealant spray can add a surface barrier in a high-traffic room. Test it on an inconspicuous section first, then apply it outdoors according to the product label. Heavy glossy coatings usually work against the relaxed, natural finish that suits an Australian beach-house interior.

Fire safety needs a separate rule. Australia's fuel moisture guidance defines vegetation fuel moisture content as the water mass in vegetation relative to its dry mass, and identifies material below 20% as readily ignitable. Dried palm leaves should therefore stay away from candles, open fireplaces, radiant heaters, and cooking areas.

CSIRO advises avoiding very fine mulch under about 0.5 cm because it can be highly flammable, while NSW guidance favours coarse woodchips over finer leaf mulches. Its bushfire landscaping guidance reinforces the wider point: dead plant material is fuel. Keep arrangements on non-combustible surfaces, and remove them from rooms during periods of heightened fire danger if their position cannot be made safe.

Styling Ideas for Vases and Wall Accents

A single frond can look intentional when the room gives it enough space. In a relaxed entryway, one fan palm in a chalky ceramic vessel can sit beside a timber bowl, a woven tray and nothing else competing for attention.

A rustic entryway table features dried palm leaves in a vase and a green palm frond nearby.

For a larger living room, use three to five areca or coconut stems in a floor vessel behind a sofa. Vary their heights and angles, but keep the colour family close. The result should feel like a breeze has arranged them, not like every stem has been measured into position.

A sideboard benefits from a narrower gesture. Place one sun-palm spear in a slim pedestal vase, then balance it with a low ceramic object on the opposite side. On a dining table, clustered bud vases can hold short palm pieces, but leave enough room for plates, conversation and candle-free entertaining.

Take the arrangement onto the wall

Wall styling changes the scale of the material. A single frond on a linen mount becomes quiet botanical art, while a symmetrical fan display above a bed creates a more graphic focal point. Woven cane frames add a second layer of texture without introducing a new colour.

Use linen, jute, unglazed ceramics and bleached timber as the supporting cast. If the frond is visually busy, keep the frame and wall behind it plain. Renters can lean larger pieces on shelves or consoles, and lighter fronds may suit removable adhesive strips when the wall surface and product instructions allow it.

A shell-inspired accent can provide the same shoreline reference without adding more foliage. Explore shell wall art as a companion piece, then let the palm remain the taller, airier element.

The video below is useful for observing how fan-shaped forms can be arranged and balanced in a decorative composition.

Seasonal Uses Through the Year

Dried palm leaves don't belong only to summer. Their neutral colour and structural shape can shift with the surrounding materials, which makes them useful across an Australian coastal calendar.

In summer, keep the display light. Pair pale fronds with linen, rattan and open-weave baskets, particularly in rooms that already receive plenty of daylight. January suits a single restrained spear or a sparse fan arrangement, with clear surfaces and plenty of visual breathing room.

Autumn brings a warmer register. Move the leaves into a terracotta vessel, add a soft throw and introduce a little timber or woven texture. The fronds stay the same, but the room feels less like a holiday rental and more like a comfortable home.

A simple seasonal rhythm

Time of year Styling direction Easy adjustment
Late December Entertaining and bright Use a broad fan in an entry or dining area
January Breezy minimalism Remove supporting pieces and keep one sculptural stem
April Transitional warmth Add terracotta, jute or a soft neutral throw
July Cosy retreat Pair carefully placed fronds with wool and warm timber
Spring Fresh renewal Swap heavier stems for slender spears beside pale ceramics

Winter arrangements need extra care around fireplaces and heaters. A palm display can sit in the same broad visual zone as a hearth, but it must remain well away from heat and ignition sources. Choose a non-combustible plinth or console and keep the composition decorative rather than densely packed with dry material.

Spring is the moment to edit. Replace darker, fuller stems with finer spear forms, then let pastel ceramics or fresh seasonal flowers provide the change. This rotation extends the usefulness of the collection and prevents the room from feeling fixed in one holiday mood.

Common Mistakes and Smart Fixes

A dried palm arrangement can look sturdy enough for any room, yet it still responds to Australian conditions. Heat, humidity, ultraviolet light and rough handling gradually shorten its useful life, much as salty air wears outdoor timber over time.

Direct sunlight may bleach one side of a frond while the other remains darker. Set the arrangement slightly back from the window, rotate it regularly and choose filtered light where possible. If the colour has already shifted, keep the stem and treat the variation as part of a weathered coastal palette.

Crowding causes another problem. Stems packed tightly into a narrow vase restrict airflow, allowing damp pockets to form. Choose a wider vessel, remove a few stems or divide the bundle between two arrangements. The leaves need breathing room, just like wet swimwear needs airflow before it dries properly.

Diagnose before replacing

  • Drooping: Check whether humidity has softened the stem. Move it to a drier room and support it with a wider vessel.
  • Dust buildup: Use a microfiber cloth, cool air or gentle outdoor shaking. Do not wash the leaf.
  • Cracked tips: Trim only the damaged section if the remaining silhouette still works.
  • Mould or musty odour: Isolate the affected material and discard it when the problem is widespread.
  • Insect presence: Remove the frond from indoor displays and inspect nearby organic materials before deciding whether it can be safely retained.

Dyed spears can add a strong accent, although artificial colour may fight the sun-washed look of an Australian beach house. Scratched surfaces can also reveal pigment more clearly. Naturally dried specimens usually provide more convincing tonal variation. In a busy household, a light matte sealant may reduce surface wear, but it cannot make palm material fireproof.

Safety first: Keep dried palm leaves away from candles, heaters and open flames. Never use fine, dry palm material as a casual substitute for fire-safe garden mulch.

If the display feels flat, adding more leaves is rarely the best first move. Combine one or two stems with raffia, beaded grass or a coarse woven object, then restore clear space around the main silhouette. That balance lets the fronds feel relaxed rather than crowded.

Bringing Coastal Calm Into Your Space

The strongest coastal arrangements make one clear decision and leave room around it. They don't rely on a crowded collection of shells, blue accessories and tropical foliage. Instead, they combine a considered botanical shape with a vessel and a few tactile materials that echo the shoreline.

Try a signature vignette on a linen-clad console. Start with a neutral stoneware vase holding three sun-palm spears. Lean a bleached pandanus wall piece behind it, then place a single coconut husk bowl to one side.

The contrast creates the depth. Rough husk sits against smooth ceramic, while the feathery or pointed leaf introduces movement without adding a strong colour. Keep the wall and console quiet so the arrangement can read as a small, cohesive scene rather than a collection of objects.

Edit it through the seasons

Photograph the arrangement when it feels balanced. That image becomes a useful reference when you rotate stems later, especially if you're working with several similar fronds. Swap the dominant stems quarterly, but don't discard every supporting piece. A change in one silhouette can refresh the whole display.

For another tactile layer, boho wall art can sit nearby when the room needs a softer woven note. Keep the piece secondary, and resist filling every blank patch of wall. Coastal calm comes from intentional simplicity, natural materials and the space between them.

Dried palm leaves are at their best when they look as though they belong to the house, not as though they've been added to prove a theme. Start with one frond, watch how the light moves across it, and build only when the room asks for more.


If you love relaxed coastal styling with a nostalgic Australian feel, Volkswagen Memorabilia offers beach-inspired home décor alongside licensed Volkswagen diecast collectibles, including classic Kombi Samba Bus and Beetle models. Visit the shop to find a thoughtful piece for your console, shelf or gift list, with local Australian support and convenient shipping.

Shell Photo Frame Buying Guide for Coastal Homes

You're at the counter of a coastal market, or halfway through an online scroll, and a shell photo frame catches your eye. For a second, it looks perfect. Then the nagging question lands, will this feel like coastal chic in a modern room, or will it look like a tired beach house relic from the 90s?

That hesitation is fair. Shell frames can go either way, and the difference comes down to construction, scale, and styling, not some vague rule about whether shells are “in” or “out”. In Australia, they also carry real cultural weight through the La Perouse shellworking tradition, which gives the best pieces more depth than souvenir-shop tat. The frames worth buying today sit right where heritage texture meets clean, current interiors.

Here's the practical bit. A good shell frame has to do four jobs: look intentional in a modern home, be built well enough for coastal conditions, suit the photo and the room, and style out without screaming “holiday gift shop”. If it fails any one of those, skip it.

Why a Shell Photo Frame Still Belongs in a Modern Home

A shell frame belongs in a modern room when it is treated like a proper decorative object, not a souvenir left to fend for itself. Put one on a pale oak console beside linen lamps and a simple print, and it can look crisp. Bury it under yellow light with fake driftwood and a starfish, and it slides straight into tacky territory.

Why it still works

The reason shell frames still earn their place is texture. Current Australian coastal interiors favour softer, grounded materials, and coverage has pointed to neutral styles, coastal preferences, and cleaner frame choices, including floating frames, slim textured mouldings, and premium natural finishes Australian Design Review. That gives shell work room to sit comfortably, as long as the rest of the room keeps its palette calm.

The best shell frames do not try to be novelty pieces. They read as organic surface, not as a gimmick. That is the difference between a frame you keep in the main living area and one you banish to the spare room after one holiday season.

Practical rule: if the frame sits naturally with timber, linen, stone, or woven fibres, it still works. If it only makes sense beside beach props, it does not.

There is also the craft side. Shellwork tied to La Perouse has been documented for more than a century, which gives the form real standing in Australian decorative culture and keeps it from feeling like pure tourist kit Sydney Morning Herald. That history is why a well-made shell frame can feel collected, not cheesy.

For more styling references, browse coastal wall styling ideas.

What a Shell Photo Frame Is Actually Made Of

A shell frame isn't one thing, it's a stack of decisions. If you can read those layers, you'll spot quality fast and avoid the brittle souvenir jobs that won't hold up in a real house near salt air.

The structure under the shells

The most important part is the substrate, the base the shells sit on. In better frames, that base is usually wood or a wood-based composite, because the frame needs enough stability to stay flat and keep the front square. The shell layer itself is decorative, not structural, and in Australian marketplace listings the construction is typically described as natural seashells bonded to a wooden frame with a glass front Etsy listing. That matters because the shells can chip, lift, or crack if the frame is treated roughly.

Cheaper frames often cut corners with thin board, sloppy glue, or a resin-coated backing that doesn't love humidity. Premium pieces usually feel tighter at the edges, with cleaner shell placement and a backing that doesn't flex when you pick it up.

An exploded diagram showing the four layers that make up a decorative shell photo frame construction.

What each layer does

The outer layer is the shell veneer. That can be whole shells, cut pieces, or shell fragments set into a pattern. Whole shells give you chunkier texture, cut pieces look neater, and crushed shell in resin is the budget end of the market.

Beneath that is the adhesive layer, usually glue or resin. A lot of cheap frames fail, because if the adhesive is sloppy, shells don't sit cleanly and edges catch dust or moisture.

The backing is the support layer, usually hardboard or MDF, sometimes with a kickstand or D-rings. The front can be glass, acrylic, or, on some decorative pieces, no glazing at all. In a coastal home, sealed backing and decent hardware matter more than people realise, especially if the frame is going anywhere near sea air or a breezy open-plan room.

See seashell craft inspiration

Styles and Sizes Worth Knowing

Shell frames aren't one category, they're a few very different looks pretending to be the same thing. If you know which family you're looking at, you'll stop buying the wrong frame for the wrong room.

Shell Frame Style Families at a Glance

Style Typical Sizes Best Room 2026 Verdict
Classic scallop mosaic in a square timber frame Small to medium Hall tables, bedside tables Current if the rest of the room is restrained
Slim floating frame with shell inlay Small to medium, sometimes larger Living rooms, home offices Very current with Scandi-coastal styling
Chunky statement frame covered in whole shells Medium to large Holiday homes, casual informal spaces Risky, can go kitschy fast
Beach keepsake shadowbox with shells over sand Medium Bedrooms, entryways, memory corners Niche but workable if edited well
Petite 4×6 tabletop style Small Shelves, desks, gift displays Safe, but not much presence on a wall

How the styles behave in real homes

The classic scallop mosaic is the easiest to live with because it usually reads as texture first, theme second. A slim timber border keeps it from feeling overworked. I'd use it on a console, not as the centrepiece of a giant gallery wall.

The floating shell inlay is the one that feels the most 2026. It suits cleaner interiors and sits comfortably beside linen, oak, and pale stone. If you want a shell frame that doesn't shout, this is the one.

The chunky whole-shell frame is the one to watch. It can be fun in a beach shack or a relaxed family room, but it's the quickest route to kitsch if you crowd it with other seaside objects.

The bigger the frame, the more the quality shows. Anything around A3 and above needs tidy shell placement, because every uneven edge is on display. If the craftsmanship is sloppy at that size, there's nowhere to hide it.

Explore boho-inspired wall pieces

How to Choose the Right Shell Photo Frame

Buy the frame like you'd buy a chair, by checking the bones first. The prettiest shell work in the world won't save a frame that's the wrong size, badly finished, or built for a house with no humidity.

Start with scale and shell density

Match the frame to the photo and the wall. A tiny frame on a big wall just disappears, while an oversized shell frame can look shouty if the room is already busy. Then look at shell density. Sparse shell work feels cleaner and more modern, while tight coverage feels heavier and more decorative.

If you're buying for a modern Australian coastal room, choose less shell, better spacing, cleaner edges.

Check the build before the shine

Look at the moulding depth next. A frame with enough depth usually feels more substantial and tends to handle glazing better. Check the colour too. White, bone, soft sand, and pale timber are easier to style than yellowed cream or harsh glossy finishes.

Then check the front. Glass is better than flimsy plastic if you want a more polished result, while acrylic can make sense for lighter hanging. The backing should feel firm, not bendy. If it's soft board or warped MDF, walk away, especially in a coastal home where humidity can make a cheap backing misbehave.

Don't ignore the hardware

A frame can look lovely and still be a pain to hang. Flip it over and check the hanging points, stand, and closures. Cheap souvenir frames often have rough internal edges or weak hardware, and that's where the disappointment starts.

  • Measure first. Make sure the frame suits both the photo and the furniture or wall space.
  • Check shell placement. If the pieces are uneven, lifted, or gappy, you'll notice it every day.
  • Inspect the back. A sturdy backboard and solid hanging hardware matter more than a flashy front.
  • Ask yourself one question. Will this still look right in five years, or will it date itself to the moment you bought it?

A four-step buying checklist for choosing shell photo frames, including tips on sizing, style, and mounting.

Styling Shell Frames the 2026 Way

A shell frame isn't the problem. Bad styling is. Put it in the wrong company and it turns novelty fast. Put it with cleaner materials and it starts reading as coastal texture instead of souvenir clutter.

What makes it feel current

Australian coastal style now leans calmer, with neutral palettes, natural materials, and more restrained surface detail Australian Design Review. That means shell frames work best when they sit inside a quiet composition. Keep the nearby objects simple, let the shells be the texture hit, and stop there.

The easiest fix is tonal pairing. Raw oak, blackbutt, linen, ceramic, and jute all make shell work feel grounded. A dense shell frame on a pale timber console looks deliberate. The same frame next to turquoise candles and faux coral looks lost in time.

What to avoid

Don't pair shell frames with too many literal beach references. Starfish, rope knots, fisher-buoy colours, and yellowed matboard drag the whole look back into the past. If the room already has a strong print, too many small decorative objects, or shiny finishes, the shell frame will feel busier than it should.

A decorative shell photo frame featuring a beach landscape picture, displayed on a shelf with decor.

A better move is to give it breathing room. One shell frame, one stack of books, one ceramic vessel, done. That's enough.

A matte white or natural linen mat also sharpens the look instantly. If the frame is heavy and textured, keep the rest of the arrangement lighter. If the shell coverage is sparse, you can lean a little harder into texture around it, but don't overdo it.

Where to Place Them in Real Rooms

A shell frame doesn't need a beach-themed room. It needs the right room and the right scale. The best placements feel calm, not obvious.

Entry, living room, bedroom, bathroom, office

On an entryway console, use one stronger frame as the hero piece. Pair it with a bowl, a lamp, or a small stack of books. That's the quickest way to make it feel considered.

In the living room, a shell frame works best as part of a mixed gallery wall rather than on its own in a large blank space. Mix it with prints, a small mirror, or a shadowbox so the texture variation feels intentional.

On a bedroom dresser, a medium frame suits best. Keep the light soft and the nearby colours quiet. Shell can look lovely in a bedroom because it has that slightly nostalgic, memory-filled feel.

The bathroom is the tricky one. It can work if the room is well-ventilated and the frame has a sealed back and decent hardware, but I wouldn't put a delicate piece directly in the splash zone. Humidity is not kind to bargain frames.

A home office is a good place for a small shell frame if you want a softer, more personal object among all the hard edges and screens. It works especially well beside a plant or a pale timber desk.

Avoid direct sun, radiators, and damp corners. Those are the places where cheap finishes age badly and shells start looking tired.

The two easiest arrangement patterns are a single hero frame on a console and a coastal gallery wall with prints, shell pieces, and one or two shadow boxes. Keep the spacing generous. Crowding kills the look.

A coastal style seashell photo frame resting on a wooden console table with a brass bowl nearby.

Price, Quality and When Premium Is Worth It

Shell frames split into three honest camps, and the price usually tells you what kind of object you're getting. The market for picture frames more broadly is also splitting between mass and premium buying, with more attention on FSC-certified timber, recycled materials, and custom sizing IndexBox.

Shell Photo Frame Price Bands Compared

Price Band Shell Quality Frame Material Glass Glazing Best Use
Under $25 Often moulded or lightly applied shell look Thin board or basic composite Usually simple glass or acrylic Holiday snaps, casual gifts, low-stakes spots
$40 to $90 Better shell coverage, cleaner finish Better wood or wood composite Glass more likely Everyday display, entry tables, relaxed living rooms
$120+ Hand-applied or more refined shell work Better timber, sometimes FSC-certified Better glazing, sometimes UV-protective Wedding photos, family portraits, statement interiors

The cheapest frames are fine when you don't need longevity. A holiday photo in a beach shack laundry? No one needs to overthink that. A wedding portrait in a polished coastal living room? Spend more.

The premium tier earns its keep when the finish is cleaner, the backing is sturdier, and the timber choice feels intentional. It also makes sense when you want the frame to behave like a design object, not just a holder for a snapshot. The La Perouse craft tradition is the benchmark here, because hand-applied shell work has a real heritage of careful making behind it Sydney Morning Herald.

Care, Gifting and DIY Alternatives

Shell frames don't need fussy care, they need sensible care. Dust them with a soft brush or a dry microfibre cloth, keep them out of direct sun, and don't park them in a steamy bathroom unless they're properly sealed. Skip oils and silicone sprays, because they can make the finish cloudy or attract grime.

For gifting, shell frames work best when the recipient already likes coastal decor, family photos, or sentimental objects. A small tabletop frame is an easy housewarming choice. A cleaner, better-made frame suits a wedding or anniversary gift because it feels more permanent and less novelty-driven.

If you want to make your own, there are two straightforward routes. The fast version is a plain timber frame, collected shells, and careful glue placement around the edge. The more ambitious version is a shadow box with proper timber moulding, removable backing, and glazing, which looks far more polished if you've got the patience.

If you'd rather skip the trial-and-error and start with curated pieces that already suit a relaxed Australian home, Volkswagen Memorabilia has coastal décor and nostalgic pieces that make it easy to get the look without the weekend craft fallout.