

You've got the Kombi strapped, the trailer's packed, and the sun's already up over the showground. Then the little stuff starts moving, the sort of movement that turns a calm run to Volksfest into a noisy, stressful drive with scratched trim, shifted boxes, and a tie-down that's suddenly working harder than it should.
That's where tie down rails earn their keep. They're not the flashy part of the setup, but they're the bit that helps keep a classic VW, a stack of parts, or a precious diecast haul sitting where you put it, not where physics wants it to end up. In Australia, that matters because load restraint isn't a casual suggestion, it's part of safe transport, and the geometry of the setup can make a bigger difference than many realise. For Kombi owners, trailer tinkerers, and collectors who care about both the gear and the journey, getting the rail placement right is worth the effort. If you're planning a van fit-out, a trailer refresh, or a smarter way to move memorabilia, this guide to VW van fit-out ideas will feel very familiar.
Why Tie Down Rails Matter for VW Enthusiasts
A good show weekend often starts with a simple load-up. The Kombi gets the folding chairs, the parts box, the picnic rug, and maybe a crate of diecast models that you'd rather not hear clattering around on corrugations. If the anchoring points are sloppy, the whole load starts to wander, and once a strap angle goes bad, the restraint you thought you had isn't the restraint you get.
That's why tie down rails are such a useful upgrade for VW people. They give you flexible anchor positions, so you can secure a Beetle bonnet one weekend and a stack of boxed models the next without relying on whatever random hooks happen to be welded into the floor. They're the quiet achiever in the setup, the bit that lets you transport irreplaceable stuff with a bit more confidence and a lot less drama.
Australian load restraint rules make this even more important. The National Transport Commission's guide shows that the restraint system has to work with real geometry, not wishful thinking, and that the effectiveness of a tie-down drops as the angle gets shallower. For a Kombi or a trailer loaded for a club run, that means the position of the rail can be just as important as the rail itself. A well-placed rail keeps the lashing angle sensible and the load stable, while a badly placed one can make every strap do less than its label suggests.
Practical rule: if the load shifts, the problem is usually not just the strap. It's often the anchor position, the angle, or both.
The other reason rails matter is protection. Classic VW bodywork, painted panels, and boxed collectibles don't like sideways movement, corner rub, or repeated strap movement. A rail system gives you more control over where the force goes, which is exactly what you want when the cargo has more sentimental value than resale value.
Understanding How Tie Down Rails Work
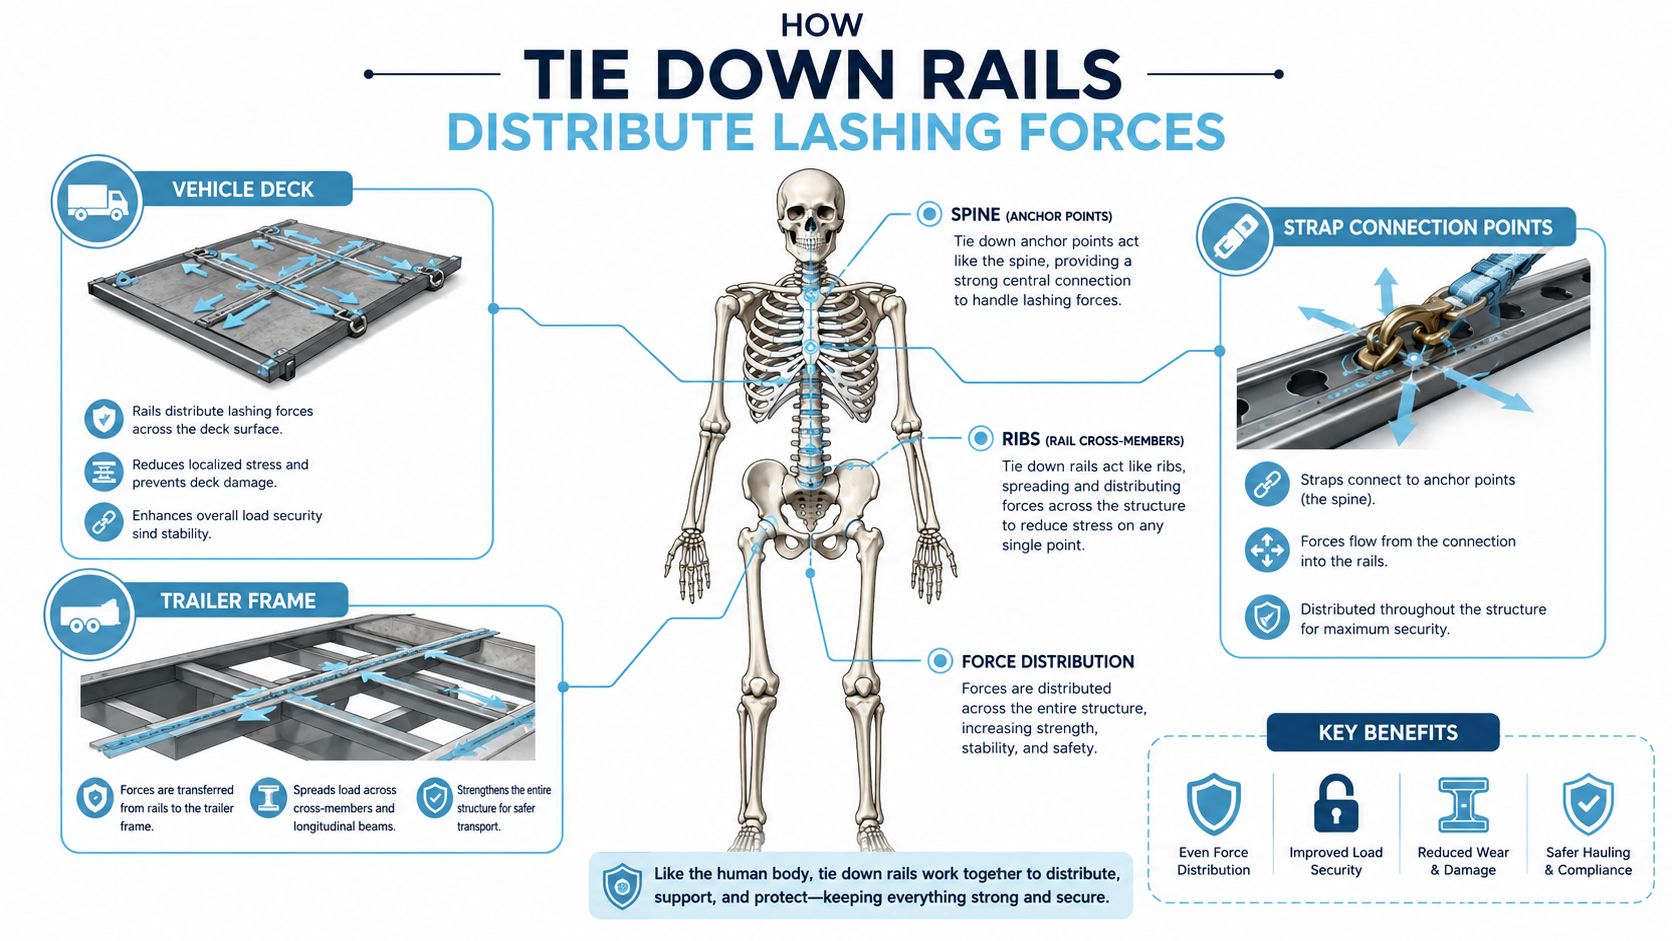
Tie down rails spread restraint forces through the van, trailer, or deck instead of dumping everything into one fixed point. That matters on a Kombi or trailer because load direction changes under braking, cornering, and rough road surfaces, and the rail gives you more control over where those forces end up.
The parts that do the work
A rail setup usually comes down to three parts in use. The rail is fixed to the floor, deck, or side wall. The second part is the slot, ring, or slider that takes the strap hardware. The third is the lashing gear, usually ratchet straps or chains, which pulls the load down and holds it from shifting sideways.
That flexibility is why rails suit VW work so well. A single anchor point can suit one load shape, but classic VW jobs change all the time. One weekend it might be a pair of seats and a box of trims, the next it could be a vintage bumper, a model display case, or a set of camping drawers. Rails let you move the tie-down point to suit the cargo without drilling new holes every time.
The rail is the backbone, the anchor points are the ribs, and the cargo is what needs to stay put over bumps, braking, and cornering. When the rail is mounted in the right place, the force spreads instead of loading up one weak spot. That is why a rail system often feels more useful than loose hooks or random floor rings.
The right ratchet strap setup still has to match the rail. A good rail cannot make up for tired webbing, poor hardware, or a strap that is wrong for the job.
A rail system works best when the load settles naturally into it. If you have to fight the cargo to make it sit right, the setup probably needs a rethink.
Comparing Tie Down Rail Types and Materials
Not every rail suits every VW job. A hidden floor rail is lovely in a clean Kombi cargo bay, but an open trailer might be better served by a tougher surface-mounted setup that's easy to inspect and easy to clean. Side-wall rails sit somewhere else again, especially when you want to hold items upright rather than clamp them straight down.
Rail types and what they're good at
| Rail Type | Material Options | Best For | Key Trade-off |
|---|---|---|---|
| Recessed floor rail | Galvanised steel, aluminium | Show-focused Kombi floors, enclosed trailers, neat installations | Better visual integration, but it usually needs more planning and often more modification |
| Surface-mounted rail | Galvanised steel, stainless steel, aluminium | Utes, trailers, general-purpose cargo decks | Easy to fit and adjust, but it's more visible and can create a raised edge |
| Side-wall rail | Galvanised steel, stainless steel, aluminium | Tall cargo, mixed loads, vans with varied packing needs | Great flexibility for side restraint, but it doesn't always help with low-slung loads |
For materials, the choice is usually a trade between weight, corrosion resistance, and appearance. Galvanised steel is the practical workhorse, especially where you expect hard use and don't want to baby the hardware. Stainless steel makes sense where moisture and corrosion are constant concerns, which is why it's popular in salty coastal conditions. Aluminium keeps weight down and can look tidy in a more polished build, but you still need to check that the specific product is rated for the job you want it to do.
For a Kombi, the decision often comes down to whether you're protecting original flooring or building a more modern cargo bay. For a trailer, visibility and easy inspection often matter more than hiding the hardware. For an open ute tray, the rail has to handle weather, mud, and rough treatment without becoming a maintenance headache.
The historical context is worth keeping in mind too. The Railway Tie Association notes that rail fastening evolved into the modern flanged-rail standard in the 1830s with Robert L. Stevens' flanged tee rail, which helped shape later tie-plate systems. That long engineering history is a good reminder that support and fastening matter as much as the rail itself, whether the load is freight, a classic VW shell, or a weekend's worth of gear. See the background at the Railway Tie Association FAQ.
The Hidden Impact of Lashing Angles and Rail Placement
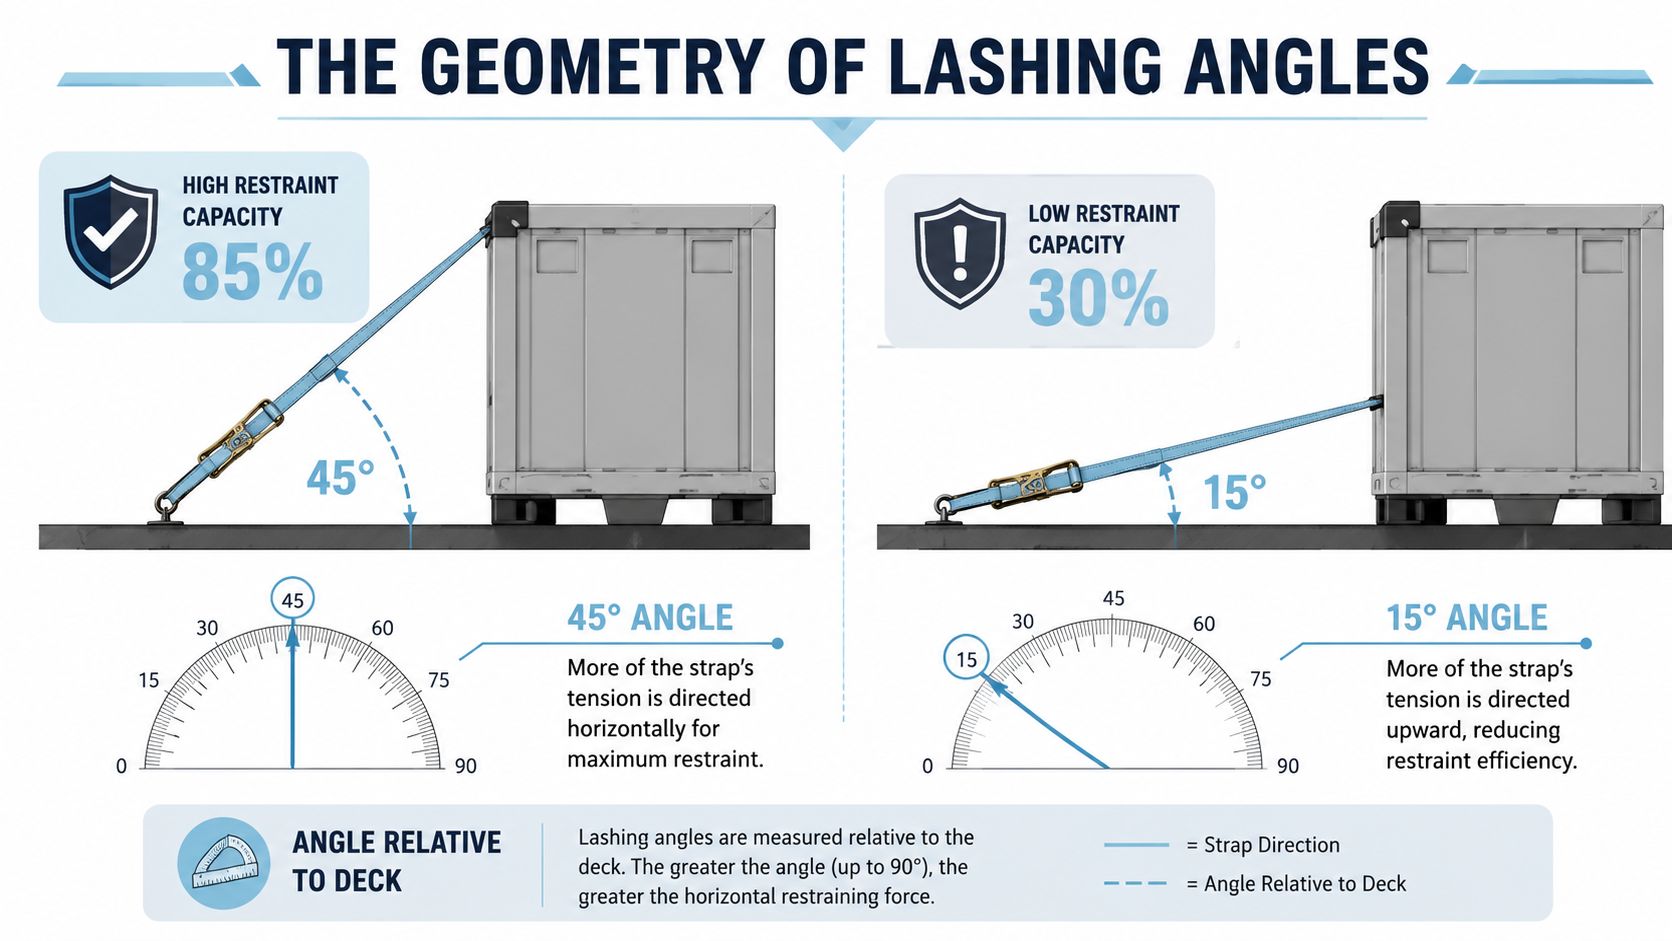
This is the bit most buying guides skip, and it's the bit that often decides whether the load is secure. Australian guidance says tie-down lashings work best when they're close to vertical, and the National Transport Commission's Load Restraint Guide shows that effectiveness falls to roughly 70% at 45° and about 50% at 30°. That's a massive swing from a simple change in rail position and load height, and it's why a rail mounted in the wrong place can look solid while doing less work than you think.
Why the rail's height and position matter
The rail height, deck width, and cargo shape all combine to set the strap angle. A low rail on a wide trailer deck can push the strap into a shallow run, especially with tall cargo, and that's where restraint capacity starts to slide. A slightly higher rail, or a rail closer to the load, can keep the angle steeper and the strap more effective without changing the strap itself.
That's especially relevant on VW vans and trailers carrying mixed loads. A Kombi floor can be narrow enough for luggage but awkward for a taller item like a toolbox, a panel, or a boxed display. If the rail sits too far out, the strap angle gets lazy. If it sits too high or too close to a sharp edge, the load may be secure but awkward to use, which is no help on a busy show morning.
A good mounting layout usually does two things at once. It preserves as much of a near-vertical lashing angle as practical, and it gives enough flexibility to handle both large and small cargo. That's the sweet spot. Too many anchor points can tempt people to use the wrong one just because it's there, while too few can force bad strap geometry and poor restraint.
The rail should fit the load, not just the vehicle. If the geometry is wrong, the hardware is only half useful.
If you want the specific load-restraint logic behind that geometry, the Australian Load Restraint Guide is the clearest reference point for how angle changes the actual restraint outcome.
Measuring and Selecting the Right Tie Down Rails
Start with the cargo bay itself. Measure the usable length, the usable width, and the way the floor is shaped, then compare that with the loads you really carry. A Beetle on a trailer asks for a different rail layout from a stack of memorabilia boxes in a van, and the difference usually comes down to where the straps can run without lying too flat.
A simple way to choose the setup is to work through the space in order. Measure the deck length, width, and the position of wheel arches, trims, or floor ridges. Map the load shape, because a low, wide load needs different anchor positions from a tall, narrow one. Check the rail layout to see whether one central run, paired side runs, or a wall-mounted approach gives you better strap geometry. Then match the rating to the job, so the rail and anchor system suit the load instead of just filling the available space.
Australian load restraint rules care about the aggregate working load limit and the restraint geometry. The number of hooks or slots is only part of the picture. Extra rail length helps only when it lets you place the straps in a better position. It does not fix a weak setup, and it does not turn a poor angle into a legal or safe one.
On VW vans and trailers, a practical layout usually gives you one set of positions for larger items, such as a car shell or bulky parts, and another set for smaller boxed cargo. That flexibility matters on show weekends because the load changes all the time. One trip might be a Kombi seat frame, the next might be a tidy stack of models and display pieces. The rail needs to work for both without forcing awkward strap runs.
The strap and rail need to work together as one system, and the selection guide for ratchet hardware helps with that choice. A good rail gives the strap a fair angle. The wrong fitting wastes that advantage before the load even moves.
If you are planning a mount for accessories as well, the same measuring habit helps with a high lift jack bracket installation guide, because neat placement and solid support matter just as much there.
Installing Tie Down Rails on VW Vans and Trailers
Installation starts with respect for the vehicle, especially if it's a classic Kombi with original panels or a trailer deck that's already been repaired once or twice. Mark the drill points carefully, check for hidden structure beneath the floor, and think about where water might sit after a wet drive home from the coast. If the deck needs reinforcement, sort that before the rail goes down, not after the first trip.
Practical points for a Kombi or trailer
For a VW Kombi, removable sub-floor plates or surface-mounted rails can help protect original flooring. That keeps the install reversible and reduces the chance of turning a tidy cargo bay into a permanent fabrication job. For a trailer, use proper fasteners and sealing around the penetrations so moisture doesn't creep into the timber or under the sheet metal.
Bolting or welding both work when done properly, but each has a different trade-off. Bolting gives you serviceability, while welding can give you a cleaner and more permanent result if the base metal and layout suit it. Either way, alignment matters, because a rail that's cocked or twisted makes the straps behave oddly and can create wear in spots you don't want.
A couple of mistakes show up again and again. Under-tightened bolts let the rail move, and unsealed holes invite rust or rot. In a Kombi, that can matter more than people expect because preserving the body and the cargo bay is part of preserving the van's value.
The installation notes in the high-lift jack bracket guide are a handy reminder that mounting hardware on a classic VW always works best when you think about structure first and accessories second.
If the rail flexes in your hand before the load goes on, it'll flex even more once the straps are tight.
Safety Checks, Maintenance, and Buying Checklist
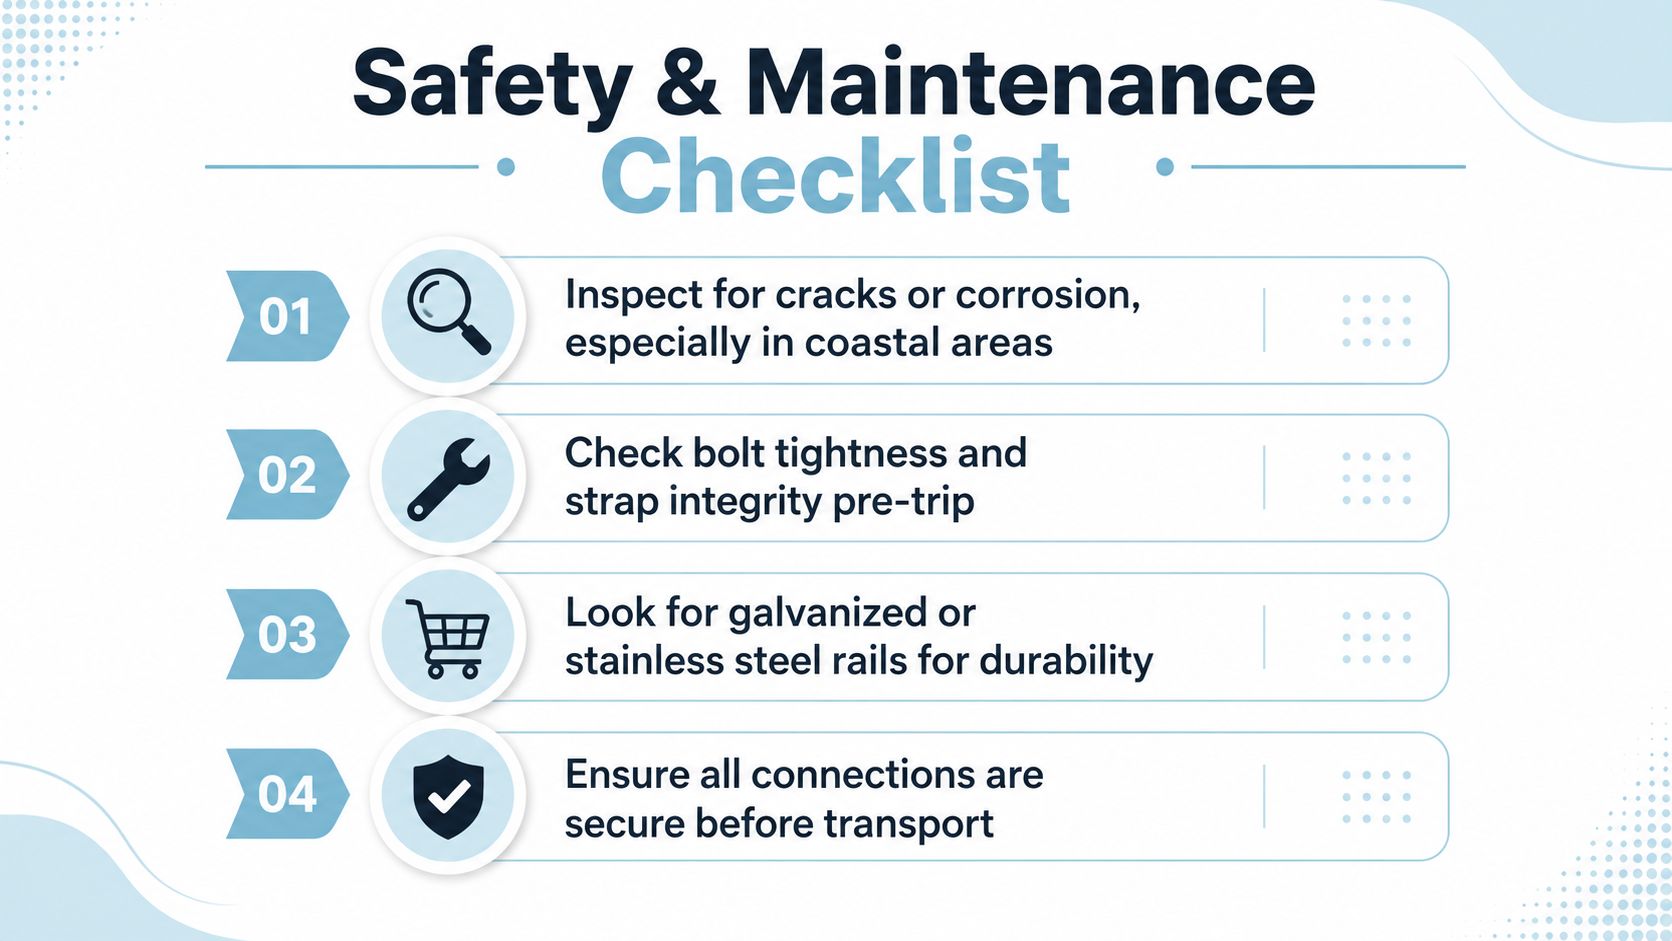
A rail setup only earns trust if you keep checking it. Before each trip, look over the rail, the fittings, and the strap points for wear, movement, or corrosion, especially if the vehicle lives near the coast. Salt air is brutal on fasteners and edges, and once a surface starts to pit or loosen, the whole system deserves a closer look.
The pre-trip routine doesn't need to be complicated. Check that bolts are still tight, straps aren't frayed, and the load still sits where you meant to place it. If anything has shifted since the last trip, fix the cause before you hit the road. A ratchet that's been forced too hard, or a rail slot that's showing deformation, is telling you something worth hearing.
A quick buying checklist
- Verify the working load limit. Make sure the rail and anchor setup suits the cargo you'll carry.
- Check vehicle fit. Confirm the rail works with a Kombi floor, a trailer deck, or a tray without interfering with the load shape.
- Choose corrosion-resistant materials. Galvanised steel and stainless steel are the obvious candidates for tougher conditions.
- Look at the mounting method. Decide whether you want a reversible install, a permanent fix, or something in between.
- Think about appearance. On a show vehicle, visual integration can matter almost as much as raw capacity.
The broader point is simple. Good tie down rails protect more than the cargo in the tray or trailer. They protect the stuff that matters to VW people, the body panels, the memorabilia boxes, the model cars, and the calm that comes from knowing the load is doing what it should.
If you're building out a VW-inspired garage, trailer, or display space, Volkswagen Memorabilia has the kind of diecast Kombi Samba Bus and Beetle pieces that suit a proper enthusiast's collection. Have a browse at Volkswagen Memorabilia for licensed VW diecast models, gifts, and memorabilia that feel right at home beside a well-prepped trailer or a neatly sorted Kombi.