
What Is a Kombi Van: A Friendly Guide for Aussie Fans

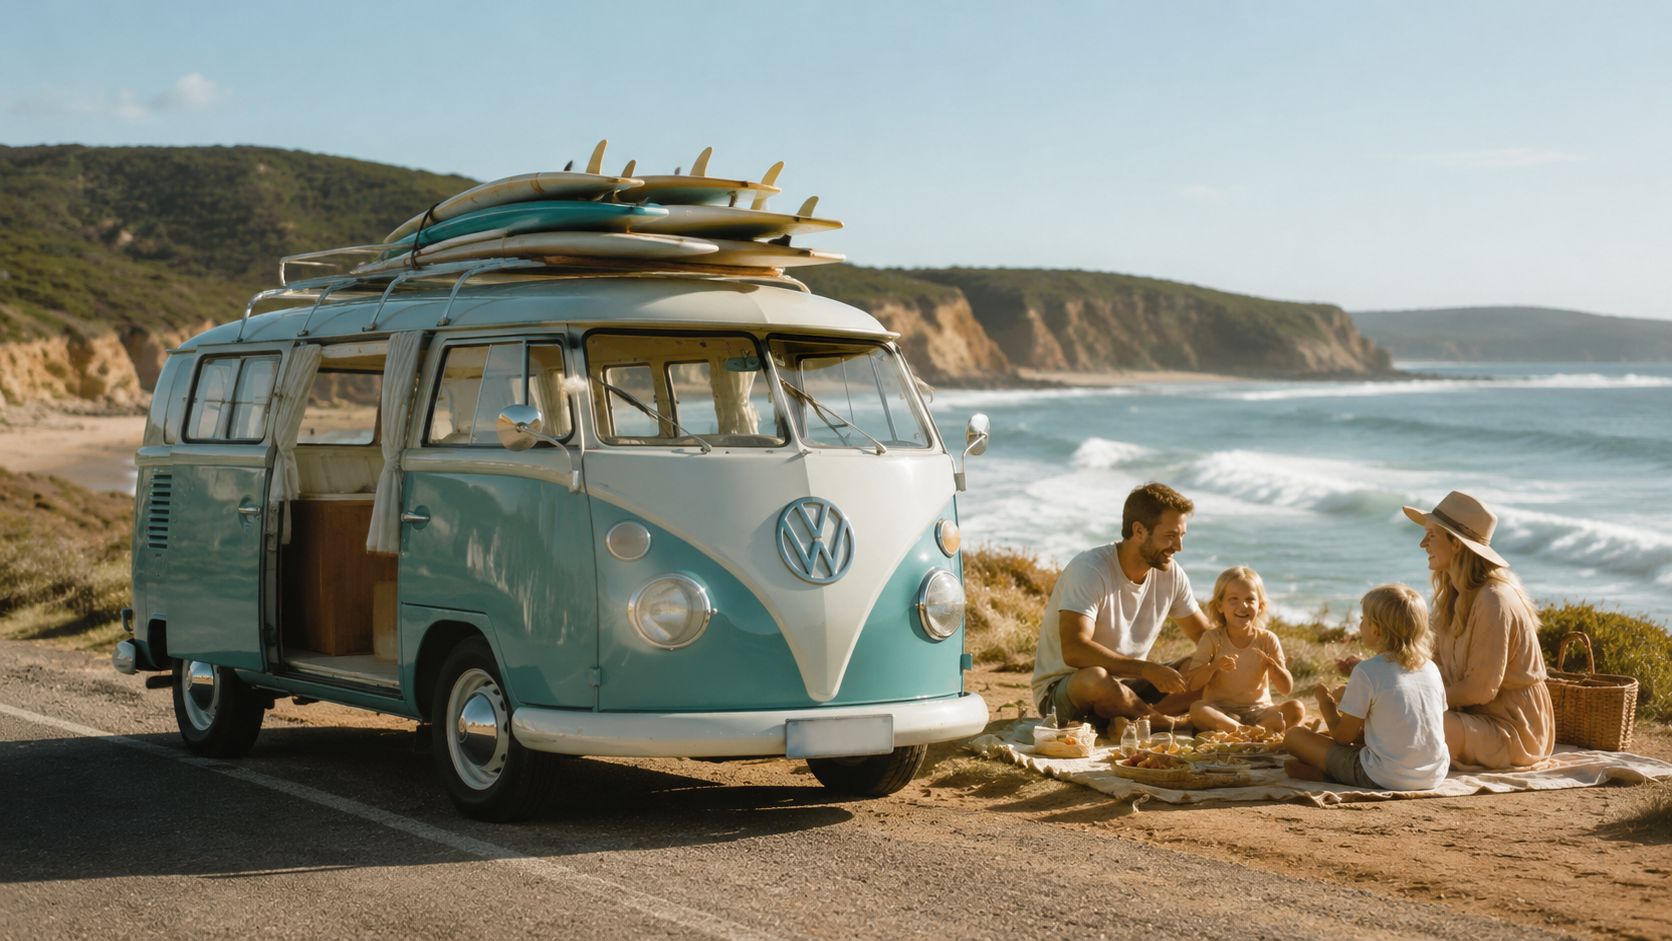
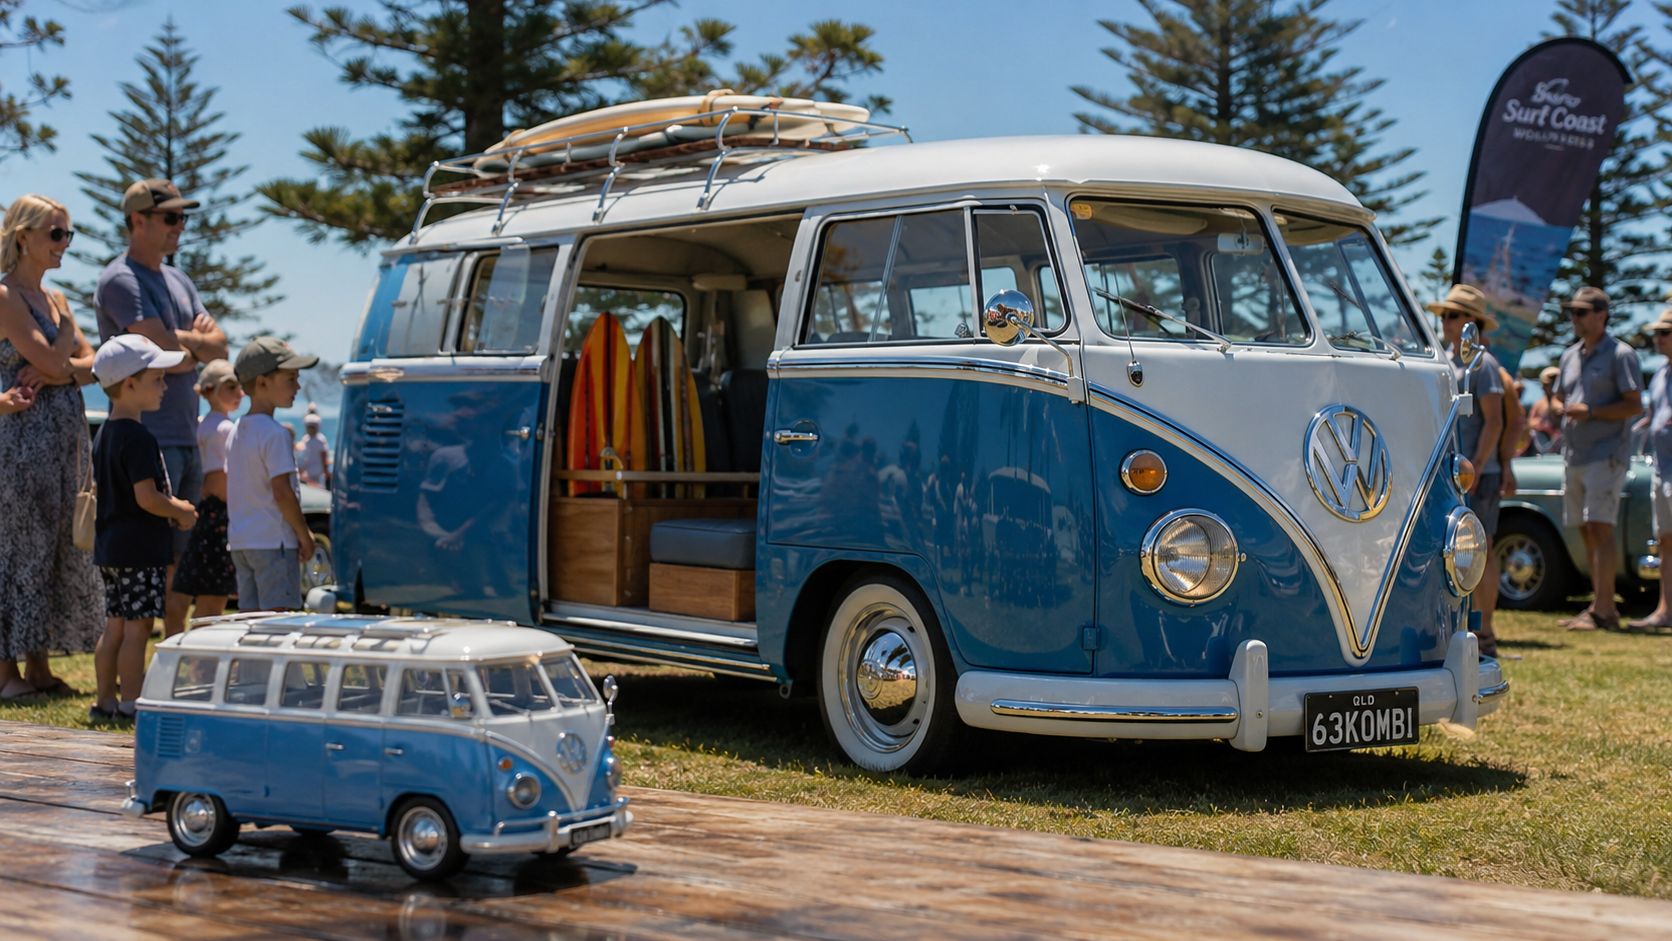
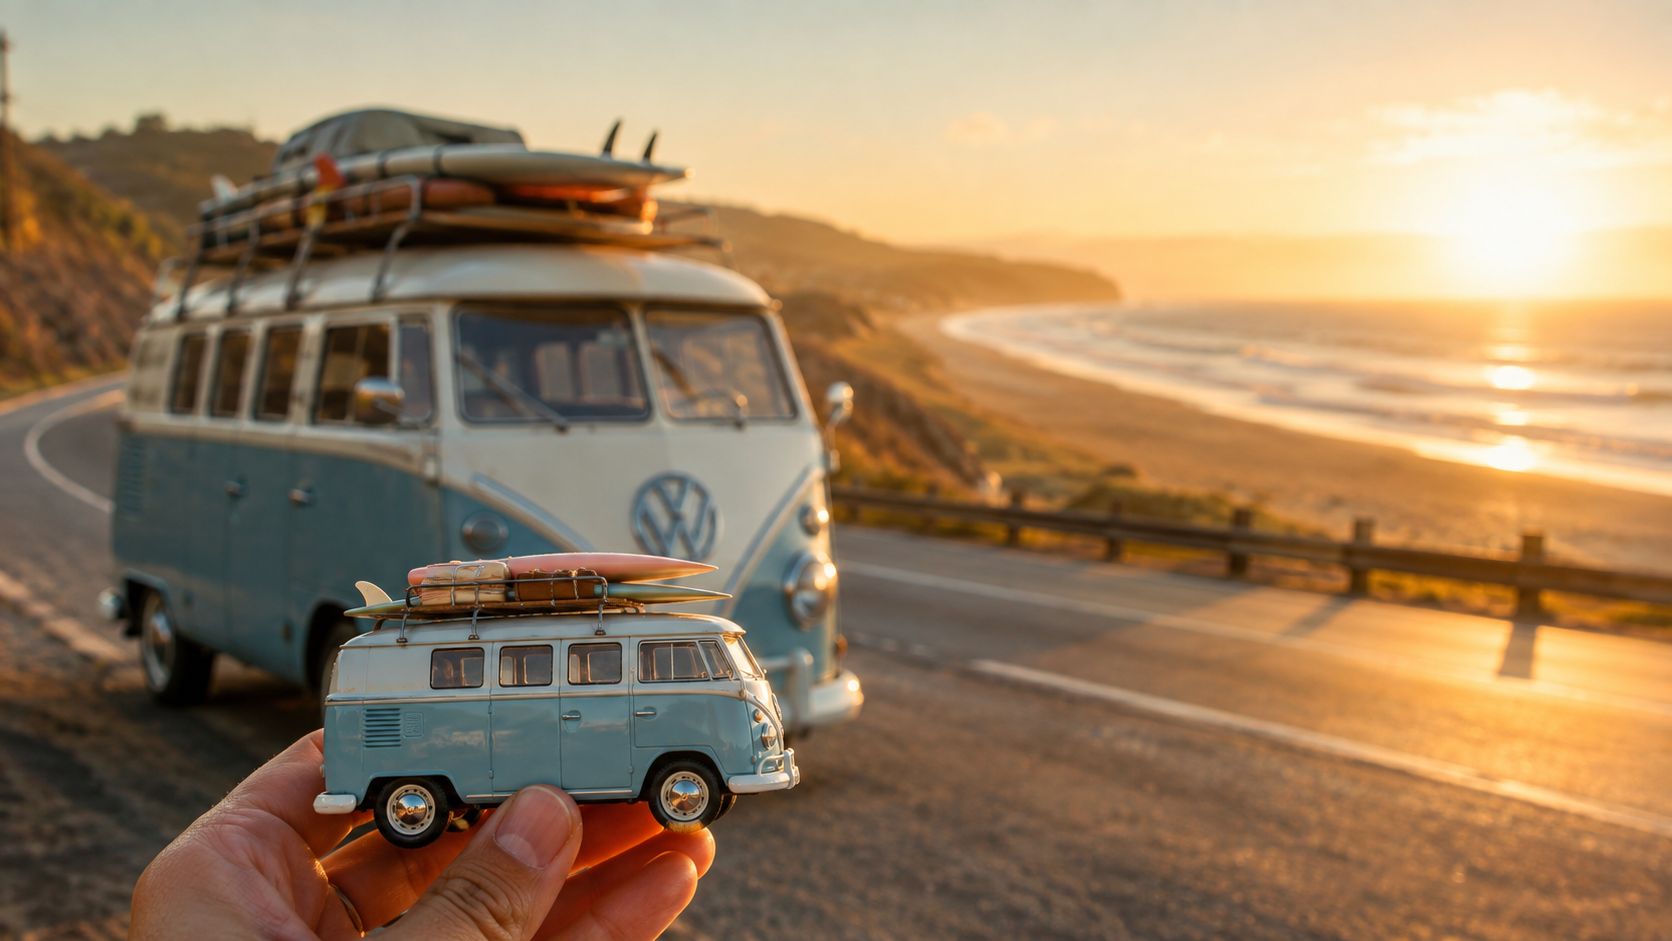
Salt spray hangs in the air as a blue-and-white split-screen Kombi rattles along a coastal road, surfboards thumping gently behind the front seats. The air-cooled engine hums past the lighthouse, and everyone nearby turns to watch.

A Friendly First Look at the Iconic VW

So, what is a Kombi van? In Australian conversation, it usually means a Volkswagen Type 2, the rear-engined van that became famous as a people-mover, camper, work vehicle and surf-trip companion. The original idea was wonderfully practical, a boxy Volkswagen that could carry passengers, cargo or both, with the windowed passenger versions designed to carry up to nine occupants according to the Australian historical overview from Volkswagen Australia.

The word doesn't describe one precise model year. Australians use Kombi as a broad label for several Type 2 generations and body styles, including passenger buses, Microbuses, campers and some Transporter variants. That broad local usage can confuse first-time buyers, especially when a car-show sign says “Kombi” but the vehicle is technically a panel van, ute or later Transporter.
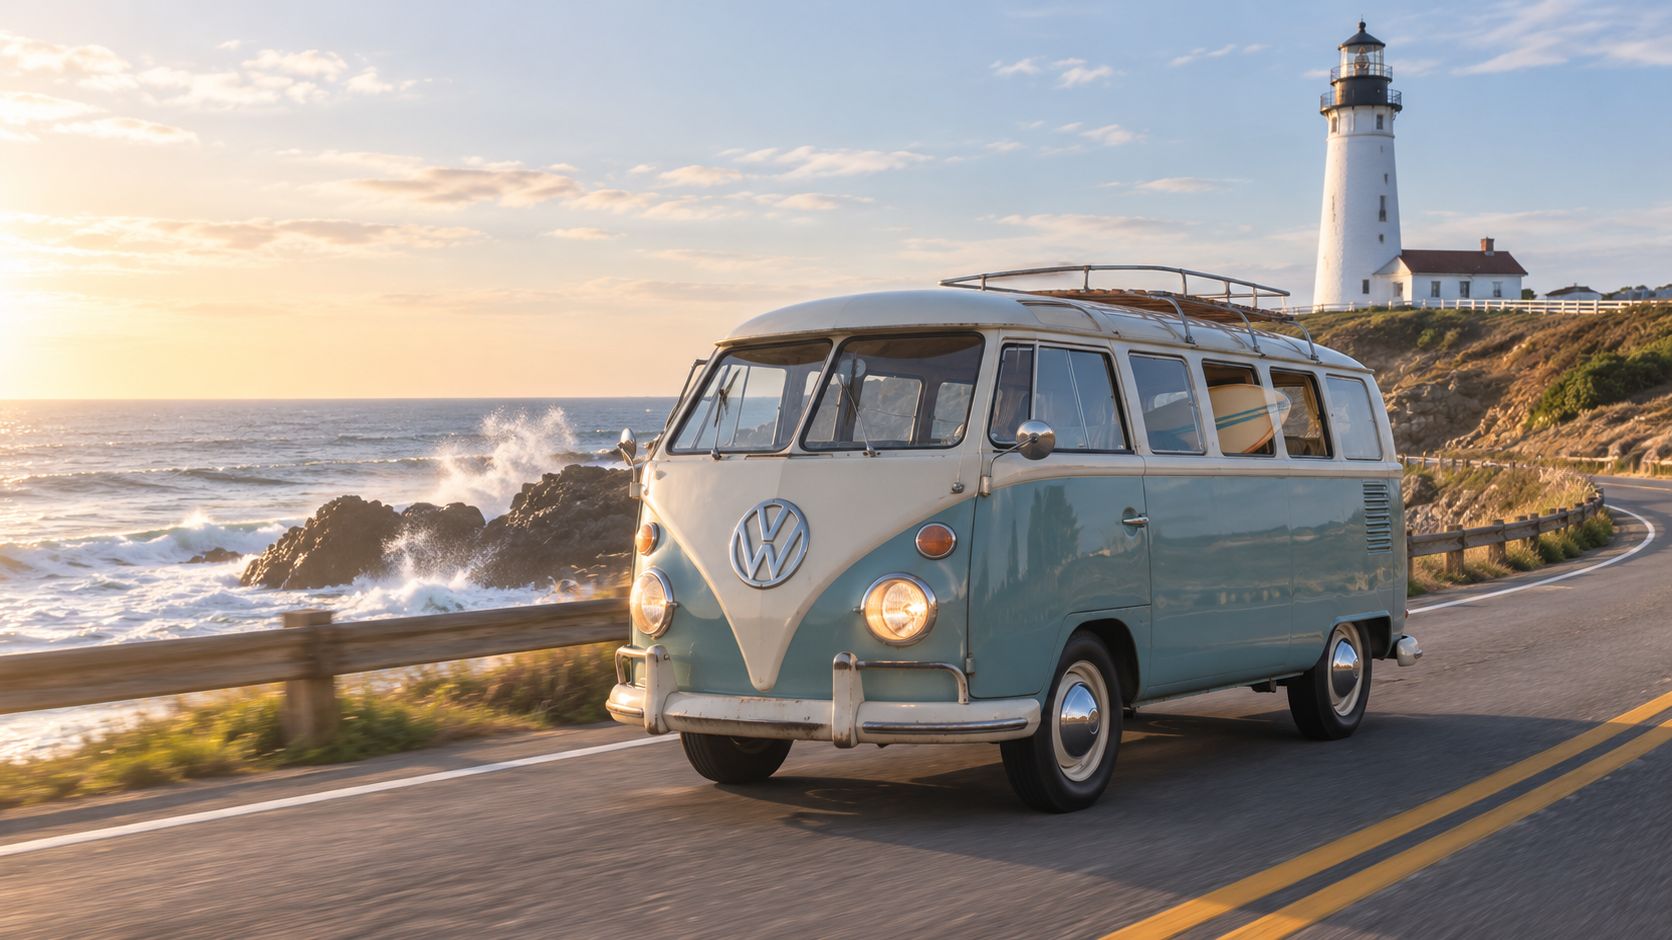
A classic blue and white Volkswagen Kombi van driving along a coastal road near a lighthouse.

The simple definition

At heart, a Kombi is a Volkswagen Type 2 with a cab-over layout and a rear-mounted engine. The driver sits close to the front of the vehicle, while the engine occupies the rear, leaving a remarkably useful cabin between them. That arrangement helped the van serve families, tradespeople, travellers and surfers without needing a long bonnet.

The rest of the story sits in the details. German origins explain the name, clever packaging explains the spacious cabin, and Australian surf culture explains why the vehicle became far more than a commercial van. Once you understand those three threads, the different T1, T2, T3, T4 and T5 labels become much easier to follow.

Where the Kombi Name and Shape Came From

The story starts with Dutch Volkswagen importer Ben Pon, who sketched a compact van concept in 1949. His idea drew on the Beetle's mechanical strengths but moved the bodywork towards a practical, forward-control shape. Volkswagen began building the Type 2 in March 1950, and the factory also knew it as the “Bulli”, while the vehicle was commonly identified as the Transporter in its early life, as outlined by CarsGuide's Kombi history.

The name Kombi comes from the German term Kombinationskraftwagen, meaning a combination-use vehicle. That description fitted a van that could carry people during the week, haul equipment when needed and become the basis for a camper at the weekend. A removable-seat passenger model could change character without changing its basic shell.
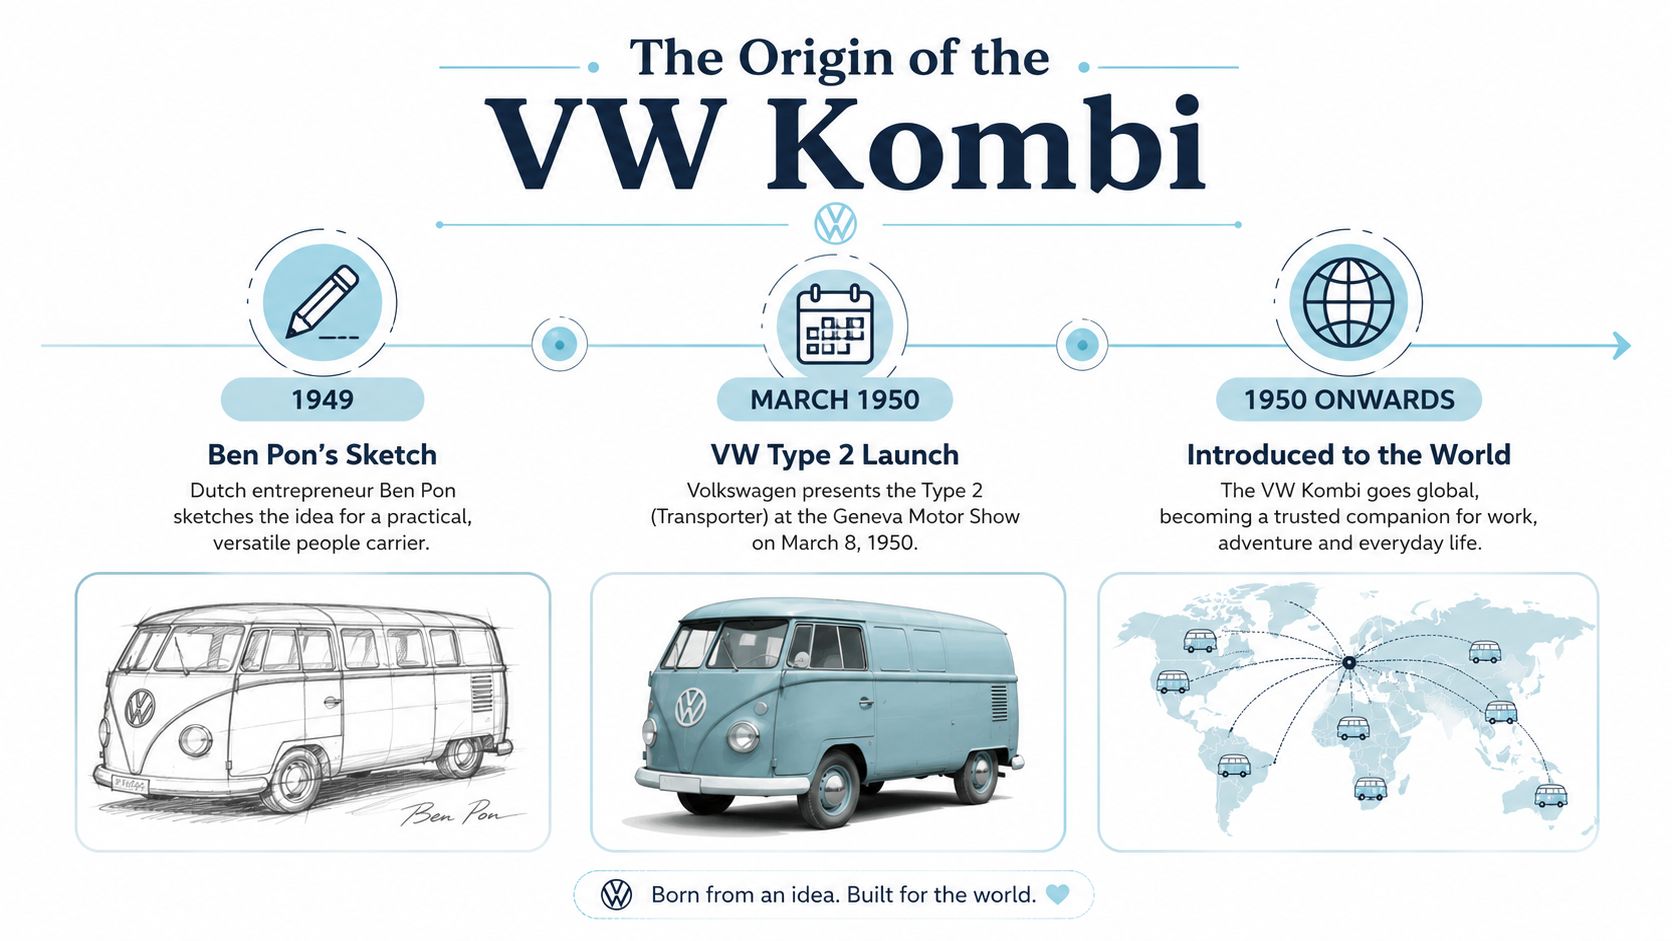
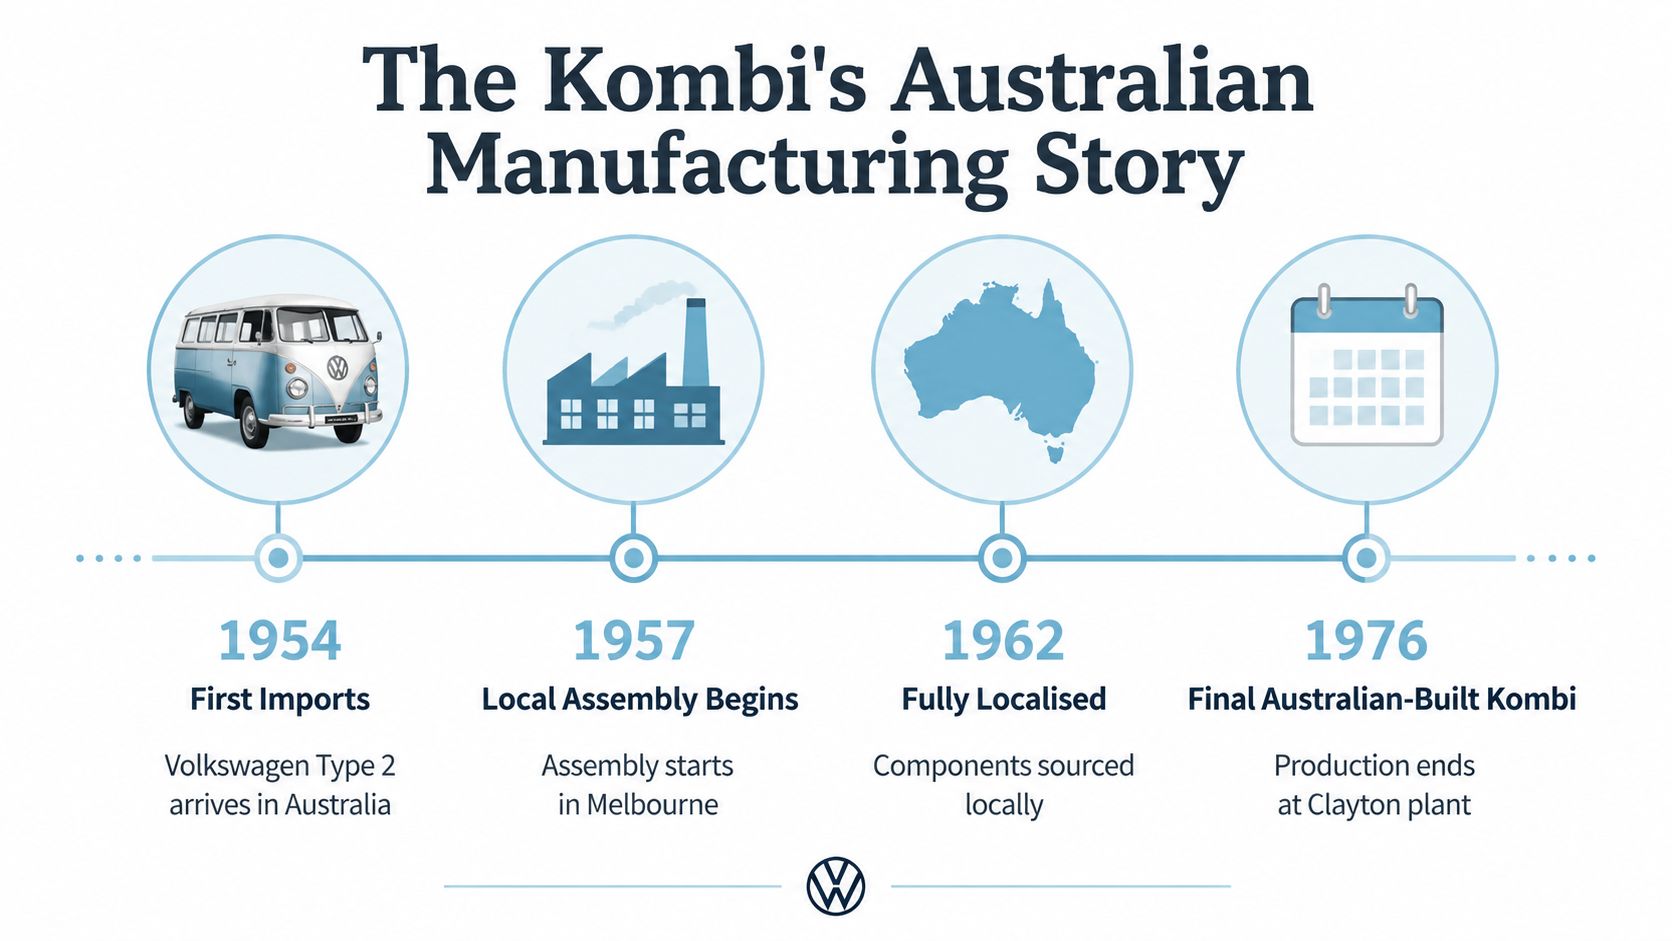
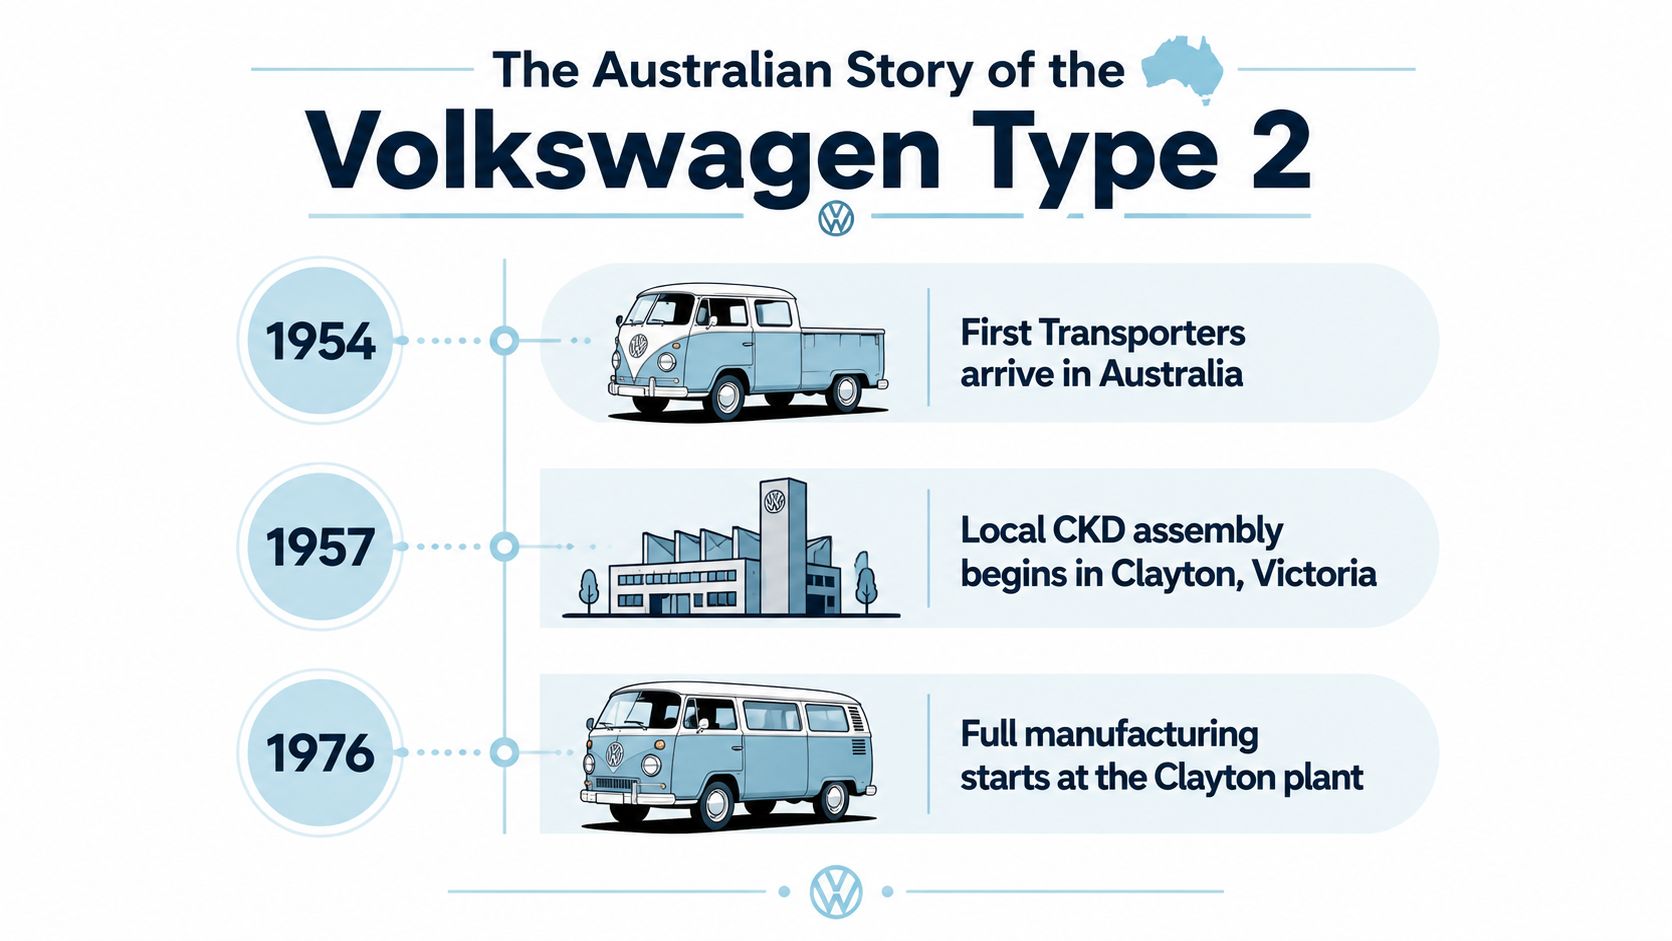
An infographic detailing the historical origin and global launch of the Volkswagen Type 2 Kombi van.

One vehicle, several names

Different markets developed their own language. “Bus” and “Samba Bus” are familiar overseas terms, while “Transporter” remains important in Volkswagen's commercial-vehicle vocabulary. In Australia, Kombi became the friendly catch-all, covering more Type 2 variations than the original narrow meaning of the word might suggest.

The shape also felt familiar because earlier commercial vehicles had already introduced the public to box-bodied utility transport. The Type 2 refined that idea with a distinctive Volkswagen identity, a compact footprint and a passenger-friendly cabin. For Australian collectors, the useful lesson is simple: read the body style and generation rather than relying on the badge alone. A windowed passenger bus, a panel van and a pickup may all be called Kombis at a local meet, but they aren't the same vehicle.

For a focused look at the model family, explore this guide to Volkswagen Type 2 memorabilia.

The Engineering Tricks That Made It Special

The Kombi's magic begins with packaging. A cab-over layout places the driver above or close to the front axle instead of behind a long bonnet. Volkswagen paired that arrangement with a rear-mounted, air-cooled flat-four engine, creating a flat and highly usable interior floor.

That layout gave the body near-vertical sides and a low loading area. Owners could fit passengers, camping gear, surfboards or trade equipment without working around a large engine bay in the nose. It also made the van an inviting starting point for camper conversions, because the cabin offered a simple, open space that could be adapted to a particular lifestyle.
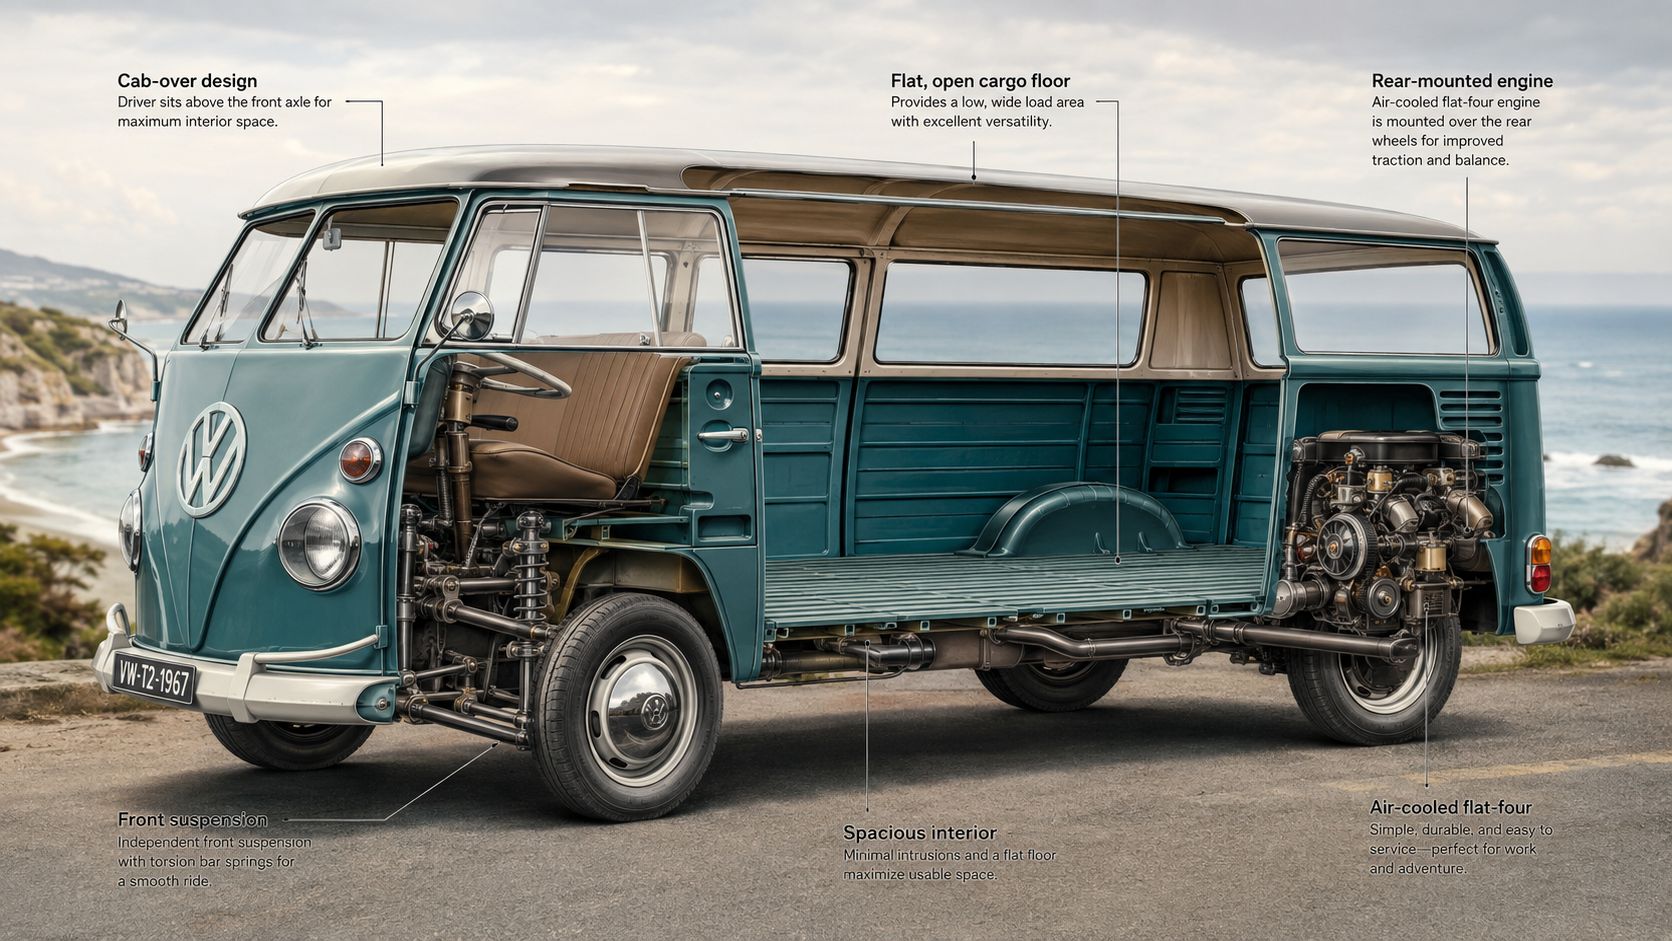
A cutaway view of a classic Volkswagen T2 van showcasing its cab-over design, interior, and rear engine layout.

Why the driving feel matters

The rear-engine arrangement changes the way the van feels from the driver's seat. The steering position gives a commanding view of the road, while the compact mechanical layout helps the vehicle feel more nimble than its upright body suggests. The simple chassis also offered plenty of scope for owners to tune, restore or adapt the van for camping and surf duty.

Suspension design played its part too. Swing-arm and torsion-bar systems kept the construction straightforward while giving the van a more forgiving ride than the plain sheet-metal shape might imply. Later improvements included synchromesh gearbox designs and fuel injection, depending on generation and specification.

Practical rule: Treat the engine layout as part of the Kombi's personality. The flat floor, rear weight bias and simple mechanicals explain why owners talk about these vans as much for their feel as for their appearance.

A collector doesn't need to memorise every mechanical variation to appreciate the engineering. Look at the way the cabin uses its footprint. That cleverness is the reason a small diecast model can still communicate so much character through its upright stance, short front end and broad side panels.

Generations and Body Styles Worth Knowing

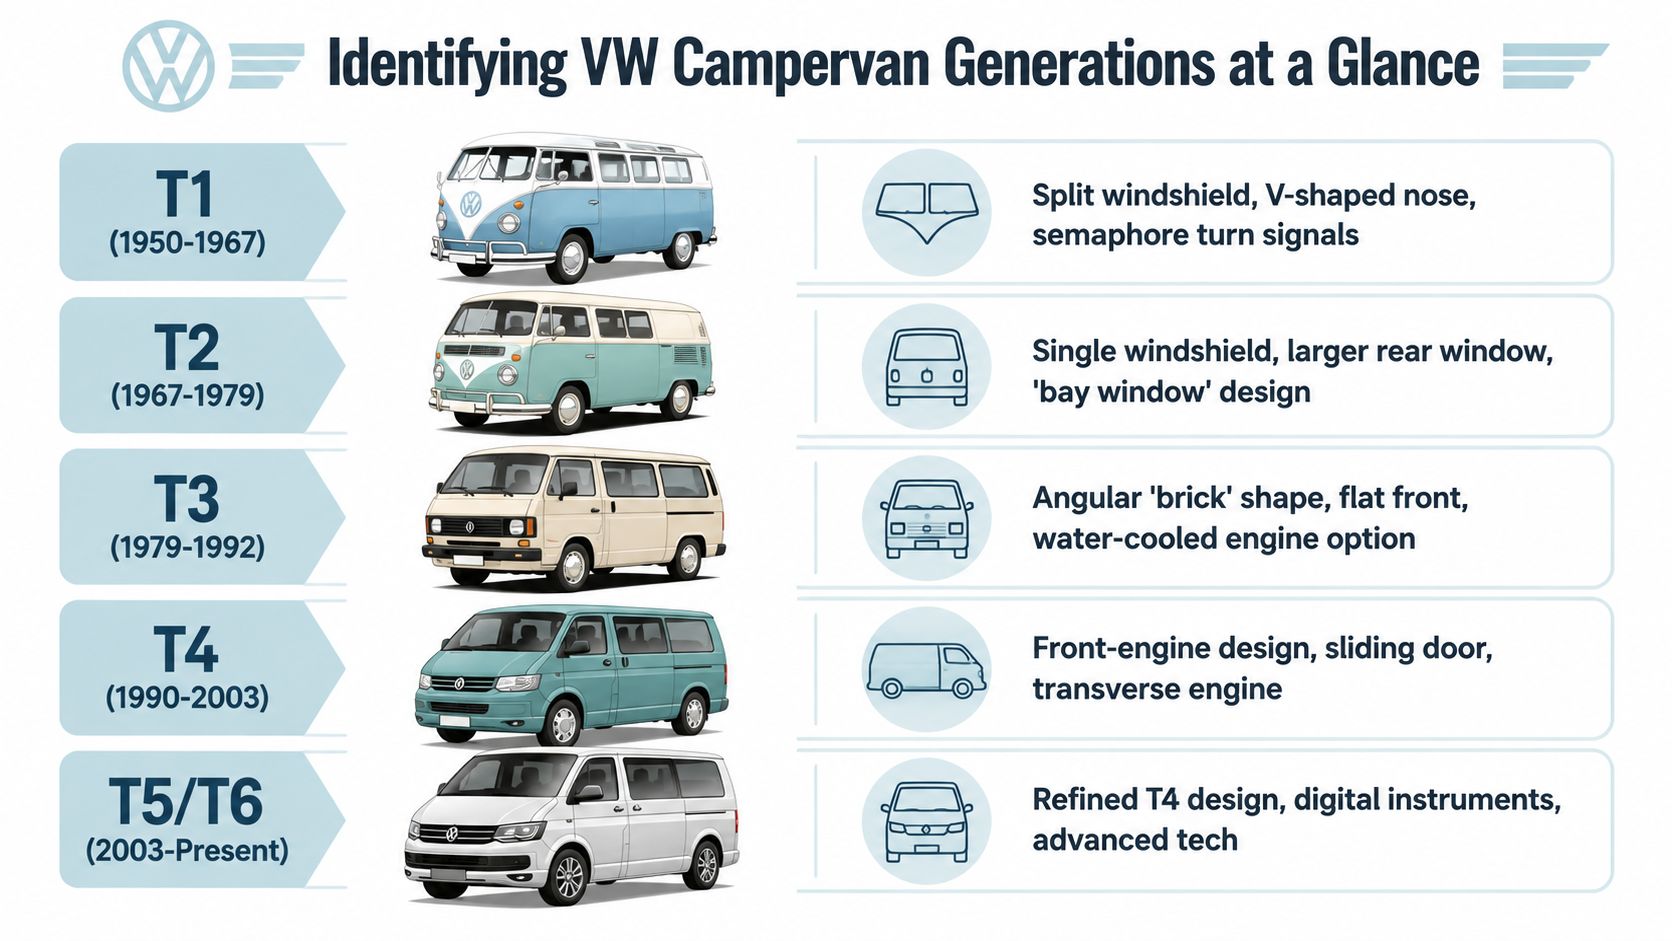
Australian enthusiasts usually talk in T numbers, which makes car-show conversations much easier. The family tree below is a useful starting point, although exact Australian availability and specifications varied between imported, locally assembled and later Transporter versions.

Generation Years Aus Availability Key Identifying Feature
T1 Split Window 1950–1967 Early Australian imports and local assembly history Two-piece windscreen and rounded body
T2 Bay Window 1967–1979 Strong Australian presence and surf identity One-piece curved windscreen and larger body
T3 Vanagon 1979–1992 Transporter-era examples, including Australian-market variants Squarer styling and more modern cabin
T4 1990–2003 Front-engine Transporter generation Front-mounted engine and car-like nose
T5 2003–2015 Modern Transporter family Contemporary front-engine commercial design

Body styles at a glance

A passenger Kombi has side windows and rear seating. A Microbus is often used for a people-moving version, while a Samba Bus generally refers to a highly glazed, more decorative specification associated with the classic Type 2 range. A panel van removes much of the rear side glass for cargo work.

Collectors may also encounter:

  • Single Cab pickups, with one row of seating and an open tray.
  • Double Cab utes, with extra passenger seating behind the front row.
  • Westfalia campers, converted for touring and overnight travel.
  • Transporter variants, which may share the family resemblance without being a classic passenger Kombi.

Australia's terminology adds another layer. Local production and assembly gave the Type 2 a deep domestic history, and Australian sources note that the name spread across multiple body styles more broadly than it did in Germany. The safest approach is to describe the generation, body style and seating arrangement together. That prevents a T3 Transporter from being confused with a T1 passenger bus because both are called Kombis at a meet.

Kombi Culture in Australia and Beyond

Australia gave the Type 2 a special setting. The van suited beaches, campsites and long coastal drives, and Volkswagen Australia records how the Kombi became tied to surf and adventure culture on both coasts. Its shape could swallow boards and camping equipment, while the upright cabin made it easy to share a trip with mates or family.

That practical role became a visual identity. Surfboards on a roof rack, faded paint, bright curtains and a well-used interior turned the Kombi into a rolling sign of weekends away. The association with freedom grew alongside the international Flower Power image, Woodstock-era styling and counter-culture artwork, but Australian owners gave those ideas a distinctly local backdrop.

From workhorse to moving art

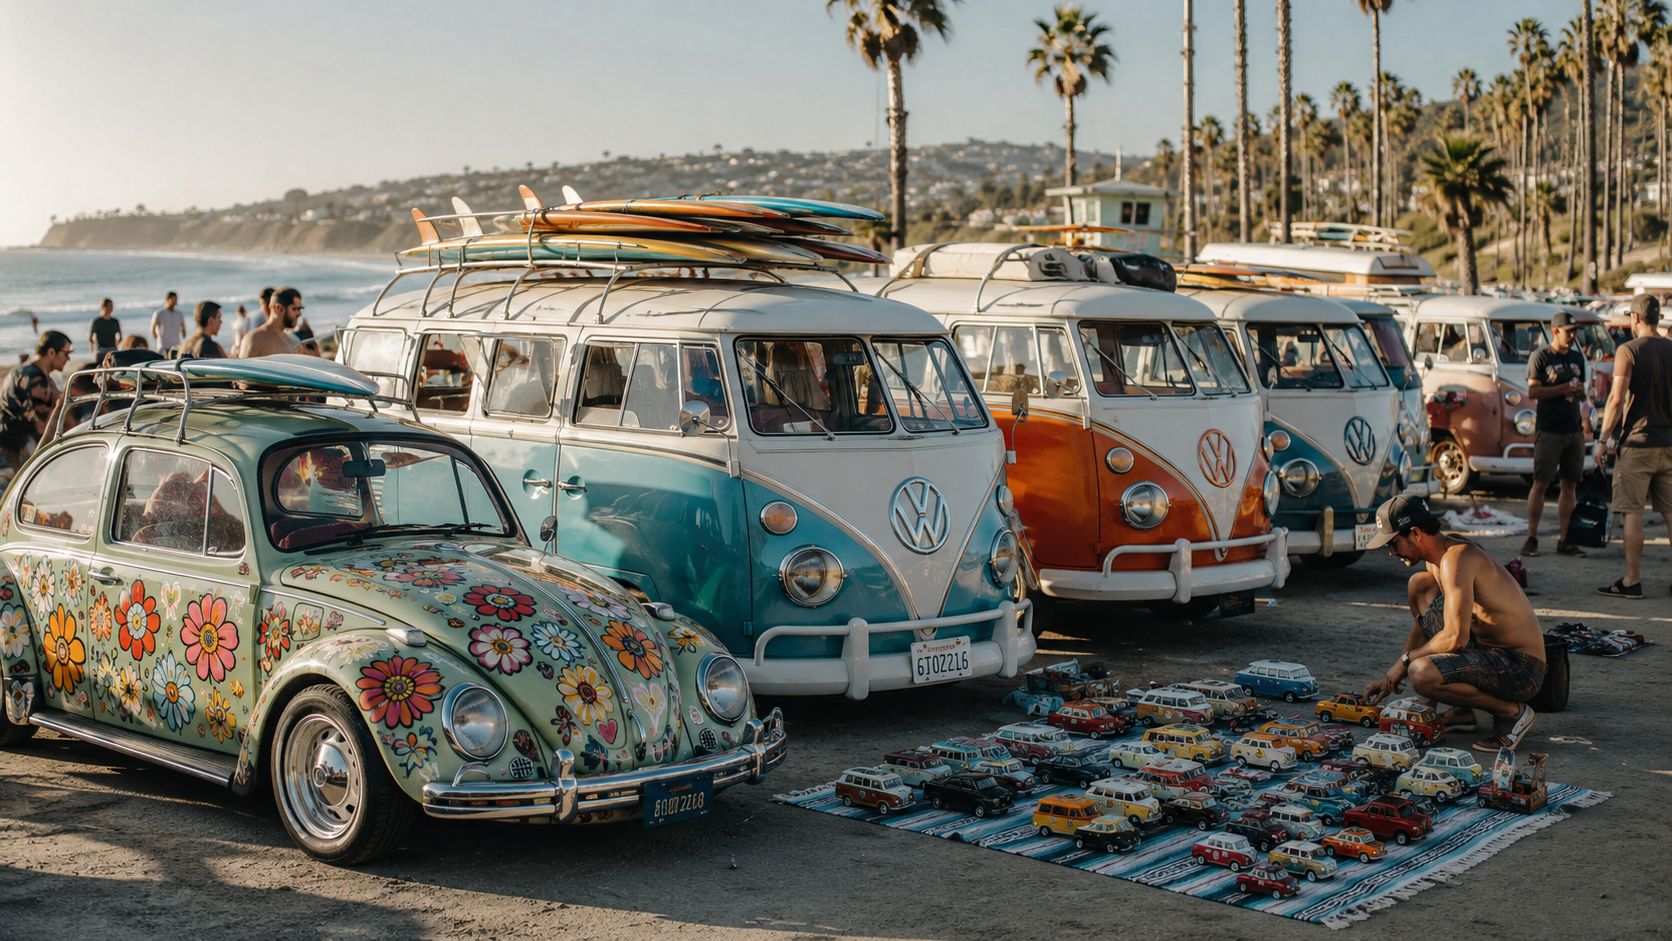
The Kombi's cultural life now stretches well beyond the beach. Owners bring restored and customised examples to Volksfest, VW Nationals, club gatherings and coastal show-and-shines. Some favour factory-correct finishes, while others choose lowered suspension, period accessories, roof racks or playful paint schemes.

The result is a vehicle that can be judged as transport, sculpture and personal history at the same time. A family might remember one from camping holidays, a surfer might associate it with dawn starts, and a collector might love the tiny details of a split windscreen or Samba roof.

Australia's local story is worth exploring through Kombi life in Australia, especially if your interest began with beach culture rather than mechanical history. The same emotional connection appears in films, music events, tourism imagery and beach tours, where the Kombi works as an instantly recognisable symbol of relaxed travel.

Collecting Diecast Kombis the Right Way

A good diecast Kombi captures more than a familiar silhouette. It should preserve the details that make the vehicle recognisable, including the split or bay windscreen, window arrangement, bumpers, wheels, roof equipment and period graphics.

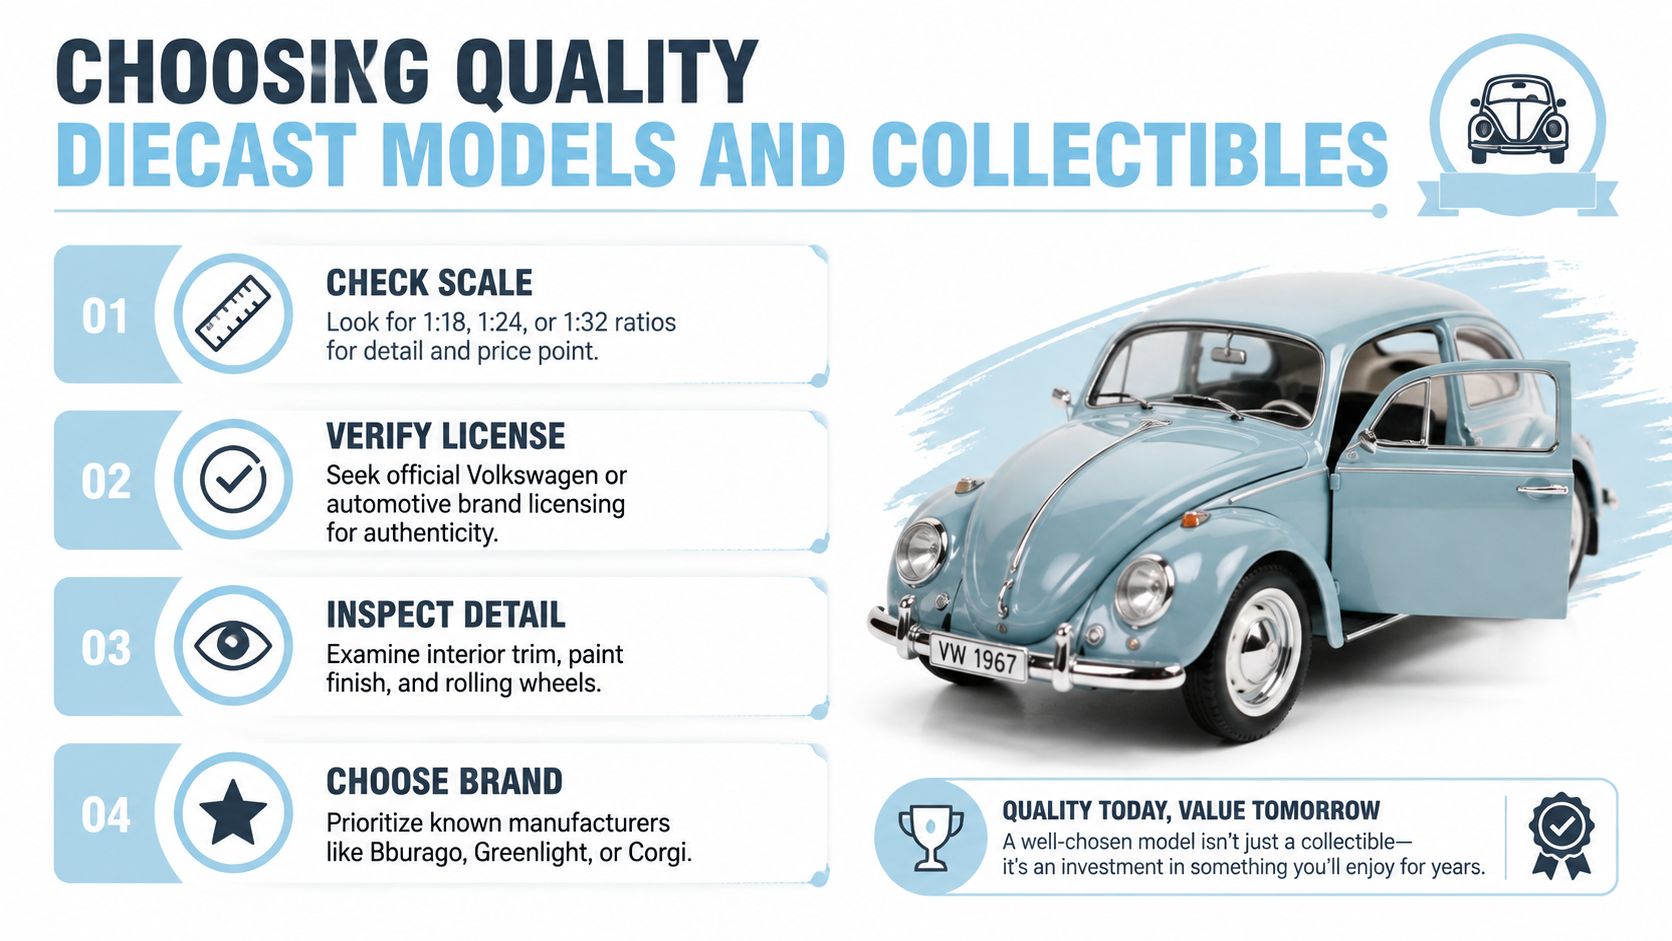
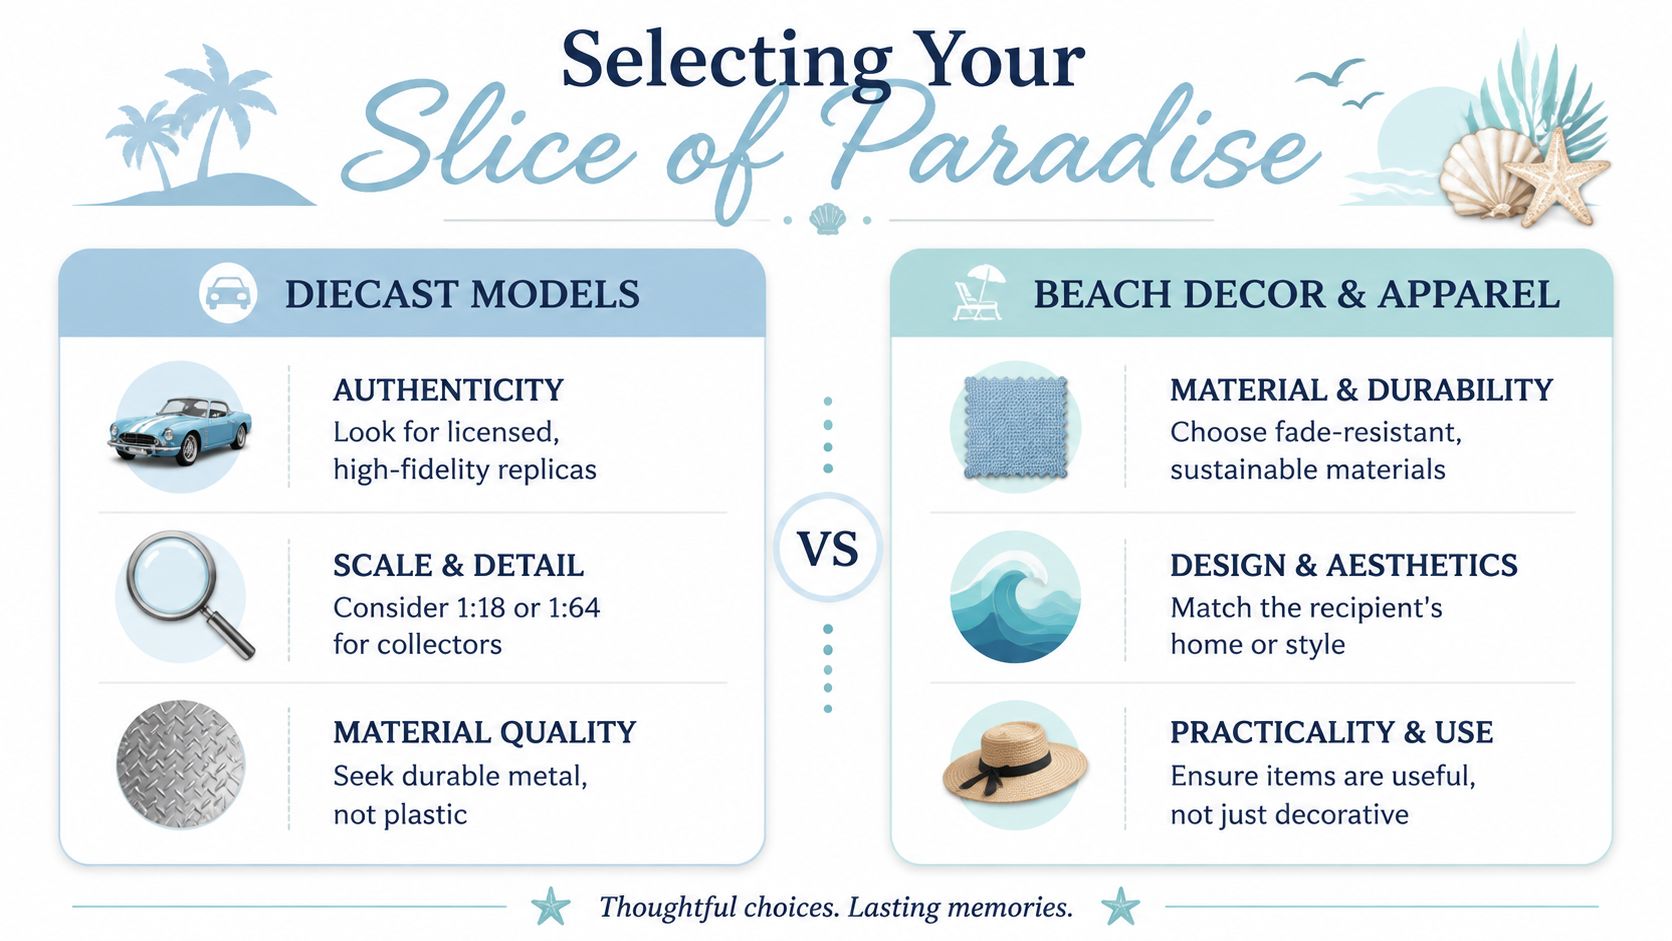
Start with authenticity. Look for official Volkswagen licensing, clear manufacturer markings and packaging that identifies the model properly. A model described as diecast should have a metal body, while some resin replicas use plastic or composite construction. Neither is automatically wrong, but the material affects weight, handling and the type of detail you can expect.
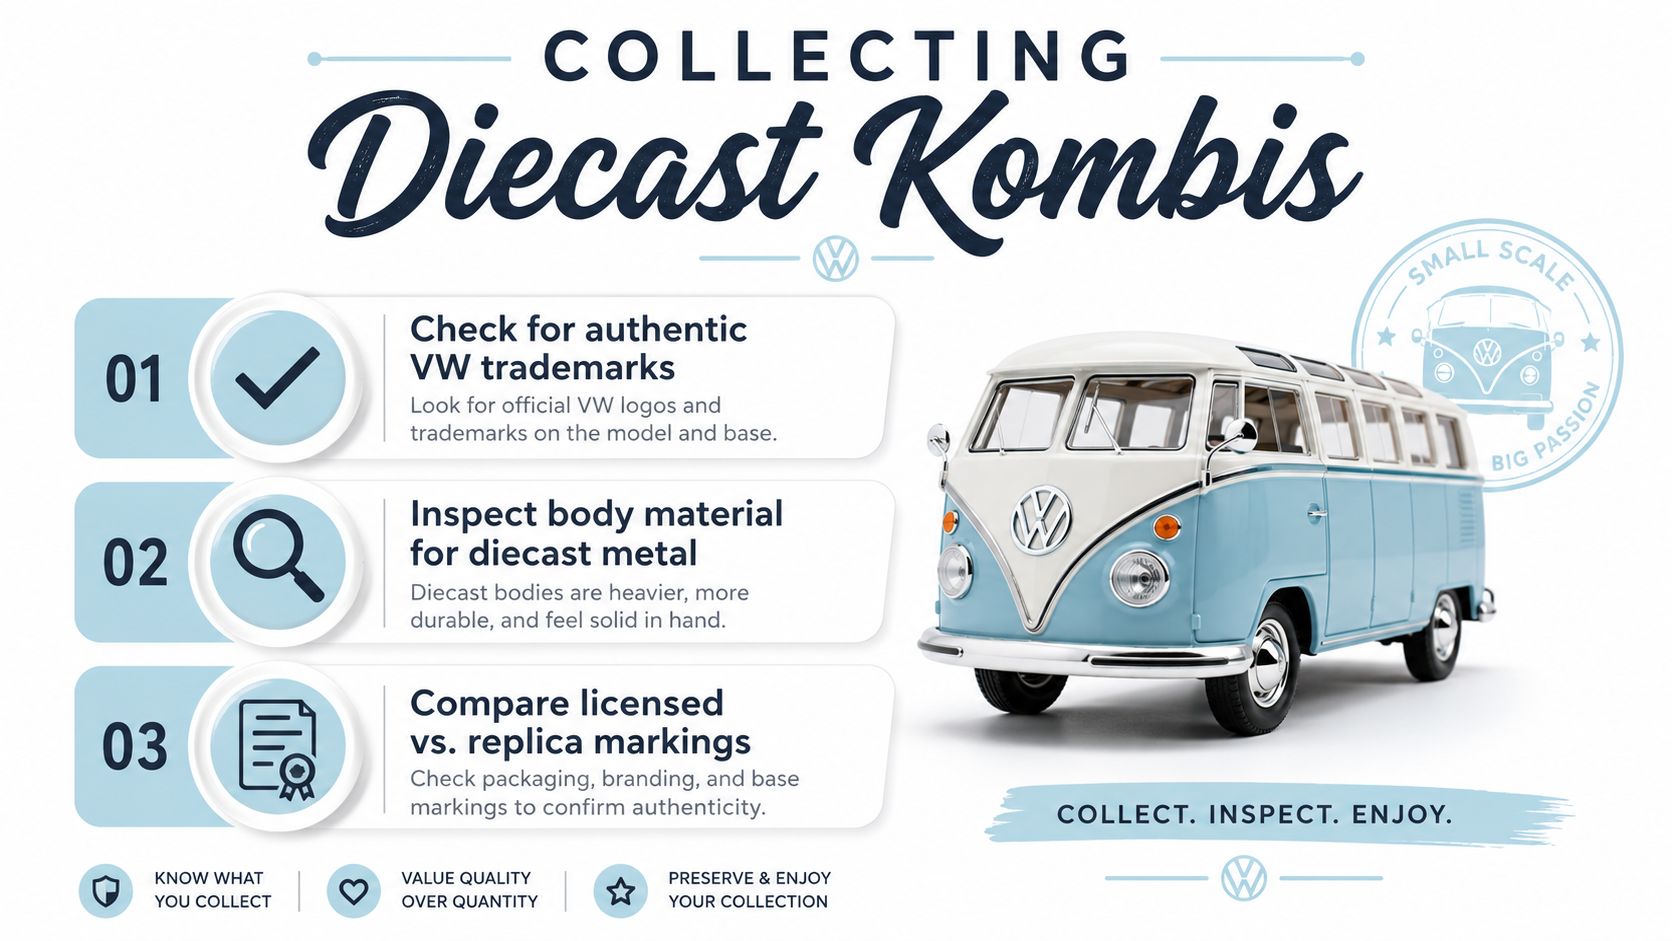
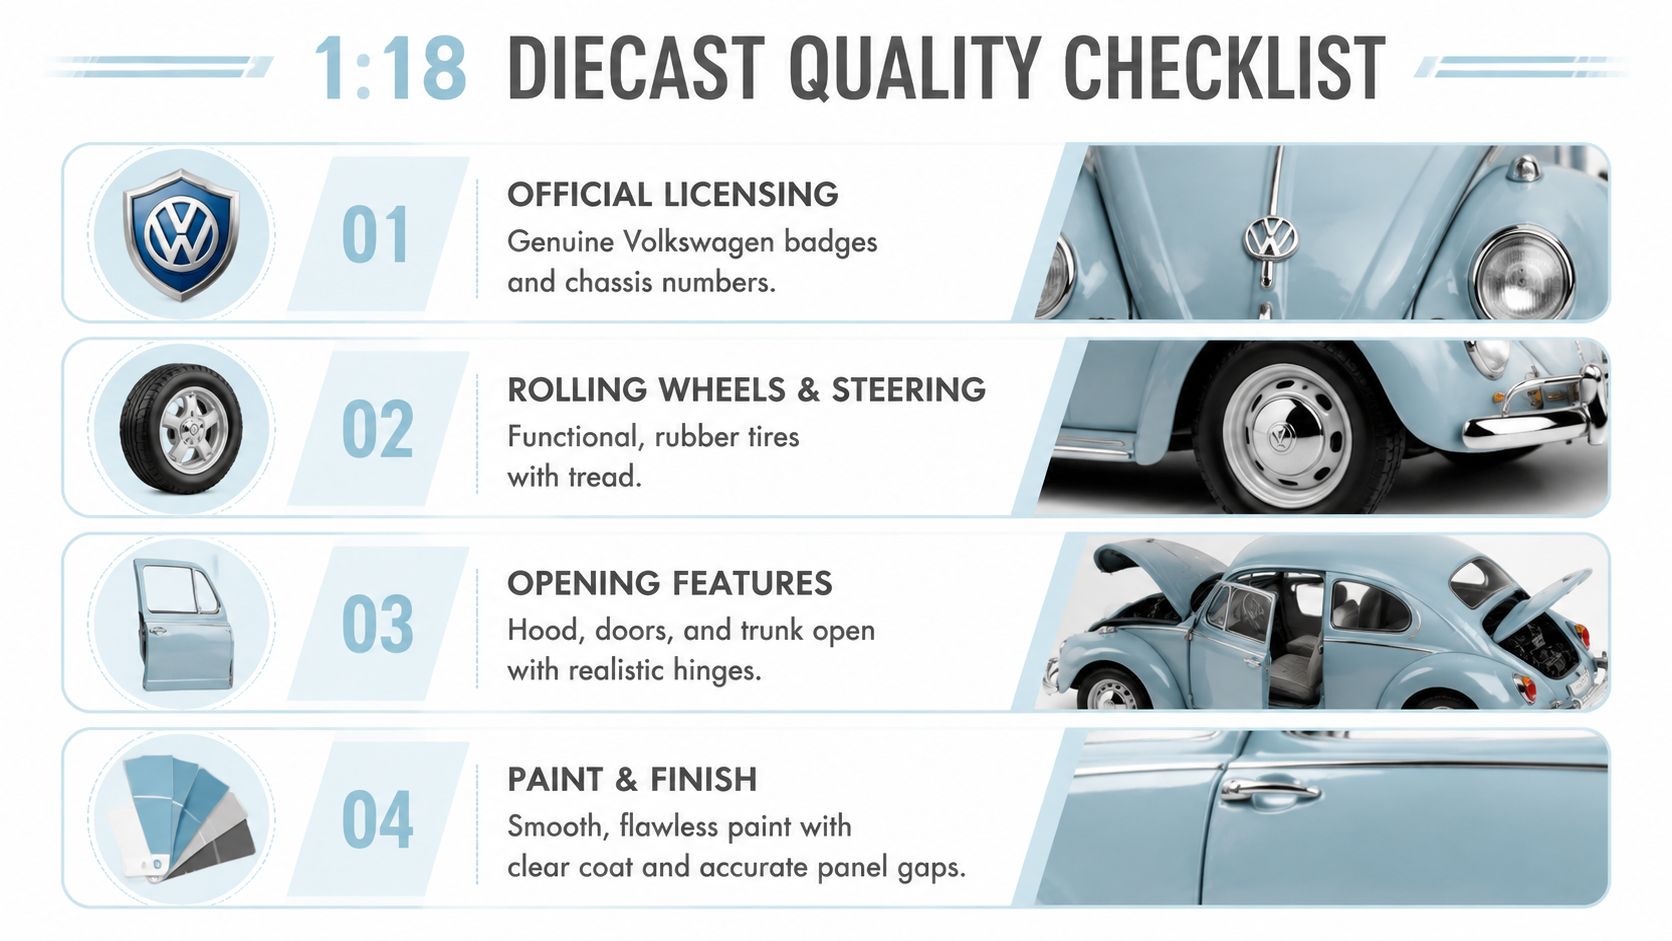
An infographic detailing three essential steps for identifying authentic diecast Volkswagen Kombi model van collectibles.

Choose the scale for the display

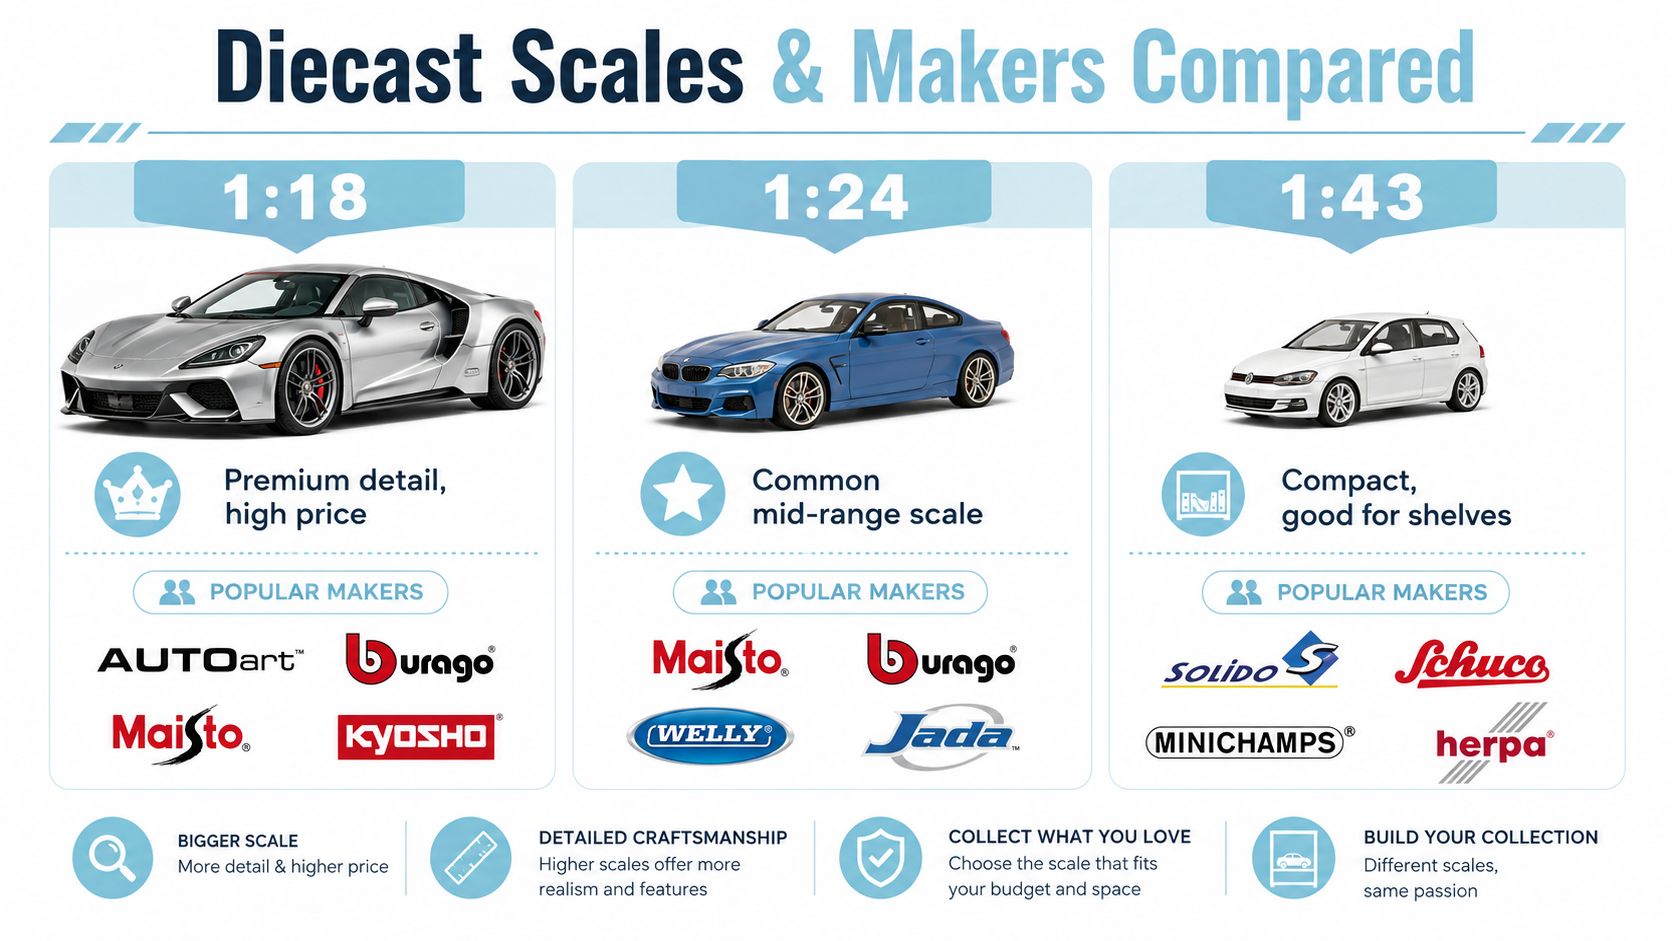
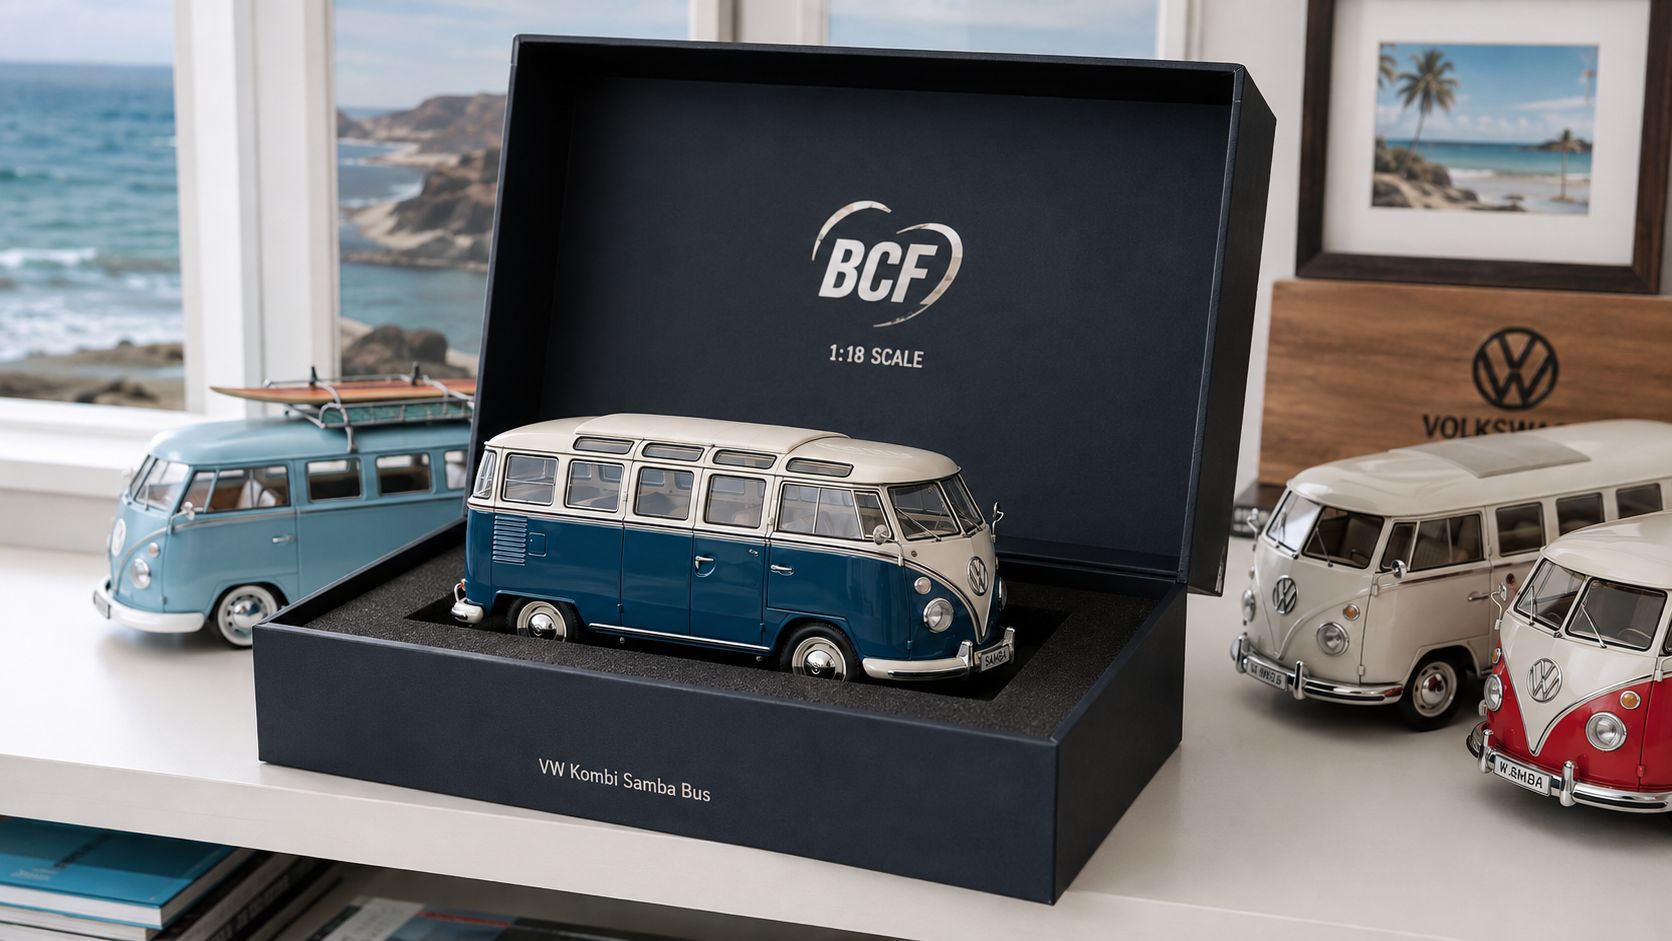
1:18 models suit a dedicated shelf where you want visible cabin, body and trim detail. They need more room, but they make a strong centrepiece.

1:24 is a useful middle ground for collectors who want presence without giving an entire cabinet to one vehicle. It also pairs neatly with other classic Volkswagen models.

1:32 works well for a starter collection, a desk display or a younger enthusiast's first model. It allows several colourways and body styles to sit together without overwhelming the space.

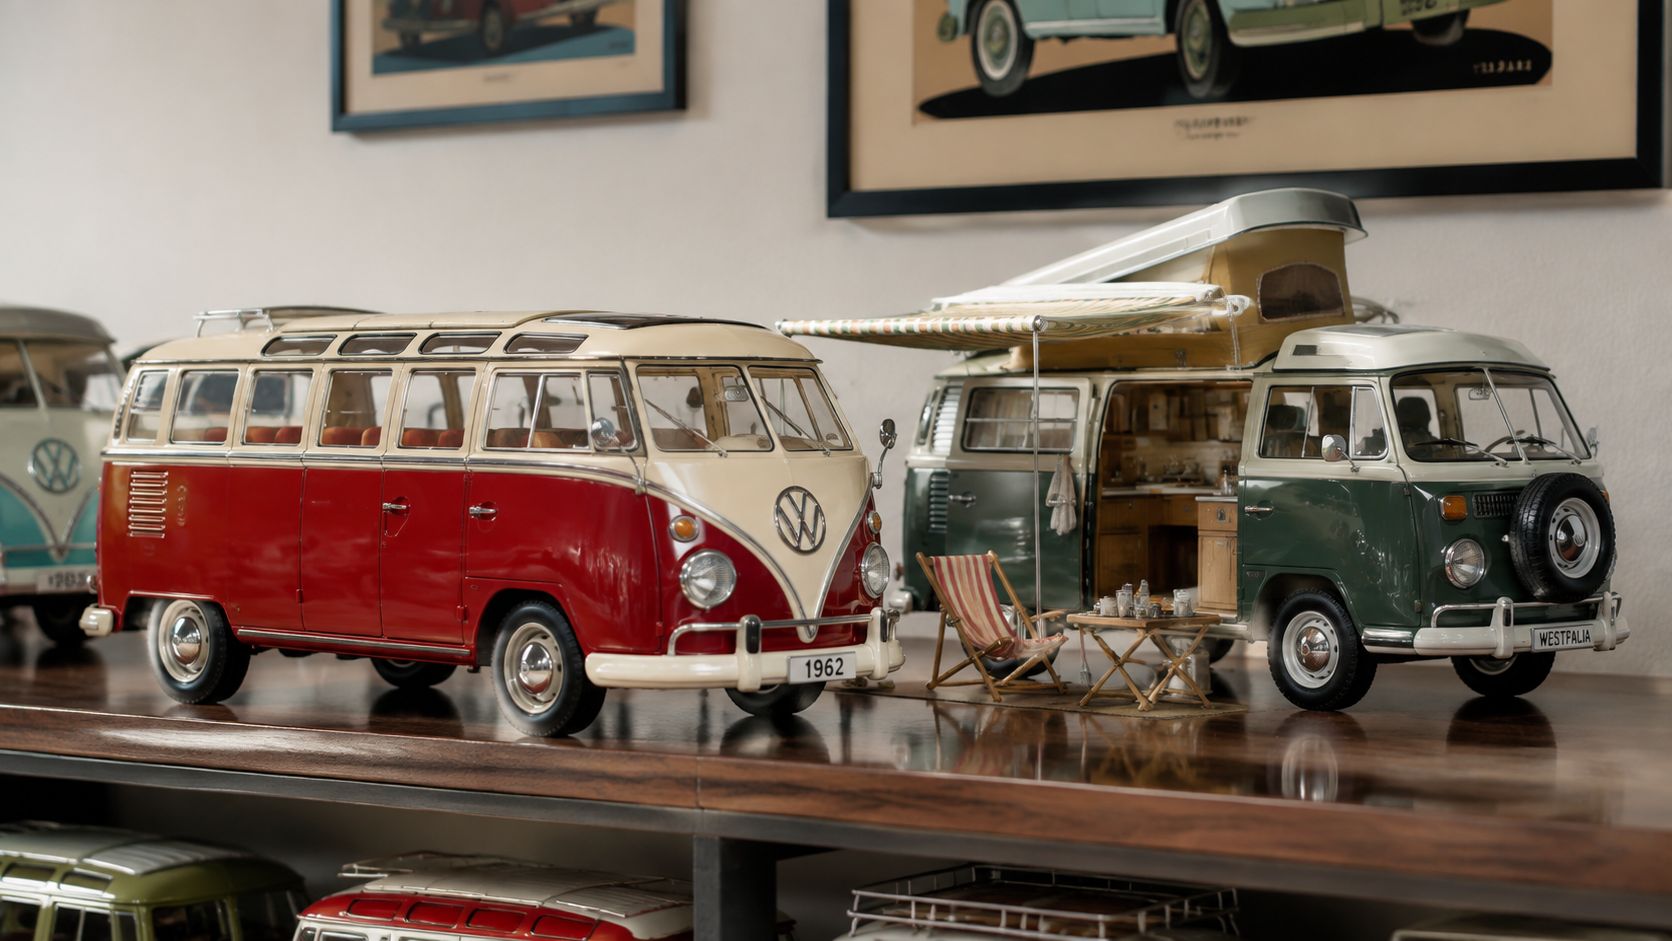
Colour matters, too. White-over-blue paint, soft seaside tones and Flower Power graphics all connect strongly with the Kombi's surf and travel identity. You could build a beach scene with miniature boards, a camper display with a road-trip theme, or a simple Volkswagen shelf pairing a Samba Bus with a Volkswagen model car collection.

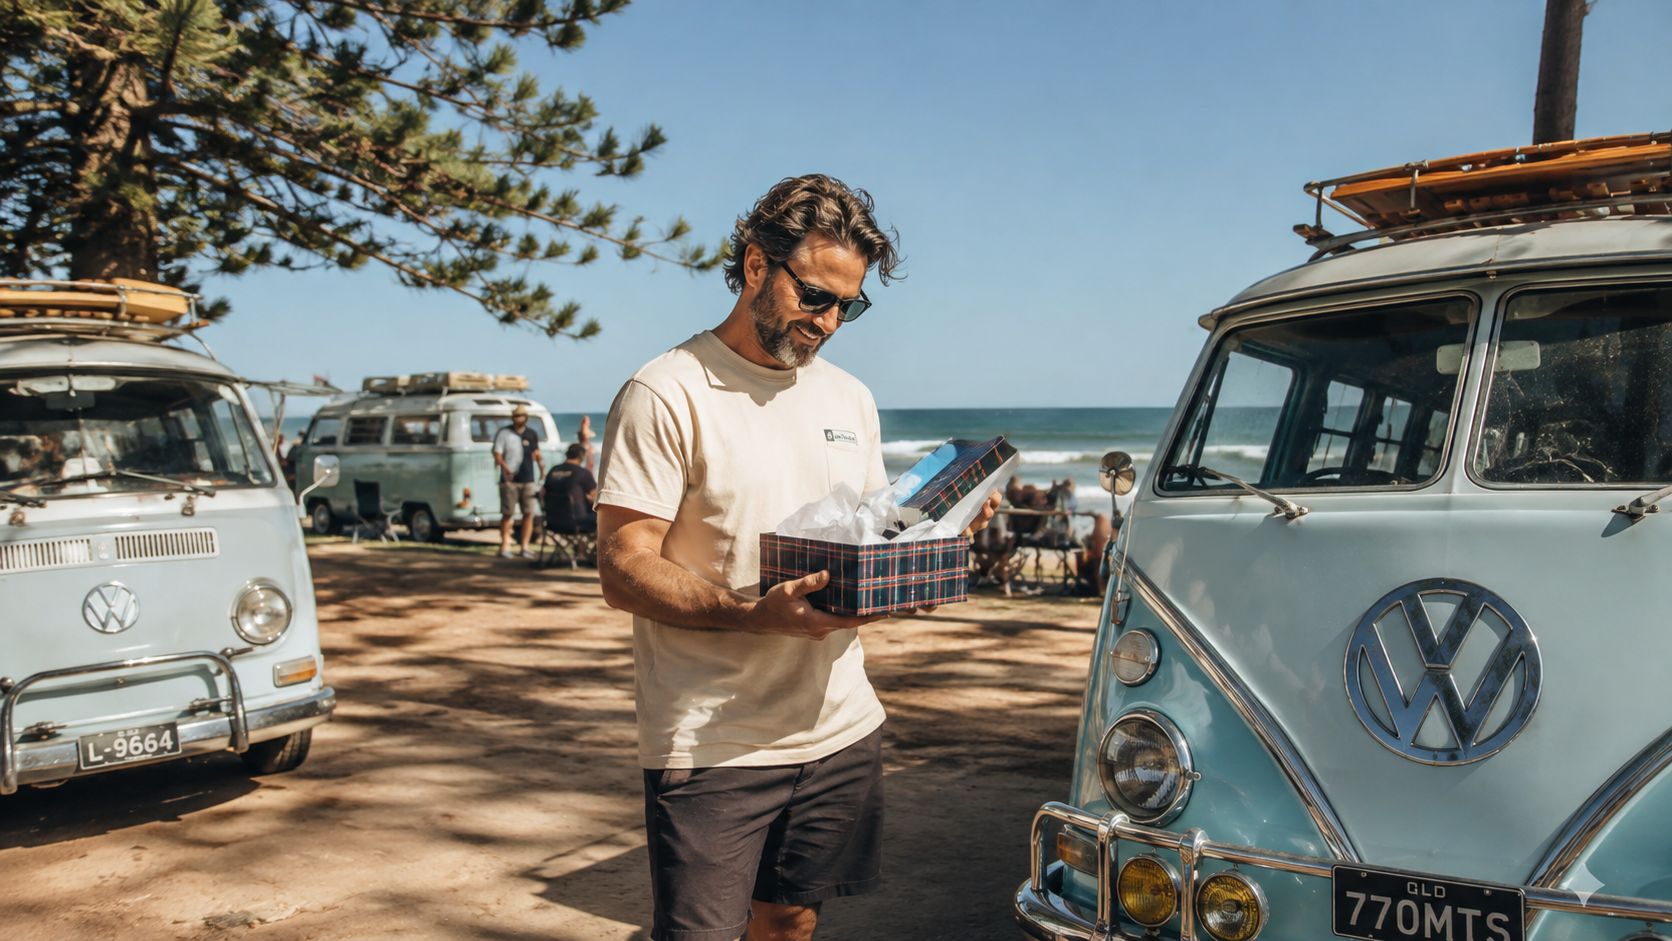
A licensed model also makes a thoughtful gift for a Volkswagen fan, retirement celebration or office desk. Before buying, inspect the box, check the scale, confirm the body material and look for any certificate or licensing information supplied by the maker.

The short video below offers another visual way to appreciate the details collectors look for.

Bringing the Kombi Story Home

The Kombi began with a practical sketch, became a versatile Type 2, and found a second identity on Australian beaches. Its cab-over shape made the interior useful, its rear engine gave it a distinctive character, and its many generations created a family tree that rewards closer inspection.

That makes a diecast model more meaningful than a generic ornament. A well-chosen Volkswagen Kombi diecast in Australia can represent a particular memory, whether that's a first camping trip, a favourite surf van at a car show or a family story about an old bus that has long since disappeared.

Build a collection with a story

Start with one model that speaks to you. A Samba Bus diecast suits a display focused on classic passenger vans, while a Beetle model makes a natural companion because both vehicles share the same period charm and air-cooled Volkswagen heritage.

From there, consider a small theme:

  • A T1 and T2 pairing to show the change from split windscreen to bay window.
  • A surf display with boards, beach colours and a coastal photograph.
  • A glass-case timeline running from early Type 2 styling to later Transporter forms.
  • A gift set pairing a model with a road-trip photo book or a framed family image.

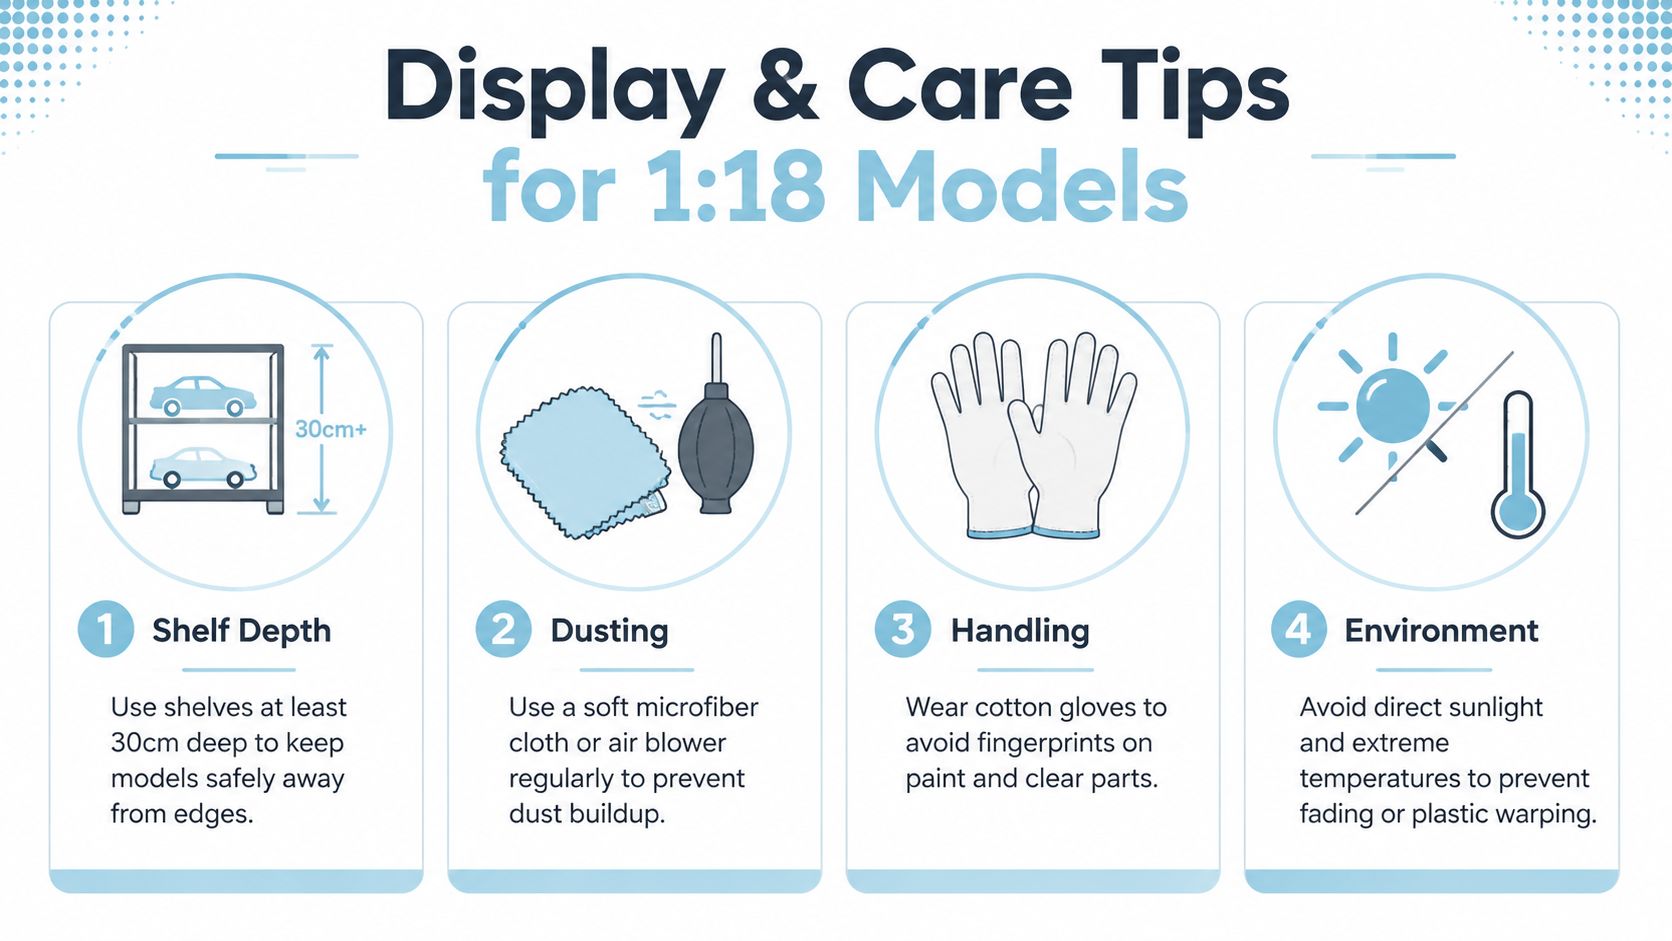
You don't need a huge collection to make an impact. Choose licensed pieces, protect the packaging where possible and keep the display away from harsh sunlight and damp conditions. The best collection feels personal, organised and easy to enjoy.


Volkswagen Memorabilia brings together officially licensed VW diecast models, Kombi and Samba Bus collectibles, Beetle models, coastal décor and thoughtful gifts for Australian enthusiasts. Visit Volkswagen Memorabilia to explore the collection and choose a Kombi model that keeps your own Volkswagen story rolling.

Light Commercial Vehicles Explained: A Practical Guide

You're standing beside a ute with a tray full of tools, or watching a courier van thread its way down a suburban lane, and someone asks a deceptively simple question: what makes a vehicle “light commercial”? The answer isn't just the badge on the grille. It comes down to how the vehicle is built, what it can carry, how it's used, and where it sits within Australia's weight and efficiency rules.

That definition includes the modern workhorse outside a building site, the enclosed van delivering parcels, and the classic Volkswagen Kombi carrying surfboards, camping gear or a small business's stock. Understanding the category makes it easier to compare payloads, licences, towing, running costs and heritage, especially when a practical work vehicle also happens to become a cultural icon.

What Counts as a Light Commercial Vehicle

A plumber's ute might spend the morning parked outside a renovation with copper pipe and tools in the tray, then head home with camping gear on the weekend. A courier's van needs a different layout, but the purpose is similar: move equipment, goods or people as part of a working routine.

A light commercial vehicle, or LCV, is generally designed around work rather than private passenger transport. In Australia's federal vehicle framework, the category includes utes, vans and heavy off-road passenger vehicles built on ladder-frame or body-on-frame construction, with a gross vehicle mass up to 4.5 tonnes and towing capacity of at least 3 tonnes, according to the Australian Government's explanation of the New Vehicle Efficiency Standard.

That formal definition sits alongside practical design clues:

  • Load-focused construction: Rear areas may be reinforced to handle tools, stock or equipment.
  • Suspension and braking: Components are selected to cope with regular payloads and commercial duty.
  • Tyres and wheels: Commercial-grade specifications often prioritise load capacity and durability.
  • Cabin layout: Panel vans and many work vans trade rear seating for enclosed cargo space.
  • Flexible use: Dual-cab utes and people-moving vans can serve a business during the week and a family on Saturday.

The word light can mislead newcomers. It describes the vehicle's position in the commercial weight system, not whether it's weak, small or incapable. A work van may have serious towing duties, while a compact ute might be easier to manoeuvre but less useful for bulky freight.

The important question is what the vehicle weighs when fully loaded, not how imposing it looks at a car show. That leads to Australia's GVM framework.

Weight Classes and How Australia Defines an LCV

Australia's central reference point is 4.5 tonnes of Gross Vehicle Mass, or GVM. GVM means the maximum permitted weight of the vehicle when it's ready for the road, including its body, fuel, passengers, accessories and payload. It isn't the same as kerb weight, which describes the vehicle before you add your working load.

Most utes and vans sit below that ceiling. Heavier vans, cab chassis models and specialised work vehicles may approach it, while vehicles above the threshold move into the heavier commercial-vehicle licensing framework. A trailer also changes the calculation, because the vehicle must remain within its own ratings while the combination must comply with towing and braking rules.

A practical weight comparison

GVM Range Typical Vehicles Licence Implication
Below 3.5 tonnes Most utes, panel vans and everyday work vans Commonly driven on a standard car licence, subject to state and territory rules
3.5 to 4.5 tonnes Heavier-duty vans, cab chassis vehicles and specialised workhorses A standard licence may still apply up to the relevant GVM, but confirm the registration and state requirements
Above 4.5 tonnes Larger commercial trucks and heavier vehicle combinations Heavy-vehicle licensing requirements generally apply

The 3.5-tonne point is also familiar to buyers comparing Australian models with European terminology. European classifications commonly distinguish lighter goods vehicles from heavier commercial categories, although local registration, licence and compliance rules still govern what you can drive here.

Towing adds another layer. A heavier trailer can require an electric brake controller, and the combination's total mass may affect licence requirements. Don't rely on a salesperson's shorthand such as “one-tonne ute” or “big van”. Check the vehicle's GVM, payload, gross combination mass and braked towing rating in the manufacturer documentation.

Practical rule: Treat the compliance plate and official specifications as the starting point. The ute's advertised towing figure doesn't tell you how much payload remains once passengers, accessories and a tow ball are included.

These ratings influence insurance, registration, body fit-outs and where the vehicle can operate. A custom service body may add useful storage while reducing available payload, so weight planning belongs at the beginning of the purchase process.

Body Types from Utes to Chassis Cabs

At a weekend job, a ute can swallow timber and ladders that would never fit inside a van. On a courier run, the priorities change: dry, secure cargo and quick access matter more than an open tray. Both vehicles are light commercial vehicles, but their body types suit different work.

Body Type Best Suited To Main Advantage Main Trade-off
Single-cab ute Tools, timber, rural work and bulky loads Open tray access and straightforward loading Less cabin space and limited weather security
Dual-cab pickup Mixed work and family use Passenger seating with useful tray capacity More cabin length can reduce tray space
Panel van Couriers, florists, trades and stock delivery Enclosed cargo with side-door access Cargo volume is fixed by the body
Cab chassis Tippers, service bodies and refrigerated units Flexible bodybuilder options Fit-out adds cost and consumes payload
Minivan or people mover Commercial passenger transport and shuttle work Flexible seating and passenger capacity Less room for bulky goods

A traditional ute is a practical choice for a tradie carrying timber, ladders or livestock. The tray accepts awkward loads, and tie-down points or a weather cover can make it more useful. Rain and opportunistic theft remain risks because the cargo area is open.

A dual-cab pickup adds rear seats for workmates or family. That makes it a useful compromise for buyers who use one vehicle during the week and weekend. The longer cabin leaves less room for tray cargo than a single-cab configuration, so check both passenger and load needs before choosing.

Panel vans keep courier parcels, flowers, tools and stock under cover. Their upright cargo area works well with shelving and drawers, while side doors make loading easier when vehicles are parked closely along a suburban street. The trade-off is fixed cargo volume. A tall item may fit easily, but an unusually wide load can defeat the van's layout.

A cab chassis arrives with the rear body still to be selected. A bodybuilder can add a tray, tipper, service module or refrigerated unit. Each addition changes the vehicle's mass, balance and remaining payload, so the fit-out should be planned before purchase.

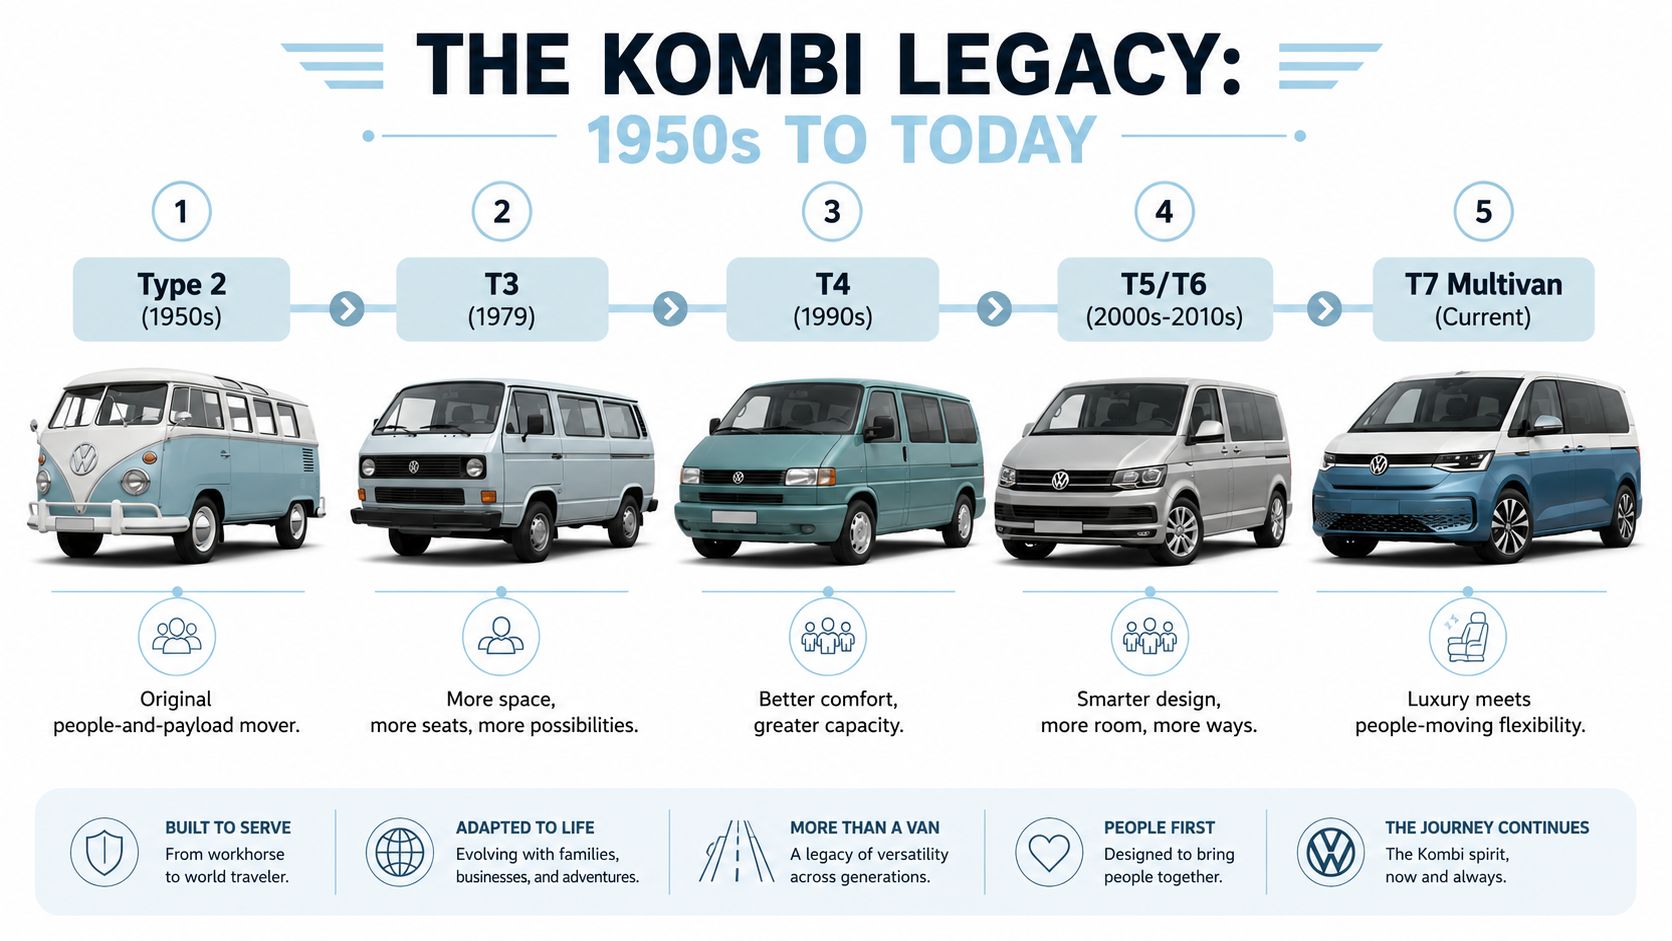
A timeline graphic showcasing the evolution of Volkswagen Kombi vans from the 1950s to the current T7 model.

The Caddy Maxi range shows how a compact van can favour urban manoeuvrability while preserving useful load space. The classic Kombi applies the same practical idea in a more nostalgic shape, carrying people, payload and personality in one adaptable package.

The Kombi Story and How an LCV Became an Icon

At a weekend car show, a Kombi might carry surfboards, camping gear or a family in period dress. Its cheerful shape can distract from the useful idea underneath: the Volkswagen Type 2 turned a simple rear-engined platform into a van, bus, pickup and people mover.

The early split-window Kombi reached Australia in the 1950s. Its upright cabin, friendly face and adaptable interior suited trades, tourism and family travel. That combination explains why the Transporter belongs in both the working-vehicle story and Australia's motoring culture.

There is a fascinating local detail behind the badge. Volkswagen Beetles weren't sold in Australia until 1954, while Australian CKD-assembled cars from 1954 to 1959 and 1968 to 1976 could lag German-built models by up to six months, according to the Volkswagen chassis reference from Club VeeDub.

The bay-window era widened the Kombi's appeal. More glass and a welcoming shape connected it with surf culture, road trips and relaxed coastal travel, yet the van still performed ordinary work. It carried tools, goods, passengers and holiday equipment, much like a practical room on wheels that could change jobs from one day to the next.

Later generations developed that formula. The T3 kept the recognisable boxy character, while the water-cooled T4 introduced a major mechanical change and expanded the Transporter's commercial role. The T5 and T6 refined capacity, comfort and fleet usefulness. The current T7 Multivan places more emphasis on flexible people moving, showing how the lineage can evolve while retaining its practical roots.

An infographic detailing Australian light commercial vehicle licensing requirements and GVM limits based on vehicle size.

A Volkswagen Type 2 heritage model reflects that dual identity. The Kombi can serve as tradesperson's transport, tourism vehicle, surf icon or restoration project, while remaining recognisable as an LCV.

That longevity drives its following. Hobbyists preserve original interiors, body lines and period details, and restorers keep the working-vehicle story visible. The Kombi became an icon because it looked friendly while carrying real people and real loads.

Licensing Rules and Emissions Standards Explained

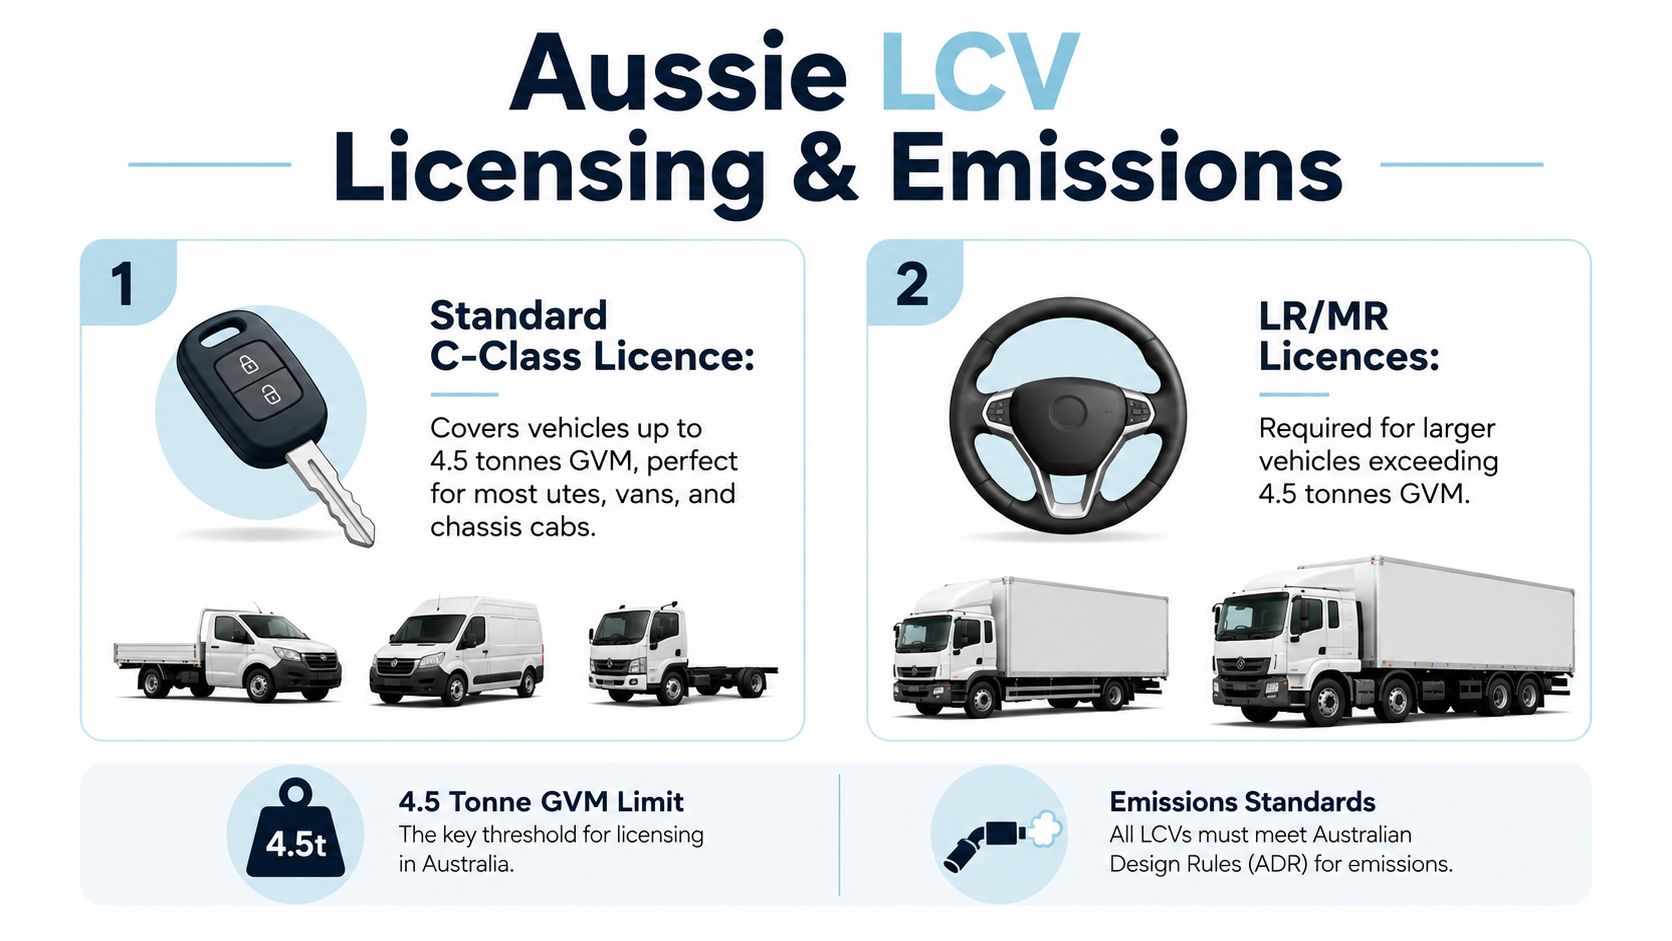
At a weekend job, the ute is loaded, a trailer is coupled and the question becomes practical: can your licence cover the whole combination? Start with the vehicle's recorded GVM, not its body style. A ute, van or chassis cab can usually be driven on a standard C-class licence while it remains within the applicable light-vehicle limit, but state and territory rules can differ once towing and vehicle combinations enter the discussion.

The 4.5-tonne GVM threshold is the practical dividing line for the federal LCV definition. Above it, drivers generally move into heavy-vehicle licensing categories such as LR or MR. A trailer can change the licensing picture even when the tow vehicle remains below that threshold, so check the relevant state transport authority before work begins.

Licence check: Match your licence to the vehicle's recorded GVM and the combination's rules. A familiar ute does not automatically make every trailer legal.

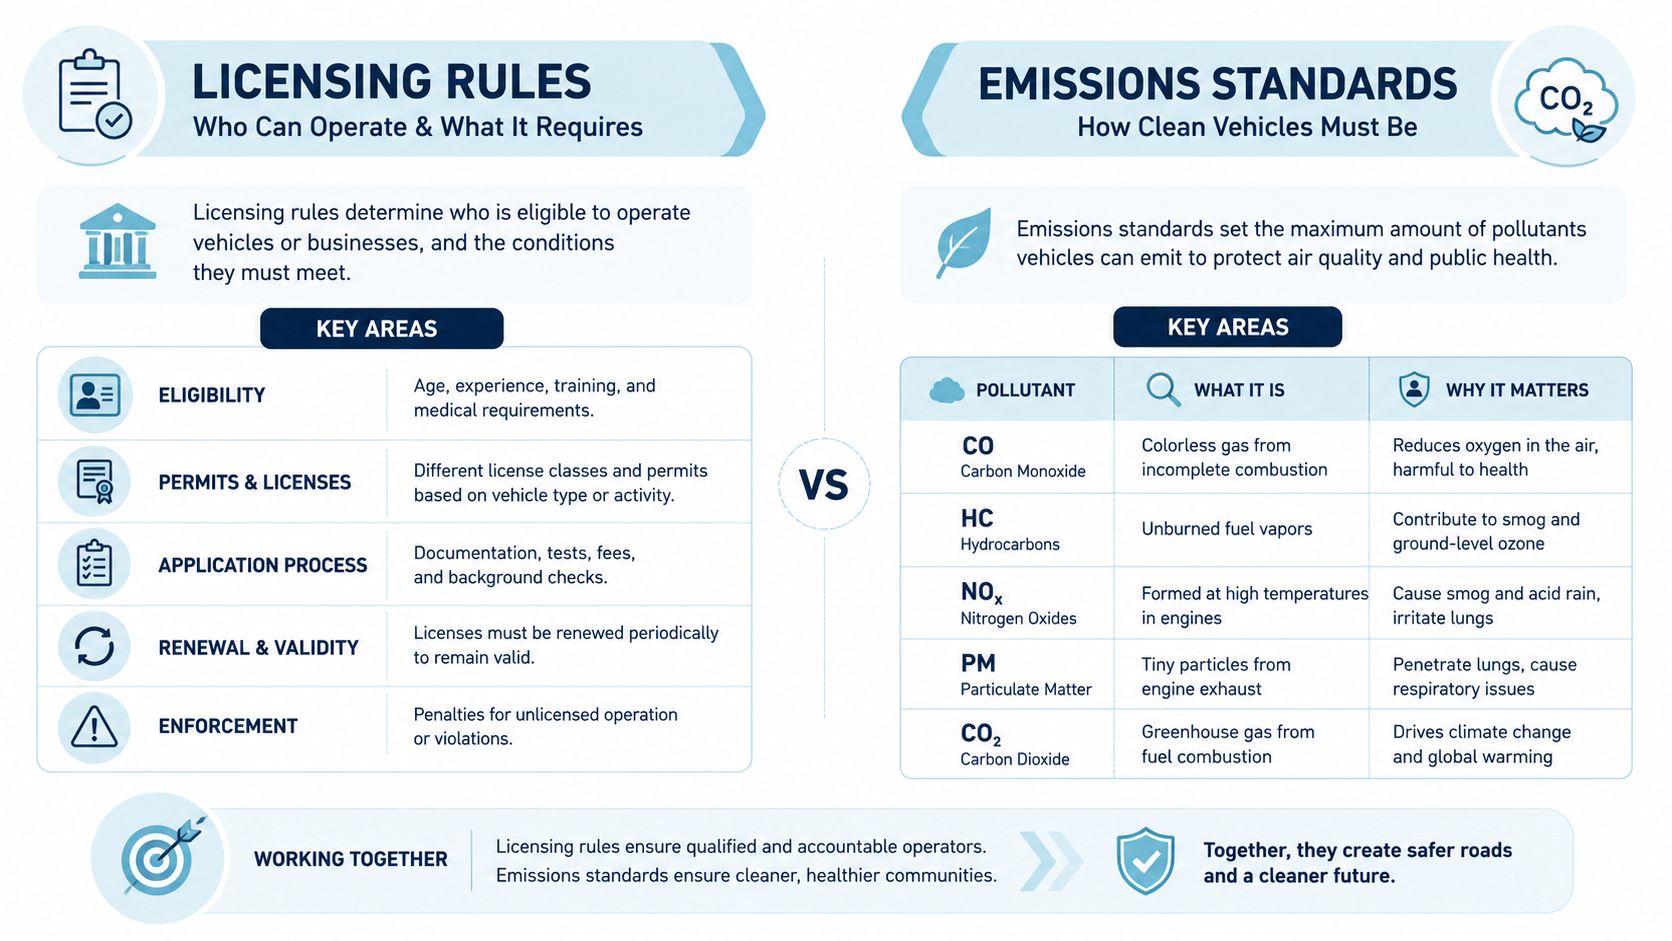
Emissions compliance now forms part of the buying decision. Australia's New Vehicle Efficiency Standard applies fleet-average CO2 targets to new vehicles, with LCVs following a separate, mass-adjusted curve. Published targets list 210 gCO2/km for LCVs in 2025, falling to 110 gCO2/km by 2029, with the figures and breakpoints set out in this Australian LCV efficiency-target summary.

The framework uses lower and upper mass breakpoints of 1,500 kg and 2,400 kg, with a reference MIRO of 2,155 kg for 2025 and 2026. In plain English, a heavier work van is assessed differently from a lighter passenger vehicle, while manufacturers still face pressure to improve fleet-average CO2 performance.

The government says the standard will roughly halve emissions from new LCVs by 2030, while preserving high-tow and high-mass use cases, according to its New Vehicle Efficiency Standard announcement.

An infographic comparing licensing rules for vehicle operators and emissions standards for vehicle pollution control measures.

For fleet buyers, diesel, petrol and electric vans each suit different jobs. Compare route length, charging access, payload, towing, downtime and servicing support. A guide to electric vans in Australia can frame that technology discussion, but the right choice still depends on the actual duty cycle.

Buying and Maintaining the Right Light Commercial Vehicle

The right LCV starts with the job, not the largest body or engine available. A plumber's van needs organised access to tools, while a lawn care specialist may need an open tray for soil, equipment and dirty loads. Measure what you carry, then calculate payload with passengers, fuel, accessories and body modifications included.

Match the vehicle to the work

Use Case Key Body Type Must-Have Feature Maintenance Priority
Plumbing or electrical service work Panel van or service-body ute Shelving, secure storage and side access Brakes, suspension and door hardware
Landscaping and rural work Single-cab ute or cab chassis Tie-downs, washable tray and suitable towing capacity Tyres, clutch and underbody inspection
Mixed work and family travel Dual-cab pickup Practical rear seating and payload discipline Scheduled servicing and tray accessories
Urban delivery Panel van Turning space, cargo organisation and easy loading Tyres, brakes and sliding-door rollers
Refrigerated or specialised transport Cab chassis Correct bodybuilder integration and load control Cooling equipment, payload and electrical systems

A new vehicle offers a current warranty, planned servicing and the opportunity to specify the body from the beginning. A used LCV can provide better value, especially when parts are readily available and the model has established resale demand. Commercial use, however, can hide wear that a short test drive misses.

Check the logbook and inspect the chassis carefully. Look at the clutch, brakes, suspension, tyres and load area, including signs of uneven wear, impact or repeated overloading. A pre-purchase inspection may find repairs concealed by a tidy exterior.

Businesses should compare finance structures such as a chattel mortgage or novated lease with professional advice. A smaller repayment does not necessarily mean a lower overall cost.

Maintenance needs to match the workload. Diesel owners should understand AdBlue requirements where fitted, while EV operators need a practical battery and charging routine. Every LCV still requires scheduled servicing, tyre checks and attention to brake wear.

A vehicle carrying light parcels will usually place less strain on its components than one loaded heavily each day. Keep the load within the vehicle's rated limits, secure it properly and treat unusual tyre, brake or suspension wear as an early warning rather than a minor nuisance.

Common Misconceptions and What to Do Next

A standard car licence doesn't mean every trailer combination is automatically covered. The vehicle's GVM, the trailer's mass, braking equipment and state or territory rules all matter. A driver who checks only the tow-ball rating can still miss a payload or combination limit.

Diesel isn't always the obvious answer, either. It can suit sustained loads and longer routes, while petrol may make sense for shorter urban work where purchase, servicing and usage patterns point in another direction. Electric powertrains can suit predictable routes with reliable charging, but payload, range and downtime still need careful planning.

GVM ratings aren't marketing fluff. They tell you how much the vehicle can legally and safely weigh when loaded, and accessories such as bull bars, canopies, roof racks and service bodies use part of that allowance. The badge doesn't define the category by itself. Mass, payload, construction and intended use do the heavy lifting.

That's why a weekend warrior in a classic Kombi and a tradesperson in a modern Transporter can share the same broad LCV story. One may carry surfboards and camping gear, the other may carry tools and stock, but both rely on a vehicle designed to combine transport with useful working capacity.

Whether you're sizing up a work van, restoring a Splittie or curious about how light commercial vehicles fit together, take the time to compare the practical figures with the heritage that makes these machines special. The best conversations often start beside a well-used van, with someone opening the doors and showing what it has carried.


Volkswagen Memorabilia offers licensed VW diecast models and memorabilia that celebrate the same Kombi, Beetle and Samba Bus heritage behind Australia's most recognisable people movers. Visit Volkswagen Memorabilia to browse VW Kombi diecast Australia favourites, Volkswagen Beetle models and thoughtful gifts for the enthusiast who still loves a van with a story.

Volkswagen Van Wall Art That Turns Any Room Into a Classic

You've just walked into a room that feels a little too ordinary. The walls are clean, the furniture works, but something's missing. Then you spot a vintage Kombi print above the console, and suddenly the room has a destination. The faded colour, rounded roofline and familiar split-window shape bring back beach holidays, roadside stops and sunny Sunday car meets without taking up a single shelf.

That's the charm of Volkswagen van wall art. It isn't just a picture of a vehicle. Done well, it becomes a piece of Australian motoring culture, a conversation starter and a practical way to give a coastal, retro or garage-inspired room some personality.

Walking Into a Room That Greets You with a Kombi

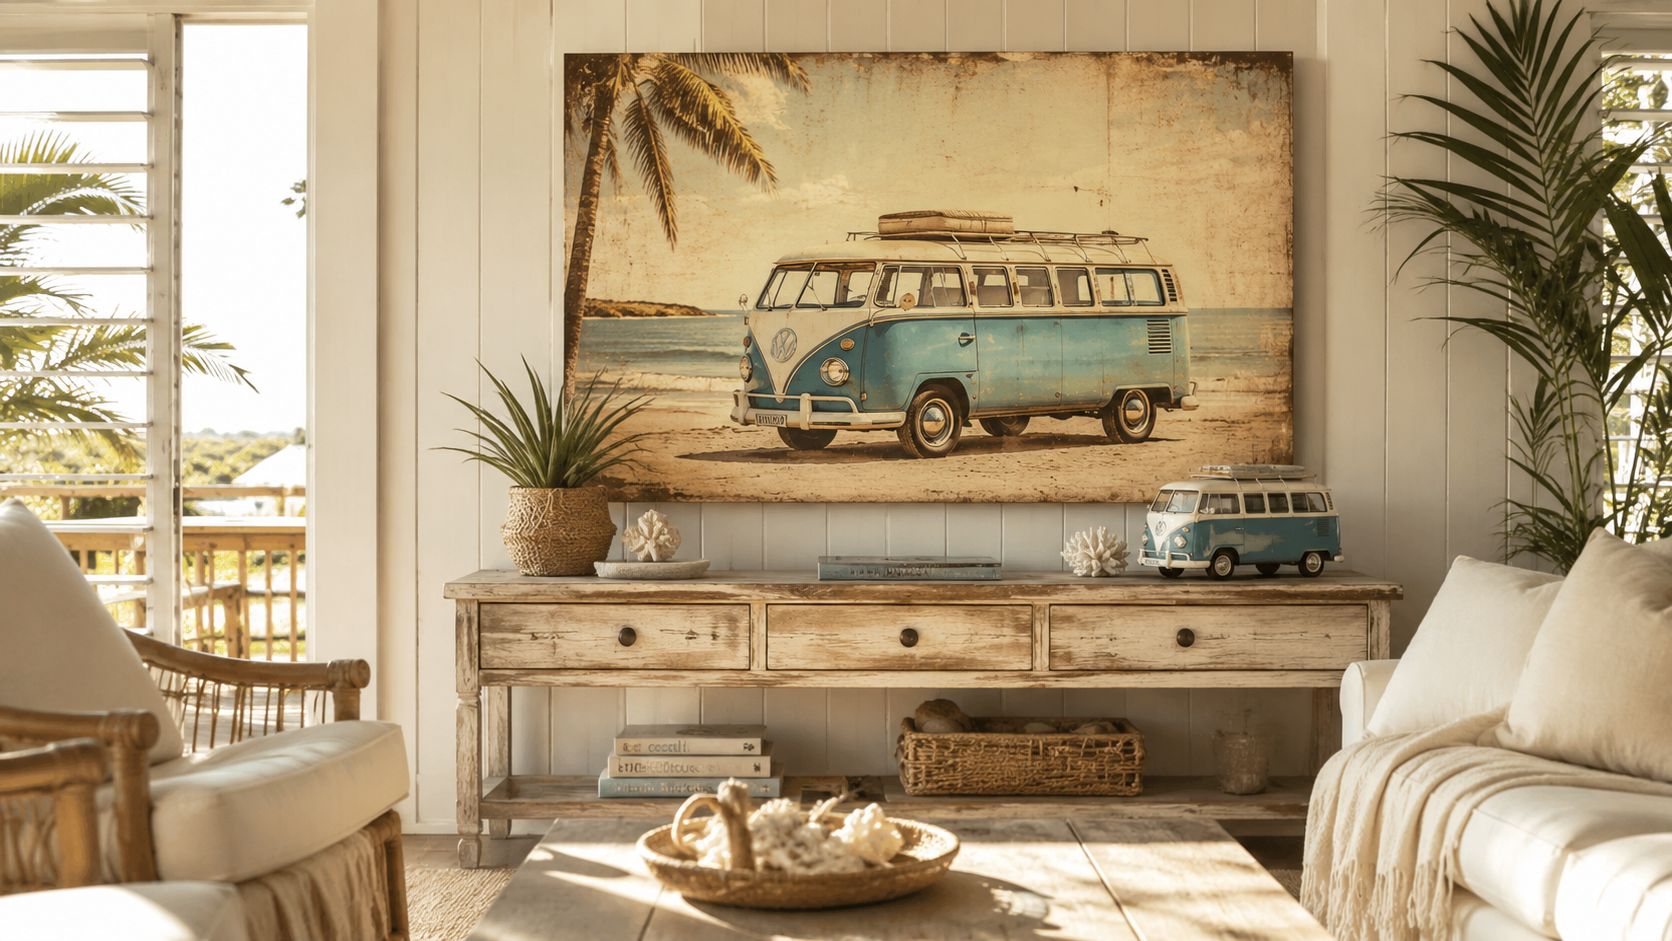
The light is warm in a Queensland beach shack. Sand has found its way across the floorboards, faded teal cushions sit slightly crooked on a linen sofa, and a weathered timber console holds a stack of old travel books. Above it hangs a vintage Volkswagen van, its rounded silhouette glowing against a simple background.

A visitor slows before reaching the room. Their eyes lift, their smile arrives first, and then comes the story. Someone remembers a family road trip. Someone else talks about a Kombi spotted at a coastal car show. The artwork has done more than fill blank plaster. It has given the room a shared memory.

A rustic coastal living room featuring a large vintage Volkswagen van wall art piece above a wooden console table.

That emotional pull has deep roots in Australia. The first Type 2 Volkswagens reached Australia in 1954, with kits from Germany assembled at Clayton South. Volkswagen took over local assembly in 1958, and Australian Kombi production continued at the Melbourne Clayton factory from 1964 to 1977, as recorded by Club VeeDub's Australian Volkswagen history.

The Kombi's visibility wasn't limited to weekend adventures. In 1975, Australian buyers purchased 8,974 Kombis, representing 43% of the Australian 1-tonne van market, according to the same historical record. That combination of workhorse usefulness, local production and surf-culture nostalgia explains why a van image feels especially at home in an Australian interior.

The Main Formats That Bring a Van to Life on Your Wall

A Kombi can feel completely different depending on the surface carrying it. A pressed metal sign gives the van a garage character, while a soft canvas print makes the same shape feel relaxed enough for a living room.

Format Material Best Room Durability Mounting Need
Embossed metal sign Powder-coated or printed steel Garage, study, man cave Strong and easy to wipe Suitable fixings for the weight and wall type
Gallery-wrapped canvas Cotton canvas with printed inks Living room, bedroom, beach house Good with sensible light protection Hooks, wire or a cleat for larger pieces
Framed print or poster Paper print with timber or metal frame Hallway, office, contemporary room Depends on glazing and print finish Picture hook or wall anchor
Vinyl decal or mural Adhesive vinyl Rental, children's room, feature wall Flexible but surface-dependent Clean, smooth wall, usually no drilling

Embossed metal suits spaces where texture matters. Light catches the raised lettering and edges, and the piece can sit comfortably beside tools, surfboards, enamel badges or workshop memorabilia. It's the natural choice for someone who wants a durable, slightly industrial finish.

Canvas brings warmth. Its texture softens the hard mechanical subject, especially when the surrounding room uses linen, timber, rattan or woven rugs. A gallery-wrapped edge also avoids the visual weight of a traditional frame.

Framed prints offer the neatest, most polished presentation. They work well in a hallway or modern home where the artwork needs to feel intentional rather than themed. For a broader Volkswagen collection, a VW Beetle wall art selection can help balance a van image with the Beetle's unmistakable rounded form.

Decals and murals are the flexible option. They're useful for renters or anyone testing a bold idea before committing to a framed piece.

Practical rule: Choose metal for durability and authenticity, canvas for warmth, framed prints for refinement and decals for flexibility.

Sizing and Hanging the Piece So It Actually Fits the Room

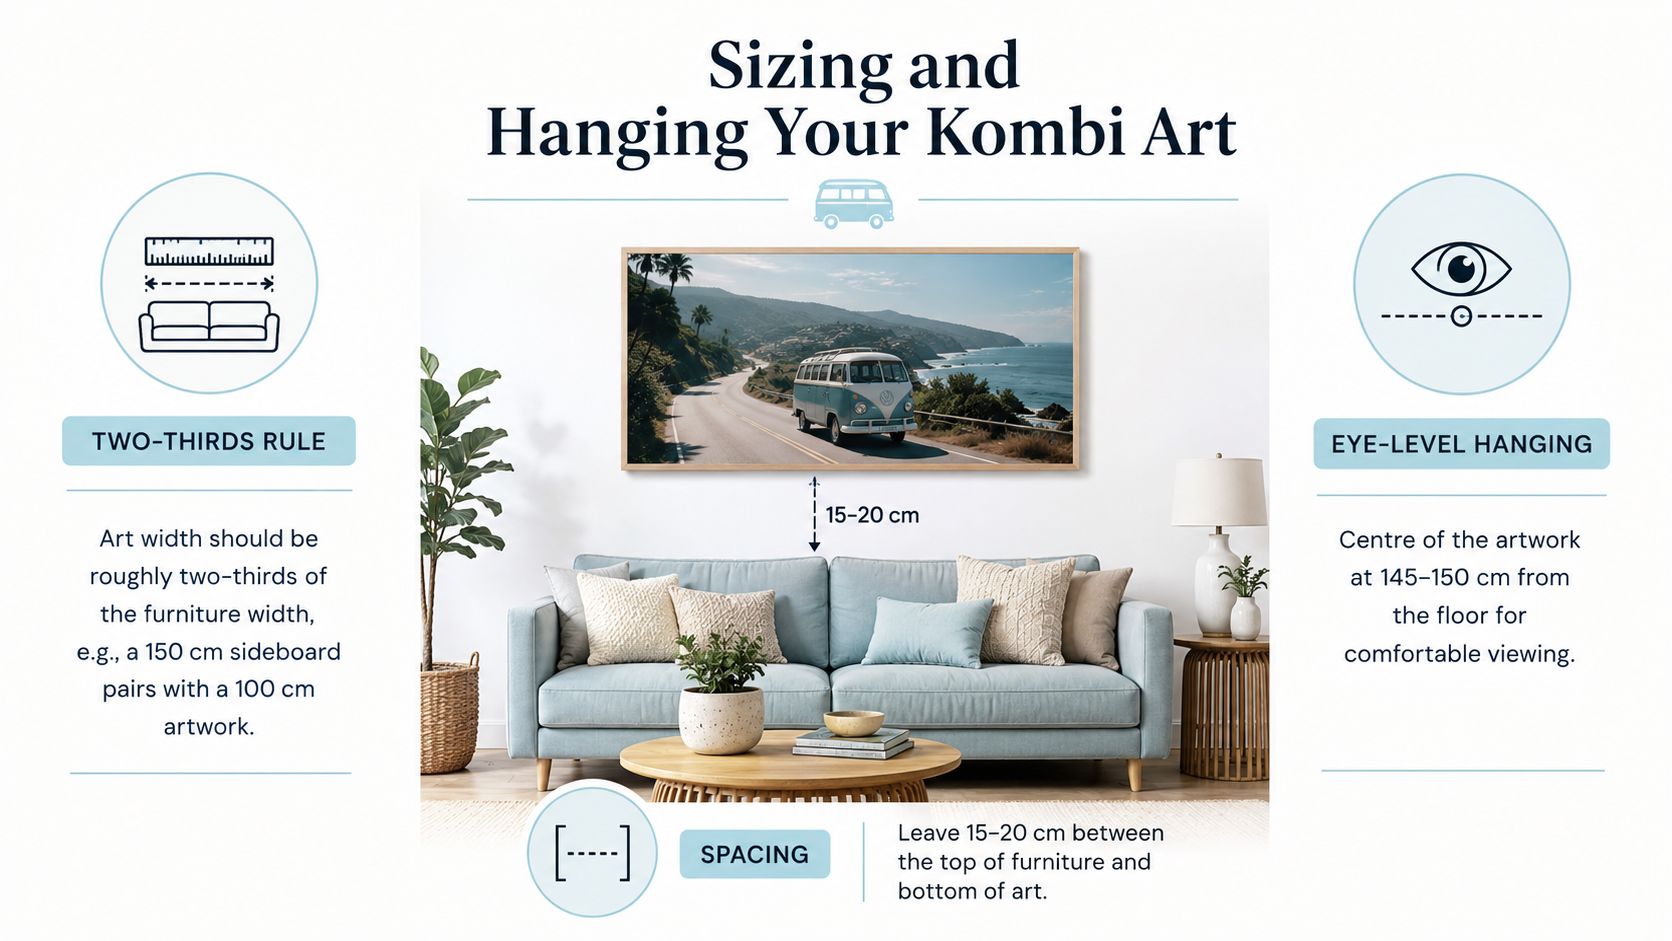
A wide Kombi print needs breathing room, but it also needs enough presence to anchor the furniture below it. Start with the width of the sideboard, console or sofa. Artwork usually looks most settled at roughly two-thirds to three-quarters of the furniture width, a proportion also recommended in Australian wall-art hanging guidance from Canvas Art Prints Australia.

For a 150 cm sideboard, a piece around 90 to 100 cm wide gives the van enough visual weight without making the arrangement feel crowded. Measure the artwork's final outer dimensions, not just the nominal print size, because a frame adds to both width and height.

Keep the lower edge of the artwork about 15 to 25 cm above furniture, particularly when the piece is wide. For a single artwork on an open wall, aim for the centre to sit about 152 cm from the floor, a benchmark based on average eye level in the same Australian guide.

Orientation matters too:

  • A wide panoramic Kombi suits a sofa, bedhead or long sideboard.
  • A tall single-van portrait works beside a doorway, in a stairwell or above a narrow hall table.
  • A group of smaller pieces needs consistent spacing, aligned centres or a clear shared baseline.

A helpful infographic demonstrating the recommended sizing and hanging placement for wall art above a sofa.

Before drilling, cut a newspaper template to the artwork's exact size and tape it to the wall. Step back from the doorway, sofa and adjacent furniture. A stud finder helps locate solid timber, while suitable wall plugs or plasterboard anchors prevent a heavy sign or framed piece from pulling loose.

The final check is simple. Does the van look connected to the furniture, or does it appear to float above it? If it floats, lower it or increase the artwork size.

Styling Volkswagen Van Wall Art in Coastal and Retro Spaces

Coastal and surf-inspired rooms already speak the Kombi's language. They use relaxed materials, sun-washed colours and objects that suggest travel, so a van artwork feels connected rather than added as an afterthought.

Over a linen sofa, try a pastel Kombi against bleached timber, neutral cushions and a woven jute rug. Let the vehicle supply the colour. You don't need every cushion, vase and print to match the van, because a small echo in a throw or ceramic accent is enough.

A retro diner corner can take a bolder approach. Pair a framed van print with red vinyl bar stools, chrome details, a jukebox image and a small neon sign. The result nods towards beach culture without turning the room into a museum display.

For a Scandi-coastal home, choose a slim black-framed canvas. Flax linen drapes, potted palms and a rattan pendant keep the composition calm, while the Kombi introduces a little road-trip character.

Interior Style Best Art Format Classic Pairings
Coastal Canvas or framed print Linen, bleached timber, jute and soft teal
Retro diner Framed print or metal sign Red vinyl, chrome, neon and checker details
Scandi-coastal Slim black-framed canvas Flax, palms, rattan and pale timber
Garage or man cave Large metal sign Exposed brick, surfboards, badges and motorsport photos
Eclectic hallway Framed print Globetrotter trunks, travel books and vintage lamps

A hallway console topped with old travel trunks makes an excellent unexpected setting. In a bathroom, a properly protected canvas can work with subway tiles, provided the room's moisture and ventilation suit the material. For more coastal decorating ideas, the coastal living room collection offers useful visual direction.

Wall Art Versus Diecast Models and Other VW Memorabilia

At a sunny Australian car meet, a full-size Kombi catches your eye from across the oval. A carefully detailed diecast bus earns attention differently. You pick it up, study the badges, paint, wheels and tiny interior, then place it back among the rest of the collection. Volkswagen van wall art and models create different kinds of connection.

A licensed model belongs on a shelf, desk or inside a glass cabinet. A Volkswagen model car collection gives a collector something tactile to handle, compare and arrange. Wall art belongs above the sofa, beside the workbench or at the end of a hallway, where its shape and colour can welcome guests before they notice smaller treasures.

The right choice depends on how you want the room to work:

  • Wall art suits someone who wants daily visual impact without adding display furniture.
  • Diecast models suit collectors who enjoy scale, detail and careful arrangement.
  • A paired display gives the room broad atmosphere and a focal object to inspect.

Scale helps with the practical decision. A 1:18 model is roughly 23 cm long, while a 1:24 model is about 16.5 cm long, according to the diecast car scale guide from Axis Frames. The larger format shows more detail, while the smaller one leaves room for several vehicles on a shelf.

A collector's diecast Kombi beneath a matching print creates a clear visual relationship. In a coastal study, framed art can carry the room's road-trip mood, while replicas on a nearby cabinet reward a closer look. A metal sign near the entry can introduce the theme before visitors reach shelves of 1:18 and 1:43 buses.

Both forms honour Volkswagen heritage. One tells the story at a glance. The other invites you to stay awhile.

Care, Mounting and Sun Protection for Australian Homes

Australian light can be beautiful and unforgiving. Keep metal signs, canvas and framed prints away from strong direct sun, especially on western walls where afternoon heat and glare can stress printed surfaces and coloured finishes.

For framed work, UV-blocking acrylic or museum-grade glass adds protection. If a canvas begins to show uneven fading, moving or rotating it can reduce its exposure pattern. Don't spray cleaner onto the artwork. A soft microfibre cloth is safer for dust, and it should be used gently.

Coastal homes need a little extra thought. Small rubber or felt standoffs behind a metal sign can create airflow between the wall and the back edge, helping reduce trapped moisture and contact with salty air. The wall itself also dictates the fixing:

  • Masonry: Use suitable wall plugs and screws.
  • Plasterboard: Use solid anchors rated for the artwork's weight.
  • Heavier canvas: A French cleat can improve support and levelling.
  • Timber frames: Check hanging points periodically as humidity changes.

Mounting habit: Check the fixings once a year, particularly in coastal rooms or spaces where the artwork is moved during cleaning.

Framing dimensions and weight deserve attention before installation. Australian framing guidance notes that a frame profile can add about 30 mm to the print's width and height, while some framed-print listings report weights from about 1.15 kg for A3 to 5.8 kg for A0. The Australian framing guide from Creative Hardt provides those metric examples for planning the final wall position and fixing strength.

Choosing the Right Piece or Gift and Bringing It Home

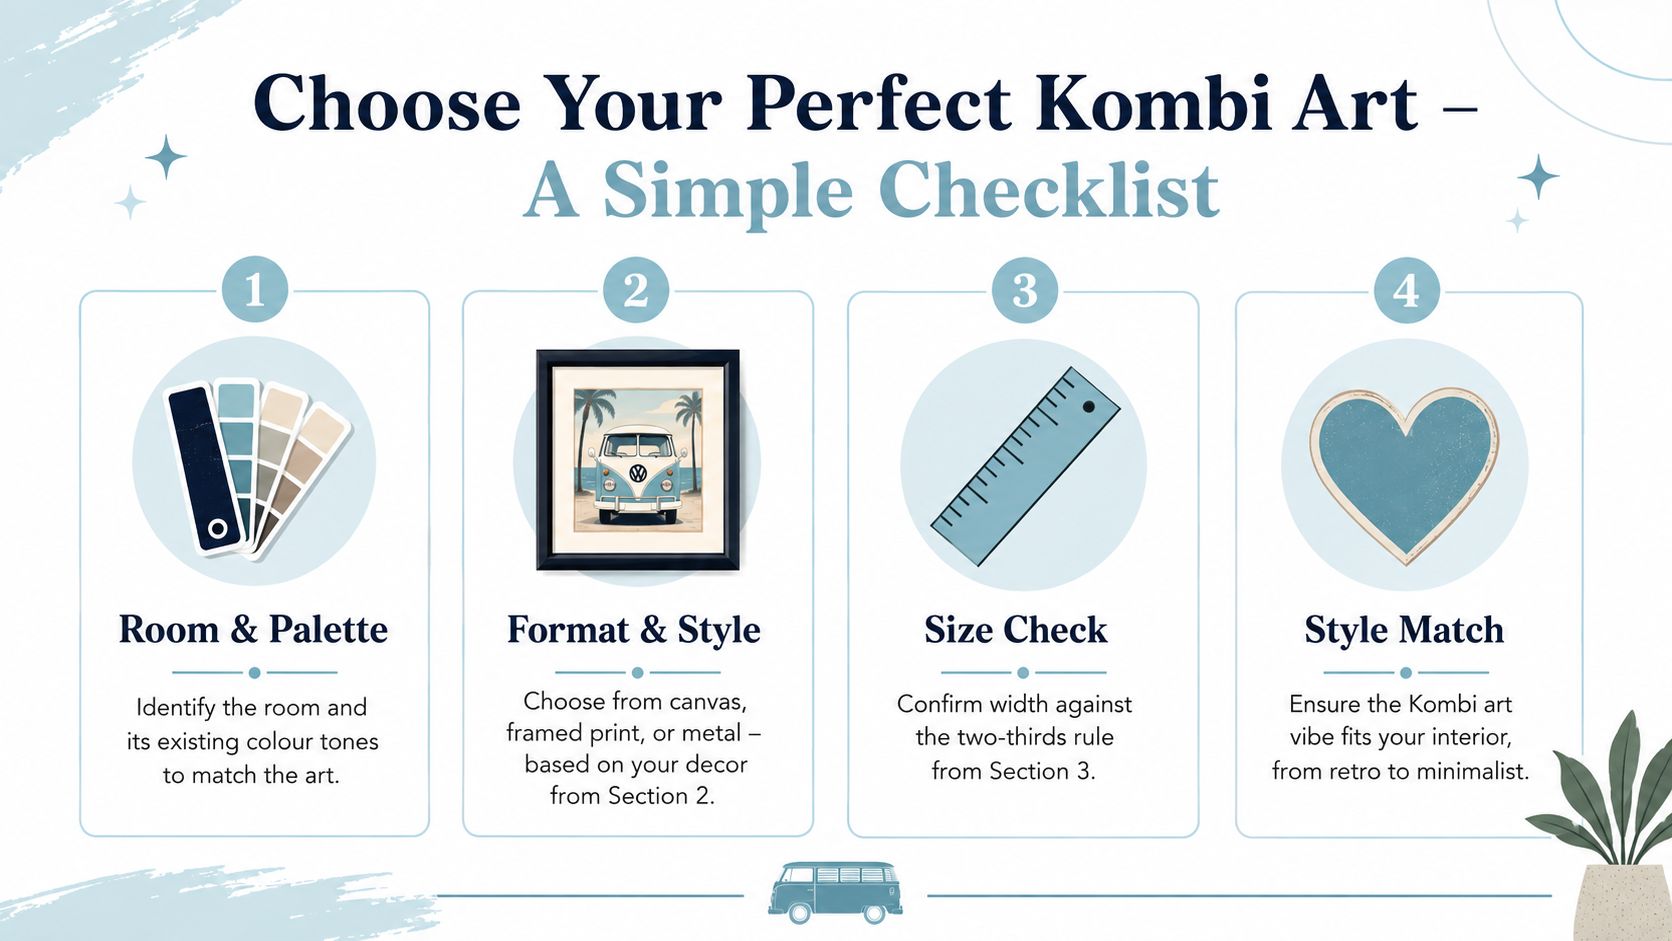
Start with the room, not the vehicle. A pale coastal space may suit a muted canvas, while a dark garage can handle the contrast and texture of a metal sign. Once you know the palette, confirm the available wall width and use the furniture ratio before falling for a design that's too small.

A four-step checklist infographic for choosing perfect Volkswagen Kombi van wall art for home decor.

A useful buying checklist looks like this:

  1. Room and palette: Note the existing paint, timber, upholstery and natural light.
  2. Format and style: Select canvas, framed print, metal or decal according to the room's character.
  3. Size check: Measure the furniture below it and keep the two-thirds rule in mind.
  4. Style match: Decide whether the piece belongs with coastal calm, retro colour, garage grit or a cleaner contemporary scheme.

For gifting, wall art works beautifully for a housewarming, birthday or retirement present for a Kombi lover. It gives the recipient something they can enjoy every day, even if they don't have room for another vehicle or display cabinet. Pairing a wall piece with a licensed 1:18 or 1:24 diecast model adds a shelf hero to the visual statement.

Before checkout, verify the product dimensions in centimetres, confirm whether hanging hardware is included and read the return policy. Check that the item is officially licensed if authenticity matters to the recipient, particularly when buying a Volkswagen Beetle model or a detailed Kombi replica.

Australian buyers also benefit from checking local availability and delivery arrangements. Local stock and fast shipping can make a difference when the artwork is a gift, a room makeover is already underway or you're preparing a display for a VW gathering. A specialist Australian importer can also make support more straightforward when you need help with product details, dimensions or a suitable pairing.

Whether you're refreshing a beach house, adding warmth to a study or building a display around licensed VW memorabilia collectibles, choose the piece that gives the room a story and gives you a reason to smile every time you walk past it.


Volkswagen Memorabilia brings together licensed VW diecast models, Kombi Samba Bus pieces, Beetle collectibles and coastal home décor for Australian enthusiasts and gift buyers. Visit Volkswagen Memorabilia to find a wall-worthy van design, pair it with a detailed model and turn your next room into a small celebration of classic Volkswagen life.

Rare Volkswagen Models Every Aussie Collector Should Know

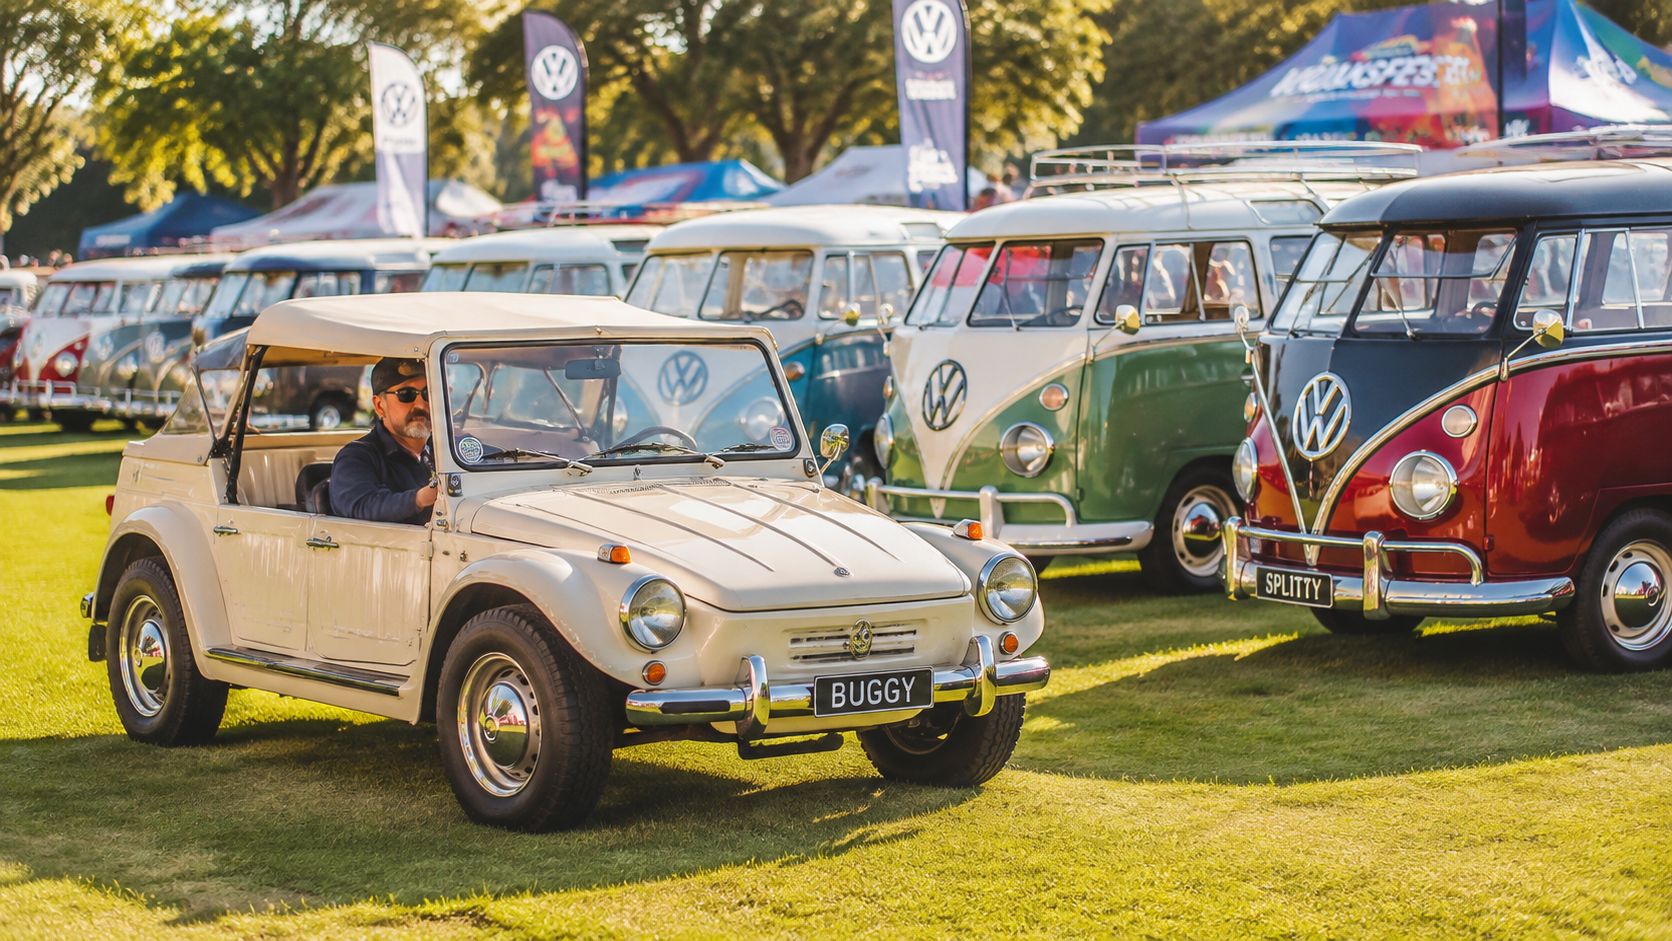
A freshly restored Country Buggy rolled past the Split-window Kombis at a sunny Australian show, its paint catching the light while half the crowd turned to follow it. Nearby, a tiny Beetle on a folding table wore the same proud stance as a full-size classic, and suddenly the conversation shifted from shiny chrome to the stories that make rare Volkswagens matter.

A Sunny Morning at Volksfest

The morning air carried the familiar mix of warm grass, coffee and the faint smell of a hard-working clutch. At a gathering such as Volksfest in Hahndorf, or a VW meet at Willowbank, the cars don't sit still like museum exhibits. They thump, rattle, gleam and gather people around them.

A row of Split-window Kombis stood nose to tail, lined up like a surf safari waiting for the coast road. Chrome bumpers flashed in the sun. A Beetle's rear-deck speakers supplied the bass, while owners leaned over engine bays discussing matching numbers, old repairs and the sort of rust that only appears after years of Australian weather.

Then someone spotted the unusual pair. A 1952 Zwitter notchback sat beside a scale diecast, and the little model suddenly made sense. Its split rear window, rounded roof and compact proportions weren't just styling details. They were clues to a particular moment in Volkswagen history, preserved on a folding table for anyone who wanted to look closer.

A classic beige Volkswagen buggy driving on a grassy field at a sunny car show event.

That's the charm of Australian Kombi history. Rare Volkswagen models aren't just scarce old cars. They're mates with complicated ownership stories, local quirks and a place in the community. The Australian-built Country Buggy, early Clayton Beetles, unusual Type 3s and special Kombis all tell that story in different ways.

What Makes a Volkswagen Model Rare

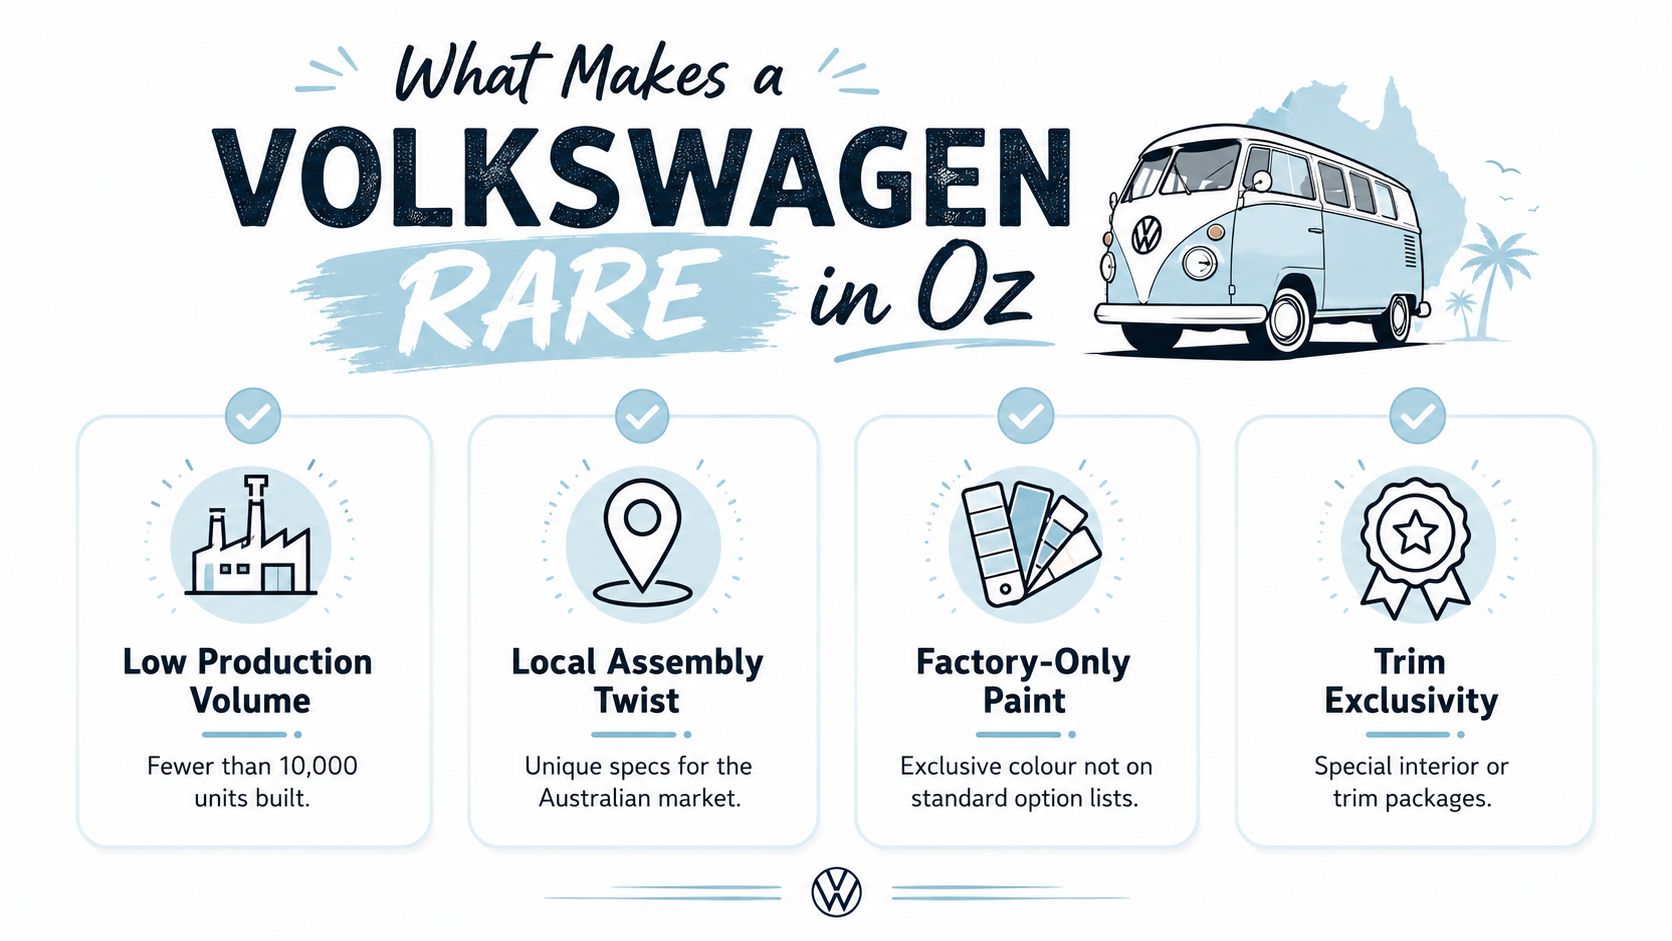
Age alone doesn't make a Volkswagen rare. A car becomes interesting when several clues come together, such as limited production, unusual specification, local assembly or documented provenance.

Start with the build story. Volkswagen assembled Beetles at Clayton, Victoria, from completely knocked-down kits, and local Beetle kit assembly ended in 1976. By 1958, the Australian plant had assembled 50,000 Beetles, a useful historical marker when comparing a Clayton car with an equivalent German-built example. The Australian story is covered in this account of rare Volkswagen history.

Then look at what makes the individual car different:

  • Low production volume: A short production run narrows the pool of surviving cars, particularly when owners modified or dismantled them.
  • Australian assembly: Local cars may carry market-specific details, tags and trim that aren't shared with overseas versions.
  • Exclusive specification: A special body, transmission, interior or fleet package can matter more than a familiar badge.
  • Provenance: A clear chain of ownership, original paperwork and known show or competition history can support authenticity.

An infographic detailing the four key factors that make specific Volkswagen models rare in the Australian market.

Originality also changes the conversation. A car restored to its delivered specification may appeal to a preservation-minded collector, while a sympathetic restomod can be a brilliant driver without representing an untouched example. Neither approach is automatically wrong, but buyers need to know which one they're looking at.

Short-run editions and factory concepts sit at the sharper end of the scale. A Golf GTI 35 Edition or Polo Harlequin attracts attention because of its specific trim identity, while concept cars such as the W12 Nardo and EA489 Concept matter because they represent Volkswagen design and engineering outside normal showroom production.

For collectors, the best evidence combines the physical car with the paper trail. A vintage Volkswagen memorabilia collection can preserve the visual side of that history, but a full-size purchase still depends on records, tags and careful inspection.

Australia's Own Rare Volkswagen Treasures

The Country Buggy is the obvious place to start because it carries Australian engineering in every line. Volkswagen designed it at the Clayton plant in suburban Melbourne, began prototype testing in 1965 and launched it in 1967. One Australian motoring history records 887 units built and sold in Australia, while a more detailed production account gives 1,956 units in total, including about 400 left-hand-drive examples exported to Singapore, New Zealand, Pacific nations and the Philippines. These figures come from separate historical accounts, so collectors should state clearly which production definition they're using.

The model lasted only from 1967 to 1968 in another documented summary, and it was cancelled eight months after launch. That short life explains the Country Buggy's pull at Australian meets. It wasn't merely an old beach car. It was a local attempt to create something suited to Australian tracks, beaches and paddocks, built on a shortened Type 1 floorpan with a 1,192 cc air-cooled flat-four and rear-engine, rear-drive layout. The technical history appears in this Country Buggy reference, while the production story is also recorded by CarsGuide.

Collector's observation: The Country Buggy isn't a Beetle with a different body. Its partial parts interchangeability means restorers need to cross-reference Beetle and Kombi components rather than assume one donor family will solve every problem.

Australia's local assembly history gives other cars their flavour. Clayton Beetles, early Transporters and locally assembled Type 2s can carry Australian-market parts and trims that are increasingly difficult to replace. The first official Volkswagen sales began in early 1954, after imports arrived in late 1953. Before that, a black right-hand-drive 1946 model arrived with German immigrant Therese Hanael, a small but remarkable detail in the country's VW story. Volkswagen identifies the 1946 Beetle Type 11 as an especially iconic and rare car, with its 1.1-litre air-cooled engine producing 24.5 horsepower, as recorded in this Australian Volkswagen history.

The Kombi adds another layer. Volkswagen says the Type 2 lineage began in March 1950, and the model family later passed 11 million vehicles in total output. In Australia, Kombis were assembled at Clayton from 1964 to 1977. That local connection helps explain why Australian collectors often value the right body style, delivery history and original trim as much as the vehicle's general age.

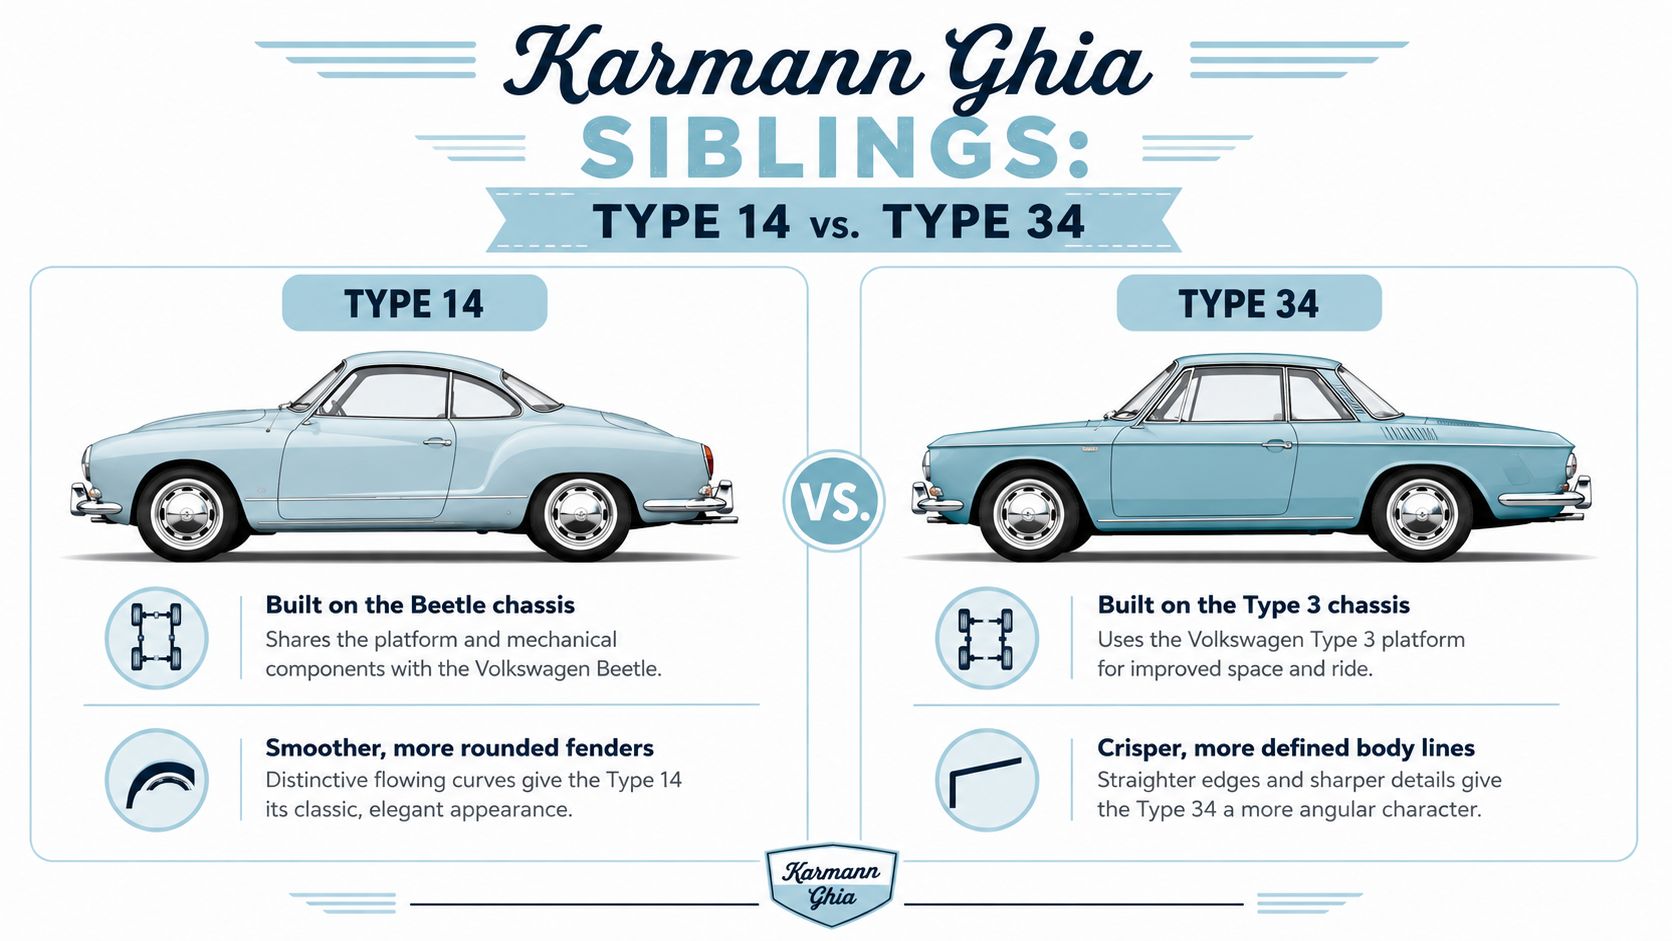
A compact diecast Karmann Ghia model can sit comfortably beside these larger stories. It gives collectors a way to celebrate the rarer shapes, even when a full-size survivor is beyond practical ownership.

Spotting an Authentic Rare Volkswagen

A rare badge isn't enough. Before money changes hands, start with the car's identity and work outward.

Read the plates and numbers

Inspect the VIN plate, body markings and compliance documentation together. Australian-delivered cars should make sense as a group, with the details supporting the claimed build period, market and specification. A replacement plate, unclear stamping or inconsistent format doesn't prove a car is false, but it does call for deeper checking.

Match the chassis and engine numbers against the seller's paperwork. Look for restoration invoices, old registration documents, club records and photographs that show the car before recent work. A clean story is more useful than a dramatic verbal claim.

Check factory evidence

Build sheets, Kardex cards and factory records can help confirm paint, trim and mechanical details when they're available. For a Country Buggy, compare the claimed identity with recognised production information and specialist club knowledge rather than relying on a generic Beetle parts catalogue.

Reproduction plaques and re-stamped engines deserve particular caution. So do unusual colour combinations that the car supposedly carried from new. A non-original colour can be perfectly acceptable on a driver, but it shouldn't be presented as factory specification without supporting evidence.

Bring another pair of eyes

A marque specialist can spot details that photographs miss, especially around Australian assembly, body seams and period-correct hardware. The Volkswagen Club of Australia, local VW clubs and experienced specialists in Melbourne, Geelong and Sydney can provide useful context before you commit.

Practical rule: Treat rarity as a claim to verify, not a feature to take on faith.

Rare Diecast Models and Limited Editions Worth Collecting

Diecast collecting gives Australian enthusiasts a practical way to keep rare Volkswagen shapes close. The strongest displays don't rely only on famous badges. They pair familiar Beetles and Kombis with unusual body styles, local colours and historically important variants.

A 1:18 Volkswagen Beetle model gives the most visual presence, with room for sharper trim, wheel and interior details. A 1:24 model suits a mixed garage display, while 1:43 works well when the collection includes several generations or a long line of commercial vehicles. Smaller pieces let you tell a broader story without filling every shelf.

Model Scale Maker Why It's Collectible
Samba Bus 1:18 Various licensed makers Captures the split-window touring shape and makes a strong centrepiece
Volkswagen Beetle 1:24 Various licensed makers Easy to combine with other classic body colours and eras
Volkswagen Bus premium series Various Hot Wheels Appeals to collectors who enjoy compact, display-friendly releases
Beetle variants Small scale Schuco Piccolo Series Suits collectors who like distinctive miniature styling
Golf Country 1:18 AUTOart Represents a less usual Volkswagen performance and utility theme
Commemorative Volkswagen editions Various Franklin Mint Often chosen for presentation, detailing and gift appeal

Collectors usually compare more than the casting. Check whether the logos are tampo-printed, whether opening panels sit neatly, whether the glazing is clear and whether the wheels match the period character. Packaging matters too, particularly when a model is intended as a gift or kept as a boxed collectible.

Limited editions can also connect a display to the wider VW story. Minichamps and Heritage Collection releases may focus on rally or concept cars, including the W12 Nardo, while Country Buggy-inspired pieces give an Australian angle to a shelf otherwise filled with German-market examples. The rarest full-size-inspired diecast doesn't need to be expensive or oversized. It needs to carry a recognisable story.

For a warm, nostalgic arrangement, place a Kombi Samba Bus beside a Beetle, then add a small surf-themed vehicle or a printed show photograph behind them. That arrangement feels more like an Australian car meet than a row of unrelated models.

Buying, Collecting and Caring for Rare VWs in Australia

The best purchases usually begin with people, not listings. Join the VW Club of Australia, regional branches and Kombi-focused forums, then attend swap meets where owners can explain a car's history face to face. Specialist dealers in Victoria and Queensland, along with auctions run by Shannons, Lloyds and Grays, can bring unusual Volkswagens into view, but every listing still needs independent checking.

For a full-size car, arrange a pre-purchase inspection before treating a seller's description as proof. Ask the inspector to examine:

  • Identity numbers: Compare engine and chassis numbers with the paperwork and the claimed model.
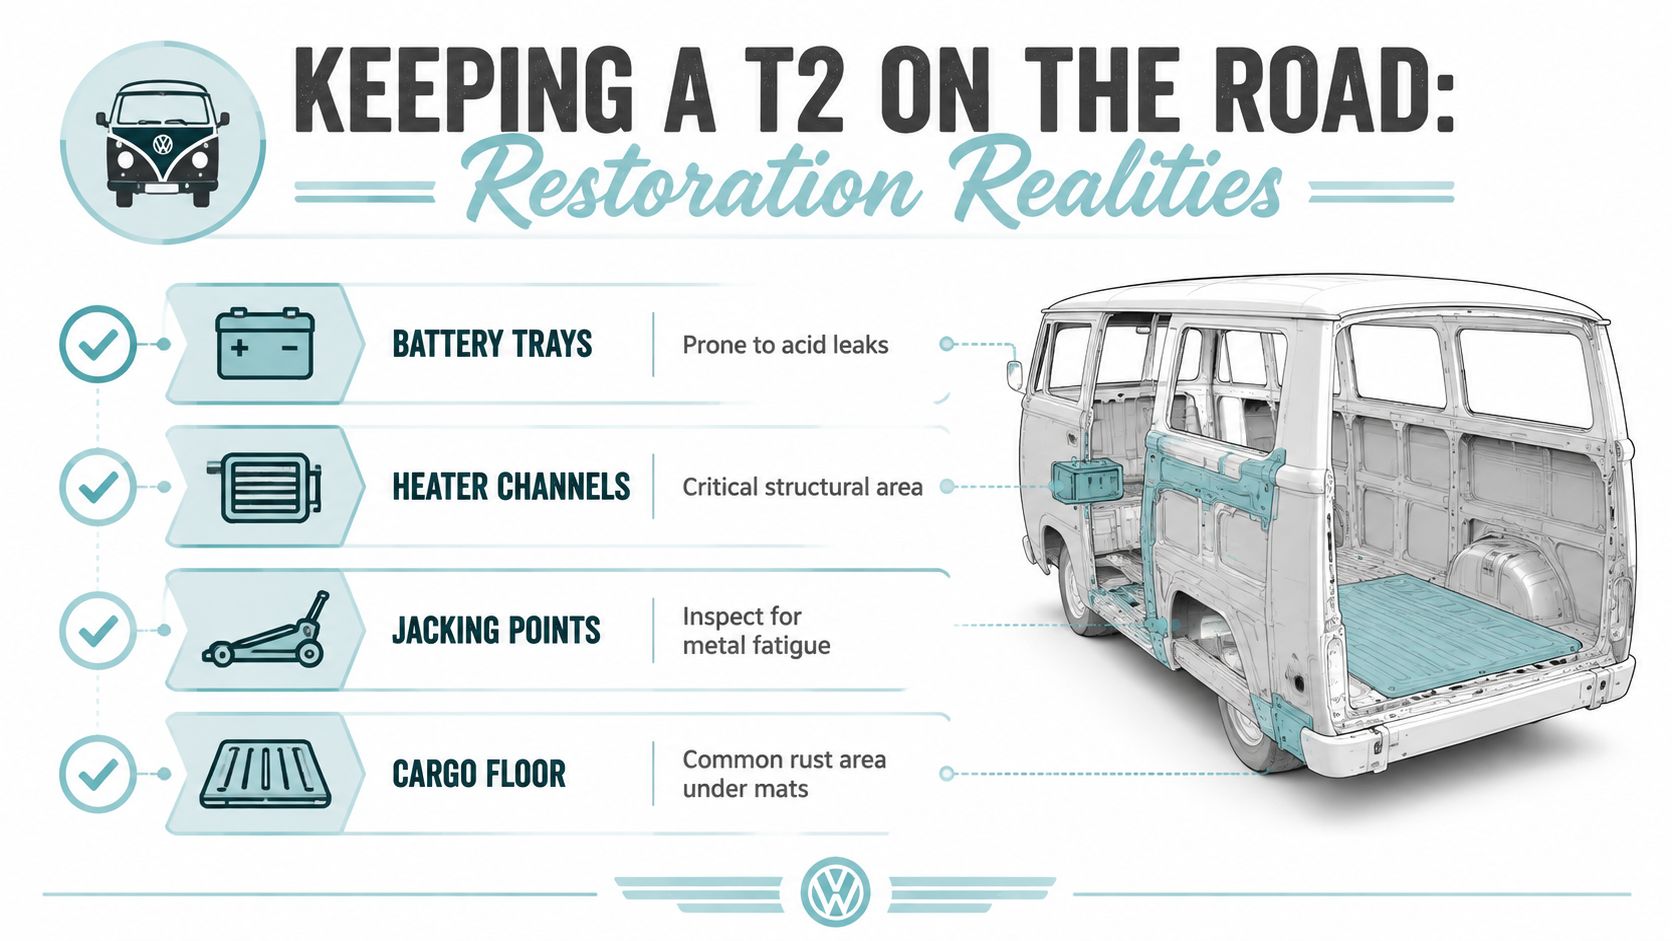
  • Air-cooled rust zones: Check heater channels, luggage shelves and battery trays carefully.
  • Restoration quality: Look behind trim, under carpets and inside repaired panels for unfinished corrosion work.
  • Parts originality: Separate genuine factory equipment from later replacements or attractive upgrades.

Australia's ownership pathway also includes compliance. The federal government changed import access in 2021 for older vehicles over 25 years old, creating broader pathways for classic and collectible passenger cars and vans under the relevant SEVS and RVS framework. Buyers still need to manage ROVER approvals, identity checks, documentation and VIN requirements, so a rare overseas car isn't automatically an easy road-legal purchase. The Australian older-vehicle import guidance should be read before committing to an import.

Before buying overseas: Confirm the approval and registration pathway first. A bargain shell can become a difficult project if its paperwork doesn't line up.

Diecast models need a gentler environment than a workshop. Keep them behind glass or in suitable cabinets, away from direct sunlight and unstable humidity. A felt base helps protect the display surface, while careful dusting avoids marking printed logos, clear parts or delicate mirrors.

Full-size classics benefit from dry storage, sensible fuel-system maintenance and original-part research through specialist suppliers such as Klassic Fab and VW Classic Parts. Keep a record of purchase details, restoration work, photographs and comparable auction results. Valuation references can include recent auction outcomes, Hagerty and VWCA magazine coverage, but no guide replaces an inspection of the individual car.

Collectors also need insurance that reflects the vehicle's agreed value, whether the car runs regularly or attends an occasional show. Providers such as Shannons and Lumley are familiar names in the classic-vehicle space, but policy conditions still vary, so read the storage, usage and modification requirements before signing.

Finally, remember that market depth matters. Beetles and Kombis have active Australian interest, while a very unusual model may be a long-term showpiece with fewer obvious buyers. A 1960 dual-cab Kombi sale at $155,000 was noted in Australian trade coverage, showing the strength of interest in certain rare variants, but one result doesn't establish a universal value for every rare Volkswagen. The sensible collector asks not only, “How scarce is it?” but also, “Can I maintain it, insure it and find the next owner?”


If a Country Buggy, Split-window Kombi or beautifully scaled Volkswagen Beetle model has a place in your story, explore Volkswagen Memorabilia for licensed diecast pieces and VW-themed gifts that bring Australia's classic car culture onto your shelf. Choose a Kombi Samba Bus, Beetle or surf-inspired collectible to start a display that feels right at home beside your treasured memories.

Fridge Magnets Australia: The Complete Buying and Decor

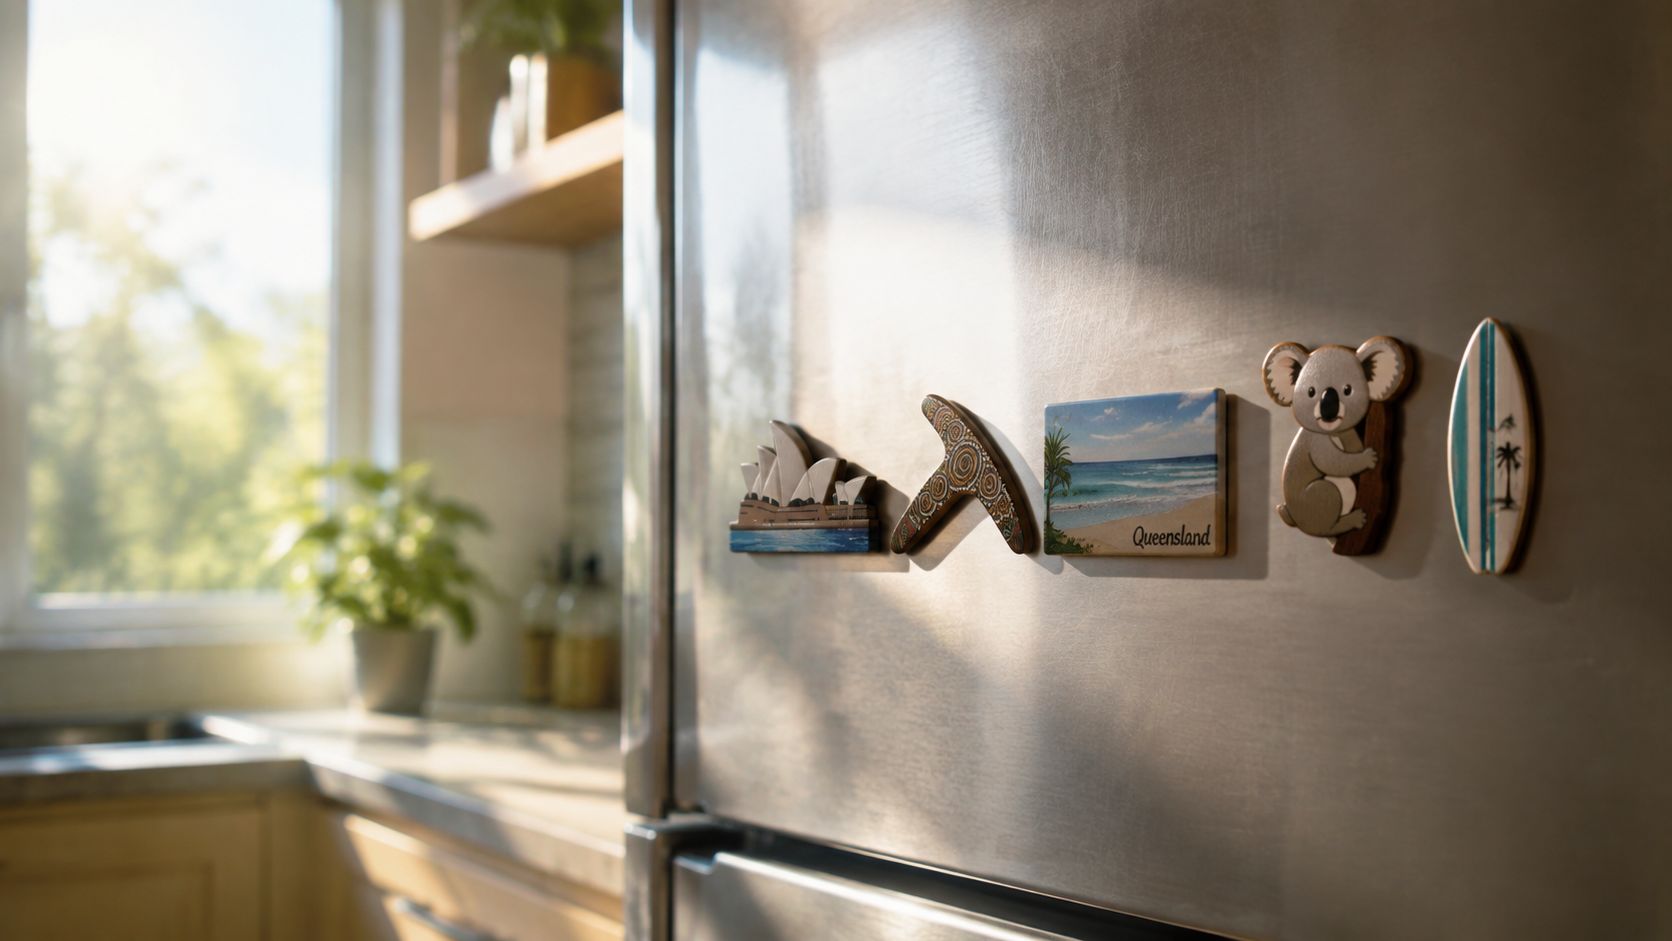
On a fine Brisbane morning, the fridge door can look a bit like the glovebox of a well-travelled Kombi. Sunlight catches a Sydney Opera House resin piece from a school trip, a tin Kombi magnet from a Gold Coast meet, a hand-painted kookaburra bought at a Mornington Peninsula market, and a neat acrylic magnet advertising the local plumber. Each one has a job, even when that job is making the kitchen feel more like home.

That's the charm of fridge magnets Australia. They're small souvenirs, practical reminders and tiny bits of design culture that turn a plain appliance into a travel diary. Australian retailers already treat the format as a familiar part of the souvenir and gift trade, with city and attraction designs sold through independent outlets and Brisbane souvenir magnets listed at AUD 6.00 each by Mobshop's Australian fridge magnet collection.

A stainless steel refrigerator door decorated with various Australian themed souvenirs and travel magnets.

A good magnet isn't just about sticking to steel. Material, theme, safety, display and the story behind the piece all matter. A coastal collector might favour timber and shells, while a VW enthusiast reaches for a split-screen Kombi, a Beetle silhouette or a soft rubber Volkswagen crest. These choices make a kitchen personal, much like the ideas collected in this guide to coastal home decor.

A Quick Trip Around the Aussie Fridge Door

The Brisbane kitchen belongs to a family who has never planned the fridge door, yet has somehow created a complete little archive. The Opera House recalls a school excursion. The Gold Coast Kombi points to a sunny car meet where conversations ran as freely as the cold drinks. The kookaburra brings back a market wander, its brushwork more important than perfect symmetry. The plumber's acrylic logo is the practical outlier, a reminder that magnets also carry the everyday business of Australian life.

That mix is what makes collecting enjoyable. A fridge becomes a scrapbook without photographs, with holidays, friendships, house moves and passing interests arranged at eye level. One magnet might celebrate a landmark, another a favourite animal, and another the moment someone discovered a lifelong affection for old Volkswagens.

The format has a particularly strong connection with tourism retail. Australian gift sellers present magnets as cultural keepsakes, ranging from city icons such as the Sydney Opera House to native animals including koalas and kookaburras. Mister Magnets' company story records how the business began in 1995, after a customer asked for fridge magnets, and later grew to more than 50,000 customers, moving from two-colour printing to full-colour magnets.

Collector's view: The best fridge door isn't the one with the most expensive pieces. It's the one where every magnet can start a story.

For VW fans, magnets sit neatly beside diecast cars, rally badges and old show flyers. A Kombi magnet can introduce a display before a larger model takes pride of place, while a coastal design can tie the whole room together. The trick is choosing pieces that feel connected rather than filling every spare patch of steel.

Popular Magnet Materials and How They Feel

Run your fingers over a resin souvenir and it feels different from a stamped tin piece or a glazed ceramic tile. The material controls not only the appearance but also the weight, edge finish, print detail and suitability for a busy family kitchen.

Resin for colour and raised detail

Resin suits bright landmarks, animals and photographic souvenirs. Makers can create a glossy surface, mould raised features and protect printed artwork beneath a clear finish. It works well for a Sydney Opera House, a Great Barrier Reef scene or a colourful VW bus.

Its weakness is exposure. Resin can scratch, yellow or lose its visual freshness if it sits in harsh afternoon sunlight, so it's better on a shaded fridge or display board.

Tin and metal for retro character

Stamped tin feels light, crisp and slightly nostalgic. It's a natural choice for budget souvenirs, garage signage and retro car designs, especially when a flat printed surface is the point. A metal Kombi silhouette can look right at home beside old enamel signs.

Thin pieces may bend, and the rear magnet can feel weaker than a larger disc. Check the edges before giving one to a child.

Timber, ceramic and acrylic

Wooden magnets bring warmth to coastal and rustic interiors. Coastal timber crafters often leave the grain visible, making these pieces especially suitable for beach shacks, white kitchens and relaxed entryways. Ceramic and porcelain offer a heavier, glossy feel that suits boutique wildlife art, botanical illustrations and premium gallery-style souvenirs, though their edges can chip if dropped.

Acrylic gives boutique custom studios and local businesses clean print clarity with almost any outline. It's a strong fit for logos, pet portraits, family illustrations and simple VW badges, but its polished surface can show fingerprints.

Material Feel & Look Durability Magnet Strength Best For
Resin Glossy, colourful, often raised Good indoors, protect from strong sun Usually moderate Souvenirs and photo finishes
Tin or metal Lightweight, flat, retro Good, edges may bend Light to moderate Tourist basics and garage decor
Wood Warm, natural, textured Good indoors, avoid moisture Varies by backing Coastal and rustic rooms
Ceramic or porcelain Glossy, substantial, gift-like Can chip if dropped Often moderate Premium keepsakes and art pieces
Acrylic Smooth, crisp and modern Good indoors, surface can scratch Varies by backing Logos, portraits and custom shapes

Iconic Australian Magnet Themes Worth Collecting

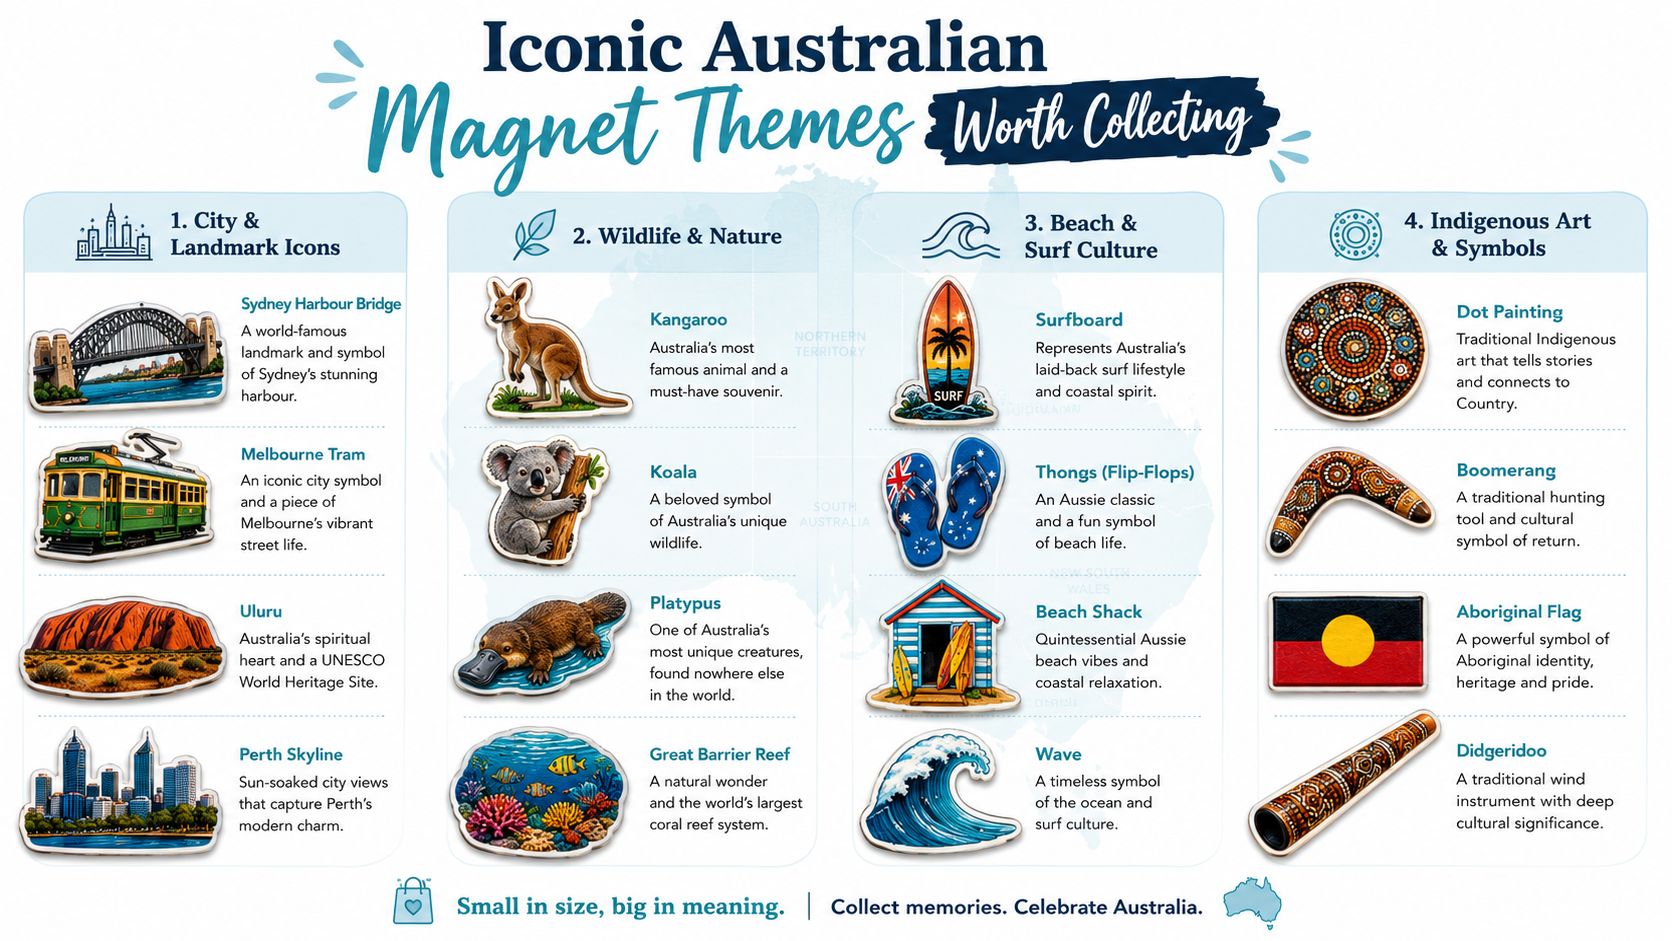
Australian magnet themes usually fall into a few recognisable families, and each one carries a different kind of memory. City and landmark icons are the classic airport and museum-shop choice. Sydney Harbour Bridge, Melbourne trams, Uluru, Perth skylines and reef imagery give visitors an immediate visual shorthand for a place they've seen or hope to visit.

Wildlife and botanical designs feel more personal. Kangaroos, koalas, platypuses, wattles and banksias work beautifully in painted ceramic or resin because those materials hold colour and expressive detail. A small kookaburra can feel less like a generic souvenir and more like a morning spent listening to one from the veranda.

An infographic displaying various iconic Australian-themed souvenir fridge magnets categorized by landmarks, wildlife, beach culture, and art.

Four collecting lanes

  • City and landmark icons: Choose resin or acrylic when sharp outlines matter. These suit visitors, interstate gifts and collections organised by destination.
  • Wildlife and nature: Ceramic, porcelain and hand-painted resin bring character to animals and native plants. They resonate with buyers who want a distinctly Australian keepsake.
  • Beach and surf culture: Timber, textured resin and shaped acrylic fit coastal homes. Surfboards, shells, whales, waves and beach shack motifs carry the easygoing feeling of places from Byron Bay to Esperance.
  • Retro Volkswagen: Tin, enamel-look metal and moulded rubber suit Beetles, split-screen Kombis and camper silhouettes. The appeal comes from shared car-show culture, road trips and the relaxed freedom associated with classic VW design.

Price matters, but theme usually matters more. A small tourist magnet can be an impulse purchase, while a hand-finished piece earns its place through material, craftsmanship or a stronger emotional connection. That's why a modest VW magnet picked up at a show can outlast a more polished souvenir that says nothing about the owner.

Where to Buy Fridge Magnets in Australia

A souvenir shop gives you instant context. You can handle the magnet, test its weight and see whether the print looks sharp under ordinary shop lighting. Museum gift stores and weekend markets are particularly useful for wildlife, landmark and artist-made designs, while newsagents tend to focus on simple local or promotional pieces.

Online shopping offers a broader search, especially for collectors chasing a specific theme such as a Volkswagen Beetle, Kombi or coastal sign. Dedicated specialists may carry designs that don't appear in general marketplaces, while Etsy can be useful for handmade timber, ceramic and illustrated pieces. Amazon Australia and larger marketplaces offer convenience, but product descriptions can be brief, so inspect the material, dimensions, seller location and dispatch terms.

The Australian gift market includes both low-cost tourist basics and more carefully finished handcrafted work. Rather than relying on a stated price alone, look for clear photographs of the front and back, a named maker, sensible packaging and honest information about whether the item is Australian-made or Australian-themed.

Channel Typical Price Range Best For Watch Out For
Specialist online shops Varies by material and licensing VW memorabilia and themed collections Check stock location and dispatch timing
Etsy and similar marketplaces Varies widely Handmade and artist collaborations Confirm dimensions and maker location
Amazon Australia Varies by brand and pack size Convenience and quick comparison Read material and seller details carefully
Souvenir and museum shops Usually straightforward tourist to premium tiers Handling the item before purchase Limited range outside the local theme
Weekend markets Varies by maker and finish Unique coastal and wildlife pieces Magnet backing and care details may be unclear

For collectors who want a gift with more personality than a standard souvenir, browse these unique gifts for car lovers. Local stock and Australian dispatch can make a meaningful difference when you're buying for a birthday, a show weekend or a last-minute housewarming present.

Understanding Australian Safety Rules for Small Magnets

Most ordinary fridge magnets are not the same as the small, high-powered loose magnets targeted by Australia's permanent safety ban. The ACCC product safety bulletin explains that most fridge magnets are ferrous and relatively weak, or have the magnet embedded in plastic, plaster or another object. The risk changes when a product contains loose or separable high-powered magnets, particularly in a toy-like format.

The injury mechanism is serious. If swallowed, magnets can attract through intestinal walls, creating a risk of obstruction or internal damage. Australian guidance identifies a hazardous magnetic flux index of 50 or more, with relevant shape thresholds including cylinders up to 32 mm long by 11 mm in diameter, discs up to 26 mm across by 5 mm thick, and spheres up to 22 mm. These figures and the applicable toy requirements are set out in Queensland's magnetic toy safety advice.

A safety checklist infographic illustrating five essential rules for handling small, high-powered magnets safely in Australia.

Keep loose magnets away from young children, mouths and noses. Place decorative pieces high on the fridge or use an adult display board, and discard any magnet whose casing cracks, peels or separates.

Practical rule: Buy encased designs for family kitchens, and treat loose high-strength magnets as adult-use items.

Sellers also need to remember that the ban applies to internet sales shipped to Australian consumers. If a magnet forms part of a toy, check the labelling and relevant standard rather than assuming its small size makes it harmless.

Creative Ways to Style Magnets at Home

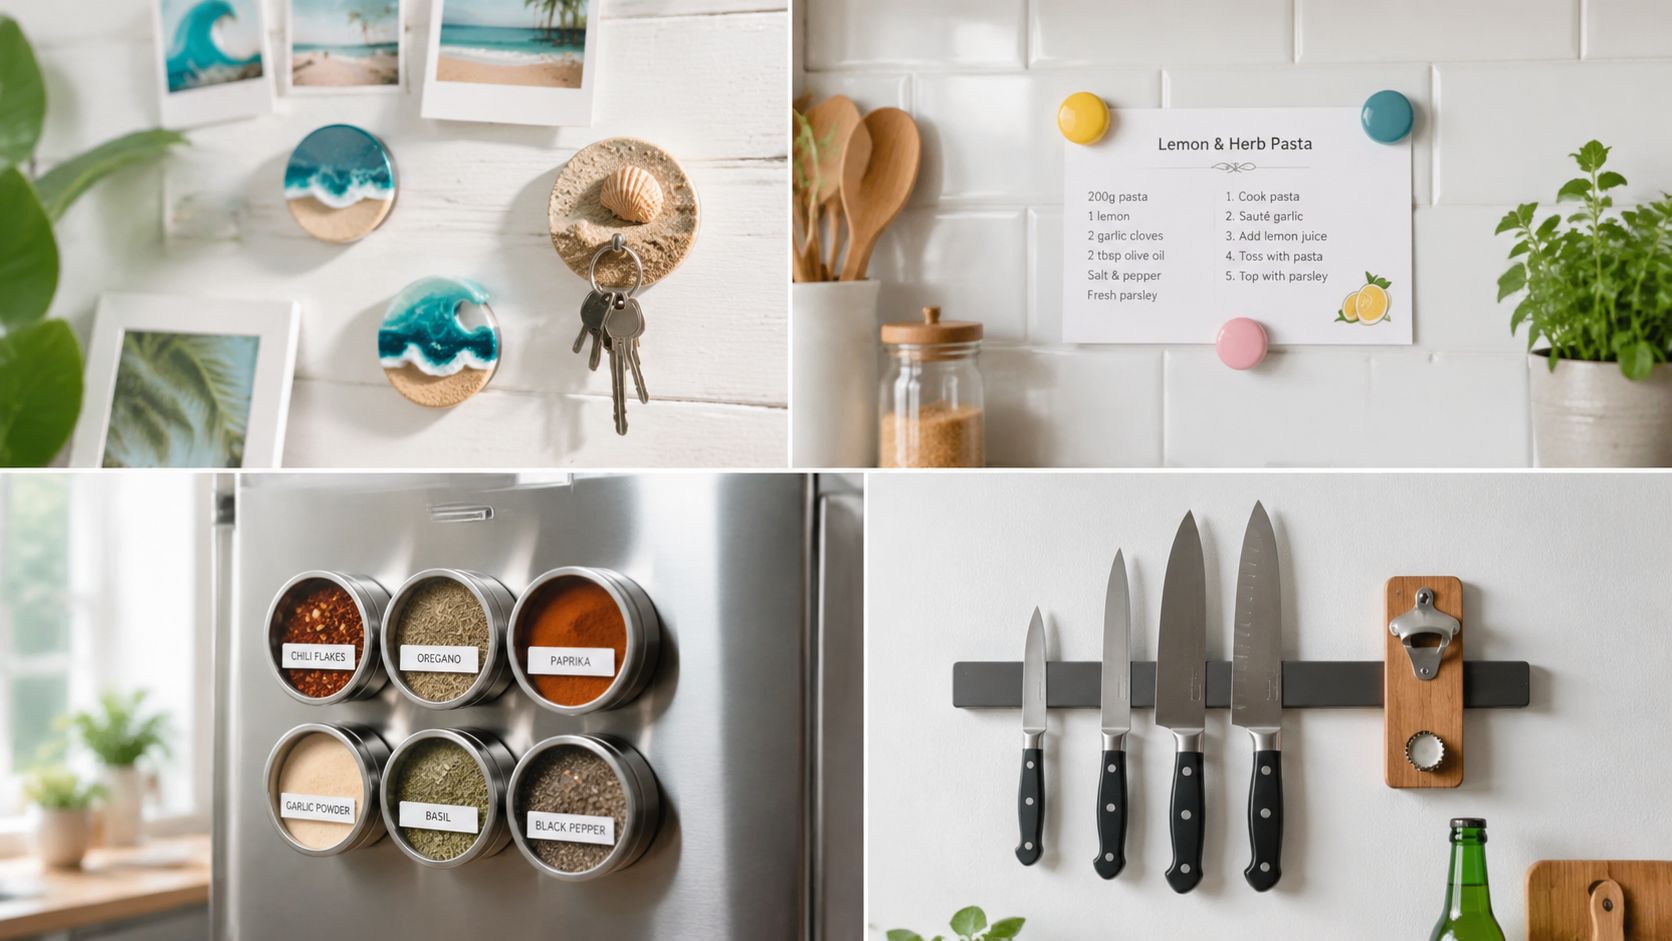
A fridge door is only the beginning. In a coastal home, a timber plank mounted near the kitchen can become a changing gallery of wave-textured resin pieces, shell motifs and small notes. Keep the palette restrained, with pale timber, soft blue, sand and white, then let one brighter magnet provide the focal point.

A collage showing various magnetic kitchen and home organization solutions including spice jars, knives, and decor.

A painted steel board works well in a children's creativity corner. Letter and shape magnets can support play and simple organisation, while a low, uncluttered arrangement makes it easier to see what belongs there. Choose larger, securely encased pieces and keep the board away from sleeping areas and small hands if the magnets are loose or powerful.

Build a VW display board

The garage or man cave gives retro VW pieces room to breathe. Mount a dark-painted steel sheet behind a shelf, then arrange Kombi-shaped magnets beside a small sign, a show pass or a diecast Samba Bus. Cream, red, seafoam and faded yellow create the visual language of classic Volkswagen design without making the wall feel like a crowded parts counter.

For a calmer kitchen, use only two or three statement pieces. A hand-painted landmark, a family portrait and one subtle VW crest can look deliberate against a matte white or stainless-steel fridge. Seasonal rotation keeps the surface fresh and prevents the collection becoming visual background noise.

This approach pairs nicely with broader wall decoration ideas, especially if you want the magnet display to connect with metal decor, framed prints or a coastal shelf.

Take a little time to watch how magnetic storage and decor work together in the kitchen before committing to a layout.

Custom Magnets, Sizes and Care Tips

A favourite VW photograph, a child's doodle or a family beach portrait can become a magnet with more emotional weight than a generic souvenir. Custom printing works best when the artwork is simple, sharp and prepared for the final shape rather than cropped at the last moment.

Choose the size around the display

For a standard fridge arrangement, 50 x 50 mm is a comfortable all-round format. It gives a photo or logo enough room to read without taking over the door. A 70 x 70 mm piece works as a feature magnet, particularly for a bold Kombi illustration or a family portrait, while a slim 40 mm round suits tight clusters where several small memories sit together.

Resolution matters because a tiny print still needs clean edges. Keep important faces, lettering and VW badges away from the trim area, allow for bleed beyond the cut line, and request a digital proof before production. A glossy finish brings out bright colour, while a matte finish reduces reflections on a sunny kitchen door.

Match the material to the job

  • Glossy resin: A strong fit for colourful indoor souvenirs and photographic artwork. Keep it out of harsh afternoon sun where possible.
  • Brushed aluminium: Suits garage boards, retro signage and clean industrial kitchens. The subtle grain can add character behind a simple logo.
  • Bamboo: Brings a warm, natural feel to coastal interiors and hand-drawn artwork. Keep it dry and wipe it gently.
  • Soft flex PVC: Useful for playful shapes, bold outlines and VW-inspired badges. Its flexibility makes it less brittle than a hard decorative piece, but the backing still needs to be securely attached.

Order with a proof-first routine

Start by uploading the artwork and confirming the finished dimensions. Ask for a digital mock-up, check the crop and colour balance, and request a physical sample if the order is important or includes several pieces. Custom suppliers may quote a turnaround of five to ten business days, so confirm the production schedule before a birthday, wedding or housewarming.

Care takes only a moment. Wipe magnets with a dry microfibre cloth, keep them away from dishwasher spray and avoid dragging them across painted or stainless-steel surfaces. Rotate seasonal pieces instead of leaving the same heavy arrangement in place indefinitely, and inspect the backing whenever you clean the fridge.

For gifting, pair a custom magnet with a handwritten note about the photo or place it inside VW-shaped packaging. A little Kombi beside a wedding date, a Beetle with a new-home illustration or a beach scene made for grandparents can feel personal without becoming overdone.


Volkswagen Memorabilia offers VW-themed fridge magnets alongside licensed diecast pieces and coastal home décor, including Volkswagen logo and Wolfsburg crest designs and classic Kombi and Beetle collectibles. Visit Volkswagen Memorabilia to browse local-stock gift ideas, compare VW memorabilia collectibles and find a diecast Kombi or Volkswagen Beetle model to give your fridge-door story a proper centrepiece.

Volkswagen Transporter T2: The Complete Aussie Enthusiast

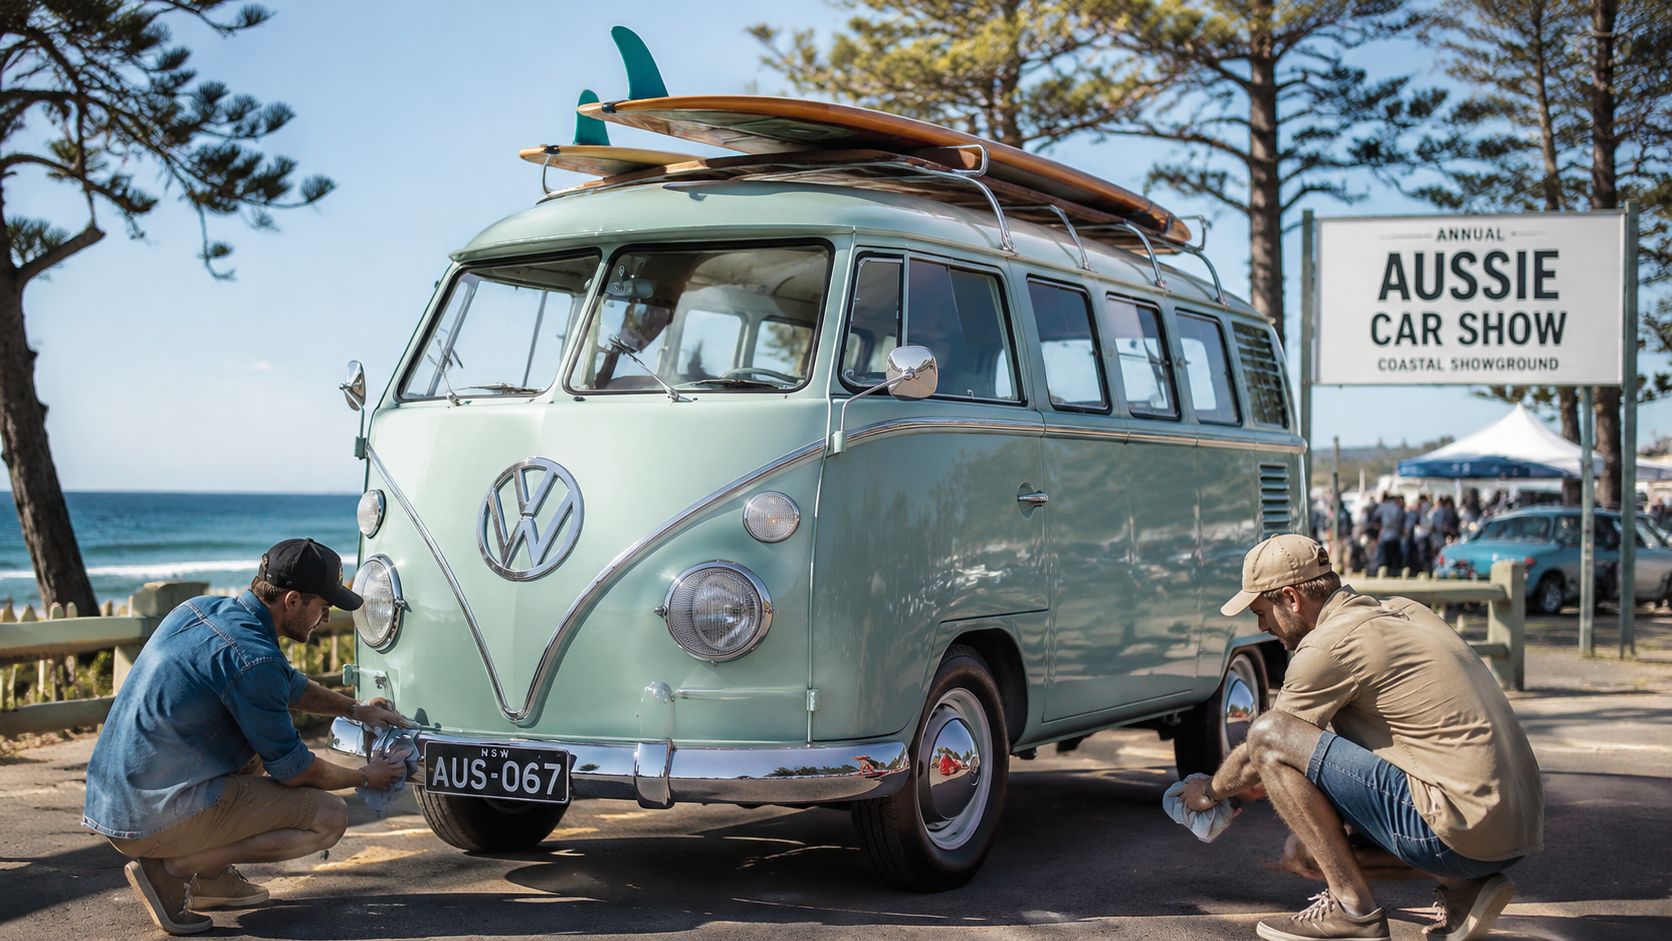
At a coastal show, a seafoam-green bay-window Kombi rolled past with surfboards on the roof and two owners polishing its chrome. People stopped talking, phones came out, and for a moment the whole crowd was looking at the same familiar shape.

Why the Volkswagen Transporter T2 Still Captivates Aussie Enthusiasts

The Volkswagen Transporter T2 has a way of turning a car show into a gathering place. Its curved one-piece windscreen, broad front beam and friendly, upright stance look practical at first glance, but the details reward a closer look. Early cars still carry the memory of the split Safari front window, while later Bay Window models trade that divided glass for a wider, more open view of the road.

Australia gave the Kombi a life of its own. The broader Volkswagen manufacturing operation began Australian assembly at Clayton, Victoria, in 1955, and Transporter assembly continued locally from 1955 until 1976, as recorded in the Volkswagen Group historical chronology. Volkswagen Australasia later shifted to kit assembly before moving from assembly to production, which helps explain why local examples can differ from later German imports.

By the 1960s and 1970s, the T2 worked everywhere. Tradespeople loaded tools into panel vans, service fleets relied on the simple rear-engined layout, and families treated Kombis as holiday machines. Surf clubs, campervan hire fleets and long Pacific Highway drives added another layer to the story. The van wasn't just transport. It became a little rolling promise of weekends away.

Two men kneeling and cleaning a vintage light green Volkswagen van at an Aussie car show.

Why the shape still works

Collectors gather at Volksfest, the VW Nationals and local Show and Shine events because the T2 invites conversation. One owner remembers a family holiday, another remembers a first surf trip, and someone else is there because a Kombi was the first vehicle they learned to repair.

You don't need a full-size restoration to take part. A carefully chosen licensed model, a period brochure or a small coastal display can carry the same visual language without placing a rusty shell in your driveway.

From Split Screen to Bay Window The T2 Story

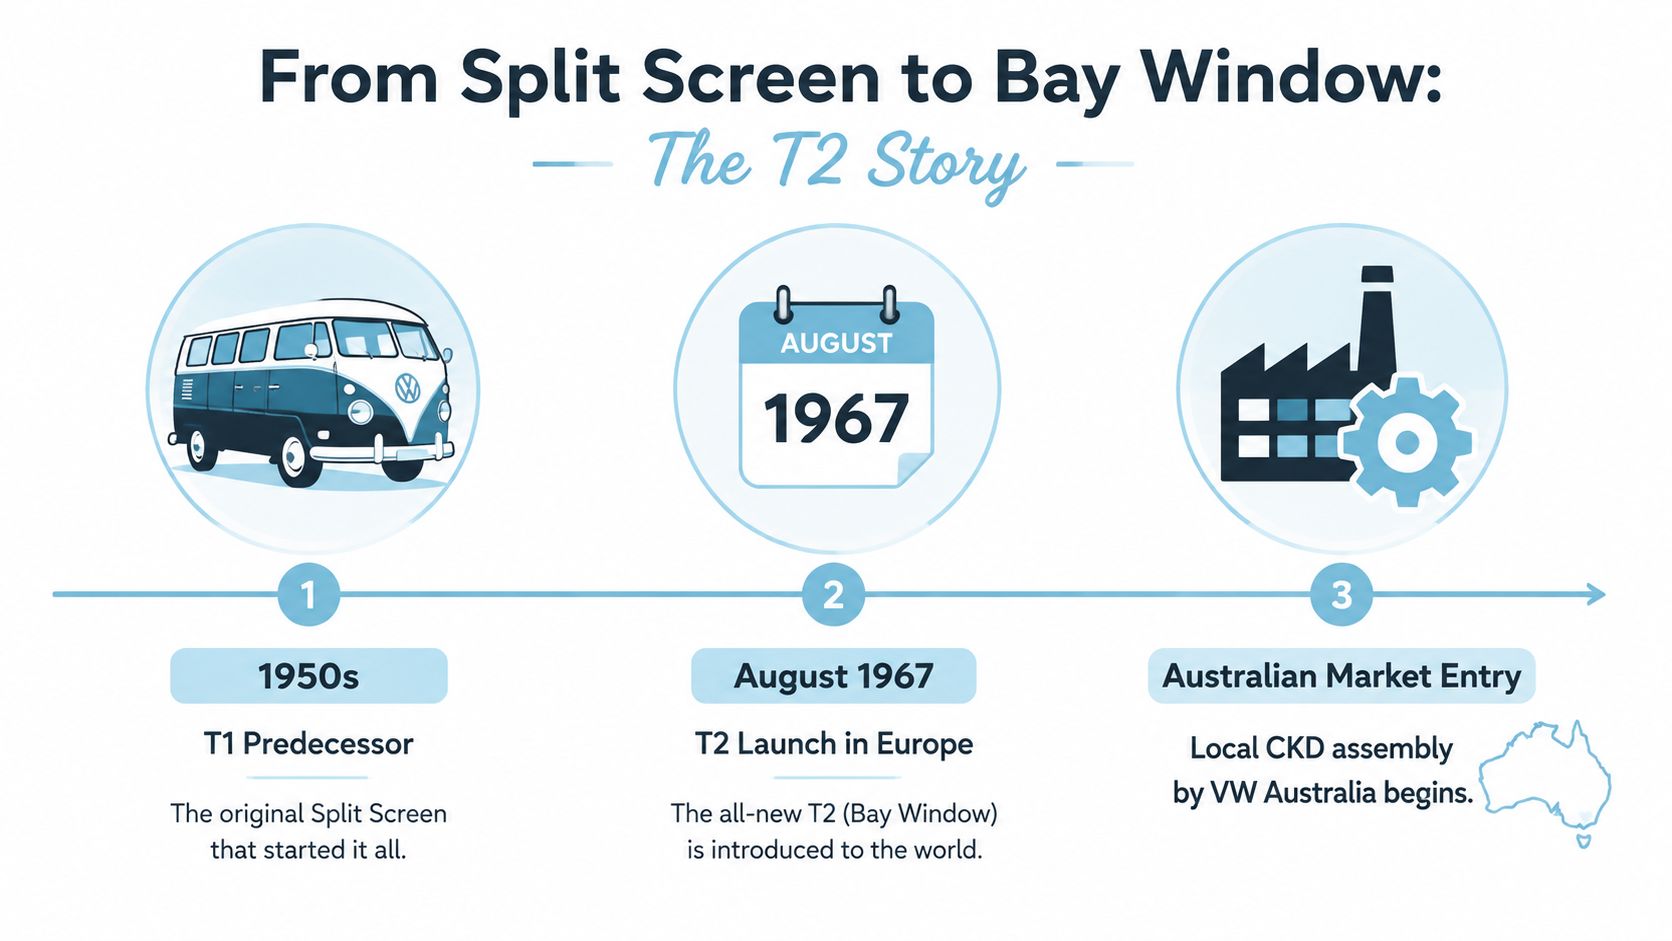
The Transporter story began with the split-screen T1 predecessor in the 1950s. The T2 arrived globally in 1967, and Australian market coverage identifies the second-generation Kombi and Transporter period as 1968 to 1979, with German imports continuing after local production ended. Just Kampers Australia's Bay Window guide is useful for checking the Australia-specific fitment window when you're identifying panels or trim.

The key Australian timeline looks like this:

Period What changed
1950s The split-screen T1 established the Transporter formula
1955 Australian assembly began at Clayton, Victoria
1959 Volkswagen Australasia shifted to assembling vehicles from kits
1962 The operation moved from assembly to production
1967 The T2 was introduced globally
1968 to 1979 The Australian-market T2 Bay Window era
1973 Higher front blinkers, larger tail lights and further safety upgrades
1976 Fuel injection appeared in Australian models, while the upright 1600cc engine was discontinued
1976 Australian Transporter assembly ended, with imported examples continuing afterwards

The T2's curved windscreen and longer body made it feel more modern than the T1, while improved safety equipment helped it meet changing expectations. The rear-engined, cab-over layout remained, so the driver still sat close to the front axle with the mechanical heart tucked behind the cabin.

A timeline graphic showing the evolution of the Volkswagen Transporter from the T1 to the T2 model.

Australian production history also matters when buying memorabilia or restoration parts. Australian Volkswagen history records the localised manufacturing path, while the Volkswagen Type 2 story notes that Transporters were first sold in Australia in 1954 and made locally from 1955 to 1976.

For a compact way to keep that history close, the Volkswagen Type 2 collection captures the recognisable family resemblance across the Transporter lineage.

Kombi Samba and Westfalia Variants Compared

Three T2 names dominate enthusiast conversations: Kombi, Samba and Westfalia. They share the basic Transporter identity, but each one served a different owner.

Variant Window Count Typical Years Original Purpose Aussie Asking Range (AUD)
Kombi Varies by body style 1968 to 1979 Australian market Commercial work, passenger transport and family use Not stated
Samba 21 or 23 windows 1967 to 1974 Premium passenger and leisure transport Not stated
Westfalia Varies by conversion Period T2 camper conversions Touring, camping and surf trips Not stated

The standard Kombi was the dependable all-rounder. In panel-van form it carried equipment and stock, while microbus versions moved people with an ease that made them useful for families, clubs and small businesses. Its appeal today comes from honesty. You can see the working vehicle underneath the nostalgia.

The Samba is the showstopper. Its panoramic glazing, two-tone finish and distinctive roof windows turn the familiar van into a rolling conservatory. Samba examples are especially popular with collectors because every side offers another detail to inspect, from the window arrangement to the polished trim.

The Westfalia took the same basic vehicle and made it a touring companion. Pop-top roofs, compact furniture and sleeping arrangements transformed the rear cabin into a small travelling room. Owners chasing the coastal road-trip dream often gravitate towards this version because it connects the T2 directly with camping, surfing and slow travel.

Collector's rule: Choose the body style that matches the memory you're trying to preserve. A work van tells a different story from a Samba, and a camper tells a different story from both.

The table's missing asking-price column is deliberate. Australian classic-vehicle prices vary with originality, rust, documentation, conversion quality and mechanical condition, and no verified price range is available here. Treat a glossy restoration, a solid survivor and a project shell as separate propositions rather than assuming the badge tells you everything.

Under the Skin T2 Engineering and How It Stacks Up Today

The T2's charm starts with its mechanical layout. A rear-mounted, air-cooled flat-four leaves the nose free for the driver and front passengers, while the cab-over body keeps the vehicle compact relative to its carrying space. The arrangement feels unusual now, but it made sense for a van designed to work in tight streets and carry useful loads.

Australian Bay Window models evolved through the era with larger engines, safety revisions and improved equipment. By 1978, Australian market coverage records a 1970cm3 engine producing 51kW and 143Nm, with a three-speed automatic option available, while T2 payload had increased to 900kg, according to Club VeeDub's Australian T2 coverage.

A modern Transporter shows how far the commercial-van formula has moved. Volkswagen Australia's current Transporter range quotes 125kW and 390Nm from a 2.0-litre turbo-diesel, a 3,225kg GVM, payloads from 760kg to 1,062kg depending on wheelbase and drivetrain, and braked towing of up to 2,800kg on some variants in its current Transporter brochure.

Spec 1974 T2 Australian 2024 T6.1
Engine character Air-cooled flat-four Turbo-diesel
Cooling Air-cooled Liquid-cooled
Drive layout Rear engine Modern commercial-van layout
Transmission feel Analogue manual driving experience Contemporary automated and manual options depending on variant
Load focus Practical utility van packaging Higher-capacity commercial work
Safety and refinement Period equipment and cabin noise Modern safety, braking and noise insulation
Technical benchmark Earlier low-power utility approach 125kW, 390Nm and up to 2,800kg braked towing on some variants

The comparison makes the trade-off plain. A modern van delivers torque, braking confidence, safety systems, quieter cruising and stronger towing capability. The T2 answers with visibility, mechanical simplicity and a direct connection between hand, lever, pedal and road.

For a scale reminder of the camper side of the family, the Volkswagen Transporter camper range reflects the touring image that still gives the T2 so much emotional pull.

Keeping a T2 on the Road Restoration Realities in Australia

A T2 can look cheerful above the beltline while hiding serious corrosion underneath. Australian owners commonly inspect battery trays, heater channels, jacking points, cargo-floor outriggers and the lower windscreen scuttle. Coastal salt air makes regular inspection even more important because moisture and contamination can remain trapped in seams, cavities and floor edges.

Start with the structure, not the accessories. Shiny bumpers and fresh upholstery won't compensate for weak mounting points or poorly repaired floors.

A diagram highlighting critical areas of a Volkswagen T2 transporter van prone to rust and wear during restoration.

A sensible inspection order

  1. Lift the mats and inspect the cargo floor. Rust can begin where damp gear, dirt or old leaks sit unseen.
  2. Check the battery area. Acid damage and previous patching can affect nearby metal.
  3. Look closely at jacking points and outriggers. These areas carry loads and reveal rushed repairs.
  4. Inspect the heater channels and windscreen surrounds. Structural corrosion here can be more serious than a cosmetic door blemish.
  5. Separate local-era and imported fitment. Australian cars and later imports may require different panel, trim or electrical choices.

Parts support remains one of the T2's strongest practical advantages. Just Kampers Australia lists more than 2,400 VW T2 Bay and Brazilian Bay Window parts, including cross members, outriggers, jack points, cargo floors and rear valances. Australian specialist suppliers also advertise windscreens, steering-wheel restoration and T2-specific alternator and accessory parts.

That doesn't mean every repair is quick or cheap. Structural panels may be available locally, while unusual trim, period-correct details or particular right-hand-drive components can involve imported stock and waiting. A buyer should ask which parts are on the shelf, which are ordered in, and whether the replacement matches a split-screen, Bay Window or Brazilian Bay application.

Workshop reality: The question isn't simply whether parts exist. Ask whether the correct part is available for your body style, steering position and production history.

Before buying, get an inspection from someone who understands air-cooled Volkswagens. A tidy weekend driver may suit an enthusiast who accepts gradual repairs, while a full restoration demands much deeper planning. The sensible choice depends on whether you want to drive, learn and improve over time, or commission a finished showpiece from the outset.

For owners planning broader maintenance, the VW replacement parts guide offers a useful place to organise the practical side of the hobby.

Collecting the Legend Diecast Models and Memorabilia

A licensed diecast model gives you the T2 silhouette without asking you to weld a battery tray on a Saturday morning. For many Australian enthusiasts, that makes a 1:18 or 1:24 Samba Bus a smart first step. You still get the roofline, glazing, colours and surf-era character, but the display fits on a shelf rather than in a garage.

Choosing scale and maker

Scale changes the experience. A 1:18 model has more room for visible trim and interior detailing, while a 1:24 model is easier to group with other cars, vans and signs. Collectors should check the model's construction, licensing, paint finish, wheel alignment, opening features and packaging before buying.

Names enthusiasts often encounter include Schuco, Greenlight, Hot Wheels Premium and AUTOart. Their ranges differ, so compare the exact release rather than assuming every model from a particular brand has the same finish.

The most visually commanding subjects tend to be Samba buses, Westfalia campers and single-cab liveries. That doesn't guarantee future value. Secondary-market demand changes with colour, condition, rarity, packaging and buyer interest, so collect what you enjoy rather than treating every model as an investment.

Display without damaging the collection

  • Use low-UV lighting. Bright direct sunlight can fade paint, decals and packaging over time.
  • Add acrylic dust covers. They keep shelves clean while leaving the model visible.
  • Rotate the display. A turntable or rotating shelf lets you appreciate the rear-engine-era shape from every angle.
  • Group by decade or theme. Pair a Samba with a Beetle, a camper with surf photography, or commercial vans with period signage.
  • Keep packaging organised. Original boxes help protect models and make future handling easier.

Memorabilia can extend beyond diecast. Australian sales brochures, dealer signage, Bosch parts catalogues and period surf stickers add context, especially when sourced through reputable sellers, swap meets or established auction channels. Check condition carefully, look for restoration or reproduction clues, and keep paper items away from damp garages and strong sunlight.

A model isn't a substitute for a real Kombi. It is a practical way to keep the story present while you save, restore or just enjoy the design from the comfort of home.

Styling Your Space Coastal Décor with a VW Twist

A T2 display works best when it feels lived in rather than crowded. Start with one location, such as a beach-house nook, garage wall or reading corner, and give the hero model enough breathing room to read clearly from across the room.

Floating reclaimed-timber shelves suit 1:24 Samba models because the wood brings warmth while the scale remains easy to handle. Place larger memorabilia, such as framed brochures or enamel-style signs, in a lower glass cabinet where visitors can inspect them without brushing against the shelf.

Build the scene in layers

Use weathered marine ply, whitewashed brick or a simple painted wall as the backdrop. Jute rugs, rope details and natural timber bring in the nautical mood, while one strong VW colour on a diecast model prevents the display from becoming visually flat.

Lighting needs care. Warm LED strips behind a shelf can create a soft evening glow, while a matte-black picture light can highlight surf photography or a period poster. Keep paper and painted models out of harsh direct sunlight, particularly near west-facing windows.

A graphic showing three tips for styling a home with coastal decor and Volkswagen transporter T2 themes.

Mix scales with a clear hierarchy

Put the main diecast at eye level and keep smaller Beetle models, magnets or surf-themed pieces below it. Avoid placing a large model directly beside several tiny pieces with no visual separation. A tray, timber riser or framed backdrop can give each group its own boundary.

Rotate pieces seasonally. Bring out a camper and beach colours during summer, then swap in a darker commercial livery, enamel sign or workshop-themed arrangement later. The collection stays fresh, and you avoid filling every surface at once.

Styling idea: Let one Samba Bus tell the story. Add supporting objects only when they help explain its world.

The strongest displays connect materials and memories. A model beside a faded surf photograph feels more convincing than a shelf packed with unrelated novelty items, while a Beetle positioned near a Kombi creates a simple visual link between two beloved Volkswagen shapes.

Bringing the T2 Spirit Home

The T2 matters because it carries several Australian stories at once. It was a locally connected working vehicle, a family hauler, a camper, a surf companion and a familiar shape at shows. Its Bay Window design modernised the Transporter without losing the friendly proportions that made earlier Kombis so memorable.

Owning a full-size example can be rewarding, but it asks for patience. Rust inspection, body-style compatibility, imported parts and workshop decisions all belong in the dream. The people who enjoy T2 ownership most usually understand that restoration is a continuing hobby, not a one-off purchase.

Collecting offers another route. A licensed Samba or Westfalia model can anchor a shelf, while a Volkswagen Beetle model adds the companion car that so often appears in the same enthusiast world. Add a brochure, sign or surf image and you've created a small scene with genuine character, not just a row of objects.

The choice can be simple:

  • Restore a real van if you want a hands-on mechanical project and accept ongoing decisions.
  • Buy a diecast Kombi if you want the design, history and display appeal without workshop commitments.
  • Style a coastal corner if your strongest connection is with surf culture, travel and relaxed beach living.
  • Give a Volkswagen model if you're choosing something meaningful for a collector, nostalgic friend or family member.

For those looking for VW Kombi diecast Australia, buy diecast Kombi, or Volkswagen diecast models for sale, the important question is less about chasing a perfect object and more about choosing a piece that feels personal. A seafoam Samba, a practical panel van or a bright Flower Power model can all keep the T2 spirit close.


Volkswagen Memorabilia brings together licensed VW diecast models, Kombi Samba Bus pieces, Beetle models and coastal décor for collectors and gift buyers who want that unmistakable Australian VW feeling at home. Visit Volkswagen Memorabilia to browse the collection and choose a small piece of Transporter history for your shelf, study or beach-house display.

VW Campervan Models Explained: The Ultimate Aussie Guide

At a sunny Australian car show, a red-and-white Kombi can stop conversation from ten metres away. Someone points out the split windscreen, another admires the tiny camper interior, and a collector nearby checks whether the diecast on his table matches the van's details.

That little exchange captures the appeal of VW campervan models explained properly. These vehicles aren't one single design, and understanding the generations, camper conversions and Australian history makes both the full-sized vans and the miniatures far more rewarding.

Why VW Campervans Capture Australian Hearts

A classic Kombi doesn't arrive at a show. It gathers people around it. At Volksfest, the VW Nationals or a coastal Surf Show and Shine, you'll see enthusiasts leaning through open doors, comparing paintwork and remembering the first family holiday, surf trip or weekend escape connected with a Volkswagen van.

Volkswagen says the Kombi's origin story began in 1949, when Dutch businessman Ben Pon sketched the idea that became the Type 2. In Australia, the model found an especially warm audience as surfing grew along the east and west coasts during the 1970s, according to Volkswagen Australia's Kombi history. That combination of practical shape and relaxed coastal character gave the van a role far beyond commercial transport.

A family having a beach picnic next to their vintage blue and white VW campervan at sunset.

The emotional pull is easy to understand. A Kombi suggests open roads, a thermos on the tailgate and enough room for boards, blankets, children or camping gear. A Beetle brings the same friendly design language in a smaller package, while a Samba Bus adds bright trim, extra windows and a more theatrical presence.

Why model knowledge matters

At a show, a split-window T1 and a bay-window T2 might both be called “a Kombi”, but they tell different stories. The same applies to miniatures. A licensed Kombi Samba Bus diecast should reproduce the correct windscreen, roof details, bumpers and body proportions for the variant it represents.

Collectors also enjoy building a visual timeline. One shelf can show the early Type 2 beside a later bay-window camper, followed by a modern Transporter-based model. The collection becomes a conversation starter, a family memory and a compact history of Australian motoring.

Collector's perspective: The best model isn't always the rarest one. It's the piece that connects with a real story, a favourite road or a van you once saw parked beside the beach.

The Kombi's Australian Manufacturing Story

The Australian Kombi story starts with a vehicle that gradually became local. Independent Australian VW history records that the first Type 2 Volkswagens reached the country in 1954 as imported kits completed locally at Clayton South. Volkswagen's Australian coverage also places Kombi assembly at the Clayton plant in Melbourne from 1964 to 1977. Between 1959 and 1968, both the Beetle and Kombi were fully manufactured in Australia before production reverted to CKD assembly, as reported by CarsGuide's Australian Kombi history.

A timeline infographic detailing the history of Volkswagen Kombi van manufacturing in Australia from 1954 to 1976.

That transition matters to collectors because an Australian-linked Kombi isn't merely an overseas icon wearing local number plates. It passed through import, assembly and full manufacturing stages, creating a genuine place in the country's automotive story. A model displayed beside an Australian road-trip photograph can represent that whole journey in miniature.

From useful van to national favourite

The Kombi's commercial success reinforced its cultural visibility. Club VeeDub records 1975 as the biggest-selling year for the Kombi in Australian history, with 8,974 Kombis sold, including Microbuses. The same history records 15,479 total Volkswagens sold that year and a 43% share of the Australian 1-tonne van market. Club VeeDub also says the Kombi captured over 60% of the 1-tonne market in Australia during the 1960s and 1970s. These figures appear in the club's Australian Volkswagen sales history.

Those numbers explain why the Kombi became familiar to tradespeople, families and surfers alike. It wasn't only a counterculture symbol. It carried tools, people and holiday equipment, then became the backdrop for memories that outlasted the working life of the vehicle.

For collectors, the Volkswagen Type 2 memorabilia range makes most sense when viewed through that local lens. A miniature Samba or Microbus can stand for Australian assembly, coastal travel and the practical van that became a cultural landmark.

Identifying VW Campervan Generations at a Glance

Learning the generations turns a car-show walk into a treasure hunt. Start with the nose and windscreen, then check the body shape, engine layout and window treatment. The visual changes are substantial enough that you can identify most vans before reading the badge.

A chart illustrating the various VW campervan generations from T1 to T5/T6 with key design features.

Generation What to look for Collector's clue
T1 Split windscreen, V-shaped nose and semaphore indicators The classic Samba Bus silhouette
T2 Single windscreen, larger rear window and rounded bay-window body A common basis for camper conversions
T3 Angular, boxy “brick” shape and flat front Later vans may use water-cooled engines
T4 Front-engine layout, sliding door and more modern proportions A major mechanical break from earlier Transporters
T5 and T6 Refined van shape, modern cabin and advanced technology Contemporary touring and conversion platforms

The early shapes

The T1 is the one instantly recognised. Its split windscreen and V-shaped front give it a friendly, almost smiling appearance. Samba versions are especially distinctive because of their additional windows and upmarket detailing.

The T2 smooths out the face with a single windscreen and a broader bay-window design. It still feels unmistakably classic, but its proportions create a more practical platform for camper layouts.

The move to modern vans

The T3 introduces a squarer, more angular body. Its flat front changes the visual rhythm completely, while water-cooled engine options mark an important mechanical development.

The T4 moves the engine to the front and uses a transverse layout, creating a very different vehicle underneath the familiar badge. The T5 and T6 continue that modern direction with more refined interiors, digital instruments and contemporary driver technology.

A diecast collector can apply the same checklist. Look at the windscreen first, then the nose, side door and roof. If a miniature claims to be a Samba but lacks the characteristic window arrangement, the casting may represent a different variant.

For a visual reference while browsing a collection, the VW campervan generations guide offers a useful starting point.

Iconic VW Campervan Variants and What Makes Them Special

The word “camper” covers several different ideas. A factory-built camper, a dealer conversion and an owner-modified Transporter may share a body shell, but their interiors, roof fittings and historical significance can differ considerably.

A shelf displaying miniature Volkswagen campervan models, featuring a red and cream van and a green Westfalia camper.

The Samba Bus

The Samba Bus is the showstopper. Its split windscreen, extra glazing, bright exterior trim and distinctive roof treatment give it a lighter, more open character than a plain panel van. In diecast form, those windows and polished details are what make the model instantly recognisable.

Westfalia conversions

A Westfalia camper is valued for its camping identity. Pop-top roofs, compact kitchens, storage and sleeping arrangements turn the Transporter into a small touring home. When inspecting a miniature, check whether the roof, awning, interior furniture and body graphics suit the claimed conversion.

Pop-top and special editions

Pop-top models appeal to owners who want a lower roof profile for everyday driving but extra headroom at camp. Flower Power variants lean into the colourful surf and festival culture associated with classic VW vans, making them particularly cheerful display pieces.

Variant Character What to inspect in a diecast
Samba Bus Bright, airy and highly decorative Window count, roof details and trim
Westfalia Practical camping conversion Pop-top, interior equipment and graphics
Pop-top camper Flexible everyday touring van Roof mechanism and compact camper fittings
Flower Power model Nostalgic, playful and colourful Licensed artwork, paint quality and clean application

The appeal comes from matching the model to its story. A restoration enthusiast may prefer mechanical and trim accuracy. A nostalgia seeker might choose a surf-themed van. A gift buyer may want the most recognisable shape, which is often a Samba Bus or classic bay-window camper.

Building Your VW Diecast Collection

A good collection starts with a clear display plan, not an impulsive pile of boxes. Decide whether your shelf will follow generations, body styles, colours or personal memories. A row that moves from Beetle to T1, T2 and later Transporter tells a stronger story than a random assortment.

Choosing a scale

Scale affects both appearance and space. A standard 1:18 diecast model is roughly 24 to 30 cm long, while a 1:24 model is roughly 16 to 20 cm long, according to this diecast model size guide. That difference becomes obvious when you measure a cabinet shelf or try to place several vehicles together.

Scale Typical length Best for Detail level
1:18 Roughly 24 to 30 cm A statement piece or detailed display Strong visual presence
1:24 Roughly 16 to 20 cm Shelves, gifts and mixed displays Detailed while easier to place
1:32 Smaller than the larger display scales Larger timelines and compact collections More compact presentation

Don't mix scales accidentally. A 1:18 Kombi beside a much smaller Beetle can make the display look uneven, unless the difference is deliberate and clearly labelled.

Quality checks before buying

Look closely at the body lines, paint edges, glazing and wheels. Licensed models should present the Volkswagen shape and badges with care, while cheap imitations often show rough trim, cloudy windows or inaccurate proportions.

Use these checks when comparing a model:

  • Body accuracy: The roofline, bumpers and windows should match the named generation.
  • Finish: Paint should look even, with graphics aligned to the body.
  • Construction: Doors, wheels and other moving parts should sit neatly.
  • Packaging: Keep original packaging if condition and future collectability matter to you.
  • Display conditions: Avoid harsh sunlight, moisture and dusty open shelving where possible.

The Volkswagen model cars collection suits collectors who want to compare different body styles and build a coherent display without losing sight of the authentic vehicles behind them.

Practical rule: Buy the model you'll enjoy looking at every day, then organise the shelf around its story.

Finding the Perfect VW Gift or Collectible

A Volkswagen gift works best when it reflects the recipient's version of VW culture. The person restoring a real Beetle may study trim and proportions, while someone raised on beach holidays may respond immediately to a colourful Kombi with surf character.

For a first purchase, a Volkswagen Beetle model offers an approachable entry point. Its rounded shape is recognisable, it pairs naturally with coastal décor and it can sit comfortably on a desk, bookshelf or bedside cabinet. A Kombi Samba Bus diecast makes a stronger centrepiece, especially for someone who remembers family holidays or owns a full-sized Type 2.

Match the gift to the enthusiast

  • For the restorer: Choose a clean, accurately finished model that rewards close inspection of lights, bumpers, wheels and badges.
  • For the surfer: Look for a Kombi or Flower Power design that carries the relaxed beach spirit of the vans.
  • For the new collector: A smaller model or mixed pack can establish a theme without demanding a large display cabinet.
  • For the home decorator: Pair a diecast van with retro automotive or coastal accents, keeping the colour palette consistent.
  • For the long-time VW owner: Select a model that echoes the generation, colour or camper style they know personally.

Official licensing matters because it connects the miniature to the Volkswagen design rather than using a generic van shape. Australian buyers also benefit from choosing an importer with local stock and fast shipping, particularly when a birthday, club gathering or Christmas deadline is close. A local supplier can make product questions easier too, with support suited to Australian collectors and gift-givers.

Search terms such as VW Kombi diecast Australia, buy diecast Kombi and Volkswagen diecast models for sale can lead to many options, but don't judge solely by the photograph. Check the stated model, scale, finish, licensing and whether the product represents a Samba, Microbus, camper or another Type 2 variant.

Join the VW Community and Start Your Collection Today

The joy of VW collecting begins before the first model reaches the shelf. It starts when you ask an owner about a restoration, spot the difference between a T1 and T2 at a show, or realise that the van in an old family photograph has a story worth preserving.

The Australian connection gives the hobby extra depth. The Kombi was assembled at Clayton, sold strongly in the local market and became woven into surf culture, working life and family touring. A diecast model can't replace the smell of an old interior or the sound of a real air-cooled engine, but it can keep that memory visible every day.

Start with one meaningful piece. Choose a Samba Bus if you love classic show-car presence, a Beetle model if the rounded design brings back family memories, or a later campervan if your interest leans towards practical touring. Then visit local shows, speak with club members and let your collection grow around the stories that matter to you.

A carefully chosen display is more than decoration. It's a small Australian VW history lesson, a reminder of open roads and a welcoming invitation for the next enthusiast to stop and ask, “Which model is that?”


Volkswagen Memorabilia brings together licensed VW diecast models, including classic Kombis, Samba Buses and Beetles, alongside coastal-inspired memorabilia for relaxed Australian displays. Visit Volkswagen Memorabilia to find a meaningful collectible, start your model timeline or choose a gift for the VW enthusiast in your life.

VW Campervan Gifts: The Ultimate Aussie Buyer’s Guide

You're standing beside a row of polished Kombis at an Australian VW show, sunscreen on your shoulders, chrome shining in the morning light, and a gift still sitting undecided in your bag. The recipient loves Volkswagens, sure, but are they a careful diecast collector, a hands-on restorer, a coastal-style home decorator, or the sort of driver who lives for the next cruise?

That distinction matters. The best VW campervan gifts aren't random novelty items. They carry a story about freedom, surf trips, music, restoration, Australian roads, or the pleasure of owning something with proper character. Match the gift to the person's relationship with VW culture, and even a modest piece can land better than an expensive item chosen without thought.

Finding the Perfect VW Campervan Gift for Every Enthusiast

At a sunny VW gathering, you can usually work out what someone values within a few minutes. One enthusiast is crouched beside a Samba Bus, checking trim and badges. Another is photographing a surfboard strapped to a Kombi roof. Someone else is admiring a neat retro display of models, signs and beach-inspired décor.

Those people may all call themselves VW fans, but they don't want the same present. A collector wants accurate proportions and licensed provenance. A driver might prefer something useful or a piece that reflects their own vehicle. A surfer responds to the coastal character of the Kombi, while a home stylist may love the silhouette without knowing the difference between a Type 1 and a Type 2.

Volkswagen's own history places the Kombi's origin story in 1949, beginning with Ben Pon's sketch, and connects the vehicle with 1960s music festivals, surfing culture and Australian coastal lifestyles in its Kombi history. That heritage gives a gift more weight than a simple retro print. You're giving the recipient a visual cue for adventure and a shared bit of automotive culture.

A bearded man smiling while opening a gift box between two vintage Volkswagen campervans at the beach.

Before you buy, ask one useful question: What does this person love about Volkswagens? Their answer will point you towards a model, a practical accessory, a heritage item or a décor piece. Browse unique VW gifts for inspiration, but choose with the recipient's taste in mind rather than your own wish list.

Matching the Gift to the VW Fan in Your Life

The safest way to choose is to identify the recipient first. Price matters, but personal relevance matters more. A beautifully detailed model can leave a casual décor fan cold, while a small licensed Kombi can make a serious collector very happy if it fills a gap in their display.

An infographic titled Matching the Gift to the VW Fan in Your Life with four gift categories.

The diecast collector

Look for a model with a clearly stated scale, recognisable manufacturer and accurate Volkswagen badging. A collector will notice the stance, wheel design, glazing, interior trim and body shape, so avoid vague “Kombi-style” products with no licensing information. A 1962 Kombi Samba Bus diecast makes a strong choice for someone who enjoys iconic people movers and display-quality detail, while a Volkswagen Beetle model suits a collection built around the marque's broader history.

A single special model works well for an established collection. Mixed packs can make more sense for a retailer, a club raffle or a collector who enjoys building a themed row of vehicles.

The classic car lover

Restorers usually appreciate memorabilia that reflects the authentic vehicle. Choose pieces linked to an era, body style, surf association or Australian ownership story. Metal décor, garage-style signs and a model matching their own Kombi or Beetle will feel more considered than generic merchandise.

If they attend show days, take note of the colours and variants they photograph. That's often a better clue than asking directly and spoiling the surprise.

The surf and coastal enthusiast

This recipient wants the feeling of the Kombi as much as the vehicle itself. A Samba Bus with a surfboard, a Flower Power design or a beach-toned wall piece can bring back road trips, salt air and old festival memories. The gift doesn't need to be mechanically precise, but it should look intentional and capture the relaxed coastal spirit.

The home stylist

For a décor-focused recipient, choose something that earns its place in the room. A mug, framed print, metal panel, photo frame or small model works better than a bulky object that has no practical use. Keep the colours aligned with the room, especially if they favour white, timber, nautical or relaxed beach styling.

The quick guide is simple:

  • Collector: scale, licensing and detail.
  • Driver: usefulness and connection to their own vehicle.
  • Surfer: coastal imagery and Kombi culture.
  • Decorator: colour, silhouette and everyday appeal.

Choosing Quality Diecast Models and Collectibles

At a sunny car show, a collector will inspect the model's details while a driver will look for a close match to their own Kombi or Beetle. Choose for that relationship with VW culture first. A diecast model should survive close inspection, so check the scale, licence, body shape and finish rather than trusting a colourful product photograph.

An infographic titled Choosing Quality Diecast Models and Collectibles displaying four tips next to a vintage Volkswagen car.

Start with scale and purpose

1:18 models make a strong visual statement and suit a dedicated cabinet or desk. 1:24 gives a practical balance between detail and display space. 1:32 models are easier to group into a larger scene or themed collection. Match the scale to the recipient's existing display, not to a general idea of which size is best.

Use the model's label carefully. A Kombi's long, recognisable body should look convincing from the side, especially when it represents the recipient's own vehicle or favourite era. Several vehicles can look untidy when their scales are mixed without a deliberate display plan. The classic Kombi's listed width is about 1,840 to 1,904 mm, and its length is about 4,789 to 5,290 mm, depending on variant and model year, as recorded in Australian Kombi vehicle data.

Check the licence and finish

Official licensing provides the starting point for authenticity. Inspect the following details before buying:

  • Badging: Volkswagen emblems and model markings should look crisp and correctly positioned.
  • Paint: Colour should be even across the body, with clean edges around windows and trim.
  • Moving parts: Opening doors, rolling wheels and visible interior features add interest for collectors.
  • Proportions: The roofline, windows, wheel placement and overhangs should suit the selected era.
  • Packaging: Good packaging protects the model and identifies the vehicle clearly.

Collector's rule: A model that looks right from three angles makes a better gift than one using a loud colour scheme to hide weak proportions.

The 1962 Kombi Samba Bus is a dependable choice for a collector or decorator. Its split-window character and iconic people-moving image read instantly on a shelf. The 1967 Beetle with surfboard suits a surfer or coastal enthusiast, linking the small car with the beach culture that made the Kombi such a lasting Australian symbol.

For a focused browse, the diecast models available in Australia category is a useful starting point. Compare the scale, body style and presentation, then choose the piece that reflects how the recipient enjoys VW culture.

Celebrating Australian VW Heritage Through Memorabilia

A VW gift carries more meaning when it matches the recipient's connection to Australian VW culture. Local assembly of the Volkswagen Kombi began in 1954, with imported kits completed in Clayton South. Full Australian production followed at Volkswagen's Melbourne-area factory from 1964 to 1977, placing the Kombi firmly in local motoring and working life. CarsGuide's Australian Kombi history records that manufacturing story.

The Kombi was a familiar working vehicle, not only a surf icon. In 1975, Australian sales reached 8,974 units, the model's biggest-selling year in Australia and about 43% of the Australian 1-tonne van market, according to the Club VeeDub history reference. Older Australians may remember Kombis as delivery vans, school-run transport, workplace vehicles or regular sights near the coast. Choose a period-authentic piece for someone who values those memories.

The Beetle has an equally strong local manufacturing connection. Production began at Clayton, Victoria, in 1954, and by 1958, 50,000 Beetles had been assembled locally, as documented in Retro Rides' history of Australian Beetle assembly. A Beetle model suits a collector of Australian industry, a driver who loves simple air-cooled engineering or anyone with family memories tied to early motoring. For vintage décor that captures the period's atmosphere rather than one body style, browse vintage Volkswagen memorabilia.

Let the era guide the gift

Choose a Samba Bus for a surfer or someone drawn to people-moving adventure. Choose a Beetle for a driver who admires compact design and Australian production history. Choose vintage décor for a home decorator who wants the colour, optimism and workshop character of the period.

Collectors know that Australian Kombis can command serious value. A restored example sold for A$158,000, while another reached A$202,000. CarsGuide's classic Kombi auction report also notes Australian examples being shipped overseas because of their dry-climate condition. That heritage makes a well-presented small collectible a smart gift, even when a full-size vehicle is out of reach.

Display Ideas and Gift Presentation Tips

A good model shouldn't disappear among books, paperwork and household clutter. Give it a deliberate position where the recipient can enjoy the silhouette from the side, because the Kombi's long body and roofline are central to its visual character.

Use a stable shelf away from direct afternoon sun. Dust gathers around windows, roof gutters and wheel arches, so a soft detailing brush and gentle cloth are safer than aggressive cleaning products. A clear cabinet or covered display case helps protect paint and small parts, particularly in homes near the coast where airborne salt and sand can settle quickly.

Build the presentation around the person

For a collector, wrap the model in a sturdy box with tissue that won't rub against the paint. Add a small handwritten note identifying the model, era and reason you chose it. For a surf enthusiast, combine a Kombi piece with a coastal card or beach-toned décor. For a home stylist, choose a practical pairing such as a model with a mug, wall piece or photo frame.

Keep the bundle visually consistent. A bright Flower Power Kombi can look terrific with colourful retro accents, while a clean white Samba suits timber, linen and nautical styling. Don't force a large bundle when one excellent piece will make the stronger statement.

If the gift includes a miniature toy or collectible accessory intended for children, check the product's age grading, small-parts warnings and paint or coating durability. Australian mandatory toy safety standards make it illegal to supply or sell non-compliant toys, and the Australian toy safety standards guidance explains why décor-style packaging doesn't automatically remove toy obligations when an item is intended for play.

Shipping advice: Protect the corners first, immobilise the model inside its packaging, and use enough cushioning that the box can't slide around inside the outer carton.

A miniature Volkswagen T1 campervan model sits on a wooden desk next to matching VW-themed decor items.

Where to Find Authentic VW Memorabilia in Australia

Buying locally makes sense when you're ordering a gift for an Australian enthusiast. An Australian specialist can offer local stock, fast domestic shipping and weekday support, which is useful when you need the item to arrive safely and on time. You'll also avoid the uncertainty that can come with overseas delivery, especially for boxed diecast models and fragile décor.

Look for a shop that makes licensing, model identity and product categories clear. A proper collection should let you compare Kombi Samba Bus diecast, Volkswagen Beetle models, vans and cars metal décor, home accents and gift ideas without making you hunt through unrelated products. That organisation helps you shop by recipient, whether you're buying for a collector, a driver, a surfer or someone styling a coastal home.

Australian VW culture is also wonderfully social. Volksfest Australia describes its family-friendly festival in Swansea, NSW, with market stalls, a beer hall, live music, Kids Korner activities, food trucks, cruises, a display day, Show n Shine and a VW swap meet in its 2025 event itinerary. A thoughtful model or piece of memorabilia fits naturally into that community, whether it sits on a club table, in a garage display or beside the family photos at home.

The best place to buy diecast Kombi gifts is one that understands the difference between a colourful novelty and a meaningful licensed collectible. Start with the recipient's connection to VW culture, confirm the model and scale, then choose a piece they'll enjoy long after the wrapping paper has gone.


Volkswagen Memorabilia offers licensed VW diecast models, Kombi Samba Bus and Beetle collectibles, metal décor and coastal-inspired gifts for enthusiasts across Australia. Visit Volkswagen Memorabilia to choose a thoughtful VW campervan gift that suits the collector, driver, surfer or home decorator in your life.

Volkswagen Type 2 History and Collecting Guide

At a sunny Australian car show, a blue-and-white Kombi rolls onto the grass and gathers a crowd before the engine has even cooled. Nearby, a tiny Samba Bus sits in a collector's display case, proving that the Volkswagen Type 2 can fill a driveway, a beach road, or a bookshelf with the same generous sense of adventure.

Why the Volkswagen Type 2 Still Captures Hearts

The Volkswagen Type 2 has a way of making strangers start talking. Someone remembers family holidays near the coast. Someone else recalls a mate's camper, a surfboard strapped to the roof, or the smell of vinyl warming in the afternoon sun. At a show, the van becomes a meeting point, with owners discussing paint shades, trim, restorations and the small details that separate one era from another.

That warmth comes from the shape itself. The upright windscreen, friendly nose, split windows and generous cabin made the Kombi instantly recognisable. It looked practical rather than aggressive, yet it carried an enormous emotional load. People associated it with weekends away, music, beach life, work, freedom and the simple pleasure of travelling with room for friends.

A classic blue and white Volkswagen Type 2 bus parked on grass next to a miniature model.

More than a transport van

The original Type 2 began production in March 1950 and became widely recognised as Volkswagen's second vehicle after the Beetle. Carsales' Australian history of the Combi records that the model reached Australia in 1954, with 334 Transporters sold locally that year.

That early arrival matters to collectors because the Australian Kombi story developed its own character. Local assembly, changing body styles and Australian-market components created a rich trail of variants for enthusiasts to identify. A diecast model is therefore more than a miniature van. The right one can represent a particular design era, a cultural mood or a memory that never quite left the road.

Why miniatures belong in the story

A full-size Kombi needs space, maintenance and a sympathetic owner. A licensed diecast model needs a shelf, a case and a little care. That makes collecting an approachable way to celebrate the same history, whether you're a long-time owner, a first-time buyer or searching for a thoughtful gift for a VW fan.

The best collections tell a story through colour and form. A classic Samba Bus can sit beside a Beetle, a surf-inspired van or a later Transporter, creating a small garage scene that feels personal rather than mass-produced.

The Australian Story of the Volkswagen Type 2

When the first Transporters reached Australia in 1954, they weren't just imported curiosities. Volkswagen quickly began building a local presence around them. The Type 2 was assembled from completely knocked down, or CKD, kits in Melbourne from June 1954, according to the Club VeeDub Australian chassis history.

The CKD approach brought German-pressed parts together with Australian fitting, trim and compliance work. For owners, that created a practical relationship with parts and servicing. For the company, it offered a way to adapt the vehicle to local conditions without replacing every part of the production system.

A timeline graphic showing the history of the Volkswagen Type 2 vehicle in Australia from 1954 to 1976.

From kits to Australian manufacturing

Australian production grew steadily. The first Australian stampings were made in 1959, and local content reached 75% by 1964, as documented in the Club VeeDub reference. In 1961, Australia produced its 100,000th Volkswagen, a milestone that shows how quickly the brand established itself in the local market.

The production story can look slightly different depending on how historians describe assembly and manufacturing stages. CarsGuide's account of Kombi production places Clayton assembly from 1964 to 1977, mostly using CKD kits, while Club VeeDub records Transporters as locally made from 1955 to 1976 and notes that fully imported Volkswagens followed from 1977.

For a collector, those distinctions are useful rather than confusing. They remind us that an Australian Type 2 may reflect several layers of production, from German-pressed shells to locally fitted components and later imported vehicles.

The van that businesses trusted

The Kombi also earned its reputation through work. Australian historical accounts describe Type 2s in service fleets, including vehicles associated with the Postmaster-General's Department during the 1960s. By 1975, the Kombi held more than 60% of Australia's 1-tonne market, according to Club VeeDub's historical article.

That working history gives Australian collectors another way to read the vehicle. The Kombi wasn't only a holiday icon. It was a delivery van, fleet vehicle, tradesperson's companion and dependable part of everyday life. When choosing a diecast replica, think about which story you want it to carry, a polished Samba, a practical panel van or a bright surf-themed display piece.

For a closer look at the local connection, the Kombi's Australian life offers a useful companion to the production timeline.

Key Type 2 Variants and How to Identify Them

At a show, identification often starts with the windows. The body shape gives you the broad answer, but roof details, front doors, side glass and trim help narrow down the variant.

The Split Screen, often called the T1, has the distinctive divided windscreen and an unmistakable early profile. Its production run is recorded as 1950 to 1967, with 1,477,330 Split Screen vehicles built, according to Heritage Parts Centre Australia's Type 2 history. That production scale helps explain why restorers and collectors continue to encounter a wide range of parts, specifications and condition levels.

The Bay Window followed with a broader, single-piece windscreen and a more modern body design. It still carried the same cab-forward charm, but the larger glass area changed the face and improved the driver's view. In diecast form, the windscreen and front profile are usually the quickest clues.

The Samba Bus is the jewel many collectors notice first. Look for the extensive window arrangement, raised roof section and bright detailing associated with the people-moving version. A Samba replica should make those features clear rather than hiding them behind vague “retro van” styling.

Type 2 Variant Quick Reference

Variant Production Years Key Identification Features Collector Appeal
Split Screen 1950–1967 Divided windscreen, early upright body, period-specific window layouts Strong historic identity and broad variant interest
Bay Window Later Type 2 era Single-piece windscreen, wider front glass, updated body profile Practical camper and commercial-van character
Samba Bus Commonly associated with early Split Screen styling Extensive side windows, raised roof section, bright people-mover trim Display presence and strong cultural recognition

The Transporter Combi Van collection is a helpful place to compare the familiar van shape with the different moods created by livery, colour and body style.

Reading a diecast model carefully

Collectors should compare the miniature with reference photographs from the same era. Check the number and position of windows, the shape of the bumpers, the roof treatment and the placement of badges. A model can look charming while still representing a generic interpretation rather than a faithful licensed Type 2.

Surf Culture, Hippie Freedom, and the Kombi's Cultural Legacy

A Kombi parked near an Australian beach never looks out of place. Its roof seems ready for boards, its cabin suggests a day's worth of towels and picnic gear, and its broad sides invite a hand-painted logo or a burst of colour. That visual language helped connect the Volkswagen Type 2 with surf culture and the wider idea of travelling light.

A couple stands next to a tie-dye Volkswagen van with surfboards on a beach at sunset

The van's cultural role grew because it made shared travel feel possible. Friends could load boards, guitars, camping gear and a chilly bin, then head towards the coast without needing everything to be perfectly organised. That sense of possibility turned the Kombi into a symbol, not merely a body style.

Colour became part of the message

Flower Power graphics, tie-dye finishes and surf imagery gave each van a personality. Some owners wanted a calm coastal look. Others preferred bold graphics that made the vehicle feel like a moving poster from another era. The same visual choices now shape memorabilia collecting, especially when a diecast model captures a period-inspired livery.

A 1962 Samba Bus with Flower Power decoration tells a different story from a plain commercial van. A 1967 Beetle with a surfboard brings the same coastal conversation into a smaller silhouette. These pieces work because they connect a vehicle to a setting, a soundtrack and a way of spending time.

A miniature can sit on a desk, but it can still suggest a long drive, a sandy car park or a sunset beside the water. The VW travel van range reflects that broader travel and lifestyle connection.

The following visual adds atmosphere to the history, especially for collectors building a display around surf and road-trip themes.

For many enthusiasts, that's the appeal. They aren't collecting a shape in isolation. They're keeping a little piece of beach culture, shared adventure and relaxed Australian optimism within reach.

Building Your Volkswagen Diecast Collection

A good collection usually starts with a question rather than a shopping list. Do you want to follow the Type 2 through its body changes, gather colourful lifestyle vans, pair Kombis with Beetles, or build a display around Australian coastal culture? Once you know the story, scale and quality become much easier to judge.

An infographic titled Building Your VW Diecast Collection featuring numbered steps for selecting scale, checking quality, and display.

Start with scale

Scale controls how much visual impact a model has and how easily it fits into your home.

  • 1:18: Choose this when the model is intended to be the centrepiece. It gives body lines, trim and interior details room to stand out, but it needs more shelf depth and display space.
  • 1:24: This is a useful middle ground for collectors who want visible detail without giving an entire cabinet to one vehicle.
  • 1:32: Pick it for a growing scene, a compact shelf or a collection that groups several vehicles together.

Don't mix scales accidentally if you're building a realistic garage display. A large Samba beside a much smaller Beetle can look intentional when the arrangement is clearly styled, but it can also make proportions feel wrong if the models are meant to represent the same scene.

Check the model before you buy

A licensed Volkswagen diecast model should communicate the design with care. Look closely at the paint coverage, badge placement, window surrounds, decals and wheel design. Rolling wheels are useful for handling and play, while opening doors or a pull-back mechanism may add interaction, depending on the model's intended style.

Collector's rule: Buy the version that represents the era and personality you love, not simply the first van with a familiar silhouette.

Packaging also matters, especially if you're buying a gift or keeping the item as a long-term collectible. Inspect the box for the Volkswagen branding and product details, then check that the model's proportions and livery match the description. Generic replicas can borrow the visual language of a Kombi, while licensed products are made to represent the brand more directly.

Protect the display

Dust and strong sunlight are the enemies of a tidy collection. A glass cabinet, acrylic case or enclosed shelf makes cleaning easier and reduces handling. Keep models away from hot windows, rotate the arrangement when you dust and retain the original packaging if storage or gifting matters to you.

Group models by era, colour, body style or story. A Samba beside a Beetle creates a classic pairing. A surf van with coastal décor gives a room a relaxed holiday feel. The strongest display isn't always the largest one. It's the one that makes visitors ask why each model is there.

VW Memorabilia Beyond Diecast Models

A miniature Kombi can anchor a collection, but it doesn't have to stand alone. Volkswagen memorabilia works especially well when the surrounding objects reinforce the same mood, whether that's coastal living, retro motoring, workshop style or relaxed road travel.

Metal van décor can add shape to a wall without needing the cabinet space required by a larger model. A framed print or photo frame can introduce colour, while fridge magnets offer a small, affordable way to mark a favourite vehicle or holiday memory. These pieces suit collectors who want their enthusiasm visible in everyday rooms rather than confined to a display case.

Building a themed corner

A coastal living room might combine a blue-and-white van motif with nautical accents, starfish, seashell pieces and simple white décor. A study or garage could lean towards vintage signage, Beetle imagery and a row of diecast vehicles grouped by colour. A man cave can handle bolder graphics, while a quieter display may suit a single Samba Bus beside a carefully chosen piece of wall art.

Seasonal decorations broaden the gift possibilities. A VW-themed Christmas piece can appeal to someone who already owns plenty of car models, while a small magnet or centrepiece suits a friend who loves the brand but has limited display space.

The important point is balance. Don't fill every surface with unrelated pieces. Choose one central vehicle, then add supporting items that echo its colours, era or travel story. That approach makes a collection feel organised and personal.

For gift buyers, match the object to the recipient's habits. A serious collector may appreciate a carefully detailed licensed model. Someone who loves beach style might prefer metal van décor or a coastal accent. A new enthusiast can start with a compact Beetle or Kombi and grow the display over time.

Where to Find Licensed Volkswagen Collectibles in Australia

The best collecting decisions begin with accurate identification. Know whether you're drawn to a Split Screen, Bay Window, Samba Bus, commercial van or a Beetle companion. Then choose a scale that suits your space, inspect the paint and decals, and decide whether the model belongs in a cabinet, a themed room or a thoughtful gift box.

Buying locally also makes practical sense for Australian collectors. An Australian importer can offer local stock, faster shipping and friendly support, which helps when you're buying a present, checking availability or trying to avoid the uncertainty of an overseas order. Local assistance is particularly welcome when a collection includes several scales, mixed packs or décor pieces that need to arrive safely.

A focused shop can also make browsing easier. Look for clear categories covering Kombi Samba Bus diecast models, Volkswagen Beetle models, vans, cars, wall décor and coastal gifts. The right range lets you compare a heritage vehicle with a surf-inspired variant without losing sight of the story behind each design.

Collecting a Volkswagen Type 2 model is a small act of preservation. It keeps Australian assembly history, surf culture, family travel and the friendly shape of the Kombi present in a form you can enjoy every day. Whether you're adding your first licensed replica or refining a display built over years, choose pieces that give the shelf a story.


Volkswagen Memorabilia offers licensed Volkswagen diecast models, including Kombi Samba Bus and Beetle designs, alongside VW-themed gifts and coastal home décor. Visit Volkswagen Memorabilia to find a meaningful piece for your display, your home or the VW enthusiast who still dreams of the next open-road adventure.

Diecast Scale 1:18 Guide for Aussie VW Collectors

You've brought home a classic VW diecast, found the perfect spot beside the books, and then realised the shelf is nowhere near deep enough. That moment is especially common with a 1:18 Volkswagen Kombi or Beetle, because this scale feels less like a desk ornament and more like a small, carefully engineered car.

For Australian VW enthusiasts, the choice isn't only about detail. It's also about shelf space, handling, display protection, price, and the story behind the vehicle. A Samba Bus connected with surf culture or a Beetle that echoes a family car can carry more meaning than another generic performance replica.

Unboxing the Magic of 1:18 Diecast

At a collectors' meet in Sutherland, a plain cardboard shipper can conceal a proper moment of theatre. Lift the lid from its foam-lined window box and a glossy red-and-white Volkswagen Samba Bus fills your hands. Chrome hubcaps catch the morning light, the curved roof feels substantial, and a door opens with enough spring-loaded firmness to make you pause before handling the rest.

That first reveal captures the appeal of diecast scale 1:18. A classic VW in this format has stronger visual presence, a heavier feel and a larger display footprint than smaller models. Australian size guidance places many 1:18 models at about 24 to 30 cm long, depending on the full-size vehicle, so shelf depth belongs in the buying decision from the start. This Australian model-car size guide offers a useful planning reference.

A person holding a detailed miniature model of a classic red and white Volkswagen T1 camper van.

Why classic Volkswagens suit the scale

A Kombi makes good use of the larger format because much of its character rises above the waistline. Roof rails, split windscreens, safari windows, bright trim and the cabin layout are easier to inspect at a glance. The Beetle has a different appeal. Its rounded guards, bonnet curve and compact engine bay give the model a pleasing sculptural quality.

For licensed classic Volkswagens, 1:18 offers more than the usual supercar or motorsport display. The generous proportions let craftsmanship, period styling and familiar VW character take centre stage, while the model's cost and shelf footprint make it a considered purchase rather than an automatic addition to the collection.

A Samba Bus can become the focal point of a cabinet, but it needs room around its mirrors, bumpers and open doors.

Practical rule: Measure the shelf before ordering. A model may fit by length yet feel cramped once you allow room to open doors or remove the display case.

What Diecast Scale 1:18 Means

You open a licensed classic VW model and place it beside a coffee mug. The proportions feel substantial because one unit on the model represents eighteen of the same units on the full-size vehicle. Measure the car, convert the measurement into the same unit, then divide by eighteen.

A VW Kombi measuring about 4.5 metres would therefore become a 1:18 model roughly 25 cm long. That is an approximation, since vehicle shapes and overall lengths vary. The included scale graphic makes the relationship easier to judge at a glance.

An infographic explaining how a 1:18 scale model vehicle relates to the size of a real car.

A simple way to visualise the footprint

Use a coffee mug as a rough reference. A 1:18 Kombi can be about as long as a generously sized mug is tall, but its width and height make it more demanding on a shelf. Mirrors, bumpers, roof rails and the tall body all contribute to the display footprint. One Australian collection listing shows an example around 28 cm long, 13 cm wide and 10 cm high, although dimensions depend on the specific model. This 1:18 collection listing helps show why cabinet depth and clearance matter.

That physical presence is particularly relevant for classic VW collectors. A detailed Beetle, Bus or Golf can become the centrepiece of a display, rather than just another small vehicle in a crowded lineup. The size gives period trim, body curves and cabin details room to be appreciated, while the cost and shelf space make each licensed model a deliberate choice.

The ratio also keeps a collection visually coherent. A 1:18 Beetle, Golf, Kombi and Porsche 911 are reduced in proportion to their full-size counterparts, so their relative sizes remain believable beside one another. That consistency helps a collection feel like a scene.

A video can help newcomers connect the ratio with the physical object:

Scale describes proportion, not construction. Two 1:18 models can still differ in materials, opening parts, paint quality and engineering.

How 1:18 Compares to Other Popular Diecast Scales

The larger format offers more room for detail, but it also takes more space and usually asks for a more deliberate purchase. A Kombi is a useful example because its boxy body makes the size difference easy to see.

Scale Approx model length, Kombi Typical detail level Indicative AUD price band Best for
1:18 About 25 cm High, often with opening features Premium, commonly around AU$99 to AU$556 across Australian listings Serious display collectors
1:24 About 19 cm Moderate to high, depending on maker Varies by brand and release Collectors balancing detail and space
1:32 About 14 cm Moderate Varies by brand and release Compact scenes and gift buyers
1:43 Closer to 10 cm Smaller-format detail Varies by brand and release Larger collections in limited space

The 1:18 price range above reflects Australian retailer positioning rather than a universal price list, as shown by Australian 1:18 category listings. The same Australian market includes many broader 1:43 and 1:64 ranges, so smaller scales can make it easier to represent more vehicles without giving each one a large display zone.

Choosing by use, not only size

A 1:24 Kombi can still look excellent, especially if your cabinet is shallow. A 1:43 Beetle may be the better choice for a timeline of Volkswagen generations, a miniature car-show scene or a shelf shared with books and memorabilia. The smaller the scale, the more likely that features such as fabric seatbelts, deep undercarriage treatment and moving panels will be simplified, although the exact specification depends on the manufacturer.

For a collector who wants to open a door and inspect the cabin, 1:18 has a clear advantage. For a casual buyer choosing a nostalgic gift, 1:24 or 1:43 may offer easier placement and a gentler entry into the hobby. Use the Australian diecast scale guide to compare the formats before committing to a shelf full of models that don't sit comfortably together.

Classic VW Models That Shine in 1:18

At a Sydney car meet, a 1:18 diecast model can turn a familiar classic VW into the display's focal point. The Samba Bus suits the format especially well. Its two-tone paint divides the body into clear, recognisable shapes, while curved roof rails, bright bumpers and safari-style windows give the eye plenty to inspect. In a well-made licensed release, glazing lets you see the interior details instead of merely assuming the seats are there.

A Volkswagen Beetle model creates a quieter kind of drama. Rounded guards and chrome bumpers make its silhouette instantly recognisable, while a detailed flat-four engine area gives collectors a reason to examine the rear. Its larger 1:18 footprint helps the Beetle read as a centrepiece, rather than a small accent among other models.

Beyond the obvious favourites

The Type 3 Notchback and Squareback offer a less predictable display choice. Their long, low proportions create a different visual rhythm beside a Kombi or Beetle. The Thing, or Type 181, adds an open-air, practical character that fits an off-road or beach-inspired scene.

Classic VW collecting also benefits from variety. A Samba Bus brings height and bright trim, a Beetle contributes familiar curves, and a Type 3 adds a lower, more horizontal profile. Together, they show why 1:18 works differently for licensed Volkswagens than for another race-car replica. The size gives each vehicle room to show its identity, but it also demands more shelf space and a more deliberate budget.

A typical 1:18 model uses a diecast zinc alloy body, plastic interior components and rubber tyres. Some releases include ABS or other composite parts, so read the product description carefully. Materials do not guarantee accuracy, but they influence the model's heft, panel movement and feel in the hand.

A classic VW does not need dramatic aero or racing decals to reward close inspection. Its appeal lives in proportion, trim and the practical details that made the original memorable.

Australian catalogues include varied 1:18 subjects connected with local vehicles, eras and marques. One Australian distributor describes modern 1:18 race cars as having roughly 145 die-cast and ABS parts, showing the engineering depth this format can support. Browse Australian 1:18 model examples to compare the range before choosing a classic VW for your cabinet.

What to Look For in a Quality 1:18 Diecast

Start with authenticity. A properly licensed model should carry genuine Volkswagen branding where appropriate, along with manufacturer identification and accurate design details. Names such as AUTOart, KK-Scale, Solido and Schuco appear across the wider collector market, but the badge on the box isn't enough by itself. Check the individual listing for licensing information, construction and opening features.

A 1:18 diecast model car quality checklist infographic detailing four key features of a Volkswagen model.

A collector's inspection checklist

  • Licensing and identity: Look for correctly formed Volkswagen badges, faithful trim and clear manufacturer details.
  • Opening parts: Doors, bonnet, boot and, on some Volkswagens, an engine cover should align cleanly and move without scraping.
  • Materials: A zinc alloy body usually gives the model a satisfying sense of weight, while plastic and photo-etched trim can reproduce fine brightwork.
  • Wheels and tyres: Rubber tyres should sit evenly, show convincing tread and align properly with the arches.
  • Paint and graphics: Look for an even colour, tidy panel lines and crisp printed markings rather than poorly applied stickers.
  • Interior finish: Seats, steering wheels, dashboards and door cards should look proportionate through the windows.
  • Packaging: A printed box, shaped inserts and a secure base help protect the model during storage and transport.

Opening features matter, but more isn't always better. A door that opens smoothly and sits flush when closed is preferable to several loose panels that undermine the model's shape. For a broader look at manufacturers and construction styles, compare the guidance in this diecast car brands guide.

The model should feel stable without forcing you to handle it by the roof, mirrors or bumpers. Pick it up by the base where possible, and inspect photographs closely if you're buying online.

Display and Care Tips for Premium 1:18 Models

A 1:18 VW needs a display plan. Allow a shelf depth of at least 30 centimetres so a longer Kombi can sit safely away from the edge, with enough room for mirrors, bumpers and a protective cover. Display cases for model cars can reduce dust while keeping the model visible for everyday enjoyment.

Build a calmer display environment

Tempered glass or acrylic cabinets work well because they protect the finish without hiding the model. Warm LED lighting around 3000–4000K can make classic paint and chrome look more natural than harsh cool-white illumination, while UV-filtered lighting helps reduce the risk of long-term fading. Keep the cabinet away from direct sun and from locations with sharp temperature changes.

An infographic showing four essential tips for the proper display and care of 1:18 scale model cars.

Handle the model by its plinth or base whenever possible. Clean cotton or nitrile gloves help prevent fingerprints on glossy paint and chrome, especially when you're photographing a newly unboxed Samba Bus.

Gentle cleaning wins

Use a rubber blower to lift loose dust from grilles, window frames and wheel arches. A clean microfibre cloth can handle broad surfaces, while a mild plastic-safe polish may help with stubborn marks. Keep water away from window glazing, printed details and openings, since moisture can settle where it's difficult to remove.

Rare pieces are safest in sealed cases. For models that you handle regularly, rotating the display each quarter can limit the time any one finish spends exposed to dust and ambient light.

Handling habit: If you need to move a Kombi, support the base with both hands. Roof rails, mirrors and bumpers are details, not handles.

Buying Smart and Building Your VW Collection

Buy from specialist diecast retailers, official or authorised promotions where available, established collector dealers and reputable swap-meet sellers. Online marketplaces can uncover older releases, but check seller feedback, photographs, packaging condition and the presence of genuine licensing marks before paying.

Australian availability can make a meaningful difference. A local importer or Australian shop may offer local stock and faster shipping, while also making returns and product questions easier than an overseas transaction. That matters when a large model arrives with a damaged case, a loose mirror or a hinge that doesn't operate as described.

Australian history also shows how scarcity and local relevance shape interest. Some Australian 1:18 releases are advertised as capped editions of 6,000 units worldwide, and listings tied to event milestones can sell through quickly. Australian road-car listings demonstrate how limited runs and commemorative subjects influence collecting decisions.

Choose one hero model first. A Samba Bus, Beetle Cabriolet, Type 2 crew cab or Flower Power variant can establish the mood, after which you can build a coherent story around body styles, colours, production eras or Australian VW culture. Biante's history is also closely associated with the format, with the company stating that it began with Kyosho 1:18 models in 1992 before growing into a major diecast distributor. See the Australian 1:18 brand range for context on the scale's local collecting footprint.

The best model is the one you'll still enjoy seeing each morning. Detail matters, but so do memories, colour and the feeling of a sunny VW show.


Volkswagen Memorabilia brings together licensed Volkswagen diecast models, including classic Kombi and Samba Bus pieces, Beetle favourites and surf-inspired variants, with Australian-friendly support and shipping. Visit Volkswagen Memorabilia to choose a 1:18-style centrepiece or find a smaller VW keepsake that fits your shelf, gift list and passion for the marque.

Vintage VW Supplies: Buyer Guide & Collectables 2026

At a sunny coastal car show, the best VW displays always seem to attract a crowd. A mint Kombi catches the light, a Beetle model sits on a folding table, and someone nearby is explaining which parts came from a long-finished restoration. You might've arrived looking for a small gift, then found yourself wondering whether a licensed diecast model, an enamel sign or a genuine vintage replacement part belongs in your own garage.

That's the charm of vintage VW supplies. The category stretches from practical restoration components to VW memorabilia collectibles, licensed Volkswagen diecast models, printed material and relaxed coastal décor. This guide focuses on the Australian buyer, with straightforward advice for choosing authentic pieces, checking fitment, comparing local and overseas sourcing, and building a collection that feels connected to real VW history.

Walking into the World of Vintage VW Supplies

The old Kombi beside the fibro beach shack tells a story before anyone turns the key. Its rounded roof, split windscreen or cheerful two-tone paint carries memories of road trips, surfboards, family holidays and weekends spent chasing the next coastal campsite. A small model on a bookshelf can bring back the same feeling, even when the full-size bus is out of reach.

A vintage mint green Volkswagen bus parked on a sandy beach next to a rustic coastal cabin.

More than parts in a cardboard box

For a restorer, supplies might mean brake components, suspension pieces, body hardware or an obsolete engine item. For a collector, they can mean a licensed Volkswagen Beetle model, a 1962 Kombi replica, a metal sign or a tin plate decoration. Renters and beach-house owners often prefer smaller objects that add retro character without requiring a full garage fit-out.

Australia has a particularly rich Volkswagen story. Early Beetles arrived in the 1950s, and local assembly began at Clayton, Victoria, in 1954. Manufacturing later ended in 1976, making the Clayton period an important part of the country's VW heritage, as documented by Museums Victoria's Beetle history.

The Beetle also became localised. By 1962, Australian content had reached 80 per cent, rising to 95 per cent by the mid-1960s, according to Carsales' account of the Beetle's Australian story. That background helps explain why an Australian collector might value a small model, workshop sign or period-style object as more than decoration.

Collector's mindset: Choose pieces that connect with a memory, a model year or a real Australian VW story. A collection feels stronger when every item has a reason for being there.

The Kombi carries its own local history. Volkswagen began building the Type 2 in March 1950, while Australian assembly took place at Clayton from 1964 to 1977. CarsGuide's history of the Australian Kombi notes that most were assembled from CKD kits, with some vehicles made from mostly local parts between 1959 and 1968.

The Main Categories Worth Knowing

A first trip through a vintage VW shop can feel like walking into a busy swap meet. Start by separating the range into three broad groups, then explore the smaller niches once you know what suits your space and budget.

A mind map diagram showing six main categories worth knowing: People, Places, Things, Ideas, Systems, and Events.

Licensed diecast models

Diecast is the serious collector tier, a bit like Matchbox grown up. The metal body, detailed interior, wheels, badges and paintwork give a Beetle or Kombi a stronger sense of presence than a basic toy. Scales such as 1:43, 1:24 and 1:18 help you judge the model's size before ordering, although the right choice depends on your display rather than a universal rule.

A 1:43 Volkswagen Beetle model suits a compact shelf or a growing line-up of different cars. A 1:24 Kombi has enough visual impact for a sideboard, while a 1:18 piece usually needs a dedicated cabinet or plinth. Check whether the model has opening panels, a fixed pose, a clear case or a presentation box, because those details affect how you'll display and handle it.

Printed and workshop memorabilia

Printed memorabilia works like the coffee-table literature of VW culture. Enamel signs, workshop manuals, period posters and reproduction garage graphics bring context to a collection, especially when you're displaying several models together.

A wall sign behind a Beetle model can make the car look like it has just rolled out of a service bay. A workshop manual beside a diecast Kombi adds a practical, mechanical note and gives visitors something to browse while they admire the model.

Home décor and smaller collectables

Home décor is often the easiest entry point. Cushion covers, lamps, metal wall art, enamel mugs, keyrings and tin toys can add a surf-shack mood without taking over the room. These pieces work well for gift buyers, renters and collectors who want VW style in a hallway, kitchen or office.

Limited-edition runs and mixed packs sit between casual décor and dedicated collecting. A mixed pack can introduce several colours or body styles, while a single special colourway may suit someone who already has a carefully organised display.

Start with the object you have room for, not the object that looks biggest online. A well-placed small model often has more impact than a crowded cabinet.

Spotting Licensed Diecast and Avoiding Reproductions

A genuine licensed model should look considered from every angle. The paint should sit evenly across the body, the graphics should be crisp, and the interior should show deliberate detail rather than a dark, featureless block. Brands such as Schuco, AUTOart and Greenlight are familiar names among collectors, but the manufacturer name alone isn't enough. Inspect the complete listing and the model itself.

Volkswagen licensing marks, manufacturer stamps, packaging information and a clear product description all help establish provenance. A weighted chassis can give a model a more convincing feel in the hand, while a clear acrylic case protects the finish and makes the piece display-ready. None of these details replaces careful checking, but several consistent signs together are reassuring.

Compare the construction, not just the price

Feature Licensed Diecast Reproductions
Branding Volkswagen licensing and manufacturer information are visible Branding may be missing, altered or unclear
Graphics Tampo-printed details are usually sharp and aligned Decals can look blurry, uneven or poorly positioned
Bodywork Panel lines, bumpers and trim are shaped with care Gaps, flat surfaces and simplified trim are common
Interior Seats, steering wheels and dashboards receive attention Interior detail may be minimal or absent
Presentation Original packaging or an acrylic case may be supplied Packaging can be generic or inconsistent
Provenance Seller can usually explain the brand and product Listing may rely on vague “vintage style” language

A model described only as a “retro bus toy” deserves extra questions. Market stalls and overseas listings can contain attractive pieces that aren't licensed collectibles, and mixed packs may combine different quality levels under one broad description. That doesn't automatically make them worthless, but it changes what you should expect to pay and how you assess future desirability.

Use this diecast model explainer to understand the construction and terminology before comparing listings.

A quick authenticity check

  1. Read the brand details: Look for the Volkswagen name, licensing information and the actual manufacturer.
  2. Inspect every photo: Check wheels, glazing, trim, graphics and the underside if it's shown.
  3. Ask about the box: Confirm whether original packaging or a protective case is included.
  4. Question vague wording: “Vintage inspired” isn't the same as officially licensed.
  5. Keep the receipt: Documentation helps if you later trade, insure or gift the model.

Licensed pieces generally make a more dependable foundation for a collection because their identity is clear. Generic reproductions can still suit a playful display, but don't confuse decorative appeal with documented collectability.

Where Aussie Buyers Source Their Supplies

The smartest buying channel depends on what you're sourcing. A local specialist may be ideal for an unusual restoration item, while an Australian online retailer can make more sense for a boxed diecast gift that needs to arrive promptly.

A professional infographic titled Where Aussie Buyers Source Their Supplies, listing eight common business procurement channels.

Match the channel to the job

Local VW specialists often carry parts for engine, suspension, rear axle, brakes and body systems. Australian suppliers also advertise reproduction components and used parts for older or discontinued Volkswagens. That range reflects how fragmented the supply chain can be, with new, used, reproduction and imported stock filling different gaps.

Rare parts need a more technical approach. One Australian classic-parts partner says it can source over 40,000 rare and obsolete genuine Volkswagen parts from the VW Classic Parts warehouse in Wolfsburg, with orders quoted in Australian dollars including freight to Australia, as explained by Mick Motors' classic-parts information. Exact identification matters because revision letters can distinguish different versions or even different models.

For restoration work, use the stamped nine-digit VW part number as your main reference, rather than relying only on a casting number or appearance. Special-order items may not be returnable unless faulty, so confirm fitment before committing.

A practical sourcing checklist

  • Local specialist shops: Best for technical questions, used components and model-specific advice.
  • Australian online retailers: Useful when domestic stock, AUD pricing and straightforward returns matter.
  • Mixed packs and bulk lots: Handy for variety, gifts or starting a display without choosing every item individually.
  • Online marketplaces: Offer breadth, but require closer inspection of photos, descriptions and seller history.
  • Peer-to-peer auctions: Can uncover unusual pieces, although condition and provenance need careful verification.

The Australian diecast models guide is a useful starting point for comparing local options. Domestic sellers can also remove the uncertainty that comes with international listings, including customs handling, currency conversion and long waits.

Before you buy: Ask for extra photos, confirm the licensing details, check the seller's reviews and make sure the return conditions are written clearly.

Local delivery isn't the only advantage. An Australian seller can answer questions in local business hours, quote in AUD and explain whether an item is stocked domestically or ordered from overseas. Those details make a bigger difference when the product is fragile, special-order or intended as a time-sensitive gift.

Styling a Collection With Coastal Retro Charm

A good VW display shouldn't look like a toy shop shelf unless that's exactly the mood you want. The most relaxed collections mix diecast models with timber, metal, woven textures and the sun-faded colours associated with Australian beach culture.

One collector might place a 1:24 Kombi on reclaimed timber beside a weathered road sign. Another could line a hallway runner with small buses, spacing them so each silhouette has room to breathe. In a living room, a Beetle model can sit on a brushed aluminium shelf above a rattan console, while a tin plate graphic adds a garage note without making the space feel industrial.

Build the display around a story

Group models by colour if you're chasing a calm visual rhythm. Mint green, cream, pale blue and red can create a cheerful coastal palette, while a collection arranged by body style gives a more automotive feel. A Samba Bus display works especially well with surf references, roof-rack details and small objects that suggest a road trip.

A dedicated cabinet with LED strip lighting protects the models from dust and gives darker paintwork a clean outline. Keep lighting soft and indirect, particularly if the cabinet sits near a window. For a patio or veranda, use metal signs and weather-tolerant décor rather than delicate diecast models.

Three rules keep shelves photogenic

  • Leave breathing space: Crowding hides the details that make licensed models worth displaying.
  • Mix heights: Combine a low model with a taller sign, lamp or framed print.
  • Repeat one colour: A shared accent, such as turquoise or warm cream, ties separate pieces together.

The coastal look works because it feels lived-in. A collection can include a polished boxed model, a slightly weathered sign and a practical key rack without pretending everything came from the same decade. That balance is what makes a room feel like a real enthusiast's space rather than a themed showroom.

Caring for, Storing and Valuing Your Collection

Diecast models and printed memorabilia last best when you treat them as display objects, not indestructible toys. Handle models with clean hands, use a soft cloth for dust and avoid dragging them across shelves. Direct sunlight can fade dashboards, graphics and paint, even when the model is safely behind glass.

Protect the finish and the packaging

A display cabinet gives better control than an open shelf, particularly in homes exposed to dust, humidity or salt air. Original boxes matter too. They protect the model during moves and help document its identity if you later trade or insure it. If you prefer an open display, keep the packaging flat, dry and away from heat.

Australian summers can be hard on enclosed rooms and window ledges. Choose a stable indoor position, avoid hot sheds and use silica gel packs where appropriate. Don't place collectibles directly beside a heater, in a damp garage or against a salty coastal window.

For a more polished setup, display cases for models can keep individual pieces visible while reducing handling and dust exposure.

An infographic detailing essential steps for properly caring, storing, and valuing vintage collectible items.

Keep a simple record

A collection log doesn't need to be complicated. Record the model name, scale, manufacturer, licensing information, purchase date, packaging condition and any marks or repairs. Add photographs from several angles, especially for rarer pieces.

Valuation comes from comparison, not wishful thinking. Look for recent comparable sales, then adjust for box condition, paint quality, missing parts and whether the model is officially licensed. An unlicensed copy may look similar in a photo, but it shouldn't be valued as though it carries the same documented identity.

A tidy record turns a shelf of models into an organised collection. It also makes gifting, trading and insurance conversations much easier.

Gift Ideas for the VW Fan in Your Life

The safest gift is one that matches the recipient's existing habits. A collector who fills cabinets with precise models may prefer a carefully chosen scale, while a beach-house stylist might get more joy from a sign or mug used every day.

Recipient Best Gift Match Why It Works
Coastal home stylist VW-inspired tin sign, surf-themed print or enamel mug Adds retro character without needing a large display
Experienced collector Licensed 1:43 or 1:24 model, special colourway or mixed pack Fits an established line-up and offers variety
Younger VW fan Robust diecast model for a bedroom shelf Introduces the hobby through a recognisable vehicle
Tradie or garage enthusiast Metal workshop sign, oil-can replica or key rack Combines VW identity with useful garage decoration
Nostalgia seeker Beetle or Kombi model linked to a remembered era Turns a personal story into a physical keepsake

Choose by display style

A Kombi Samba Bus diecast suits someone who talks about camping, surfing or family road trips. A Beetle model works well for a person who remembers their first car, follows local shows or has a soft spot for the rounded original shape. If you're unsure which colour they like, a mixed pack can provide a wider spread without forcing you to guess one exact variant.

For a homewares lover, look beyond the car itself. Metal wall art, printed signs, cushion covers and enamel-style kitchen pieces can carry the VW mood into everyday spaces. Garage types often appreciate practical objects, particularly key racks or signs that look at home beside tools and parts.

Check scale and packaging before ordering. A collector may already have a particular series, so clear photographs and manufacturer information help you avoid an accidental duplicate. For children, choose a display-friendly model with sturdy construction and avoid assuming that every small item is designed for rough play.

Wrapping Up and Where to Shop Locally

The best vintage VW supplies do more than fill a shelf. They preserve the shapes, colours and stories that make Beetles, Kombis and Samba Buses such enduring parts of Australian car culture. That connection is visible in the Beetle's local manufacturing history, and in the affection surrounding the Kombi at shows, club gatherings and beachside meet-ups.

Australia's Beetle sales history gives the nostalgia some useful context. 1960 was the Beetle's most successful sales year in Australia, with 24,388 sold, according to the Club VeeDub reference history. That kind of local presence helps explain why an old Beetle often feels familiar even to people who've never owned one.

The buyer's short list

Choose licensed diecast when accurate branding, construction and long-term collectability matter. Choose décor when you want a broader coastal look, and consider mixed packs when you're starting a display or buying for someone whose exact preferences you don't know.

For restoration parts, slow down before ordering. Confirm the complete part number, including suffix letters, check the model and system version, and ask whether the item is stocked locally, imported or special order. Suppliers serving Australian restorers may combine domestic inventory with overseas warehouses, so lead times and return rules deserve the same attention as price.

Local sourcing also makes practical sense for memorabilia. Domestic stock can mean faster shipping, AUD pricing, easier communication and fewer surprises than an overseas marketplace listing. A local importer or specialist seller may also provide weekday support when you need help checking a model, scale, brand or product description.

The VW community has always been about sharing knowledge. At Volksfest, VW Nationals, Surf Show and Shine events and smaller club gatherings, a conversation about a model often leads to a story about a real car. Start with one piece that means something, give it a safe place to live, then let the collection grow at its own pace.


Volkswagen Memorabilia brings together licensed VW diecast models, including Kombi Samba Bus and Beetle pieces, along with coastal décor and gift-ready memorabilia. Visit Volkswagen Memorabilia to browse locally supplied pieces, find a relaxed retro addition for your home or choose a thoughtful gift for the VW fan who already has the stories.

Beach House Gifts: Stylish Coastal Decor for 2026

You're standing in a coastal gift shop with sand still on your thongs, looking at another anchor plaque, another shell-covered frame, and another sign telling everyone to relax. Or you're scrolling online before a housewarming, birthday or Christmas visit, trying to find something that feels personal rather than pulled from the same beach-themed display.

The better answer is to choose a gift with a story. A classic Volkswagen model brings design heritage, surf culture and a sense of travel into the room, while modern coastal styling keeps the result calm, useful and distinctly Australian. The best beach house gifts don't shout “seaside”. They suggest freedom, salt air and weekends spent chasing the next good road.

Finding Beach House Gifts That Actually Feel Special

A friend recently asked me to help find a present for a beach house owned by a lifelong VW fan. The obvious options were easy to find, but none felt right. A basket of shells would have suited the room, yet said nothing about the owner. A novelty anchor sign might have earned a laugh, but it would have added clutter rather than character.

The winning idea was a licensed Volkswagen diecast model, chosen to echo the recipient's real interests. A Kombi Samba Bus made sense for someone who associates the coast with surfboards, road trips and open tailgates. A Beetle would have worked just as well for a collector drawn to compact, unmistakable design. Either piece could sit on a shelf as décor, then become the starting point for a conversation when guests arrive.

Australian coastal living gives this approach broad relevance. About 87% of Australians live within 50 kilometres of the coast, according to That Beach Shop's Australian coastal living overview, so seaside-inspired styling isn't limited to people who own holiday homes. Coastal references connect with everyday Australian homes, shopping habits and memories across the country.

My rule for beach house gifts: choose something that reflects the person first, then let the coastal setting shape the colour, material and presentation.

That's why I favour gifts combining practical longevity with genuine personality. A well-made model car, a restrained piece of wall art or a useful serving object can fit a beach house without turning it into a themed souvenir shop. The strongest choices also avoid fragile finishes and untreated materials that struggle with salt-laden air.

For VW lovers, the Kombi and Beetle offer a particularly good shortcut to that balance. They carry real heritage, but their rounded forms and cheerful colours also sit naturally beside linen, timber, woven textures and relaxed summer interiors.

What Makes a Great Beach House Gift in Australia

A smart coastal gift has to pass three tests. It should suit the recipient, work with contemporary Australian interiors and survive the practical demands of a humid, salt-prone environment.

An infographic titled What Makes a Great Beach House Gift in Australia outlining three key gift-giving tips.

Start with the home's actual style

Modern coastal rooms have moved well beyond a pile of shells, anchors and navy stripes. Australian design coverage now points towards seafoam greens, sandy neutrals, driftwood tones, linen, jute and pale timber, with marine references used more subtly. Homes to Love's guide to modern coastal décor is a useful reference when you're trying to choose something current rather than kitschy.

A turquoise Kombi can bring a lively accent to a neutral shelf. A white Beetle can reinforce a soft, pared-back palette. A darker model may suit a room with charcoal joinery, aged leather or industrial details. Match the gift to the home's existing mood instead of forcing a beach theme.

Check the materials before you buy

Salt-laden air accelerates corrosion on exposed metals. Technical guidance treats locations within about 1 kilometre of surf beaches as high-corrosivity environments, so frames, fixings and hardware should favour marine-grade aluminium, 316 stainless steel or powder-coated non-ferrous components, as explained in this Australian coastal corrosion guide.

For broader décor, sealed hardwoods, fibre cement, marine fabrics and stainless or galvanised fasteners are safer choices than untreated timber or basic steel. Drainage and drying gaps matter too, particularly for pieces used on balconies, verandahs or outdoor entertaining areas. Landmark Pro's coastal material guidance explains why stable, moisture-resistant materials reduce swelling, corrosion and maintenance.

Choose a gift that earns its place

The strongest beach house gifts support real life. Think about a model for a bookshelf, a framed piece for an entryway, or décor that can sit comfortably near an alfresco dining area without getting in the way. Australian coastal design is closely tied to summer entertaining and indoor-outdoor living, so a useful or display-friendly gift will usually beat a novelty object.

A good shortcut is to browse coastal home accessories with the recipient's routines in mind. Do they host friends? Collect automotive pieces? Prefer white décor, retro colour or natural texture? The answer will point you towards a gift that feels chosen, not generic.

Volkswagen Diecast Models as Unique Coastal Gifts

A VW diecast model works because it brings two kinds of nostalgia together. The Kombi Samba Bus evokes surf trips, campgrounds and the easy optimism of the road. The Volkswagen Beetle model adds a smaller, more sculptural note, with a shape recognised even by people who aren't serious collectors.

Scale is the first practical decision. The most popular diecast scales include 1:12, 1:18 and 1:24, with models commonly measuring about 16 centimetres to 33 centimetres in length. Australian diecast collecting guidance explains why this range works well: the models remain display-friendly while retaining room for fine detailing.

For a beach house shelf, I'd usually favour a compact scale that doesn't dominate the room. A larger model suits a dedicated display cabinet or collector's study. A Flower Power Kombi with surfboards brings more visual energy, while a classic two-tone Samba Bus looks polished beside books, ceramics and framed coastal photography.

Exact prices depend on the current model, finish, licensing and availability, so it's better to compare the specification and presentation than chase the cheapest box. Use this guide to narrow the choice:

Recipient Type Recommended Model Scale Price Range Best For
Casual VW admirer Classic Beetle 1:24 Check current listing Shelf décor and first-time gifting
Dedicated Kombi fan Samba Bus 1:24 or 1:18 Check current listing Collectors and beach-house displays
Surf and retro enthusiast Flower Power Kombi with surfboards Compact display scale Check current listing Colourful coastal interiors
Experienced collector Detailed Beetle or Samba Bus 1:18 Check current listing Display cabinets and established collections

The key is buying from a range that clearly identifies licensed Volkswagen diecast models. Look for clean paint, crisp badges, accurate body proportions, neatly fitted glazing and packaging that protects the model. A model should feel like a considered collectible, not a flimsy novelty.

You'll find the widest choice by comparing Volkswagen model cars by body style, colour and scale. For someone who already owns one iconic VW, a complementary model often makes a better present than an attempted duplicate.

Blending VW Memorabilia with Modern Coastal Styling

The trick is to style a VW model as an object with history, not as proof that the room has a theme. Give it breathing space, pair it with natural materials and let the shape do the talking.

A classic blue and white toy Volkswagen bus sits on a wooden shelf next to books.

A 1962 Kombi Samba Bus looks right at home on a floating timber shelf beside a stack of travel books and a piece of beach photography. Keep the surrounding objects restrained. Driftwood, linen-covered books, a small ceramic vessel and a pale frame can connect the model to the room without competing with it.

For a different vignette, group Beetle models with vintage surf magazines or a simple woven tray. The Beetle's compact profile works particularly well on a console, where it can add a flash of colour without blocking the view. A Flower Power version can be the one bright note in an otherwise sandy, white and seafoam palette.

Build a story, not a display pile

A strong arrangement usually has one main object, a few supporting textures and a clear sense of direction. Place the Kombi facing towards an open section of shelf, as if it's ready to leave for the next coastal stop. Use books or a low box to create height, then soften the grouping with jute, timber or stoneware.

Display idea: Pair automotive colour with coastal texture. Let the model provide the personality, while linen, jute, pale timber and glazed ceramics keep the setting relaxed.

Wall art follows the same principle. A VW print can sit beside an abstract coastal painting, a muted horizon photograph or simple linework. Avoid matching every item to the vehicle. Contrast makes the arrangement feel collected over time.

This short visual reference also shows how effectively a classic bus can sit among books and timber rather than shells and anchors.

A beach house doesn't need to look like a showroom, either. One carefully positioned model near the entry, living room or reading nook often says more than a crowded shelf of matching ornaments. The result feels authentic because the objects point towards travel, freedom and Australian coastal life without spelling out the message.

Caring for Beach House Gifts in Coastal Conditions

Coastal air is beautiful, but it's hard on exposed finishes. Salt residue settles on surfaces, humidity affects paper and untreated timber, and direct sun can fade paint over time. A thoughtful gift lasts longer when the recipient can display it in the right place and clean it without damaging the finish.

An infographic titled Caring for Beach House Gifts in Coastal Conditions featuring material and maintenance tips.

Protect the model first

Keep diecast models inside a display case where possible. A case limits dust and salt residue, reduces handling and adds a barrier against accidental knocks. Display cases for models are especially useful for collectors who want to keep packaging, accessories and the model itself in good condition.

Dust regularly with a soft brush or damp microfibre cloth. Don't spray cleaner directly onto the model, and don't soak painted surfaces. Direct sunlight deserves equal attention. Position the display away from strong windows, or use UV-blocking curtains when the room receives harsh afternoon light.

Choose coastal-ready supporting pieces

Glazed ceramics and stoneware are sensible choices for moisture-prone rooms. Aluminium, treated stainless steel and powder-coated finishes handle coastal exposure better than untreated steel. Solution-dyed acrylic and Sunbrella fabrics are useful around outdoor entertaining areas because they're designed to resist fading and mould.

Paper prints, cardboard packaging and untreated timber need more protection. Store delicate items indoors during humid periods, keep frames away from damp walls and allow air to circulate behind wall art. These small decisions prevent a beautiful beach house gift from becoming a maintenance job.

Why VW Gifts Resonate with Australian Collectors

The Beetle and Kombi aren't just retro shapes. They're part of Australia's motoring memory. Volkswagen formally introduced the Beetle here in 1953, began local assembly at Clayton, Victoria, in 1954, and reached nearly 95% Australian content by the early 1970s. The final Australian-assembled Beetle left the line in July 1976, as recorded in the Volkswagen Beetle history reference.

The Kombi has an equally strong local connection. Volkswagen sold 4.5 million Kombis worldwide since 1950, and the Microbus launched in 1954 accounted for more than one million of those sales. The first Type 2 vehicles were made in September 1952, sold in Australia from 1954, and the T2 arrived here in 1968, with German imports continuing after Australian assembly ended, according to Club VeeDub's Kombi history.

That heritage explains why a VW gift feels more personal than generic coastal filler. It can recall a family car, a surf trip, a restoration project or a long-held dream of owning a Samba Bus.

Australian events keep that community spirit visible. Volksfest Australia publishes its venue at 1 Dobinson Drive, Swansea NSW 2281, giving collectors a real gathering point for the culture, while VW Nationals and local Show and Shine events bring cars, owners and stories together. A diecast model fits naturally into that world. It's a compact way to celebrate the full-size cars, even when the beach house has no garage.

Wrapping and Presenting Beach House Gifts

Presentation should feel relaxed, tactile and easy to open. Use kraft paper, jute twine and a small dried flower or shell as an accent. Keep the decoration restrained, so the wrapping suggests the coast without repeating the same novelty motifs you were trying to avoid.

For a diecast model, leave the original display box intact and make it part of the presentation. Add a handwritten note explaining why you chose the Beetle, Samba Bus or Flower Power variant. If you're giving a housewarming present, pair the model with a small coastal accessory. For a birthday, build the bundle around the recipient's collecting interests. At Christmas, a model with a simple timber or linen accent makes a memorable display piece after the wrapping comes off.

Buying from an Australian importer also makes sense for collectors who value local stock, fast shipping and authentic licensed products. Check the current model details before ordering, especially when the gift needs to arrive for a specific gathering.


Volkswagen Memorabilia brings together licensed VW diecast models, Kombi Samba Bus and Beetle collectibles, surf-inspired pieces and coastal home décor for gifts with genuine character. Visit Volkswagen Memorabilia to find a beach house gift that celebrates Australian coastal living and the unmistakable spirit of classic Volkswagens.

Karmann Ghia Models: A Collector’s Guide to Types and Values

At a sunny Australian car meet, a Karmann Ghia can stop conversation without making a sound. Parked beside a Beetle, its low nose, flowing guards and crisp chrome look like the Beetle dressed for a night out.

The Story Behind the Karmann Ghia Name

The Karmann Ghia has always carried two identities. Underneath, the familiar Type 14 used the Beetle's mechanical foundation. Above it, coachbuilder Karmann shaped the body, while Italian design house Ghia gave the car its elegant lines. That combination explains why the Ghia feels related to a Beetle but looks entirely different.

Karmann's role matters because this wasn't a Beetle with a new badge. The body required its own panels, trim, glass and finishing details. For collectors, that distinction is still important. A model catalogue may list a Karmann Ghia beside a Beetle, yet the two miniatures can represent very different body shapes and production details.

Collector's eye: Treat the Karmann Ghia as a Volkswagen with shared mechanical DNA and a separate visual personality.

Australians encountered the Ghia as a stylish alternative to the more practical Volkswagens already becoming familiar on local roads. Its low roof and sculpted sides suggested European glamour, while its Volkswagen underpinnings kept it connected to the dependable Beetle family.

That blend gives the car lasting appeal at shows. A Beetle celebrates honest simplicity. A Kombi recalls travel, surf trips and open-air adventure. The Karmann Ghia adds a touch of grand-touring elegance, which makes it a terrific subject for licensed Volkswagen diecast models and display collections.

Type 14 and Type 34 Side by Side

Think of the two main Karmann Ghia models as siblings. The Type 14 is the rounded, familiar sibling, while the Type 34 is sharper, larger-looking and more angular. Both wear the Karmann Ghia name, but they don't share the same platform or visual language.

Type 14

The Type 14 is the classic coupe that many picture first. It was built on the Beetle chassis, with smooth, rounded fenders and a low, flowing roofline. It was also offered as a convertible, giving the design an even stronger connection with relaxed cruising and sunny coastal motoring.

Its mechanical relationship with the Beetle helps owners understand parts sourcing, although the body, trim and many exterior fittings remain specific to the Ghia. In miniature, a Type 14 usually has the soft curves, rounded nose and graceful rear haunches that make the full-size car so recognisable.

Type 34

The Type 34 used the Type 3 chassis, not the Beetle platform. Its styling is crisper, with more defined body lines, a squarer roof and a more formal fastback or notchback character. The windows, dashboard treatment and interior layout also give it a different feel from the Type 14.

The engine story follows the platform. Type 14 cars are closely associated with Beetle-based mechanical components, while Type 34 parts align more closely with Type 3 engineering. That difference matters when reading restoration guides or checking whether a diecast listing represents the right car.

A comparison infographic featuring the classic Volkswagen Karmann Ghia Type 14 and the angular Type 34 models.

For a quick identification, start with the silhouette. A rounded coupe or convertible points towards the Type 14. A squarer, more angular car with a larger-looking cabin suggests the Type 34. Catalogues sometimes use the type code because “Karmann Ghia” alone isn't precise enough for collectors ordering parts or choosing a miniature.

Why Australia Got So Few Karmann Ghia Models

Australia's local Karmann Ghia story is unusually scarce. Volkswagen Australasia introduced the model here in 1959 as a fully imported luxury coupe, and it remained on sale until 1968, according to Club VeeDub's Australian Karmann Ghia history.

The early sales record shows why Australian-delivered cars attract so much attention. Only about 800 Karmann Ghias were officially sold in Australia across that ten-year span. The first three recorded years were especially small, with 13 units in 1959, 264 in 1960 and 284 in 1961.

Year Units Sold
1959 13
1960 264
1961 284

Those figures don't tell you the condition or history of any individual car, but they do explain the emotional response when a genuine Australian-delivered Ghia appears at a display day. The local population was never large, so surviving examples sit in a very different context from imported cars sourced from markets where the model was more common.

Local car or private import

Paperwork is the starting point. Ask for registration history, import documentation, chassis information and restoration invoices. A seller who can explain where the car came from and which work was performed gives you a stronger basis for judging originality, parts choices and future maintenance.

A private import isn't automatically a poor purchase. It needs to be assessed as its own category, with attention to market specification, replacement panels and compliance work. Local scarcity also means an owner may depend on specialist suppliers and mixed sourcing rather than finding every item on one Australian shelf.

Spotting the Year on a Real Car

Model-year identification is best treated like reading clues at a crime scene. Don't rely on a badge, a sales description or one shiny replacement part. Walk around the car and compare several body details together.

Start at the front

Early cars are associated with lower-set, round headlights and smaller bumpers. Later styling brought altered headlight positions, revised grilles and more substantial bumper treatments. A car with replacement guards can confuse the picture, so inspect mounting points, inner panels and the consistency of the brightwork rather than judging a single lamp.

Move along the sides and rear

Side vents, fender louvers, window proportions and rear glass shape can help narrow the era. Taillights changed as the design developed, and later cars generally present a more substantial lighting treatment than the earliest examples. The rear window is another useful clue, but it should support the rest of your observations, not decide the year by itself.

A visual guide comparing early and late model Karmann Ghia design features like headlights, bumpers, vents, and windows.

Use this simple order when inspecting a car:

  1. Check the headlights: Compare round early shapes with later positioning and treatment.
  2. Inspect the bumpers: Look for the car's original style, not merely what has been fitted during restoration.
  3. Study the side vents: Fender louvers and their absence can separate different styling periods.
  4. Confirm the rear window: A smaller oval appearance and a larger rectangular treatment point to different eras.
  5. Match the details: Make sure lights, trim, glass and interior choices belong together.

For a visual walk-through before visiting a show or seller, watch this Karmann Ghia identification video. It's still wise to verify chassis information and documentation before making a restoration or purchase decision.

Karmann Ghia Diecast Scales and Makers

Diecast scale tells you how large the miniature is compared with the full-size car. A 1:18 Karmann Ghia is a substantial display piece with room for stronger body detail, while a 1:24 model takes up less shelf space and usually sits at a more accessible price point. A 1:43 model works well when you want a whole street scene or a broad Volkswagen collection.

An Australian diecast retailer lists 1:18 models at $110 and 1:24 models at $45, giving collectors a useful local comparison between scale and price. These figures are a guide to listed retail pricing, not a universal valuation, as maker, edition, condition and availability still matter. See the Australian diecast models guide for more collecting context.

An infographic comparing three common diecast car model scales, including 1:18, 1:24, and 1:43 ratios.

Choosing the right shelf companion

Look for a model with clean proportions, correctly shaped lights and a finish that matches the era it claims to represent. Recognised makers such as AutoArt and Bburago are familiar names in larger-scale collecting, while other licensed releases may prioritise affordability, playful decoration or compact display size.

A Ghia looks especially good beside a Beetle or a Flower Power Samba Bus. The Ghia brings the polished coupe profile, the Beetle supplies the unmistakable rounded family connection, and the Samba Bus adds the unmistakable travel story. Free-wheeling wheels, opening doors and pull-back action can be enjoyable, but collectors should decide whether they want a display model, a play-oriented piece or a mixture of both.

Buying Tips for New Collectors

A good first purchase starts with condition, not excitement. A rare-looking colour or dramatic box can catch your eye, but the miniature still needs straight panels, even paint and tidy detailing.

Four checks before paying

  • Inspect the box: Look for shelf wear, crushed corners, missing inserts and complete labelling. Packaging can matter to collectors who plan to keep the piece boxed.
  • Examine the blister: Cracks, clouding or yellowing plastic may affect presentation, especially when the model is intended as a gift.
  • Study the miniature: Check for paint chips, loose parts, uneven badges, crooked wheels and fingerprints under clear finishes.
  • Confirm the licence and provenance: Ask whether the model is an officially licensed Volkswagen product and whether the seller can explain its edition, previous ownership or special release status.

Licensing matters because it connects the miniature to the manufacturer's identity and gives buyers clearer expectations about the design. It doesn't guarantee perfect condition or future resale value, so keep your receipt, photograph the model when it arrives and store the packaging carefully.

Buying from an Australian importer or local seller can simplify the experience. Local stock, faster domestic shipping and accessible after-sales support are practical advantages over waiting on an international hobby shipment, particularly when you're buying a gift or trying to complete a display before a club event.

An infographic titled New Collector Buying Tips with four numbered steps for evaluating collectible car models.

Display Ideas for Cars and Diecast Together

A Karmann Ghia miniature doesn't need to sit alone in a glass box. Try building a small coastal scene with the coupe at the centre, a licensed Samba Bus behind it and a Flower Power Beetle angled as though the group has just arrived at the beach. Surfboards, starfish accents and pale timber tones can reinforce the relaxed Australian character without distracting from the cars.

Another approach is a family display. Put a Beetle beside the Type 14 to show their shared visual heritage, then add a Kombi to represent the travelling side of Volkswagen culture. Keep the arrangement at eye level, leave enough space between vehicles to see their profiles and avoid crowding several large models onto one narrow shelf.

The care routine is simple:

  • Control sunlight: Direct sun can fade paint and packaging over time.
  • Use a soft brush: A clean, fine brush lifts dust from grilles, badges and wheel arches without rubbing the finish.
  • Protect the boxes: Store packaging flat where possible, away from damp areas and heavy objects.
  • Handle by the base: Holding the miniature by its base or sturdy underside reduces fingerprints and pressure on mirrors or trim.

For a more formal setup, display cases for model cars can keep dust away while letting the details remain visible.

Australian FAQs and Where to Shop

Which parts are Karmann Ghia specific?

The Beetle-based Type 14 shares important mechanical foundations with the Beetle, so some brakes, suspension and engine-related components may be sourced through the wider air-cooled Volkswagen network. The body is another matter. Ghia panels, exterior trim, glass, seals, lights and bumpers can be model-specific, and Type 34 parts follow the Type 3 platform rather than the Beetle.

Australian owners face a practical supply challenge because the local population is small. Karmann Ghia Australia shows that specialist parts and services exist locally, while broader Australian air-cooled VW suppliers support mixed sourcing. Owners may still need to combine local specialist help, compatible Beetle-based components and private imports.

What Australian events help collectors connect?

The VW Nationals 2025 was scheduled for Sunday 25 May at Fairfield Showgrounds in Prairiewood, while the announced 2026 Nationals included a Saturday 25 May VW Cruise and Sunday 26 May Car Show, as listed by Volkswagen Australia's Kombi information. Check event details before travelling, especially where a schedule refers to a future event.

What makes a useful gift?

A Volkswagen Beetle model suits someone who loves the original people's car. A Samba Bus miniature works for a surfer, traveller or Kombi admirer, while a Karmann Ghia model makes a thoughtful choice for someone drawn to elegant coachwork and less common VW history. Mixed packs can also help a new collector discover which scale and style they prefer.

For a focused browse, explore Karmann Ghia models for sale and compare the shape, scale and finish before choosing.


Volkswagen Memorabilia brings together licensed VW diecast, including Beetles, Kombi Samba Buses and playful Flower Power pieces, alongside coastal décor for a relaxed display. Visit Volkswagen Memorabilia to find a Karmann Ghia companion, build a classic VW shelf or choose a thoughtful gift for the enthusiast who never walks past a Volkswagen without taking a second look.

Boho Throw Blanket: Your Australian Guide 2026

You're on the sofa, the evening air has turned cool, and the room feels one small change away from looking finished. You open a search tab for a boho throw blanket, scroll past a dozen tasselled options, and still can't decide whether your space needs warm terracotta, faded blue, or something quiet in oatmeal.

The right throw can do more than keep your knees warm. It softens a hard-edged room, adds colour without repainting, and brings a relaxed coastal-meets-vintage mood that suits Australian homes beautifully. The trick is choosing one that works with your climate, furniture and existing textures, rather than buying the loudest pattern on the page. For a few easy ways to build that laid-back look, browse these boho style room ideas.

Why Australians Are Draping Boho Throws on Everything Right Now

Australian homes often need warmth without heavy layers. A boho throw blanket handles that job neatly, adding softness to a sofa arm, cane chair or bed without permanent changes. It suits rentals, open-plan rooms and homes where the climate shifts between bright afternoons and cooler evenings.

This style also works because it is easy to move around. Keep a cotton throw on the lounge, carry it to the verandah, then fold it over a chair when guests arrive. Choose texture and colour that look useful, not staged. For more relaxed coastal-vintage combinations, use these boho style room ideas as a practical starting point.

Australia's home textiles market was estimated at USD 2.37 billion in 2026, up from USD 2.24 billion in 2025, and is projected to reach USD 3.11 billion by 2031, with a projected 5.62% CAGR from 2026 to 2031, according to Mordor Intelligence's Australia home textiles market overview. Cotton held 40.78% of the market in 2025, while bed linen led application demand with 38.02% revenue share. For shoppers, those figures support a cotton-first approach to comfortable, natural-looking layers.

The palette that feels right here

Australian boho styling works best with sandy cream, weathered timber, ocean blue and sun-faded red. Combine those tones with practical furniture instead of matching every piece. The result has the easy nostalgia of a beachside road trip, with a subtle VW Kombi-inspired vintage mood carried through throws, cushions and small decor.

Blankets are also becoming a stronger comfort and décor category. One Australian market overview forecasts blanket growth of more than 7.41% CAGR from 2026 to 2031, while another estimates the Australia blankets and quilts market at USD 421.4 million in 2024, projecting USD 821.2 million by 2033 at a 6.9% CAGR from 2025 to 2033. These figures come from Bonafide Research's Australia blanket market overview, pointing to throws as useful comfort pieces with genuine decorative value.

What Actually Makes a Throw Boho

Boho isn't just "anything with tassels". A convincing boho throw blanket usually combines three visible cues: tactile edging, an eclectic pattern and a warm or sun-softened colour story.

An infographic checklist for selecting boho throw blankets, featuring three key design elements including fringe, patterns, and colors.

Use the three-cue test

  • Fringe or tassels: Look for a deliberate, visible finish rather than a barely-there stitched edge. Fringe gives a plain weave movement and makes casual draping look intentional.
  • Eclectic pattern: Geometric, mandala, tribal and floral motifs all work, especially when the design isn't perfectly uniform. A small repeating pattern can feel calmer than a giant central medallion.
  • Warm colour: Terracotta, ochre, rust, clay, camel, cream and faded navy are reliable choices. Rich colour can work too, but it needs breathing room around it.

Think of texture like travel memories on a shelf. One woven basket, a weathered timber object and a patterned textile feel collected. Add fringe, boucle, rattan, heavy pattern and several ornaments at once, and the room starts telling too many stories.

Know what boho isn't

A plain charcoal knit is practical, but it reads minimalist. A crisp white and blue cotton throw with restrained stripes leans coastal Hamptons. A boho option sits between those poles, with enough pattern and hand-finished detail to feel relaxed, personal and slightly nomadic.

Check the product photograph at a distance. If you notice only a solid block of colour, it may be a basic lounge blanket. If you notice fringe, uneven visual rhythm and earthy colour working together, you're much closer to the look.

Picking Materials That Survive Australian Weather

A throw that makes you overheat in Darwin or shiver in Hobart has missed the brief. Choose the fibre for the room's actual conditions, including hot summers, cool evenings and strong indoor air-conditioning.

Cotton is the best all-rounder for much of Australia. It breathes, handles everyday use and suits coastal rooms because its natural texture looks good slightly rumpled. Cotton-linen blends feel drier and airier, though linen creases more easily. Cotton-acrylic blends are practical, hold their colour and need less fuss, but they do not breathe as well as natural fibres.

Wool and wool blends earn their place in cooler homes or on sofas used for proper winter warmth. Wool-rich designs feel substantial and cosy. A wool-cotton blend softens that weight for homes with changing temperatures. In tropical and subtropical areas, keep wool for occasional use instead of making it the everyday sofa layer.

Match weight to the room

GSM, or grams per square metre, reveals fabric density more reliably than a product photograph. A lightweight weave suits warm rooms and outdoor entertaining. Medium weight works through the year, especially where hot afternoons give way to air-conditioned evenings. Dense, heavy construction belongs in cold bedrooms and winter lounging.

Lightweight chenille gives you softness and relaxed drape, but inspect the weave. Raised yarns can snag on rough furniture and pet claws. Recycled fibres also suit hard-working family rooms when the fabric feels comfortable and the seller clearly explains the blend.

A throw should support the room's climate as well as its style. Cotton-led coastal schemes usually look fresher with a lightly crinkled weave, timber, rattan and washed colours than with a dense synthetic pile. For a VW Kombi-inspired vintage mood, use a faded cotton throw with a small geometric pattern, then repeat its colours in a cushion or compact woven basket. The reference should feel collected, not like a themed display.

Sustainability wording needs a close read. Australian market analysis says cues including organic cotton, recycled polyester, low-impact dyes and transparent sourcing appear in over 30% of new throw launches, compared with about 10% in 2021, as reported by IndexBox's Australian modern throw blanket analysis. Use that figure as a reason to check the fibre content and sourcing details, not as proof that every product with green wording is comparable.

Material Feel Best for AU climate Care difficulty
Cotton Breathable, soft, easy-going Warm homes, coastal rooms, everyday use Low to moderate
Cotton-linen blend Dry, airy, naturally relaxed Hot summers and breezy interiors Moderate
Cotton-acrylic blend Light, smooth and practical Air-conditioned rooms and frequent use Low
Wool or wool blend Warm, springy and substantial Cool nights and colder southern homes Moderate to high
Recycled synthetic blend Often smooth and resilient Busy households and occasional outdoor use Low to moderate
Lightweight chenille Plush, soft and drapey Sheltered interiors and decorative layering Moderate

Practical rule: For most Australian living rooms, start with lightweight or medium cotton. Add wool only when the climate and your actual habits justify it.

Sizes That Actually Fit Your Furniture

Throw sizing makes more sense beside furniture than on a product page. A small blanket is roughly 100 x 150 cm, a medium option is about 130 x 180 cm, and a large throw is around 150 x 200 cm. Those are useful guides, not rigid rules, because fringe, thickness and drape change how much fabric you need.

Approximate size Best placement How to style it
100 x 150 cm Single chair, armrest or reading nook Fold lengthways and place it where someone can grab it
130 x 180 cm Sofa end or generous armchair Let one corner fall naturally, keeping the rest off the floor
150 x 200 cm Queen bed foot or broad sofa Fold into a long band for a tidy, hotel-style finish

A medium throw usually gives the most useful sofa drape. Place the centre over the back or arm, then allow one side to hang lower. Don't spread it evenly across every cushion, because that can make the room look staged and hides the furniture you chose carefully.

For a coastal room, an oversized lightweight cotton piece often photographs beautifully because it falls in soft, irregular folds. A heavy throw in a smaller size can look bulky, particularly over a narrow chair. Before adding to cart, measure the furniture width and decide whether you want coverage, warmth or a colour accent. More guidance on bed placement is available in this throw blanket for bed guide.

Three Easy Ways to Style a Boho Throw at Home

Start with one hero colour, one texture, one pattern, one natural element and one plant. That five-part rule stops boho styling from becoming a pile of competing details.

A cozy white couch decorated with a textured burnt orange throw blanket and a woven throw pillow.

Coastal living room

Use terracotta as the hero colour against white or sand-coloured linen. Add a woven cushion for texture, choose a restrained geometric pattern, bring in a rattan tray or timber stool, and finish with a leafy plant.

The throw should sit at one end of the sofa, not cover the whole thing. This keeps the coastal base light while allowing the boho detail to do the work. If the pattern is strong, keep the cushion quieter.

Vintage-inspired nook

Build the corner around a faded red or mustard throw, a cane chair, a small patterned cushion, warm timber and one hardy indoor plant. The palette recalls old travel posters and sun-baked surf culture, including the cheerful character of a vintage Kombi, without relying on novelty décor.

Use the chair as the hero rather than adding colour to every nearby object. A single throw with a soft fringe is enough to make a reading nook feel collected.

A small wall piece can reinforce the mood without crowding the seat. These boho wall art ideas can help you keep the surrounding display simple.

Layered bedroom

Choose one warm base colour, then combine a patterned throw with a quieter textured blanket. Place the boho layer across the foot of the bed, add one natural material such as timber or seagrass, and use a plant to break up the fabric.

Don't match every pattern. Let one design lead, let the other support it, and keep the sheets calm enough for both to breathe.

Caring for Your Throw Without Ruining the Tassels

Care labels aren't decorative paperwork. In Australia, household textile throws must follow the Consumer Goods (Care Labelling) Information Standard 2023, which requires a permanent, securely attached label. From 5 March 2024, labels can use English instructions, international care symbols, or both, as explained in the ACCC care-labelling guide.

The label should cover five categories: washing, bleaching, drying, ironing and professional care. Those categories matter because fringe, woven patterns, blended fibres and decorative dyes can react differently to heat, agitation and chemicals.

Wash according to construction

Cotton and durable blends may tolerate a gentle machine cycle, ideally inside a laundry bag with mild detergent. Hand-washing is the safer choice for loose weaves, heavy fringe and delicate dye work. Wool-rich throws need particular restraint because heat and agitation can encourage felting and dimensional change.

Never assume “cotton” tells you everything. The weave, finish and blend affect shrinkage and shape, which is why Australian requirements align with AS/NZS 1957:1998 and ISO 3758:2012, according to the mandatory care-labelling standard guidance.

Protect the shape and edge

Dry flat when the label allows it, especially for heavier or stretchy textiles. Hanging a wet throw from one edge can pull the body out of shape and leave the tassels uneven. Keep bleach away unless the label explicitly permits it, and don't iron across fringe.

For storage, fold rather than hang. Wool blends benefit from a clean, dry cupboard and sensible moth protection such as cedar, while cotton should be stored completely dry to avoid musty smells.

Customisation Tricks and a Smart Buying Checklist

A good throw can be adjusted without turning it into a craft project. Secure a loose tassel with a needle and matching thread, refresh a tired shade with a fibre-safe dye, or stencil a small border with fabric paint. Test any dye or paint on an unseen section first, and don't alter a valuable textile before checking its care instructions.

Quick buying check

  • Inspect weave and weight: Look for a construction that matches your room, not just a flattering photograph.
  • Read the fibre blend: Cotton, wool, acrylic and recycled fibres each bring different warmth, drape and care needs.
  • Measure the destination: A chair, sofa end and queen bed need different proportions.
  • Find the care label: Clear washing, drying and finishing instructions signal a more considered product.
  • Question sustainability claims: Look for specific fibre, dye and sourcing information instead of broad eco language.

An infographic displaying tips for customizing and smart buying of home decor items like throw blankets.

A throw should support your room's mood, not force a full makeover. If your space already has rattan, timber and patterned cushions, choose a calmer weave. If the room is mostly white linen and pale walls, a sun-faded red or mustard layer can give it the spark it's missing.

Common Boho Throw Mistakes and Where to Shop in Australia

More texture does not automatically create a boho room. Put a chunky weave beside tassels, boucle cushions, a shaggy rug and busy wall art, and the result feels crowded rather than relaxed. Make one texture the feature, then keep the others quieter.

Cotton throws also vary widely. Fibre quality, weave density and GSM affect breathability, drape, washing and shape retention. For warm Australian weather, choose a thin, open cotton weave over a dense blanket, even if both labels say “cotton”.

Keep throws in rotation through summer. Australian homes use winter-weight wool, sherpa and heated options, as well as lightweight cotton and blended styles, partly because air-conditioning can leave indoor rooms cool. Overseas supply plays a substantial role in the local market, while demand for premium natural fibres is growing faster than demand for synthetics.

The common styling mistake is treating every surface as an invitation for pattern. In a relaxed coastal or VW Kombi-inspired vintage room, let the throw lead. Add a cushion, small metal sign or other decor detail that repeats its colour, then leave breathing space around the arrangement.

Visit Volkswagen Memorabilia for coastal home décor and VW-inspired pieces that pair naturally with a relaxed boho throw blanket. Browse the shop for vintage character, beachside colour and thoughtful gifts, then choose a small detail that makes your room feel collected rather than cluttered.

Amarok VW Review: The Honest Aussie Buyer’s Guide

You've got the family packed, the caravan hitched and a long run of Australian highway ahead. The Amarok looks perfectly placed for the job, especially in V6 form, but the badge and 3,500 kg tow rating don't tell the whole story. Once passengers, towball mass, accessories and camping gear join the party, the ute's legal limits matter more than its brochure shine.

That's the point of this Amarok VW review. I'm looking past the glamour of the V6 and the easy five-star talking points to explain what the current Amarok means for touring families, tradies and buyers who want a premium dual-cab without getting caught short on payload.

Why the Amarok Still Matters on Aussie Roads

At a caravan park on the coast, an Amarok makes sense before anyone opens the bonnet. It has the stance, cabin comfort and towing confidence to handle a family holiday, while the tray swallows the awkward gear that never fits in the boot. Point it towards a dirt road and it feels like a genuine touring tool, not just a polished city ute wearing an adventurous costume.

That broad usefulness explains why the Amarok has become such a familiar sight across Australia. Volkswagen launched the nameplate locally in 2010, and by 21 November 2024 it had reached 100,000 Australian deliveries, according to CarExpert's Amarok milestone report. That's a serious local run, built on buyers who wanted something more refined than a basic workhorse without giving up practical towing ability.

A ute with a particular audience

The Amarok isn't the automatic choice for every buyer. Some people want the simplest possible ute, the cheapest tyres and a cabin they won't worry about on a rough worksite. Others want a vehicle that can cover big highway distances, tow a sizeable caravan and still feel civilised when the trip ends.

That second group is where the Amarok earns its keep. It suits the couple crossing the Nullarbor, the family heading inland for a long weekend and the tradie who spends just as much time travelling between jobs as working at them. The appeal is less about being the toughest vehicle in the paddock and more about combining touring comfort, strong towing and premium presentation.

Practical rule: Don't buy an Amarok because the V6 sounds impressive at the dealership. Buy it because its comfort, towing layout and equipment match the way you'll actually use it.

The rest of the decision comes down to limits. A fully loaded caravan, four adults, a bullbar, roof gear and camping equipment can turn a generous-looking ute into a carefully managed weight equation. The Amarok is worth serious consideration, but only if you assess the whole rig rather than admiring the badge.

Two Generations of Amarok and What Changed

The easiest way to understand the Amarok is to split its Australian story into two clear stages.

Step one, understand the original

The first generation arrived locally in 2010 and built its reputation over the following years. Its Australian sales peaked at 9,290 units in 2018, a milestone recorded in CarExpert's local Amarok history. That original model became known for its strong diesel engines, comfortable road manners and distinctly European take on the dual-cab formula.

It also gave the nameplate enough time to become part of everyday Australian ute culture. You'll see older Amaroks at boat ramps, building sites and caravan parks, often still being used as intended rather than hidden away as occasional transport.

Step two, see what the second generation changed

The second-generation Amarok arrived for the current era and moved the model into a more heavily equipped, more polished space. By the end of October 2024, it had delivered 7,297 units in Australia, running about 49% ahead of the same period in 2023, according to the same Australian Amarok sales coverage. That renewed demand shows the newer vehicle hasn't relied on nostalgia for the first generation.

The change is easiest to feel in the cabin and technology. The current model brings a stronger safety package, a more modern interior and a wider spread of variants, from work-focused Core versions to luxury-leaning V6 models. It's still recognisably an Amarok, but it now targets buyers who expect their ute to double as a comfortable family car.

An infographic detailing the history and generational updates of the Volkswagen Amarok in the Australian market.

The wider VW Australian story

For VW enthusiasts, the Amarok sits inside a much older local history. Volkswagen began producing the Kombi in 1949, officially known as the Volkswagen Type 2 or Transporter. The first three generations covered 1950-1967, 1967-1979 and 1979-1992, with the early vans using an air-cooled, rear-mounted engine driving the rear wheels, as explained in CarPart's VW Kombi history.

Australia received Type 2 Volkswagens in 1954 as CKD kits assembled at Clayton, Victoria. Volkswagen later took over local assembly there in 1958, while Beetle assembly also began at Clayton in 1954 before ending in 1976, according to Club VeeDub's history and Retro Rides' Clayton account. The Amarok isn't a Kombi, but it carries that same useful, unmistakably VW thread into modern Australian life.

The Trim Ladder from Core to Aventura

The current Amarok range makes more sense when you stop treating the trims as a prestige ladder and ask what each one adds to your routine. Exact equipment can vary by market specification, so treat this as a practical buying guide rather than a substitute for a dealer's current build sheet.

Amarok Trim Ladder at a Glance

Trim Cab Style Key Standard Features Best Suits
Core Dual-cab ute Work-focused equipment and practical cabin layout Tradies and buyers who value function first
Life Dual-cab ute More comfort and convenience equipment than Core Daily drivers wanting a balanced entry point
Style Dual-cab ute More premium interior presentation and added technology Families and highway commuters
PanAmericana Dual-cab ute Adventure-focused styling and higher-grade equipment Touring buyers who want a tougher visual edge
Aventura Dual-cab ute Premium V6-oriented specification and luxury touches Buyers chasing maximum refinement and performance

The Core is the sensible starting point if the Amarok will spend its week carrying tools, materials or worksite grime. It gives you the basic platform without asking you to pay for presentation features that may get battered.

The Life is the trim I'd look at first for mixed use. It makes more sense when the ute is also the family car, because comfort and convenience matter every day, not just when you're parked outside a café.

Choosing the upper trims

The Style moves the Amarok closer to a premium SUV with a tray. It suits owners who spend long hours behind the wheel and care about interior finish, infotainment and the small upgrades that make a highway stint less tiring.

The PanAmericana is aimed at buyers who want touring character and a more distinctive look. It's the choice for someone who visits the coast, camps regularly and wants the ute to feel special without necessarily choosing the most expensive option.

The Aventura is the emotional purchase. It brings the strongest presentation and the V6 appeal, but it also deserves the closest payload check because high equipment levels can reduce the useful carrying margin when towing. Don't assume the top trim is automatically the best touring trim. For many owners, Life or Style will provide the better balance.

Towing and Payload on Australian Terms

Every current Australian Amarok variant is rated to tow 3,500 kg braked, according to Volkswagen Australia's Amarok specifications. That headline figure is useful, but it's also where too many reviews stop.

At full tow, available payload varies from 401 kg to 540 kg, depending on trim, and the Aventura has the lowest payload at full tow among the listed variants, as shown in LoadMate's Australian Amarok towing data. That remaining allowance must cover occupants, luggage, accessories, towball download and anything carried in or on the ute.

What disappears from the payload

Start with the holiday kit:

  • Towball download: The caravan's downward load acts on the Amarok and uses part of its payload.
  • Passengers: Adults and children count, even when they're sitting inside the comfortable cabin.
  • Accessories: A bullbar, winch, towbar, roof rack and touring hardware all consume capacity.
  • Fuel and luggage: Food, water, recovery gear, bikes and camping equipment add up quickly.
  • Tray cargo: The ute may look empty while still carrying a substantial load beneath a cover.

Gross combined mass, or GCM, is the other figure that matters. It governs the combined legal mass of the Amarok, caravan, passengers, fuel and cargo. Volkswagen states that V6 variants can combine the tow rating with a GCM of up to 6,400 kg, giving useful legal headroom for a large caravan while still carrying people and gear, as outlined in Volkswagen Australia's official model information.

Before buying: Get the loaded caravan weighed, check the towball mass, then calculate the Amarok's payload after accessories and passengers. A tow rating alone won't tell you whether your family setup is legal.

A practical example makes the issue clear. If your chosen trim leaves 401 kg at full tow, that allowance can become tight once a family, bullbar, towbar and touring equipment are included. A trim with more remaining payload may be the wiser caravan choice, even if it gives up some luxury equipment.

For work use, make sure your load is restrained properly. Quality Amarok tie-down rails can help organise tray cargo, but they don't increase the vehicle's legal payload. Treat load restraint and weight management as separate jobs.

An infographic illustrating how towing at maximum capacity reduces a vehicle's available payload and occupant capacity.

Engines, Ride and What the V6 Really Feels Like

The local buying pattern tells you how strongly Australians respond to the V6. The Amarok's turbo-diesel V6 has been reported to outsell the cheaper four-cylinder by roughly 9:1 in Australian sales patterns, according to CarExpert's Amarok sales analysis.

That preference makes sense on the road. The V6 feels relaxed when you're overtaking a road train, climbing a long grade or pulling a caravan away from a roundabout. Its low-down shove means you don't need to work the engine hard, and the eight-speed automatic keeps the drive smooth during highway cruising.

A miniature black Volkswagen Amarok V6 toy truck parked in front of a real full-sized Amarok vehicle.

The ride is another reason people step up from a basic ute. The Amarok settles more convincingly over corrugated dirt and feels less agricultural on long bitumen runs. It still has the suspension compromises of a vehicle designed to carry loads, but the overall impression is more composed than the cheapest dual-cab alternatives.

When the four-cylinder makes more sense

The four-cylinder isn't a foolish choice. If your Amarok mostly handles school runs, commuting, light tray work and occasional towing, it can deliver the practical shape and cabin without the V6 premium. Buyers who rarely tow a large caravan may prefer putting the saving towards a bullbar, suspension preparation, quality tyres or touring equipment.

The V6 earns its keep when your use is demanding and regular. Choose it for sustained towing, frequent highway work, heavy touring or because you value effortless performance. Don't choose it because every other owner at the dealership did.

For a visual sense of the model's appeal, this Amarok V6 video is best watched after you've decided whether your own driving needs the extra engine.

Diesel ownership also requires sensible use. Buyers comparing engine choices should understand the role of a diesel particulate filter and make sure their driving pattern suits a modern diesel rather than relying on short, cold trips.

Safety, Tech and How It All Helps in Real Driving

The current Amarok carries a five-star ANCAP rating based on 2023 testing. ANCAP records 86% adult occupant protection, 93% child occupant protection, 74% vulnerable road user protection and 83% safety assist, with the assessment applying to dual-cab variants sold from May 2023, as detailed in ANCAP's Amarok safety rating.

Those figures matter because the Amarok often works as the family car. A high child occupant score is more relevant when you're loading school bags and booster seats than when you're admiring the ute at a show.

Safety features that earn their keep

The standard package includes nine airbags, autonomous emergency braking, adaptive cruise control, lane-keep assist and blind-spot monitoring, according to Australian Amarok tow-test coverage.

Each system has a different job:

  • Autonomous emergency braking: Helps respond when traffic stops unexpectedly.
  • Adaptive cruise control: Reduces fatigue during long highway sections by managing following distance.
  • Lane-keep assist: Provides steering support when the vehicle begins to wander.
  • Blind-spot monitoring: Gives extra warning when a vehicle sits beside the ute, particularly useful with a caravan attached.

The technology doesn't replace attention. Lane assistance can feel intrusive on narrow country roads, and sensors still need to be kept clean after a dusty track or wet-weather run. Good systems should support the driver, not encourage anyone to switch off their judgement.

Cabin technology in daily life

The modern dashboard makes the second-generation Amarok feel far removed from the original workhorse formula. The screen, driver display and controls give the cabin a more passenger-car feel, which helps on a long trip but can also mean more menus and electronic dependences than some traditional ute buyers want.

My recommendation is simple. Take an extended test drive, not a quick loop around the dealership. Adjust the seat, connect your phone, test the camera views and see whether the controls make sense while you're wearing work gloves or managing children in the back.

Reliability and Ownership Costs

A polished cabin and premium badge do not guarantee trouble-free ownership. Owner feedback includes complaints about electrical issues, oil leaks and DPF problems, alongside praise for comfort, in the Australian first-drive discussion of the performance-oriented model by Chasing Cars.

That record does not condemn every Amarok. It does mean you should keep a repair buffer, read the warranty terms carefully and demand a proper service history before buying used. I would walk away from a ute with vague answers, missing invoices or unexplained warning lights.

Costs that can catch you

The V6 diesel has more mechanical and emissions hardware than a basic four-cylinder ute. Servicing, fluids, filters, tyres and diesel-system repairs can all push up the budget, particularly after fitting a bullbar, touring load or larger accessories. Heavy towing adds wear that headline performance figures rarely show.

Before signing, ask the dealer:

  • What's covered: Confirm warranty limits and exclusions in writing.
  • What's scheduled: Request the full service timetable and likely consumables.
  • What's included: Check whether roadside assistance or service plans form part of the offer.
  • What's been repaired: On a used vehicle, look for documented work around electrical systems, oil leaks and DPF operation.
  • What's modified: Aftermarket wiring and accessories can complicate fault diagnosis.

Strong demand does not guarantee low ownership costs. A sought-after ute still needs careful maintenance.

The chassis and towing ability are genuine strengths, yet the ownership bill involves more than engine work. Electronics, emissions equipment and accessory installations deserve the same attention. If you maintain an older VW or need compatible VW parts in Australia, check the vehicle identification details and confirm suitability before ordering.

A comparison infographic showing the pros and cons of vehicle reliability and maintenance costs.

Who Should Buy One and Where VW Pride Lives On

Buy the Amarok if you want a dual-cab that works hard without making every trip feel like work. It's a strong fit for touring families, grey nomads, caravan owners who understand payload limits and premium ute buyers who want an alternative to the usual Japanese defaults.

The V6 is worth the extra spend when you tow regularly, cover big distances or want relaxed performance with a heavy load. For mostly urban driving and moderate tray duties, the four-cylinder is the sharper financial decision. A mid-range trim may also suit you better than an Aventura if carrying capacity matters more than luxury presentation.

Who should walk away

Choose something else if your priorities are absolute simplicity, the lowest possible running costs or maximum payload with every accessory fitted. Buyers who want to load a large caravan, a full family, a heavy bullbar and plenty of touring equipment without carefully checking the figures may find the Amarok too demanding.

The same goes for buyers who rarely use a ute. A wagon or SUV may offer better everyday space and easier parking without asking you to manage tray weight, towball mass and GCM.

For VW enthusiasts, the Amarok still feels connected to a much bigger story. It shares the badge with the Beetles and Kombis that built communities around weekend cruises, restoration projects and sunny show days. The old Kombi's Australian assembly history, including the Clayton years, gives local VW culture a depth that goes well beyond any single model.

That's why a well-chosen Volkswagen Beetle model, a classic Kombi Samba Bus diecast or another piece of VW memorabilia can sit comfortably beside a modern Amarok in the garage or study. Collectors can choose a 1:18 model, usually around 24-30 cm long, or a more compact 1:24 model, generally around 16-20 cm long, using the practical scale guidance in this diecast model size guide. The right scale depends on your shelf, your existing collection and whether you want one centrepiece or a whole little VW gathering.


Volkswagen Memorabilia celebrates the same Beetle, Kombi and Samba Bus spirit that makes the Amarok more than just another ute, with licensed diecast pieces and VW-themed gifts for collectors and fans. Visit Volkswagen Memorabilia to browse VW Kombi diecast Australia favourites, Volkswagen Beetle models and Volkswagen diecast models for sale, with local stock and fast shipping for Australian buyers.

BCF Storage Boxes for VW Collectors and Coastal Decor

You've just come home from a sunny Volksfest weekend with a beautiful 1:18 Kombi Samba Bus diecast tucked under your arm. The model is safe for the moment, but the shelf is already crowded, the cardboard packaging is vulnerable to dust, and the old plastic tubs in the garage are hardly worthy of a little piece of Volkswagen history.

That's where BCF storage boxes become more than a practical purchase. Chosen carefully, they can protect delicate diecast models, organise a growing collection and sit comfortably among white shelving, timber accents and relaxed coastal décor. For Australian collectors, the trick is matching the box to the model, the room and the way you enjoy your Volkswagens.

Why Your VW Collection Deserves Better Storage

A collector named Mark might recognise the scene. His Beetles sit in their original boxes beneath a workbench, while a pair of Kombis share a container with old camping gear. After a humid spell, dust has found its way into the corners, one cardboard sleeve has softened and a tiny aerial has bent where another model shifted during a clean-up.

Nothing dramatic happened. That's the problem. Diecast damage often begins with ordinary handling, sunlight, dust and movement, not one spectacular accident. A model can lose its crisp presentation long before its owner realises the storage arrangement has become the weak point.

A premium blue and white Volkswagen Kombi Samba Bus model displayed in a BCF branded collector's box.

Storage should respect the story

The Beetle's Australian story gives collectors plenty to care about. Volkswagen says German migrant Karl Regel and his family brought a right-hand-drive Beetle to Sydney, making it one of the first Volkswagens registered in New South Wales. The Beetle was later manufactured at Clayton, with full local manufacture ending after 6 years, as recorded in Volkswagen's Australian Beetle history.

A model connected to that heritage deserves better than a box that collapses when another container sits on top. The same applies to the Kombi, which began in March 1950 as the Type 2. Club VW records that Volkswagen sold 4.5 million Kombis worldwide since 1950, while the Microbus launched in 1954 accounted for more than 1 million of those sales, according to its Kombi history feature.

Practical rule: Store the model as though you'll want to show it to a fellow enthusiast tomorrow, not merely find it again one day.

A well-sized BCF box gives each Volkswagen a defined home. It prevents loose items from rubbing against mirrors and bumpers, keeps the original packaging together and makes transport to a show less nerve-racking. It can also turn an untidy pile into a display system that feels deliberate, especially when the box's colour and finish suit the room.

Choosing the Right Size and Material for Your Models

Start with the model, not the box label. Measure the diecast from bumper to bumper, allow room for mirrors and other protruding details, then add clearance for a soft insert or divider. A lid that presses against a roof, aerial or surfboard accessory defeats the purpose of protective storage.

Collectors commonly use 1:18 and 1:24 scales for larger display models. A scale guide defines 1:18 as one-eighteenth of the vehicle and 1:24 as one-twenty-fourth, with typical finished lengths of about 23–30 cm for 1:18 and 16–20 cm for 1:24. Those measurements are outlined in this diecast car scale guide.

Match the internal space to the collection

Use the table as a starting point, then check the actual model because mirrors, opening doors and display plinths vary.

Diecast Scale Model Length Recommended Box Size Models Per Box
1:18 Beetle or Kombi About 23–30 cm A deep, rigid box with generous side clearance One model
1:24 Beetle or Kombi About 16–20 cm A compact lidded box with a soft divider One or two models, separated
Mixed 1:18 and 1:24 collection Varies Modular boxes in separate size groups Keep scales separate
Small accessories and miniatures Shorter than larger display models Shallow divided organiser Several, each in its own compartment

Polypropylene-style plastic suits collectors who want a light, washable and practical container for regular handling. Look for walls that don't flex easily and lids that remain aligned after repeated opening. A reinforced box is preferable for heavier models or boxes that will be stacked.

Material choice matters more in Australian conditions than many buyers expect. A container near a bright window, in a warm garage or beside a coastal doorway faces more environmental stress than one kept in a shaded study. Choose opaque or UV-conscious materials where possible, and avoid placing any box in direct sun because the plastic feels sturdy.

For mixed collections, modular sizing beats one oversized tub. A snug box reduces shifting, while separate compartments stop a detailed Samba Bus from sharing space with loose metal signs, tools or unrelated ornaments.

Protective Features That Preserve Collectible Value

A 1962 Kombi Classical Bus with opening doors and pull-back action has moving parts that need space. A basic dust cover may keep grit away, but it won't stop the model sliding into a wall or another car during transport.

The most useful protective features work together. Foam interiors cushion, dividers prevent contact, and latching lids keep the environment closed. None replaces sensible placement, but each reduces a different risk.

An infographic highlighting the three protective features of BCF storage boxes, including foam interiors, latching lids, and dividers.

Prioritise fit, closure and stability

Acid-free or archival foam is a smart choice for long-term contact with painted surfaces and packaging. It should hold the model gently rather than grip it tightly. If you can hear the diecast moving when you tilt the box, add a divider or reshape the insert.

A secure latch matters during a trip to a display day. Loose lids can lift in the boot, while strong closures help keep dust and accidental knocks away from fragile features. Stackable construction also matters, but only when the lid and base transfer weight around the model rather than through it.

Ventilation requires judgement. A fully sealed container can trap moisture if a model is packed away damp, while a loosely covered box invites dust. Let models and inserts dry before closing them, and store the box in a stable indoor position rather than an overheated shed.

For a more presentation-led approach, compare a box with a dedicated display case for models. The right choice depends on whether the model is travelling, being archived or staying on show.

A useful priority order looks like this:

  1. Correct internal dimensions, because pressure and movement cause avoidable damage.
  2. A clean, stable insert, especially around mirrors, aerials and opening panels.
  3. A dependable latch, so the lid stays closed during handling.
  4. Stacking strength, if you plan to build a vertical collection.
  5. Clear viewing panels, when you want to identify models without opening every box.

Storage That Doubles as Coastal Home Decor

The best storage doesn't always disappear into a cupboard. In a coastal home, a crisp box on open shelving can sit beside pale timber, woven textures, shell accents and a favourite Volkswagen print without looking like garage equipment.

White and soft blue finishes complement a nautical palette, while natural-looking timber tones suit a more relaxed surf shed feel. The secret is repetition. Use similar box colours, align the fronts and leave enough breathing room for each model to read as part of the display.

A rustic wooden storage crate containing seven colorful vintage miniature Volkswagen Beetle model cars on a table.

A mixed group of Flower Power Beetles can bring colour to an otherwise quiet shelf. A blue-and-white Samba Bus can anchor a vignette beside a miniature surfboard, framed beach photograph or metal Volkswagen sign. The box becomes part of the styling rather than a visual interruption.

Build a display you can change

Keep the most frequently admired models at eye level. Use closed boxes for seasonal pieces, duplicate models and packaging you want to preserve, then rotate a few favourites into the open display. That approach gives the collection movement without exposing everything at once.

For more ideas on combining practical organisation with relaxed Australian interiors, browse these coastal home décor ideas.

The same arrangement can work for a small retailer. Mixed packs of Beetles and Kombis can sit in a tidy crate near a counter, where the packaging protects stock and the colour adds a little beach-town character.

Here's a short visual reference for styling a compact collection:

Budget Versus Premium Options for Every Collector

A new collector doesn't need museum-style storage on day one. A durable, lidded plastic box with a suitable insert can protect a small group of models and make a thoughtful gift for someone beginning a Volkswagen collection.

A serious enthusiast may value different features. Premium cases can offer more refined lining, stronger closures, custom compartments and a finish suited to a study or living room. They cost more, but they also make sense when the case itself forms part of the presentation.

Spend where the risk is highest

Save on boxes for sturdy, frequently handled models that don't have fragile accessories. Spend more on limited pieces, opening-feature models, signed packaging or anything you intend to transport regularly.

Collector profile Sensible starting point Upgrade when
New enthusiast Simple lidded box with dividers Models begin sharing compartments
Gift buyer Neat, durable case with easy viewing The recipient starts collecting a scale
Established collector Modular boxes grouped by scale Stacking and inventory become difficult
Display-focused enthusiast Finished case that suits the room Storage starts competing with décor

The cheapest container isn't always the best value if it lets models rub together or forces you to replace inserts. Conversely, a premium case may be unnecessary for a spare model kept safely on a shaded shelf. Choose based on model sensitivity, handling frequency and visibility, not status.

Maintenance and Labelling for Long-Term Organisation

A storage system stays useful when the owner can clean it, identify it and put everything back correctly. Start with a soft, dry cloth for dust. If the box needs more attention, use a slightly damp cloth and dry the surfaces fully before returning the model.

Avoid harsh solvents, abrasive pads and wet foam. They can mark plastic, weaken printed packaging or leave residue near painted surfaces. Keep boxes away from direct Australian sunlight, and inspect them after hot weather for warping, brittleness, loose hinges or latches that no longer close evenly.

Give every box an identity

Place the label where you can read it without moving the container. A useful label might include:

  • Model: Beetle, Kombi or Samba Bus
  • Scale: 1:18 or 1:24
  • Colour or edition: Include Flower Power or surf styling where relevant
  • Condition: Sealed, displayed or handled
  • Location: Shelf, cabinet or storage room

For a larger collection, keep a simple digital inventory with purchase details, photographs and notes about original packaging. Don't write directly on a presentation box. Use removable labels or an archival-friendly sleeve instead.

Collectors looking after older pieces can also consult this guide to collectible care and vintage home accessories. A quick inspection during each seasonal rotation helps you catch dust, moisture or loose parts before they become expensive problems.

When Traditional Storage Boxes Aren't the Best Choice

A box protects a model, but it can also hide the reason you bought it. A favourite Beetle or Samba Bus that you admire every morning may deserve a glass cabinet, open display case or custom shelf instead.

Choose protected storage for duplicates, delicate models, original packaging and pieces that travel to shows. Choose open display for sturdy favourites that bring daily joy, provided the shelf stays shaded and dust is managed.

The best collection uses both. Keep the archive secure, display the cars with the strongest stories and rotate them when the room or season changes. Your Volkswagens shouldn't vanish into a garage forever.


If you're ready to pair thoughtful storage with officially licensed VW memorabilia collectibles, visit Volkswagen Memorabilia to explore Kombi Samba Bus diecast, Volkswagen Beetle models and coastal-inspired pieces for your home. Browse the range, choose the models that belong in your collection and give each one a display or storage place worthy of its story.

VW Electric Car Australia: Models, Pricing & Buyer’s Guide

At a VW show in Australia, the conversation usually starts the same way. Someone's leaning over a Kombi, someone else is polishing a Beetle badge, and then a mate asks whether Volkswagen has made an electric car that still feels like a proper VW on an Australian road. That question lands because the brand's story here has always been about more than transport, it's been about freedom, touring, and a bit of weekend personality.

That's why the phrase vw electric car australia matters to so many enthusiasts now. It's not just about switching fuel types, it's about whether the next chapter still carries the same shape, spirit, and practicality that made the Kombi, Samba Bus, and Beetle icons in the first place. If you're weighing up an ID.4, an ID. Buzz, or just trying to sort the rumour mill from the truth, this guide keeps the heritage in view while giving you the practical details you need.

From Air-Cooled Classics to Australia's Electric VW Lineup

Saturday mornings at Volksfest or the VW Nationals usually bring out two kinds of people. One group is there to admire patina, roof racks, and polished chrome, and the other is there because they've started wondering whether their next daily driver could be electric without losing the VW charm. That's a fair question, because Volkswagen's appeal in Australia has always blended design, usefulness, and a bit of road-trip optimism.

The modern EV range sits neatly inside that legacy. A Kombi was never just a van, it was a rolling holiday plan. A Beetle was never just a small car, it was simple, clever, and easy to love. The ID. family tries to carry some of that same thinking forward, with the difference that the new chapter is quieter, plugged in, and built for a market where charging, range, and touring need to make sense on real Australian roads.

Volkswagen's local EV story is still young, but it's no longer theoretical. In 2025, electrified vehicles in Australia reached 156,857 sales nationwide, made up of 103,355 battery electric vehicles and 53,502 plug-in hybrids, which lifted electrified vehicles to 13.1% of the market, up from 9.5% in 2024, according to the Australian year-in-review sales data compiled by zecar (zecar's 2025 Australian EV sales review). Volkswagen's own footprint was part of that broader shift, with the ID. Buzz recording 552 sales in 2025 in the local market context described in that same review.

Practical rule: if you love the shape and story of a VW, treat the EV question like a continuation of that story, not a replacement for it.

For collectors and enthusiasts, that makes the present moment a good one. You can keep building the nostalgic side of your garage, display cabinet, or office while learning how the electric side of the brand is settling into Australia. If you're browsing for a gift or a model to mark the transition, a licensed Kombi or Beetle piece is still the easiest way to celebrate the VW heritage while you research the future.

Which VW Electric Models Are Available in Australia Right Now

Volkswagen Australia's EV range is clearer than the online chatter makes it seem. The brand's Australian EV page confirms the ID.4 electric SUV and the ID. Buzz electric van as the local line-up, while also noting that images may show overseas models, optional equipment, or features not available here (Volkswagen Australia EV range page). That last part matters, because a lot of confusion starts when international photos get mixed up with Australian availability.

The simplest way to read the current market is by body style. The ID.4 is the family SUV choice, the ID. Buzz is the modern people mover and cargo van interpretation of VW utility, and the ID.5 appears in Australian reporting as part of the local ID. SUV conversation, even though buyers still need to check the current Australian configurator and dealer stock rather than assume every overseas variant is here. For shoppers who care more about real-world use than badge trivia, that distinction is the difference between shortlisting a car and waiting for a dream spec that may never arrive.

A diagram showcasing various Volkswagen electric car models available in Australia, organized by vehicle category segments.

What the badges usually mean

The naming can trip people up, especially if you've followed VW Europe news. In plain English, the ID.4 and ID.5 are mid-size SUVs, the ID. Buzz is the electric heir to the Kombi idea, and the Cargo version is the commercial-style van for business buyers. Smaller names like ID.1 and ID.2 are the sort of cars people hope will make EV ownership cheaper and easier, but they're not locked into an Australian launch timetable.

If a model name sounds familiar from overseas media, check whether Volkswagen Australia has listed it locally before you treat it as real stock.

For anyone comparing options, the safest approach is simple. Confirm the model on Volkswagen Australia's own EV pages, then compare the local spec sheets and dealer information. That helps you avoid the common trap of assuming a European launch, a concept render, or an overseas review means the same car is sitting in an Australian showroom right now.

ID.4 and ID.5 Specs, Range and Charging Explained

If you grew up around Kombis and Beetles, the ID.4 Pro is the point where Volkswagen's old-school practicality meets its electric future in Australia. The local ID.4 page shows a rear-wheel-drive SUV with 210kW, 545Nm, a 77kWh usable battery, and 544km WLTP range. The GTX adds a front motor for all-wheel drive, lifts output to 250kW, trims range to 511km, and cuts the 0 to 100km/h time from 6.7 seconds to 5.4 seconds (Volkswagen Australia ID.4 page). That's the familiar EV trade-off, more grip and stronger acceleration in the dual-motor version, with a little less efficiency in return.

ID.4 Pro versus GTX at a glance

Variant Motors Power (kW) Battery (usable) WLTP range 0–100 km/h
ID.4 Pro Rear-wheel drive 210 77kWh 544km 6.7s
ID.4 GTX Dual-motor all-wheel drive 250 77kWh 511km 5.4s

Those figures are easier to read once you picture everyday driving around Australia. The 545Nm in the Pro should give it the calm, immediate shove you want for merging, overtaking, and climbing hills without fuss. The 250kW GTX is the sharper choice if you want a more planted feel on wet roads or long highway runs, but that extra urgency comes at the cost of some range.

Volkswagen Australia also lists a 1200kg braked towing limit for the Pro, which gives caravan buyers, small trailer owners, and weekend gear-haulers a clearer idea of what the car is built to do (Volkswagen Australia ID.4 brochure). That is enough for many light towing jobs, yet it is still a passenger SUV, so it pays to be honest about the kind of load you plan to carry.

For shoppers who want a local ownership reference point, the model overview at VW ID.4 on Volkswagen Memorabilia sits neatly beside the official VW details while you compare how the car fits into the broader lineup.

ID. Buzz Cargo and People Mover Options for Australian Buyers

The ID. Buzz brings a bit of Kombi charm back into the showroom, but it does the job with modern EV practicality. For Australian buyers, that matters because the same nameplate can suit a family, a camper setup, or a small business that needs a van every week. Volkswagen Australia lists several local versions, including the 5-seat PRO, the 7-seat long-wheelbase PRO, the Cargo van, and the GTX performance variant, so there is a clear spread between passenger and load-carrying roles (Volkswagen Australia ID. Buzz GTX brochure).

The battery and range figures shift with body style, which makes sense once you remember how much space the Buzz body gives up for people or cargo. RACV reports the 5-seat PRO with an 84kWh battery and 422km WLTP range, the Cargo with 431km, and the long-wheelbase 7-seat PRO with a 91kWh battery and 452km WLTP range (RACV ID. Buzz price and specs). That spread points to the long-wheelbase people mover as the better touring pick, while the Cargo version is aimed at work duties, load space, and everyday hauling rather than family seating.

Charging and performance that suit Australian life

Volkswagen Australia lists 11kW AC charging that takes the battery from 0 to 100% in about 7h30m to 9h, plus DC fast charging up to 200kW with a 10 to 80% top-up in 26 minutes. That sort of charging rhythm suits the way Australians often travel, with a meal break or coffee stop doing double duty as a recharge stop.

The GTX version is the one that will catch the eye of drivers who want more urge without losing the Buzz shape. Volkswagen lists 250kW, 560 to 590Nm, and 6.4-second 0–100km/h acceleration, which helps a tall EV feel settled when it is carrying people, bags, or work gear. The figures line up with the broader local ID. Buzz details in the official Volkswagen Australia material, and the same model family is also discussed in the local buying guide at Volkswagen ID. Buzz Australia price.

A quick video walkaround helps too, especially if you are trying to judge space and stance before visiting a dealer.

Charging, Range and Running Costs in Real Australian Conditions

A lot of first-time EV questions start at the charger, not the showroom. With a VW electric car Australia buyer, that usually means one simple check, can it suit the way you already drive, park, and plug in at home without turning every trip into a planning exercise? The answer depends on the route, the weather, the charging access you've got at home, and how patient you are with stops.

What range really means on the road

Brochure figures are a starting point, like a speedo reading with the car parked in the workshop. Real Australian driving adds steady motorway speeds, headwinds, hills, and sometimes towing, so the number on the page is best treated as a reference rather than a promise for every trip. That is why many buyers do better by planning around charging stops, instead of chasing the last few kilometres on the display.

The 544km WLTP range listed for the ID.4 Pro gives a useful benchmark, but it is not the whole story. The official Volkswagen Australia material for the ID.4 lays out the headline specs clearly, and the local brochure is the place to check the current figures before you compare trims or options. In day-to-day use, the same car will feel different on a flat suburban run, a hot inland highway, or a weekend trip with a loaded boot.

Practical rule: if your route already includes regular coffee or meal breaks, build the EV around those pauses instead of fighting them.

Public charging etiquette matters too. Park to charge, move on when you've taken enough energy for the next leg, and don't leave the car sitting at a fast charger while you wander off for an extra hour. Home charging is where most owners get the easy part done, so a wallbox in the 7kW to 11kW range makes sense for overnight top-ups and weekday use.

Running costs are usually easier to live with once the charging habit is set. Electricity at home is often the quiet advantage, because the car can refill while you sleep, much like charging a phone after a long day instead of hunting for power at lunchtime. Public charging still has a place for longer runs, but for regular commuting and local errands, home charging does most of the heavy lifting.

The towing question is simpler. The ID.4 Pro's 1200kg braked limit means it can handle some lifestyle jobs, but buyers should match the caravan, trailer, or tinny to the car rather than assume every SUV badge means serious tow work. That is the honest way to avoid disappointment.

For shoppers who want a broader look at van practicality as well as range, the electric van Australia guide sits neatly alongside the ID. Buzz discussion above.

An infographic detailing four tips for improving electric vehicle charging and range, including home charging and weather factors.

Confirmed and Speculative VW EVs Coming to Australia

The easiest way to sort the Volkswagen EV roadmap is to split it into three piles. First, the cars Australians can already buy, which includes the ID.4, ID.5 and ID. Buzz conversation that's already underway locally. Second, the models that are being discussed as likely future additions, such as the smaller ID.1 and ID.2 city EVs. Third, the nameplates that keep turning up in overseas coverage but remain uncertain for Australia, including the kind of compact EVs that make more sense in Europe than in a large SUV-oriented market.

Carsguide's reporting captures the mood well, describing Volkswagen Australia as still in a “fence-sitting phase” on EVs and noting that sub-$40,000 models are being considered without any firm local timing locked in (Carsguide coverage). That's important for buyers because it explains why European timelines don't automatically translate to Australian showrooms.

What to watch next

  • Confirmed now, keep an eye on the current ID.4 and ID. Buzz specs if you're ready to buy rather than wait.
  • Announced but not scheduled, watch for clearer guidance on affordable small EVs such as the ID.1 and ID.2.
  • Still uncertain, treat any overseas-only ID. nameplate with caution until Volkswagen Australia says it's coming here.

The practical takeaway is simple. If you need a family SUV or people mover now, work from the local cars already listed. If you're waiting for a cheaper city EV, keep checking announcements rather than assuming a launch is near. Australia's market still leans hard towards SUVs, so smaller VW EVs have a tougher business case here than they do overseas.

A comparison chart of three Volkswagen ID. Buzz electric van models available for the Australian market.

Buying Tips, Dealer Visits and VW Memorabilia for Enthusiasts

A proper dealer visit still beats a spec sheet. Book back-to-back drives in an ID.4 Pro and a GTX, then pay attention to steering feel, cabin comfort, and whether the extra performance of the dual-motor car suits your use case. Ask the dealer about software updates, after-sales support for EV-specific components, and what charging advice they give owners who park on a driveway rather than in a garage.

If you're comparing cities, it's smart to ask the same questions in Sydney, Melbourne, Brisbane, and Perth, because dealer experience and stock availability can feel different from one metro area to another. A quick chat with a finance or novated-lease adviser is also worth your time, especially if you want a simple ownership structure rather than a one-size-fits-all guess.

While you wait for the right delivery slot, keep the VW spirit alive on the shelf, not just in the driveway. A licensed 1:24 1962 Classical Samba Bus diecast or a Flower Power Beetle desk model is a neat way to mark the moment, and it keeps the Kombi-and-Beetle heritage front and centre while the electric side of the story grows.

If you love Volkswagen history as much as the next enthusiast at a sunny car show, now's the time to pair your EV research with something that celebrates the badge. Visit Volkswagen Memorabilia for licensed VW diecast models, nostalgic Kombi pieces, and gift ideas that keep the spirit of the brand alive while Australia's electric future settles into place.

7 Wall Decoration Ideas for VW and Coastal Homes (2026)

Salt air, a half-open Kombi door, and a wall that's still blank after the weekend tidy-up. That's the sort of moment where wall decoration ideas stop being abstract and start feeling personal, especially in an Aussie beach house, surf shed, or garage full of VW memories. The best pieces don't just fill space, they carry the road trips, the show days, and the easygoing spirit that makes a Volkswagen feel like part of the family.

In Australia, wall styling sits inside a big home-furnishings market, and the broader décor world gives the category real weight, with wall art and decorative pieces treated as part of the room's identity rather than an afterthought (home furnishings and wall décor market research, wall décor market research). That matters for VW lovers because a Beetle silhouette, a Kombi print, or a tidy diecast shelf can do the same job a glossy magazine room does, only with more personality and a lot more grin factor.

1. VW Beetle Wall Art for Aussie Collectors

A Beetle wall piece earns its keep fast because the shape does half the work for you. The classic roofline is instantly recognisable, and the Beetle's long run from 1938 to 2003 gives it the kind of heritage that feels right at home above a bench, behind a sofa, or in a garage shrine built around surf days and Sunday drives. Volkswagen Memorabilia's VW Beetle wall art range leans into that nostalgia with metal wall art, vintage-style prints, and coastal-ready pieces that suit Aussie homes without trying too hard.

How to style the silhouette without overdoing it

The cleanest look is to let the Beetle be the anchor, then build around it with a few softer textures. A linen sofa, a timber side table, or a weathered shelf gives the piece room to breathe, while coastal accessories keep the mood relaxed rather than theme-park loud. For a living room or beach shack, a single bold Beetle outline often works better than a crowded cluster, especially when the wall already has busy windows or rattan furniture.

Practical rule: use one strong VW focal point, then keep the rest of the wall quieter so the shape can do the talking.

The other win here is material choice. Metal suits garages and breezy covered spaces, framed prints feel easy in living rooms, and lighter finishes are the safer pick in humid or seaside settings. If you're shopping for a mate, this is the sort of piece that feels thoughtful without needing a massive budget or a huge wall.

The wall accents for living rooms category is worth a look if you want the Beetle to sit alongside other pieces instead of standing alone. It's a neat way to build a display that looks curated rather than collected by accident.

2. Temple & Webster for Flexible Wall Prints

A blank wall can feel a bit like a half-finished Kombi conversion, close, but not quite ready for the road. Temple & Webster is handy when you want to sort that problem quickly, with framed prints, canvases, diptychs, triptychs, and photographic wall art that work across coastal, retro, abstract, and more polished looks. Their Wall Art Prints collection suits a hallway, an open-plan lounge, or a rental where you want the room to feel settled without touching the paintbrush.

For VW and coastal homes, this retailer works best when you need scale choices and a quick visual test. A large print above a low sofa can carry the same easy confidence as a Kombi parked near the surf, while a multi-piece set can fill a wide wall without leaving the space feeling sparse. The mix also helps when you're cross-checking style, size, and colour before you commit, which matters in homes where the wall has to sit alongside timber, rattan, and salty daylight. For more styling angles that suit that relaxed beach-house feel, have a look at our guide to coastal home decor ideas.

Why it works for quick room refreshes

The strength here is choice without much fuss. If your wall is awkwardly shaped, a multi-panel set can balance it out, and if you're styling a rental, a framed print is easy to take with you later. The selection also suits buyers who like to compare looks side by side before they commit, especially when the sofa, rug, and colour palette are already doing some of the heavy lifting.

A broad catalogue helps when the room is still coming together, because you can pick the artwork after the main pieces are in place.

Print quality and materials can vary across suppliers, so it pays to check the product details before you buy. For a coastal home, calmer imagery usually sits better than anything fussy, because the wall should feel like part of the view rather than competing with it.

3. Adairs for Fast Coastal Makeovers

Adairs is ideal when the wall needs a lift before the next open home, family visit, or show weekend. The retailer sells ready-to-hang canvases, framed prints, embroidered pieces, and beaded wall art, which gives you more texture than a basic poster wall and a faster path to a finished room than custom framing. Their wall art and mirrors range is especially handy for coastal bedrooms, breezy living rooms, and entryways that need a friendly first impression.

What makes Adairs useful for VW-inspired homes is the mix of approachable style and easy turnover. You'll often find beach, botanical, and abstract pieces that sit comfortably beside timber, rattan, and the sort of soft neutrals that make a Kombi print feel right at home. The sizes also tend to suit standard wall zones, which helps when you're trying to avoid art that feels either postage-stamp small or overpowering.

Best use cases in Aussie homes

  • Rental living rooms: Pick a ready-to-hang canvas so you can update the wall without a huge commitment.
  • Beach-house bedrooms: Choose quieter colour palettes that echo sand, shell, and sky.
  • Entryways and narrow halls: Use a vertical frame or narrow piece so the wall feels intentional.

The downside is that stock moves quickly, so if you spot a piece that fits your mood, don't leave it sitting in your cart for a week. Product specs also vary by SKU, so it's worth checking glazing, paper, and finish before you buy.

Adairs

A good Adairs wall can be the visual equivalent of a freshly polished Beetle at sunrise, easy on the eye and ready for the day.

4. Urban Road for Designer-Led Statements

Urban Road suits the collector who wants the wall to feel considered rather than merely decorated. Their made-to-order prints and canvases come in abstract, scenic, and floral styles, and the collaborations with names like Shaynna Blaze and Darren Palmer give the collection a more design-forward edge. If your VW space leans coastal-modern instead of retro-kitsch, this is the sort of retailer that helps the room feel pulled together.

The made-to-order setup matters because scale and finish become part of the decision, not afterthoughts. You can choose a size that sits properly above a sideboard, or go larger so the artwork has the same presence as a Kombi parked front and centre at a car show. The product photography is also useful for judging proportion, which saves a lot of guesswork when you're styling a big wall in an open-plan living area.

Where Urban Road fits best

  • Contemporary coastal lounges: Use soft-toned scenes or abstract works to echo sea and sky.
  • Bedrooms with restraint: A single framed canvas can keep things calm and uncluttered.
  • Feature walls: Bigger pieces work well where the wall needs a real anchor.

The trade-off is lead time, since made-to-order production isn't instant. Premium frames and larger canvases can also lift the final cost, so it's the better pick when you're happy to wait for a specific look rather than buying on the spot.

Urban Road

If you want a polished finish that still feels warm, Urban Road gives you that middle ground between showroom clean and lived-in coastal charm.

5. Desenio Australia for Budget-Friendly Gallery Walls

Desenio Australia is the easy answer when you want to build a gallery wall without making it a huge project. Their poster packs and matching frames are made for people who want the layout sorted in one hit, which is handy for renters, first homes, and beach cottages where you want cohesion more than one-off drama. Their poster and frame collection makes it simple to mix typography, coastal prints, and vintage-inspired pieces into one tidy wall.

For VW lovers, that's useful because a gallery wall can echo the rhythm of a car meet, a few standout pieces with supporting characters around them. You might hang one Kombi image as the centrepiece, then build around it with softer shapes, beach tones, or simple graphics. The result feels collected over time even when you bought it in one afternoon.

A smart fit for smaller walls

Desenio's strength is accessibility. The packs lower the barrier to starting, and the wide size matrix makes it easier to fill a wall above a sofa, a desk, or a hallway console. That's particularly handy in apartments or compact homes where every metre needs to earn its place.

Keep the palette tight and the frame finishes consistent, and even a budget wall can look deliberate.

One thing to watch is that the lighter frames can feel more basic, and open-edition prints won't have the uniqueness of originals. Still, for a cohesive wall that doesn't blow the budget, it's one of the simplest ways to get a polished result.

Boho wall art ideas from Volkswagen Memorabilia can sit nicely beside this style if you want a softer, more relaxed VW look.

6. The Print Emporium for Made-to-Order Calm

The Print Emporium works well when you want your wall to feel settled, not loud. The brand makes its wall art to order in Australia, with framed and unframed options across abstracts, botanicals, and scenic views. Their wall art collection is a strong fit for coastal homes that need a calm backdrop for a Kombi model, a surfboard, or a dining room that doubles as a memory wall.

The appeal is consistency. Local production gives you a clearer handle on finish and fit, and the catalogue photography makes it easier to imagine how a piece will sit in a real room. That matters for buyers who'd rather choose carefully once than chase a few cheaper options that never quite land.

When this kind of wall art shines

The Print Emporium suits quiet walls that still need personality. A soft vista above a bed, a framed canvas in an entry, or a muted botanical in a sunroom can all carry the room without making it feel crowded. For coastal styling, it also pairs well with pale timber, white walls, and the sort of natural textures that don't fight for attention.

A small caution, though. Production takes time, so this isn't the shop for a last-minute weekend refresh. It's the better choice if you're happy to wait for a piece that feels more resolved and less disposable.

The Print Emporium

If your goal is a wall that feels like a long, relaxed drive home rather than a loud showroom display, this retailer has the right temperament.

7. Gioia Wall Art for Coastal Personality

Gioia Wall Art brings a more playful, beach-friendly edge to the mix. The range includes posters, framed prints, framed canvases, hand-painted canvases, and custom wallpaper, so there's enough variety to suit both simple styling jobs and more distinctive feature walls. Their wall art store is especially handy if you want something coastal or nature-forward that still feels a bit more individual than a generic print shop pick.

The best thing here is choice across substrates. A framed canvas can sit comfortably in a casual living room, while hand-painted options bring a bit more soul if you're styling a holiday home, garage lounge, or gift wall for a VW enthusiast. The free Australia-wide shipping callout on many products is another practical plus for buyers who'd rather keep the whole process simple.

Use it for character, not clutter

Gioia works best when the wall needs one or two strong notes rather than a crowded arrangement. A coastal image in a beach shack or a layered set of nature-inspired prints can echo the same easygoing feeling you get from a Kombi at a surf club car park. It also suits buyers who want something a little less expected than a standard framed print.

The trade-off is that some pieces are made to order, so timing still matters. Frame specs can vary too, which means it pays to read the product page carefully before settling on a piece.

Gioia Wall Art

For a coastal wall with a bit more warmth and personality, Gioia gives you a nice balance of ease and character.

Wall Decoration Ideas: 7-Item Comparison

Item Implementation complexity 🔄 Resource requirements ⚡ Expected outcomes ⭐📊 Ideal use cases 💡 Key advantages ⭐
VW Beetle Wall Art: A Guide for Aussie Collectors Low, straightforward selection & styling 🔄 Low, budget-friendly options, local shop support ⚡ High, strong nostalgic impact and mood anchoring ⭐📊 Collectors, VW fans, coastal/garage styling 💡 Curated VW-focused range with Aussie styling tips ⭐
Temple & Webster Medium, large catalog needs filtering 🔄 Medium, wide price range; in-stock & premium items ⚡ Medium–High, variety enables quick finds & trial at home ⭐📊 Shoppers wanting broad choice and home trials 💡 Extensive range, reviews and 30-day returns ⭐
Adairs Low–Medium, ready-to-hang convenience 🔄 Low–Medium, mid-range pricing, store pickup available ⚡ Medium, fast room updates with seasonal pieces ⭐📊 Quick makeovers and seasonal refreshes 💡 Regular promotions and standard-size fit for frames ⭐
Urban Road Medium, made-to-order options require decisions 🔄 Medium–High, custom sizes/frames and lead time ⚡ High, consistent design-led finish and cohesive collections ⭐📊 Design-focused rooms and coordinated whole-room looks 💡 Made-to-order quality and designer collaborations ⭐
Desenio Australia Low, plug-and-play poster packs 🔄 Low, budget posters and matching frames ⚡ Medium, cost-effective gallery walls with visual cohesion ⭐📊 Affordable gallery walls and trend-driven styling 💡 Curated poster packs, fast delivery, low barrier to entry ⭐
The Print Emporium Medium, bespoke ordering with timelines 🔄 Medium, Australian production, predictable framing ⚡ High, reliable quality and accurate sizing ⭐📊 Coastal/neutral interiors seeking consistent finishes 💡 Local made-to-order production and clear guidance ⭐
Gioia Wall Art Medium, mix of ready-stock and custom work 🔄 Medium, free shipping options; custom lead times ⚡ Medium–High, unique hand-painted and custom outcomes ⭐📊 Coastal/nature themes and bespoke feature walls 💡 Hand-painted, custom wallpaper and good value framed canvases ⭐

Time to Hang the Heritage

Pick one idea, not all seven. The strongest walls usually start with a single anchor, a metal Beetle silhouette, a Kombi print, or a diecast shelf, then grow naturally as you find the right pieces. Measure twice, hang once, and give the wall a bit of breathing room so the room feels lived in rather than crammed.

For VW lovers who want that unmistakable mix of heritage and coastal ease, Volkswagen Memorabilia brings the right pieces together in one Aussie-friendly store. You'll find licensed diecast models, including the 1962 Kombi Samba Bus and Flowered Beetle lines, plus metal wall decor, photo frames, nautical accents, and gift-ready pieces that suit garages, beach houses, and relaxed living rooms.


If you're ready to turn a blank wall into something with a proper story, visit Volkswagen Memorabilia and start with a piece that feels like your own bit of VW history. It's a handy way to find licensed collectibles and coastal décor in one place, with local support and easy browsing for the next garage, shack, or lounge-room refresh.

Detailed Map Queensland: A Practical Guide

You're standing over a kitchen table with a mug of tea, a phone in one hand and a printed route in the other. Maybe you're checking a drive from Cairns to the west, maybe you're weighing up a block near the coast, or maybe you just want to know whether a walking track near the Scenic Rim makes sense on the ground. That's usually the moment people search for a detailed map Queensland, and it's also the moment confusion starts, because Queensland doesn't give you one neat all-purpose map. It gives you a strong mapping system, split across different tools, each built for a different job.

Queensland is huge, and that matters here. The state covers about 1,730,648 square kilometres and had a population of 5,156,138 in the 2021 Census according to Britannica. It's bordered by New South Wales, South Australia, and the Northern Territory, with the Coral Sea and Pacific Ocean on the eastern edge as described by WorldAtlas. So when someone says they want a detailed Queensland map, they're usually not asking for decoration. They want the right layer for a real decision.

Picture Yourself Planning a Queensland Trip

A family is planning a long drive and someone asks the practical question, “Which map should we trust once we leave the suburbs?” A buyer near Moreton Bay wants property boundaries, while a hiker around Binna Burra cares more about contours, access roads, and park edges. Those are all Queensland map questions, yet each one points to a different layer.

That is the first thing to sort out. A detailed map of Queensland is not one fixed product, it is a match between task, scale, and layer. If you only need highways and towns, a broad state map may be enough. If you need drainage, slopes, cadastral lines, or planning overlays, you need a more precise source.

A simple rule helps here. Start with the question, not the map. If you know whether you are travelling, checking land, or studying terrain, the right Queensland tool becomes clear much faster.

For road trips, a state basemap plus offline navigation may be enough. For land research, cadastre and title information matter more. For bushwalking, the topographic series usually gives more useful detail than a glossy road atlas. Queensland's own mapping ecosystem already reflects that split, even if a search for detailed map Queensland makes it feel like one link should do everything.

That is why the better approach is to ask, “What am I trying to do?” and then choose the official layer that answers it. A learner-friendly map guide should feel like a good co-driver, calm, specific, and honest about the limits of each source. Van life and long Queensland drives make that need feel very real, because the same route can be a holiday plan, a logistics run, or a property scouting trip depending on who is in the car.

What a Detailed Map of Queensland Actually Means

A detailed Queensland map is not one single thing. It changes with the job in front of you, because detail can mean coverage, scale, or content. Coverage asks whether the map shows the whole state or a small area such as a shire, coastline, or transport corridor. Scale asks how much real ground is compressed into the page or screen. Content asks what the map includes, roads, contours, cadastre, planning layers, hazards, or a combination of them.

Coverage, scale and content

Queensland's official mapping makes that difference easy to see. A state-wide physical map is built for broad context, and the Queensland Government's dataset describes a 1:2,000,000 map plotted at A0, first produced in 2023 with GDA2020 in the Albers Queensland projection from Queensland Government data. That kind of map is useful for seeing the shape of the state at a glance. A historical topographic sheet works very differently. The Queensland Government dataset includes 1:25,000 sheets, and those carry much finer local detail through the Queensland Government dataset.

An infographic showing the definition of detailed Queensland maps by comparing coverage area and map scale.

That difference matters because a large-area map and a local sheet answer different questions. Whole-state maps give you context, while local sheets give you the kind of detail needed for decisions on the ground. The same stretch of country can feel broad and simple in one view, then become much richer once roads, relief, parcels, and overlays are shown together.

Historical depth adds another layer to the idea of detail. Queensland's government also provides historical map images through the Open Data Portal and Queensland Globe, so “detailed” can mean more than fine scale, it can also mean seeing how places changed over time as noted in Britannica. That matters if you are tracing old roads, settlement patterns, or shifts in land administration.

A road atlas tells you where to go. A topographic map shows why the ground behaves as it does.

The practical rule is simple. If a map shows highways and towns, it is useful for movement. If it shows cadastre, contours, and overlays, it is useful for interpretation. Queensland's official sources support both kinds of reading, but they do not all do the same job in the same window.

The Four Official Queensland Map Tools Side by Side

A Queensland map search works better once you stop expecting one page to do every job. The official tools are split by purpose, a bit like a workshop with separate drawers for tracing paper, rulers, title plans, and hazard overlays. That division can feel awkward at first, but it becomes useful as soon as you know which drawer to open.

Which tool does what

Queensland Globe is the exploration tool. It lets you switch layers on and off, compare themes, and move around the state visually. If you want to inspect roads, ecosystems, hazards, or general context, it is usually the most flexible starting point as outlined in Queensland Government data and mapping resources.

Maps Online is the land and title style tool. If your question is “What's here legally?” or “Where does the parcel line sit?”, this is the clearer place to look. It suits property-search work much better than a broad tourism map.

The Open Data Portal is for downloads and historical series. If you want files you can keep, print, compare, or analyse later, the durable datasets are there. It is also where the historical record becomes most useful, especially when you need to compare how a place has changed across time.

Planning mapping is the overlay tool. If you are checking zones, coastal hazard areas, regional ecosystems, or land-use constraints, this is the layer set that speaks directly to decisions about what can happen on a block or in a corridor.

A plain rule of thumb helps:

  • Queensland Globe: use it when you want to explore layers quickly.
  • Maps Online: use it when the question is cadastral or title-based.
  • Open Data Portal: use it when you need downloads or historical map files.
  • Planning mapping: use it when zoning, hazards, or land-use rules matter.

The Queensland Government presents these as separate queryable products, not as one all-in-one consumer map. That explains why the search experience can feel split at first. The tools are strong, but they are organised by task, and that is the key to using them well.

Reading Scales, Contours and Coordinates the Easy Way

A detailed map of Queensland only makes sense once the scale stops feeling abstract and starts reading like distance on the ground. A 1:25,000 map shows a smaller area with more local detail, while a 1:250,000 map shows a much wider area with less precision for individual streets, tracks, or bends in a creek. That difference is why two maps of the same place can feel so different in hand.

The historical Queensland 1:25,000 series helps make that idea concrete. The set includes 708 map sheets, most with 7'30" x 7'30" extents, 5 m contour intervals, and selected 2.5 m auxiliary contours from the Queensland Government dataset. In practice, that means the sheet is built to show the shape of the land, not just the roads across it.

What the numbers mean in practice

At 1:25,000, 1 cm on the map equals 250 m on the ground. At 1:250,000, 1 cm equals 2.5 km. The first works better for foot travel, contour reading, and choosing a local route. The second is better for seeing the wider region at a glance.

Contour intervals matter just as much as the scale. 5 m contours show rise and fall closely enough to help with hiking, drainage checks, corridor checks, and slope awareness. On steeper country, such as the Scenic Rim, those lines tell a much richer story than they do on flatter ground, where the terrain changes more gradually.

The official 2023 physical map uses GDA2020 and the Albers Queensland projection with a central meridian of 145°E and standard parallels at 14°S and 26°S from Queensland Government data. You do not need to memorise the projection maths. You do need to know that Queensland's official cartography is set up so state-scale mapping stays consistent from one layer to the next.

Grid references are easier once you treat them as a two-part address. Read the eastings first, then the northings, then match that point against the sheet name. A Mount Superbus 1:25,000 sheet is the kind of map where this pays off, because the detail is local enough to matter and the contours are close enough together to reveal shape, not just position.

Practical rule: if the hills matter, read the contours first. If the road network matters, read the legend first. If both matter, use the local sheet, not the state overview.

Queensland's official topographic basemap service is updated biannually in May and November on the state basemap service. If you print a copy and leave it in the glovebox for a long time, it can still help with orientation, but it will not always match the newest ground conditions.

An infographic explaining how to read map scales and topographic contour lines for Queensland, Australia.

How to Download, Print and Use Queensland Maps Offline

A field trip works better when the map is already on your device. Start in Queensland Globe, pick the view that matches your job, then add only the layers you need. Roads help with driving plans, park boundaries help with access, and hazard layers help when you need to understand constraints before you leave home.

A field-ready workflow

Once the right layers are visible, select the area you want and export it in a format you can use without a live connection. Queensland's public mapping tools let you download data through official channels, and the topographic basemap is built as a tiled web map cache that spans fixed scales from 1:18,056 through 1:36,978,595. That scale range explains why some exports look sharp while others look generalized. The wider the view, the more the map has to simplify roads, contours, and small features.

Printing works best when you treat the map like a working page, not a wall poster. A4 sheets can be a good choice for field use if you mark the route or study area before you export. A clean PDF is usually easier to carry and annotate than a crowded layout with layers you will not use.

If you are preparing for a trip to a place like Fraser Island, save the file to your phone before you lose reception. Queensland map planning for Fraser-style trips is a useful reminder that sand tracks, ferry timing, and route changes are easier to handle when the map is already offline.

The video below shows a practical navigation mindset for working with maps in the field.

Before you close the file, check three things.

  • Overlay choice: make sure the layer matches the task.
  • Export format: use a PDF for simple carrying, or a GIS-friendly file when you need more analysis.
  • Phone storage: save the map before you lose signal, not after.

That routine sounds simple because it is. In the bush, or on a long coastal drive, simple preparation saves time and confusion. Queensland's official map tools work best when the map is ready before you leave home.

Real Use Cases for a Detailed Map of Queensland

A hiker heading into Lamington National Park needs a very different map from a driver crossing the Savannah Way or a buyer checking a coastal block near Cairns. The common thread is detail, but the detail changes with the decision in front of you. One map helps you read slope and tracks. Another helps you judge distance across open country. A third helps you see zoning or hazard layers before you commit to a property decision.

Three situations, three map choices

For the hiker, the best fit is the 1:25,000 topographic series with contours and park boundaries. That sheet-level detail helps with slope reading, track alignment, and terrain awareness, the kind of things you need when the path bends, rises, or disappears into rough ground. A broad state map is too coarse for that job, because it leaves too much out.

For the grey nomad, the state physical map at 1:2,000,000 gives a clear long-range frame, while a regional topographic set adds the local detail you need once the route gets more complex. The two maps work together. One handles orientation across a large part of Queensland, the other helps with the turns, junctions, and road conditions that matter once you are closer to the ground.

For the coastal buyer, Planning mapping is the starting point. Zoning, hazard overlays, and erosion-related layers matter more than scenic context when the core question is whether a block is suitable, constrained, or exposed.

The right Queensland map often is not one map. It is a stack of layers used in the right order.

That stack matters even more outside the southeast. Queensland's mapping tools become most useful when you compare regions, because remoteness, service access, and land-use context change quickly as you move inland. The map starts doing less as a picture and more as a decision aid. It shows what is nearby, what is missing, and what conditions may affect the trip or the purchase.

Map reading in the Australian outback makes that point clearly. Big distances, thin services, and changing road conditions reward a map set that is chosen carefully rather than grabbed casually.

When Google Maps and Paper Maps Still Beat the Official Layers

Official Queensland mapping is powerful, but it's not always the best everyday answer. Google Maps and similar apps are still better for turn-by-turn navigation, live traffic, and quick business lookups. If you're trying to find the nearest café, mechanic, or servo in a hurry, those consumer tools often win.

Where other maps still earn their keep

Printed maps from third-party publishers still matter too. Outback travel, marine charting, and four-wheel-drive routes can be under-represented or less readable in official layers, especially when you want a paper sheet on the dashboard. That's not a criticism of Queensland's mapping system, it's just a reminder that no single platform covers every use case well.

The regional-detail issue is real. Queensland's official tools are strong, but the practical experience can thin out once you move beyond the south-east corner into North and Western Queensland. That's where remoteness and service-access layers become important, because the map starts telling you as much about distance to help as it does about roads.

A sensible habit is to cross-check. Use the official layer for boundaries, planning, and terrain. Use consumer navigation for live movement. Use paper or specialist maps when you're going well off-grid.

The honest answer is that a detailed map of Queensland is sometimes a government layer, sometimes a phone app, and sometimes a folded paper sheet. The best choice is the one that fits the country you're driving through.

Your Quick Decision Checklist for the Right Queensland Map

If you're planning a road trip, open Queensland Globe first and switch to the topographic or road layer. If you're checking property boundaries, use Maps Online or a cadastral view. If you're hiking, choose the 1:25,000 topographic sheet with contours. If you're researching flood or coastal risk, go straight to Planning mapping overlays. If you want a historical view, use the Open Data Portal and the old map record that reaches back to 1841 through Queensland's historical map resources.

Keep one final rule in mind. Small scale means broad context. Large scale means local detail. Once you know that, the phrase detailed map Queensland stops being vague and starts becoming a useful search.

A Queensland map decision checklist featuring four categories for road trips, property boundaries, hiking, and cadastral searches.

For more ideas that suit Queensland road trips, coastal stops, and nostalgic travel planning, take a look at the Volkswagen Memorabilia blog and the shop. You'll find VW-themed pieces that suit the same kind of open-road spirit, from classic Kombi style to Beetle-inspired gifts. Visit Volkswagen Memorabilia and have a browse when you're ready to bring a little more road-trip character into your home or collection.

Auto Swivel Seat Guide for Classic VW Owners

A swivel seat in the car world has gone from 40-degree novelty fittings in the early Chrysler era to modern powered units that can turn through 0–113° or even a 360° rotation path, depending on the mechanism. In Australia, the idea makes the most sense as an accessibility aid, because our ageing population and our love of practical vans and classic cruisers both put a premium on easier entry and exit.

If you've ever folded yourself down into a Beetle, or shuffled a hip awkwardly across a Kombi passenger seat at a showground, you already know the problem. A good auto swivel seat is a rotating base under the seat that pivots the occupant toward the door, so getting in and out takes less twisting and less grunt.

What an Auto Swivel Seat Is

The easiest way to understand an auto swivel seat is to picture a seat mount doing more than just holding the chair in place. The seat itself still looks like a seat, but underneath it has a rotating base that lets the whole assembly turn outward before you climb in or step out.

In a classic VW, that can make a low sill feel far less awkward. In a Kombi or Samba, it can turn a cramped front seat shuffle into a much calmer move, especially when you are trying not to twist your knees, shoulders, and back all at once.

An infographic explaining the benefits of an auto swivel seat for easier vehicle entry and exit.

What sits under the cushion

Most systems are built from a few core parts. There is a mounting plate that fixes to the vehicle floor or seat base, a bearing ring that allows the movement, and a locking detent that keeps the seat in the right position. Some units also use a motor, so the turn happens with a switch instead of your arm.

That is why the term covers more than one product type. A simple manual turntable, a locked indexing plate, and a powered lift-and-rotate unit all count as swivel seats, even though they behave very differently in use. The manual versions are mainly about easier turning. The powered versions add easier turning plus transfer support.

For a VW owner, that difference matters. In a Beetle, the gain is often about making a low perch less awkward. In a Kombi, it can mean turning a tight front passenger step into something much easier to handle.

Practical rule: if the seat only turns but does not make the transfer easier, you may be paying for a gimmick rather than a real usability upgrade.

The three choices buyers keep facing

The first choice is manual versus powered. The second is rotation angle, because some seats only lock into a few positions while others swing much further. The third is fitment, because a mechanism that suits a roomy van may be a poor match for a compact cabin.

If you are looking at listings, start with the practical question, “Can I get in, sit down, and fasten the belt without fighting the cabin?” That is the point where the product earns its keep.

A Short History of Swivel Seats in Cars

Swivel seats aren't some modern gadget dreamed up for today's mobility market. The idea has shown up in production vehicles before, then faded, then come back in different forms when drivers needed it again. Chrysler's late-1950s and early-1960s swivel seats pivoted about 40 degrees to help with entry and exit, and GM later used swivel bucket seats in selected intermediate coupes during 1973–1977. Car Design News

Why the idea kept returning

That history tells you something useful. The feature never became a high-volume mainstream standard, but it kept proving its value in the world, especially where awkward access or limited mobility made a fixed seat annoying. It has lived on in specialty vehicles and accessibility conversions because the basic problem never went away.

For Australia, the demographic context makes the story even clearer. The ABS says that in the 2021 Census, people aged 65 years and over numbered 4.2 million, which was 16.6% of the population, up from 15.8% in 2016. Australian Bureau of Statistics

That doesn't automatically mean every older driver wants a swivel seat. It does mean the market for easier ingress and egress is real, and growing. A classic VW community understands this instinctively, because plenty of owners love the car but don't love the yoga move needed to get into it after a long day at a show.

The best automotive ideas often come back not because they're clever, but because they solve the same old problem better than the alternatives.

Why VW enthusiasts should care

In a vintage scene full of restoration purists and practical modifiers, swivel seating sits in an interesting middle ground. It doesn't change the soul of a Kombi or Beetle, but it can make the thing more usable for a partner, parent, or mate who finds the original layout awkward. That's why it belongs in the conversation alongside seat runners, step plates, and other comfort-driven upgrades.

A timeline graphic illustrating the evolution of swivel seats in automobiles from 1959 to the 2020s.

How the Mechanism Works and What to Choose

The part that separates a useful auto swivel seat from an expensive mismatch is the motion itself. A good setup matches how you get in, how you turn, and how much room the cabin gives you. For a Kombi or Samba owner, that matters because the charm of these vans often comes with a front seat position that is awkward to work around.

Manual, free-rotating, and powered

A manual indexed swivel is the simplest version. It turns to preset positions and locks there, which makes it useful when you only need a controlled turn for entry and exit. In a tight Beetle, that can be enough, because you often only need the seat moved outward rather than spun around like a lounge chair.

A free-rotating 360° plate gives more choice in how the seat sits, but that freedom comes with more packaging and safety questions. The seat still has to lock positively for road use, and the assembly has to stay stiff under load so it does not feel loose or flexy. One automotive-grade example, the YSR-P034 mechanism, is listed at 390 × 360 × 100 mm and 14.02 kg. YSR Seating

A powered lift-and-swivel unit is the most specialised option. Technical product data for accessible-vehicle use commonly shows 12 VDC power, around 120 W drive load, support for up to 150 kg, and rotation ranges such as 0–113° with transfer travel near 390–395 mm. Xinder Mobility SLIFT Pro V2

How to read the listing without guessing

A listing that mentions 90° is usually pointing to a basic swivel motion for getting in and out. 180° means the seat can turn further, which can help when you want a more comfortable exit position. 360° needs a closer look, because that figure can describe either free movement or a controlled system with proper locking.

The easiest way to choose is to match the mechanism to the job. If the vehicle is narrow and the goal is easier access, a plain turntable is usually enough. If the user needs help moving outside the door opening before lowering, a powered lift-and-swivel unit makes more sense than a basic rotating base. For anyone sorting seat rails, trim, or related conversion parts, Volkswagen interior access accessories are a sensible place to compare the broader setup.

An infographic comparing three types of seat swivel mechanisms: manual indexed, free-rotating, and electric auto swivel.

Fitting a Swivel Seat to a Classic or Modern VW

A Beetle, a Kombi, and a modern Transporter don't ask the same thing of a swivel seat, so don't buy them the same way. In a Beetle, space is tight, the roofline is low, and the seat position is already part of the car's charm and challenge. Even a modest turn can make that perch easier to live with.

A Kombi or Samba Bus is a better fit for the idea because the front passenger area is where the awkwardness shows up most clearly. The cab layout suits a front-seat swivel far more naturally than a small hatch, and Aussie owners often think about the passenger side first for that reason. A modern van usually gives you a simpler install and more door clearance, but the improvement can feel less dramatic because the original entry is already friendlier.

For VW readers, the question is not whether swivel seats are cool. It's whether they suit the body style you own.

  • Beetle: Best if you need a cleaner entry motion, but space constraints mean you should keep expectations modest.
  • Kombi or Samba Bus: Often the sweet spot, especially on the front passenger side where the seat change feels immediately useful.
  • T3, Multivan, Transporter: Usually the easiest candidates for fitment, though the practical gain depends on the trim and seating layout.

One useful place to start is the general range of interior-access parts, especially if you're also weighing seat rails, trim, or related conversion pieces. Volkswagen Memorabilia vehicle interior accessories

A clean way to judge suitability is to sit in the car and rehearse the motion before you buy. If you can already see the knee, handbrake, or B-pillar getting in the way, that's your answer. A swivel seat helps, but it doesn't change the shape of the cabin.

DIY Install Versus Professional Fitting

A neat swivel-seat install can be done at home, but the work is not all equal. A manual indexed plate is usually the friendliest place to start, because once the seat is out, the job comes down to aligning brackets, tightening bolts, and checking that the seat still clears the rails and trim. Powered units need more care, because they bring wiring, load demands, and a bigger consequence if something is fitted poorly.

What a home install can realistically cover

For a manual kit, a weekend DIY approach often makes sense. You still need to keep an eye on the seatbelt anchor points, the handbrake in older Beetles, and the way the seat base swings through its arc. A bad fit does not always look wrong on day one, it often turns up when the seat starts rubbing or binding where it should not.

Powered lift-and-swivel systems are better left to a fitter who understands vehicle electrics. The product details for these units point to 12 VDC and around 120 W drive load, so the system is more than a simple bolt-in swap. A proper auto-electrician can set up the fuse protection, relays, and cable routing in a way that suits the seat and the vehicle, and if you are weighing a broader conversion plan, the Volkswagen van fit-out guide is a useful place to compare how seating changes sit alongside the rest of the cabin work.

The mistakes that cause trouble

  • Seat-rail clearance: The seat can look fine in the shed and then bind against the floor or trim once installed.
  • Seatbelt geometry: If the belt no longer anchors or tensions correctly, the mod has failed the basics.
  • Handbrake interference: Older Beetles are notorious for tight packaging near the front seating area.
  • Wrong rotation side: Some powered seats come in separate left-hand and right-hand versions, so the side has to match the vehicle and the user flow.

If the installer cannot explain how the seat locks, how the belt works, and where the wiring lives, keep asking questions.

A professional fit also gives you a clearer paper trail for warranty and peace of mind. The more the system changes the seat's movement or electrical load, the more sensible it is to have the work documented properly.

A comparative flowchart infographic showing DIY installation versus professional fitting options for vehicle seat swivels.

Safety and Legal Considerations in Australia

The safety question is the one people sometimes hesitate to ask out loud. A swivel seat feels helpful, but any change that alters how the occupant sits and belts in needs proper restraint logic and proper locking. In the United States, NHTSA says swivel seats are not prohibited by Federal Motor Vehicle Safety Standard No. 207, but a front outboard swivel seat must have lap-and-upper-torso restraints that fit the occupant in any position the seat can occupy while the vehicle is moving, including rearward-facing. NHTSA interpretation

What that means in plain English

The seat can't just spin and hope for the best. It has to lock positively for travel, and the belt has to work with the seat position rather than fighting it. That principle matters in Australia because the spirit of the rule is the same, even when you're dealing with local compliance pathways, engineering sign-off, or an insurer checking the vehicle after a crash.

A useful mental checklist is simple. The seat should lock firmly in the forward-facing position, the belt should still anchor and tension correctly, and the installation should look like a proper vehicle modification rather than a home-made bracket job. If any of those three looks flimsy, stop there.

The crash-safety side is still an active conversation. A 2023 Frontiers study evaluated an integrated safety system for swivel-seat arrangements in a frontal crash, which is a reminder that convenience alone doesn't settle the safety question. Frontiers study

The sensible Australian approach

For Aussie VW owners, that means treating the seat like a structural change, not a comfort accessory. If you're fitting one to a Kombi or Beetle, check that the installer understands restraint alignment, and ask how the mechanism behaves if the vehicle is moving. If the answer sounds vague, that's your warning sign.

For anyone planning a fit-out in a van or specialist vehicle, the same discipline applies. VW van fit-out guidance makes more sense when you think about the seat as part of the whole cabin, not a standalone bolt-on.

Buying Guide and Common Questions

A decent buying checklist keeps you from getting seduced by the shiny bits. Start with load rating, because commercial units are specified for real-world occupants, and one verifiable example is the BraunAbility Turny Evo swivel car seat at 370 lb, while a related BraunAbility Turny swivel car seat listing shows 330 lb for the standard model. BraunAbility Turny listings That tells you how seriously the market treats capacity differences.

What to check before you buy

  • Rotation angle: Match the turn to the doorway and cabin space, not to the biggest number in the brochure.
  • Manual or powered: Manual suits simple access help, powered suits transfer support and reduced physical effort.
  • Left or right hand: Some units are built for one side only, so the side matters.
  • Seat pattern: Make sure the kit matches your donor seat and vehicle base.
  • Locking behaviour: A good seat should feel solid when it's supposed to be driving position solid.

Quick answers people usually want

A cleanly installed swivel seat usually doesn't hurt resale on a classic Beetle, especially if the original parts are kept and the work is reversible. Factory seatbelts can still work, but only if the anchor points and belt path stay correct. Child seats on the swivelling side are often a bad idea, because the rotating position and the child-seat installation don't always play nicely together.

Best buying habit: choose the seat for the person and the car together, not for the spec sheet alone.

If you're still weighing whether the upgrade fits your VW life, think about the use case. A Kombi owner who hauls grandparents to club runs needs something different from a Beetle owner who just wants easier Sunday drives. That's where a measured, honest approach beats a flashy one every time.

For collectors and enthusiasts who like their VW world to stay personal, it's also worth browsing a proper range of VW parts Australia options before locking in the seat project. VW parts Australia


If you're building a classic VW space around comfort, heritage, and the right sort of detail, Volkswagen Memorabilia has a lovely range of VW-themed pieces that suit a Kombi bench, a Beetle shelf, or a workshop wall. Visit Volkswagen Memorabilia to browse diecast models, gifts, and display pieces that match the same old-school charm as the cars themselves.

Unique Beach Themed Gifts: Coastal & Surf Styles

You're standing in the driveway with the Kombi idling, the late sun bouncing off the chrome, and someone's asking what to bring to the weekend barbecue in Noosa. A towel feels ordinary. A candle gets forgotten. But a beach themed gift that carries the same easygoing charm as a classic VW, that's the sort of present people keep on the shelf, in the lounge, or in the cab corner of the van and smile at every time they pass it.

That's why the best coastal gifts aren't just “beachy”. They feel like a memory from a road trip, a day parked near the dunes, or a summer run down the coast with the windows cracked and the radio low. For VW lovers, the sweet spot is simple, a gift that can live happily beside a Volkswagen Beetle model, a Kombi Samba Bus diecast, or a bit of sun-washed décor and still feel right at home.

Capturing the Endless Summer Feeling

A mate once told me the hardest part of buying for a beach-loving VW fan isn't the budget, it's the feeling. He didn't want another throwaway trinket. He wanted something that brought back childhood holidays, surfboard wax in the back of the van, and those long, lazy afternoons when the Kombi became the family base camp.

A hand holds a miniature vintage Volkswagen camper van against a full-sized van on a beach road.

That's the magic with beach themed gifts, the best ones bottle up a scene. A diecast Kombi on a desk does it instantly, because it carries the same road-trip spirit as the full-size van parked by the esky. A shell-inspired accent or a nautical print does something similar, it shifts a room from plain to personal without trying too hard.

Practical rule: if a gift makes someone tell a story the moment they unwrap it, you've probably picked well.

A good coastal gift also holds its own in the house, not just in the car or the caravan. A piece with a weathered finish, a familiar VW shape, or a bit of seaside character can sit beside family photos and still feel like it belongs. For the right person, that is what turns a simple present into a keepsake, something they'll place on a shelf and point to years later while talking about the trip that first brought it home.

More Than Just Sand and Shells

There's a big difference between a souvenir and a keepsake. A souvenir says, “I was there.” A keepsake says, “This mattered.” That's the line beach lovers and VW people both understand, because both worlds are built on memory, movement, and a bit of personality.

An infographic titled Beyond Souvenirs presenting gift categories: collectible treasures, coastal comforts, and everyday escapes for beach lovers.

What makes the gift feel personal

For a lot of Australian shoppers, the sweet spot is something that feels local and specific rather than generic. Independent gift guides show strong demand for beach gifts and coastal décor, but they don't always help with housewarming presents, caravan trips, or gifts that belong in a home rather than a beach bag (Bella Coastal Decor). That's where collectible pieces and styled décor start to make sense.

A licensed diecast VW lands as a collectible treasure because it gives the recipient a tiny, well-made version of something they already love. Coastal home accents do the same job in a different way, they turn a mantel, shelf, or entry table into a little seaside scene. The point isn't to buy more stuff, it's to choose something with staying power.

Why coastal décor belongs in the same conversation

Australia's 25,760 km of coastline explains a lot about our décor habits, because nautical styling keeps showing up in gifts and interiors, from wall art to photo frames and decorative accents (About Darwin). That's not a trend in the flimsy sense, it's a recurring visual language that feels familiar to a lot of homes.

A good beach gift should look at home beside a Kombi on the shelf, not fight for attention with it.

For a practical touch, shell and wind chime pieces can work beautifully when you want something relaxed, coastal, and a little nostalgic. If you're leaning into that soft seaside look, start with a curated piece like this shell wind chime and let the rest of the room follow its lead.

Gift Ideas for Every Beach and VW Lover

A good gift gets easier when you stop thinking about categories and start thinking about people. The diecast collector, the coastal home stylist, and the weekend wanderer all want something different, even if they'll all smile at a Kombi badge or a beachy colour palette.

Screenshot from https://vwmemorabilia.com.au/shop/

The diecast collector

This is the person who notices panel lines, mirror placement, and whether the paint finish feels true to the original. A Kombi Samba Bus diecast or a Volkswagen Beetle model makes sense here because the joy is in the detail, the silhouette, and the authenticity of the miniature.

Scale matters too. A larger model like 1:18 gives more presence on a desk or display cabinet, while 1:24 usually hits a nice balance between detail and space. Smaller formats suit mixed collections, especially if the recipient already has a few models lined up together.

The coastal home stylist

This buyer wants pieces that feel relaxed, light, and easy to place in the home. Think nautical photo frames, wall art, or a decorative accent that works with timber, white, blue, and sand-toned rooms. In Australian homes, those pieces often end up on a console near the entry or on a shelf in the living room.

The draw here is less about “beach kit” and more about atmosphere. A coastal ornament or a styled accent can soften a room the same way a Kombi softens a car park, it changes the feel without shouting.

The weekend wanderer

This is the friend who's always planning the next escape. They're the ones who love practical gifts with character, something that belongs in the van, the caravan, or the holiday house. A surfy VW model, a playful magnet, or a small display piece can all work because they're easy to enjoy without needing much space.

A lot of beach gifts fail because they look good for one day and then vanish into a drawer. The better ones earn a permanent spot on a shelf, which is exactly what a collector or nostalgic traveller wants.

Good gift test: if it would still make sense in a beach house, a study, and a garage, it's probably a strong pick.

For a broader browse of themed ideas, the gifts for the beach collection is a handy place to start when you're matching personality to present.

For a quick visual guide, the right item usually falls into one of these lanes:

  • Collector lane: licensed model, true-to-era styling, display value.
  • Decorator lane: coastal colours, easy styling, shelf-friendly proportions.
  • Travel lane: compact, personal, and tied to road trip memory.

The best part is that these choices don't compete with each other. A diecast Kombi can sit beside a framed print or a shell-inspired accent and still feel cohesive, especially in a home that already leans into relaxed Aussie coastal style.

Choosing the Right Piece of Paradise

A thoughtful gift starts with fit, not just flair. The first question is whether the recipient wants something to display, use, or collect, because that decides everything from size to material to finish. A display piece can lean decorative, but a collectible needs authenticity and a sense of proportion that feels true to the original vehicle.

Diecast details that matter

For VW collectors, officially licensed models carry real weight because they signal fidelity, not guesswork. That matters when the gift is meant to celebrate a specific Kombi or Beetle rather than just nod at the shape of one. The closer the model stays to the actual vehicle, the more satisfying it feels to the person receiving it.

Scale is the other decision point. 1:18 models command attention and suit a feature shelf. 1:24 models are easier to work into an existing display without taking over the room. If the recipient already collects, matching scale to the rest of the shelf usually matters more than chasing the biggest box.

Beach décor and practicality

For coastal décor, material and finish matter just as much. A pale timber accent, a metal wall piece, or a framed print needs to sit comfortably with the home's palette, not clash with it. The safest route is to think in textures, timber, linen, metal, glass, and matte finishes tend to sit well in beach-style spaces.

Australian conditions add another layer. Many parts of the country regularly experience very high to extreme UV levels, so gifts that live near windows or spend time outdoors should be chosen with that in mind (GiftLab). That makes durability and placement worth thinking through before you buy.

Selection rule: if it's for a bright room, a beach house, or a sunlit display cabinet, choose a finish that still looks good after the afternoon light shifts.

A useful way to decide is simple.

  • Choose licensed diecast when the gift is for a collector or VW devotee.
  • Choose coastal décor when the recipient wants the beach feeling in the home.
  • Choose compact display pieces when space is tight but sentiment still matters.

The right piece feels deliberate. That's what separates a present from a placeholder.

An infographic comparing selection tips for diecast car models versus beach-themed home decor and apparel gifts.

Styling Your Coastal and VW Treasures

A gift really lands when it finds its place in the home. A Kombi model on its own is lovely. A Kombi model on a timber shelf with a framed surf photo and a small coastal accent turns into a story corner.

Start with one focal point. A road trip shelf works well for VW memorabilia, especially if the recipient already has a few models or keeps small travel keepsakes. Put the diecast in front, then build around it with a framed print, a map, or a small decorative piece that echoes the colour of the vehicle.

Make the room do the work

In a living room, coastal décor works best when it's grouped rather than scattered. A shell piece, a photo frame, and a neutral-toned accent will usually feel more considered than three unrelated items placed across the room. The goal is a calm, beach-house feel, not a souvenir shop.

For a study or home office, a single Beetle model can do more than a full shelf of clutter. It gives the space personality without crowding the desk, which is ideal for anyone who wants a nod to their VW side without turning the room into a garage display.

A few practical display ideas help:

  • Use height changes: place the model on a book or plinth so it sits above flat décor.
  • Repeat one colour: echo the Kombi's colour in a frame, cushion, or art print.
  • Leave breathing room: a small group looks more deliberate than a crowded shelf.
  • Keep direct sun in mind: bright light can be lovely, but it's not kind to every finish.

The beauty of this style is that it grows naturally. One gift becomes the start of a corner, then a shelf, then a whole room that feels like summer and road trips at once.

Your Go-To Aussie Shop for VW Memorabilia

A Kombi model on a shelf, a weathered map from a family trip, or a piece of beach-inspired home décor can carry the same feeling. It brings back the sort of day you still talk about later, the one where the windows were down, the esky was packed, and the coast kept appearing around the next bend. That is why the best beach themed gifts often end up being the ones with a story attached.

I have seen that at car shows and in living rooms alike. A collector sets a VW diecast beside a framed coastal print, and the whole corner starts to feel lived in, not staged. A decorator places a small Kombi next to timber, linen, and a pale blue accent, and the room suddenly feels like a holiday house that has been loved for years.

If you want a gift that feels local and personal, Volkswagen Memorabilia is a strong place to begin. The range suits the person who loves a clean display as much as the one who wants a reminder of summer drives, surf stops, and old-school motoring charm. You can browse beach-inspired home décor alongside VW diecast and other pieces that sit naturally in a collector's room or a coastal home.

A good gift does not need to shout. It just needs to land in the right hands, on the right shelf, in a room where the owner will spot it each morning and think of a Kombi by the water, a packed road trip, or a favourite stretch of coast. That is the kind of piece worth choosing from Volkswagen Memorabilia, especially if you want something that feels at home with Kombi nostalgia, beach style, and a proper Aussie road-trip spirit.

Volkswagen Seat Covers: A Practical Buying and Care Guide

You know the feeling. The cabin's been baking in the sun, the driver's bolster's gone shiny, and there's a bit of sand in the seams from the last beach run. In a Beetle, Kombi, Golf or Passat, that's usually the moment seat covers stop being an “extra” and start looking like a smart way to keep the car usable, tidy, and worth caring for.

The right Volkswagen seat covers do more than hide wear. They protect the original trim, make daily driving easier, and let a VW cabin feel personal without turning it into a gimmick. The wrong ones do the opposite, they bunch up, block access, and make the interior feel cheap the second you sit down.

Why Volkswagen Seat Covers Matter for Aussie Owners

A hot afternoon changes the way you think about a seat cover very quickly. If you've ever climbed into a Volkswagen after it's been parked outside and felt the seat back grab at your shirt, you already know why protection matters in Australia. Add UV, sweat, dust, sand, and the odd coffee spill, and the factory trim starts wearing the cost long before the odometer suggests it should.

That's especially true for cars that are still worked hard, not just admired. A Kombi used for weekends, a Golf that does the school run, or a Beetle that's parked at shows but still driven regularly all face the same slow damage.

Practical rule: if the seat cover only looks good in a product photo, it's probably not built for Australian use.

The aftermarket is already built around that reality. Recent automotive seat-cover research values the category at USD 6.8 billion in 2024 and projects USD 12.78 billion by 2035, with a 5.9% CAGR from 2025 to 2035, showing that buyers treat seat protection as a serious replacement-and-refresh purchase, not a novelty (Market Research Future). For VW owners, that matters because a good cover has to do two jobs at once, defend the original trim and still suit the car's character.

The practical question isn't whether to buy one. It's whether the cover matches the seat, the way you use the car, and the conditions it lives in.

Popular Materials from Neoprene to Leatherette

Pick the material first, and a lot of the rest becomes clearer. The cover has to feel right every time you climb in, but it also has to cope with a hot cabin, beach sand, wet gear, and the kind of regular use that slowly chews through factory trim. For Australian Volkswagen owners, the usual shortlist is neoprene, canvas, and leatherette, and each one suits a different mix of comfort, durability, and appearance.

Neoprene for wet, active weekends

Neoprene suits cars that regularly carry swimmers, surfers, dogs, or equipment that is still damp when it goes into the back seat. The material has a wetsuit-like feel, wipes down without fuss, and handles water exposure better than many fabric options, so it fits a Kombi used for beach trips or a Golf that spends its weekends near the coast.

There are trade-offs. Neoprene can feel warm in a parked car, especially after the interior has baked in the sun, and it rarely gives the most authentic classic look. It still makes sense if the main job is keeping salt, moisture, and sand from settling into the original upholstery.

Canvas for hard use and older-style utility

Canvas is the tougher, more work-focused choice. It suits overlanders, utility-minded drivers, and classic VW interiors that need a practical finish rather than a soft one. It usually breathes better than synthetic-look materials and carries a straightforward, honest appearance that fits older Volkswagens well.

The trade-off is comfort and polish. Canvas can look right in a hard-working Kombi or a Beetle that gets used regularly, but it will not deliver the same tidy, premium finish some owners want in a modern Golf or Passat. If the car sees mud, tools, pets, or repeated loading, canvas earns its place quickly.

Leatherette for a cleaner, smarter cabin

Leatherette gives you the easiest route to a neat, upscale-looking interior without the upkeep that comes with real leather. It suits owners who want the cabin to look sharp at a show or on a weekend run, while still being easy to wipe after daily use. Volkswagen Genuine Accessories for the Virtus describe seat covers as improving aesthetics and comfort, while also protecting against wear and dirt, which matches the practical job most buyers expect from this kind of product (Volkswagen Virtus accessories).

That said, leatherette has its own realities. In harsh Australian sun, a dark finish can heat up quickly, and cheap versions can feel slippery or look a little too glossy for a heritage VW cabin. A better-quality cover keeps the car looking cleaner, but it still needs to suit the seat shape and the way the car is driven.

A good material choice should suit how you actually drive, not how you wish the car lived.

For owners comparing cabin trim options, the Volkswagen interior accessories collection is a useful place to see how seat protection sits alongside other interior pieces.

Model-Specific Fitment for Classic and Modern Volkswagens

Volkswagen cabins are not all built the same, and that is where a lot of seat-cover mistakes begin. A classic Beetle or early Kombi has a very different seat frame, headrest arrangement, and upholstery shape from a modern Golf, Passat, or Tiguan. If the cover is not cut for the seat platform, it will wrinkle, slip at the base, or interfere with important fittings. In Aussie conditions, that poor fit also means more movement from heat, more dust working under the fabric, and more wear where the cover rubs on the seat.

Why universal covers usually disappoint

Universal covers promise convenience, but on a VW they often become a compromise. They can sit loose over contoured seats, fight with headrests, and leave awkward gaps around bolsters or split-fold backs. That is fine if you only want temporary protection. It is not what most enthusiasts mean when they want a proper fit.

Model-specific covers are a better match because they are built around the vehicle's seat geometry. VW Classic Parts lists a genuine Golf Mk4/Bora RECARO seat cover in leather and leatherette with exact dimensions of 610 mm by 550 mm by 40 mm and a weight of 0.81 kg, which shows how OEM parts are dimension-controlled rather than guessed (Volkswagen Classic Parts). That kind of detail matters more on a VW than on a generic hatch, because the seat shape, bolster depth, and trim layout vary so much between generations.

What to match before you buy

For Australian buyers, three fitment points matter most. First, check the exact vehicle platform and year. Second, confirm whether the seat has removable headrests or integrated ones. Third, make sure the rear bench still folds the way it should, especially in cars that use 60/40 or similar split layouts.

The seat base itself also needs attention. A cover that fits the cushion but misses the backrest tension points usually ends up looking baggy after a few weeks, and a rear cover that blocks the fold release becomes a daily annoyance. If the car carries kids, pets, tools, or surf gear, that trade-off shows up fast.

Aftermarket VW-fit systems often use rear-seat zipper architecture to preserve fold function and armrest use where fitted. That is useful in real life, because a seat cover that protects the cabin but kills cargo flexibility is a poor trade. In older VWs, correct cut-outs also help the cover sit neatly over slimmer frames and simpler trim. In newer models, the same logic helps the cover follow the seat contours instead of floating over them.

Best-fit habit: buy for the seat layout, not just the badge on the tailgate.

If you are comparing display ideas and cabin styling touches for a Beetle or Kombi, the vehicle interior accessories range is a handy place to start thinking about the overall look, not just the cover itself.

Safety and Compliance Considerations for Side-Airbag Seats

This is the part many casual buyers skip, and it's the one that matters most. A seat cover can look neat and still be the wrong choice if it interferes with side-airbag deployment, seat-mounted sensors, or child restraint access. In Australia, that's not a detail, it's a serious buying check.

What to ask for before you commit

A properly designed cover should preserve the factory seat's safety functions. VW Genuine rear-seat protection accessories specify access to seat-belt buckles, ISOFIX anchors, armrest and pass-through functions, and use durable polyester construction, which is a good example of how protection and practicality should coexist (VW rear-seat cover with GTI logo).

Look for these features in plain terms:

  • Airbag-compatible seams, ideally breakaway or specifically shaped for side airbags.
  • ISOFIX access slots or clear opening points for child restraints.
  • Headrest and belt cut-outs that don't distort when tightened.
  • Clear model notes for your VW platform, not vague “fits most” wording.

A four-point safety check

  1. Ask whether the cover is tested for side-airbag seats. If the seller can't explain the seam design, move on.
  2. Check child-seat compatibility. Rear seats used for kids need clean access to tether points and anchors.
  3. Confirm the fit around sensors and folding mechanisms. A cover shouldn't jam movement or strain the seat back.
  4. Avoid generic shells on airbag seats. A loose cover can shift, bunch, and compromise deployment geometry.

One Australian-fit concern is whether the cover is legal and safe with side-airbag seats and child-seat anchors, because many product listings stop at style and ignore restraint compatibility (airbag and ISOFIX fitment concern).

A cover that blocks a tether point or ignores airbag geometry is cheap only until it causes a problem.

Installation Overview and Common Troubleshooting

A good install starts before the cover goes anywhere near the seat. Clear the cabin, slide the front seats to give yourself room, and take the headrests off if the design allows it. That alone makes the rest of the job much cleaner, especially on tighter VW buckets where access around the bolsters is limited.

Work methodically. Feed the cover over the top, line up the headrest holes, and make sure any side-airbag seam sits where the seat expects it to be. Then smooth the base out before tightening the straps, because once the elastic is tensioned, wrinkles are harder to fix.

  • If the cover slips on vinyl seats, roughing up the surface isn't the answer, the fix is usually better anchoring under the seat and tighter strap routing.
  • If the backrest rides up, the shape is wrong for the seat or the lower ties aren't secured evenly.
  • If rear zippers fight split-fold seats, pause and re-check whether the cover was cut for your exact 60/40 or 50/50 layout.
  • If the belt latch sits awkwardly, stop and reopen the opening before you force anything through.

The same logic applies to other interior protection pieces, which is why matching products to the car matters across the cabin. If you're planning a broader refresh, the automotive dashboard covers collection can help you think about the dashboard and seats as one interior system instead of separate add-ons.

If the cover needs brute force to fit, it probably wasn't designed for your seat.

Call a trimmer if the seat shape is unusually modified, the cover tension is uneven after a proper install, or you're dealing with foam damage that needs repair before any cover will sit correctly.

Cleaning and Maintenance for Australian Conditions

Australian conditions punish neglected interiors. UV fades colour, coastal salt leaves residue on surfaces, and red dust finds every seam you forgot to check after a long drive. The answer isn't complicated maintenance, just regular habits matched to the material.

For neoprene, use a gentle vacuum and mild soap, then let it dry properly before the next drive. For leatherette, wipe it with a damp cloth and use a suitable conditioner so the surface doesn't go dull or brittle over time. For canvas, spot-clean stains early and reproof if the fabric starts losing water resistance.

An infographic titled Upholstery Care Under the Australian Sun providing four tips for maintaining furniture and seat covers.

Keep a seasonal rhythm

  • Spring dust-off: vacuum seams and brush out grit before it embeds.
  • Summer sun care: park in shade where you can and use a fabric-safe UV protectant on suitable materials.
  • Winter mud control: shake out floor dirt and clean transfers before they dry.
  • Beach-day reset: tip out sand early, don't let it grind into the bolsters.

Avoid harsh solvents on leatherette and bleach on canvas. Those shortcuts tend to cause more damage than the stain you were trying to remove. The other habit that pays off is simple, park in shade when possible, because reducing UV exposure protects both the cover and the original trim underneath.

For owners pairing seat protection with coordinated cabin styling, the customised floor mat range helps keep the same practical mindset flowing through the rest of the interior.

Styling Ideas That Celebrate VW Heritage

The fun part comes after fitment and safety are sorted. That's where a seat cover can nod to VW heritage without turning the cabin into a costume. A Beetle can wear a bit of retro floral energy, a Kombi can handle surf-inspired colour, and a Samba Bus can carry a two-tone scheme that feels faithful rather than forced.

The strongest interiors usually keep the graphics calm. Contrast stitching, a subtle embroidered logo, or a restrained pattern often ages better than loud prints that dominate the whole cabin. That matters if you care about resale and long-term enjoyment, because the nicest VW interiors usually feel like they belong to the car rather than to one trend.

A quick way to choose is to match the cover to the vehicle's personality:

  • Classic Beetle, lean into warm, nostalgic colours and softer textures.
  • Kombi or Type 2, choose beachy tones or surf-camp styling that feels relaxed.
  • Modern Golf or Passat, keep the palette cleaner and let the fit do the talking.

The better styling choices echo the car's history instead of shouting over it. That's why a restrained VW motif tends to look more expensive than a busy print, even when both started from the same materials.

The vintage interior of a classic Volkswagen Beetle featuring colorful retro floral print seat covers.

For more inspiration around cabin accents and themed pieces, the vehicle interior accessories collection is an easy place to compare what feels tasteful versus overdone.

Buying Checklist and Final Recommendation

Before you buy, check material, exact model fitment, airbag and ISOFIX compatibility, install effort, and cleaning commitment. That short list catches most mistakes before they become returns or regrets. If a product can't answer those five points clearly, it's probably not the right cover for your VW.

For classic Beetles and Kombis, prioritise shape and style. For modern Golfs, Passats, and other airbag-equipped VWs, prioritise safety geometry first, then look at finish. The best choice is the one that protects the car, suits your life, and still feels right every time you open the door.


If you're ready to compare VW-themed pieces, Volkswagen Memorabilia has a friendly range for enthusiasts, collectors, and gift buyers who want the heritage without the fuss. Take a look at Volkswagen Memorabilia and browse the shop for VW-inspired items that suit a classic build, a modern daily, or a Kombi-loving garage.

Anderson Plug Double Adaptor: The Complete Aussie Guide

You're parked up with the fridge humming, the camp kettle on, and one Anderson feed already spoken for. Then the question lands, can you run a second device off the same plug without turning the whole setup into a headache? That's where an Anderson plug double adaptor earns its keep, or exposes a weak point you didn't know was there.

The appeal is obvious. One tidy lead, two outputs, less mucking around at the tow bar or in the van. The catch is that a Y-splitter is still just a passive split, so what looks simple on the outside can get messy fast once current, cable size, and charging behaviour all start doing their thing.

What an Anderson Plug Double Adaptor Actually Does

A bloke rocks up to camp, plugs the fridge into the tow vehicle, then realises the solar blanket or auxiliary charger still needs a home. That's exactly the sort of moment where an Anderson plug double adaptor makes sense. It takes one Anderson-style input and splits it into two outputs, so you can feed two accessories from a single 12V source without rewiring the vehicle on the spot.

The old Anderson family has proper backbone behind it. Anderson Power Products introduced the original Storage Battery Connector in 1953 for forklift batteries, and the SB connector line has stayed largely unchanged while becoming the base of modern DC power distribution connectors. That heritage matters in Australian 12V work because the same rugged, high-current design language now shows up across caravans, 4WDs, marine gear, and solar rigs. Anderson connector history and SB family background

Why the physical design works so well

The connector is genderless, so there's no fumbling around for a male or female end in the dirt. It's also polarity protected, which helps stop simple connection mistakes when you're half a metre from a muddy wheel arch and trying to get dinner sorted.

A good double adaptor usually uses a short lead and compact split. That keeps resistance down and stops the adaptor from becoming a long, lossy extension lead. In practice, that short construction is the whole point, it's meant to bridge a feed cleanly, not become a permanent spaghetti monster hanging off the back of the van.

Practical rule: if the adaptor is doing more than splitting one feed into two short runs, you're probably asking too much of it.

A double adaptor is best understood as a tidy bit of hardware for a simple job. It's not a smart controller, it's not a distribution hub, and it won't sort out bad load planning for you.

Common Types and Ratings for Australian Setups

In Aussie 12V gear, the 50A SB50 class is a common starting point. It suits plenty of caravan, camping, and dual-battery work because it sits in that practical middle ground where the hardware is common, tough enough for real use, and easy to source. CTALS puts the common SB50 / 50A family in the 12 to 6 AWG range, which is roughly 5.3 to 13.3 mm², so the connector size and the cable size still need to match the job. CTALS Anderson plug size guide

For a typical Australian 50A Anderson-style double adaptor, you'll often see 300 mm lead lengths and cable around 6 mm² / 8 AWG-class. That shorter split is deliberate, because it helps keep resistance down and stops the adaptor from turning into a lazy little bottleneck when it is feeding fridges, lighting, or solar loads. Typical AU twin-Anderson adaptor listing details

Anderson Plug Series and Ratings Overview

Connector Series Amp Rating Wire Range (AWG) Common Use Case
SBS Mini 15 to 45A Varies by series guidance Smaller DC accessories and lighter mobile use
SB50 50A 12 to 6 AWG Caravans, fridges, solar inputs, dual-battery links
SB120 120A Larger conductors than SB50 Heavier auxiliary power and charging runs
SB175 175A Heavy industrial and high-current cable Serious battery and power distribution work
SB350 350A Very large cable runs Major DC power distribution systems

Anderson connectors are built around the AWG system, even though Australian installers usually think in mm². CTALS places the common SB50 / 50A in the 12 to 6 AWG range, about 5.3 to 13.3 mm², and also shows the broader family from SBS Mini 15 to 45A up to SB350 350A. That matters because the adaptor only makes sense when the connector series, cable size, and intended current all line up cleanly. A neat example is a slimline lithium battery 200 Ah, where the charging demand and cable run need a bit more respect than a small weekend setup.

A lot of twin adaptors look similar at the plug, but the difference is buried in the cable and the way the load is shared. A short SB50 lead can suit a fridge and a light load without drama, yet the same basic format can become the weak point if the cable is undersized for the current being asked of it.

The Hidden Risks of Splitting One Feed Into Two

A double adaptor looks innocent, but the electrical behaviour is where the sharp edges live. The big rule is simple, the combined load must stay within the adaptor's rating. For many Australian twin-split leads, that means 50A combined, not 50A on each side. One AU product page says it plainly, “DO NOT Connect 2 Appliances that draw more than 50Amp Combined”, and “NEVER connect to an Unfused or Unprotected Circuits.” Another seller says the same thing in slightly different words, “Never connect appliances that will draw more than 50 amps by itself or combined at the same time on this adaptor.” Epic Store safety wording and Sinister Offroad 50A double adaptor listing

Why two loads can clash

The problem isn't just total current. It's what happens when two devices try to behave as if they own the feed. AU forum and guide content points out that one solar panel or one Anderson feed can't reliably charge two separate batteries at the same time, and two controllers can fight each other. That's the kind of behaviour people only notice after the system starts acting odd, with charging that seems to hunt, stall, or never settle properly. Caravaners Forum discussion on split charging limits

Back-feeding is the other gremlin. If one connected device has a higher internal voltage or a different control strategy, current can flow in a direction the owner didn't expect. That can make one appliance behave strangely, or it can stress parts of the circuit that were never meant to share duties in the first place.

An infographic showing four risks of splitting one power feed into two, including load imbalances and voltage drops.

The key thing to remember is that a double adaptor is not a smart distribution hub. It doesn't balance current, prioritise loads, or isolate two batteries from each other. It just joins them at one point, and that's fine when the loads are modest and simple, but it's a pain when the setup needs proper control.

If the two devices expect to regulate power for themselves, don't assume a passive splitter will behave politely in the middle.

Wiring Safely and Getting the Termination Right

A lot of double adaptor trouble starts before the first crimp is made. If the cable is too light for the job, the run heats up, voltage sags, and the whole setup works harder than it should. With an Anderson plug double adaptor, the connector rating matters, but the cable size and the actual load matter just as much.

There is also a physical limit inside the connector body. In practice, some cable sizes do not sit right in certain Anderson-style contacts, so the adaptor is not a free pass to use whatever wire is lying around in the shed. That matters once you start building out real touring systems, especially when a van fit out utility systems setup needs clean cable runs and sensible load planning.

What good termination looks like

A proper termination starts with the right contact, the right die, and a clean crimp. The conductor needs to be fully seated, the insulation supported, and the finished joint tight enough to stay sound under vibration. In tow vehicles and caravans, poor terminations show up fast once the corrugations and heat start working on the wiring.

Practical rule: if the crimp looks crushed, loose, or lopsided, redo it before it ever sees the road.

The safety basics still apply. Do not connect a double adaptor to an unfused or unprotected circuit, and do not assume one branch fuse protects the other branch automatically. The adaptor should sit inside a system that already has proper protection, not act as the only barrier between the gear and a fault.

A clean build is easier to trust when the whole system is laid out with protection and cable choice in mind, the same way a proper van fit out utility systems setup treats the wiring as part of the job, not an afterthought.

A step-by-step instructional infographic showing how to safely wire and terminate electrical cables for proper connectivity.

A quick field checklist helps keep it honest:

  • Match the connector to the load: A 50A adaptor is still only a 50A adaptor.
  • Use the right conductor size: Pick cable that suits both the current and the connector body.
  • Inspect the crimp: A proper termination beats a rushed one every time.
  • Protect the circuit: Fuse the feed correctly and keep protection close to the source.
  • Check for heat: Warm termination points are a warning, not a character trait.

When a Double Adaptor Is Not the Right Solution

A Y-splitter is handy for temporary or light-duty use, but it stops being the right answer once the system needs independence. If you're trying to charge two separate batteries at once, or run two serious appliances from one feed, the passive split becomes the weak link. That's where a DC-DC charger, a fuse block, or a proper distribution hub starts making more sense.

The difference is control. A DC-DC charger actively manages battery charging, which is a very different job from just sharing a feed. A fuse block gives each output its own protection, which is exactly what you want when multiple accessories need to live on one supply without interfering with each other. A distribution hub does the same broader job in a more organised way, especially in caravan and touring setups.

A comparison infographic between a simple Anderson plug double adaptor and a professional DC-DC battery charger.

When the splitter makes sense

Use the adaptor when the loads are modest, temporary, and clearly within the rating. That might be a fridge plus a light accessory, or a simple camp setup where one feed needs to branch without a permanent install.

When to step up

Move to a proper charging or distribution solution when the job needs:

  • Independent control: Each battery or accessory needs to behave on its own.
  • Better protection: Every branch deserves its own fuse and fault path.
  • Higher confidence: The system is permanent, hot, vibration-prone, or expensive to repair.
  • Less guesswork: You want predictable charging rather than hoping the split behaves nicely.

One practical reason people step up is cable and termination pressure. Existing how-to content also shows the same thing from another angle: the question isn't only how to crimp it, it's what cable size, contact type, and connector series keep the adaptor from becoming the bottleneck. Once the build starts pushing beyond a simple split, the sensible move is a dedicated system, not a bigger Y-lead.

Buying Smart and Maintaining Your Adaptor

A quality adaptor starts with genuine Anderson-style contacts, properly rated cable, and a lead length that suits the job. If the cable feels skinny for the rating, or the terminations look rough, walk away. Australian suppliers that stock locally are handy here because the right part shows up faster, and you've got a better chance of getting sensible support if the fit or rating doesn't match the setup.

The basic maintenance routine is simple but easy to ignore. Check for loose connectors, warmth at the terminations, damaged insulation, and any sign that the lead is being bent hard at the plug body. If the jacket is cracked or the contacts are bent, replace the lead rather than nursing it along.

An infographic titled Buying Smart and Maintaining Your Adaptor featuring five steps for maintaining Anderson style electrical connectors.

A practical upkeep checklist

  • Verify the contacts: Make sure you've got genuine SB-series style hardware, not vague lookalikes.
  • Inspect regularly: Look for corrosion, heat marks, or bent pins.
  • Keep it dry: Moisture is the enemy, and a small amount of suitable dielectric grease can help protect terminals.
  • Watch the cable jacket: Cracks or stiff sections are a sign the lead's been abused.
  • Check the fuse: If the protection's blown or suspect, fix the cause before you plug in again.

If a connector starts running hot, the first suspects are nearly always the same, poor crimping, undersized cable, or a load that's too heavy for the adaptor. That's why good buying decisions and simple maintenance go hand in hand.

Hit the Road with Confidence

A well-planned 12V setup makes the trip easier. Match the cable to the connector, respect the combined load limit, fuse the circuit properly, and don't ask a passive splitter to do the job of a proper charging system. Get those basics right and your fridge, lights, and camp gear are a lot less likely to become an expensive lesson. If you've got a favourite touring or VW-inspired setup, share it with the community and keep the practical knowledge rolling. For gear that suits the lifestyle, have a look at the 12 volt air conditioner options and then browse the rest of the collection for pieces that celebrate the same road-trip spirit.
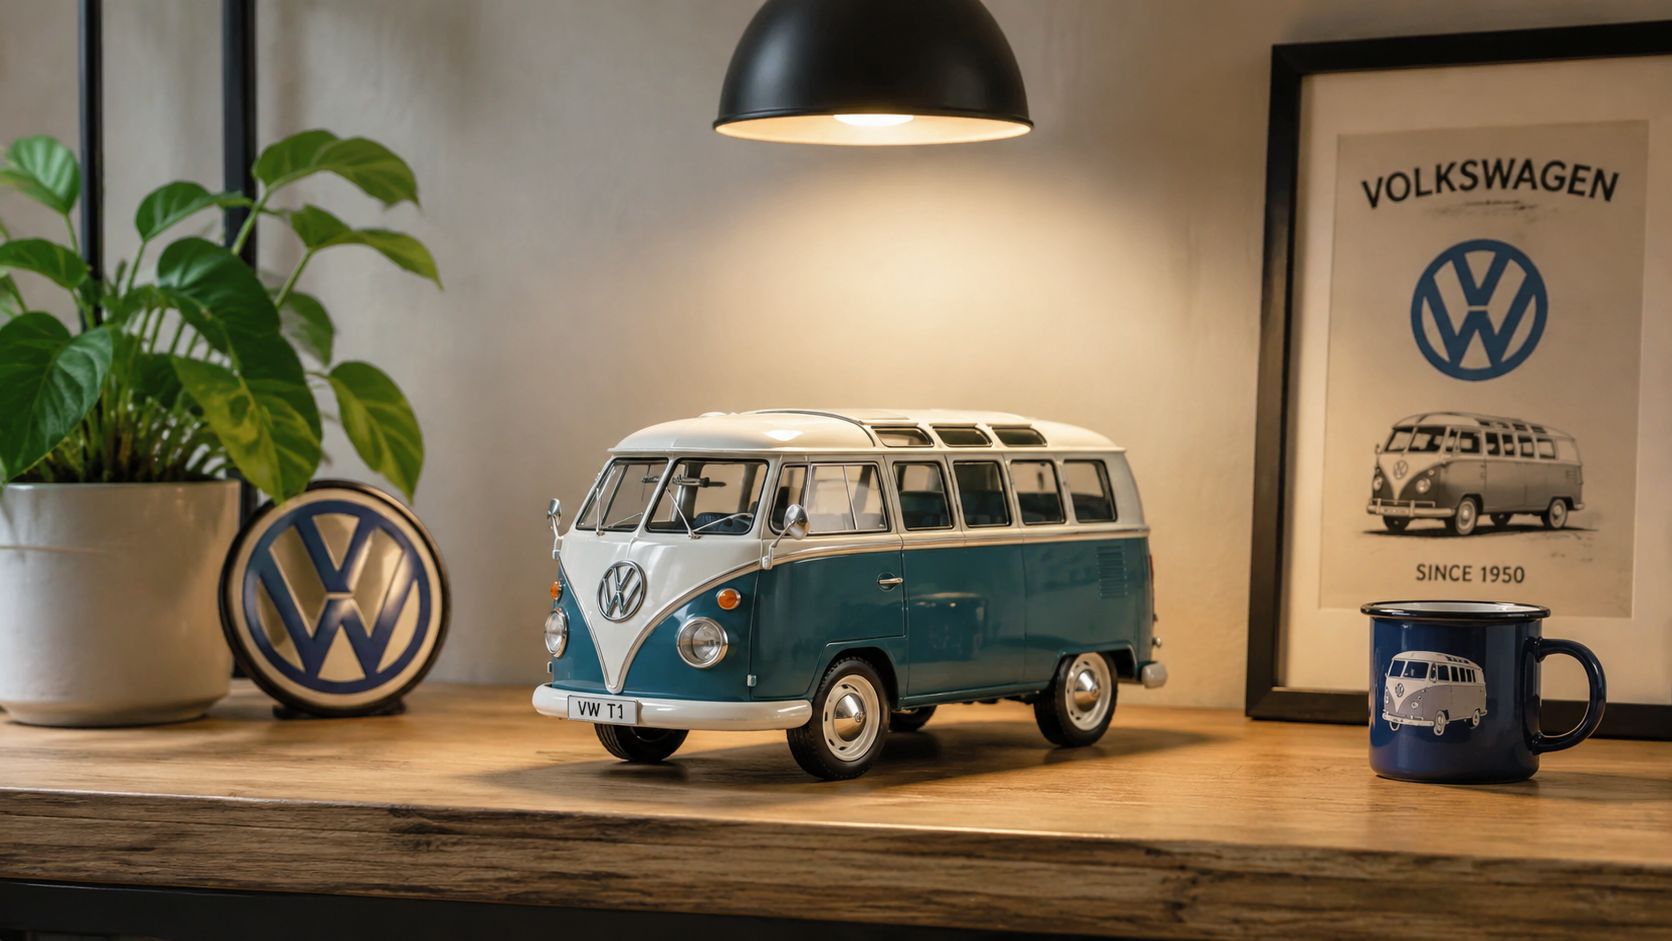

Volkswagen Memorabilia brings together VW-themed gifts, diecast models, and coastal décor that fit right alongside the kind of Aussie road trip life that starts with a Kombi dream and ends at a beach camp. If you're building a collection or hunting a gift that feels properly nostalgic, visit Volkswagen Memorabilia and explore the pieces that keep classic Volkswagen memories alive.

VW Beetle Wheels: Australian Fitment & Collector Guide

At a summer VW show in Australia, the Beetle that stops people in their tracks usually isn't the loudest one. It's the one sitting just right on its wheels, with the hubcaps polished, the stance honest, and the details looking like they belong there. That's where vw beetle wheels go from simple hardware to part of the car's whole personality.

A Beetle can wear the wrong wheels and still roll into the shed. It won't look right, it won't steer right, and if the fitment is off, it may not even behave safely at highway speed. The good news is that once you understand the basics, the whole topic starts to make sense quickly.

Why VW Beetle Wheels Matter More Than You Think

At a sunny Aussie car show, the Beetle that gets the slow walk-around is usually the one with wheels that suit the body. A stock-looking set of steel rims and tidy hubcaps can make a car feel properly period-correct, while the wrong offset or a too-modern alloy can throw the whole shape out. On a Beetle, the wheels don't just finish the look, they define it.

The reason that matters is bigger than style. Volkswagen's own history shows the Beetle wasn't a short-run model with a tiny parts window, it became one of the longest-running single-generation cars ever built, with 21,529,464 first-generation Beetles produced between 1938 and 2003. Volkswagen also says the Beetle took the overall sales record from the Ford Model T in 1972, and finished its final Puebla, Mexico production run on 30 July 2003 after a 65-year production span. Volkswagen Beetle production history

That long life explains why Beetle wheel choices can feel like a family tree instead of a single spec sheet. Some owners chase exact factory appearance, others want a subtle stance change, and plenty just want something that drives straight and clears the guards. If you've ever seen one Beetle look tidy and another look awkward on almost the same body, the difference is usually the wheels.

Practical rule: on a Beetle, wheel choice changes the car's character faster than almost any other bolt-on part.

A vintage light blue Volkswagen Beetle parked on grass with prominent chrome hubcaps and whitewall tires.

There's also a collector side to it. Australian owners, restorers, and memorabilia fans often gravitate to Beetles because the model's long production life preserved parts continuity, which helps explain why wheel-related restoration demand stayed active well after production ended in Europe and then Mexico. That same continuity is why the humble hubcap can become a talking point at a club picnic.

Understanding the Critical Bolt Pattern Split

The first thing to check on any classic Beetle wheel is the bolt pattern. If you get this wrong, nothing else matters, because the wheel won't mount correctly. Classic Volkswagen Beetles used two main lug patterns, 5×205 on models up to 1966, and 4×130 from 1967 onward. Heritage Parts Centre Beetle alloy wheel guide

Early and late Beetles belong to different fitment families

Early cars are known for the 5×205 pattern, often called the “wide 5”. Later Beetles moved to 4×130, which opened the door to a different pool of factory and aftermarket wheels. For Australian owners, that split is the single most important thing to know before buying rims, hubcaps, or restoration parts.

Here's a quick reference for the classic era:

Model Years Bolt Pattern Common Name Hub Bore Notes
Up to 1966 5×205 Wide 5 Not specified in the verified data Early Beetles use the wide 5 layout
1967 to end of production 4×130 Four bolt 57.1 mm on later models Non-OEM wheels often need hubcentric rings

The hub bore matters because a wheel can bolt on and still fit badly. For later-model Beetles, the 57.1 mm bore is common, and non-OEM wheels often need hubcentric rings so the hub carries the load instead of the studs. Australian Heritage Parts Centre notes that the wrong PCD or a non-hubcentric fit can lead to steering vibration, uneven clamp load, and wheel runout at highway speeds. Heritage Parts Centre AU wheel guide

Why the split matters in the real world

A lot of confusion starts when buyers shop by badge instead of chassis era. A “VW Beetle wheel” listing sounds simple, but the actual fit depends on whether the car is an early wide-5 car or a later four-bolt car. That's why period-correct hubcaps and original-style wheels often need era-specific checking, not just a glance at the car's shape.

A Beetle wheel that looks right in a photo can still be completely wrong on your chassis.

That's also why many owners keep original wheels if they can. Once you've identified the bolt pattern family, the rest of the decision gets much easier, whether you're hunting parts at a swap meet or sorting a restoration in the garage.

Offset and Width Explained in Plain English

Offset sounds technical, but the idea's simple. It tells you where the wheel sits relative to the hub, and on a Beetle that position affects guard clearance, steering feel, and whether the tyre sits tucked in or sticks out too far. Classic Beetle wheels are typically in the ET25 to ET45 range, with common widths around 4.5 to 6 inches. Just Kampers Beetle wheel fitment guide

Why factory-style sizing works

Volkswagen built the Beetle around relatively narrow wheels, and wheel-size reference data for a 1970 Beetle shows OE combinations such as 4Jx15 ET20 and 4.5Jx15 ET34. Those specs show the original idea clearly, modest positive offset, conservative width, and a tyre position that stays inside the fender line while still allowing steering lock and suspension movement. Wheel-size Beetle fitment data

That's why the classic 15-inch factory-style wheel is still such a familiar sight. Heritage Parts Centre notes most stock Beetle wheels are 5Jx15, with positive offset usually around +25 to +34 ET. Heritage Parts Centre wheel fit guide

Once you move outside that envelope, the car starts talking back. Go too wide and you can get inner suspension contact or outer fender rubbing. Change offset too far and you alter scrub radius and steering effort, which can make the car feel heavier or more nervous on the road.

Good fitment is a geometry problem, not just a looks problem.

What to check before you fall in love with a rim

A wheel's diameter alone doesn't tell the story. You need to look at width, offset, backspacing, and tyre section width together, because those numbers work as a set. A Beetle on a pretty rim with the wrong backspacing can look fine parked up and still rub hard on the first full-lock turn.

For club cars and street Beetles, a careful measured approach beats guesswork every time. If the wheel fits the arch but scrubs the steering, or clears the front but kisses the rear guard under load, the spec wasn't matched to the car. That's why the old VW crowd talks about fitment with the same respect as paintwork.

Popular Wheel Styles for Every Beetle Vision

The nicest thing about Beetle wheels is how much personality they carry. A set of plain steel wheels with clean hubcaps says one thing, while alloy rims with a sharper profile say something else entirely. The car hasn't changed, but the mood has.

OEM steel wheels and polished hubcaps

For concours-style restorations, the factory steel wheel is still the cleanest answer. It keeps the car visually honest, especially when paired with tidy hubcaps and sensible tyres. On a Beetle, that simple setup suits the body lines better than many owners expect, because the car was designed around that restrained look.

If you're considering refurbishing original rims, proper finishing matters. A refreshed factory wheel set can transform a driver-grade Beetle without forcing the car into a modified look, and a professional refinish can lift a tired car while keeping it period-aware. VW rim powder coating ideas

Aftermarket and period-inspired choices

Cal-Look builds often lean toward wider steelies or subtle alloys, while 70s-inspired cars sometimes suit slot mags or other retro patterns. Porsche-style Fuchs-inspired alloys also have a following because they sit neatly in the overlap between classic VW culture and German sports-car styling. The best choice depends on whether the car's story is restoration, street use, or a deliberate period tribute.

A few style cues help owners narrow the field:

  • Stock steel and hubcaps, best for original presentation and show-day authenticity.
  • Widened steel wheels, popular for a tougher stance without abandoning the old-school vibe.
  • Slot mags, a strong choice for 70s-flavoured builds that want a bit more visual muscle.
  • Fuchs-style alloys, chosen when the owner wants a cleaner, more performance-leaning German look.

All of those choices still need correct fitment. A beautiful rim that lands outside the Beetle's practical offset window will cause more grief than joy, especially if the car gets driven often.

The right wheel style respects the Beetle's shape instead of fighting it.

If you want to keep the look authentic, start from the car's era and build outward. If you want a more customised result, keep the stance controlled so the wheel choice still looks like it belongs under a Beetle body.

Measuring and Installing Your New Wheels

Before you buy anything, measure what's on the car now. Start with the bolt pattern, then check the centre bore, then measure width and offset. If the current wheel already fits well, it gives you a baseline that's worth more than a guess from a catalogue photo.

A simple workshop method

The two identifiers that trip people up most are PCD and centre bore. Australian Heritage Parts Centre states that Beetles up to 1966 use 5 x 205, while cars from 1967 onward use 4 x 130. For later Beetles, the 57.1 mm hub bore is commonly referenced, and non-OEM wheels may need hubcentric rings. Heritage Parts Centre AU wheel guide

Once the wheel is in hand, check the face, the backspacing, and the tyre size together. If you're changing only the rim diameter but ignoring the tyre section width, you're still flying blind. That's where people get caught out by rubbing that only appears when the suspension compresses or the steering reaches full lock.

A sensible fitting process looks like this:

  1. Confirm the bolt pattern, because a wheel that doesn't match the hub family is dead on arrival.
  2. Measure the centre bore, so you know whether hubcentric support is needed.
  3. Compare width and offset, then test the wheel against actual clearance on the car.
  4. Check tyre section width, because the tyre can be the part that rubs first.
  5. Trial-fit before driving, especially if the wheel is non-OEM or the offset differs from stock.

Install with safety in mind

Use the correct tightening sequence and torque procedure, and don't assume a wheel that spins on the studs is mounted correctly. If the wheel is aftermarket, hubcentric rings can be the difference between a clean fit and a shimmy you'll feel through the steering wheel. For any wheel and tyre change that alters offset, track width, load rating, or tyre choice together, Australian compliance rules can come into play, so the legal side matters as much as the mechanical side.

Practical rule: if the wheel looks close but not quite right, stop and measure again before the first drive.

When the basics are measured properly, wheel installation becomes calm work instead of guesswork. That's especially true on a Beetle, where small changes can have a surprisingly big effect on how the car drives.

An infographic detailing Volkswagen wheel measurement and installation procedures, including PCD, center bore, and torque sequence instructions.

From Real Cars to Diecast Displays

The fun part of learning Beetle wheel specs is that the knowledge doesn't stop at the shed door. Once you know what a factory wheel should look like, you start spotting accuracy in scale models too. That makes a Volkswagen Beetle model far more satisfying, because the wheels, hubcaps, and stance suddenly tell the same story as the full-size car.

Licensed diecast Beetles and Kombis earn their keep when the details are right. Collectors notice whether a model's wheel style suits the era, whether the hubcap shape feels believable, and whether the car sits like a real Volkswagen rather than a generic toy. That's why people chasing VW memorabilia collectibles often care about wheel fidelity almost as much as paint colour.

A good display doesn't need dozens of pieces. A classic Beetle on one shelf, a later model on another, and a Kombi Samba Bus nearby can show the progression of Volkswagen design in a way that feels authentic. If you've got a VW Kombi diecast Australia collectors' shelf, pairing it with a Beetle model that matches the same era language makes the whole setup stronger.

The best collections usually mix display logic with memory. One car can represent a family restoration, another can stand in for a car show favourite, and a third can be the model you always wanted as a kid. When those models come from a trusted Australian source, you're also more likely to get the kind of licensed pieces that serious collectors prefer. Volkswagen model cars

A scale model feels more valuable when it matches the real car's proportions and wheel story.

For anyone building a shelf, the easiest starting point is a themed pair. Match a classic Beetle with a Samba Bus, or line up a stock-style car beside a more customised version, and let the wheels show the difference in era and attitude. That's the quiet pleasure of collecting, the details are small, but they make the whole scene feel true.

Your Next Steps in the VW Community

Beetle wheels are one of those topics that pull together the whole VW hobby. They connect restoration, safety, styling, and collecting in a way that makes sense whether you're standing under a car at Volksfest or unpacking a model from the box at home. Once you know the bolt pattern, offset, and era cues, you stop guessing and start choosing well.

That's the heart of the Aussie VW scene. People love the cars, but they also love the shared knowledge, the club banter, the swap-meet finds, and the satisfaction of getting the details right. Whether you're chasing a tidy factory look or building a small display of licensed Volkswagen pieces, the right wheel knowledge adds another layer of enjoyment.

So keep learning, keep comparing notes with other enthusiasts, and keep going to the events where these cars still get celebrated properly. Volksfest, VW Nationals, and local club meets are full of owners who've already made the mistakes, fixed them, and are happy to tell the story over a cuppa and a close look at the hubcaps.


If you're ready to keep the Volkswagen passion going at home, Volkswagen Memorabilia brings together VW-themed gifts, diecast models, and display pieces that suit Beetle and Kombi lovers alike. Visit Volkswagen Memorabilia to browse pieces that fit the same heritage-minded spirit as the cars themselves, and add something special to your shelf, garage, or gift list.

8 Living Room Boho Ideas for the VW Enthusiast

You know that feeling when your lounge is almost right, but it still doesn't sound like you? The couch is in place, the light's good, maybe there's a bit of surfy ease in the room, yet it's missing the one thing a true enthusiast notices straight away, personality with a story behind it. That's where living room boho comes into its own, especially if you're the sort of person who can spot a Kombi by its silhouette, smile at a Beetle on the road, and still want a home that feels relaxed, coastal, and a touch nostalgic.

The trick is to make your room feel collected, not crowded. Boho has always been about eclectic layering, and its roots go back to the late 18th century counterculture that followed the French Revolution, later tied to the unconventional lives of artists in Paris, so it's hardly a style that was ever meant to be rigid or polished to death, and that long run matters because boho has stayed recognisable for more than two centuries as it moved from social identity into mainstream interiors House Beautiful. In Aussie homes, that makes it a beaut fit for VW lovers who want vintage charm, natural textures, and a laid-back finish that still feels intentional.

1. Vintage VW Diecast Displays in Boho Living Spaces

A mate's boho lounge in Byron had a little timber shelf above the sideboard, and the whole room came alive the moment he lined up a couple of Volkswagen diecast models beside a clay pot and a woven basket. That's the sweet spot here, models that look like they've rolled in with the rest of the room, not like they're waiting behind glass for inspection. A floating timber shelf with 1:43 classic Beetles works a treat, and a low console with 1:18 Kombi models on a macramé runner brings the same easy, sun-warmed feel.

A rustic wooden shelf displays three vintage Volkswagen toy cars beside a potted plant and terracotta vase.

The best displays feel like they've been built in little moments. Three cars on a shelf looks more relaxed than a neat row, especially when one sits a touch higher on a stack of old motoring books or a timber riser. A deeper shelf helps too, because it gives the models room to breathe and stops the whole setup from looking flat.

Practical rule: If the shelf looks too tidy, it starts feeling like retail. Bring in a plant, a ceramic vessel, or a worn timber tray so the diecasts sit inside a room with texture and warmth.

That approach suits Australian VW collectors beautifully, because the room ends up telling a personal story instead of just showing off a stash. A brighter Kombi can come out in summer, while a darker Beetle can stay on show through winter, and the change keeps the corner feeling fresh without any fuss. If you're building out a bigger collection, the VW diecast range at Volkswagen Memorabilia gives you a handy starting point for choosing a few favourites and styling the shelf around them.

2. Kombi Gallery Wall With Posters, Prints and Vintage Signs

A Kombi gallery wall is a quick way to turn a plain lounge into a room with proper living room boho character. One larger travel print above a rattan chair, a cluster of smaller frames, a weathered sign, and a tiny mounted shelf for a diecast or two can give the space that sun-faded, collected feel that sits so well in a coastal Aussie house.

The best walls usually start with one strong piece. A bold Kombi print, a vintage service sign, or a surf-travel artwork can set the tone, then the smaller pieces can follow the same mood without making the wall feel crowded. That keeps the display personal, which suits VW people who'd rather tell a story than hang decor for the sake of it.

For the colour palette, sandy neutrals, soft blues, and terracotta work beautifully. Those tones echo the relaxed boho style that often draws on Moroccan and Mediterranean influences and pairs well with textured rugs, patterned textiles, and handcrafted décor House Beautiful. Around a Kombi theme, the same colours also sit neatly beside timber, cane, and linen, especially in a room that already feels light and airy.

Boho wall art for VW lovers gives you a handy starting point if you want the wall to revolve around one anchor piece instead of filling every gap. That anchor might be a graphic Kombi print, a vintage road sign, or a travel artwork that nods to long drives and beach stops without tipping the room into novelty territory.

Keep the wall airy

Leave some negative space so the display can breathe. A gallery wall packed with tiny frames starts to feel busy fast, while a clear rhythm between prints keeps the room calm and easy on the eye.

The best VW wall displays feel like they were collected after a long road trip, not ordered all at once.

Mix paper, metal, timber, and woven pieces so the textures carry the display. If a rattan lounge chair sits underneath, even better, because the wall and the furniture will speak the same laid-back language. A soft, slightly uneven arrangement suits boho living rooms far more than a rigid grid, and it leaves room for the odd treasured sign or print to stand out properly.

3. Beetle Accent Pieces With Soft Furnishings and Lamps

A little Beetle piece can carry a room in the same way a favourite old Kombi badge does at a car show, with plenty of heart. A pair of cushions with stylised Beetle silhouettes, a small lamp with a rounded base, or a ceramic accent on a side table is usually all you need to bring VW character into a boho living room without tipping it into novelty territory.

That gentle touch suits boho living rooms, which are built from layered textures and a mix of decorative pieces rather than one strict formula Business Insider. Let the Beetle sit inside that mix as one part of the story, not the whole scene. Linen cushions, wool throws, and a lamp that spills a warm glow across a timber side table do the heavy lifting, while the VW detail adds the grin.

A real room setup might look like this. A mustard cushion with a Beetle outline sits on one end of the sofa, a teal cushion balances it on the other, and the rest of the couch stays plain so the motif feels chosen, not crowded. A small Beetle lamp on a woven side table brings a friendly glow to the corner, while a rounded ceramic vase or bowl keeps the shape language soft and in step with the rest of the room. If the palette already runs through sand, rust, and faded blue, the Beetle accents slide in naturally.

  • One cushion pair: Use Beetle-print cushions in mustard and teal, then keep the sofa plain so the colour pop feels deliberate.
  • One lamp only: A small Beetle lamp on a woven side table does the job without turning the corner into a themed display.
  • One ceramic accent: A rounded vase or bowl in a matching colour pulls the motif back into the boho palette.

For a family lounge, that restrained approach makes life easier. The room still works for movie nights, visitors, and daily traffic, but it also gives the Beetle collector something personal to enjoy every time they settle in. When the rest of the space leans on texture, warmth, and easy colour, even one little Beetle shape can feel right at home.

4. Kombi-Inspired Coastal Boho Styling

Kombi culture and coastal boho go together like a summer arvo and a cold drink. If you want the room to feel like a beach stop just beyond the dunes, start with driftwood tones, soft stripes, and natural fibres, then bring in Kombi imagery or a restored part as the hero detail.

One Australian Scandi-boho project handled glare beautifully by swapping the window dressing for an airy but light-blocking fabric so the room stayed visually light while cutting evening sun, and it also carried material continuity through the open-plan zone with a quartz fireplace surround that matched the kitchen's marble surfaces Decorilla. That's a smart lesson for coastal boho in Australia, where the light can be fierce and the style still needs to work at 5 pm, not just in a styled photo.

For your own room, aim for sun-bleached blues, sandy beige, and rust. A framed Kombi surf print above a low timber credenza, a macramé hanging beside a vintage photo, or a hood emblem mounted like art all bring in the VW story without making the room feel cramped. Natural fibres, like sea-grass rugs and cotton throws, keep the whole thing honest.

Practical rule: In bright Australian rooms, choose textiles for both softness and function. A sheer that can't cope with glare looks pretty for five minutes, then becomes a nuisance.

Boho and coast really suit VW enthusiasts. The Kombi already carries surf, road-trip, and freedom energy, so the room only needs a gentle hand to make that heritage feel at home.

5. Repurposed VW Parts as Boho Wall or Table Art

A genuine VW part can become the strongest talking point in the whole room. Hubcaps, badges, grille pieces, and even old trim bits can be turned into wall art or a table centrepiece that feels rustic, personal, and properly collected.

The best examples use contrast. A round hubcap display above a cedar console looks great because the metal shape sits against the warmth of timber, while VW badges in a reclaimed frame give you a clean focal point without looking too polished. If you've got rust or patina, seal the piece properly so it doesn't shed onto textiles, because nothing kills the mood faster than a lovely linen cushion with orange flecks on it.

The vintage home accessories collection is handy here because it keeps the look tied to the room, not just the garage. Add a woven bowl, a potted jade plant, or a linen runner nearby, and the whole vignette starts speaking boho instead of workshop.

Balance the metal with softness

A smart repurposed VW corner usually mixes one hard surface with a couple of soft ones. That might mean a badge frame on timber, a ceramic pot beside it, and a woven mat underneath.

If you want to keep the room cohesive, pick one metal tone and stick with it. If you prefer a more eclectic feel, mix finishes, but keep the background calm so the parts themselves can shine. That's the sweet spot for a VW home, a bit rugged, a bit soulful, and never overly precious.

6. Retro VW Coffee Table and Sideboard Styling

A coffee table or sideboard can carry a lot of personality without needing much space. Set up a few Volkswagen memorabilia collectibles on top, add a book stack, a candle, and a plant, and suddenly the room feels like someone who loves old buses and beach drives lives there.

This works beautifully on a mid-century sideboard, especially if you place Kombi models beside surf magazines and a woven basket. On a coffee table, one feature diecast, a couple of books, a ceramic pot, and a trailing plant gives you that layered boho finish while still keeping the surface usable for cups and conversation.

A related design guide uses a 60-30-10 colour balance with 2–3 neutral base colours, 3–5 accent colours, and a 60% / 30% / 10% split Field Flower Collective. That idea translates neatly to a VW sideboard, where the timber or neutral base does most of the work, the model or art gives you the medium colour field, and the smallest accent, maybe a candle or book spine, adds the final spark.

Keep the centrepiece low. Boho is meant to feel easy, and no one wants to peer around a towering arrangement just to pass a cuppa. Use trays to group smaller diecasts or keepsakes so the surface doesn't drift into clutter, and leave a bit of breathing room around the edges.

If you're furnishing an Aussie lounge with a coastal bent, this is the simplest way to make the room feel finished without buying a heap of new furniture. A single sideboard styled with intent often does more for the room than another chair ever could.

7. Diecast Display Cabinets With Boho Flair

A display cabinet doesn't have to look corporate. Choose a glass-fronted cabinet or open cubbies with a warm timber frame, and it can feel relaxed enough for living room boho while still protecting the models from dust and little hands.

A minimalist living room coffee table styled with a VW van model, books, and a small vase.

A tall cabinet with 1:18 models lit from above, plus trailing plants on top, gives you a nice vertical line in the room. Open-front cubbies work well too, especially if you mix diecasts with books and woven baskets so the cabinet feels styled, not showroom-stiff.

Soft background finishes make the biggest difference. If the cabinet back is textured, fabric-lined, or wallpapered, the models look richer straight away.

The trick is to keep the cabinet from going too glossy or too sharp-edged. Boho warmth comes from timber, fibres, and organic shapes, so a sleek high-gloss unit can fight the rest of the room unless you soften it with plants, shells, or a few woven objects. That mix is especially handy in Australian homes where display space is often limited and every surface needs to earn its keep.

For collectors who want a proper home for their pieces, display cases for models are worth a look because they let the collection breathe without exposing it to dust. Done well, a cabinet becomes part of the room's texture rather than a separate object sitting on top of it.

8. Boho Textiles and Rugs With VW Stripe Motifs

A faded kilim under the coffee table, a striped throw over the sofa, or a cushion stitched with VW-style lines can do a lot of heavy lifting in a living room boho setup. These pieces bring in the colour and rhythm of classic VW paintwork without making the room feel like a decal shop at the local swap meet.

That soft mix suits boho because the style already welcomes lots of textures, colour, and textile art on walls and floors. A striped rug or a layered throw sits naturally in that mix, especially if the tones echo the Kombi or Beetle you love. One or two colours from the van, matched with the rest of the soft furnishings, can pull the whole room into line without making it feel overdone.

A simple room might start with a neutral sofa, then add one patterned rug, a folded throw on the arm of a rattan chair, and a couple of cushions that bring the colour back through the space. In a larger lounge, layered rugs can add warmth underfoot and give the room more depth, which works especially well when the furniture is spread across a wide floor.

Houzz's boho decorating guide says there are no true rules for boho-chic decorating, and suggests beginning with neutral walls, then adding a rug or two and some Moroccan influence Houzz. That lines up neatly for VW fans too, because a calm sofa and wall colour give the stripes room to breathe, and the patterned textiles can carry the character without the room fighting itself.

Keep the bold pattern balanced with textured plains. Linen, boucle, cane, and washed cotton sit well beside a VW-striped rug, and they stop the room from tipping into visual noise. In a coastal home, that mix feels especially right, a little sun-faded, a little nostalgic, and full of the easy charm you'd want after a day out by the beach or parked beside a row of polished old VWs.

VW-Inspired Boho Living Room: 8-Item Comparison

Design Implementation 🔄 Resources ⚡ Expected Impact 📊 ⭐ Ideal Use Cases Tips 💡
Vintage VW Diecast Displays in Boho Living Spaces Medium 🔄, styling, shelving Low–Medium ⚡, diecasts, lighting, risers Intentional décor, warm personal character, ⭐⭐⭐ Open shelving, vignette tables in living rooms Arrange in odd groups, use risers, rotate seasonally
Kombi Gallery Wall: Posters, Prints and Vintage Signs Medium 🔄, framing, layout, secure hanging Medium ⚡, prints, frames, small ledges, hardware Bold focal wall, easily updated, ⭐⭐⭐ Accent wall above rattan chair, cafés, boutiques Start with an anchor piece, mix textures, leave negative space
Beetle Accent Pieces: Soft Furnishings and Lamps Low 🔄, swap-in accents Low ⚡, cushions, lamps, ceramics Subtle VW nods, high flexibility, ⭐⭐ Rentals, quick refreshes, subtle themed rooms Limit motif repetition to 1–2 pieces, match palette
Kombi-Inspired Coastal Boho Styling Medium 🔄, cohesive palette and larger pieces Medium–High ⚡, driftwood, artworks, authentic parts Strong storytelling, relaxed holiday vibe, ⭐⭐⭐ Beach houses, surf-inspired living rooms, vanlife themes Use sun-bleached palette, anchor with one larger piece
Repurposed VW Parts as Boho Wall or Table Art Medium–High 🔄, mounting, sealing, finishing Medium ⚡, authentic parts, mounting hardware Authentic, tactile statement pieces, conversation starters, ⭐⭐⭐ Eclectic rooms, industrial–boho mixes, feature walls Seal rusty parts, mix metals with soft fibers, secure heavy items
Retro VW Coffee Table and Sideboard Styling Low–Medium 🔄, vignette composition Low–Medium ⚡, table/sideboard, trays, books, plants Functional stylish focal vignette, everyday use, ⭐⭐⭐ Living-room centrepieces, social seating areas Keep centerpieces low, use trays to contain smaller models
Diecast Display Cabinets with Boho Flair High 🔄, sourcing cabinets, lighting, layout High ⚡, cabinet cost, lighting, floor space Protected, organised showcase for valuable pieces, ⭐⭐⭐⭐ Valuable collections, homes with children, collectors Line shelf backs for depth, mix organic props, mind reflections
Boho Textiles and Rugs with VW Stripe Motifs Low 🔄, textile selection and layering Medium ⚡, rugs, throws, cushions (authentic pieces cost more) Subtle automotive reference, adds warmth and texture, ⭐⭐⭐ Floor anchoring, layering in living areas, colour pulls Pull colours from a favourite model, balance bold patterns

Ready to Hit the Road with Your New Style?

A great living room boho space doesn't need to be complicated. It just needs a few pieces that feel like you, a calm base to hold them together, and enough texture to make the room feel warm when you walk in after a long day. That's why VW memorabilia works so well here, it brings in history, shape, colour, and a bit of road-trip spirit without forcing the room to become a theme.

If you're working with a smaller Aussie home, start with one shelf, one cushion pair, or one framed Kombi print and build slowly. If you've got more space, let a sideboard, cabinet, or gallery wall carry the story, then tuck in diecasts, soft furnishings, and repurposed parts so the room feels collected over time. The best part is that this style plays nicely with coast-inspired interiors, so you can keep the light, breezy vibe while still celebrating your VW passion.

As you refine the room, think about what you want the space to say. Maybe it's “road trips and surf weekends,” maybe it's “classic Beetles and Kombis,” or maybe it's “this home belongs to someone who loves old Volkswagens.” Once that story is clear, the rest gets easier.


Volkswagen Memorabilia brings together VW diecast models, coastal home décor, and gift ideas that suit this exact kind of room. If you want locally stocked pieces that help a lounge feel relaxed, nostalgic, and properly Aussie, visit Volkswagen Memorabilia and start building a boho display with a bit of VW soul.

VW T Roc R: VW T-Roc R

You're standing at a showground, coffee in hand, when a low, muscular little SUV rolls past with an R badge on the tail. It doesn't look like a wild concept car or a softened family hauler, it looks like a Volkswagen that knows exactly what it's doing. That's the charm of the VW T-Roc R, a performance SUV that lands somewhere between everyday practicality and the sort of grin you usually reserve for a quick blast down a coastal road.
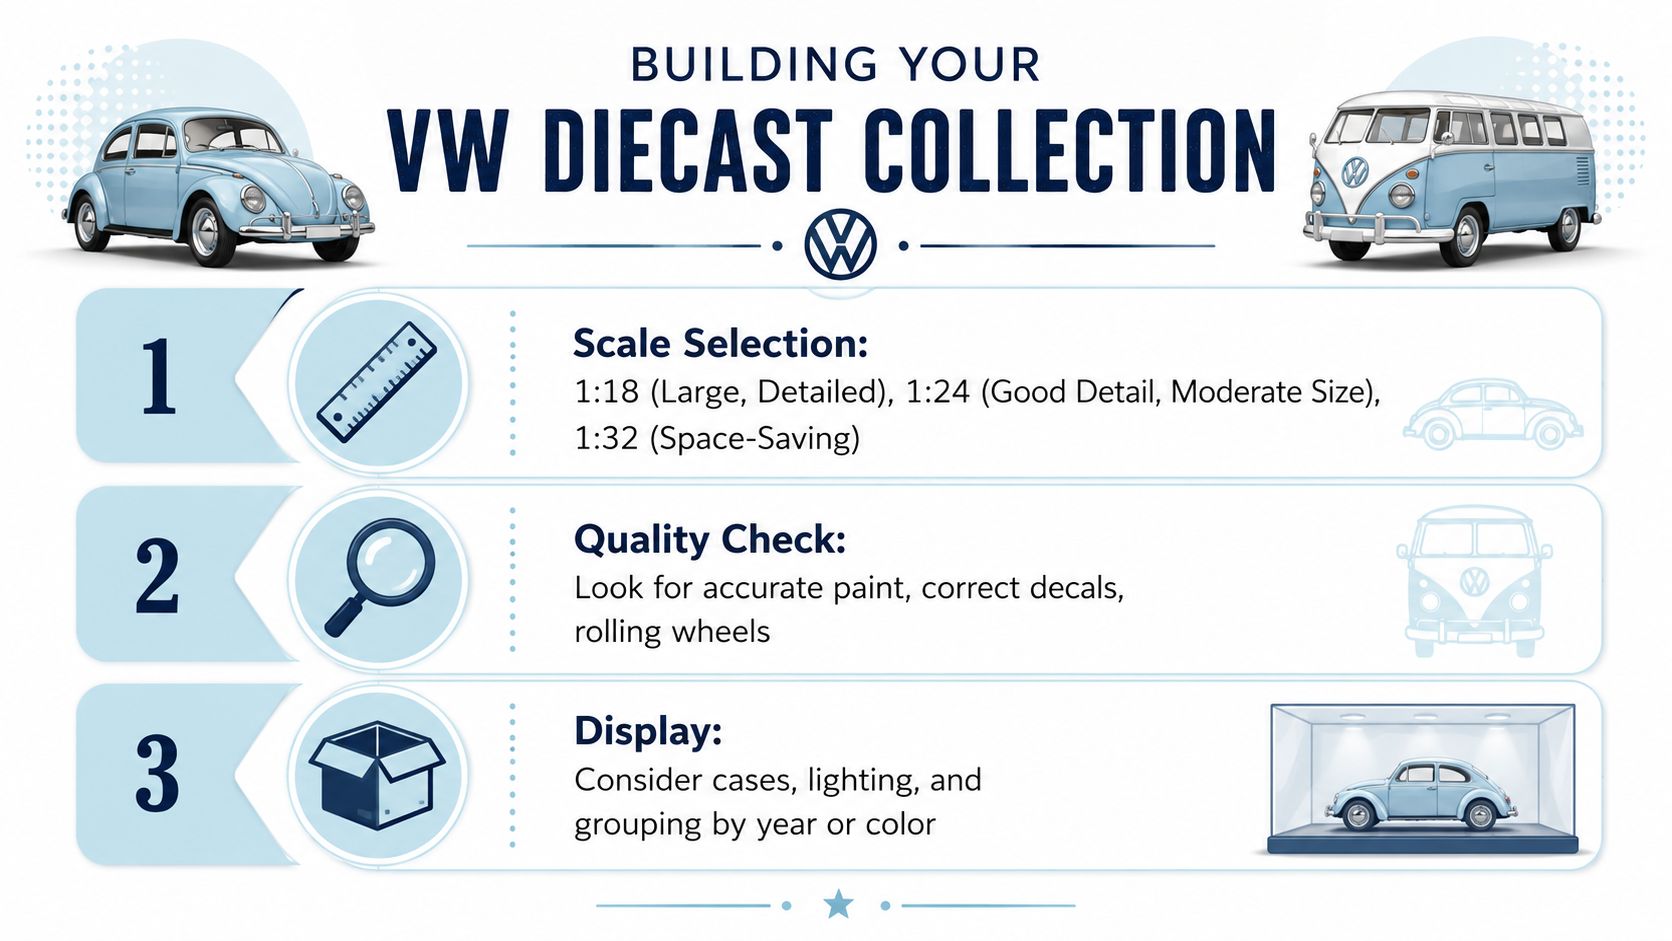
For Australian VW fans, that mix matters. We grew up around Beetles parked beside fibro houses, Kombis loaded with boards, and Samba Bus stories that still get told at club meets. The T-Roc R feels like part of that same family tree, just wearing modern hardware and a very confident stance. It's a niche performance SUV, but it carries the brand's old instinct for doing more with less fuss, which is exactly why it's getting attention from enthusiasts who usually spend half their weekends talking models, restorations, and what makes a genuine Volkswagen special.

Meet the VW T-Roc R Volkswagen's Performance SUV Arrives in Australia

The first time you see a Volkswagen T-Roc R in the metal, it tends to catch you off guard. It's compact enough to sit neatly in traffic, yet it has the posture of something that's ready to leave the lights hard and clean. At a dealership, a car show, or even parked outside a café in a coastal town, it looks like the sort of VW that's been sharpened rather than merely dressed up.

Volkswagen's R division created it as the high-performance derivative of the T-Roc range, and that lineage is part of the appeal. The model was introduced internationally as a compact crossover with 300 horsepower class output, then brought into Australia as a niche performance SUV that fits neatly between sensible daily transport and genuine enthusiast machinery. Volkswagen Australia positions it as the brand's performance SUV, which tells you straight away where its priorities sit. Volkswagen Australia's T-Roc R model page

A sleek blue Volkswagen T-Roc R compact SUV parked outdoors on a sunny day at a track.

Why it resonates with Volkswagen people

There's a particular kind of VW fan who notices the badging, the stance, the way the body sits over the wheels, and immediately starts comparing it with the brand's history. The T-Roc R taps into that instinct. It doesn't need a huge size or dramatic styling trickery to make its point, it just feels purposeful.

Practical rule: if a modern VW still makes you think about how the brand moved from humble, air-cooled beginnings to serious performance engineering, it's doing something right.

That's why the T-Roc R matters in Australia. It gives enthusiasts something current to talk about at a meet, while still feeling connected to the broader Volkswagen story. It's the sort of car that can sit in the same conversation as a treasured Beetle model or a diecast Kombi on a shelf, because both are about more than transport. They're about identity, memory, and the way Volkswagen keeps reinventing itself without losing the thread.

Under the Bonnet T-Roc R Performance Specs and Engineering

The first thing you notice in a T-Roc R is not a gimmick or a theatrical flourish, it is the engine note and the way the car sits ready to pounce from a standstill. Under the bonnet, Volkswagen fits a 2.0-litre four-cylinder turbocharged direct-injection petrol engine with 1984 cc displacement, rated at 221 kW at 5300 to 6600 rpm and 400 Nm at 2000 to 5300 rpm. It is paired with a 7-speed DSG and 4MOTION all-wheel drive, a combination that gives the car its sharp, planted character. Volkswagen Australia brochure Volkswagen Australia model page

What the torque spread means on Australian roads

That wide torque band from 2000 rpm to 5300 rpm is the part you feel on a damp on-ramp, on a passing lane with traffic building ahead, or when you squeeze the throttle out of a slow corner on a coast road. The engine keeps pulling without feeling peaky, so the car comes across as flexible and eager rather than fussy. On a Sunday run through the hills, that matters just as much as any badge on the tailgate.

The official sprint to 100 km/h in 4.9 seconds gives the T-Roc R its serious edge, while the electronically limited top speed of 250 km/h keeps it firmly in performance-SUV territory. Volkswagen's launch material and Australia model information align with that setup, and the figures match the car's brief as a road-focused performance SUV. Volkswagen newsroom launch material

The fuel story is calmer, and it belongs in the world of commuting, weekend runs, and the occasional spirited drive. The WLTP combined fuel-use figure of 8.3 L/100 km sets the official benchmark, while Australian-market reporting also recorded a review result of 9.5 L/100 km on local testing. That difference is a good reminder that performance and thrift rarely shake hands without a small compromise, especially once the road opens up and the right foot gets busy.

The simplest way to read those figures is to treat the official number as the benchmark, then judge the rest by your commute, your roads, and how often you hear that turbo working.
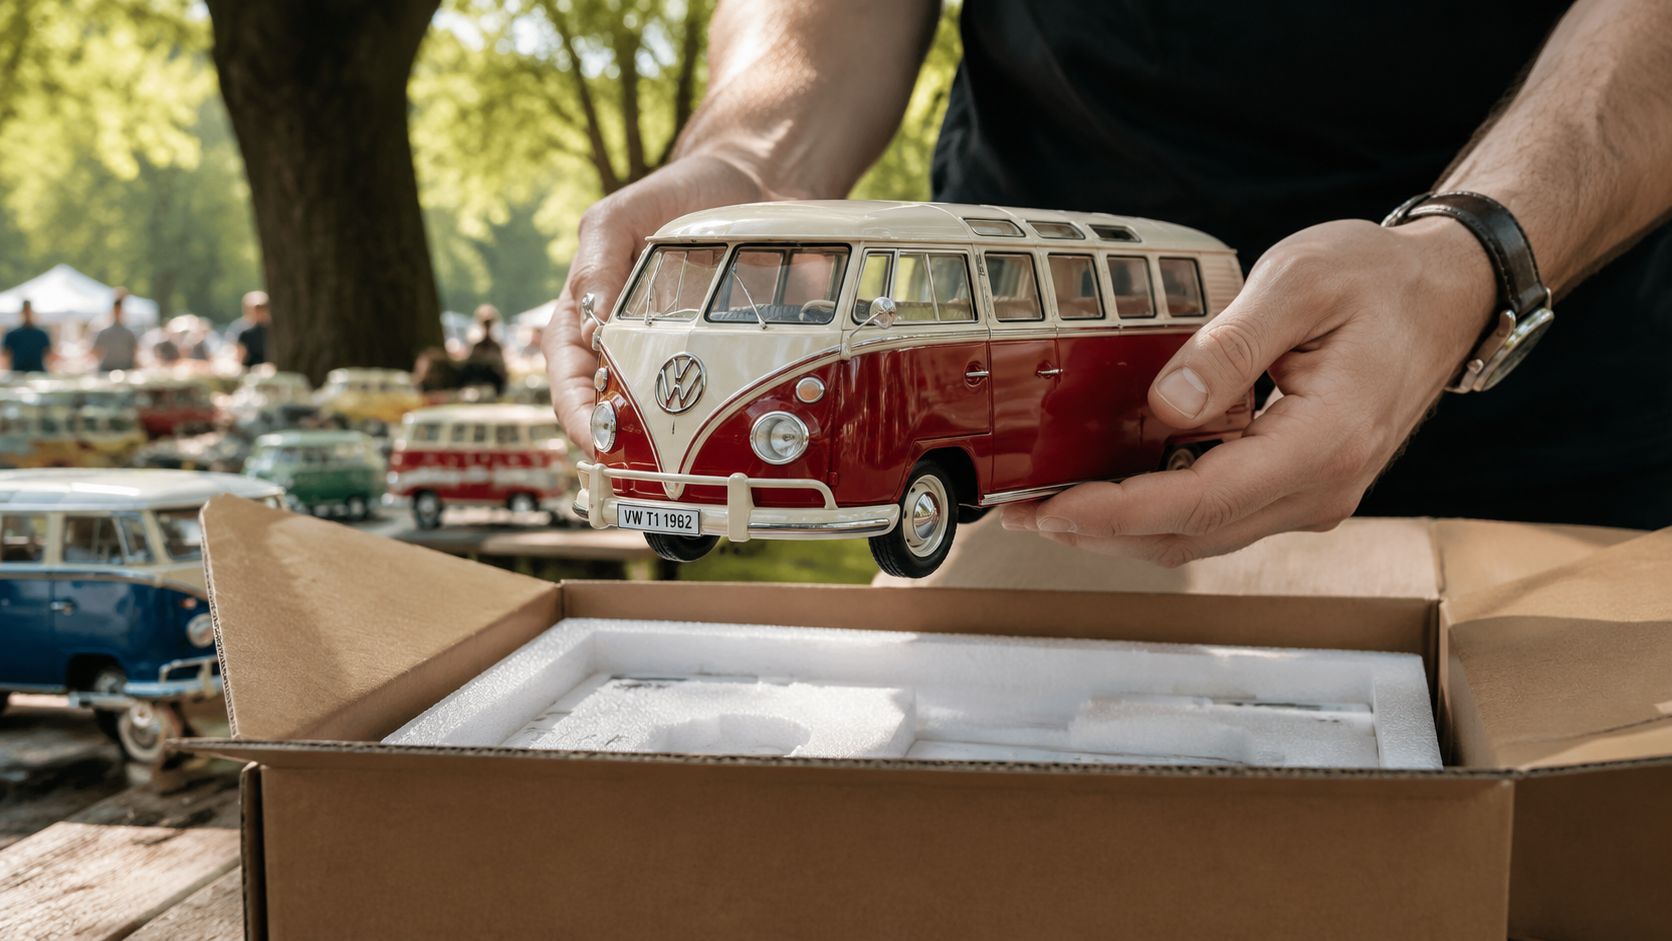
T-Roc R Performance Heart

A technical infographic detailing the T-Roc R engine performance specifications including power output, peak torque, and acceleration.
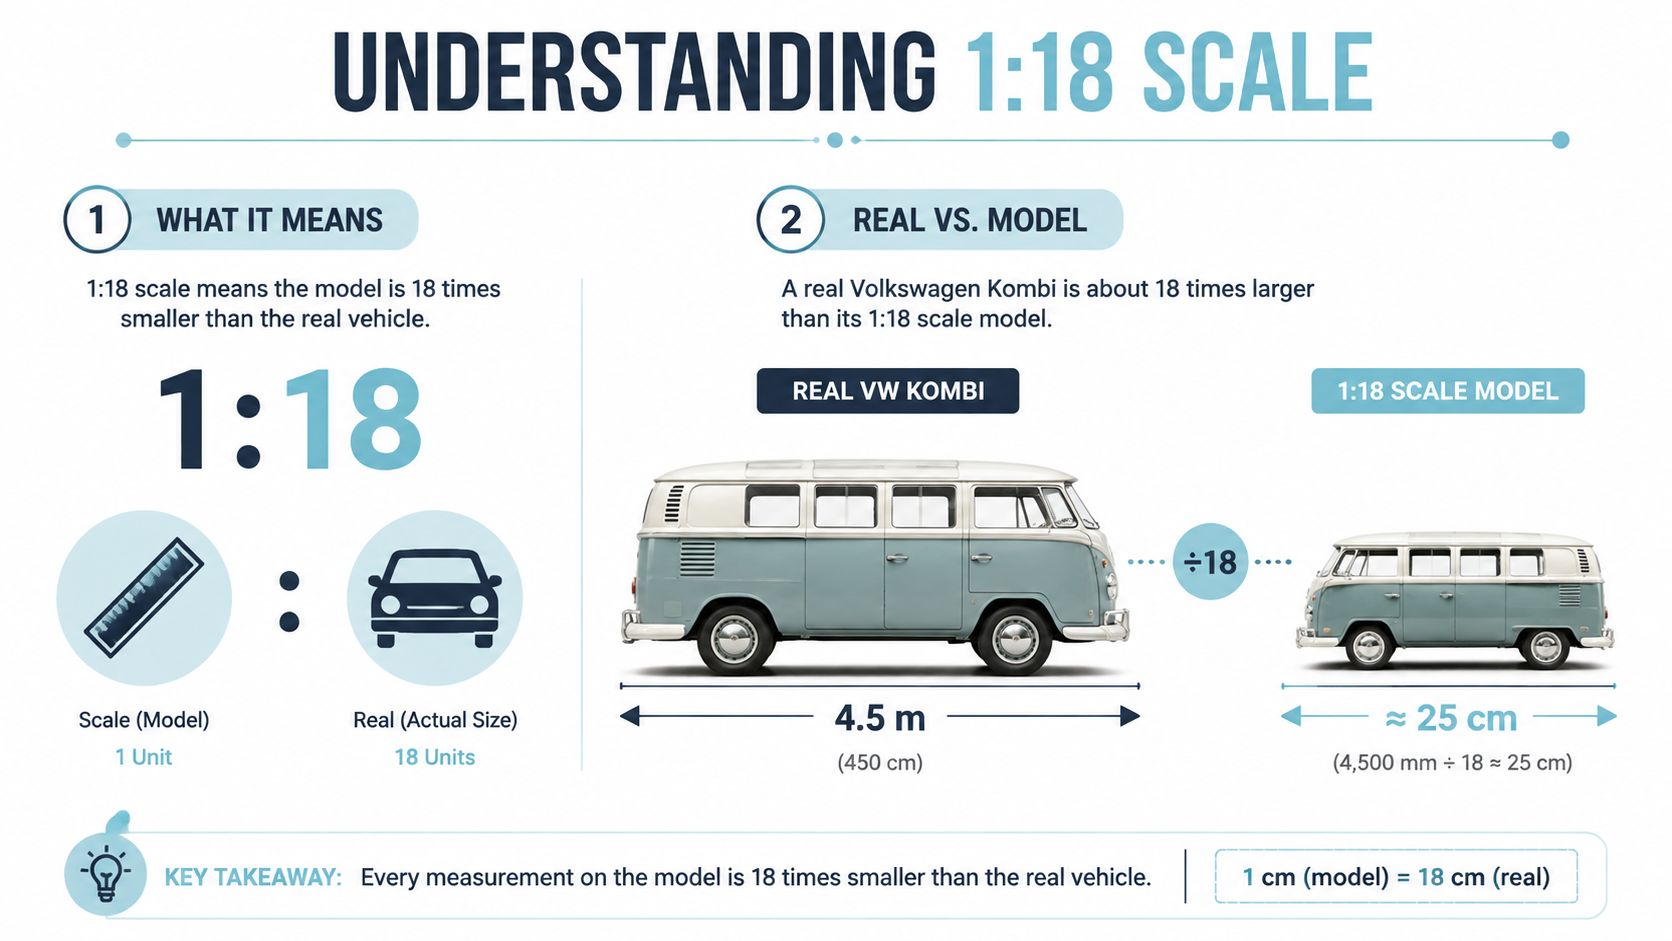
For enthusiasts who like the engineering as much as the driving, the appeal goes beyond acceleration figures. The 4MOTION system helps put the power down cleanly, and the DSG keeps shifts quick enough to suit the car's sharper personality without making it feel harsh in daily use. It is the kind of setup that makes a late-model VW feel worthy of a shelf next to a favourite diecast, especially for collectors who already enjoy comparing modern performance cars with the brand's older icons. A good example is these Volkswagen Touareg reviews and memorabilia notes, where the same blend of machinery and memory keeps showing up in a different form.

That is where the T-Roc R earns its place among VW people. It gives you a modern turbocharged performance SUV with the sort of technical balance that is easy to admire at a car show, then lets you carry that same appreciation home through model cars, display pieces, and coastal-inspired décor that nods to the brand's heritage without feeling stuck in the past.

How the T-Roc R Stacks Up Against Other T-Roc Variants and Compact SUVs

The price conversation is where the T-Roc R starts to separate itself from the rest of the range. Australian sources show the standard model at $60,300 plus on-road costs, with the Grid Edition at $54,300 plus on-road costs. That puts it well above the cheaper T-Roc variants that most buyers would normally cross-shop, and it's exactly why the question isn't just “is it fast?”, it's “does the performance premium make sense for you?” carsales review

Where the R badge earns its keep

The answer depends on what you want from a compact SUV. If your shortlist is built around everyday commuting, weekend errands, and sensible running costs, a lower-spec T-Roc probably makes more sense. If you want the sort of car that still feels special when the road opens up, the R badge is doing real work here.

Model Power Output 0-100 km/h Price (AUD)
Volkswagen T-Roc R 221 kW 4.9 seconds $60,300 plus on-road costs
Volkswagen T-Roc R Grid Edition Not stated in verified data Not stated in verified data $54,300 plus on-road costs
Mainstream compact SUV alternatives Not stated in verified data Not stated in verified data Generally below the T-Roc R in market positioning

That table tells the story clearly enough. The T-Roc R isn't trying to be the cheapest choice in the segment, it's trying to be the most engaging one. For buyers who care about punchy acceleration, AWD confidence, and a stronger sense of occasion, the premium can feel justified.

For a wider Volkswagen ownership lens, this comparison is worth reading alongside Volkswagen Touareg reviews, because both cars show how VW shapes different SUVs for different jobs, from comfort-led touring to performance-led versatility.

The value question in plain language

Insurance, fuel, and maintenance all move the total cost higher than the sticker alone suggests. That's the reality of any performance SUV, and the T-Roc R is no exception. If you're cross-shopping it against mainstream compact SUVs, you're really deciding whether you want the R's extra pace and all-wheel-drive hardware more than you want the lower buy-in and softer running costs of a regular crossover.

Ownership Reality What Australian T-Roc R Buyers Should Know

If you're serious about buying a T-Roc R in Australia, start with the way it fits into daily life. The purchase price is only part of the story. Insurance, fuel, and servicing all matter once the keys are in your hand, especially if your weeks are made up of school runs, suburbs, and the odd clear stretch of road where the car can stretch out a bit.

As covered in the specs section, real-world testing recorded 9.5 L/100 km, so budget with that in mind. The official figure sits lower, but the gap is exactly why owners should plan on more than the brochure number alone. That is the kind of detail that helps you buy with your eyes open.

A sensible ownership checklist

Use the car the way you'll really live with it. That means thinking about whether your commute is stop-start, whether your weekend routes open up on the highway, and how often you'll be tempted to let the R badge do what it was built to do. Performance SUVs make the most sense when the owner knows what kind of driving is waiting outside the showroom.

Practical rule: buy the car for the life you drive, not the life you picture on a perfect Saturday.

A few points deserve attention:

  • Fuel budgeting: plan around the Australian real-world figure instead of relying only on the official number.
  • Service care: follow the Volkswagen service schedule and use authorised Volkswagen service centres so the car stays within the proper support channel.
  • Insurance: get quotes before you sign, because the R badge usually pushes premiums higher than a regular compact SUV.
  • Secondhand shopping: look for clean documentation, honest service history, and signs that the car hasn't been thrashed every time the road cleared.

If you're looking at a used example, patience pays. The best cars are usually the ones owned by people who understood what they had, not the ones driven like a rental with extra horsepower. For a broader look at how enthusiasts track Volkswagen ownership and model history, the Volkswagen Golf Mk 7 archive is a useful reference point.

What to inspect before you buy

A pre-owned performance SUV should feel tight, tidy, and consistently serviced. Check the DSG shifts, listen for any unusual drivetrain noises, and make sure the cabin wear matches the mileage. If the car has lived an easy life, it will usually show in the details, from the steering wheel to the seat bolsters. A clean interior, crisp controls, and even wear patterns can tell you more than a shiny wash ever will.

The ownership picture for any performance SUV comes down to honesty about use, running costs, and condition. The T-Roc R rewards buyers who want pace and all-wheel-drive confidence, but it asks for careful budgeting and a realistic view of how often that performance will be used. That balance is what separates a happy garage story from an expensive impulse buy.

Celebrating VW Heritage From Modern Performance to Timeless Collectibles

A car like the T-Roc R makes more sense when you see it as part of a bigger Volkswagen story. It belongs to the same family that gave us Beetles, Kombis, and Samba Buses, only now the family has turbocharged muscle and all-wheel drive. That's why so many VW fans enjoy collecting the brand's older shapes in miniature, because the models carry the memory of the marque even when cars are long gone.

Why collectors keep coming back to the classics

A Volkswagen Beetle model or a VW Kombi diecast Australia release does more than sit on a shelf. It captures a bit of design history, a bit of surf culture, and a bit of family nostalgia all at once. A 1962 Kombi Samba Bus replica feels different from a modern SUV in every way, but the emotional connection is the same, it's still Volkswagen doing what Volkswagen does best, which is turning practicality into personality.

Different scales suit different spaces. 1:18 models tend to look brilliant as a centrepiece, 1:24 pieces feel easy to display in a study or office, and 1:32 items are a neat fit when you want a broader collection without taking over the room. Quality licensed models stand out because they respect the original vehicle, right down to the trim, proportions, and finish.

If a display makes you smile every time you walk past it, you've set it up properly.

A few display ideas work especially well with VW memorabilia:

  • Coastal shelf styling: pair Kombis and Beetles with shells, pale timber, and relaxed beach tones.
  • Desk-side collections: keep a T-Roc R model beside books, framed prints, and a couple of older Volkswagens for contrast.
  • Cabinet grouping: mix classic vans, surf-inspired Beetles, and newer performance VWs so the collection tells a timeline.

A miniature Golf GTI and a T-Roc R model car sit on a desk with books.

The lovely thing about collecting is that a modern car like the T-Roc R can sit beside a Samba Bus or a Beetle and still feel connected. One shows where Volkswagen's engineering is now, the others remind us where the affection started.

Perfect Gifts for VW Enthusiasts and Coastal-Inspired Décor

A good VW gift works because it feels personal, not generic. A 1962 Volkswagen Classical Samba Bus in flower power colours, a Blacktop series Kombi with pull-back action, or a 1967 Beetle with a surfboard all hit that sweet spot between collectible and display piece. They're easy to appreciate, and they suit birthdays, anniversaries, Father's Day, or a surprise for the person who still talks about their first Beetle like it was yesterday.

For shoppers building a themed space, the mix matters. VW diecast models pair neatly with nautical décor, wall art, photo frames, and beach-inspired accents, which is why they work so well in coastal homes and retro interiors. If you're buying for a collector, mixed packs can be a smart way to build a display quickly, especially when you want a balanced lineup rather than a single hero piece. The diecast models Australia collection is the sort of place that makes that kind of gift hunting much easier.

Fast local dispatch matters too. Australian importers with stock on hand take the stress out of last-minute gifting, and they're a practical choice when you want something to arrive safely and on time. For anyone who loves the brand, a well-chosen diecast Kombi or Beetle isn't just decoration, it's a little piece of Volkswagen history.


If you're ready to add a bit more Volkswagen spirit to your shelf, desk, or gift list, take a look at Volkswagen Memorabilia. You'll find VW-themed diecast models, nostalgic décor, and thoughtful pieces that suit collectors, gift buyers, and anyone who still lights up at the sight of a Kombi, Beetle, or a sharp modern VW badge.

Vehicle Interior Accessories for VW Enthusiasts

You pull up to a VW meet with sand still in the footwells, a Kombi full of camping bits, and a Beetle that still smells faintly of vinyl and sunscreen. That's when vehicle interior accessories stop being little add-ons and start becoming part of the story, the kind of detail that keeps a classic usable on the drive home from the coast and still worthy of a slow lap around the show field.

For Australian VW lovers, the cabin matters as much as the paint. A smart set of mats, a well-chosen seat cover, or a tidy organiser can protect original trim, make long drives easier, and keep that nostalgic feel intact. It's the same instinct that makes collectors line up a diecast Kombi on the shelf at home, then go back out and make the one you drive feel right again.

A man and woman admire vintage Volkswagen vehicles during a sunny outdoor car show event.

Why Interior Accessories Matter for Classic VWs

The best VW cabins have character before you touch them. A Beetle with its simple dash, a Kombi with bench seats and a bit of patina, a Samba Bus with that rolling holiday feeling, they all invite you to keep things practical without killing the charm. That's why vehicle interior accessories matter so much, they let owners keep the cabin usable on real Australian roads while still respecting the original personality.

At a sunny show, you can spot the difference straight away. One owner has floor mats that catch the sand after a morning at the beach, another has a seat cover that shields tired vinyl from extra sun, and someone else has tucked a neat organiser into the cabin so maps, sunnies, and charging cables aren't rolling around under the seats. The car still looks like a classic, but it's ready for a longer day out.

Practical rule: the best accessory is the one that improves daily use without making the cabin feel cluttered or fake.

That balance matters for collectors too. A diecast Beetle on a shelf often mirrors the same styling instinct, clean lines, retro colour choices, and a few well-placed details that make the whole display feel intentional. When you treat the actual car and the model with the same eye, you end up with a VW story that feels consistent from the driveway to the display cabinet.

Key Categories of Vehicle Interior Accessories

The easiest way to shop well is to break the cabin into jobs. Some accessories protect, some organise, some style, and some help the modern bits sit more comfortably inside an older shell. That's especially useful in a classic VW, where every addition has to earn its place.

A diagram illustrating four key categories of vehicle interior accessories including floor mats, seat covers, organizers, and dash trims.

Start with the bits that take the punishment

Floor mats are the first line of defence in a Kombi after a beach run. Heavy-duty rubber mats make sense when you've got sand, wet towels, and the odd leaf from a coastal car park. In a Beetle, mats also protect the original carpet from scuffing where your heels naturally land.

Seat covers come next, especially if the car still wears vintage vinyl. They help guard against UV and everyday wear, and they can add a bit of colour without committing to a full retrim. A good cover should feel like a safeguard, not a costume.

Add the pieces that keep the cabin livable

Organisers are a gift to anyone who uses their VW properly. A glovebox tidy, a seat-back pocket, or a no-drill storage solution keeps road-trip essentials close without hacking into classic panels. If you're after a neat dash-friendly option, have a look at dashboard covers and cabin protection ideas.

Dash trims are where personality really shows. Brushed-metal looks suit a cleaner restoration vibe, while retro wood tones can echo the warmth of old-school camper furniture. In a Samba Bus, that little bit of visual warmth goes a long way.

Don't forget the modern helpers

Phone mounts and charging-friendly accessories are part of the modern cabin reality. They're especially handy in older Volkswagens, where navigation still matters on unfamiliar coastal roads. The trick is choosing mounts that sit securely without dominating the dash or blocking your view.

A quick way to sort your shopping list is to think in four questions.

  • What gets dirty first? Start with mats and seat protection.
  • What gets lost most often? Add organisers and storage.
  • What changes the feel of the cabin? Look at trim and dash accents.
  • What makes the car easier to drive today? Consider phone and tech mounts.

For a more customised feel underfoot, the fit and finish of custom floor mats can make a classic cabin feel tidier straight away.

Materials, Fit and Safety Considerations

Australian sun is brutal on cabin materials, especially in older Volkswagens that spend time parked at shows, beaches, or weekend meets. That's why manufacturers often turn to ABS, PC-ABS, PP-TD, and glass-filled PA for interior accessory and trim parts, because these polymers balance dimensional stability, impact resistance, and cabin heat performance. UV-stabilised and heat-resistant formulations also help reduce warping, clip loosening, and surface creep when the car bakes in the sun, which is exactly the kind of wear that turns a neat cabin into a squeaky one. That material approach is reflected in the way some Australian suppliers describe their interior accessory and trim parts, with fitment precision and validated clips used to keep things secure in service Jairaj Group on automotive interior and exterior plastic components.

Fit matters just as much as material. A poorly designed add-on can create squeaks, rattles, or electrical interference with cabin systems like reading lights, power outlets, and infotainment modules. In a classic VW, that kind of mismatch is more than annoying, it can make the whole interior feel tired even if the car's still mechanically sound.

Practical rule: if an accessory needs force to install, it'll probably cause trouble later.

There's also the compliance side. In Australia, interior accessories that affect occupant safety have to be considered against the Australian Design Rules. ADR 5/05 covers seatbelt anchorages and the static-load performance they must meet, while ADR 42/04 governs general safety requirements for interior fittings and controls ADR document. In plain English, a seat cover, console organiser, or armrest insert shouldn't obstruct belt anchorages, reduce access to controls, or interfere with the load paths of restraint hardware.

That's why the safest cabin upgrades are the ones that respect the original structure. If an accessory changes how a belt anchors, blocks a control, or presses against a safety component, it's not just a style choice anymore. It's a cabin decision with real consequences.

For a simple buying filter, look at three things together.

  • Material strength: ask what's used where the sun hits hardest.
  • Clip quality: check whether the fit is made to stay put.
  • Safety clearances: make sure belts, switches, and cabin systems stay unobstructed.

When the part fits properly, the car feels quieter, tidier, and more original. When it doesn't, you usually hear it before you see it.

An infographic detailing important materials, fit and safety considerations for choosing vehicle interior seat accessories.

Styling Ideas Inspired by VW Memorabilia and Coastal Living

The nicest VW cabins don't shout. They pick a theme and carry it through with a light hand, a colour here, a texture there, maybe a bit of chrome or timber that reminds you of a surf stop at Byron or a Sunday at a local swap meet. That same instinct works beautifully in a Kombi, a Beetle, or a Samba Bus, especially if your home already leans coastal.

A soft blue and cream palette can echo the sea without turning the interior into a novelty act. Woven textures, brushed finishes, and simple retro trims feel at home beside old VW curves, and they also sit nicely in a display cabinet with diecast models. A 1962 Samba Bus model beside a small shell piece or a framed photo can carry the same relaxed mood as a carefully styled real cabin.

Let one detail lead the theme

If your car already has a standout element, build around it. A restored Beetle steering wheel can inspire a cleaner dash treatment. A Kombi with warm timber accents might suit subtle tan organisers or a stitched seat cover that softens the cabin without hiding the original lines.

Flower Power styling works best when it stays restrained. One patterned cushion, one retro print, or one playful dash detail is often enough. Too much, and the cabin starts competing with the car's shape instead of celebrating it.

For collectors, the home display can echo the same logic. A 1967 Beetle diecast, a surf-inspired wall piece, and a tidy shelf arrangement create a little museum of memory, not just a pile of objects. The result feels more authentic because the car, the model, and the décor are speaking the same visual language.

Keep the palette easy on the eye, then let the VW badge do the heavy lifting.

Maintenance, Installation and Smart Buying Tips

A clean cabin starts with the simple habits. Vacuum sand and grit out of mats before it works into fabric, spot-clean spills early, and use non-abrasive protectants on dash trims so the surface doesn't fade or dry out. In coastal conditions, that routine matters even more because salt, moisture, and sun all work together on trim and fabric.

Installation should stay reversible wherever possible. Clips are better than screws on classic panels, because they avoid permanent holes and make it easier to return the car to original condition later. Adhesives can be useful, but they're risky on vintage surfaces, so test carefully and avoid anything that leaves residue or pulls at old material.

When you're shopping, look for licensed, high-quality pieces from a trusted Australian importer so you're not guessing about stock or shipping. Local stock helps when you want the right item for a weekend install, and it's handy to deal with a seller who understands the difference between a Beetle cabin, a Kombi layout, and a general universal fit. For display pieces, a protective case can keep the finish clean and the shelf looking sharp, and display cases for models are worth considering if you're building out a serious collection.

A good checklist keeps the decision simple.

  • Weekly cleaning: stay ahead of dust and beach grit.
  • Careful installation: choose the method that preserves original trim.
  • Fit to model: make sure the accessory suits the exact VW shape.
  • Seller reputation: buy from someone who knows classic Volkswagens.
  • Display care: keep memorabilia out of harsh sunlight and heavy dust.

An infographic titled Maintenance, Installation and Smart Buying Tips for vintage Volkswagen vehicle interior accessories.

Bringing Your VW Story to Life

The best vehicle interior accessories don't try to reinvent a Volkswagen, they help it stay useful, safe, and loved. That's the sweet spot for Aussie VW owners, a cabin that still feels authentic on a Sunday cruise, a beach run, or the trip home after a show.

If your collection already includes diecast Kombis and Beetles, it makes sense to let the car and the shelf display share the same spirit. A thoughtful interior, a coastal accent, and a well-chosen model on the shelf all tell the same story, one that honours heritage without turning it into something precious.


Volkswagen Memorabilia brings that same love of VW style into one place, with licensed models, display pieces, and coastal-inspired accents that suit collectors and gift buyers alike. If you're ready to pair practical cabin touches with authentic VW keepsakes, visit Volkswagen Memorabilia and browse pieces that fit your car, your home, and the story you want to keep driving.

Car Emblem with Wings: History, Meaning and Collector Guide

At a sunny Aussie car show, I once stopped dead in front of a vintage bonnet because the badge looked like it had just flown in from another era. The wings caught the light, the chrome had that old-school depth, and for a second the whole row of cars faded out. That's the magic of a car emblem with wings, it doesn't just decorate a vehicle, it tells you where the brand came from and what it wanted people to feel.

The Story Behind the Wings

A winged badge always makes a car feel like it has somewhere better to be. That's why the motif keeps showing up across luxury and performance marques, from Bentley to Aston Martin and beyond, where the wings have long been used to suggest speed, freedom, dreams, and exploration (car logos with wings).

A close-up view of a chrome Volkswagen car emblem featuring decorative wings on a white vehicle.

Why wings keep appearing on classic badges

The shape works because it says a lot in a small space. On a grille, wheel cap, or diecast bonnet, the silhouette has to read instantly, and wings do that without needing a long explanation. That's why winged marks often become the part collectors remember first, even when the rest of the branding changes around them.

Practical rule: if a badge uses wings as the main shape, it's usually trying to communicate motion, aspiration, or prestige, not a literal mechanical feature.

For Australian enthusiasts, that symbolism lands well because it feels at home beside the country's love of road trips, surf culture, and weekend cruising. A winged emblem on a polished classic can evoke the same mood as a Kombi parked near the coast, ready for an early start and a long drive. It's part of the visual language of motoring heritage.

There's also a collector's angle here. Once you start looking closely, the wings stop being simple decoration and become a clue about era, brand identity, and whether a piece belongs in a period-correct display or a modern reproduction box. That's where the fun begins for anyone who collects badges, brochures, or diecast models with real provenance.

A Century of Winged Emblems in Automotive History

Winged automotive branding didn't appear out of nowhere. It rose with the art-deco years, when designers favoured clean lines, motion, and the feeling that machines could carry people into a modern future. In that context, wings made perfect sense, they looked elegant, technical, and a little bit heroic.

The timeline that collectors keep coming back to

Aston Martin first adopted wings in 1927, Bentley's winged “B” became its official emblem in 1930, Chrysler added wings in the 1930s as a symbol of speed and modernity, and Mazda's first winged emblem appeared in 1936 (Aston Martin logo meaning). Those dates matter because they help separate early design language from later heritage revivals. In collector terms, that's the difference between a badge that belongs to the original period and one that merely echoes it.

A timeline infographic illustrating the evolution and history of winged automotive emblems over the past century.

The Mazda story is especially useful because it shows that winged emblems weren't frozen in time. Mazda's wing theme began with an explicit idea of agility, speed, and ability to soar to new heights, then shifted into the modern curvy “v” form by 1997 (list of car logos with wings). That kind of redesign helps explain why a 1930s brochure badge looks so different from a later corporate emblem, even when both are trying to project the same broad idea.

For Australians who collect imported memorabilia, that timeline matters even more. Many British and American cars entered local enthusiast culture through postwar motoring clubs, restoration scenes, and memorabilia collecting, so the wing motif often turns up in local collections as a sign of age, class, or heritage. A winged badge on a vintage Bentley or Aston Martin is usually a historical marker, not a random styling flourish.

Famous Winged Logos and How to Spot Them

Bentley is the benchmark. Its logo uses a bold circular crest with outstretched wings, and it has been the official emblem since 1930. The wings point back to founder W.O. Bentley's service in the Royal Naval Air Service, where he developed engines for fighter aircraft (KBB luxury car logos).

What separates a true winged emblem from a wing-like badge

That aviation link gives Bentley's badge a stronger provenance story than a simple decorative motif. Aston Martin's wings are sleeker and more aerodynamic, while Chrysler's wing designs changed across eras to suit different styling trends. Mazda's winged forms began in a more direct way and later flattened out, which is exactly the kind of evolution collectors need to recognise when they're comparing a brochure, hubcap, or diecast bonnet badge.

Iconic Winged Car Emblems at a Glance
Brand Year Adopted Key Visual Features Heritage Connection
Bentley 1930 Circular crest, outstretched wings Aviation and engineering history
Aston Martin 1927 Sleek spread wings Early sporting brand identity
Chrysler 1930s Winged radiator-cap and badge variations Speed and modernity
Mazda 1936 Winged and later oval-wing forms Agility and upward motion

Not every badge that looks airy is a winged emblem. Rolls-Royce is a good reminder, because its main logo is the interlocking double-R monogram, while the Spirit of Ecstasy is a hood ornament, not the primary logo (Alibaba logo insights). That distinction matters at shows and in online listings, where monograms, mascots, and winged badges can get mixed together.

For a deeper look at how branding language connects across marques, the Volkswagen logo history piece is a handy companion. It's a nice reminder that emblem design is never just about decoration, it's about identity, memory, and the story a maker wants the badge to tell.

Collector's eye: a genuine winged emblem should use wings as the dominant visual motif, not just a shape that vaguely suggests flight.

Authenticating Winged Badges for Your Collection

The tricky part is telling a period-correct badge from a modern reproduction. In the Australian market, that question comes up fast because so much buying now happens online, and the Australia Post eCommerce Industry Report 2025 says 8.4 million Australian households shopped online in 2024 (Man of Many on car emblems). When you're shopping from a listing photo, tiny differences start to matter.

A four-step checklist infographic titled Authenticating Winged Badges for Your Collection, showing how to verify collectible badges.

Four checks that save collectors headaches

  1. Examine the material feel. Authentic older badges usually have a different weight and finish than lightweight decorative decals.
  2. Look for period markings. Part numbers, maker marks, and mounting details often help place a badge in the right era.
  3. Compare the shape closely. Feather count, outline thickness, and text placement can shift between production runs.
  4. Check the hardware. Age-appropriate pins, clips, and wear patterns often tell a better story than the front face alone.

Minor changes aren't trivial here. Bentley's wing count has historically varied by model, and Mazda's winged forms changed significantly over time, so a “close enough” badge can still be wrong for a specific vehicle or restoration. That's why collectors who care about originality look beyond the front view and study the whole object.

Working rule: if the badge looks perfect but the mounting hardware looks too new, slow down and ask for better photos.

The Australian angle matters too, because online listings can blur the line between official memorabilia and decorative aftermarket pieces. A seller might use the right brand name but still offer a badge that's only inspired by the original. That's where careful comparison to catalog images, model-year references, and known production styles protects you from buying the wrong piece for your build or display.

For vintage pieces and memorabilia hunts, the vintage Volkswagen memorabilia category style of collecting is a good benchmark for how serious collectors think, period fit first, then condition, then presentation. That mindset works just as well for winged badges as it does for VW gear.

Displaying Winged Emblems in VW-Themed and Coastal Décor

Winged emblems look surprisingly good next to Volkswagen pieces, especially when the whole display leans into vintage travel and beachside nostalgia. A chrome badge, a diecast Kombi Samba Bus, and a Beetle model can sit together like a tiny garage story, one that feels right at home on an Aussie shelf, in a study, or beside coastal accents.

Small displays that feel personal, not cluttered

The best arrangements use height, texture, and a clear theme. A framed wing badge above a Volkswagen Beetle model gives the eye a focal point, while a Kombi on a lower shelf adds shape and movement. If the room already has beach tones, timber, linen, and sea-glass colours, the chrome and enamel details pop without feeling overworked.

A display also gets stronger when it mixes eras deliberately. A winged badge from a luxury marque beside a classic VW diecast creates a contrast between aspiration and everyday nostalgia, which is exactly why collectors enjoy these pieces so much. The result feels like a conversation between different parts of motoring history, not a random pile of shiny objects.

For coastal styling ideas, the coastal home decor ideas collection approach works beautifully with automotive memorabilia because both rely on light, space, and a sense of relaxed movement. Add a shadow box, a small framed print, or a surf-inspired backdrop, and you've got a display that feels curated rather than crowded.

A good shelf tells a story in three objects, a car, a badge, and one piece of décor that ties them together.

Start Your Winged Emblem Journey Today

A winged emblem is never just a shape. It carries aviation history, brand identity, and the kind of detail collectors love to study, especially when the goal is to separate a true period piece from a later reproduction. If you enjoy that mix of heritage and display appeal, pair your badge hunting with licensed VW diecast, a Kombi Samba Bus, or a classic Beetle for a setup that feels properly Australian and unmistakably nostalgic.


If you're ready to build a display with real character, visit Volkswagen Memorabilia for licensed VW diecast models, coastal décor, and gift ideas that suit collectors, restorers, and anyone who loves the look of old-school motoring. It's a great place to find pieces that sit beautifully with your favourite badges, and they're made for the kind of home display that still feels like a car show on a sunny weekend.

Creative Centerpiece Ideas for Every Table

If you're setting the table for a relaxed backyard lunch, a VW club get-together, or a beachy dinner where the Kombis are as much a talking point as the food, the centre of the table does more work than most realise. A good centerpiece idea doesn't just fill space, it sets the mood, keeps the table practical, and gives collectors a way to bring their favourite Volkswagen Beetle model or VW Kombi diecast Australia piece into everyday life without making the display feel precious or stiff.

The sweet spot for Australian entertaining is a piece that feels personal, durable, and easy to move from indoor dining to alfresco use. That's where licensed VW diecast models, shells, driftwood, candles, and low coastal textures come together beautifully. The result is a display that looks right at home beside a seafood lunch, a Christmas spread, or a display bench at a show, while still feeling like proper VW memorabilia collectibles rather than generic décor.

Why VW Memorabilia and Coastal Decor Make Perfect Centerpieces

A sunny Saturday at a Volkswagens on the Beach meet gives you the whole idea in one glance. One table has a tiny blue Beetle parked on a timber board with shells around it, another has a Kombi beside a low bowl and a few bits of driftwood, and both tables feel unmistakably Australian. That blend works because the car culture side brings nostalgia and identity, while the coastal side keeps the styling relaxed, light, and easy to live with.

A coastal-themed table centerpiece featuring a model blue Volkswagen Beetle, succulents, seashells, and driftwood on a table.

The bigger context matters too. The 2021 Census counted 25,422,788 people in Australia, and the Australian Bureau of Statistics reported that the population had grown by more than 8 million since 1991, while 84.3% of Australians lived in capital cities in 2021 (ABS reference). That urban, apartment-heavy reality helps explain why centrepieces need to be stylish but space-aware, especially in Sydney, Melbourne, Brisbane, Perth, and Adelaide.

For VW lovers, the emotional side is just as strong. The Beetle's history stretches back to the mid-1930s, mass production followed after the Second World War, and cumulative production eventually exceeded 21 million units worldwide (Volkswagen Beetle history reference). That kind of longevity gives a Beetle or Kombi display real nostalgic weight. Add shells, glass, or timber, and you've got a table piece that feels like a summer drive, a car show, and a coastal holiday all at once.

Browse more home styling ideas in the vintage home accessories collection

Why the mix feels so natural

The best displays borrow from both worlds. The diecast model gives the arrangement a clear hero, while the coastal materials soften the look so it doesn't read like a showroom pedestal. On a dining table, that means the piece feels warm instead of formal. On a sideboard, it feels collected instead of cluttered.

Practical rule: if the arrangement can't survive being moved from the dining table to the outdoor table without falling apart, it's too fragile for real entertaining.

Building Your Centerpiece Base and Structure

The most reliable builds follow a simple order, and that order matters more than the decorative theme. Start with the container, tray, or board, then add any foam, risers, or stabilising material, then place the larger structural items, and only after that bring in the smaller accents. If you reverse that flow, you end up lifting and repositioning delicate pieces too many times, which makes the arrangement harder to keep symmetrical and much easier to damage.

A good base should feel heavy enough to stay put but not so bulky that it swallows the table. Shallow timber trays, low mirror plates, and flat ceramic dishes work well because they give the eye a defined edge without adding height. For a diecast model, a small patch of museum wax, a discreet cradle of foam, or a hidden support under the base keeps the car from skating around when someone shifts a chair or reaches for a serving dish.

A simple assembly sequence

  1. Choose the container first. Pick the footprint before anything else, because the table shape should drive the display shape.
  2. Condition the base material. If you're using foam, sand, or driftwood, make sure it's stable and dry before you build on top of it.
  3. Place the anchor object. The Beetle, Kombi, or Samba Bus should go in early so everything else can be balanced around it.
  4. Add the finishing accents last. Shells, foliage, candles, and small collectibles are easier to place once the main structure is settled.

A technical demonstration on floral mechanics recommends building in exactly that kind of sequence, with the largest fillers and greenery going in before the finer accents, and another example shows that stems need to be driven deep into the foam for better stability. In practice, that translates neatly to collectible centrepieces too, because the anchor object belongs deep in the visual structure, not perched on top where it can wobble or tip.

Shop the model car range for display-ready Volkswagen pieces

The same logic applies to mixed tables at a car show or a long barbecue setting. One strong centrepiece can work on a small round table, but longer tables usually look better with several lower vignettes spread out so conversation stays easy and the whole display feels intentional rather than crowded.

Keep the first pass simple. If the arrangement already looks balanced before the tiny accents go in, you've built it right.

Three Centerpiece Variations for Every Occasion

The easiest way to choose a centerpiece idea is to decide what's doing the heavy lifting, the car, the natural textures, or the season. A diecast-led build feels most collectable, a beach-led build feels most relaxed, and a holiday build lets the same core pieces move through Christmas and summer entertaining without starting from scratch.

Variation Best for Main look
Vintage VW Diecast Display Collector tables, gift displays, show benches Beetle or Kombi on timber or mirror with restrained coastal detail
Beach and Starfish Arrangement Alfresco dining, relaxed lunches, summer entertaining Shells, sand, driftwood, and a model VW as the focal point
Holiday VW Centerpiece Christmas tables, seasonal styling, gift-ready décor Festive greens, candles, and a heritage VW model with seasonal accents

Vintage VW Diecast Display

This is the cleanest option if you want the model to do the talking. A 1:24 or 1:32 Beetle or Kombi sits well on a timber board or mirror base, especially when you keep the surrounding elements low and selective. A 1962 Kombi Samba Bus or 1967 Beetle with surfboard gives the display instant personality without making it feel theme-park loud.

Use one hero vehicle, a few shells, a strip of driftwood, and perhaps a low candle or succulent. The point is to frame the model, not compete with it. On a round table, keep the composition centred. On a rectangle, shift it slightly off-centre and let the negative space do some of the work.

Beach and Starfish Arrangement

This version leans hard into texture. Shells, starfish pieces, sand, and pale timber create a low, easygoing base, then the diecast model sits on top as the one deliberate man-made object. It works especially well for shared lunches and outdoor tables because the materials already read as calm and conversation-friendly.

The trick here is restraint. Too many shells turn it into a souvenir pile, and too much sand makes cleanup annoying. One VW model, a handful of larger shells, and one or two natural driftwood pieces usually read better than a crowded spread.

Holiday VW Centerpiece

For Christmas or end-of-year entertaining, keep the VW heritage visible and let the festive detail stay secondary. A Kombi in a seasonal setting, a few red or gold accents, and low greenery can carry the mood without turning the table into a crowded display shelf. The same arrangement can often be refreshed after the holidays by swapping the colour accents and keeping the base intact.

That reuse value is the real win. You don't need a new centrepiece for every event if the base is strong enough to adapt.

Sizing Your Centerpiece to Fit Any Table

A beautiful display can still fail if it blocks conversation or overwhelms the table. For that reason, proportion matters more than novelty. One practical rule says the arrangement should be about two-thirds the length of the table (centerpiece rule reference), while another suggests using multiple smaller vignettes on longer rectangular tables rather than one oversized bowl. That approach suits Australian entertaining particularly well, because shared plates, BBQs, and alfresco meals all depend on open sightlines.

An infographic chart displaying recommended centerpiece dimensions for dining tables, coffee tables, and patio bars.

What works by table type

A dining table usually needs a low centrepiece that stays practical for serving. Some design guides recommend keeping arrangements under 12 inches for clear sightlines, and if a taller form is used, the middle should be see-through so people can still talk across it (table-centre guidance). That's why low bowls, flat trays, and loose coastal compositions work so well with VW models.

For a coffee table, scale down again. The arrangement should feel collected, not dominant, and it should leave room for mugs, books, and remotes. A patio bar or sideboard needs even more restraint because the surface depth is often shallow, so low-profile materials like shells and driftwood are a better fit than upright florals.

Unscented materials are the safer choice for food tables. A strong fragrance can fight with dinner, especially when guests are already sharing plates or sitting close together.

How to avoid the common mistakes

The most common error is building vertically just because the model itself is visually strong. A Beetle or Kombi already brings character, so the surrounding elements should support it rather than add more height. Another mistake is using one large arrangement on a long table when two or three smaller groupings would feel calmer and easier to talk across.

On round tables, central placement usually works best. On long trestle tables at car shows, repeat low vignettes at intervals so the eye travels along the table instead of hitting one dense block. That's the difference between styling and obstruction.

Sourcing Quality Diecast Models and Coastal Materials

A centerpiece only looks effortless if the components are worth using in the first place. For the diecast side, start with officially licensed Volkswagen models rather than generic lookalikes. Good pieces usually have accurate scale, clean paint, functioning doors where applicable, free-wheeling wheels, and packaging that helps protect them when you rotate them in and out of display.

Scale matters more than many buyers expect. A 1:18 model of a 4.0-metre car measures about 22.2 centimetres, while a 1:24 version is about 16.7 centimetres (scale reference). That changes everything about table footprint, storage, and whether the piece reads as a statement model or a cabinet-friendly collectible.

Diecast Scale Comparison for Centerpiece Planning Approximate Length for a 4m car Best Centerpiece Use
1:18 22.2 cm Statement piece on larger tables and sideboards
1:24 16.7 cm Flexible size for dining tables and mixed vignettes
1:32 Smaller again Best for compact displays and grouped arrangements

What to look for before you buy

  • Accurate body proportions. The Beetle or Kombi should look right from the front, side, and rear.
  • Solid packaging. If you're giving it as a gift or storing it between events, packaging matters.
  • Display-friendly finish. Glossy paint, clear trim, and clean detailing hold up well in a centrepiece setting.
  • Size fit. A model that looks great online can be too large for a small alfresco table.

For coastal materials, keep it local and practical. Shells, small pieces of driftwood, glass, timber, and compact nautical accents all work because they don't fight the vehicle theme. You can gather some pieces naturally, then fill gaps with curated décor that matches the tone of the table rather than trying to force one style across everything.

The most efficient route is to think in layers. First choose the scale of the VW model, then match the surrounding materials to the footprint, then decide whether the arrangement needs to survive sun, breeze, or frequent movement.

Caring for and Storing Your Centerpiece Components

A reusable centrepiece pays off only if you can pack it away properly. In Australian conditions, diecast models need protection from dust, humidity, and harsh sun, while shells and driftwood need gentle cleaning and dry storage so they're ready for the next event. That's why durable materials, especially timber, glass, faux botanicals, and metal diecast models, are such a smart fit for warmer, brighter homes.

Use protective display boxes and cases to keep your models ready for rotation

The simplest system is a dedicated storage container for the whole build. Wrap fragile shells individually, separate metal models from anything abrasive, and keep any small accessories in a labelled bag so you're not hunting for bits before the next dinner or show. Original model boxes are worth keeping too, because they make transport and re-display much easier.

Seasonal rotation made simple

A display doesn't need to be static to be valuable. The same Kombi base can work for Christmas, a summer barbecue, or a coastal birthday if you swap only the accents and keep the core structure intact. That gives you more use from each component and keeps the collection feeling fresh without buying a whole new set every season.

Fresh flowers look lovely, but they're not always the best fit for outdoor entertaining or heat-heavy afternoons. Reusable décor holds up better and makes more sense when you want a centrepiece to last across multiple occasions. That's especially true if the model itself is part of your collecting story.

Store it the way you'd store a favourite diecast, not like a disposable party prop. That mindset saves breakages and keeps the whole display looking sharp for years.


If you're ready to build a centrepiece that feels right at home in an Australian dining room, on a patio table, or next to a prized Kombi display, take a look at Volkswagen Memorabilia. You'll find diecast models, coastal décor, and display pieces that make it easy to create a table with real VW character, not just a generic styling filler.

How to Remove Dents from Car Panels at Home

You've got a fresh door ding, a supermarket kiss on the bumper, or a mysterious crease that showed up after a tight garage shuffle, and now you're staring at the panel wondering if it's a five-minute fix or a proper body-shop job. The honest answer is that how to remove dents from car panels depends on paint condition, panel material, and whether you can get behind the damage without making it worse. On a classic Beetle or Kombi, that decision matters even more, because factory paint, thinner steel, and awkward access can turn a quick fix into a mess if you rush it.

Spotting the Dent and Deciding If It Is a DIY Job

The first thing I do is look at the dent like it's telling me a story. If the paint is cracked, the metal has a sharp crease, or the dent sits right beside a badge, sensor, camera, or trim line, that's already a warning sign that a home fix may not be the smart play. Small, shallow dents with intact paint are the only ones I'd call friendly territory for a driveway repair.

Read the panel before you reach for any tool

Press around the dent with the flats of your fingers, not your thumbnail. If the panel flexes and springs back a little, that usually means you're dealing with a light deformation rather than a stretched crease, and that's a much better candidate for suction, heat, or PDR-style nudging.

If you can reach behind the panel, you've got more options. If you can't, and the dent is on a modern bumper cover or near sensitive hardware, the risk climbs fast. Neutral guidance from AutoZone and RAC-backed advice both point to the same practical threshold, some dents can be softened and pushed out, but overheated paint, sharp creases, and inaccessible backsides are where DIYs tend to go sideways.

Practical rule: if the paint is intact, the dent is shallow, and the panel is flexible, you've probably got a DIY job. If any one of those three is missing, slow down and reassess.

For vintage Volkswagens, I'd be even stricter. A Beetle door or Kombi side panel can often be reached from behind, but once you see cracked paint or a stretched ridge, the job starts moving out of “Saturday arvo” territory and into restoration work.

Gathering Your DIY Dent Repair Toolkit

A checklist infographic titled DIY Dent Repair Toolkit listing essential tools and helpful additions for car maintenance.

A decent kit makes the whole job calmer. You don't need a workshop full of gear, but you do need the right basics so you're not improvising with a kitchen plunger and a prayer.

What to have on hand

  • Hair dryer with controllable heat: use it gently, not on full blast unless the method calls for it.
  • Suction plunger or dent puller: a clean seal matters more than brute force.
  • Microfibre cloths: good for cleaning, drying, and protecting the paint.
  • Nitrile gloves: useful when you're pushing from behind warm panels.
  • Plastic trim tools: safer than metal tools around clips and edges.
  • Automotive glue sticks and a small puller: handy for shallow, slightly deeper dents.
  • Fine sandpaper and light body filler: only for dents that need finish work, not quick pop-outs.
  • Isopropyl alcohol: helps clean the surface before suction or glue.
  • Torch or work light: lets you read the panel from the side so you can see highs and lows.

RAC guidance recommends warming plastic bumper panels with a hair dryer held 5 to 7 inches away on medium heat before applying firm hand pressure or a suction method to avoid paint damage, so a hair dryer with sane temperature control is worth having RAC dent repair guidance.

A sensible starter kit for home use usually lives somewhere between a basic plunger and a more complete grab bag of trim tools, glue tabs, and lights. I'd also lay a soft blanket or moving pad on the driveway before you start, because once you've got the panel warm, you don't want grit scratching anything while you work.

Plunger, Boiling Water and Suction Methods for Shallow Dents

A technician using a black suction cup tool to remove a dent from a silver car door.

A shallow dent is where suction earns its keep. The trick is not to yank like you're starting a mower, it's to seal cleanly and pull with controlled force so the panel moves instead of the paint lifting.

Suction plunger done properly

Start by cleaning and drying the dent and the plunger. Wetting both surfaces helps the seal, then press the plunger straight over the centre of the dent and pull in short, vigorous jerks until the panel pops back into shape, which matches common suction-based repair guidance WikiHow minor dent repair.

Wet it, seal it, pull straight, and stop if the edge starts to distort.

A toilet plunger can work on broader, smooth dents, but it's not magic. If the plunger is too small, too dirty, or sitting on a panel edge, the grip disappears fast. On a Kombi side panel, I'd treat suction as a first pass, not a guarantee.

Boiling water for plastic bumpers

For a small plastic bumper dent, a documented DIY method is to pour boiling water over the area, reach behind the bumper, and push the dent out while the plastic is softened, then cool it with cold water so the plastic sets again Car and Driver dent repair. That approach belongs on flexible plastic, not on a painted steel guard from a Beetle.

Small pullers versus brute force

Small suction cups with a screw-type puller give you more control on smooth, shallow dents than a big old plunger. They're especially handy on bumper covers and broad door skins where you want a little persuasion, not a wrestling match.

A careful point here, don't pull from the edge of a badge or moulding, and don't work over fresh paint. That's how a simple ding becomes a much pricier panel repair.

Hot and Cold Tricks Plus Paintless Dent Repair Basics

The heat-and-cold method works because metal and plastic respond to temperature swings. Warm the dented area first, then cool it sharply, and on some shallow dents the surface can shift enough to relax back towards shape.

Using heat without cooking the paint

Australian repair guidance from DingGo notes that DIY dent methods use the same basic physics as paintless dent repair, with a hair dryer held about 10 cm away, then the dent pushed back from behind while wearing gloves, and it specifically warns against maximum heat because of paint-damage risk DingGo dent removal guide. That's the right mindset, gentle warmth, not a paint-stripper session.

Another heat-and-cold technique uses a hair dryer on the highest setting to warm the area, then compressed air sprayed upside down for rapid cooling, with one guide using about 5 minutes of heating and another using roughly 60 seconds, so the exact timing clearly varies by method and product Credit Acceptance dent removal. I'd treat those timings as a cue to watch the panel, not a stopwatch contest.

PDR basics for the home shed

Paintless dent repair is the cleanest foundation for minor dents when the paint is still intact. The idea is simple, massage the metal from behind while it's warm and workable, then let the surface settle back without sanding or filler.

Best-fit PDR job: a small, round dent with unbroken paint and access behind the panel.

Use the right tool for the job is the rule I'd keep in mind here. On a classic VW, that often means reaching inside a door or quarter panel carefully, using gloved hands or a soft PDR tool, and leaving sharp creases to someone with more experience.

An important line in the sand, PDR suits intact paint and manageable dents. It doesn't suit cracked paint, stretched steel, or a panel that's already been repaired badly once.

Glue Pullers and Light Filler for Slightly Deeper Dents

When suction won't bite and the dent's a bit deeper, glue tabs can bridge the gap. The trick is to pull straight, not sideways, and to stop as soon as the metal comes up near its original line.

How a glue puller helps

Choose a tab that suits the size of the dent, clean the area well, and warm it lightly if the glue system calls for it. Apply the adhesive, let it set, then attach the puller and work the tab in a straight line so the deepest part of the dent rises without dragging a new wave into the panel.

Don't chase perfection with glue alone. If you over-pull, you'll leave a high spot that's just as annoying as the original ding.

When filler makes sense

For a metal dent that's gone past the tidy-pull stage, a documented repair workflow involves sanding the paint off about 2 to 5 inches around the dent, applying body filler, letting it dry for 15 to 20 minutes, then sanding the filler smooth until it sits flush with the surrounding panel Synchrony dent repair guide. That's no longer a quick cosmetic pop-out, it's finishing work.

Once filler comes out, you're aiming for a stable surface, not a showroom miracle.

A skim of filler can be fine on a tired daily driver where appearance matters more than originality. On a collectible Beetle or Kombi, though, I'd be far more careful about how much original metal and paint you remove, because that history is part of the car's value.

The honest move is to stop sanding as soon as the panel is flat enough to live with. Home repairs look rough when the filler is too thick or the sanding edge is obvious in sunlight.

Cost and Time Comparison of DIY Versus Professional Repair

A dent repair decision usually comes down to two questions, how long do you want to spend, and how fussy do you want the finish to be? DIY can save money and teach you a lot, but it also asks for patience, steady hands, and a willingness to walk away when the panel starts fighting back.

DIY vs Professional Dent Repair in Australia

Method DIY Cost (AUD) DIY Time Finish Quality
Suction plunger on a shallow dent Low, often just the tool itself Minutes to an hour Good for simple dents, variable on edges
Boiling water on a plastic bumper Low Short Fair on flexible plastic, not for steel
Hair dryer and push from behind Low to moderate Short to moderate Good when paint is intact and access is easy
Glue puller and light filler Moderate A weekend job if you're careful Better, but needs sanding skill
Professional PDR or panel repair Higher than DIY Usually faster once booked in Best for consistency and return-quality finish

For many owners, the maths is simple. A cheap plunger can rescue a minor ding, but a professional is the smarter spend when the car is leased, financed, or destined for show use, because the finish standard matters at hand-back or sale.

Keep receipts for any professional work and photos of the damage before repairs. That's just sensible paperwork, especially if the car needs a claim or if you want a clean record for future resale. Volkswagen service book style record-keeping is a good habit even when you're doing the repairs yourself, because evidence of care always helps later.

Working on Vintage VW Beetle and Kombi Panels

A dent on a Beetle bonnet or a Kombi side panel can look simple from the outside, then turn awkward as soon as you get tools on it. Classic Volkswagens ask for a softer hand. The steel is often thin in the wrong spot, the paint may still be original, and getting behind the panel can mean more gymnastics than repair.

Why old VW panels change the job

Heat needs a lighter touch on vintage paint, because too much of it can mark the finish or start lifting old coating. AutoZone dent repair advice also warns that heat-based fixes can damage paint if you push them too far. On a vintage VW, that means lower heat, smaller tabs, and slower movements than you'd use on a newer daily driver.

Access changes the whole job as well. A Beetle rear quarter or Kombi sliding door might give you a way in behind the dent, but the angle is often awkward and the panel can flex when you don't want it to. Once the back side is hard to reach, a home repair turns delicate quickly, and a small push in the wrong spot can leave a high spot that's harder to clean up than the original dent.

A car technician uses a wooden block to repair a dent on a light blue vintage car door.

On older Volkswagens, the trim and replacement parts matter too. If you're dealing with a door edge, a stubborn low spot, or a panel that's already been repaired before, it helps to know what fits and what can be sourced before you start forcing metal around. A good place to check is Beetle parts for panel and trim work, especially if the dent repair may turn into a parts swap instead of a clean pull.

When to hand it to a specialist

Call a pro if the dent sits near parking sensors, radar units, or cameras, if the crease is sharp, if the paint has cracked or lifted, or if the damage runs across multiple panels. Those jobs usually fight back harder than they save, and vintage VW metal can punish guesswork.

A good heritage panel beater or PDR tech can usually tell you quickly whether the panel can be massaged, needs filler, or needs proper metal finishing. If you're booking one for a classic VW, ask whether they've worked on vintage Volkswagen panels before, what warranty they offer on the finish, and how they handle original paint preservation.

Keep a photo record as well. Take shots of the dent before you touch it, then again after the repair, and store them with the car's history. That matters on a Kombi or Beetle, where provenance and careful upkeep are part of the appeal.

If you're restoring a VW or keeping a cherished daily driver tidy, match the method to the panel in front of you, not the one that looks easiest on a video. Old VW skin is thin, access is often poor, and original paint gives you less room to make mistakes, so the sensible move is the one that leaves the panel straight without chasing damage into the rest of the car.

Tie Down Rails for VW Vans and Trailers: A Complete Guide

You've got the Kombi strapped, the trailer's packed, and the sun's already up over the showground. Then the little stuff starts moving, the sort of movement that turns a calm run to Volksfest into a noisy, stressful drive with scratched trim, shifted boxes, and a tie-down that's suddenly working harder than it should.

That's where tie down rails earn their keep. They're not the flashy part of the setup, but they're the bit that helps keep a classic VW, a stack of parts, or a precious diecast haul sitting where you put it, not where physics wants it to end up. In Australia, that matters because load restraint isn't a casual suggestion, it's part of safe transport, and the geometry of the setup can make a bigger difference than many realise. For Kombi owners, trailer tinkerers, and collectors who care about both the gear and the journey, getting the rail placement right is worth the effort. If you're planning a van fit-out, a trailer refresh, or a smarter way to move memorabilia, this guide to VW van fit-out ideas will feel very familiar.

Why Tie Down Rails Matter for VW Enthusiasts

A good show weekend often starts with a simple load-up. The Kombi gets the folding chairs, the parts box, the picnic rug, and maybe a crate of diecast models that you'd rather not hear clattering around on corrugations. If the anchoring points are sloppy, the whole load starts to wander, and once a strap angle goes bad, the restraint you thought you had isn't the restraint you get.

That's why tie down rails are such a useful upgrade for VW people. They give you flexible anchor positions, so you can secure a Beetle bonnet one weekend and a stack of boxed models the next without relying on whatever random hooks happen to be welded into the floor. They're the quiet achiever in the setup, the bit that lets you transport irreplaceable stuff with a bit more confidence and a lot less drama.

Australian load restraint rules make this even more important. The National Transport Commission's guide shows that the restraint system has to work with real geometry, not wishful thinking, and that the effectiveness of a tie-down drops as the angle gets shallower. For a Kombi or a trailer loaded for a club run, that means the position of the rail can be just as important as the rail itself. A well-placed rail keeps the lashing angle sensible and the load stable, while a badly placed one can make every strap do less than its label suggests.

Practical rule: if the load shifts, the problem is usually not just the strap. It's often the anchor position, the angle, or both.

The other reason rails matter is protection. Classic VW bodywork, painted panels, and boxed collectibles don't like sideways movement, corner rub, or repeated strap movement. A rail system gives you more control over where the force goes, which is exactly what you want when the cargo has more sentimental value than resale value.

Understanding How Tie Down Rails Work

A diagram comparing tie down rails to a human skeleton to illustrate how force is distributed.

Tie down rails spread restraint forces through the van, trailer, or deck instead of dumping everything into one fixed point. That matters on a Kombi or trailer because load direction changes under braking, cornering, and rough road surfaces, and the rail gives you more control over where those forces end up.

The parts that do the work

A rail setup usually comes down to three parts in use. The rail is fixed to the floor, deck, or side wall. The second part is the slot, ring, or slider that takes the strap hardware. The third is the lashing gear, usually ratchet straps or chains, which pulls the load down and holds it from shifting sideways.

That flexibility is why rails suit VW work so well. A single anchor point can suit one load shape, but classic VW jobs change all the time. One weekend it might be a pair of seats and a box of trims, the next it could be a vintage bumper, a model display case, or a set of camping drawers. Rails let you move the tie-down point to suit the cargo without drilling new holes every time.

The rail is the backbone, the anchor points are the ribs, and the cargo is what needs to stay put over bumps, braking, and cornering. When the rail is mounted in the right place, the force spreads instead of loading up one weak spot. That is why a rail system often feels more useful than loose hooks or random floor rings.

The right ratchet strap setup still has to match the rail. A good rail cannot make up for tired webbing, poor hardware, or a strap that is wrong for the job.

A rail system works best when the load settles naturally into it. If you have to fight the cargo to make it sit right, the setup probably needs a rethink.

Comparing Tie Down Rail Types and Materials

Not every rail suits every VW job. A hidden floor rail is lovely in a clean Kombi cargo bay, but an open trailer might be better served by a tougher surface-mounted setup that's easy to inspect and easy to clean. Side-wall rails sit somewhere else again, especially when you want to hold items upright rather than clamp them straight down.

Rail types and what they're good at

Rail Type Material Options Best For Key Trade-off
Recessed floor rail Galvanised steel, aluminium Show-focused Kombi floors, enclosed trailers, neat installations Better visual integration, but it usually needs more planning and often more modification
Surface-mounted rail Galvanised steel, stainless steel, aluminium Utes, trailers, general-purpose cargo decks Easy to fit and adjust, but it's more visible and can create a raised edge
Side-wall rail Galvanised steel, stainless steel, aluminium Tall cargo, mixed loads, vans with varied packing needs Great flexibility for side restraint, but it doesn't always help with low-slung loads

For materials, the choice is usually a trade between weight, corrosion resistance, and appearance. Galvanised steel is the practical workhorse, especially where you expect hard use and don't want to baby the hardware. Stainless steel makes sense where moisture and corrosion are constant concerns, which is why it's popular in salty coastal conditions. Aluminium keeps weight down and can look tidy in a more polished build, but you still need to check that the specific product is rated for the job you want it to do.

For a Kombi, the decision often comes down to whether you're protecting original flooring or building a more modern cargo bay. For a trailer, visibility and easy inspection often matter more than hiding the hardware. For an open ute tray, the rail has to handle weather, mud, and rough treatment without becoming a maintenance headache.

The historical context is worth keeping in mind too. The Railway Tie Association notes that rail fastening evolved into the modern flanged-rail standard in the 1830s with Robert L. Stevens' flanged tee rail, which helped shape later tie-plate systems. That long engineering history is a good reminder that support and fastening matter as much as the rail itself, whether the load is freight, a classic VW shell, or a weekend's worth of gear. See the background at the Railway Tie Association FAQ.

The Hidden Impact of Lashing Angles and Rail Placement

A diagram demonstrating how lashing angle affects cargo restraint capacity using 45 degree and 15 degree examples.

This is the bit most buying guides skip, and it's the bit that often decides whether the load is secure. Australian guidance says tie-down lashings work best when they're close to vertical, and the National Transport Commission's Load Restraint Guide shows that effectiveness falls to roughly 70% at 45° and about 50% at 30°. That's a massive swing from a simple change in rail position and load height, and it's why a rail mounted in the wrong place can look solid while doing less work than you think.

Why the rail's height and position matter

The rail height, deck width, and cargo shape all combine to set the strap angle. A low rail on a wide trailer deck can push the strap into a shallow run, especially with tall cargo, and that's where restraint capacity starts to slide. A slightly higher rail, or a rail closer to the load, can keep the angle steeper and the strap more effective without changing the strap itself.

That's especially relevant on VW vans and trailers carrying mixed loads. A Kombi floor can be narrow enough for luggage but awkward for a taller item like a toolbox, a panel, or a boxed display. If the rail sits too far out, the strap angle gets lazy. If it sits too high or too close to a sharp edge, the load may be secure but awkward to use, which is no help on a busy show morning.

A good mounting layout usually does two things at once. It preserves as much of a near-vertical lashing angle as practical, and it gives enough flexibility to handle both large and small cargo. That's the sweet spot. Too many anchor points can tempt people to use the wrong one just because it's there, while too few can force bad strap geometry and poor restraint.

The rail should fit the load, not just the vehicle. If the geometry is wrong, the hardware is only half useful.

If you want the specific load-restraint logic behind that geometry, the Australian Load Restraint Guide is the clearest reference point for how angle changes the actual restraint outcome.

Measuring and Selecting the Right Tie Down Rails

Start with the cargo bay itself. Measure the usable length, the usable width, and the way the floor is shaped, then compare that with the loads you really carry. A Beetle on a trailer asks for a different rail layout from a stack of memorabilia boxes in a van, and the difference usually comes down to where the straps can run without lying too flat.

A simple way to choose the setup is to work through the space in order. Measure the deck length, width, and the position of wheel arches, trims, or floor ridges. Map the load shape, because a low, wide load needs different anchor positions from a tall, narrow one. Check the rail layout to see whether one central run, paired side runs, or a wall-mounted approach gives you better strap geometry. Then match the rating to the job, so the rail and anchor system suit the load instead of just filling the available space.

Australian load restraint rules care about the aggregate working load limit and the restraint geometry. The number of hooks or slots is only part of the picture. Extra rail length helps only when it lets you place the straps in a better position. It does not fix a weak setup, and it does not turn a poor angle into a legal or safe one.

On VW vans and trailers, a practical layout usually gives you one set of positions for larger items, such as a car shell or bulky parts, and another set for smaller boxed cargo. That flexibility matters on show weekends because the load changes all the time. One trip might be a Kombi seat frame, the next might be a tidy stack of models and display pieces. The rail needs to work for both without forcing awkward strap runs.

The strap and rail need to work together as one system, and the selection guide for ratchet hardware helps with that choice. A good rail gives the strap a fair angle. The wrong fitting wastes that advantage before the load even moves.

If you are planning a mount for accessories as well, the same measuring habit helps with a high lift jack bracket installation guide, because neat placement and solid support matter just as much there.

Installing Tie Down Rails on VW Vans and Trailers

Installation starts with respect for the vehicle, especially if it's a classic Kombi with original panels or a trailer deck that's already been repaired once or twice. Mark the drill points carefully, check for hidden structure beneath the floor, and think about where water might sit after a wet drive home from the coast. If the deck needs reinforcement, sort that before the rail goes down, not after the first trip.

Practical points for a Kombi or trailer

For a VW Kombi, removable sub-floor plates or surface-mounted rails can help protect original flooring. That keeps the install reversible and reduces the chance of turning a tidy cargo bay into a permanent fabrication job. For a trailer, use proper fasteners and sealing around the penetrations so moisture doesn't creep into the timber or under the sheet metal.

Bolting or welding both work when done properly, but each has a different trade-off. Bolting gives you serviceability, while welding can give you a cleaner and more permanent result if the base metal and layout suit it. Either way, alignment matters, because a rail that's cocked or twisted makes the straps behave oddly and can create wear in spots you don't want.

A couple of mistakes show up again and again. Under-tightened bolts let the rail move, and unsealed holes invite rust or rot. In a Kombi, that can matter more than people expect because preserving the body and the cargo bay is part of preserving the van's value.

The installation notes in the high-lift jack bracket guide are a handy reminder that mounting hardware on a classic VW always works best when you think about structure first and accessories second.

If the rail flexes in your hand before the load goes on, it'll flex even more once the straps are tight.

Safety Checks, Maintenance, and Buying Checklist

A rail setup only earns trust if you keep checking it. Before each trip, look over the rail, the fittings, and the strap points for wear, movement, or corrosion, especially if the vehicle lives near the coast. Salt air is brutal on fasteners and edges, and once a surface starts to pit or loosen, the whole system deserves a closer look.

The pre-trip routine doesn't need to be complicated. Check that bolts are still tight, straps aren't frayed, and the load still sits where you meant to place it. If anything has shifted since the last trip, fix the cause before you hit the road. A ratchet that's been forced too hard, or a rail slot that's showing deformation, is telling you something worth hearing.

A quick buying checklist

  • Verify the working load limit. Make sure the rail and anchor setup suits the cargo you'll carry.
  • Check vehicle fit. Confirm the rail works with a Kombi floor, a trailer deck, or a tray without interfering with the load shape.
  • Choose corrosion-resistant materials. Galvanised steel and stainless steel are the obvious candidates for tougher conditions.
  • Look at the mounting method. Decide whether you want a reversible install, a permanent fix, or something in between.
  • Think about appearance. On a show vehicle, visual integration can matter almost as much as raw capacity.

The broader point is simple. Good tie down rails protect more than the cargo in the tray or trailer. They protect the stuff that matters to VW people, the body panels, the memorabilia boxes, the model cars, and the calm that comes from knowing the load is doing what it should.

An infographic titled Safety & Maintenance Checklist, listing four essential inspection steps for secure equipment transport.


If you're building out a VW-inspired garage, trailer, or display space, Volkswagen Memorabilia has the kind of diecast Kombi Samba Bus and Beetle pieces that suit a proper enthusiast's collection. Have a browse at Volkswagen Memorabilia for licensed VW diecast models, gifts, and memorabilia that feel right at home beside a well-prepped trailer or a neatly sorted Kombi.

VW Type 3: A Collector’s Guide to Variants and Memorabilia

At a car show in Melbourne, a beige Squareback sat between a tidy Beetle and a Kombi with surf racks, and the Type 3 was the one people kept circling back to. It had that low, calm stance that made it look like a proper family car with a bit more class, and a few old VW hands were already swapping stories about parts, rust, and the one that got away.

The VW Type 3 has always had that effect. It doesn't shout like a Beetle or wear the beach-party badge of a Kombi, but it carries a confident shape and a proper piece of Volkswagen history that still feels fresh on Australian roads and in collectors' living rooms alike.

Why the VW Type 3 Still Turns Heads Down Under

A cream-coloured Squareback easing past a line of Beetles at Volksfest gets the same reaction every time. People lean in, smile, and ask the same question, what is that one? The answer usually comes with a grin, because the VW Type 3 is one of those cars that rewards anyone who looks a little closer.

A beige Volkswagen Type 3 Squareback parked on a grassy field at an outdoor vintage car show.

A Volkswagen with a more grown-up presence

The Type 3 has a shape that feels lower, longer, and more settled than the Beetle. That's part of the charm. It looked like the practical Volkswagen for people who'd outgrown the tiny back seat but still wanted the same air-cooled honesty and easygoing character.

Australian enthusiasts have long responded to that balance. The model stayed in local output until 1974, which gives it a longer regional life than many people realise, and Australian buyer's-guide coverage notes that more than 2.5 million Type 3s were built globally across 13 years. Volkswagen's own record puts the total at 2,587,989 units from the start of production to the 1973 model change, which says a lot about how seriously the car was taken in its day. Those figures help explain why surviving Australian examples feel more than just quirky leftovers, they feel like part of the country's VW story.

Why it still works at shows and in collections

The Type 3 stands out because it doesn't rely on novelty alone. Its silhouette, practical proportions, and family-friendly packaging give it real presence next to Beetles and Kombis, especially when it's cleaned up and sitting on period wheels. You can see why collectors keep hunting for tidy examples, and why memorabilia buyers keep reaching for diecast versions that capture the same shape on a shelf.

Practical rule: if a classic Volkswagen gets attention from both longtime owners and first-time showgoers, it usually has something genuinely distinctive going on. The Type 3 absolutely does.

For Australian collectors, that distinctiveness matters. It's a car with enough production scale to support restoration interest, parts interest, and memorabilia interest, but enough individuality to feel special in a crowded VW scene.

How the Type 3 Came to Life

Volkswagen launched the VW Type 3 in 1961 as a more spacious, more practical step beyond the Beetle, while still keeping the rear-engine, air-cooled formula that made the brand famous. The car was sold in three main body styles, the notchback, the fastback, and the station wagon or estate version that many markets knew as the Squareback or Variant. Volkswagen's newsroom notes that the estate arrived in February 1962, with the fastback TL following later, so the range built out quickly once the model was underway. Volkswagen's Type 3 history page captures that launch sequence clearly.

From one new idea to a broad family of cars

That timing matters because it shows the Type 3 wasn't just a single niche sedan. Volkswagen was building a family of cars that could serve different buyers at once, from more conservative saloon customers to families wanting estate practicality. The Australian market felt that practicality strongly, especially because the model kept rolling locally until 1974, extending its presence beyond the global run.

The production numbers tell the rest of the story. Volkswagen's own newsroom says the model reached more than 2.6 million units overall, while another official summary describes more than 1.4 million saloon cars and 1.2 million Variant models. That split is useful for collectors because it shows the Type 3's market identity was firmly rooted in usable body styles, not just a sporty offshoot. Volkswagen newsroom production summary

A car that bridged the old and the new

The Type 3 mattered because it sat in the middle of Volkswagen's air-cooled era. It still had the familiar mechanical family resemblance, but it brought a more modern body, more room, and a calmer road presence. That combination explains why the model has never felt like an odd side project to serious VW people.

A timeline graphic showing the history of the Volkswagen Type 3 from its 1961 launch until 1973.

By the time the 1973 model change arrived globally, the Type 3 had already built a strong legacy. In Australian terms, that longer local life helped cement it as a car people remembered on the street, not just in a brochure.

The Three Body Styles Worth Knowing

The Type 3 story really comes alive once you stand beside all three body styles. Each one has a different personality, and each one appeals to a different kind of buyer or collector. The production mix also makes the picture clearer, because Volkswagen records show that out of 2,587,989 Type 3s built worldwide, about 1,339,124 were saloons or notchbacks and fastbacks, while 1,202,935 were Variant estates. That works out to roughly 52% sedan-type bodywork and about 47% wagon-type bodywork, which is a handy guide to how Volkswagen positioned the range. Type 3 production figures

Type 3 Body Styles at a Glance

Body Style Also Known As Global Share Best For
Notchback saloon Two-door saloon About 52% of total output across saloon-type cars Drivers who like the cleanest classic sedan look
Fastback TL in some markets Included in the saloon-type production total Buyers who want a sleeker, slightly sportier profile
Squareback estate Variant in many markets About 47% of total output Families, practicality fans, and display pieces with strong visual balance

The notchback brings the classic sedan feel

The notchback is the easiest place to start if you're drawn to tidy lines and a more formal Volkswagen shape. It looks honest and upright, with enough character to stand apart from the Beetle without trying too hard. In collection terms, it appeals to people who like the purest expression of the Type 3 body language.

The fastback adds a bit of drama

The fastback gives the range a more flowing profile. It keeps the same core Type 3 idea, but the rear treatment makes it feel slightly more athletic and a little less traditional. If you've got a shelf full of diecast VWs, the fastback is the one that often adds contrast and motion to the row.

The Squareback is the practical favourite

The Squareback, or Variant, is the shape many Australian enthusiasts remember most fondly. It suits the Type 3's family-car brief perfectly, and that's why it still resonates with collectors today. It's also the version that tends to connect most naturally with memorabilia buyers, because it looks great in both outdoor scenes and home displays.

The body style you choose usually says more about how you want to enjoy the car than about which one is “best”. That's the fun of it.

Engineering Differences from the Beetle and Kombi

Under the skin, the Type 3 is where Volkswagen started showing how far the air-cooled formula could be stretched. It still shared the rear-engine family DNA, but it packaged that hardware in a way that made the car more usable day to day. Australian road-test coverage recorded fuel consumption averaging 9.4 L/100 km, with automatics using 10% more fuel, which gives a solid local benchmark for how the model was judged in its period. Australian Type 3 buyer's guide

The Type 3 was built for better everyday use

The biggest difference came from packaging. Volkswagen reworked the engine layout into a low-profile arrangement that created a more practical rear cargo area, while the body itself offered a more conventional car shape than the Beetle. That's why Type 3 owners often talk about it as the Volkswagen that felt a bit more grown-up, a bit more civilised, and a lot easier to live with.

Compared with the Beetle, the Type 3 gives you a broader sense of space and a more composed stance. Compared with the Kombi, it's lower and more car-like, so it feels less like a van and more like a proper family machine. For people who want classic VW character without the towering driving position or the Beetle's compact packaging, the Type 3 lands in a very sweet spot.

Why parts knowledge matters

The Type 3's engineering story becomes useful for owners and restorers. The car's mechanical family links make some jobs familiar to long-time VW hands, but the model also has its own details that deserve respect. If you're already comfortable with Type 1 thinking, this VW Type 1 parts reference is a good reminder of what carries over and what doesn't.

The local road-test angle

That 9.4 L/100 km figure matters because it shows the Type 3 was being judged as a real-world car, not just a curiosity. The 10% fuel penalty for automatics also tells you how closely buyers and testers watched running costs in Australia. Those numbers don't turn the Type 3 into a modern economy car, but they do explain why it appealed to people who wanted a bit more substance than the Beetle without giving up the familiar VW ownership rhythm.

Buying and Restoring a Type 3 in Australia

A good Type 3 can still make a brilliant Australian classic, but the buying process rewards patience. The cars that survive well usually did so because someone cared, and the ones that need major work often hide their problems in the places you can't see from three steps away. That's where a careful inspection saves real grief.

An infographic checklist for buying and restoring an Australian VW Type 3 car featuring five key inspection areas.

Start with the body, not the polish

Rust, accident damage, and filler work tell you far more than a shiny respray ever will. The Type 3's body lines are subtle, so poor repairs can disappear at a glance and then become expensive later. Stand back, crouch down, and look for symmetry in the panels before you get distracted by trim or wheel choice.

Buyer's rule: a tidy interior can hide a tired shell, but a straight shell gives you a fighting chance.

What to inspect on site

  • Rust-prone areas: check sills, floor pans, and the battery tray carefully, because those are the kinds of places that can turn a cheap car into a long project.
  • Engine bay clues: look for oil leaks and make sure the carburetion setup has been handled neatly if the car has been modified.
  • Underbody condition: assess structural integrity first, especially if the car has spent time near the coast or in damp storage.
  • Electrical health: test lights, switches, and wiring rather than assuming old age is the only issue.
  • Body panel fit: look for dents, filler, and mismatched paint that might point to hidden repair work.

Restoration priorities that save time

Originality is lovely, but drivability matters too. A Type 3 with complete trim, tidy glass, and a presentable interior often makes a much smarter starting point than a shiny shell missing half its details. The Australian market also tends to reward honest cars that haven't been over-restored into something unrecognisable.

For parts, local VW circles can often help with the common wear items, while rarer Type 3-specific pieces may need more searching. That's part of the charm, because it turns ownership into a conversation with other enthusiasts rather than a solo project. When the right car turns up, the best move is to buy on condition and completeness, not just on colour or excitement.

Diecast Models and Type 3-Inspired Home Decor

Not every Type 3 fan has room for a full-size project in the shed, and that's where diecast and home styling come in. A well-made model on a shelf can carry the same lines, stance, and memory trigger as the actual car, especially when it sits alongside Beetle and Kombi pieces. That's why the Type 3 works so well as a collectible, it feels like a small sculpture of a very usable car.

A display can tell the same story as a driveway

A collector I spoke to had a Squareback diecast set beside a framed beach photo, a Kombi model on the other side, and a whitewashed shelf that felt straight out of a coastal holiday house. The effect was simple and smart. The cars weren't just toys or props, they were a visual shorthand for Volkswagen history, surf culture, and relaxed Australian living.

The Type 3's shape suits that kind of display because it has clean surfaces and a calm profile. It doesn't fight for attention, so it works beautifully with timber, linen, white ceramic, and soft blue accents. That makes it a natural fit for coastal-themed interiors where people want nostalgia without clutter.

What to look for in a quality model

For collectors, the best Volkswagen diecast models for sale usually feel solid in the hand, with clean paint, accurate badging, and believable proportions. A Volkswagen Beetle model and a VW Kombi diecast Australia piece often make perfect companions to a Type 3 because they complete the family story on one shelf. If you're building a display, mixed scale can work, but matching finishes and themes usually looks cleaner than forcing every model into the same slot.

Display idea: place the Type 3 between a Beetle and a Kombi, then use one framed surf print or shell accent to tie the whole shelf into a coastal room.

For browseable inspiration, the Volkswagen model cars collection is the kind of category collectors like because it keeps the search focused on licensed pieces rather than random lookalikes. The same goes for anyone trying to buy diecast Kombi pieces or build a small, giftable VW corner without needing a full garage to enjoy it.

Common Misconceptions and Where to Go Next

The Type 3 isn't just a stretched Beetle, it's a different answer to a different brief. It also isn't rare in Australia in the sense that it vanished without a trace, because local output continued until 1974 and left enough of a footprint to build a real enthusiast following. And no, licensed VW memorabilia isn't hard to find locally if you know where to look, especially when you're after pieces that fit both the car culture and the coastal home style.

The bigger myth is that the Type 3 only matters to hardcore historians. It sits right where nostalgia, practicality, and design meet, which is why it still works for owners, collectors, and gift-buyers alike. If you want to keep the story going in your home, office, or display cabinet, the best next stop is a trusted source of VW memorabilia collectibles and licensed pieces that feel right in an Australian setting. Start with the vintage Volkswagen memorabilia collection and see what catches your eye.


If the Type 3 has you daydreaming about a clean shelf display, a gift for a VW mate, or a coastal-themed room with a proper air-cooled touch, have a look at Volkswagen Memorabilia. You'll find licensed Volkswagen diecast models, Kombi and Beetle favourites, and home décor pieces that suit Australian collectors who want the authentic thing, with local-friendly service and fast shipping.

Seashells for Crafts: A Complete Australian Guide

I picked up a pocket of shells off a NSW beach once, tipped them onto the kitchen bench, and most of them sat there for months in a jam jar. The good ones were already telling me what they wanted to become, a little dish here, a framed piece there, and the rest were just waiting for proper cleaning and a decent glue.

Seashells for crafts work because they've got history, texture, and that easy coastal look that never seems to go out of style. In Australia, they also sit in a bigger story of shell waste being turned into value, with around 8 million tonnes of waste seafood shells generated worldwide each year designwanted.com, and Australia's seafood-processing sector contributing to that broader shell stream. That's why a handful of shells can feel like more than holiday leftovers. They're a material worth sorting, washing, and using.

Once you start treating shells that way, the choices get more practical. A clean cowrie can suit a small coastal décor project, flatter a VW-inspired beach-house shelf, or sit comfortably beside a gold-toned accent like this shell necklace gold. A thin, chipped shell may still work in a mosaic or children's craft, while a brittle or crumbly one is better left out of the box. The trick is to read each shell for what it can safely handle, then match it to the right finish, glue, and place in the room.

Why Seashells Are Worth a Second Look

A few summers back, I came home with a tote full of shells and thought I'd hit the jackpot. By the time I'd rinsed the sand off, half of them were clearly just filler, a few were keepers, and a couple were right for a small piece on the mantel. That is the shift with seashells for crafts, once you stop treating them like souvenirs and start seeing them as a proper material, the whole pile becomes useful.

Shells have always been more than decoration

Shell work has a long place in coastal making, from ornament to trade to ceremonial objects. In the broader Indian Ocean context, shells also carried exchange value, and cowrie shells were used as money in parts of Asia and the Pacific, including India until about the 1830s and still in Papua New Guinea handicrafts.nic.in. That history gives shell craft a depth that plain decorative materials just don't have.

For Australian makers, that matters because shell pieces sit naturally in coastal décor, handmade souvenirs, and kids' projects that already feel familiar in beach towns. Mixed shell craft packs still have a place in home décor and beach-themed events, and the work reads well in a room with a VW-inspired beach-house feel, where simple textures, pale timber, and retro seaside colours do a lot of the heavy lifting.

Practical rule: if a shell has shape, texture, and a clean surface, it's probably useful even if it's chipped or small.

There is another reason shells deserve a second look. They often start as a low-cost or waste-stream input, not a newly manufactured one designwanted.com. That makes them a smart choice for people who want that beach-house look without filling the craft room with synthetic bits.

Picking the Right Shells for Each Project

The easiest way to sort a shell pile is by shape, not by species. Once you start doing that, the whole bench makes sense fast, and you stop forcing a shell into a project it was never built for. That's especially helpful if you're buying pre-packed mixes or raiding the jar from old holidays.

Match the shell to the job

Large statement shells, like scallops or broad clams, suit ring dishes, framed feature pieces, and mirror borders. Their wide curves give you a natural focal point. Mid-sized gastropods, such as whelks or conch-style spirals, work well when you want height, movement, or a strong centre in a wall piece.

Small bivalves and tiny scallops are the workhorses for mosaics. They fill gaps cleanly and let you build a dense, layered surface without making the whole piece look bulky. Tiny filler shells are the last useful group, because they tuck into corners, edge lines, and background texture where a bigger shell would look clumsy.

If the shell already has a strong profile, let it lead. If it's plain but clean, use it as structure or filler.

Flat sand dollars and thin slices are handy for jewellery-style pieces and lighter decorative panels, where weight matters and you want a flatter finish. Broken or chipped shells aren't rubbish either. They're often perfect for inner borders, layered backgrounds, or any project where only the face of the shell will be seen.

For buying, the main thing is to look for mixed packs with a useful spread of sizes and shapes. Heavily dyed shells can look loud at first but often date quickly, and overtreated shells tend to lose the natural texture that gives shell craft its appeal. If you want a simple starting point for a wearable coastal accent, a piece like this shell necklace in gold shows how a shell shape can sit neatly in a finished design without needing much extra fuss.

Ethically, the rule is straightforward, leave live molluscs where they are and don't bring in shells that could breach Australian biosecurity rules. A good shell collection starts with dead, clean, legally sourced material and a bit of patience, not a bucket of questionable beach finds.

Cleaning and Preparing Shells the Safe Way

An infographic showing four steps to clean seashells using brushing, soaking in bleach, rinsing, and air-drying.

The best shell projects usually begin with boring work. If you skip the prep, the glue gives out later, the shell smells off, or the finish looks patchy, so a clean start is worth the effort.

Use a staged clean, not a rushed soak

Start by dry-brushing off loose sand, salt, and bits of organic debris. A stiff nylon brush or a soft brush is the right call here, because metal brushes and steel tools can scratch the surface and dull the natural sheen dsource.in. Once the loose stuff is gone, soak the shells in a 1:3 bleach-to-water solution for 2 to 4 hours, which is the NSW Department of Primary Industries approach for collected shells before they're dried fully for use craftionary.net.

That bleach soak matters because it helps lift the flaky periostracum, the outer layer on some shells, and it deals with the grime that causes lingering odours. The catch is that the soak time isn't fixed across every shell type, so look at the shell rather than setting a timer and forgetting it. Thin or fragile shells can suffer if you leave them too long.

Dry them properly before you touch glue

Rinse well after soaking, then air-dry completely on newspaper in fresh air. Goan shell-processing guidance also recommends a baking-soda soak if a shell still carries that stubborn fishy smell dsource.in. For the workbench, the big rule is simple, no residual moisture before gluing.

Practical rule: if a shell still feels cool or damp at the base, it's not ready for adhesive yet.

Keep gloves on, work in a ventilated area, and keep bleach well away from kids and pets. That sounds obvious, but it's exactly the kind of thing people rush when they're eager to start the pretty part. Once the shells are dry, they're ready for the next stage, and the finish will hold up much better.

Tools, Adhesives, and Workshop Basics

A tidy shell bench does not need a pile of gear. It needs the right kit, a steady hand, and a clear sense of what each shell can tolerate. The common mistakes are simple, using the wrong glue, forcing a heavy shell onto a weak base, or rushing the finish before the piece is ready.

Build a small kit that works

Sharp wire cutters and small pliers help if you need to trim rough edges or remove awkward bits without cracking the shell. For cleaning, keep both stiff nylon brushes and softer brushes on hand, because some shells need a firmer scrub and others only need a light touch. For most craft work, PVA suits porous bases, while cyanoacrylate or two-part epoxy works better for heavier shells or pieces that need a stronger hold dsource.in.

Clear varnish or gloss lacquer is worth keeping in the drawer too. It helps protect handled pieces and holds on to the shell's natural luster, especially on ornaments that sit in bright rooms or get picked up often dsource.in.

A small tray for sorted shells saves time as well. I sort by size, shape, and how much cleanup each one still needs, because that makes layout work far less fiddly once the glue comes out.

Pick the base to suit the weight

Shadow boxes, mirror frames, cork boards, driftwood, and small canvases all serve different purposes. A heavy layered mosaic needs a solid, flat base, while a lighter ornament can sit comfortably on driftwood or inside a shallow frame. If you are building something for an outdoor spot, use a glue that is weather-resistant rather than assuming an indoor craft adhesive will survive coastal air.

Good glue beats strong hands. If the adhesive choice is wrong, no amount of pressing fixes it.

Adhesive Best for Cure time Notes
PVA Porous bases, light filler shells Varies by product Good for indoor decorative work, not ideal for heavy shells
Cyanoacrylate Small shells, quick tack jobs Fast Handy for immediate grip, but not the best choice for large load-bearing joins
Two-part epoxy Heavy shells, layered pieces, stronger joins Varies by product Better for durability, especially when the shell has real weight

Ventilation matters with all of them, and so does keeping your bench uncluttered. Shell craft gets easier when each tool has a place and each shell type has a place too.

For styling, the same basics carry through to retro coastal rooms. A shell border on a mirror or a small art panel sits naturally beside VW-inspired coastal interiors, especially where timber, white paint, and faded blue accents already do the heavy lifting. If you want a reference point for that look, shell wall art ideas show how shells can read as decor, not souvenir clutter.

Five Shell Projects from Easy to Ambitious

A DIY project featuring a seashell-decorated candle jar, a beach-themed framed art piece, and a shell-encrusted mirror.

A shell project should feel like a tidy win, not a weekend spent fixing mistakes. Start with something small, then work up once you can see how the shells sit, how much glue they need, and how the finish behaves. That order saves frustration, especially if you are sorting through beach finds from around the Australian coast and deciding what is worth the bench time.

Start simple, then layer up

A beach-jar candle holder is the easiest place to begin. Use a clean jar, a little PVA, and small filler shells around the base or neck, then keep the arrangement open so the glass still shows through. It is a low-risk way to test colour, spacing, and shell size before you commit to anything larger.

A framed coastal mosaic comes next. Lay the shells out dry first, work from the largest shells to the smallest, and give the standout pieces room so the frame does not feel cramped. If you are using grout, clean the excess off carefully with a damp sponge and let the work dry fully before handling housemixblog.com.

Move into mirrors and wall pieces

A shell-framed mirror works best when you use stronger shells for the outer rhythm and smaller shells to close the gaps. Border shells such as Turritella give a neat edge and stop the frame from looking ragged. A setup like shell wind chimes also suits this kind of shell choice, because the hanging parts need pieces that look good and hold up to movement.

A hanging wall piece on driftwood suits shells with mixed sizes, because the wood already gives you a natural line to follow. A more ambitious shadow-box seascape lets you build depth, so fix the larger base shells first, then tuck smaller shells into the spaces between them to improve coverage and visual density. The strongest shell-art layouts start with a plan, not with glue on the fingers handicrafts.nic.in.

Here is a short bench reminder before you start one of these pieces:

  • Lay everything out first: Dry-fitting saves time and keeps the design balanced.
  • Keep shells dry: Moist shells are the usual reason glue slips later.
  • Avoid opaque paint: Heavy paint hides the shell texture that makes the piece appealing.

If a shell lifts, do not panic. Re-clean the spot, dry it fully, and bond it again with the right adhesive instead of piling on more glue. Cloudy sealants usually come from over-application, and mould on outdoor pieces usually means water got trapped in the finish somewhere along the way.

Styling Shell Crafts at Home and Storing Them Well

A coastal-themed living room wall featuring a large seashell-covered frame and a matching shell vase.

Shell pieces come alive when they're given room to breathe. They sit beautifully with pale timbers, white-washed frames, linen, rattan, and that relaxed beach-house palette many people already use in retro-inspired rooms and VW-friendly interiors.

Make shells feel styled, not scattered

Group finished pieces in odd numbers, because a trio or a cluster of five usually looks more settled than a straight row. Mix shells with driftwood, woven textures, and matte ceramics, then let one material lead so the shelf doesn't turn into a souvenir shop. If you love the softer coastal look, a shell frame beside a simple surf-print or vintage van print can feel right at home without shouting for attention.

That's also why shell work pairs so neatly with beachy, retro styling. The shape language is relaxed, a bit nostalgic, and never too polished. If you want to see that mood in ready-made form, a coastal accent such as shell wall art can sit beside handmade pieces and keep the whole room coherent.

Store the finished work properly

Keep shell crafts out of harsh direct sunlight, because strong light can age finishes and fade surrounding décor. Dust them with a soft brush rather than a wet cloth, especially if the shell has a gloss finish or delicate glued edges. For unused shells, breathable boxes are better than sealed containers, because trapped moisture can make them go musty over time.

Good storage is part of the craft. If the shells stay dry and clean, the next project starts easier.

A finished shell piece doesn't need much fuss, just a steady spot and a bit of respect. That's the whole charm of shell craft, really. It brings the beach indoors without turning the room into a theme park.


If you're after more coastal styling ideas, ready-made accents, or Volkswagen-inspired pieces to sit alongside your handmade shell work, have a look at Volkswagen Memorabilia. It's a handy place to find decor and collectables that suit the same relaxed, beachy mood, with plenty of options for thoughtful gifts and display ideas.

Vintage vs Retro: A Collector’s Guide for VW Fans

A bloke at a Byron Bay Cars and Coffee once held up a faded Kombi diecast, grinned, and asked if it was vintage or just “properly retro”. The answer mattered more than he expected, because one label pointed to age and originality, while the other pointed to style, and that difference changes how VW fans buy, price, and display their gear.

Criterion Vintage Retro
What it is An original item from a past era A newer item designed to look like an earlier era
Main value Age, originality, provenance Style, nostalgia, display appeal
VW example Original Kombi accessory from the era New Flower Power print or modern diecast with surf styling

A Sunny Morning and a Tricky Question

The tradie with the Eski, the bloke in the terry-towelling shirt, and the couple unloading a pair of folding chairs all stopped at the same blanket of model cars. One Beetle had period paint and honest wear, while another looked like it had rolled straight out of a surf poster. People nodded at both, then got tangled up in the same question, because VW culture loves nostalgia, but nostalgia isn't always the same thing as original history.

A scenic beachside gathering of vintage Volkswagen buses and a decorated flower-patterned Beetle with model cars.

That's where collectors get caught out. A genuine period Kombi accessory, a diecast Beetle from an earlier era, and a brand-new surfy wall print can all sit happily in the same display, but they don't belong to the same category. Australian guidance commonly uses the 20-year mark for vintage, while retro stays a style label rather than an age bracket, and that distinction matters when you're deciding what belongs in the cabinet and what belongs in the beach house.

Practical rule: if the item was made in the era it celebrates, think vintage. If it was made later to evoke that era, think retro.

For VW fans, that one split changes everything. It affects whether a Kombi badge feels like a survivor, whether a Beetle print feels like a wink, and whether a gift buyer is paying for history or for vibe.
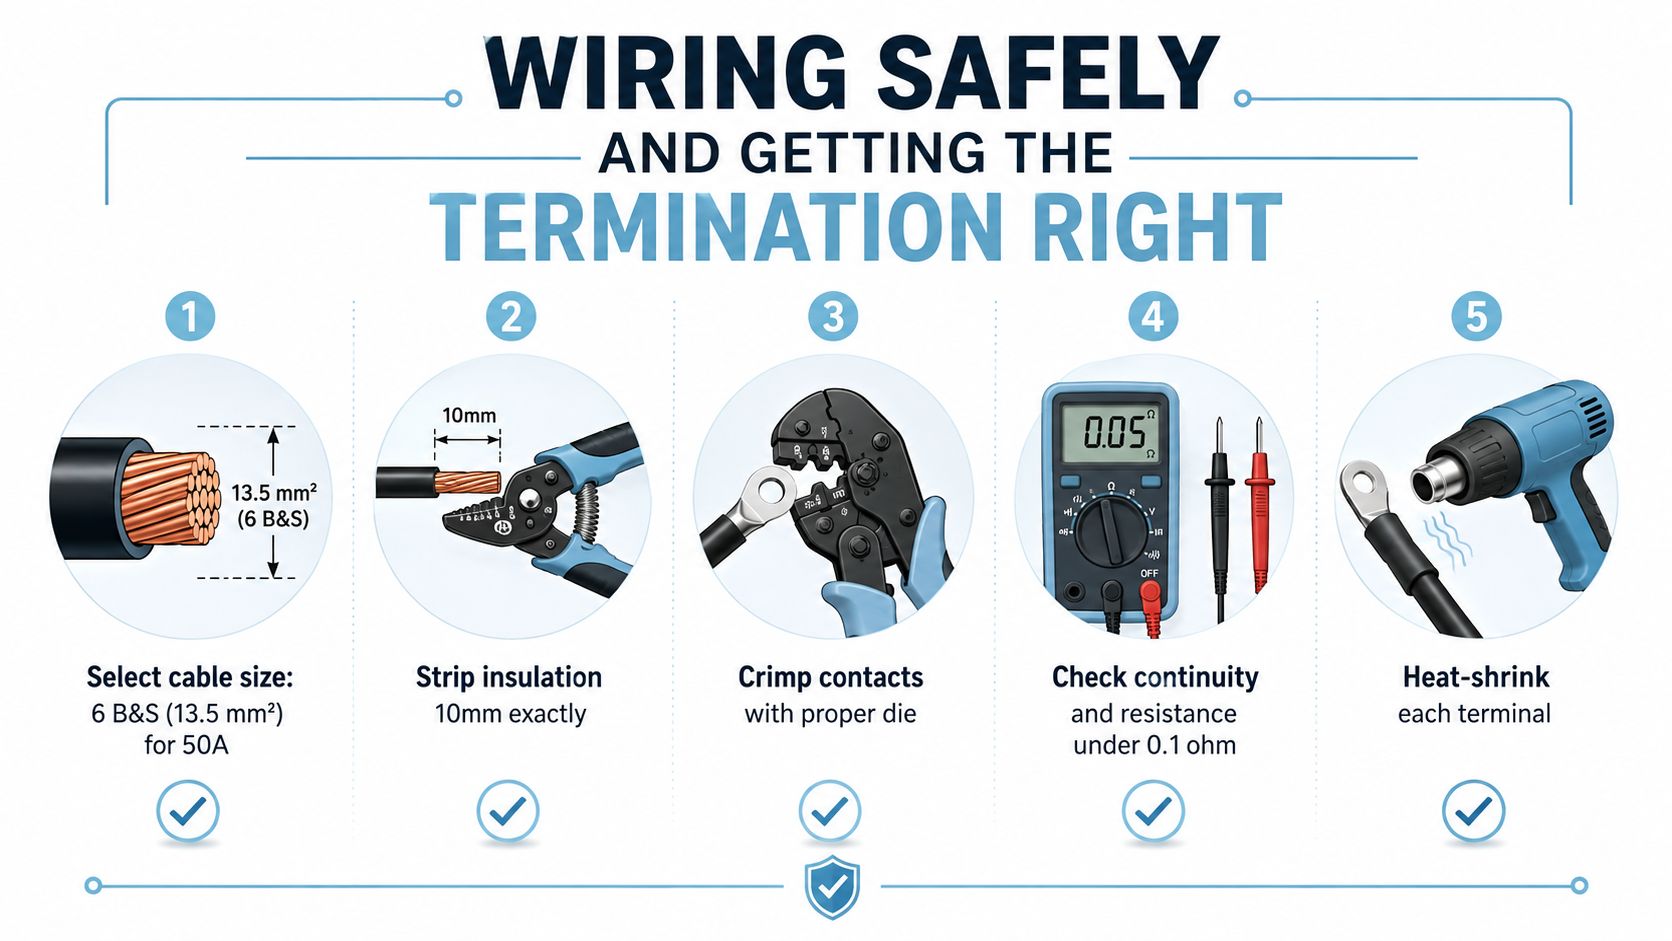
What Vintage and Retro Actually Mean

An infographic illustrating the difference between authentic vintage items and modern objects created in a retro style.

A useful shortcut is simple. Vintage means an original item from a past era, while retro means something new made to look old. Australian style guidance commonly treats vintage as starting around 20 years old, and one local source places the broader vintage band at roughly 20 to 80 years ago, with 80 years and beyond usually moving into antique territory difference between antique, vintage and retro, vintage versus retro guidance in Australia.

The age line that collectors actually use

That age line changes the way people talk at a swap meet. A 2000s VW accessory can already fit many experts' idea of vintage if it's old enough and era-authentic, while a brand-new reproduction can still be retro even if it copies a 1950s to 1980s look retro styling guidance. An antique is the clearer category still, usually meaning 100 years or more difference between antique, vintage and retro.

The other thing to keep straight is intent. Vintage items are survivors from the period they represent, with their own materials, marks, and wear. Retro items borrow the look, which is why a freshly made Kombi print can nail the mood of an old surf shack without pretending it's lived through the era itself.

A 1970s Kombi clock on original trim is a vintage object. A new Samba Bus diecast with Flower Power graphics is retro, even if it looks like it belongs on a postcard from 1974.

Vintage vs Retro Across the Things Collectors Care About

Criterion Vintage Retro
Age and era Made in the earlier period it represents Made recently, styled to echo an earlier period
Authenticity Original survivor, era-correct Inspired by the era, but not from it
Materials and condition Original materials, patina, wear, and ageing matter Modern materials, often cleaner and more uniform
Price and rarity Often tied to originality, provenance, and scarcity Usually priced for design appeal and current demand

A collector at a market stall is really asking four questions at once. Was it made in the right era? Does it carry genuine marks of age? Has anything important been swapped out? And does the asking price reflect the item's real place in the vintage or retro spectrum?

Why the same VW look can live in two different worlds

A Beetle model with original packaging from decades ago sits in a different lane from a newly produced model that copies the same curves. One is attractive because it is part of history, the other because it celebrates history in a neat, display-friendly way. The same applies to Kombi signage, wall art, and fridge magnets, which is why buyers should separate era value from visual appeal.

For deeper background on the car heritage itself, the Volkswagen logo history piece is a handy companion when you're tracing how the brand's identity has been carried across generations.

If you collect for the story, vintage usually wins. If you collect for the look and the ease of display, retro is often the smarter buy.

Volkswagen Examples You Can Actually Picture

A 1967 Beetle in original paint tells a different story from a modern Beetle-themed print hanging above a sofa. The car is vintage because it's an authentic survivor from its own era, while the print is retro because it borrows the mood without being part of that time. That difference is why enthusiasts at Volksfest or VW Nationals tend to talk about authenticity with one voice and styling with another.

A diagram comparing vintage and retro Volkswagen cars, posters, and models with a central company logo.

A 1970s metal Kombi sign is also a vintage object if it dates from that period and carries the right signs of age. A new surf-themed wall print with the same beach palette is retro, even if it fits the room beautifully. Then there's the collectible middle ground, the diecast model of an old Bus, which is a modern object, but the thing it depicts may be vintage in spirit.

When reproduction gets clever

Some pieces blur the line on purpose. A reproduction built with period-correct materials and a careful eye for detail can feel more convincing than a cheap old original that's been battered beyond recognition. That doesn't make it vintage, though, because the category still rests on when it was made, not just how convincingly it looks.

A brand-new Flower Power Kombi replica is a perfect example of retro done well. It can look right on a shelf, sit comfortably beside a coffee machine, and still be unmistakably modern. That's not a knock on it, either, because retro often gives people the joyful colour and surf culture energy they want without the fragility of genuine period pieces.

Buying and Authentication Tips for Aussie Collectors

An infographic titled Tips for Aussie Collectors detailing four steps for authenticating and buying vintage items.

The first thing to check is provenance. Ask where the item came from, whether it has receipts, old photos, or family history, and whether the seller can explain how its age was established. If the story changes every time you ask, that's a warning sign.

What to inspect before you hand over the cash

  • Check for original markings: Look for maker's marks, date stamps, part numbers, or packaging details that match the claimed era.
  • Study the surfaces: Original paint, patina, and material ageing can support a vintage claim, while overly fresh finishes may point to a reproduction.
  • Read the listing carefully: Vague words like “old-style” or “classic look” often mean retro, not vintage.
  • Buy from a local importer when possible: Australian stock usually means easier support, quicker delivery, and less drama if something turns up wrong.
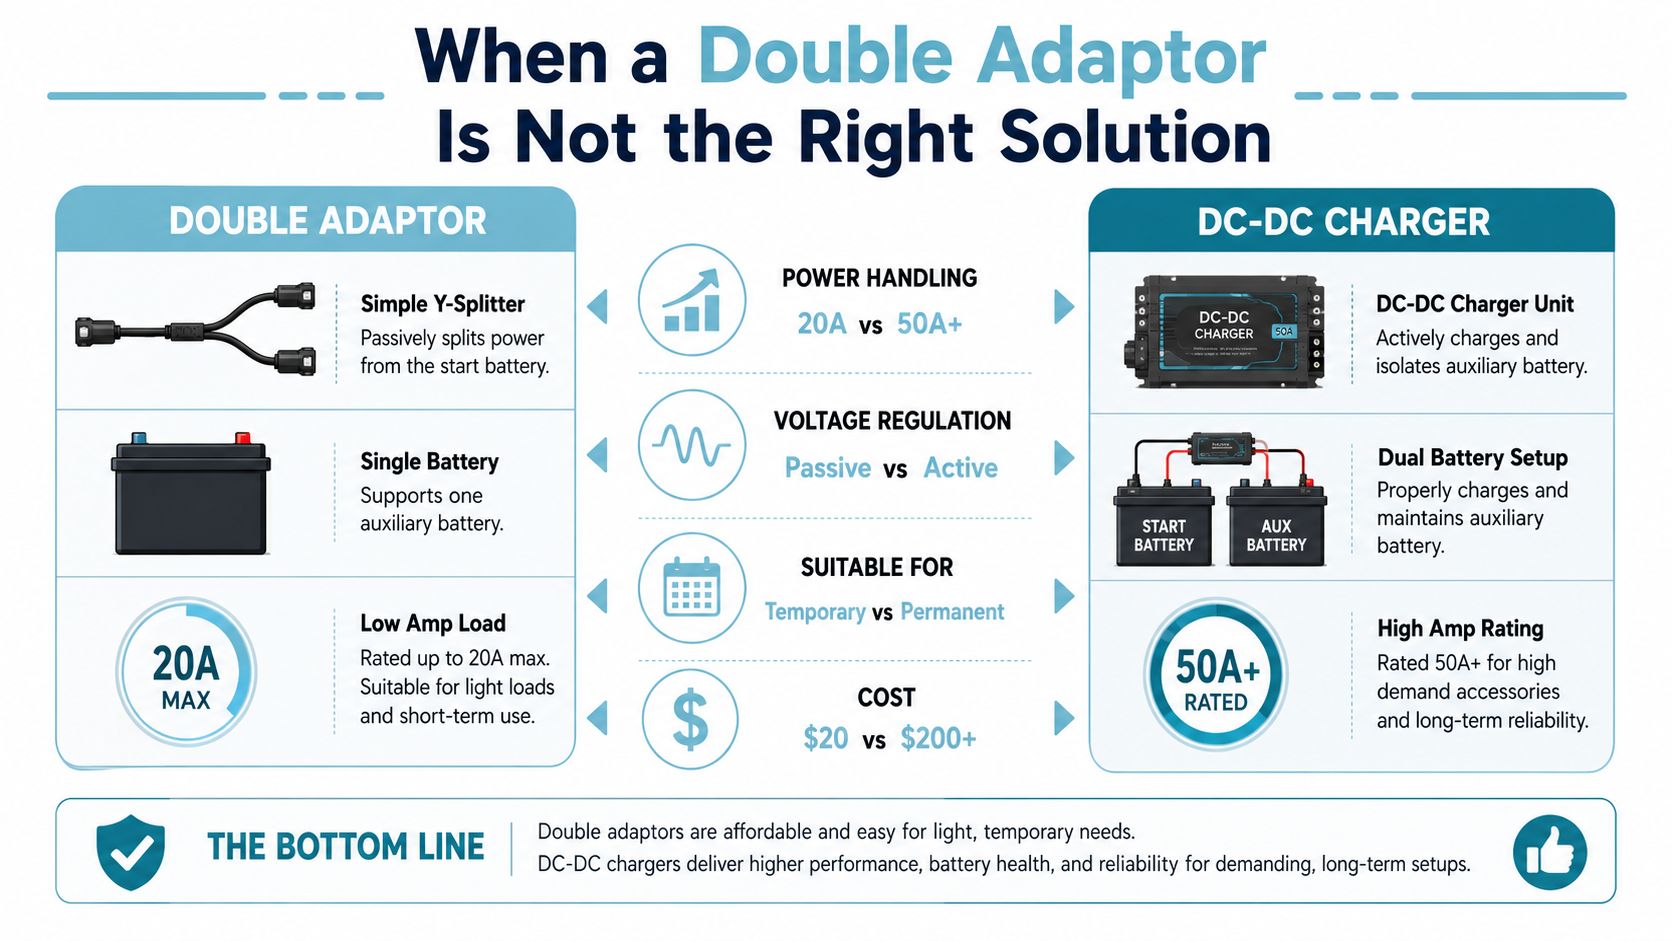
Why licensed models deserve close attention

On diecast, licensing and branding matter. A properly licensed model is much easier to trust as a collector's piece than an unbranded imitation that just happens to resemble a VW shape. Packaging, inserts, and inner-box details can tell you a lot about quality, especially when you're choosing a VW Kombi diecast Australia buyers can confidently display or gift.
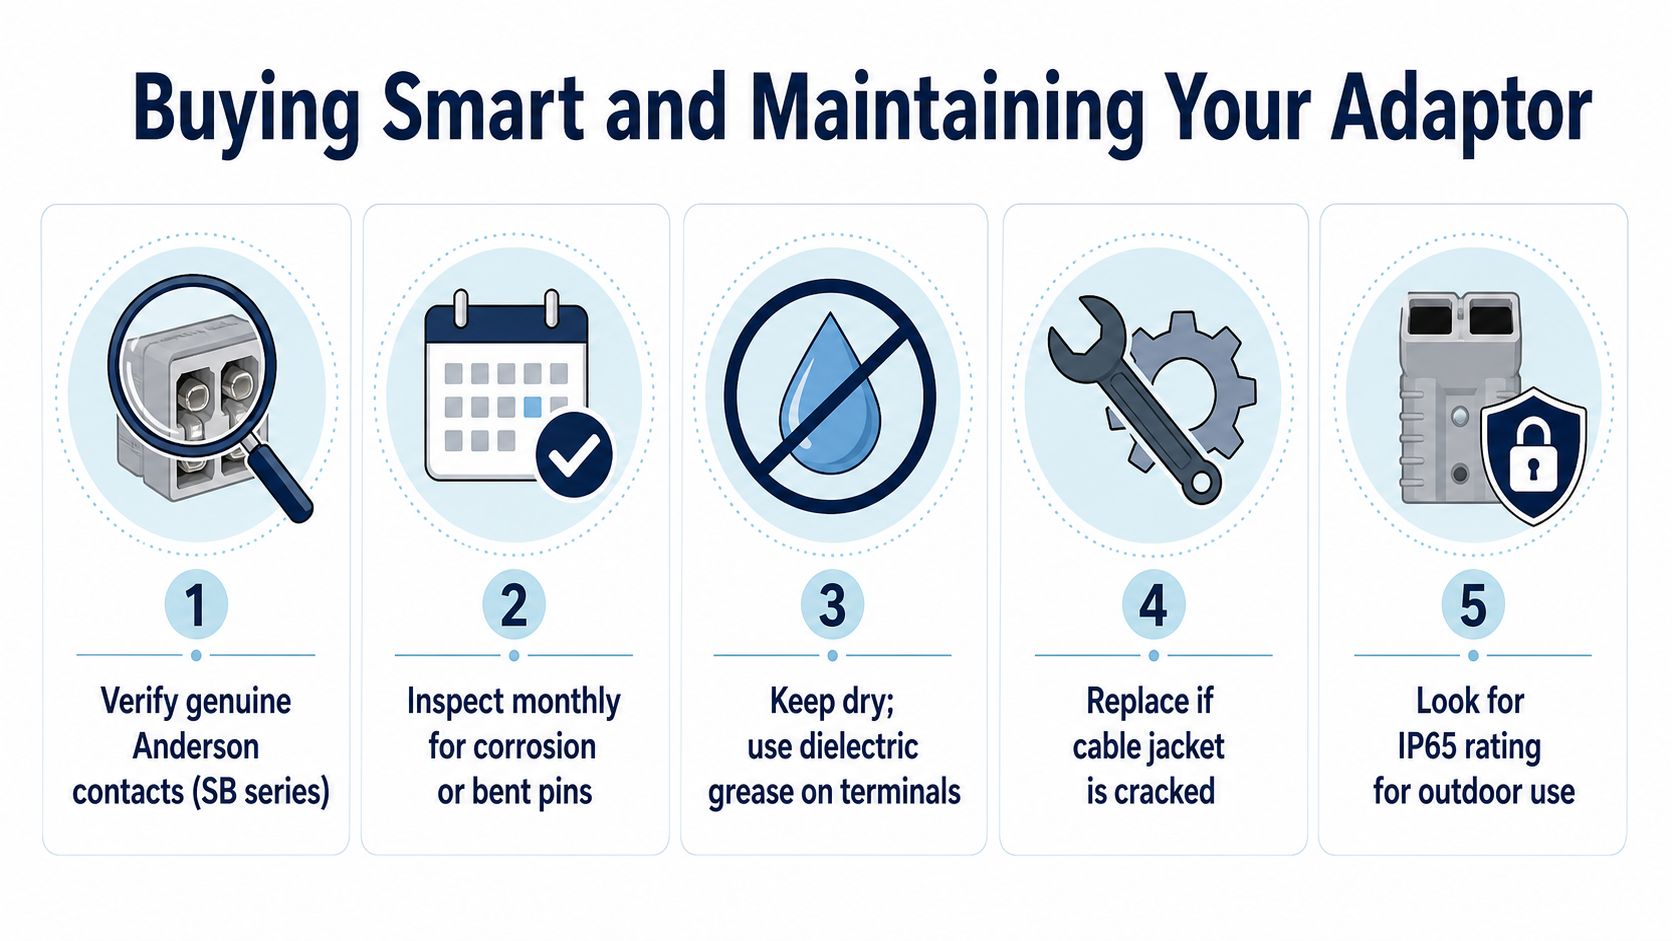
For readers who want a broader collecting reference, the vintage Volkswagen memorabilia page is useful for seeing how era-correct pieces sit alongside modern reproductions.

If the seller can't tell you who made it, when it was made, or why it's priced the way it is, walk away and keep your flat white.

Styling Coastal and Retro Spaces with VW Memorabilia

A beach house doesn't need a museum feel, and that's where the vintage versus retro mix gets fun. A vintage Kombi sign or period petroliana piece can carry the room as a hero item, while retro diecast models, surfy van décor, and Flower Power prints soften the edges and keep things playful. The result feels collected, not staged.

Think in layers. Put one original piece with character on a wall, then build around it with newer items that echo the colour palette, whether that's faded aqua, cream, mustard, or soft red. That way the room still feels relaxed, and the old object gets space to breathe instead of being crowded by a dozen smaller bits.

For more relaxed styling ideas, the coastal home décor ideas page is a good starting point.

A simple room formula

  • Hero piece: one vintage VW item with genuine age or provenance.
  • Support pieces: retro prints, models, and small décor items in matching tones.
  • Finish: natural timber, white walls, and a few varied heights so the display feels casual.

That mix works because it mirrors the way enthusiasts live with their collections. A shelf of diecast Kombis on one side, a weathered sign on the other, and a couple of beachy accents in between can make a room feel like summer without tipping into theme-park territory.

Choosing What Suits You and Answers Worth Knowing

If you want history, chase vintage. If you want style, lean retro. That's the cleanest rule, and it holds up whether you're buying a Kombi accessory, a Beetle model, or a gift for someone who lights up at the sight of a split-window Bus.

Collectors who care about originality, provenance, and long-term satisfaction should prioritise vintage when the budget and the market make sense. A genuine survivor carries the sort of presence that a replica can't fake, and that's the appeal for people who love the story behind the object as much as the object itself. Decorators and gift buyers, on the other hand, often get more joy from quality retro pieces because they bring the VW mood home without needing conservation-level care.

A few common questions always come up at this point. Does vintage always cost more? Not always, because condition, rarity, and provenance matter, but original pieces often carry a stronger collector premium than newer reproductions. How do I spot licensed diecast? Look for branding, packaging quality, and clear maker details, because proper licensing usually leaves a trail. What suits a first-time buyer? A well-made retro piece is often the easiest win, since it gives you the look, the fun, and the flexibility to display it anywhere.

For Australian VW fans, the sweet spot is often a mix of both. Use vintage as the anchor, then add retro pieces that keep the space friendly, colourful, and easy to live with. That balance lets a collection feel personal instead of precious, which is exactly how a good Sunday morning at a car meet should feel.


If you're ready to turn the theory into a shelf, a wall, or a gift that'll get a proper grin, have a browse through Volkswagen Memorabilia. You'll find VW diecast, coastal décor, and gift ideas that suit both the vintage purist and the retro-loving Kombi tragic, all in one easy place.

White Home Accessories: Styling Tips for 2026

You're standing in a bright Aussie room, probably with a shelf that already carries a diecast Kombi, a surf photo, and one or two bits you've moved around ten times because the balance still feels off. The fix is often simpler than another big buy. White home accessories can calm the scene, give your favourite VW pieces room to breathe, and make a coastal setup feel intentional instead of crowded.

That's the bit many overlook. White isn't just “safe”, it can act like the quiet mate at a car show who somehow keeps every conversation flowing, especially when your display mixes retro motoring, sand, timber, and a bit of nostalgia. In Australia, white still has staying power when it's used with intention, and it works best as a stable base rather than a default everywhere Abbey Hall Interiors.

The same goes for home styling more broadly. Australian households have grown over the long run, with the ABS reporting 10,944,300 households in 2021, up from 8,312,000 in 1991 Fortune Business Insights, and the home improvement market in Australia was projected at US$29.88 billion in 2025, rising to US$34.17 billion by 2030 at a 2.73% CAGR Mordor Intelligence. That backdrop helps explain why decorative pieces keep getting refreshed, especially the movable ones that let a room evolve without a full renovation.

Setting the Scene With White Accessories and a Classic Kombi

A white shelf in a sunlit lounge can do a lot of heavy lifting. Put a 1962 Kombi Samba Bus diecast, a rattan vase, and a black-and-white surf print together, and the room suddenly feels like coastal Australia met a Sunday swap meet in the best possible way. The white background doesn't compete with the model, it gives the little van its own patch of stage.

A miniature red and white Volkswagen van sits on a white shelf next to a wicker vase.

That's why white home accessories work so well in VW-inspired spaces. They keep the look light, and they let the details people care about, like a diecast roof rack, a surf decal, or a patina-coloured tin sign, stay in focus instead of disappearing into visual clutter. A white frame, a ceramic bowl, or a simple candle holder can act like the missing last piece in a display that already has personality.

Home decoration items with a coastal VW feel fit this approach because they're easy to shift around as the room changes. You can move a frame from the shelf to the hallway, swap a vase from the console to the coffee table, or bring in a seasonal accent without rethinking the whole room.

Practical rule: if the hero piece is bold, the surrounding white should be calm. That's how you make the display feel curated instead of busy.

A good white scheme doesn't shout. It gives your Kombi, Beetle, or surf memorabilia enough space to feel like the collector's pieces they are.

What White Home Accessories Actually Do in a Room

White pieces work best when you treat them as visual rest stops. If a green Kombi, timber shelf, and framed photo are all asking for attention at once, a white vase or tray gives the eye somewhere to pause. That pause matters because decorative objects are meant to be moved, replaced, and rearranged, which is exactly why accessories are such a flexible part of interior styling Home Accessories.

Start with balance, then add rhythm

One white object can soften a shelf. Three white objects, spaced well, can create rhythm. That's the point of repetition, not sameness, but a pattern the eye can follow without effort.

A simple setup might look like this. Place a white ceramic bowl on one end of a sideboard, a white photo frame in the middle, and a white lamp on the other end. The objects don't need to match perfectly, they just need to repeat the colour in a way that feels deliberate.

White works best when it connects the pieces you already love.

Why white feels so useful in Australian light

Australian daylight can be bright and unforgiving, especially in open-plan rooms and coastal homes. White surfaces help a room feel lighter, but they also need surrounding texture so the scheme doesn't go flat. White is described as a cornerstone colour when it's used with intention, which is a strong way of saying it's reliable, not boring Abbey Hall Interiors.

An infographic titled The Role of White Home Accessories showing how they provide balance, prevent clutter, and highlight key pieces.

When white is doing its job, you notice the room feels easier to read. The Kombi still stands out. The shelf still feels tidy. The whole setup just looks like it belongs together.

The Four Categories Worth Collecting First

At a sunny car show, the easiest displays to admire are the ones that already know where to stand. A white vase beside a diecast Kombi, a framed surf photo on a timber shelf, and a soft textile under a metal accent can make a room feel collected without looking overworked. That same approach suits white home accessories at home, because the pieces stay easy to move, swap, and live with as the season changes.

The four categories below do the heavy lifting first.

Vases and vessels

A white vase is one of the cleanest ways to calm a shelf next to a diecast Volkswagen model. A tall vessel suits dried banksia, a squat ceramic piece works on a coffee table, and a textured form gives a room with smooth surfaces a bit more grip. White stoneware and ceramic are especially handy because they carry enough presence to be noticed, but they do not crowd out the model beside them.

Photo frames

Frames are the quiet achievers in a VW-friendly room. A slim white frame around a vintage VW poster, a surf photo, or a family holiday snapshot brings shape to a wall or shelf without making the display feel stiff. In a lounge with timber furniture, that white border can tidy the whole scene and let the memories, and the models, stay in focus.

Textiles

Cushions, throws, and table runners bring softness in a hurry. A white cushion with texture feels different from a flat white cushion, and that difference matters when metal models or glossy décor are already doing the visual talking. Textiles also make it easier to shift a room from relaxed summer styling to a slightly warmer winter look without replacing the whole setup.

Metal décor

A small white-and-metal accent can lift a quiet corner without stealing the show. Candle holders, trays, and framed pieces with silver or gold detail add polish near reflective surfaces or pale walls, especially when the rest of the room is already carrying a lot of white. If you want one compact accent that sits neatly on a shelf with retro pieces, white candle holders are a smart place to start.

Buyer's eye: choose pieces that feel easy to move, not precious to the point that you never touch them.

A good collection builds in layers. Start with one vase, one frame, one textile, and one metallic accent, then let the room show you what it needs next.

Choosing Materials and Finishes That Hold Up

Not every white finish behaves the same way. A glossy ceramic vase catches light differently from matte stoneware, and a woven cotton cushion brings a completely different mood from a polished metal tray. If your room gets strong daylight, the finish matters as much as the colour.

A chart illustrating the durability and characteristics of various white home materials like ceramic, glass, and wood.

Compare the finish, not just the shade

Ceramic feels crisp and sturdy, which makes it a strong choice for shelves and sideboards. Glass reads lighter and more delicate, so it's best where you want airiness more than visual weight. Matte stoneware has a calmer, earthier feel, which suits beachy interiors and doesn't demand attention every second.

Polished metal is the high-shine option, and it's the one that instantly sharpens a display. Woven cotton and bleached timber do something else entirely. They soften the whole room and keep white from feeling clinical.

Material Best use Visual effect
Ceramic Vases, bowls, candle holders Clean and grounded
Glass Small decorative vessels Light and airy
Matte stoneware Sculptural decor Soft and earthy
Polished metal Trays, frames, accents Bright and reflective
Woven cotton Cushions, throws Relaxed and tactile
Bleached timber Bowls, small objects Natural and weathered

The practical decorating rule is to layer different textures so the room does not feel cold or flat, with metal accents such as silver, copper and gold used to lift an all-white room Laurel Harrison. That advice matters more in Australia, where strong light can make flat surfaces look even flatter.

A textured white room feels finished. A smooth white room often feels unfinished, even if the colour choice is right.

Styling Tips for Coastal and Retro VW Interiors

A white accessory can look perfect in the shop and wrong at home if it's the wrong scale. Australian-style decor guidance emphasises choosing accessories that repeat the room's existing colours and fit the scale of surrounding furniture, because overscaled white objects can dominate a space while undersized pieces vanish against pale walls and flooring Stone Gable Blog. That rule matters just as much for a Kombi display as it does for a lounge.

Use the shelf like a small stage

Start with the largest object first. If the diecast Kombi is the hero, give it some breathing room on both sides, then build around it with one taller white piece and one lower white piece. That change in height keeps the eye moving and stops the shelf from looking like a straight line of objects.

A few practical moves help:

  • Repeat the room colour: if the room already leans white, sand, and timber, keep the accessories in that family so the display feels coherent.
  • Leave gaps: a little open space around the model makes the piece look more deliberate.
  • Mix heights: pair a low tray with a medium vase and a taller frame or lamp.
  • Avoid wall-to-wall clustering: too many white pieces in one corner can make the rest of the room feel unbalanced.

White ceramics work especially well near VW memorabilia because they echo the clean curves of the cars without copying them. A Beetle poster, a shell dish, and a white frame can sit together without looking themed in a heavy-handed way.

If you want a small accent that fits the same idea, white candle holders can anchor a console or dining table without stealing the show.

Visual trick: if everything is lined up at the same height, the display goes flat. Let one piece rise, one stay low, and one sit in between.

That simple variation gives a shelf the kind of easy rhythm you see at a good car meet, where no two builds are exactly the same but the whole lineup still makes sense.

Caring for White Pieces in Australian Sun and Sea Air

White looks clean for about five minutes in a coastal home if you ignore the sun and dust. UV exposure, airborne salt, and everyday wear can dull pale finishes quickly, and that's exactly the maintenance question a lot of white decor content skips over Houzz Australia. If you want the pieces to keep their brightness, you've got to choose and care for them with a bit of intent.

Match the material to the spot

Put wipe-clean ceramics and glass in brighter, busier areas. They're easier to freshen up after dust, fingerprints, or the odd splash. Keep textiles away from direct sun if you can, especially cushions that sit close to a window, because pale fabric can look tired faster in a bright room.

Metal frames and accents need a different approach. They usually look best with a gentle polish and a soft cloth rather than aggressive cleaners. Woven pieces and timber accents are more forgiving in a relaxed room, but they still benefit from being rotated now and then so one side isn't doing all the work.

Keep the routine simple

A quick weekly wipe is better than a big rescue clean later. Check window-adjacent pieces for fading, move fragile objects out of direct sun if the room gets harsh afternoon light, and refresh textiles before they start looking dusty rather than soft.

A small care routine protects the look you've built. It also makes white feel more liveable, which is the whole point. You want a room that looks collected, not a showroom that no one can relax in.

Vintage home accessories care is worth thinking about for the same reason. A little maintenance keeps the display from losing its edge.

Seasonal Styling and Where to Shop Next

White accessories earn their keep when the seasons change. At Christmas, they let greenery, baubles, and warm lights do the talking. In summer, they keep the room feeling breezy. In cooler months, they stop heavier colours from making the whole space feel closed in.

A visual guide showing how to style white home accessories across Christmas, Spring, Summer, and Autumn seasons.

A simple seasonal swap can be enough. Change a cushion cover, swap a vase insert, or move a white tray from the coffee table to the hallway console. White gives you that flexibility because it sits under whatever else you want to celebrate.

For VW lovers, that flexibility is handy. A Kombi diecast, a Beetle model, and a few white coastal accents can carry a room through Christmas lunch, a summer BBQ, and a quiet winter evening without needing a full restyle. That's the charm of a good neutral, it keeps the nostalgia front and centre.

If you're ready to build a display that feels more like a classic Aussie beach house than a cluttered souvenir shelf, take a look at Volkswagen Memorabilia. You'll find VW diecast models, white decor, and coastal pieces that suit collectors who want local stock, friendly weekday support, and a style that feels right at home in Australia.


Volkswagen Memorabilia brings together licensed Volkswagen diecast models, coastal home accents, and gift ideas that suit real Australian living. If you're ready to add a Kombi, a Beetle, or a white decorative piece that gives your display a cleaner finish, visit Volkswagen Memorabilia and pick the pieces that make your shelf, console, or gift list feel spot on.

Shadow Box Shelves for Your VW Model Collection

You've got a Beetle on one shelf, a Kombi on the TV unit, and a Samba Bus still sitting in its box because you haven't found the right home for it yet. That's the usual sign the collection's grown past casual storage and needs a proper display with a bit of theatre. Shadow box shelves solve that problem neatly, because they give your models depth, protection, and a framed stage that feels worthy of a sunny Aussie car show.

A shadow box is a display case or vitrine, a framed enclosure with a transparent front and enough depth to hold three-dimensional pieces, not just flat photos or paperwork Display case definition and use. That depth is the whole trick. A Volkswagen model, especially a chunky Kombi or a curvy Beetle, looks far better when it's presented as an object in space rather than lined up like stock on a regular shelf.

From the Mantelpiece to a Masterpiece Display

A lot of collectors start the same way. One model becomes three, then five, then a few “temporary” spots around the house turn into a scattered little museum of VW life. The trouble is that ordinary shelves don't frame the story, and a flat picture frame can't handle the physical presence of a diecast Kombi or Beetle.

A shadow box is built for that job. Independent product guidance describes shadow boxes as framed display cases made to showcase three-dimensional objects and memorabilia, which is why they work so well for a Volkswagen Beetle model or a VW Kombi diecast Australia favourite What a shadowbox frame is. The transparent front protects the model while still letting the colour, shape, and trim details breathe.

Why depth matters for VW models

The depth turns a model from a thing you own into a thing you've curated. A shallow shelf can hold a car, but a proper shadow box shelf gives the bonnet line, roof curve, mirrors, and surfy roof racks room to read cleanly from the room. That matters if you're displaying a Flower Power Kombi, a split-window Bus, or a classic Beetle in a way that tells a story.

Practical rule: if the model looks crowded from the side, the box is too shallow for the job.

For VW lovers, the payoff is visual as much as practical. You get a tidy display that feels closer to a gallery than a storage solution, and that suits the heritage of these cars. The Beetle and Kombi already carry nostalgia, so the display should lean into that rather than hide it.

A miniature sage green vintage Volkswagen Beetle toy car displayed inside a simple wooden shadow box shelf.

Planning Your Perfect VW Showcase

Before you buy timber or click through to a ready-made unit, measure the actual models you want to show off. A bigger 1:18 scale Samba Bus needs more breathing room than a tighter 1:24 scale Beetle, and the display should suit the tallest object, not the average one. That one step saves a lot of frustration later, especially when roof racks, mirrors, or surf accessories push past the line you thought you had.

Measure first, then choose the wall

Start with the collection, not the wall. Lay out the models you want together and note the widest, tallest, and deepest pieces. If you're planning a mixed display, include anything with extra thickness, such as accessories, stands, or boxed extras you want to keep nearby.

The next question is location. A wall near natural light can look brilliant, but bright sun can be harsh on finishes and plastics, especially in coastal homes. The available guidance for Australian conditions points to the same common-sense idea, treat the display as a micro-climate decision, because moisture, UV, and placement affect how long the materials stay looking sharp Material choice for Australian conditions.

A four-step infographic guide on how to plan and display a Volkswagen model car collection.

Material choices that suit Australian homes

For most collectors, the trade-off is between looks, weight, and durability. MDF can be neat and paintable, plywood can be sturdy, solid timber brings warmth, and acrylic fronts can feel lighter than glass. The right answer depends on where the display sits and whether you're building for a dry lounge room, a humid coastal space, or a brighter area that sees plenty of sun.

A sensible approach is to think like a restorer. The finish should suit the room, not just the car. If the display is going near a beachy interior, sealed timber and careful coating choices often make more sense than an unfinished craft look.

A good display starts with a place, then a size, then a finish. Reverse that order and you usually end up compromising on all three.

For model selection and display inspiration, it helps to browse a focused range of Volkswagen model cars and compare how different scales sit together: Volkswagen model cars.

Choosing Your Shadow Box Style

The biggest decision is simple. Do you buy a ready-made shadow box or build one yourself? Both paths can produce a great VW display, but they suit different people. A bought unit is quicker and usually cleaner out of the gate, while a DIY build gives you more control over depth, finish, and character.

Buying ready-made

A good pre-made unit should feel solid, square, and purposeful. Look for a strong frame, a clear front, and enough internal depth that your model doesn't press against the glazing. The source material also points to framed cases being selected first by width, height, and depth, then by back style, then by whether shelves are added later if the case is drilled for them Shadow-box supplier workflow.

That order matters. If you need multiple cars in one display, the back style becomes part of the plan, not an afterthought. A solid back suits single hero pieces, while a pegboard-style back helps when you want to wire objects in place or move them around.

Building your own

DIY makes sense if you want the box to echo the mood of the collection. A retro paint finish, a weathered timber look, or a clean painted frame can all work beautifully with VW memorabilia. The trade-off is time and accuracy. You need clean cuts, square joints, and a clear sense of what the box is meant to hold.

A custom build also lets you match the display to the actual model rather than the other way around. That's especially handy if your collection includes a taller Kombi, a low Beetle, or a mix of both. If you're building for a surf-style room, a slightly rustic finish often feels right, because it echoes the relaxed colour palette of coastal VW culture.

Building Your Own VW Shadow Box Shelf

A simple DIY build starts with a cut list, a square frame, and patience with the finish. The most useful guide from practical woodworking is to size the case first, then decide on the back, then add shelves only if the frame is drilled for them Shadow-box supplier workflow. That keeps the structure honest and avoids trying to force components into a frame that was never meant to hold them.

A woodworker assembling custom wooden shadow box shelves on a desk with various tools and supplies nearby.

Tools and materials that actually help

You don't need a full workshop to do this well, but accuracy matters. A measuring tape, saw, wood glue, painter's tape, finish nails, a square, and a level will get most hobbyists a long way. The build method documented by experienced woodworkers stresses exact cuts, taped joints, and finish nails while the glue cures, plus proper wall anchoring once the shelf is ready How to make shadow box shelves.

The build sequence that keeps the frame clean

A proven workflow is to cut the frame parts to length, dry fit everything, and make sure the corners close flush before glue ever touches the timber. One build example used 45-degree corners and cut the frame sides 1/2 inch wider than the shelves to make room for a back panel, with shelf slots placed four inches from each end Example build dimensions. Those details matter because they control whether the internal parts fit neatly and whether the display finishes square.

The practical part is not fancy, it's disciplined. Tape the joints so they don't creep, glue them carefully, and add nails only as support while the adhesive sets. A common mistake is overdriving fasteners or mis-cutting the pieces, which stops the corners closing properly How to make shadow box shelves.

Useful workshop rule: if the dry fit isn't clean, the glued version won't magically improve.

For collectors who want a display that feels more like a proper cabinet than a craft project, that clean assembly is what separates a tidy VW wall from a wobbly one. If you want a display base for a car and a few accessories, explore display cases for models.

Installation and Lighting Done Right

Mounting is where a nice-looking shelf becomes a serious display. Most DIY content spends plenty of time on the build and not enough on how to hang the finished unit safely, yet that's the part that protects the models and the wall. A loaded shadow box shelf should be treated like furniture, not just decoration, especially once metal diecast pieces and mixed memorabilia are inside.

An infographic comparing the pros and cons of installation and lighting for shadow box shelves.

Safety first on the wall

Find the studs where you can, use the right anchors where you can't, and level the shelf before you tighten anything fully. The practical advice in the source material makes the point clearly, wall anchoring and wall-type-matched hardware are essential, and the fitter should use a level rather than trusting the eye How to make shadow box shelves. That's especially true in typical Australian plasterboard walls, where the substrate matters as much as the shelf itself.

A crooked display distracts from the models, and a weak fixing can turn a prized Kombi into floor scrap. The better habit is to test the weight path before the collection goes in. If the shelf feels marginal empty, it won't improve once the cars are loaded.

Lighting that suits the models

Lighting should flatter details, not blast them. LED strips give a clean gallery feel, while small puck lights can highlight a single hero vehicle or a focused corner of the display. The point is to bring out paint, chrome, and glass without creating reflections that make the front look busy.

Secure mounting first, lighting second. If the shelf isn't solid, no amount of glow makes it better.

For a wall display that sits near living areas, discreet lighting usually works best. It keeps the silhouette clean and lets the vehicles remain the star, which is exactly what you want with a well-kept Beetle or a bright Kombi Samba Bus. If the room already has strong ambient light, use the LEDs sparingly so the display still feels relaxed rather than overdone.

Styling Your Display Like a True Enthusiast

Once the shelf is up and lit, the fun part starts. A shadow box display looks best when it tells a small story, not when it holds objects. That might mean a Flower Power Kombi with a tiny surfboard beside it, or a Beetle line-up that tracks different eras of VW design in a tidy visual rhythm.

Build a scene, not just a row

A beach-day setup works beautifully for Australian VW culture. Put the Kombi at the centre, angle a smaller model beside it, and leave a little breathing space so the eye can move across the frame. Add a shell, a miniature sign, or another understated piece from your memorabilia stash, but keep the scene restrained so the cars stay dominant.

You can also theme by memory. One shelf might hold the model that reminds you of your first Volksfest run. Another might feel more like a Kombi-and-coastline tribute, with softer colours and a relaxed layout that suits a room with surf style. For more wall-friendly pieces that echo that look, browse wall accents for the living room.

Keep the rotation fresh

Seasonal styling works well with VW displays because the models themselves carry so much personality. A Christmas touch can be as simple as a small red accent or a festive background card, then back to a clean summer look once the holidays pass. That keeps the shelf feeling alive without turning it into clutter.

The strongest displays usually have one thing in common. They reflect the owner's taste, not a generic showroom. If your collection leans toward licensed diecast Kombis, Beetles, and surfy VW pieces, let the colour palette and props nod to that heritage rather than fighting it.


Volkswagen Memorabilia has a strong range of VW-themed gifts, diecast models, and coastal décor that fits this kind of display beautifully. If you're ready to build a proper home for your VW memorabilia collectibles, visit Volkswagen Memorabilia and start turning your favourite models into a display worth showing off at the next car meet.