


You're parked up by the water in a classic Kombi. Kettle's on, side window cracked, sunset doing its best work across the paint. Then the mozzies arrive and turn the whole evening into a slap-dance. That's usually the moment people start thinking seriously about a car window fly screen.
On a modern SUV, you can get away with almost anything that's black, stretchy, and vaguely window-shaped. On a Beetle or Kombi, it's different. These cars have character. The screen needs to work, but it also needs to look right. If it flaps, scratches paint, ruins the line of the window frame, or feels like a cheap camping hack, you'll notice it every time you walk up to the car.
That's why most classic VW owners end up treating this as a small custom job rather than a simple accessory purchase. In Australia, there's no established market data for car window fly screens as a distinct product category, unlike the much better documented residential fly screen trade, which is a good sign this remains a niche, enthusiast-led solution rather than a standardised off-the-shelf fitment, as noted in this Melbourne fly screen guide.
Choosing Your Fly Screen Material and Style
A mate of mine brought a tidy bay-window Kombi to a camp weekend and fitted one of those slip-on sock screens over the door frame. It worked well enough once the van was parked. But every time the door opened, the thing shifted a touch, and by the end of the weekend it looked more “temporary bush fix” than “sorted touring setup”.
That's the trade-off. The easiest option isn't always the one that suits a classic VW.

Mesh that suits the way you use the car
For most owners, fibreglass mesh is the sensible starting point. It's easy to work with, has a soft look, and doesn't feel too harsh against older trim and painted frames. If you're building a removable screen for summer touring and weekend markets, that's often enough.
If you travel with a dog, or you've got kids leaning on the window opening, a heavier-duty pet mesh makes more sense. It's tougher, but it also looks chunkier. On a splitty or an early Beetle, that heavier weave can feel visually out of step with the car's lighter lines.
A quick way to think about it:
| Style choice | What it does well | Where it falls short |
|---|---|---|
| Fibreglass mesh | Light, tidy, easy to tension | Can sag if handled roughly |
| Heavy-duty mesh | Better for pets and harder use | Heavier look, less subtle |
| Fine dark mesh | Good outward visibility in camp use | Can look too modern on some classics |
Practical rule: If the screen is obvious from three metres away, it's probably too bulky for a Beetle.
Screen styles that actually suit old Volkswagens
You've really got three common directions.
- Slip-on sock screens work for quick camping jobs. They're easy to store and don't ask much of you. They also look the least integrated.
- Magnetic screens can be neat if the mounting is discreet. They're handy on vans that see frequent use, but cheap magnets and rough edges can mark older paint.
- Channel-fit or framed screens take more effort, yet they usually suit a classic VW best. They look intentional, sit flatter, and don't scream “universal accessory”.
For inspiration on the sort of relaxed touring setup many VW owners are chasing, even beyond the screen itself, it's worth a look at these awning fabric samples for vans. The colours and camping vibe are often the same cues people use when choosing mesh tone and trim finish.
What works visually
A classic VW rewards restraint. Soft black or charcoal mesh usually disappears better than bright grey. Slim edging beats chunky tape. If your Kombi's got a warm cream roof, polished trim, or original-style rubbers, match the screen to that mood instead of fighting it.
The best car window fly screen is the one nobody comments on until dusk, when everyone else is getting eaten alive and you're still sitting comfortably.
Nailing the Measurements for a Perfect Fit
Bad measuring ruins more fly screen projects than bad materials. The classic mistake is taking one quick width and one quick height, cutting confidently, then discovering an old VW window opening is less square than your memory.
That's especially true on cars that have had seals replaced, doors adjusted, or frames repainted over the years.
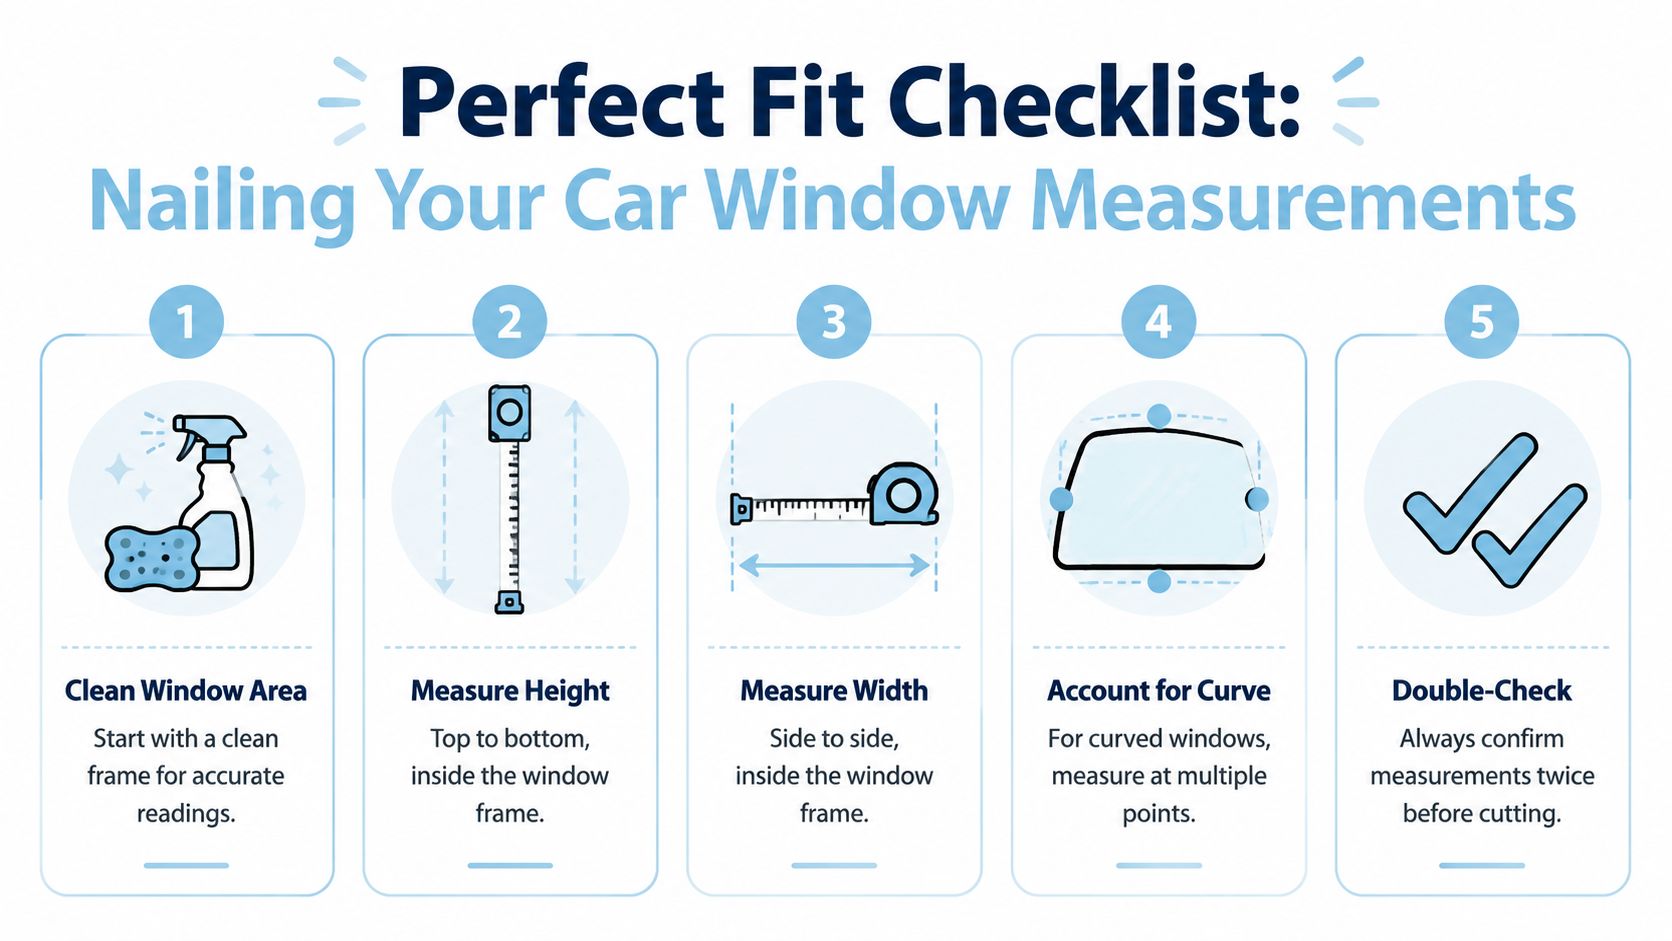
How to measure a Kombi sliding window
On a Kombi with a sliding side window, clean the channel first. Dust, old adhesive, and hardened grime can throw your reading off. Use a tape measure that hooks firmly, and take your height in three places. Front, centre, and rear.
Then measure the track depth at the top and bottom. For a DIY track-mount screen, the key formula is H = CH + TD – 3mm, where the 3mm tolerance helps account for track irregularities and thermal expansion in Australian heat, preventing the screen from jamming, according to the DIY measuring guidance from Flyscreens in a Box.
That little subtraction matters. Old Volkswagens spend plenty of time in the sun, and a snug fit in the shed can become a sticky fit at the beach.
Measuring a Beetle pop-out window
A Beetle's pop-out is a different animal. You're not usually dealing with a straight sliding channel. You're measuring the usable opening and the arc of the frame.
Do this instead:
- Measure the maximum width across the opening, but don't assume that's your cut line.
- Take several height readings because the frame curve changes the usable shape.
- Make a cardboard template before you touch the mesh.
- Check latch clearance so the screen doesn't foul the hardware.
- Test the template with the window partly open and fully open.
Measure the shape the air passes through, not just the shape the glass sits in.
That sounds simple, but it's where people go wrong. Beetle windows often look more symmetrical than they are.
The small habits that save rework
A tidy setup starts before the cutting.
- Clean first: Dirt in the channel creates false readings and scratches.
- Use a rigid tape measure: Soft sewing tapes are fine for trim, not ideal for frame work.
- Mark orientation: Top, bottom, left, and right on your template. Don't trust memory after tea break.
- Re-check after lunch: Fresh eyes catch mistakes.
If you want a handy nod to the measuring side of workshop life, this customised floor mat with tape measure design is the sort of thing that makes VW garage spaces feel a bit more personal.
A Weekend Guide to DIY Installation
This job sits nicely in a Saturday-and-Sunday rhythm. Saturday is for cutting, trial fitting, and muttering at corners. Sunday is for final tension, clean-up, and that satisfying moment when the screen pops into place and looks like it belongs there.
Start with the gentlest part of the job first. Protect the paint and trim before you build anything rigid.
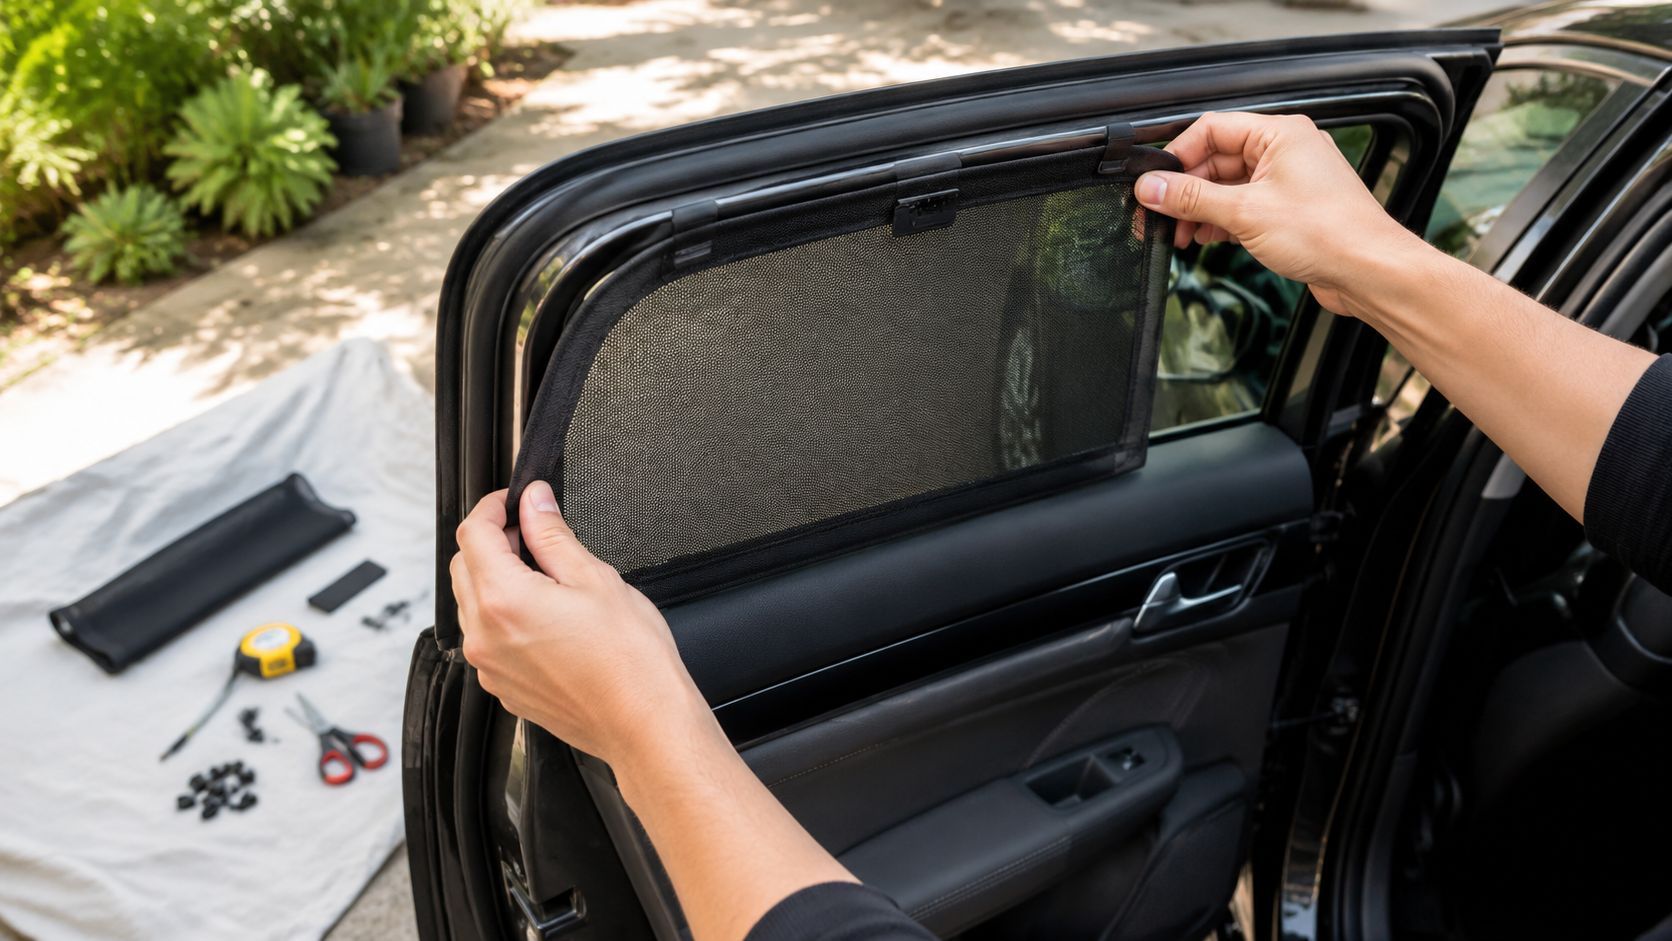
Before you fit anything
Lay out your tools on a blanket or bench, not directly on the van. For most DIY installs, I'd want:
- A tape measure and square
- Cardboard for templates
- Sharp scissors or a fresh utility blade
- Spline roller if using framed mesh
- Painter's tape for temporary positioning
- Felt tape or soft edging where a frame may touch painted metal
- A marker that wipes off easily
If you're building a framed screen, do a dry assembly first. Don't tension the mesh until you know the frame sits cleanly.
Building the screen without making it look homemade
The difference between neat and rough is usually tension. Pull the mesh evenly, not brutally. If one corner goes drum-tight while the opposite side is still soft, you'll end up with a twist that shows the moment it's installed.
For framed screens, work opposite sides in sequence rather than chasing one edge all the way around. That keeps the pull balanced. If you're using magnetic mounts, test each point with the door shut and then reopened. A magnet that feels fine static can shift the second the panel flexes.
Workshop note: Felt tape on contact points is cheap insurance for original paint and older powder-coated trim.
A lot of owners also underestimate edge finishing. A beautifully cut mesh can still look unfinished if the perimeter tape is wavy or oversized. Keep the border narrow and even.
Fitting and final checks
On a Kombi sliding window, insert the screen gently and check for rattle before you call it done. On a Beetle pop-out, test both latch operation and seal compression. You're not just checking if it fits. You're checking if the car still feels normal to use.
This installation clip is handy for getting your eye in before you start cutting:
If your van also runs touring gear, it helps to think of the fly screen as part of a broader camp setup rather than a random add-on. The same clean, functional approach shows up in a well-fitted Fiamma F45 awning installation for a van. Good accessories should look settled, not bolted-on in a hurry.
What a finished job should feel like
A proper car window fly screen on a classic VW should do four things:
| Check | What you want |
|---|---|
| Fit | Sits snug without forcing |
| Look | Doesn't dominate the window line |
| Use | Allows normal opening, latching, or sliding |
| Sound | No rattles at idle or in a breeze |
If it fails one of those, adjust it. Don't live with a result that annoys you. These cars teach patience, and usually reward it.
VW-Specific Tips and Classic Aesthetics
A fly screen on a Volkswagen shouldn't feel like camping gear borrowed from another hobby. It should feel like something a careful owner added because they use the car properly. Beach runs, overnighters, swap meets, summer shows. That's the spirit.
The line between useful and ugly is thin on an old VW.
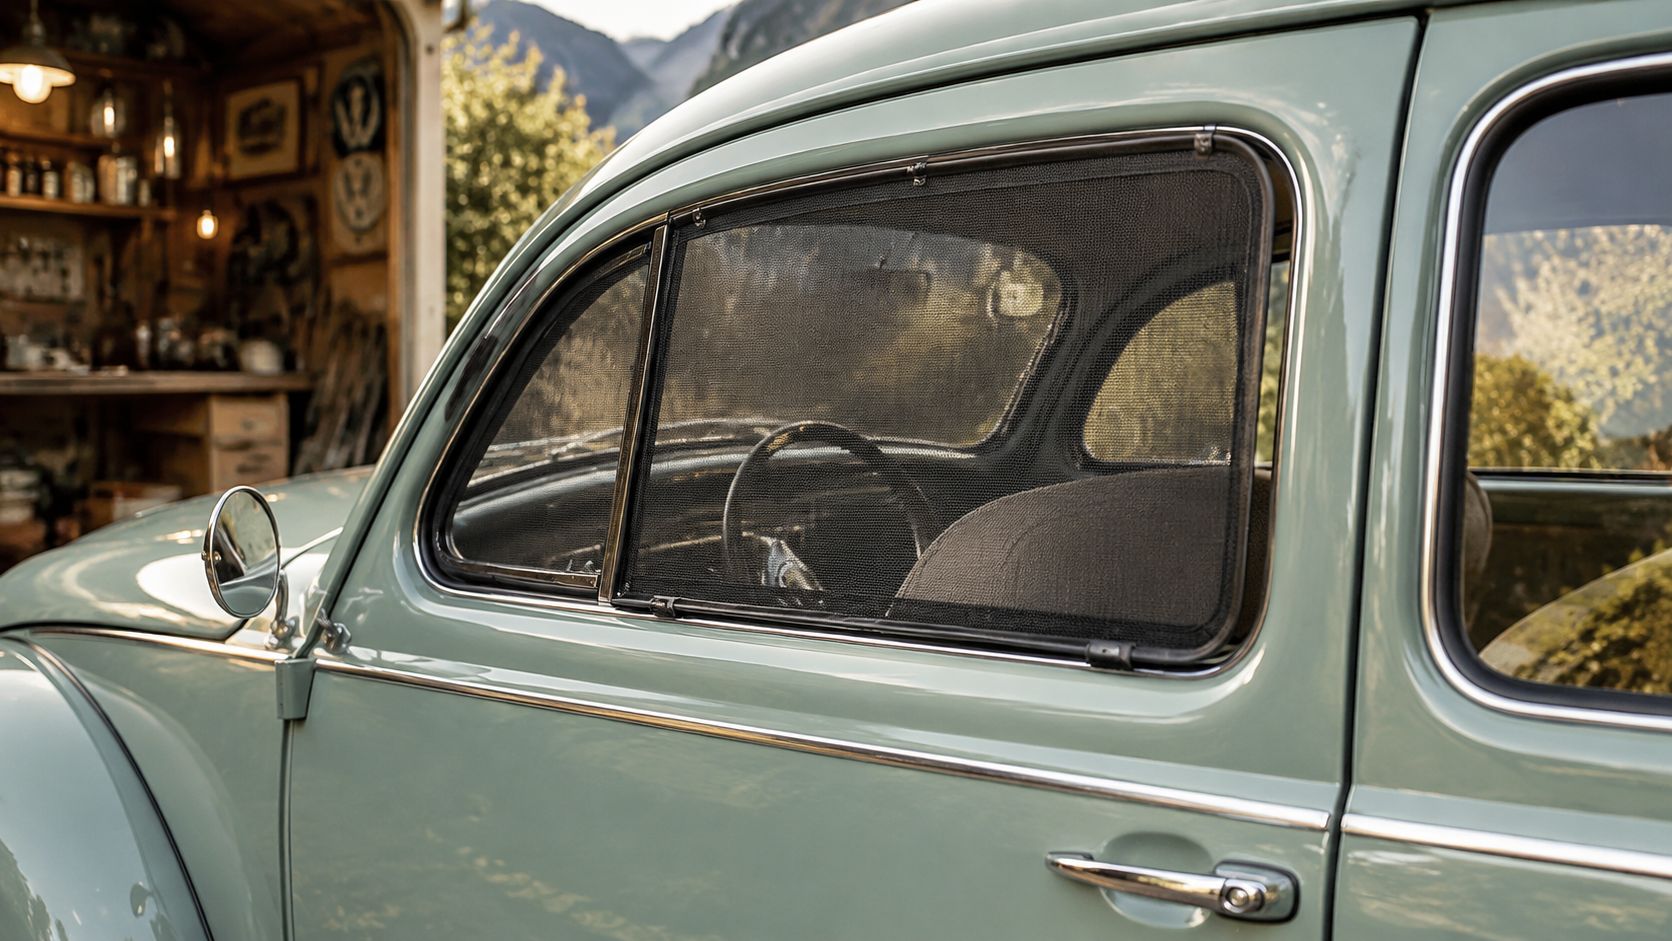
Let the car's era lead the design
Early Beetles suit lighter visual treatment. Thin surrounds, softer mesh colour, and hardware that disappears. A chunky black frame can look too aggressive against rounded guards, narrow pillars, and delicate chrome.
Kombis give you a little more freedom, especially campers with roof racks, awnings, timber interiors, or surf styling. Even then, the best screens still echo the van's shape instead of fighting it.
A few combinations that usually work well:
- Pastel or lighter body colours pair well with charcoal mesh and slim edging.
- Commercial or utility builds can carry a slightly more durable framed screen.
- Samba-inspired looks benefit from the neatest possible finish because the extra glass makes any clutter more obvious.
Why old Volkswagens deserve a tailored approach
The Beetle wasn't just another imported novelty. It was officially introduced to Australia in 1953, with local assembly beginning a year later, which helped cement it in Australian motoring culture, as recorded in the Volkswagen Beetle history entry. That matters because these cars aren't appliances to their owners. They carry memory, family history, and a very particular visual language.
The same goes for the Kombi name. In Australia, enthusiasts use it with real affection because it means more than “van”. It points to a whole lifestyle around road trips, markets, surfboards, and slow weekends.
The best modifications on a classic VW never try to modernise the car out of its personality.
Small aesthetic choices that make a big difference
If you want the screen to feel almost factory-minded, pay attention to the details around it.
- Match the trim mood: Satin finishes usually sit better than glossy ones.
- Respect original hardware: Don't cover latches, catches, or signature frame shapes unless there's no alternative.
- Avoid oversized tabs and straps: They break the silhouette immediately.
- Keep storage tidy: A removable screen should store flat or in a simple sleeve, not as a crumpled bundle in the parcel area.
For many owners, diecast models are surprisingly useful here. A well-finished model often highlights the colour breaks, trim lines, and proportions that make a real Beetle or Kombi look “right”. If you're restoring or accessorising a car, studying those familiar lines in miniature can sharpen your eye before you commit to materials on the full-size vehicle.
Care Maintenance and Common Pitfalls
A good screen can last well if you treat it like trim, not like camping rubbish. Most damage happens off the car. People toss the screen into the back, fold it sharply, or scrub the mesh with whatever cleaner is nearby.
Use mild soapy water, a soft cloth, and patience. Let the mesh dry fully before storage, especially after coastal trips. Salt and damp don't do older fittings any favours.
The problems that show up after the first trip
Most issues aren't disasters. They're signs that the screen needs a small rethink.
- Wind flap at low speed: Usually means the mesh isn't tensioned evenly or the perimeter isn't supported enough.
- Tiny gaps at corners: Common on curved windows. A revised template often fixes it better than trying to stretch the mesh harder.
- Rubbing on paint or trim: Add softer isolation at contact points before the marks become permanent.
- Difficult window operation: The screen may fit the opening but still interfere with latches, sliders, or seals.
If insects are still getting in, don't assume the mesh is wrong. More often, the opening around the edge is the culprit.
The legal grey area that's worth taking seriously
This is the part many generic guides skip. A car window fly screen might work brilliantly at camp, but road use is a separate question.
Australian vehicle rules already deal with visibility and obstruction. The key point for owners is that side mirrors are required if rear vision is obstructed, but no source explicitly clarifies whether mesh fly screens breach the common 20% Visible Light Transmittance limit for rear side windows in states like NSW and VIC, which leaves a legal grey area, as discussed in this Australian guide touching on window screen and visibility rules.
That means common sense matters.
If you're unsure whether a screen could affect legal visibility while driving, remove it for road use and refit it at camp.
That's the cautious path, and for classic VW owners it's usually the sensible one. These screens make the most sense as parked-up comfort gear, not as something left on permanently without checking the rules that apply in your state.
A simple maintenance rhythm
Keep it boring and you'll keep it working.
- Brush dust off before washing
- Wash gently
- Dry fully in shade
- Store flat if possible
- Inspect mounting points before every trip
A tidy routine beats a heroic repair later.
If you love the classic Volkswagen lifestyle as much as the cars themselves, Volkswagen Memorabilia is well worth a browse. It's a proper local Australian shop for VW memorabilia collectibles, with local stock and fast shipping that makes gift buying and collecting much easier than chasing overseas listings. You'll find everything from the main VW shop collection to favourites for people searching Volkswagen diecast models for sale, including VW Kombi diecast Australia pieces, Volkswagen Beetle model collectibles, and classic bus-inspired items that suit anyone looking to buy diecast Kombi. If your heart leans toward the iconic split-window look, have a look at the 1962 VW Kombi Samba Bus range. It's a lovely way to bring a bit of that Beetle and Kombi magic onto the shelf when the real car is in the shed.