Tie Down Rails for VW Vans and Trailers: A Complete Guide

You've got the Kombi strapped, the trailer's packed, and the sun's already up over the showground. Then the little stuff starts moving, the sort of movement that turns a calm run to Volksfest into a noisy, stressful drive with scratched trim, shifted boxes, and a tie-down that's suddenly working harder than it should.

That's where tie down rails earn their keep. They're not the flashy part of the setup, but they're the bit that helps keep a classic VW, a stack of parts, or a precious diecast haul sitting where you put it, not where physics wants it to end up. In Australia, that matters because load restraint isn't a casual suggestion, it's part of safe transport, and the geometry of the setup can make a bigger difference than many realise. For Kombi owners, trailer tinkerers, and collectors who care about both the gear and the journey, getting the rail placement right is worth the effort. If you're planning a van fit-out, a trailer refresh, or a smarter way to move memorabilia, this guide to VW van fit-out ideas will feel very familiar.

Why Tie Down Rails Matter for VW Enthusiasts

A good show weekend often starts with a simple load-up. The Kombi gets the folding chairs, the parts box, the picnic rug, and maybe a crate of diecast models that you'd rather not hear clattering around on corrugations. If the anchoring points are sloppy, the whole load starts to wander, and once a strap angle goes bad, the restraint you thought you had isn't the restraint you get.

That's why tie down rails are such a useful upgrade for VW people. They give you flexible anchor positions, so you can secure a Beetle bonnet one weekend and a stack of boxed models the next without relying on whatever random hooks happen to be welded into the floor. They're the quiet achiever in the setup, the bit that lets you transport irreplaceable stuff with a bit more confidence and a lot less drama.

Australian load restraint rules make this even more important. The National Transport Commission's guide shows that the restraint system has to work with real geometry, not wishful thinking, and that the effectiveness of a tie-down drops as the angle gets shallower. For a Kombi or a trailer loaded for a club run, that means the position of the rail can be just as important as the rail itself. A well-placed rail keeps the lashing angle sensible and the load stable, while a badly placed one can make every strap do less than its label suggests.

Practical rule: if the load shifts, the problem is usually not just the strap. It's often the anchor position, the angle, or both.

The other reason rails matter is protection. Classic VW bodywork, painted panels, and boxed collectibles don't like sideways movement, corner rub, or repeated strap movement. A rail system gives you more control over where the force goes, which is exactly what you want when the cargo has more sentimental value than resale value.

Understanding How Tie Down Rails Work

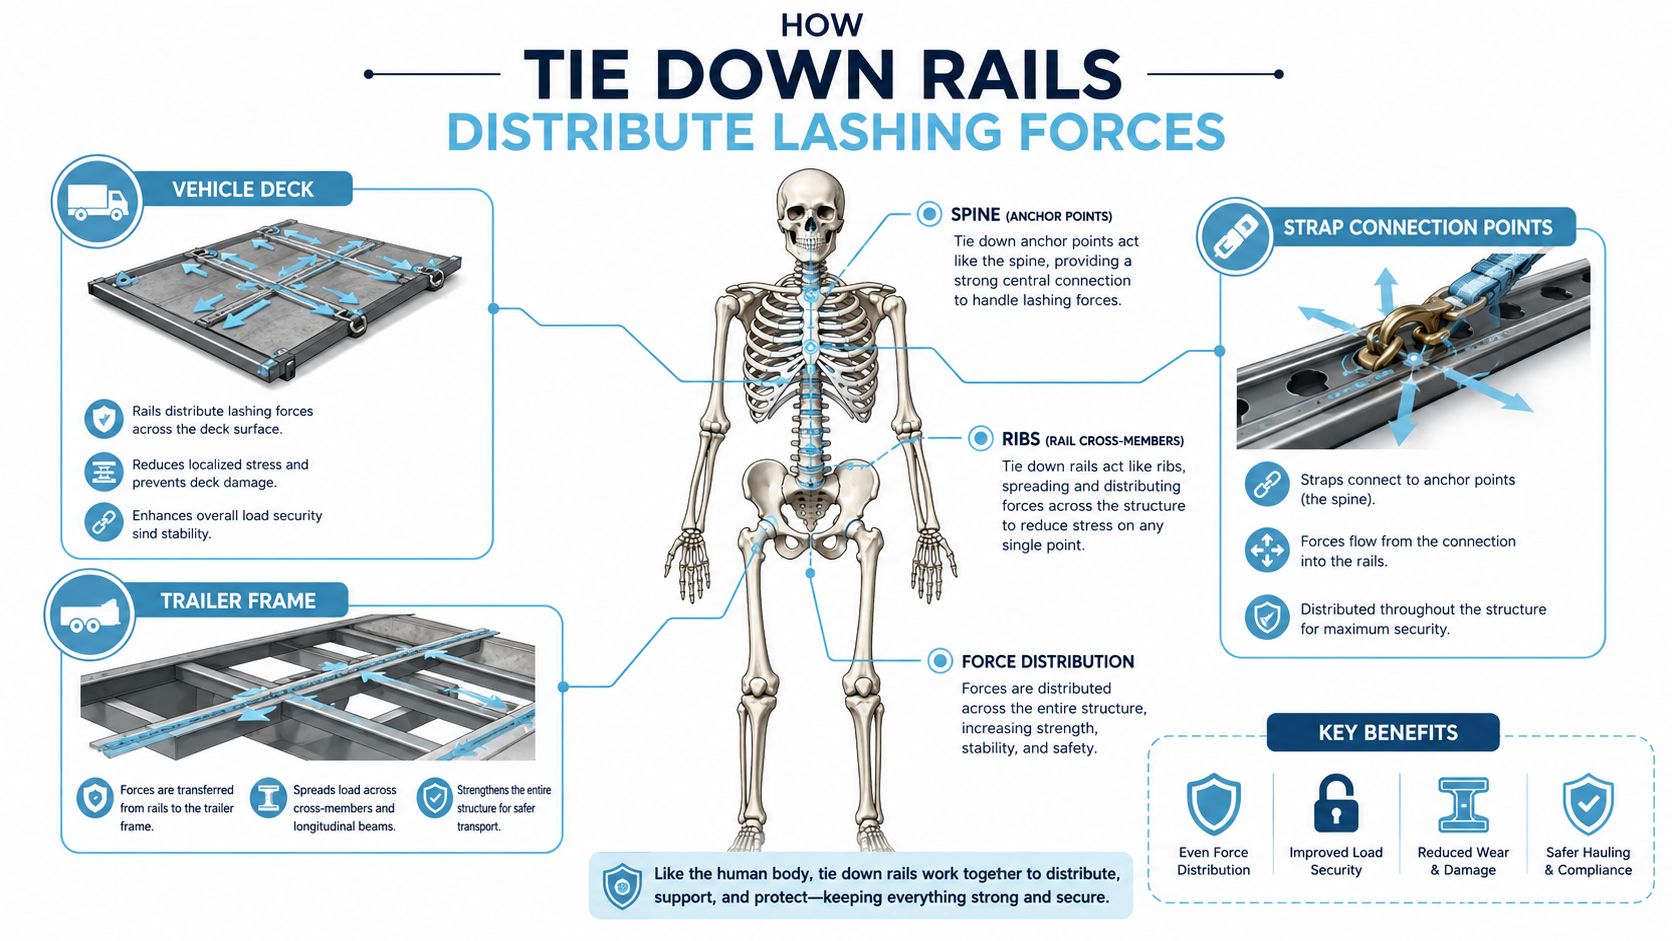
A diagram comparing tie down rails to a human skeleton to illustrate how force is distributed.

Tie down rails spread restraint forces through the van, trailer, or deck instead of dumping everything into one fixed point. That matters on a Kombi or trailer because load direction changes under braking, cornering, and rough road surfaces, and the rail gives you more control over where those forces end up.

The parts that do the work

A rail setup usually comes down to three parts in use. The rail is fixed to the floor, deck, or side wall. The second part is the slot, ring, or slider that takes the strap hardware. The third is the lashing gear, usually ratchet straps or chains, which pulls the load down and holds it from shifting sideways.

That flexibility is why rails suit VW work so well. A single anchor point can suit one load shape, but classic VW jobs change all the time. One weekend it might be a pair of seats and a box of trims, the next it could be a vintage bumper, a model display case, or a set of camping drawers. Rails let you move the tie-down point to suit the cargo without drilling new holes every time.

The rail is the backbone, the anchor points are the ribs, and the cargo is what needs to stay put over bumps, braking, and cornering. When the rail is mounted in the right place, the force spreads instead of loading up one weak spot. That is why a rail system often feels more useful than loose hooks or random floor rings.

The right ratchet strap setup still has to match the rail. A good rail cannot make up for tired webbing, poor hardware, or a strap that is wrong for the job.

A rail system works best when the load settles naturally into it. If you have to fight the cargo to make it sit right, the setup probably needs a rethink.

Comparing Tie Down Rail Types and Materials

Not every rail suits every VW job. A hidden floor rail is lovely in a clean Kombi cargo bay, but an open trailer might be better served by a tougher surface-mounted setup that's easy to inspect and easy to clean. Side-wall rails sit somewhere else again, especially when you want to hold items upright rather than clamp them straight down.

Rail types and what they're good at

Rail Type Material Options Best For Key Trade-off
Recessed floor rail Galvanised steel, aluminium Show-focused Kombi floors, enclosed trailers, neat installations Better visual integration, but it usually needs more planning and often more modification
Surface-mounted rail Galvanised steel, stainless steel, aluminium Utes, trailers, general-purpose cargo decks Easy to fit and adjust, but it's more visible and can create a raised edge
Side-wall rail Galvanised steel, stainless steel, aluminium Tall cargo, mixed loads, vans with varied packing needs Great flexibility for side restraint, but it doesn't always help with low-slung loads

For materials, the choice is usually a trade between weight, corrosion resistance, and appearance. Galvanised steel is the practical workhorse, especially where you expect hard use and don't want to baby the hardware. Stainless steel makes sense where moisture and corrosion are constant concerns, which is why it's popular in salty coastal conditions. Aluminium keeps weight down and can look tidy in a more polished build, but you still need to check that the specific product is rated for the job you want it to do.

For a Kombi, the decision often comes down to whether you're protecting original flooring or building a more modern cargo bay. For a trailer, visibility and easy inspection often matter more than hiding the hardware. For an open ute tray, the rail has to handle weather, mud, and rough treatment without becoming a maintenance headache.

The historical context is worth keeping in mind too. The Railway Tie Association notes that rail fastening evolved into the modern flanged-rail standard in the 1830s with Robert L. Stevens' flanged tee rail, which helped shape later tie-plate systems. That long engineering history is a good reminder that support and fastening matter as much as the rail itself, whether the load is freight, a classic VW shell, or a weekend's worth of gear. See the background at the Railway Tie Association FAQ.

The Hidden Impact of Lashing Angles and Rail Placement

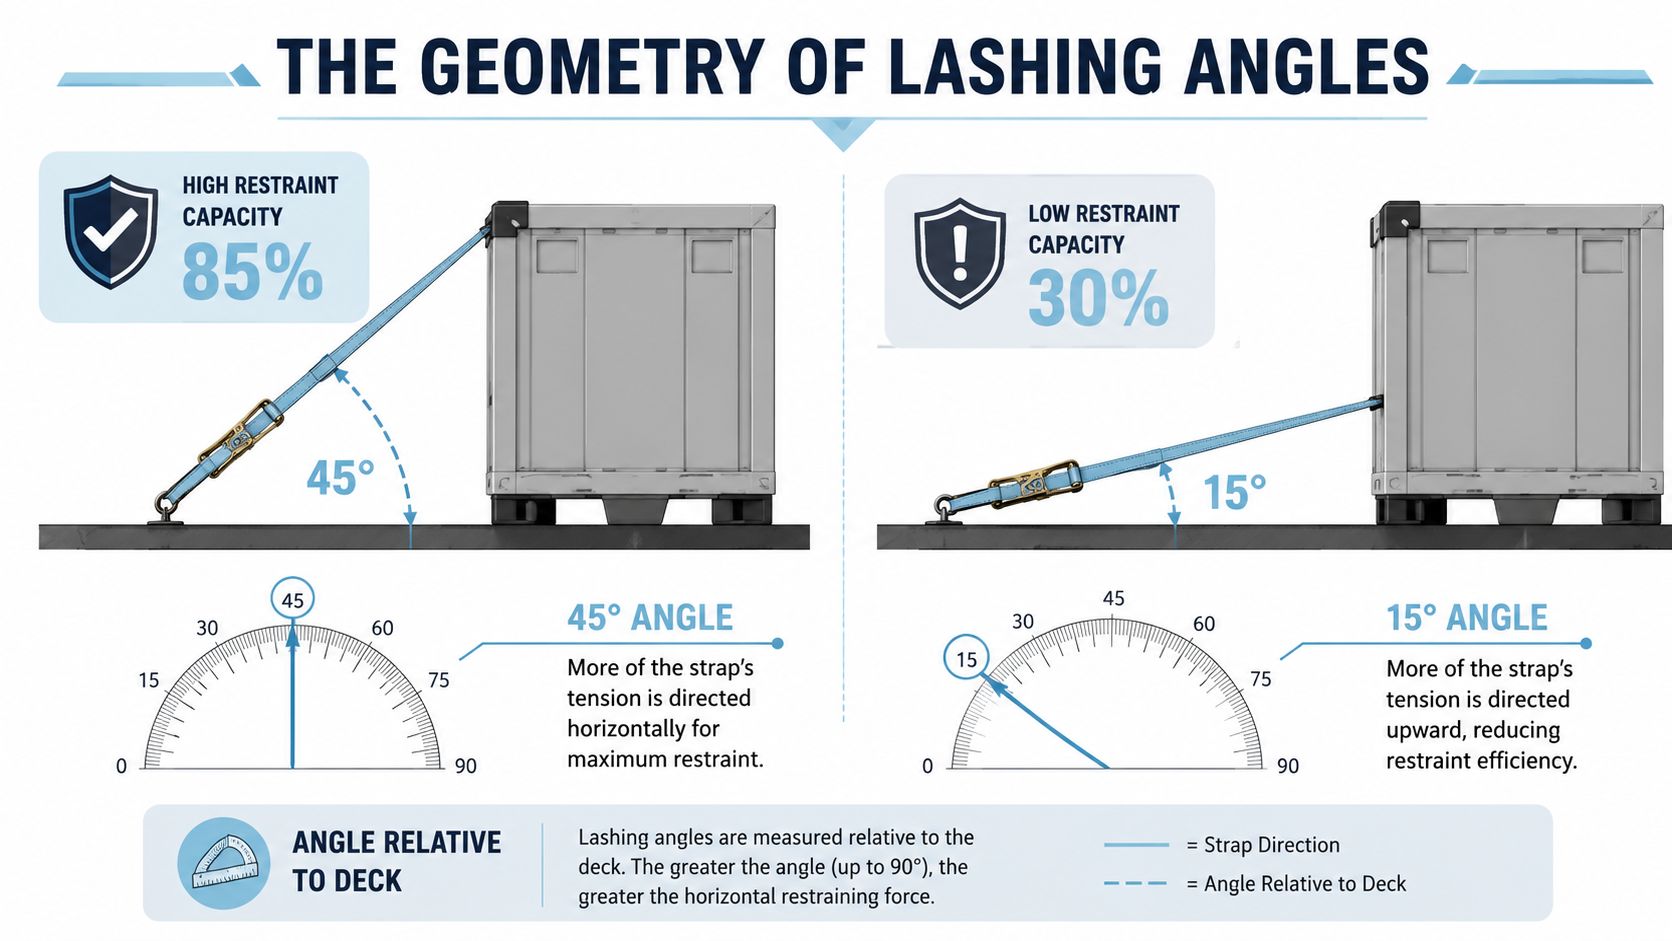
A diagram demonstrating how lashing angle affects cargo restraint capacity using 45 degree and 15 degree examples.

This is the bit most buying guides skip, and it's the bit that often decides whether the load is secure. Australian guidance says tie-down lashings work best when they're close to vertical, and the National Transport Commission's Load Restraint Guide shows that effectiveness falls to roughly 70% at 45° and about 50% at 30°. That's a massive swing from a simple change in rail position and load height, and it's why a rail mounted in the wrong place can look solid while doing less work than you think.

Why the rail's height and position matter

The rail height, deck width, and cargo shape all combine to set the strap angle. A low rail on a wide trailer deck can push the strap into a shallow run, especially with tall cargo, and that's where restraint capacity starts to slide. A slightly higher rail, or a rail closer to the load, can keep the angle steeper and the strap more effective without changing the strap itself.

That's especially relevant on VW vans and trailers carrying mixed loads. A Kombi floor can be narrow enough for luggage but awkward for a taller item like a toolbox, a panel, or a boxed display. If the rail sits too far out, the strap angle gets lazy. If it sits too high or too close to a sharp edge, the load may be secure but awkward to use, which is no help on a busy show morning.

A good mounting layout usually does two things at once. It preserves as much of a near-vertical lashing angle as practical, and it gives enough flexibility to handle both large and small cargo. That's the sweet spot. Too many anchor points can tempt people to use the wrong one just because it's there, while too few can force bad strap geometry and poor restraint.

The rail should fit the load, not just the vehicle. If the geometry is wrong, the hardware is only half useful.

If you want the specific load-restraint logic behind that geometry, the Australian Load Restraint Guide is the clearest reference point for how angle changes the actual restraint outcome.

Measuring and Selecting the Right Tie Down Rails

Start with the cargo bay itself. Measure the usable length, the usable width, and the way the floor is shaped, then compare that with the loads you really carry. A Beetle on a trailer asks for a different rail layout from a stack of memorabilia boxes in a van, and the difference usually comes down to where the straps can run without lying too flat.

A simple way to choose the setup is to work through the space in order. Measure the deck length, width, and the position of wheel arches, trims, or floor ridges. Map the load shape, because a low, wide load needs different anchor positions from a tall, narrow one. Check the rail layout to see whether one central run, paired side runs, or a wall-mounted approach gives you better strap geometry. Then match the rating to the job, so the rail and anchor system suit the load instead of just filling the available space.

Australian load restraint rules care about the aggregate working load limit and the restraint geometry. The number of hooks or slots is only part of the picture. Extra rail length helps only when it lets you place the straps in a better position. It does not fix a weak setup, and it does not turn a poor angle into a legal or safe one.

On VW vans and trailers, a practical layout usually gives you one set of positions for larger items, such as a car shell or bulky parts, and another set for smaller boxed cargo. That flexibility matters on show weekends because the load changes all the time. One trip might be a Kombi seat frame, the next might be a tidy stack of models and display pieces. The rail needs to work for both without forcing awkward strap runs.

The strap and rail need to work together as one system, and the selection guide for ratchet hardware helps with that choice. A good rail gives the strap a fair angle. The wrong fitting wastes that advantage before the load even moves.

If you are planning a mount for accessories as well, the same measuring habit helps with a high lift jack bracket installation guide, because neat placement and solid support matter just as much there.

Installing Tie Down Rails on VW Vans and Trailers

Installation starts with respect for the vehicle, especially if it's a classic Kombi with original panels or a trailer deck that's already been repaired once or twice. Mark the drill points carefully, check for hidden structure beneath the floor, and think about where water might sit after a wet drive home from the coast. If the deck needs reinforcement, sort that before the rail goes down, not after the first trip.

Practical points for a Kombi or trailer

For a VW Kombi, removable sub-floor plates or surface-mounted rails can help protect original flooring. That keeps the install reversible and reduces the chance of turning a tidy cargo bay into a permanent fabrication job. For a trailer, use proper fasteners and sealing around the penetrations so moisture doesn't creep into the timber or under the sheet metal.

Bolting or welding both work when done properly, but each has a different trade-off. Bolting gives you serviceability, while welding can give you a cleaner and more permanent result if the base metal and layout suit it. Either way, alignment matters, because a rail that's cocked or twisted makes the straps behave oddly and can create wear in spots you don't want.

A couple of mistakes show up again and again. Under-tightened bolts let the rail move, and unsealed holes invite rust or rot. In a Kombi, that can matter more than people expect because preserving the body and the cargo bay is part of preserving the van's value.

The installation notes in the high-lift jack bracket guide are a handy reminder that mounting hardware on a classic VW always works best when you think about structure first and accessories second.

If the rail flexes in your hand before the load goes on, it'll flex even more once the straps are tight.

Safety Checks, Maintenance, and Buying Checklist

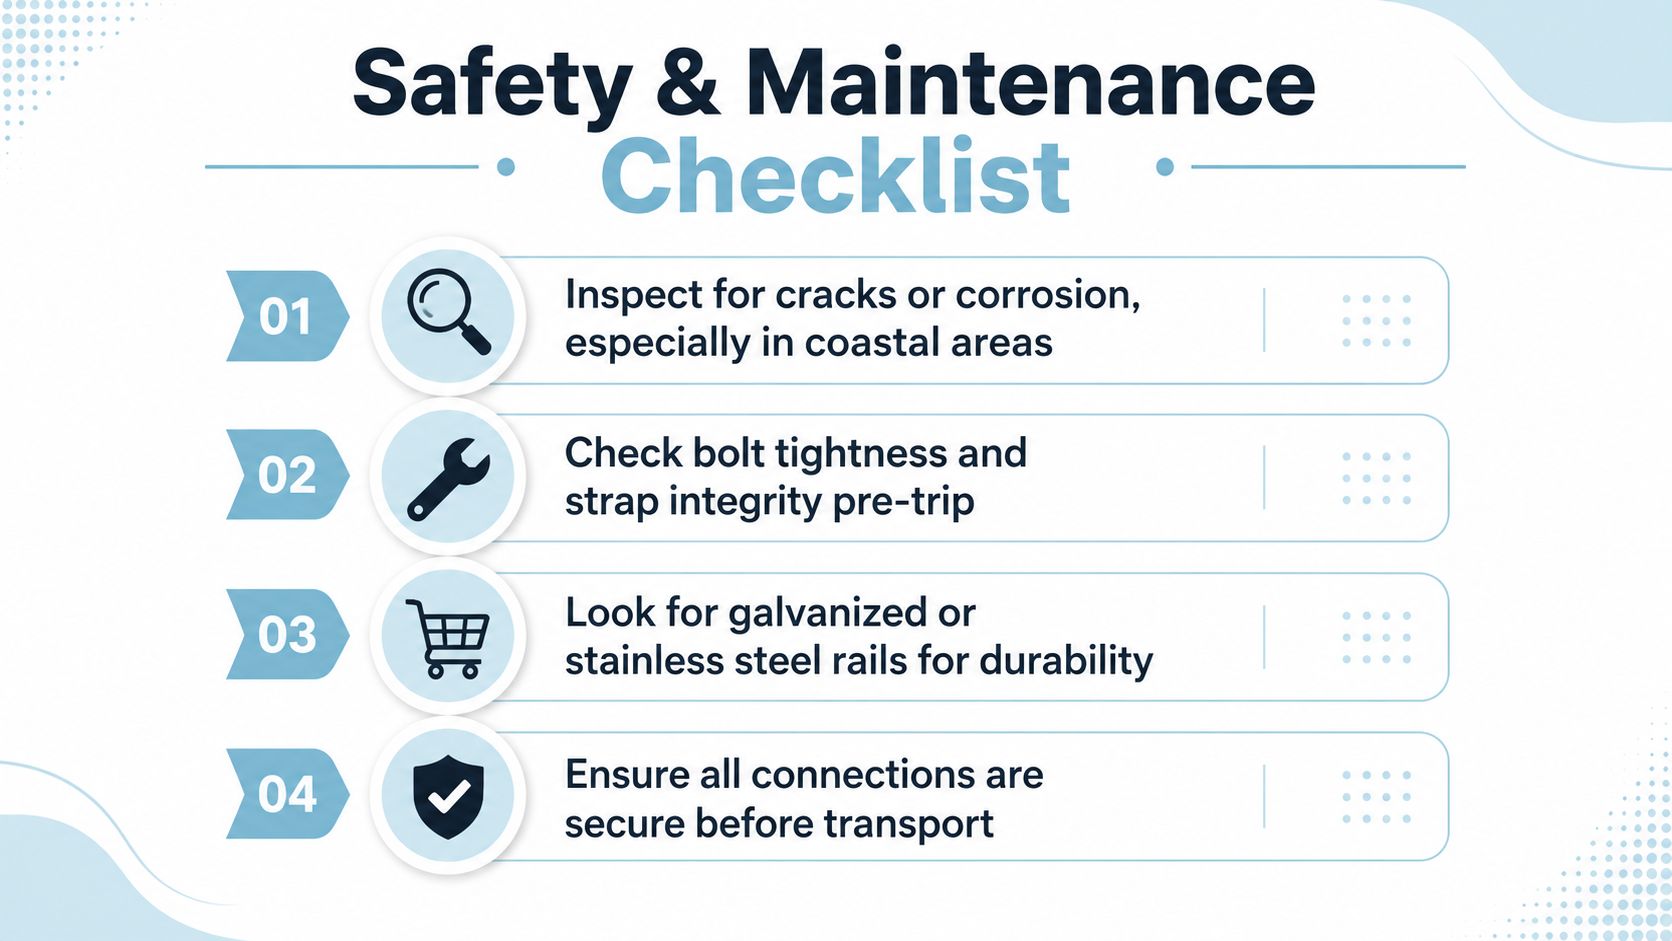
A rail setup only earns trust if you keep checking it. Before each trip, look over the rail, the fittings, and the strap points for wear, movement, or corrosion, especially if the vehicle lives near the coast. Salt air is brutal on fasteners and edges, and once a surface starts to pit or loosen, the whole system deserves a closer look.

The pre-trip routine doesn't need to be complicated. Check that bolts are still tight, straps aren't frayed, and the load still sits where you meant to place it. If anything has shifted since the last trip, fix the cause before you hit the road. A ratchet that's been forced too hard, or a rail slot that's showing deformation, is telling you something worth hearing.

A quick buying checklist

  • Verify the working load limit. Make sure the rail and anchor setup suits the cargo you'll carry.
  • Check vehicle fit. Confirm the rail works with a Kombi floor, a trailer deck, or a tray without interfering with the load shape.
  • Choose corrosion-resistant materials. Galvanised steel and stainless steel are the obvious candidates for tougher conditions.
  • Look at the mounting method. Decide whether you want a reversible install, a permanent fix, or something in between.
  • Think about appearance. On a show vehicle, visual integration can matter almost as much as raw capacity.

The broader point is simple. Good tie down rails protect more than the cargo in the tray or trailer. They protect the stuff that matters to VW people, the body panels, the memorabilia boxes, the model cars, and the calm that comes from knowing the load is doing what it should.

An infographic titled Safety & Maintenance Checklist, listing four essential inspection steps for secure equipment transport.


If you're building out a VW-inspired garage, trailer, or display space, Volkswagen Memorabilia has the kind of diecast Kombi Samba Bus and Beetle pieces that suit a proper enthusiast's collection. Have a browse at Volkswagen Memorabilia for licensed VW diecast models, gifts, and memorabilia that feel right at home beside a well-prepped trailer or a neatly sorted Kombi.

Double Jerry Can Holder Your Kombi Road Trip Essential

A mate of mine once rolled his Bay Window into a dusty servo outside a tiny outback town, smiling like he'd just won TattsLotto, only to find the bowser taped off and the next fuel stop a very long stretch away. The grin came back when he swung open the rear carrier and pulled out two full cans, because the trip was still on and the sunset camp still happened.

The Ultimate Symbol of Kombi Freedom

A classic Kombi always promises more than transport. It promises that old feeling of following the road just to see where it bends, windows open, warm air coming through the cabin, a board on the roof and a kettle rattling in the back. In Australia, that promise means long distances too, and long distances can turn romance into arithmetic very quickly when the fuel gauge starts playing games.

That's why a double jerry can holder has such a place in the touring story. It isn't glamorous hardware on its own. Yet in the life of an old VW, it becomes part of the folklore, right alongside the striped camp chairs, the enamel mugs and the map folded badly into the glovebox.

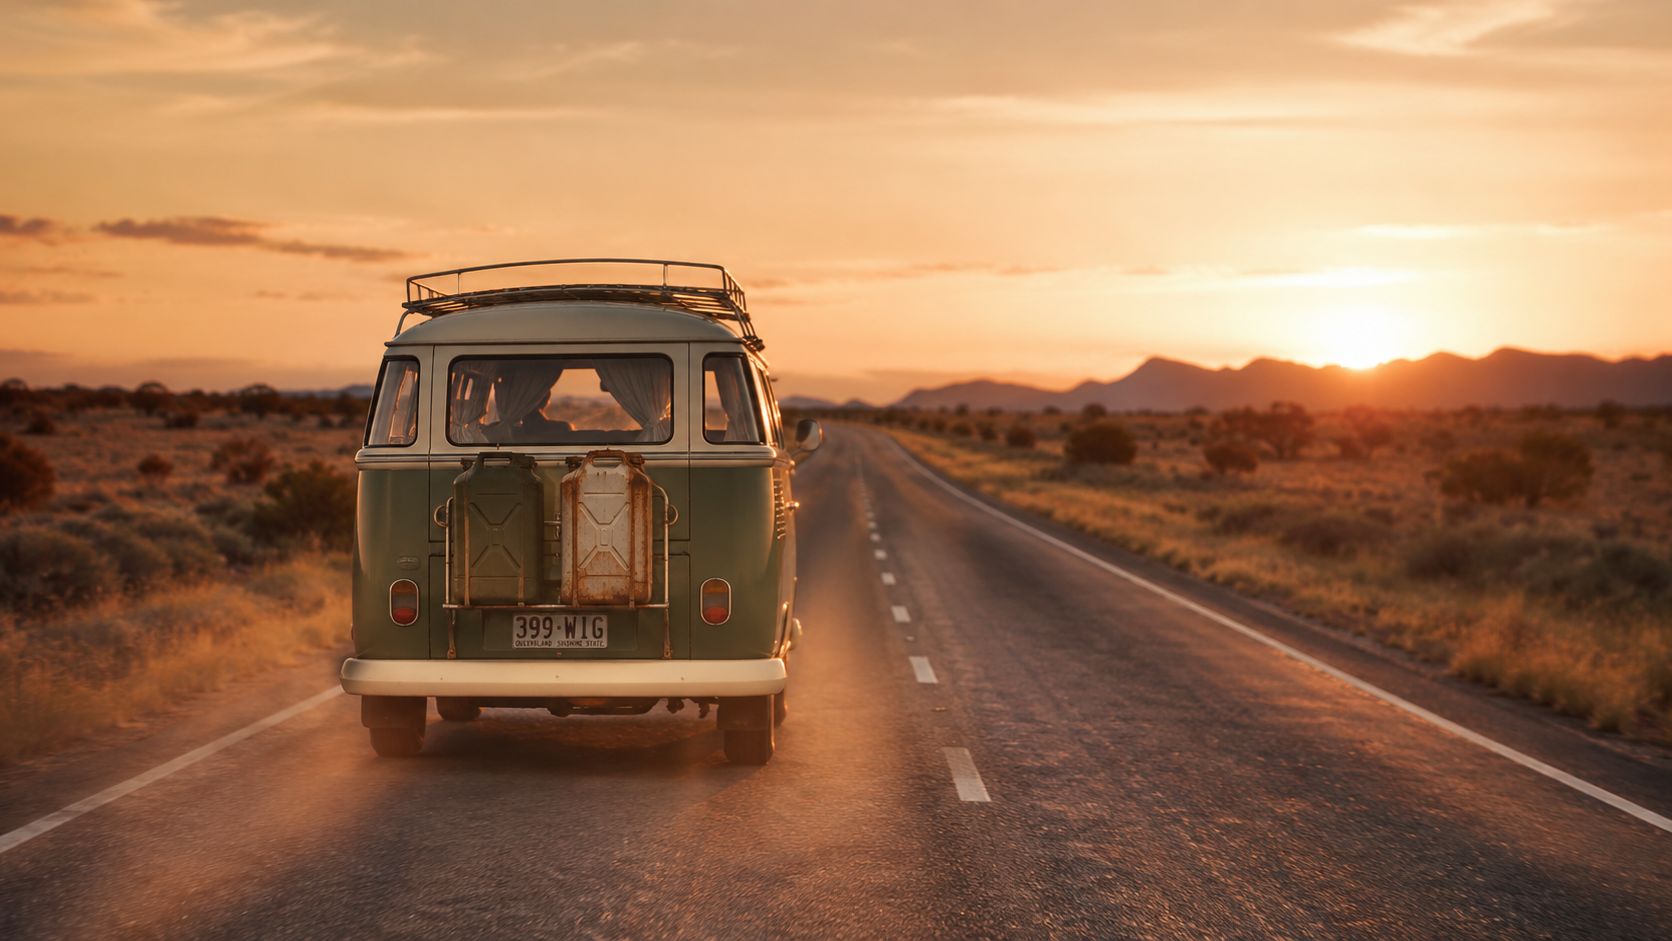
A vintage Volkswagen camper van driving down a desert highway during a beautiful orange sunset.

The connection between old Volkswagens and Australian road culture runs deep. The Volkswagen Beetle was formally introduced to the Australian market in 1953, with local assembly kicking off in Clayton, Victoria, just a year later, cementing its place in Australia's automotive culture, as noted in the Volkswagen Beetle history entry. Once Beetles and Kombis settled into local life, they became more than imported curiosities. They became beach cars, camping rigs, family runabouts and memory-makers.

Why this bit of gear matters

A Kombi asks you to travel with intention. You pack carefully. You listen to the engine. You pay attention to wind, heat and hills. Adding spare fuel fits that same old-school rhythm.

Practical rule: If your trip depends on one fuel stop being open, your trip needs a better backup plan.

For many VW owners, the double holder becomes the difference between staying relaxed and watching the dashboard with a knot in your stomach. It protects the spirit of the trip. That's its primary purpose.

The freedom machine in one glance

  • More confidence: You can head beyond the usual town-to-town loop.
  • Better trip planning: You're less tied to hoping every roadhouse is operating when you arrive.
  • A stronger touring setup: The holder turns a charming classic into a more capable adventure companion.

That's why this humble accessory belongs in the same conversation as the Kombi itself. It keeps the journey open.

Choosing Your Holder Styles and Materials

Some gear suits a lifted four-wheel-drive but looks like a gate hinge bolted to the back of a Splitty. A classic VW needs practicality, yes, but it also needs a bit of visual sympathy. The right holder should look purposeful rather than clumsy.

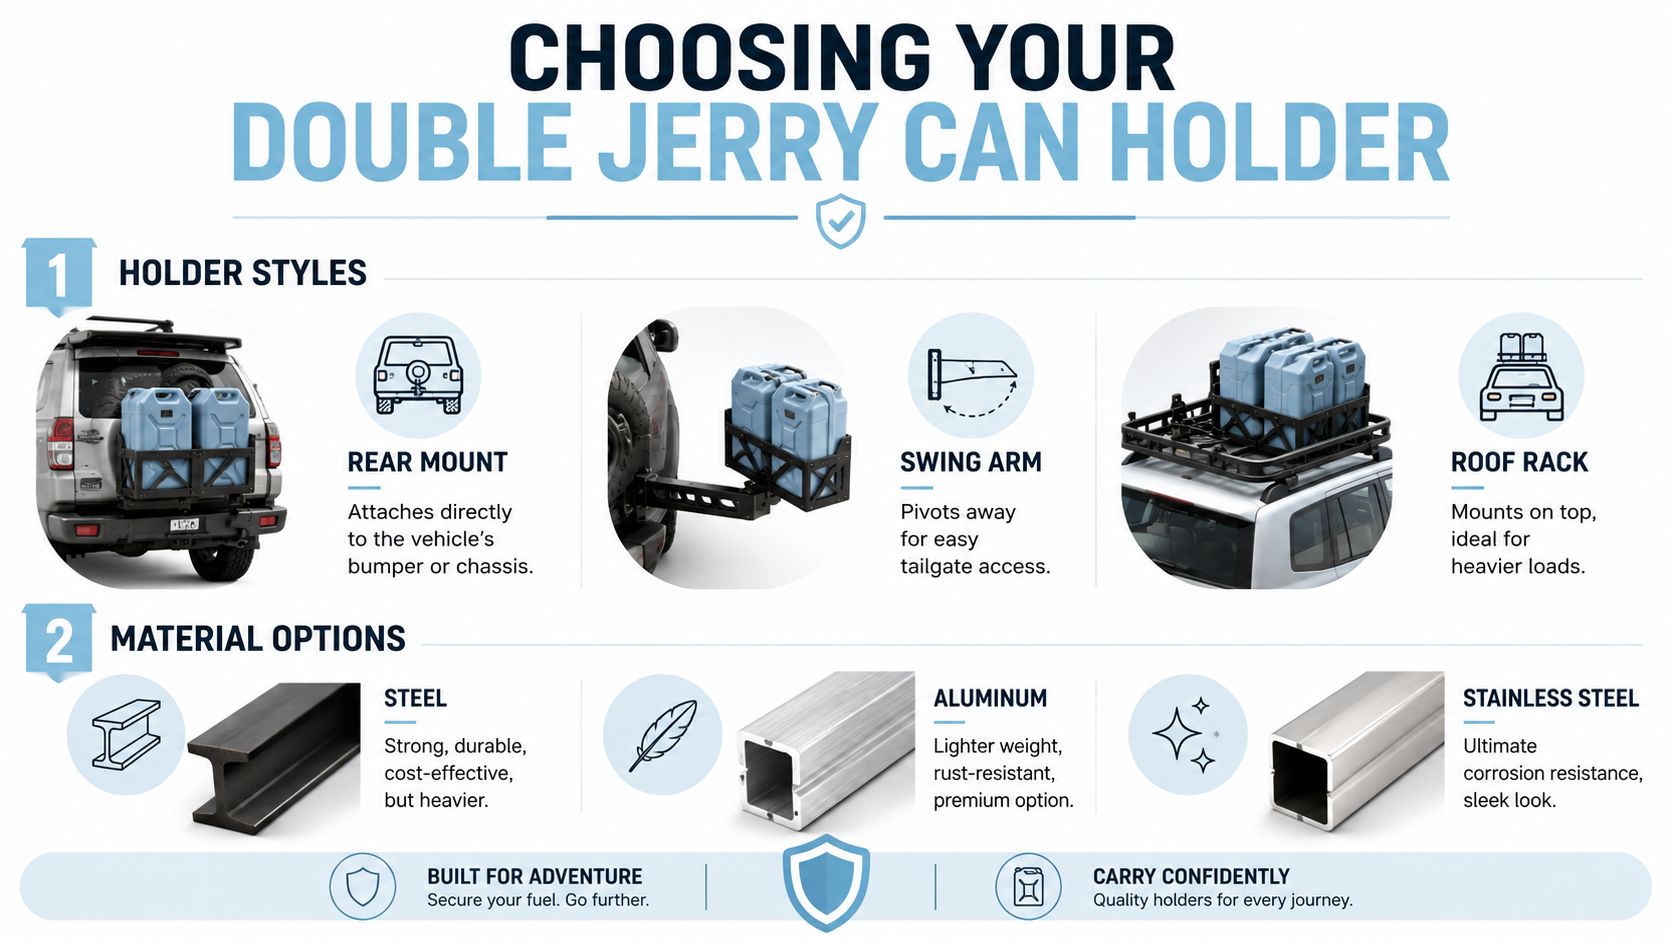
An infographic showing various types and materials for double jerry can holders for vehicles and adventure travel.

The main holder styles

Three layouts come up most often when enthusiasts talk about carrying extra fuel on touring vehicles.

Style Where it suits best What to watch
Rear mount Vans and utes with strong mounting points at the back Check access to engine lids, doors and lights
Swing arm Touring setups where rear access matters Hinges and latches need to stay tight and clean
Roof rack mount Vehicles already set up for roof storage Higher lifting effort and extra weight up top

A rear mount tends to look the most natural on a Kombi because the weight sits lower and the cans are easy to reach. It can also echo the period-correct touring look many owners love.

A swing arm setup is clever if you still need to get at the back regularly. For campers and weekenders, being able to move the carrier out of the way without unloading everything is a big win.

A roof rack mount can work, especially if your VW already wears a rack as part of its personality. Still, fuel up high changes the feel of the vehicle, and lifting full cans overhead isn't everyone's idea of a pleasant roadside stop.

Keep the clean lines of the car in mind. On a classic VW, the best accessory often looks like it belongs there even when it's doing a hard job.

Steel, aluminium or stainless steel

Material choice is where utility and style really meet.

  • Steel: Tough, familiar and usually the easiest on the wallet. It suits owners who value ruggedness and don't mind a bit more heft.
  • Aluminium: Lighter and naturally attractive for anyone trying to keep extra mass under control. It often feels like the smarter choice where weight matters more than brute toughness.
  • Stainless steel: The polished old pro of the bunch. It offers strong corrosion resistance and a tidy finish, though it usually sits in the premium end of the conversation.

Steel is the work boot. Aluminium is the running shoe. Stainless is the nicely polished RM Williams pair you still expect to survive a bit of weather.

Matching the holder to the VW look

If your Beetle or Kombi wears original-style trim, hubcaps and soft pastel paint, a bulky industrial carrier can look out of place. If your bus is more adventure-spec, with roof rack, awning and camping gear, a sturdier black-finished holder might look spot on.

A good rule is simple:

  • For touring authenticity: choose a tidy rear-mounted style with understated hardware.
  • For practical camping use: prioritise access and durable construction.
  • For show-and-drive pride: pick a finish that complements the vehicle's colour and period feel.

The holder shouldn't steal the scene. It should support it.

Mounting Tips for Your VW Kombi or Beetle

Classic Volkswagens are charming because they weren't designed like modern SUVs with accessories in mind. That means mounting a double jerry can holder takes more thought than just grabbing a drill and hoping for the best. On a Kombi, access matters. On a Beetle, proportions matter even more.

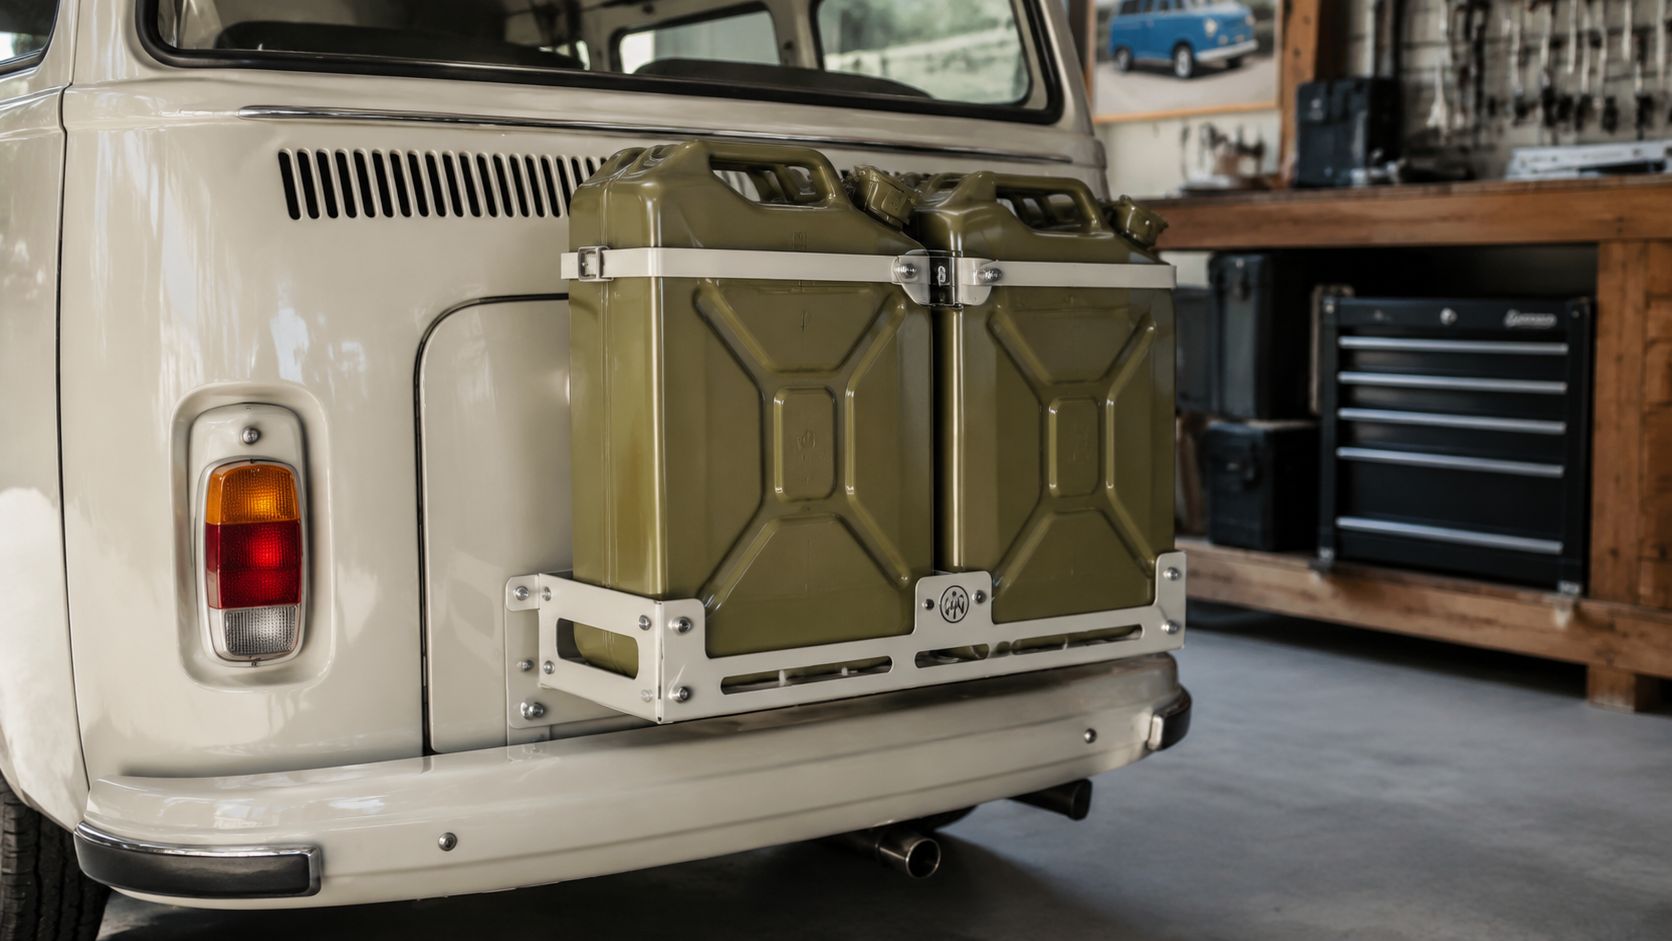
A beige Volkswagen bus featuring a white metal rack holding two olive green jerry cans on the back.

Kombi mounting points that make sense

A Type 2 gives you more room to work with, but each version has its own quirks. Split Screens and Bay Windows both reward careful placement.

For a Kombi, think about these points before you commit:

  • Rear access first: If the holder blocks the engine lid or rear hatch, routine checks become a nuisance.
  • Weight close to structure: Mounting should tie into strong points, not just thin body panels.
  • Departure angle: If the holder sits too low, the first steep driveway or spoon drain will remind you.

A rear swing-away arrangement often suits a touring bus because it keeps fuel outside the cabin and leaves the interior free for camping gear. The trick is making sure the opened carrier still gives you enough space to work around the back of the van.

Splitty versus Bay Window

A Splitty has that wonderfully upright rear, and almost every accessory shows. That means neatness counts. A simple, symmetrical setup usually looks better than anything overbuilt.

A Bay Window can wear a slightly sturdier arrangement without looking awkward. Its broader rear profile tends to absorb the visual weight of a carrier more gracefully.

If the mount looks like an afterthought, it probably was. Take the extra time to line it up, brace it properly and check how it opens with the vehicle loaded.

Beetle solutions that respect the shape

A Beetle is trickier. You're working with one of the most recognisable silhouettes ever sold here. Hanging too much off the tail can spoil both the look and the balance.

Some owners look at spare-wheel-adjacent solutions or custom rear mounting ideas, but the same rule always applies. Don't ask thin vintage metal to do a chassis job. If you're carrying fuel externally, the support needs to be up to the task.

For owners thinking through brackets, force distribution and safe support, the ideas around high-lift jack bracket mounting options are worth browsing because they sharpen your eye for strong attachment points and sensible load paths.

Workshop checklist before first use

  1. Cycle every opening panel with the holder fitted and loaded as intended.
  2. Check latch and hinge movement after a short local drive on mixed roads.
  3. Inspect for flex around mounting points, especially on older bodywork.
  4. Retighten hardware after the first few trips because vibration will find any weakness.

The prettiest setup in the club car park means nothing if it rattles loose on corrugations. Mount it like you plan to trust it.

Sizing Capacity and Safe Fuel Transport Rules

Fuel is one area where old-car charm shouldn't lead the decision-making. The right setup has to be secure, sensible and legal. If you treat fuel carrying casually, you're gambling with the vehicle, your passengers and everyone else on the road.

A common double jerry can holder is designed around two standard 20L jerry cans, giving a total load of 40L, and many designs use gas struts to help manage weight and reduce swinging on rough ground, as described in the Kaymar Left Double Jerry Can Holder listing. That figure gives Kombi owners a straightforward mental picture of what the carrier is meant to handle. It also underlines why mounting quality matters so much.

Safe transport habits worth sticking to

You don't need drama to learn these lessons. You just need to be disciplined.

  • Use approved containers: Don't carry fuel in makeshift vessels or old cans with questionable seals.
  • Secure the load properly: Straps, latches and locking points should stop movement in all directions. The gear in tie-down ratchet cargo securement is a useful reminder that restraint matters just as much as the holder itself.
  • Keep fuel outside the cabin: In a Beetle or Kombi, fumes and spills have no place near passengers, bedding or cooking gear.

A simple risk check before you leave

Check Why it matters
Seal condition Stops leaks and vapour escape
Holder latch tension Prevents bounce and side-to-side movement
Clearance from hot components Reduces fire risk
Load balance Helps the vehicle stay predictable on the road

Carrying extra fuel isn't just about extending range. It's about doing it without creating the very emergency you were trying to avoid.

If you're unsure about local transport requirements for fuel where you live or travel, check the relevant state or territory guidance before the trip. Rules can differ, and this is one area where “she'll be right” doesn't belong.

Keeping Your Gear Classic Maintenance and DIY

A salty coastal breeze can make even a tidy VW owner slightly paranoid, and for good reason. Metal accessories live a hard life. They catch road grime, moisture, fuel splashes and whatever the last muddy campsite threw at them.

Small maintenance jobs that pay off

The nicest holders I've seen at shows aren't always the newest ones. They're the ones owners keep after. A rinse, a dry-off and a close look at hinges and fasteners can save a lot of grief later.

Try this routine:

  • After dusty trips: Wash off grit before it starts wearing moving parts.
  • After beach runs or wet roads: Dry the unit properly and check for early rust stains around bolts.
  • When paint chips appear: Touch them up early, before surface rust gets a foothold.

A classic VW teaches patience. The same habit that keeps a Kombi's paint gleaming will keep a fuel carrier respectable for years.

The DIY temptation

VW people are resourceful. Someone in every club can fabricate brackets, weld tabs and make an accessory from raw stock over a weekend. That spirit is part of the culture, and it deserves a nod.

Still, a fuel carrier isn't the place for guesswork. If you're building or modifying one, strength, latch security, alignment and long-term corrosion protection all matter. So does the way the whole assembly behaves on bumpy roads. If your setup also ties into broader camping or touring storage, looking through van fit-out utility systems can help you think more cohesively about how your gear works together.

The sweet spot is simple. Build carefully if you know exactly what you're doing. Buy quality if you want confidence without experimentation. Either way, maintain it like it belongs on the vehicle, not hanging off it as an afterthought.

From Real Adventures to Timeless Collectibles

A mate of mine keeps a faded photo in his garage. It shows his orange Bay Window at a servo outside Broken Hill, two fuel cans strapped on the back, kids barefoot in the dirt, kettle already on the boil. On the shelf below sits a little diecast Samba with the same cheerful stance and the same promise of miles to come. That pairing says more about Volkswagen life than any brochure ever could. The holder carried the trip. The model kept the memory.

A double jerry can holder earns its place in that story because it speaks the language old VWs have always spoken. Go a bit farther. Stay a bit longer. Leave room for the detour to the beach, the camping spot by the river, or the gravel road that looked too good to pass by. In a Kombi or Beetle crowd, practical gear has never been separate from sentiment. The touring bits become part of the folklore.

Analysts at Market Intelo link growing interest in jerry can holders with adventure travel and off-road recreation. You can see that shift at any weekend meet. Alongside polished hubcaps and old enamel signs, there is real affection for the accessories that made these cars into freedom machines.

Why collectors get it straight away

Collectors rarely fall for perfect metal alone. They fall for a scene.

A small Kombi model with a roof rack, a fuel can, and a sun-faded paint scheme can bring back a whole chapter of life. Early starts. Hot vinyl seats. The smell of petrol and instant coffee. A stop on the side of the road while someone digs out a map and swears the campsite is only ten minutes away. The holder on the working vehicle and the miniature on the shelf belong to the same tradition. One helped write the yarn. The other keeps it within reach.

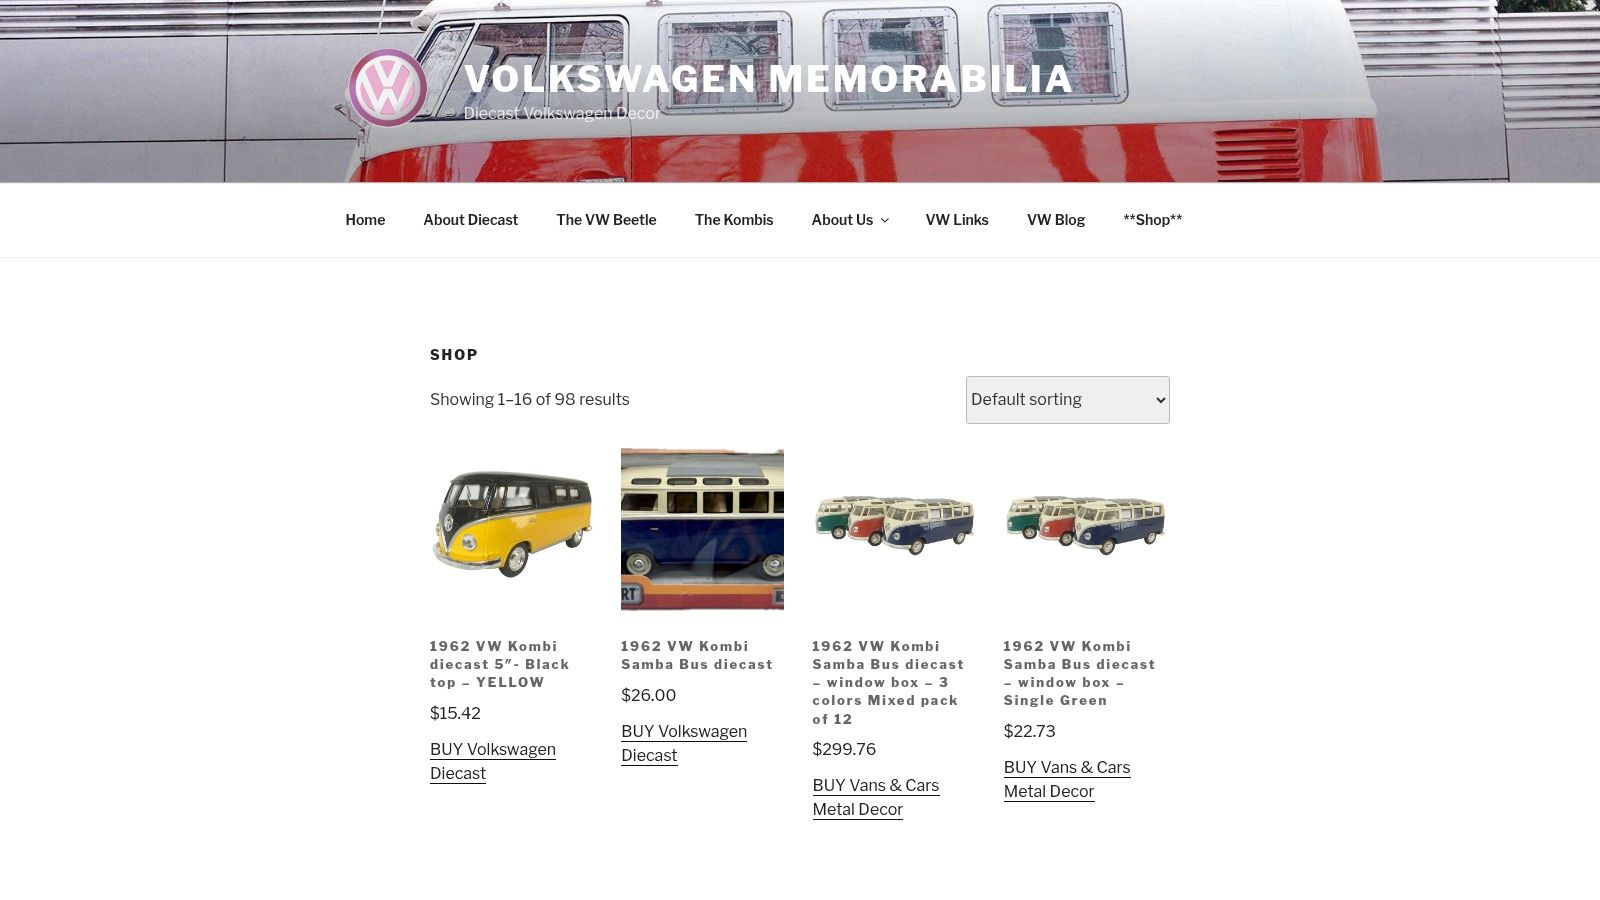
Screenshot from https://vwmemorabilia.com.au/shop/

Display ideas that feel like a real VW life

  • Match the model to the trip: Set a diecast Kombi beside an old campsite photo, a rally badge, or a dog-eared road map.
  • Build a proper bench vignette: A Beetle model, an enamel mug, a spare key tag, and a vintage petrol tin give the shelf the feel of a shed with stories in it.
  • Show the family resemblance: Mix Beetles and buses together, especially if your real-world VW history has included both.

People hunting for VW Kombi diecast Australia, Volkswagen Beetle model, buy diecast Kombi, VW memorabilia collectibles, or Volkswagen diecast models for sale are usually chasing that same spark. They want something solid in the hand that brings the road back into the room.

FAQ

Does a double jerry can holder suit every classic VW

No. Kombis usually give you more realistic mounting options. Beetles need more careful thought about access, balance, and structure.

Is a roof rack holder a good idea for a Kombi

It can work, though lifting fuel that high is a chore and the added weight changes how the van feels. Plenty of owners prefer rear-mounted setups for easier handling.

Can I build my own holder

Yes, if you know your way around fabrication and can get the mounting, latch security, and corrosion protection right. Fuel gear deserves careful work, not rough guesswork.

Why does this matter to VW collectors

Because the hardware is part of the legend. A holder, a rack, a weathered can, and a bus pointed toward the coast all belong to the same picture collectors have loved for decades.


If those road-trip scenes sound familiar, have a wander through Volkswagen Memorabilia and browse the locally stocked range of VW diecast models, Kombi pieces, Beetle collectibles, and other shelf-friendly reminders of why these old cars still tug at people's hearts.

Car Window Fly Screen: A VW Kombi & Beetle Guide

You're parked up by the water in a classic Kombi. Kettle's on, side window cracked, sunset doing its best work across the paint. Then the mozzies arrive and turn the whole evening into a slap-dance. That's usually the moment people start thinking seriously about a car window fly screen.

On a modern SUV, you can get away with almost anything that's black, stretchy, and vaguely window-shaped. On a Beetle or Kombi, it's different. These cars have character. The screen needs to work, but it also needs to look right. If it flaps, scratches paint, ruins the line of the window frame, or feels like a cheap camping hack, you'll notice it every time you walk up to the car.

That's why most classic VW owners end up treating this as a small custom job rather than a simple accessory purchase. In Australia, there's no established market data for car window fly screens as a distinct product category, unlike the much better documented residential fly screen trade, which is a good sign this remains a niche, enthusiast-led solution rather than a standardised off-the-shelf fitment, as noted in this Melbourne fly screen guide.

Choosing Your Fly Screen Material and Style

A mate of mine brought a tidy bay-window Kombi to a camp weekend and fitted one of those slip-on sock screens over the door frame. It worked well enough once the van was parked. But every time the door opened, the thing shifted a touch, and by the end of the weekend it looked more “temporary bush fix” than “sorted touring setup”.

That's the trade-off. The easiest option isn't always the one that suits a classic VW.

A hand waving from the open window of a vintage camper van overlooking a sunset lake scene.

Mesh that suits the way you use the car

For most owners, fibreglass mesh is the sensible starting point. It's easy to work with, has a soft look, and doesn't feel too harsh against older trim and painted frames. If you're building a removable screen for summer touring and weekend markets, that's often enough.

If you travel with a dog, or you've got kids leaning on the window opening, a heavier-duty pet mesh makes more sense. It's tougher, but it also looks chunkier. On a splitty or an early Beetle, that heavier weave can feel visually out of step with the car's lighter lines.

A quick way to think about it:

Style choice What it does well Where it falls short
Fibreglass mesh Light, tidy, easy to tension Can sag if handled roughly
Heavy-duty mesh Better for pets and harder use Heavier look, less subtle
Fine dark mesh Good outward visibility in camp use Can look too modern on some classics

Practical rule: If the screen is obvious from three metres away, it's probably too bulky for a Beetle.

Screen styles that actually suit old Volkswagens

You've really got three common directions.

  • Slip-on sock screens work for quick camping jobs. They're easy to store and don't ask much of you. They also look the least integrated.
  • Magnetic screens can be neat if the mounting is discreet. They're handy on vans that see frequent use, but cheap magnets and rough edges can mark older paint.
  • Channel-fit or framed screens take more effort, yet they usually suit a classic VW best. They look intentional, sit flatter, and don't scream “universal accessory”.

For inspiration on the sort of relaxed touring setup many VW owners are chasing, even beyond the screen itself, it's worth a look at these awning fabric samples for vans. The colours and camping vibe are often the same cues people use when choosing mesh tone and trim finish.

What works visually

A classic VW rewards restraint. Soft black or charcoal mesh usually disappears better than bright grey. Slim edging beats chunky tape. If your Kombi's got a warm cream roof, polished trim, or original-style rubbers, match the screen to that mood instead of fighting it.

The best car window fly screen is the one nobody comments on until dusk, when everyone else is getting eaten alive and you're still sitting comfortably.

Nailing the Measurements for a Perfect Fit

Bad measuring ruins more fly screen projects than bad materials. The classic mistake is taking one quick width and one quick height, cutting confidently, then discovering an old VW window opening is less square than your memory.

That's especially true on cars that have had seals replaced, doors adjusted, or frames repainted over the years.

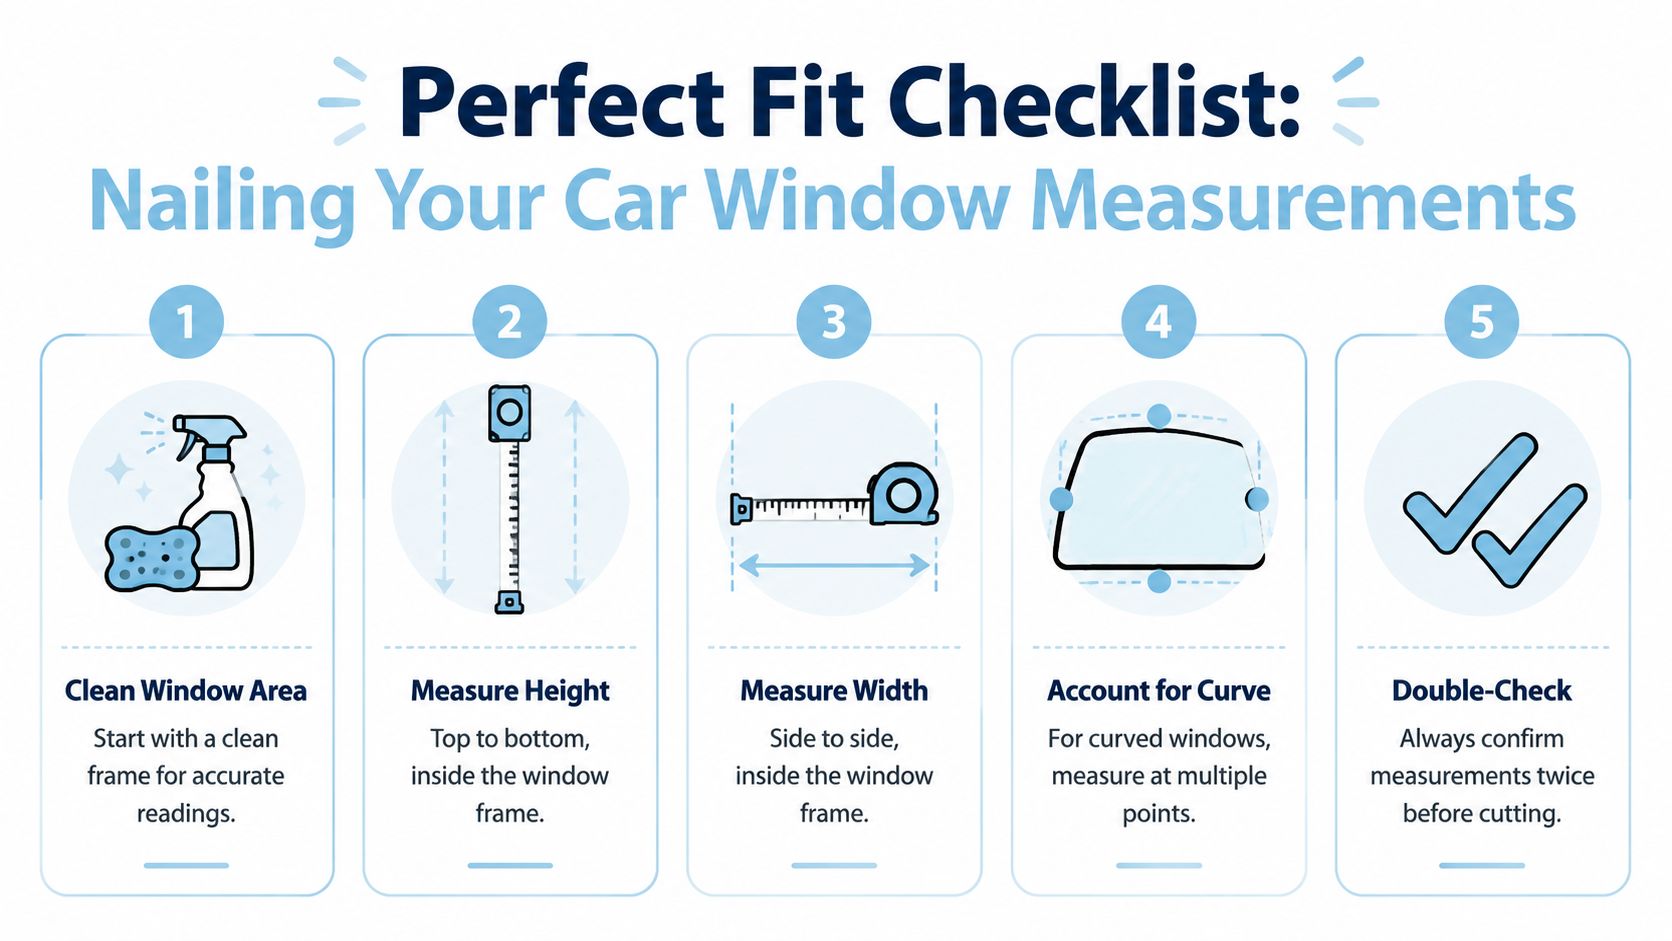
A five-step instructional checklist for measuring a car window accurately before installing a fly screen.

How to measure a Kombi sliding window

On a Kombi with a sliding side window, clean the channel first. Dust, old adhesive, and hardened grime can throw your reading off. Use a tape measure that hooks firmly, and take your height in three places. Front, centre, and rear.

Then measure the track depth at the top and bottom. For a DIY track-mount screen, the key formula is H = CH + TD – 3mm, where the 3mm tolerance helps account for track irregularities and thermal expansion in Australian heat, preventing the screen from jamming, according to the DIY measuring guidance from Flyscreens in a Box.

That little subtraction matters. Old Volkswagens spend plenty of time in the sun, and a snug fit in the shed can become a sticky fit at the beach.

Measuring a Beetle pop-out window

A Beetle's pop-out is a different animal. You're not usually dealing with a straight sliding channel. You're measuring the usable opening and the arc of the frame.

Do this instead:

  1. Measure the maximum width across the opening, but don't assume that's your cut line.
  2. Take several height readings because the frame curve changes the usable shape.
  3. Make a cardboard template before you touch the mesh.
  4. Check latch clearance so the screen doesn't foul the hardware.
  5. Test the template with the window partly open and fully open.

Measure the shape the air passes through, not just the shape the glass sits in.

That sounds simple, but it's where people go wrong. Beetle windows often look more symmetrical than they are.

The small habits that save rework

A tidy setup starts before the cutting.

  • Clean first: Dirt in the channel creates false readings and scratches.
  • Use a rigid tape measure: Soft sewing tapes are fine for trim, not ideal for frame work.
  • Mark orientation: Top, bottom, left, and right on your template. Don't trust memory after tea break.
  • Re-check after lunch: Fresh eyes catch mistakes.

If you want a handy nod to the measuring side of workshop life, this customised floor mat with tape measure design is the sort of thing that makes VW garage spaces feel a bit more personal.

A Weekend Guide to DIY Installation

This job sits nicely in a Saturday-and-Sunday rhythm. Saturday is for cutting, trial fitting, and muttering at corners. Sunday is for final tension, clean-up, and that satisfying moment when the screen pops into place and looks like it belongs there.

Start with the gentlest part of the job first. Protect the paint and trim before you build anything rigid.

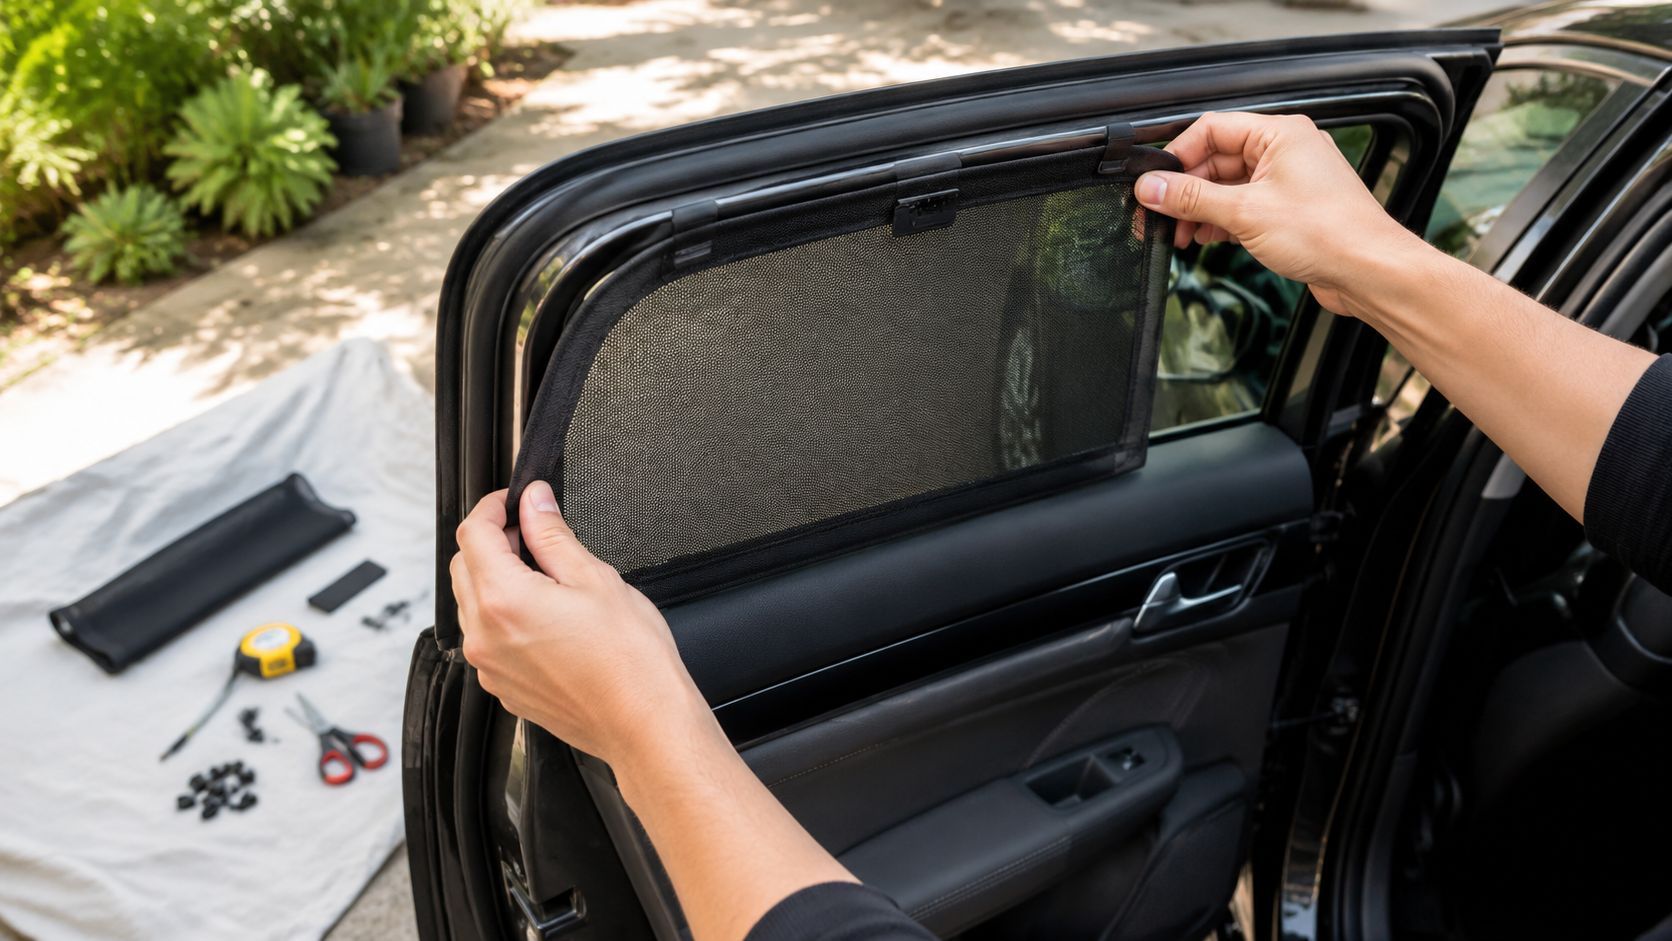
A person installs a black mesh car window fly screen onto the rear door frame of a vehicle.

Before you fit anything

Lay out your tools on a blanket or bench, not directly on the van. For most DIY installs, I'd want:

  • A tape measure and square
  • Cardboard for templates
  • Sharp scissors or a fresh utility blade
  • Spline roller if using framed mesh
  • Painter's tape for temporary positioning
  • Felt tape or soft edging where a frame may touch painted metal
  • A marker that wipes off easily

If you're building a framed screen, do a dry assembly first. Don't tension the mesh until you know the frame sits cleanly.

Building the screen without making it look homemade

The difference between neat and rough is usually tension. Pull the mesh evenly, not brutally. If one corner goes drum-tight while the opposite side is still soft, you'll end up with a twist that shows the moment it's installed.

For framed screens, work opposite sides in sequence rather than chasing one edge all the way around. That keeps the pull balanced. If you're using magnetic mounts, test each point with the door shut and then reopened. A magnet that feels fine static can shift the second the panel flexes.

Workshop note: Felt tape on contact points is cheap insurance for original paint and older powder-coated trim.

A lot of owners also underestimate edge finishing. A beautifully cut mesh can still look unfinished if the perimeter tape is wavy or oversized. Keep the border narrow and even.

Fitting and final checks

On a Kombi sliding window, insert the screen gently and check for rattle before you call it done. On a Beetle pop-out, test both latch operation and seal compression. You're not just checking if it fits. You're checking if the car still feels normal to use.

This installation clip is handy for getting your eye in before you start cutting:

If your van also runs touring gear, it helps to think of the fly screen as part of a broader camp setup rather than a random add-on. The same clean, functional approach shows up in a well-fitted Fiamma F45 awning installation for a van. Good accessories should look settled, not bolted-on in a hurry.

What a finished job should feel like

A proper car window fly screen on a classic VW should do four things:

Check What you want
Fit Sits snug without forcing
Look Doesn't dominate the window line
Use Allows normal opening, latching, or sliding
Sound No rattles at idle or in a breeze

If it fails one of those, adjust it. Don't live with a result that annoys you. These cars teach patience, and usually reward it.

VW-Specific Tips and Classic Aesthetics

A fly screen on a Volkswagen shouldn't feel like camping gear borrowed from another hobby. It should feel like something a careful owner added because they use the car properly. Beach runs, overnighters, swap meets, summer shows. That's the spirit.

The line between useful and ugly is thin on an old VW.

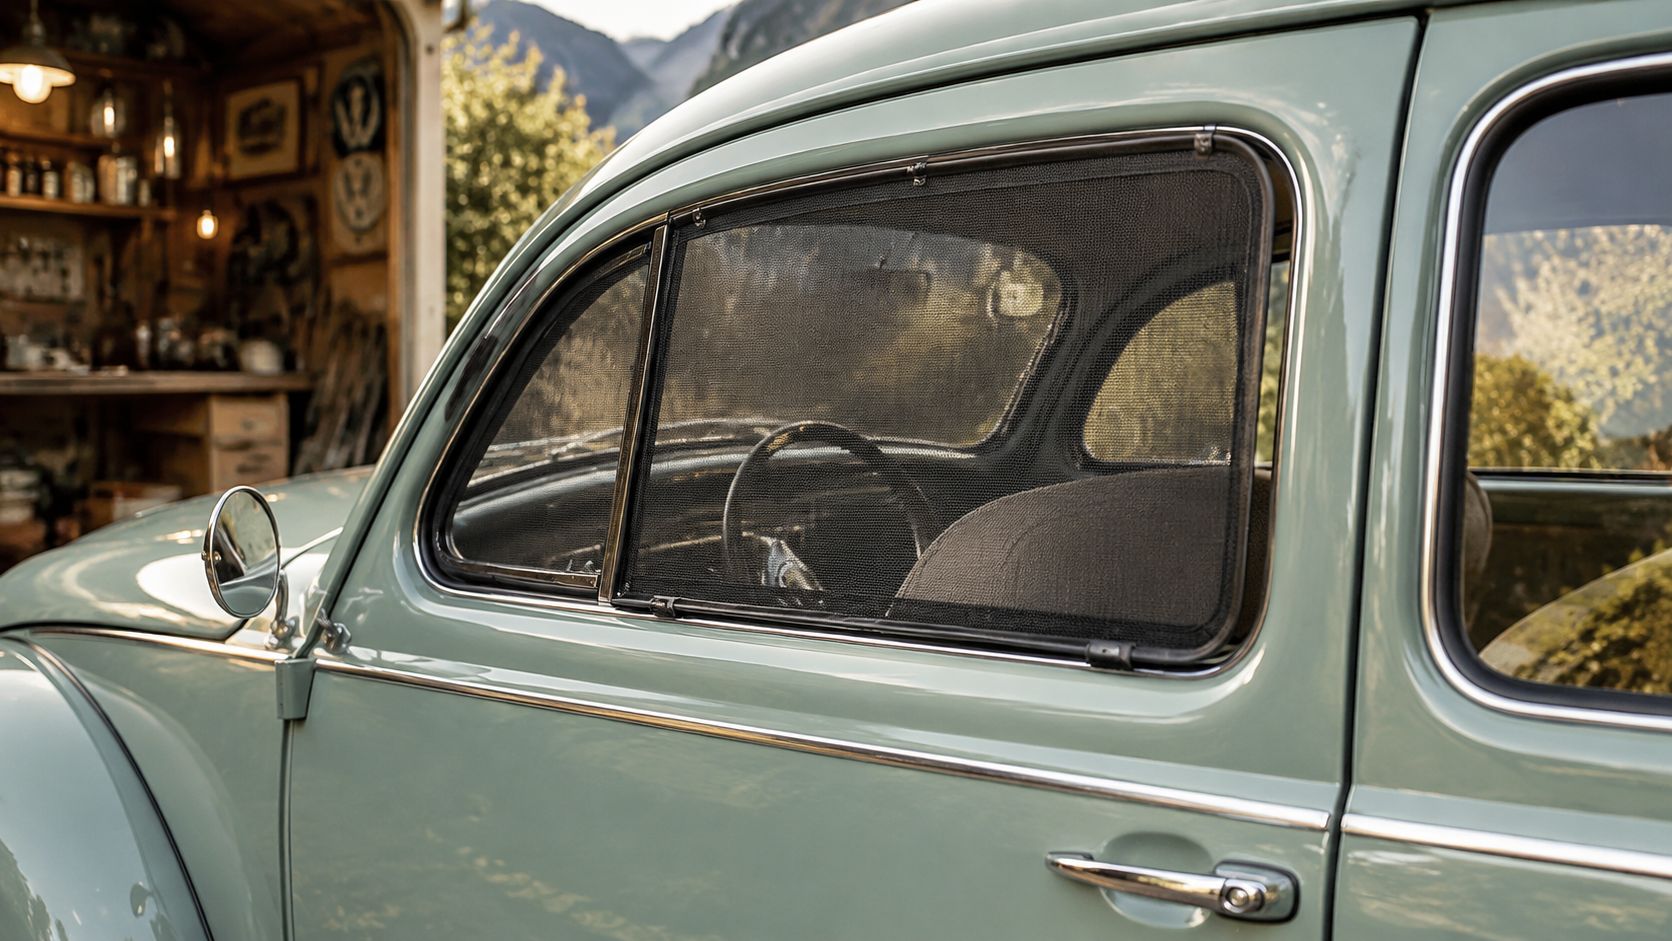
A close-up view of a vintage sage green Volkswagen Beetle parked outdoors with a black mesh window screen.

Let the car's era lead the design

Early Beetles suit lighter visual treatment. Thin surrounds, softer mesh colour, and hardware that disappears. A chunky black frame can look too aggressive against rounded guards, narrow pillars, and delicate chrome.

Kombis give you a little more freedom, especially campers with roof racks, awnings, timber interiors, or surf styling. Even then, the best screens still echo the van's shape instead of fighting it.

A few combinations that usually work well:

  • Pastel or lighter body colours pair well with charcoal mesh and slim edging.
  • Commercial or utility builds can carry a slightly more durable framed screen.
  • Samba-inspired looks benefit from the neatest possible finish because the extra glass makes any clutter more obvious.

Why old Volkswagens deserve a tailored approach

The Beetle wasn't just another imported novelty. It was officially introduced to Australia in 1953, with local assembly beginning a year later, which helped cement it in Australian motoring culture, as recorded in the Volkswagen Beetle history entry. That matters because these cars aren't appliances to their owners. They carry memory, family history, and a very particular visual language.

The same goes for the Kombi name. In Australia, enthusiasts use it with real affection because it means more than “van”. It points to a whole lifestyle around road trips, markets, surfboards, and slow weekends.

The best modifications on a classic VW never try to modernise the car out of its personality.

Small aesthetic choices that make a big difference

If you want the screen to feel almost factory-minded, pay attention to the details around it.

  • Match the trim mood: Satin finishes usually sit better than glossy ones.
  • Respect original hardware: Don't cover latches, catches, or signature frame shapes unless there's no alternative.
  • Avoid oversized tabs and straps: They break the silhouette immediately.
  • Keep storage tidy: A removable screen should store flat or in a simple sleeve, not as a crumpled bundle in the parcel area.

For many owners, diecast models are surprisingly useful here. A well-finished model often highlights the colour breaks, trim lines, and proportions that make a real Beetle or Kombi look “right”. If you're restoring or accessorising a car, studying those familiar lines in miniature can sharpen your eye before you commit to materials on the full-size vehicle.

Care Maintenance and Common Pitfalls

A good screen can last well if you treat it like trim, not like camping rubbish. Most damage happens off the car. People toss the screen into the back, fold it sharply, or scrub the mesh with whatever cleaner is nearby.

Use mild soapy water, a soft cloth, and patience. Let the mesh dry fully before storage, especially after coastal trips. Salt and damp don't do older fittings any favours.

The problems that show up after the first trip

Most issues aren't disasters. They're signs that the screen needs a small rethink.

  • Wind flap at low speed: Usually means the mesh isn't tensioned evenly or the perimeter isn't supported enough.
  • Tiny gaps at corners: Common on curved windows. A revised template often fixes it better than trying to stretch the mesh harder.
  • Rubbing on paint or trim: Add softer isolation at contact points before the marks become permanent.
  • Difficult window operation: The screen may fit the opening but still interfere with latches, sliders, or seals.

If insects are still getting in, don't assume the mesh is wrong. More often, the opening around the edge is the culprit.

The legal grey area that's worth taking seriously

This is the part many generic guides skip. A car window fly screen might work brilliantly at camp, but road use is a separate question.

Australian vehicle rules already deal with visibility and obstruction. The key point for owners is that side mirrors are required if rear vision is obstructed, but no source explicitly clarifies whether mesh fly screens breach the common 20% Visible Light Transmittance limit for rear side windows in states like NSW and VIC, which leaves a legal grey area, as discussed in this Australian guide touching on window screen and visibility rules.

That means common sense matters.

If you're unsure whether a screen could affect legal visibility while driving, remove it for road use and refit it at camp.

That's the cautious path, and for classic VW owners it's usually the sensible one. These screens make the most sense as parked-up comfort gear, not as something left on permanently without checking the rules that apply in your state.

A simple maintenance rhythm

Keep it boring and you'll keep it working.

  1. Brush dust off before washing
  2. Wash gently
  3. Dry fully in shade
  4. Store flat if possible
  5. Inspect mounting points before every trip

A tidy routine beats a heroic repair later.


If you love the classic Volkswagen lifestyle as much as the cars themselves, Volkswagen Memorabilia is well worth a browse. It's a proper local Australian shop for VW memorabilia collectibles, with local stock and fast shipping that makes gift buying and collecting much easier than chasing overseas listings. You'll find everything from the main VW shop collection to favourites for people searching Volkswagen diecast models for sale, including VW Kombi diecast Australia pieces, Volkswagen Beetle model collectibles, and classic bus-inspired items that suit anyone looking to buy diecast Kombi. If your heart leans toward the iconic split-window look, have a look at the 1962 VW Kombi Samba Bus range. It's a lovely way to bring a bit of that Beetle and Kombi magic onto the shelf when the real car is in the shed.

Camper Van Awnings: Your Complete Guide for VW Kombis

You're probably in that familiar spot right now. The van's packed, the kettle's rattling in the cupboard, and you're staring at a stretch of Australian coast or bush thinking, “A bit of shade out the side of the Kombi would make this perfect.”

That's where camper van awnings stop being an accessory and start feeling like part of the trip itself. They turn a parking space into a little front porch. Suddenly there's somewhere to kick off sandy thongs, lean back with a cuppa, and watch the afternoon slide by while the old VW cools down beside you.

For Kombi people, that feeling runs deeper than convenience. It's tied up in why these vans still pull at us after all these years, and why the right setup matters so much when you're chasing simple, sun-drenched weekends in a classic Volkswagen.

That Instant Verandah Feeling

I still reckon one of the best sights in motoring is a Kombi pulled up by the water with an awning stretched out like a little beachside verandah. Not fancy. Not overdone. Just enough shelter for two camp chairs, an enamel table, and a pair of salt-stiff towels drying in the breeze.

That scene fits the Kombi perfectly because the Kombi has always been more than transport. The Volkswagen Kombi's story in Australia starts in 1950, and by the 1960s it had become the “hippie van”, tied to freedom, counterculture, and adventure across late 60s and 70s Australian life. That's exactly why so many of us still smile when we hear an air-cooled engine burble into a showground.

An awning carries that same spirit. It says you're not rushing off in five minutes. You're staying long enough to make lunch, trade stories, and watch people wander over for a yarn about the first Beetle or Bay Window they ever owned.

Why the awning matters so much

A classic VW cabin is full of charm, but no one's pretending it's sprawling. Once you add bags, an eski, spare parts, and the usual road trip clutter, a bit of outside shelter changes everything. The van feels bigger without losing its cosy character.

A good awning doesn't just give you shade. It gives your Kombi a front room.

That's the bit many first-time owners don't realise. The best camper van awnings don't fight the VW lifestyle. They extend it. Morning coffee happens outside. Wet gear stays outside. Mates gather outside. The van remains the heart of camp, but the awning makes it liveable in that laid-back Aussie way we all chase.

The memory-maker beside the van

At any VW meet, you'll spot it straight away. One Kombi has an awning up and people gravitate there. Kids duck in and out. Someone's fiddling with a surfboard rack. Somebody else is telling a story that starts with, “Back in ’76…”

That's why this stuff matters. Awnings aren't only about fabric and poles. They're about creating the sort of setup that makes a classic Volkswagen feel like home.

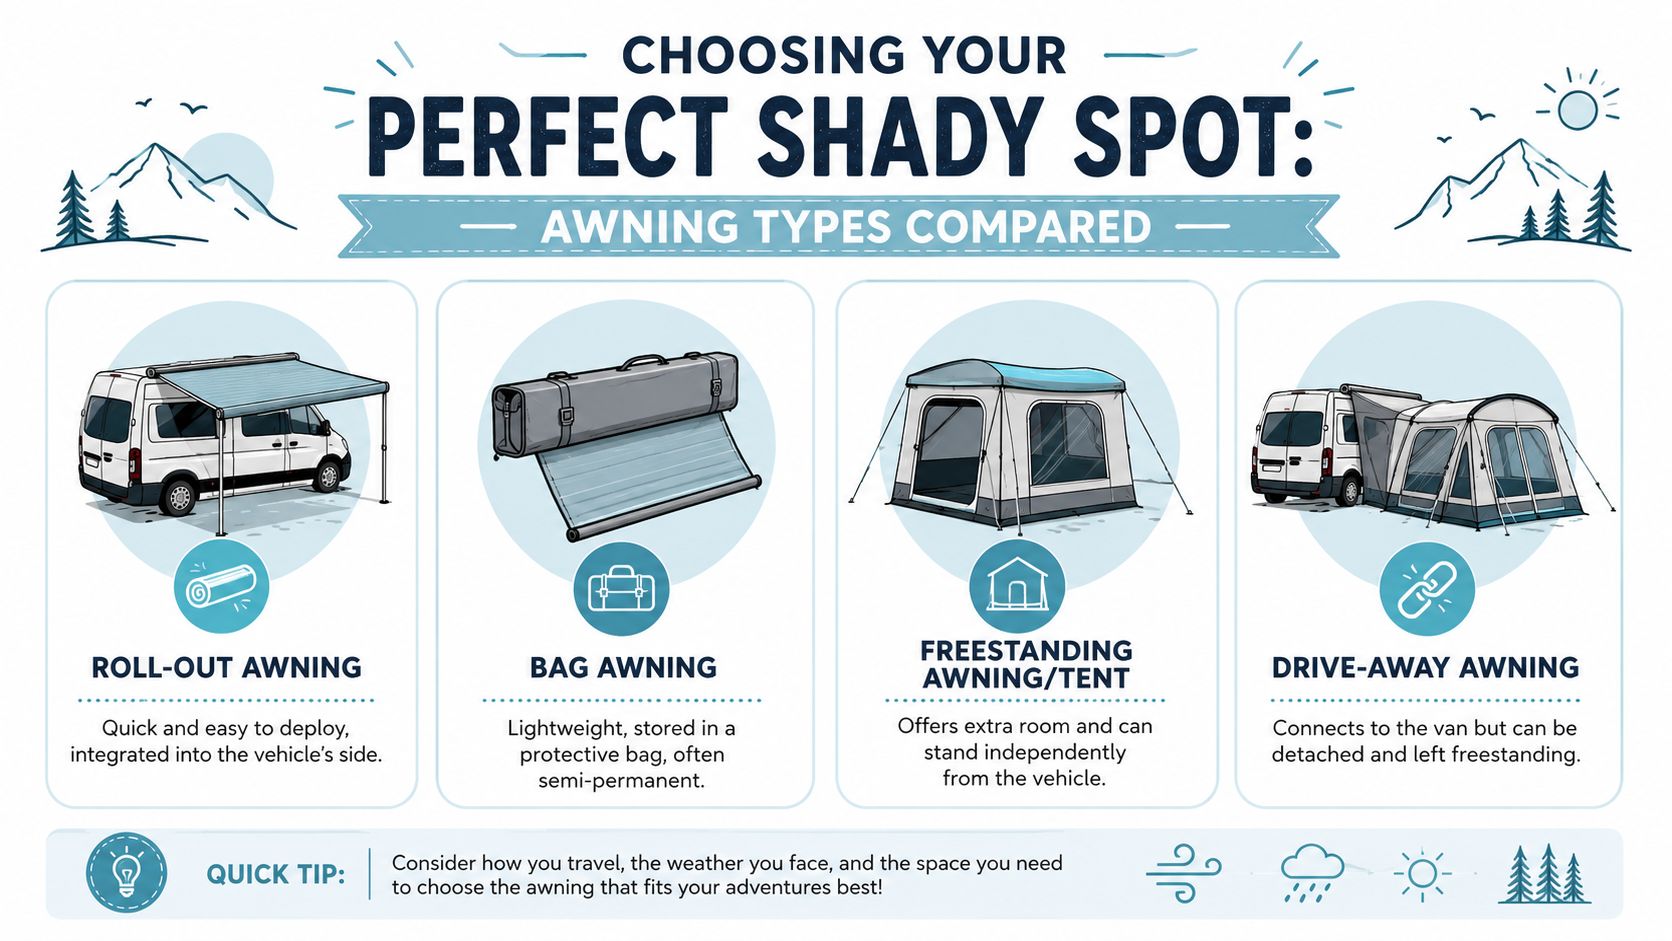
Choosing Your Perfect Shady Spot

Some awnings are made for quick roadside tea stops. Others suit a longer camp where you want proper living space. The trick is matching the awning to how you typically travel, not how you imagine you travel on your most organised day.

In Australia, the biggest names are Fiamma, Dometic, Carefree, and Aussie Traveller, and they lead the market across roll-out, box, bag, and inflatable styles built for our UV-heavy conditions and changing winds, according to RV Daily's guide to caravan and motorhome awnings.

An infographic comparing four types of camper van awnings including roll-out, bag, freestanding, and drive-away designs.

Four common styles on Aussie roads

Type Best for What it feels like in use
Roll-out awning Quick stops and simple touring Like a sturdy window blind for your van. Fast, neat, and easy to live with.
Bag awning Lightweight classic setups A softer, old-school option that suits period-style vans nicely.
Freestanding awning or tent Longer stays Gives you a separate zone for gear, chairs, or extra shelter.
Drive-away awning Campers who base themselves in one spot Lets you leave the awning standing while you take the van out.

How to choose without overthinking it

If your weekends are usually one-nighters, a roll-out makes a lot of sense. You pull in, wind it out, and you've got instant shade without turning arrival into a project.

If you like your Kombi looking period-correct, a bag awning has real charm. It doesn't feel as sleek as a cassette unit, but it suits older vans beautifully and keeps the visual style relaxed and classic.

If your trips involve staying put for a few days, cooking outside, or giving the family a bit more breathing room, freestanding and drive-away setups start looking very attractive. They create a proper camp footprint instead of just a strip of shade.

Practical rule: Buy for your most common trip, not your most ambitious holiday.

What different owners usually prefer

A simple way to think about it:

  • Solo cruiser in a Bay Window. A roll-out is often the sweet spot.
  • Couple doing beach weekends. Bag awning or roll-out, depending on whether style or speed matters more.
  • Family with a bus full of gear. Freestanding shelter gives you room to breathe.
  • Campground base-camp traveller. Drive-away design earns its keep.

One more thing matters. Fit. A brilliant awning that doesn't suit your van's rails, gutters, or body shape becomes a headache fast. That's especially true for old Splitties and Bays, where owners usually want secure mounting without turning the body into Swiss cheese.

Will It Fit My Splitty Or Bay Window

You pull into a grassy spot at Busselton, kettle still warm from the drive down, and the first thing you notice is the wind tugging at anything loose. That is usually the moment a Kombi owner stops caring about brochure words and starts asking the key question. How does this awning attach to my van without upsetting old paint, bent gutters, or a carefully kept original body?

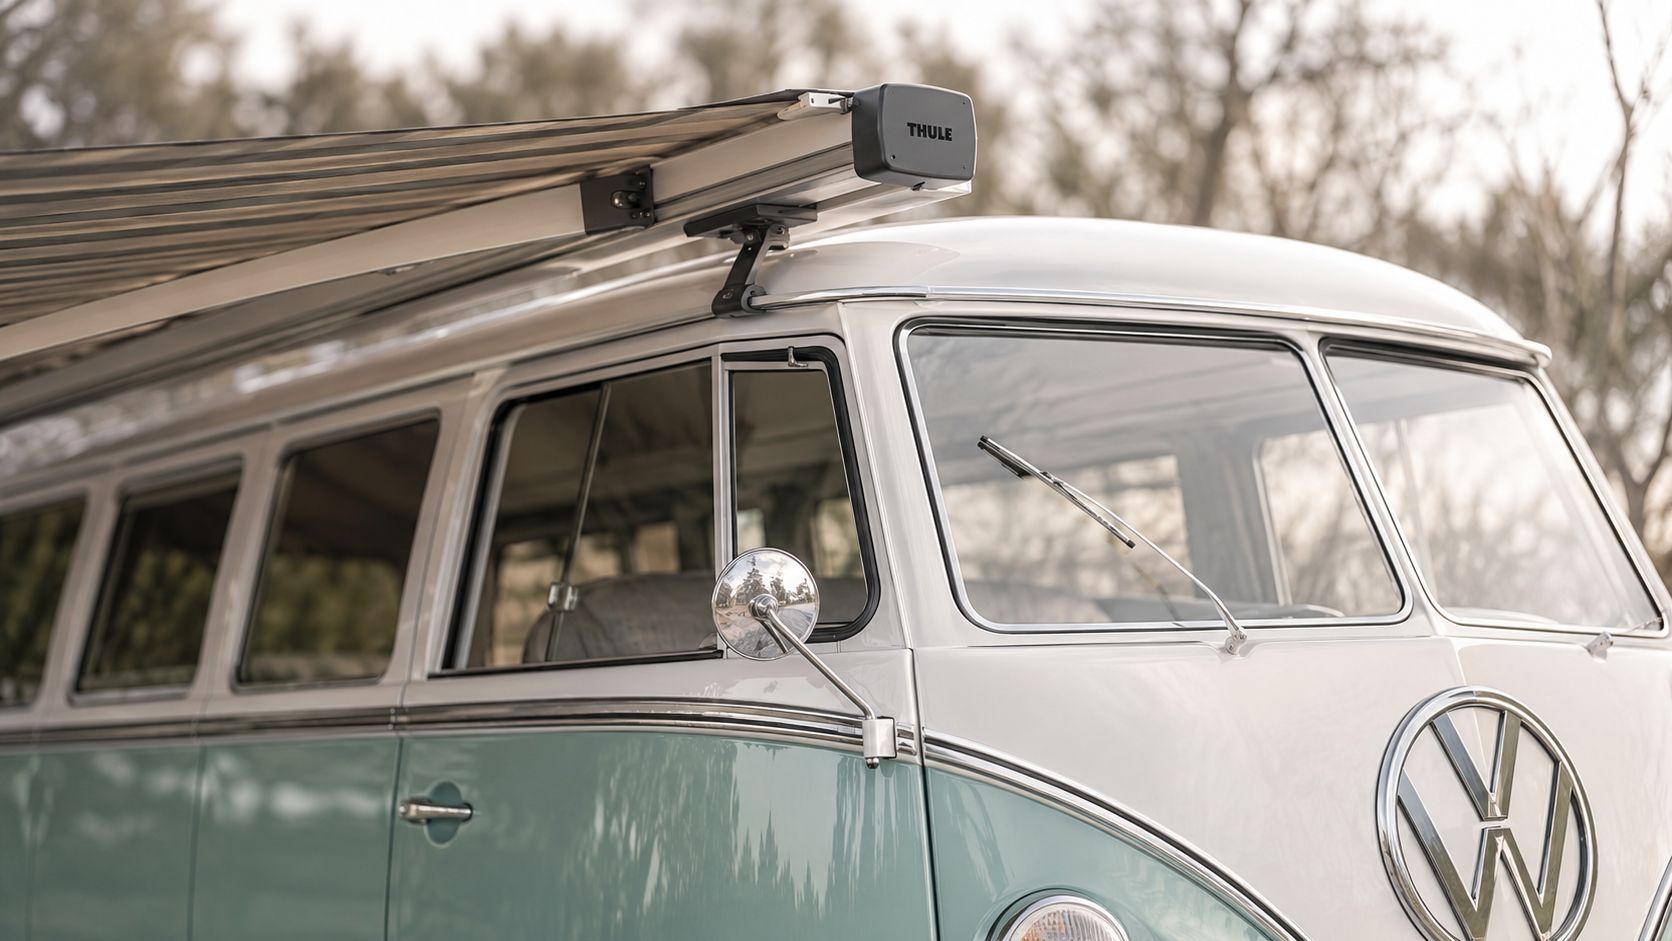
A close-up view of a vintage white and light blue Volkswagen camper van with a Thule awning.

On a classic VW, fit is about more than width on a spec sheet. A Splitty, a Bay, and a later Transporter all carry their awnings a bit differently, and old buses often have their own little quirks after decades of repairs, restorations, and beach runs. Gutters might be deeper on one side, doors may sit slightly proud, and some vans wear fresh paint that you will not want rubbed raw by a poor clamp.

The attachment setup many VW owners end up happiest with uses a kador strip and figure of 8 channel. In plain English, the beaded kador edge slides into an awning rail or channel, then the figure of 8 piece joins that edge to the awning itself. It is a tidy system, especially for owners who want something secure but still kind to an older body.

What usually suits each VW

A Split-screen Kombi deserves a close look at the gutter before you buy anything. Early vans can vary more than people expect, particularly if they have had roof work over the years. Measure both the depth and the shape, not just the length.

A Bay Window often plays nicely with gutter-mounted setups. Plenty of Bay owners like them because they keep the van looking right and avoid turning a weekend shade solution into a permanent body modification.

A later Transporter usually gives you more straightforward mounting options thanks to rails and model-specific hardware.

A Samba or freshly restored show bus calls for the gentlest approach of the lot. Reversible fittings and paint-safe contact points are the ones worth chasing.

If you want to see what a popular side-mounted option looks like on a VW body, the Fiamma F45 awning for Volkswagen campervans is a handy reference.

The bit owners forget until camp is set

Door clearance.

I have seen lovely old buses set up with plenty of shade, only for the owner to realise the side door now catches fabric, straps, or hardware every time someone reaches for the tea tin. On a camper, that gets annoying fast. Check how the awning sits when the door is fully open, and make sure the attachment method does not turn normal van life into a shuffle.

For vans with deep gutters, a figure of 8 channel can often clip on neatly. For shallower gutters, a pole and clamp kit may give a safer, steadier hold. Either way, take a tape measure to the van itself. Do not trust memory, and do not assume every Bay or Splitty matches the next one parked beside it at the show.

A moving visual helps if you're still trying to picture how all these parts come together.

Fit first, fabric second. If the mounting does not suit your Kombi, the awning will never feel right.

Sizing It Up For Sun and Salty Air

At Inverloch one summer, a mate rolled in with a tidy Bay and a bargain awning that looked the part in the morning. By mid-arvo, the fabric had gone limp in the heat, the fittings were already showing a dusty bloom from salt air, and everyone had shuffled their chairs back under the van's skinny strip of shade. That was the day he learned what plenty of VW owners learn the hard way. Aussie sun and coastal air sort the good gear from the cheap stuff very quickly.

Awnings live a rough life here. They cop harsh UV, hot gusts off the beach, and salt that creeps into hinges, screws, and brackets while you are busy putting the billy on. Size matters, but material matters just as much.

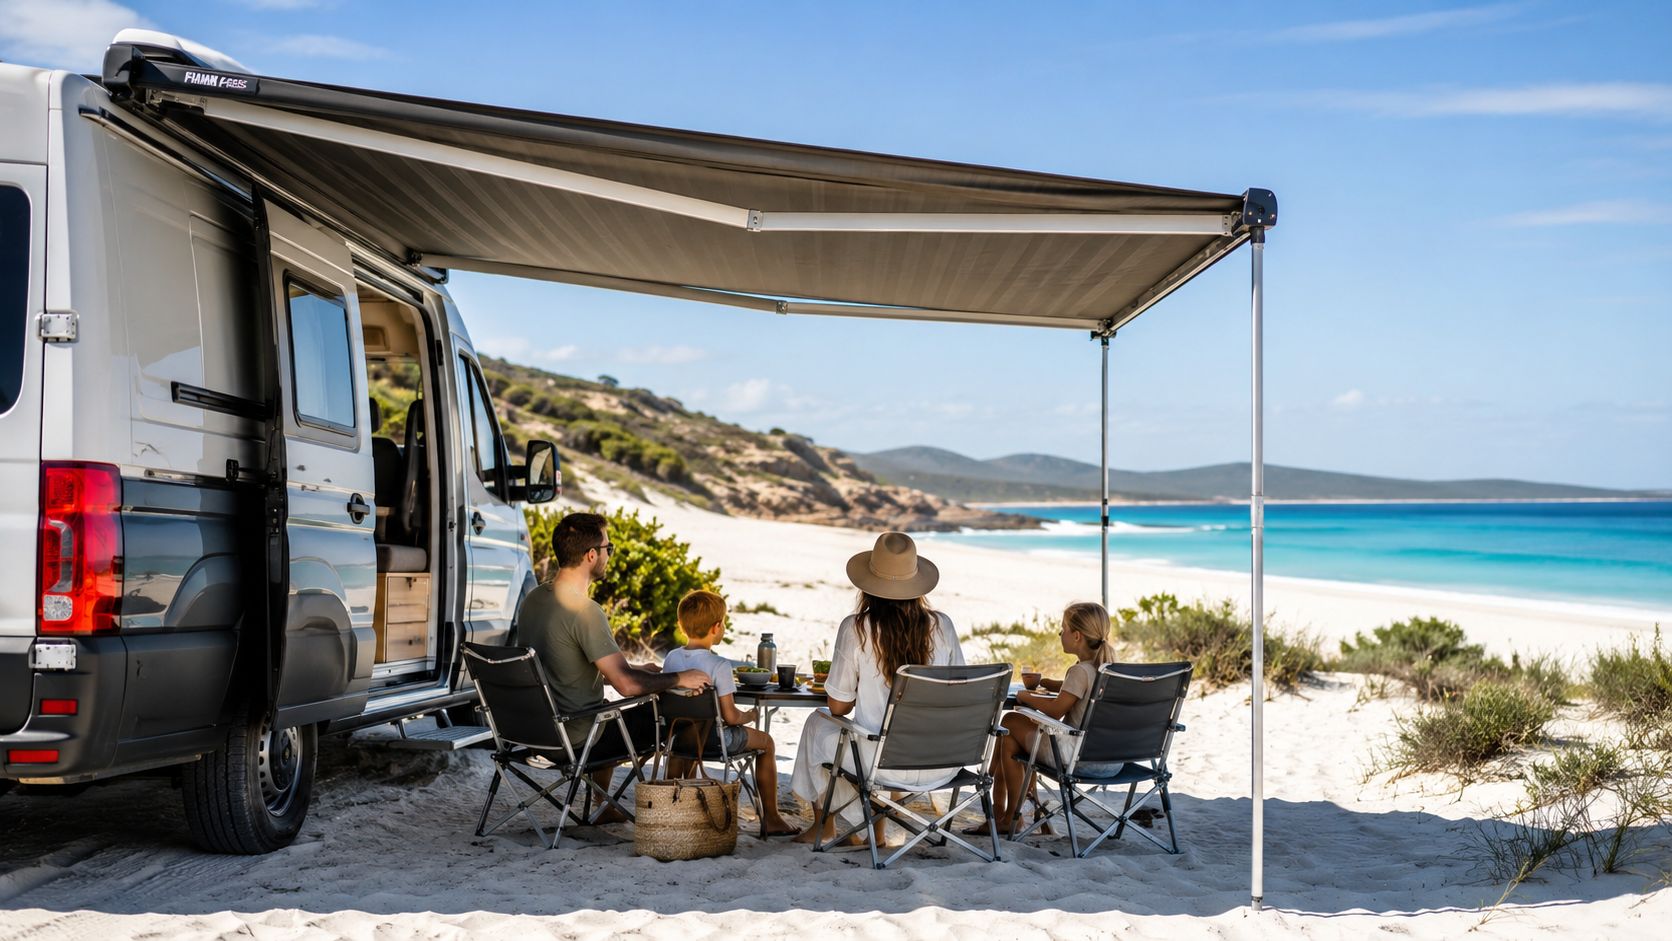
A family of four enjoys a picnic lunch under the shade of a camper van awning on a beach.

What a good size looks like on an old VW

On a Splitty or Bay, a compact awning often feels better balanced than an oversized one that sticks out like a patio bolted to a surf shack. For quick overnight stops, enough cover for two chairs, the kettle, and a small table is usually plenty. If your weekends tend to turn into long, lazy camp sessions with kids, mates, or a camp kitchen spread out under the side door, the extra width starts to earn its keep.

The trick is matching the awning to how you camp. Solo tourers usually appreciate something lighter and easier to wrestle into place. Families parked up near the coast for three nights straight will usually forgive a bit more bulk if it buys proper shade and room to move.

If you want a feel for the proportions many owners like, these wind-out awning options for Volkswagen campervans show the sort of coverage that suits a classic VW without dwarfing it.

Sun, salt, and the bits that wear out first

Coastal camping is where weak hardware gets exposed. The first signs are usually small. A bit of staining on a bracket, a sticky hinge, a fastener that no longer looks happy. Leave it long enough and setup gets annoying, pack-down gets rougher, and the whole thing starts feeling tired before its time.

Aluminium frames generally cope better than cheaper steel parts in salty air, especially if the finish is decent. Fabric wants proper UV resistance too, because strong sun does more than make shade important. It also dries, fades, and weakens cloth over seasons of use. Dense fabric often feels steadier and more reassuring, though it can add weight and take up a bit more room in the van.

A quick buyer's comparison

Priority Better choice
Beach use Corrosion-resistant frame and UV-rated fabric
Frequent solo touring Lighter awning with easy handling
Long family stays Larger covered area for chairs, cooking, and gear
Classic VW aesthetics Proportions that suit the van and do not overpower it

One good rule has never let me down. Buy for the worst day, not the best one. A pretty awning looks lovely on the grass at a car show, but a Kombi awning in Australia earns its stripes in hard sun, sea breeze, and a campsite full of sand.

A No Fuss Guide To Getting It Up

The first setup always feels like a bit of theatre. You've got the awning out, someone's offering advice they definitely haven't tested, and the pegs are rolling under the van. Then you do it properly once and realise it's much easier than it looked.

In Australia, Achtung Camper's awning guide puts single-person setup for the basic configuration at 3–5 minutes, using a strap extension system where straps go over the roof and tension down to ground pegs. That sounds about right when the gear suits the van and you're not fighting the wind.

The simple setup flow

  1. Attach the awning properly
    Slide or secure the awning into its channel or mounting point before you tension anything. A rushed start usually causes the fiddly bits later.

  2. Pull the straps over the roof
    That strap system earns its keep. It keeps the setup controlled and manageable, even if you're on your own.

  3. Extend to the ground and peg out
    Tension matters. Too loose and the fabric sags. Too tight and you'll make adjustments harder than they need to be.

The wind-out awning options for Volkswagen campervans give you a good feel for the sort of setup many VW owners prefer when ease and speed are high on the list.

One rookie mistake worth avoiding

Don't peg where the sliding door wants to travel.

It sounds obvious until you're tired, hungry, and trying to beat the weather. Ground pegs should sit far enough away from the van that doors can open freely and nobody catches a foot on a strap every five minutes.

A tidy setup routine

  • Park with intention. Give yourself room on the awning side.
  • Face the van sensibly. Think about wind and shade before you deploy.
  • Peg wide, not messy. Clean lines are safer and easier to live with.
  • Check tension after a few minutes. Fabric can settle once it's opened up.

Once you've done it a couple of times, setting up an awning becomes part of arriving. It's as natural as popping the kettle on.

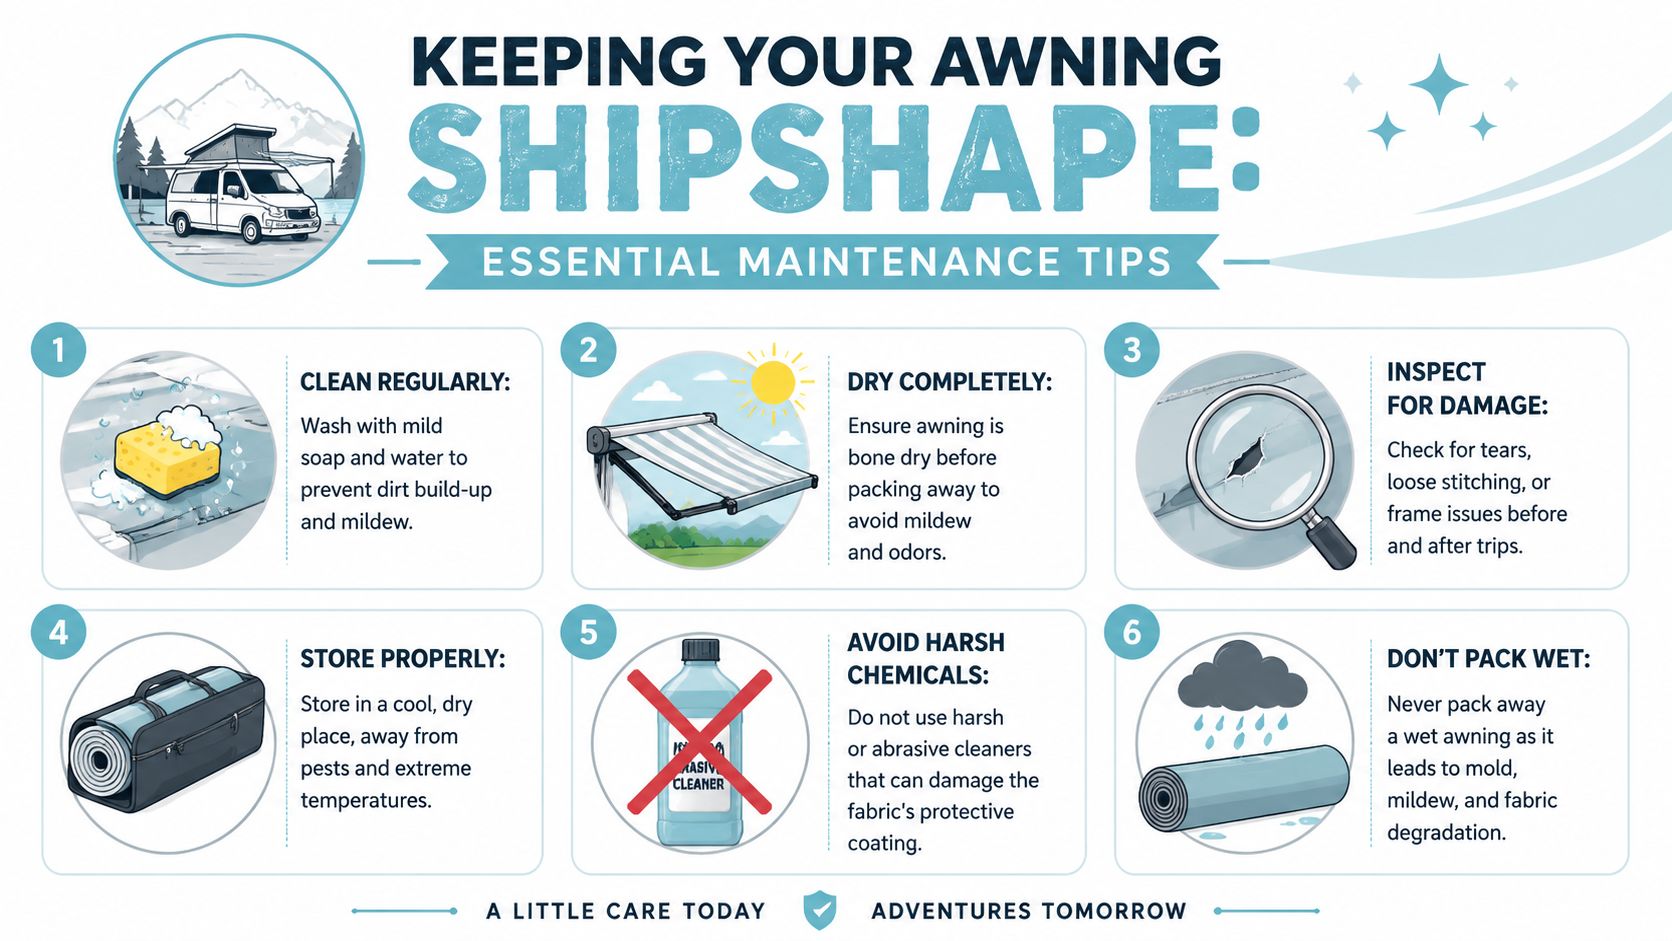
Keeping Your Awning Shipshape

Awnings cop plenty. Dusty showgrounds, salt breeze, sudden rain, and that one pack-up where you promise yourself you'll dry it later. If you want yours to last, maintenance can't be an afterthought.

The big insider trick is drainage pitch. Plenty of owners know they should lower one side in rain, but not enough realise how important the angle really is. Carefree's awning guidance points to an optimal 10–15° tilt for heavy Australian monsoon-style rain. The same source says a flat setup increases water retention by 40% in tropical climates, and 60% of technician-reported awning failures come from mould rather than wind damage.

An infographic titled Keeping Your Awning Shipshape providing six essential maintenance tips for camper van awnings.

The maintenance habits that actually matter

That drainage pitch alone can save you grief. Water pooling stretches fabric, encourages mould, and adds load where you don't want it.

Then there are the basics, which sound dull until you've had to scrub out mildew or replace worn gear.

  • Wash off salt and grime after coastal trips.
  • Dry the awning completely before packing it away.
  • Inspect stitching, clamps, and frame points before the next run.
  • Store it clean and dry so you're not opening a musty mess next time.

Wind noise and fabric fatigue

Rain isn't the only enemy. Flapping fabric wears out faster and makes a peaceful campsite sound like a loose yacht sail. Achtung Camper notes that Anti-Flap Kits are standard inclusions for Australian-made awnings such as Queensland-made examples, using curved bars and tensioning hardware to reduce flutter and protect the vinyl fabric during frequent gusts.

That's one of those accessories owners often skip until they've had one noisy, windy night and changed their tune.

A practical care checklist

After each trip Before the next trip
Rinse off salt Check for mould spots
Air dry fully Inspect pegs and straps
Brush off debris Look over rails or channels
Roll or pack neatly Test moving parts

Workshop wisdom: Most awnings don't fail in dramatic fashion. They get neglected in small, fixable ways until one wet weekend finishes the job.

If you want a VW-specific reference point for upkeep, the Fiamma F45 awning maintenance guide is a handy place to compare your cleaning and care routine.

Your VW Awning Buying Checklist

Last summer at a meet-up near Torquay, a mate rolled in with a lovely Bay Window and a bargain awning still in the box. By lunch, the van looked the part, but the awning legs were fighting the slope, the fabric sat too low over the slider, and the sea breeze had everyone grabbing cups before they skittered off across the grass. Same bus, same sun, very different afternoon once he swapped to a setup that suited how he camps and where he parks.

That is the checklist worth using. Not the glossy catalogue version. The practical one you run through with a cup of tea in hand, picturing your own Splitty or Bay by the beach, out west in harsh sun, or tucked into a shady holiday park.

The checklist I'd use before spending a cent

  • How do you use the van?
    A quick one-nighter down the coast suits a simple awning you can throw up fast. A week away with the family usually calls for more covered space and a bit more structure.

  • Will it suit your particular VW?
    A Splitty, a Bay, and a later camper can all need slightly different mounting gear. Check the gutters, door clearance, roofline, and any existing rails before you buy.

  • Does the shade match Australian conditions?
    Strong sun changes the equation here. Fabric that holds up in mild weather overseas can feel ordinary after a run of bright days in an Aussie summer.

  • How will it cope near the coast?
    Salt air gets into everything. Frame finish, fittings, and hardware quality matter a lot more if your best trips involve sand, sea spray, and fish and chips in the car park.

  • Can you put it up without turning camp setup into a project?
    The best awning is the one you will use often. If it takes too long, needs too many hands, or always ends in muttering, it will stay packed away.

  • Does it leave room for the way you live around the van?
    Make sure you can still move easily through the side door, set up a table, and shuffle a couple of camp chairs under cover without feeling cramped.

  • Will you still be happy owning it after a few trips?
    A good awning needs basic care and a bit of common sense. Buy one you can clean, dry, pack, and inspect without making a fuss of it.

The VW owner's final gut check

A good awning makes the van feel settled within minutes. The kettle goes on. Wet towels get a place to hang. Someone pulls out a camp chair, and all at once the old bus feels less like transport and more like home for the weekend.

That matters with a classic Volkswagen because these vehicles already ask for a bit of patience and affection. Your awning should add to the pleasure, not pile on more jobs. It should suit the lines of the bus, cope with our hard sun, and stand up to those breezy foreshore camps that look calm until late afternoon.

If you are still torn between two options, pick the one you can see yourself using on an ordinary trip, not just on a perfect one. Practical always wins in the long run.

FAQ

Which awning type suits a classic Kombi best

For plenty of owners, a roll-out or bag awning gives the nicest mix of ease, appearance, and day-to-day usefulness. The better choice comes down to your mounting points and whether you stay put for a night or a week.

Can I fit an awning without drilling into my VW

Often, yes. Gutter-mounted systems and kador-style setups can be a tidy option for owners who want to avoid altering original bodywork.

Are camper van awnings worth it for short trips

Yes. Even a modest awning gives you quick shade, a dry patch for the camp stove, and somewhere pleasant to sit when the sun is belting down.

What matters most for Australian conditions

UV resistance, hardware that copes with salt air, and a setup that stays manageable when the weather changes quickly.

Do awnings suit Beetles too

Not in the same way they suit Kombis and campervans. Beetle owners usually enjoy that touring spirit through club days, displays, and collectible pieces rather than vehicle-mounted camping setups.

If the camper van life has you daydreaming even when the Kombi's parked at home, have a browse through Volkswagen Memorabilia. It's a cracking Australian shop for licensed VW collectibles, with local stock and fast shipping that suits collectors and gift buyers alike. You'll find Volkswagen diecast models for sale that celebrate the same charm discussed here, with plenty to suit Kombi and Beetle fans who like a little Wolfsburg soul on the shelf as well as in the driveway.

Camping Utensil Sets: Your 2026 Aussie Road Trip Guide

The morning usually starts the same way. Salt in the air, kettle just starting to mutter on the camp stove, and the Kombi side door open to that lovely little world you've packed with care. Not crammed. Curated. Towel rolled tight, enamel mugs nested properly, tea bags where you can grab them half asleep, and a camping utensil set tucked where it won't rattle the whole way up the coast.

If you've ever chased a sunrise out of a Beetle boot or cooked brekkie from the back of a Type 2, you already know the small gear matters more than people think. A dodgy spoon, a knife that bends, or tongs that vanish into the cutlery drawer chaos can turn a relaxed camp meal into a grumble. The right kit keeps the vibe intact. That matters when the road is the point.

The Joy of a Perfectly Packed Kombi

A Kombi has a way of teaching you discipline without making it feel like work. Every item has to earn its place. You learn fast that the things you touch every day matter most. The mug. The torch. The tea towel. The camping utensil set.

I remember a beach run up the New South Wales coast in an old two-tone bus, the sort of trip where the destination kept changing because the weather was too good to ignore. One mate brought a flimsy drawerful of mismatched cutlery wrapped in a supermarket bag. I had a compact roll with the proper basics, a serving spoon, a decent knife, a spatula that could flip a fritter without folding in half, and tongs long enough to save my knuckles from the pan. By the second camp breakfast, everyone knew which setup felt like home.

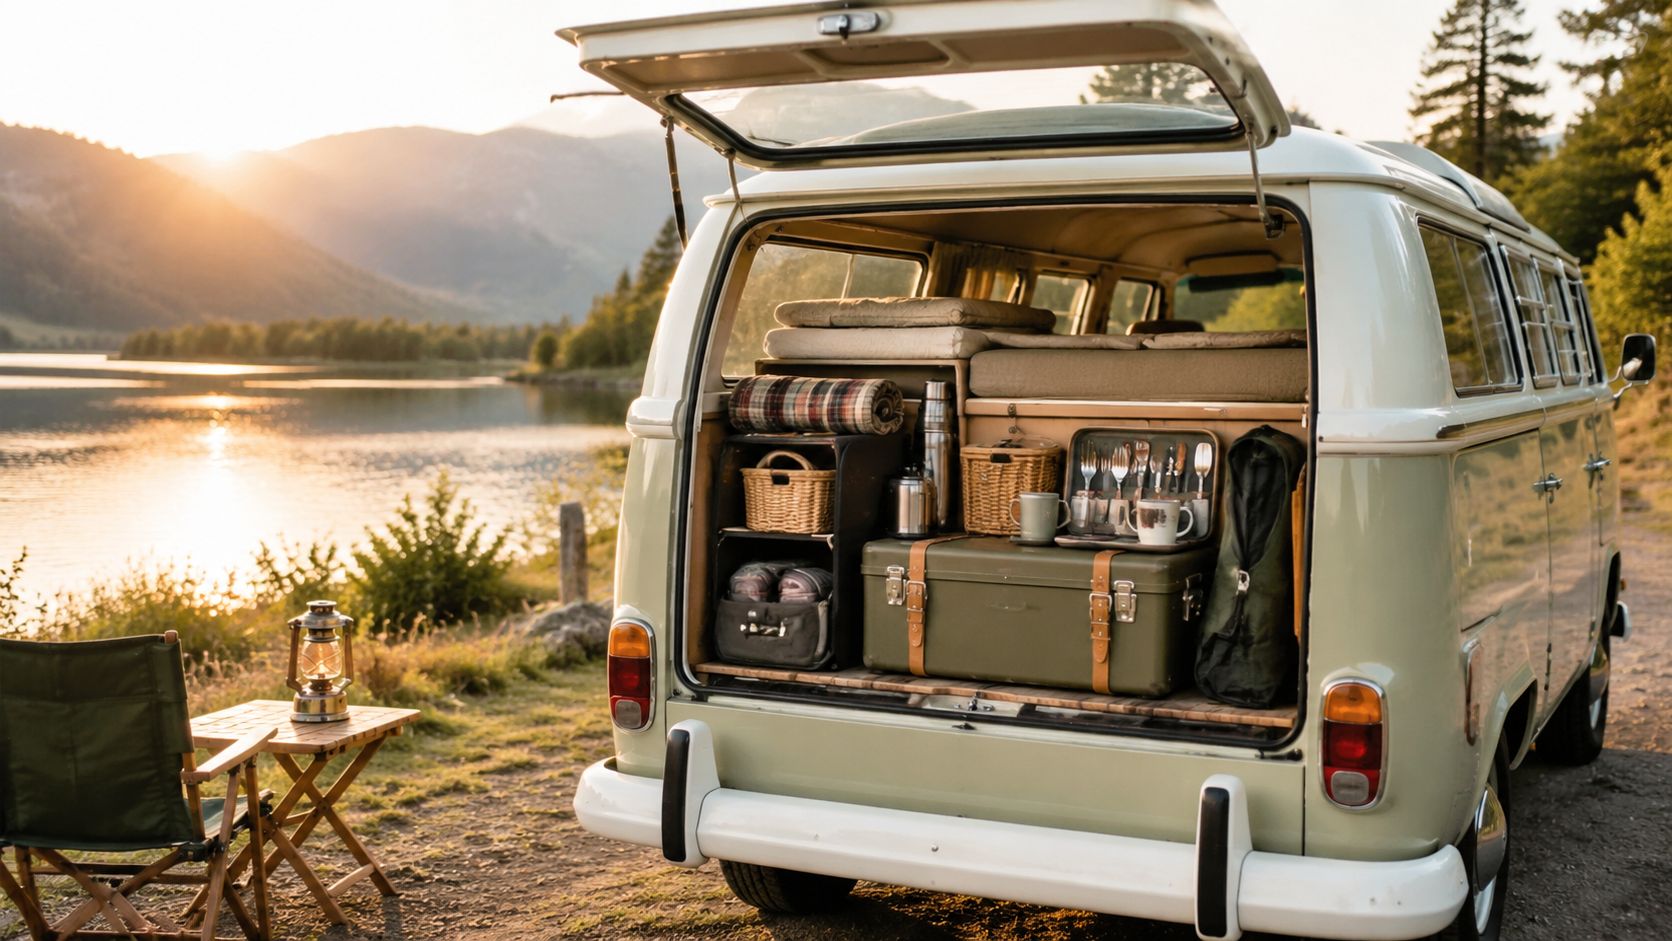
A vintage green camper van parked by a serene lake at sunset, featuring a curated camping utensil set.

That little ritual is becoming more familiar all over the country. In 2025, caravan and camping trips in Australia, including glamping, increased by 14%, with Australians taking a total of 17.3 million caravan and camping trips, according to Tourism Research Australia's caravan and camping data. More people are getting outdoors, and more of them are realising camp cooking works best when your gear is sorted before the wheels start turning.

Packing for comfort, not clutter

A classic VW doesn't reward overpacking. It rewards intention.

  • Keep daily-use gear together: Your utensil set should live near the stove, not buried under bedding.
  • Pack for the meal you cook: If you make pasta, eggs, snags, toasties, and salads, pack for those jobs.
  • Use your van like a tiny kitchen: A good layout saves time and keeps the camp mood easy.

Camp rule: If you need it at every stop, it deserves a fixed home.

A tidy van feels better to drive and better to live in. If you're refining that setup, this van fit-out planning checklist is handy for getting the essentials in the right order before your next trip.

Beyond the Spork What Is a Camping Utensil Set

A spork is fine if you're hiking light and dinner comes from a pouch. That's not how most VW road-trippers cook. A proper camping utensil set is less about surviving and more about eating well by the beach, at a bush stop, or at a meet-up where someone always says, “Throw another onion on.”

For van life, a useful set usually covers two jobs. First, personal eating tools. Second, cooking and serving tools. If it only handles one, you'll still end up rummaging through odd bits and pieces.

What belongs in a proper road kit

The best camping utensil set for a Kombi or Beetle trip usually includes a mix like this:

  • Eating pieces: Fork, spoon, knife, and a mug or bowl setup that nests neatly.
  • Cooking tools: Spatula, tongs, serving spoon, prep knife.
  • Problem-solvers: Bottle opener, can opener, corkscrew, and something for turning food over a hot plate.
  • Storage: A roll, pouch, or compact box that stops metal-on-metal chatter.

That last bit matters more than people think. In a van, every loose item develops a soundtrack. The wrong storage turns a scenic drive into a percussion session.

Why van campers need more than a backpacker kit

Backpackers strip things back because weight rules everything. VW travellers have a bit more room, so the better question is whether a piece earns its space. A full-size spatula often earns it. So do proper tongs.

The nicest camp meals happen when your tools feel familiar enough to use without thinking.

A camping utensil set should make your mobile kitchen feel settled. Not fancy. Not overloaded. Just ready. When you can make breakfast one-handed while balancing a mug of tea in the other, you've packed well.

Choosing Your Utensil Material for Aussie Adventures

Material changes everything once you leave the driveway. It affects how your gear feels in the hand, how it copes with heat, and how long it lasts after beach runs, dusty inland stops, and damp mornings near the water.

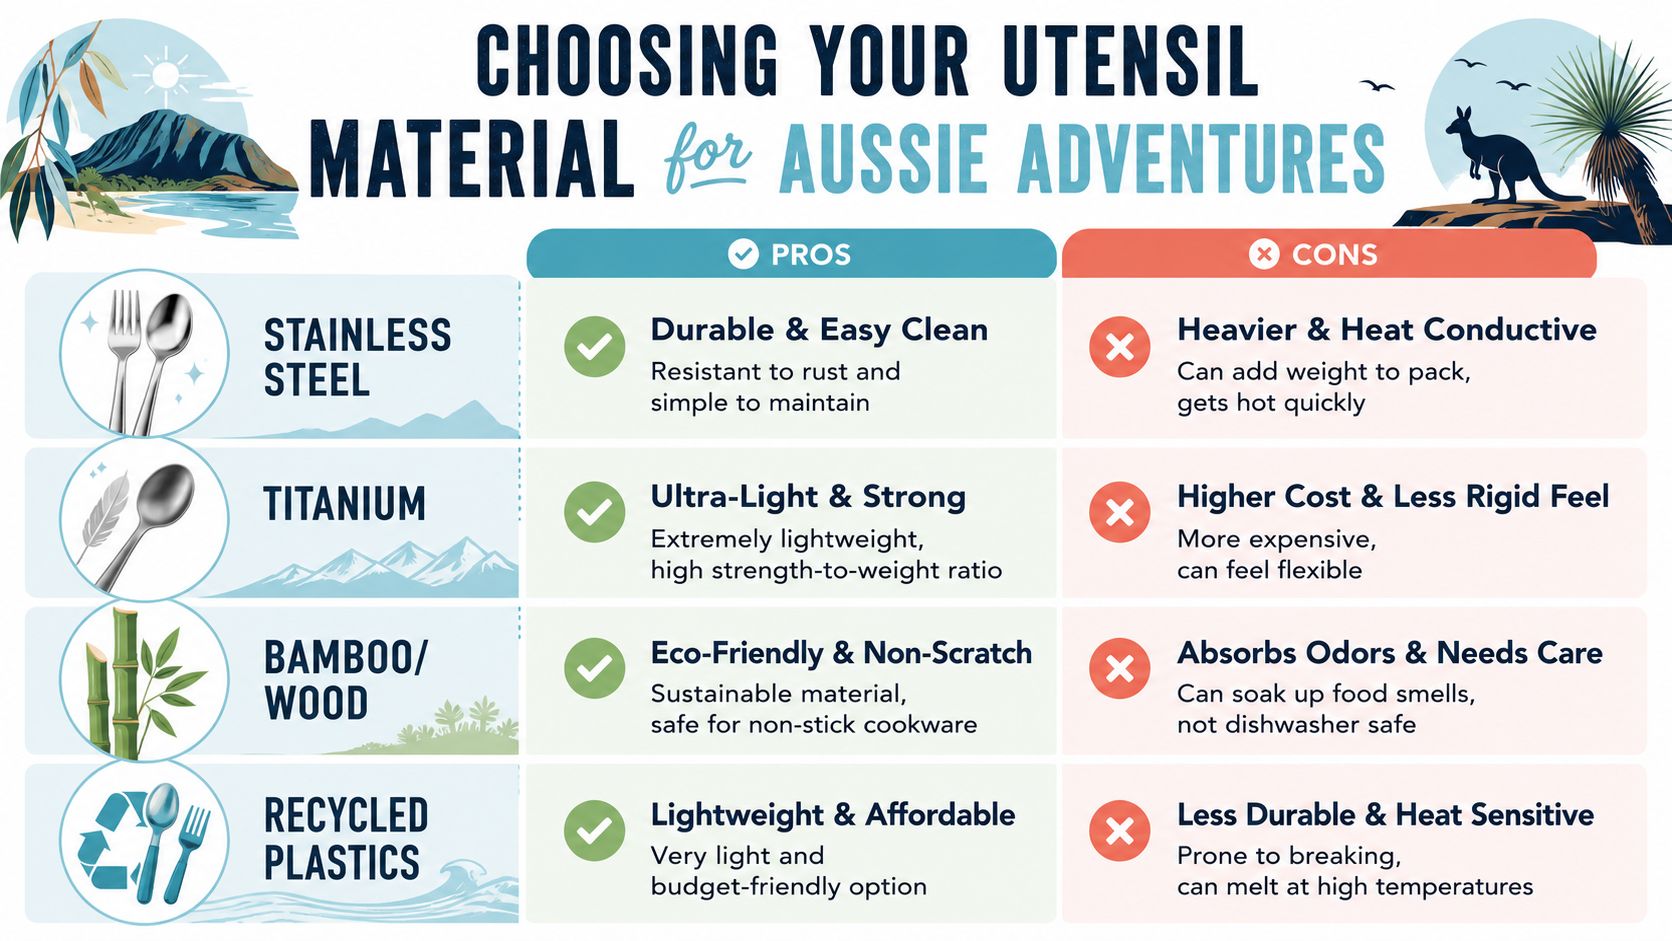
A comparison chart outlining the pros and cons of different camping utensil materials including stainless steel, titanium, bamboo, and plastic.

The coastal factor is where many buyers get caught. Most camping utensil content fails to separate normal wear from real durability in Australian conditions. 68% of Australian campers report replacing their utensil sets annually due to corrosion from coastal salt and heat, as noted in Cranky Croc's discussion of camp kitchen utensil considerations. If your VW weekends usually end with sandy feet and salty windows, material deserves a proper look.

Camping Utensil Material Comparison

Material Pros Cons Best For
Stainless steel Durable, easy to clean, familiar feel Heavier, can get hot fast Regular road trips and general camp cooking
Titanium Very light, strong for its weight Higher cost, can feel less solid in use Minimalist packers and serious lightweight travellers
Bamboo or wood Retro look, gentle on non-stick cookware Holds odours, needs more care Relaxed camp setups with a natural, coastal feel
Recycled plastics Light and budget-friendly Less durable, heat sensitive Backup kits, casual use, or very simple meals

How each material suits VW travel

Stainless steel feels right in a classic setup because it's dependable. It washes up easily and suits campers who cook often. If your style is more “park by the dunes and fry something proper”, stainless is usually the safe choice.

Titanium suits travellers who love compact, efficient packing. It's especially appealing if your Beetle has very little spare room or you just enjoy finely made gear. The trade-off is cost. Some Australian camping utensil sets range from about $2 for a simple spoon to $30 for premium titanium spoon and fork sets, while a mid-range set noted by Outdoor Life sits at $22 with a 4.6 out of 5.0 rating, according to Outdoor Life's guide to the best camping utensils.

Bamboo and wood have undeniable charm. They look good on a striped towel beside the van and feel perfect for the retro crowd. They do ask more of you, though. Dry them well and don't treat them like something you can forget in a damp tub overnight.

Recycled plastics have their place, mostly as a second kit, a picnic backup, or something for easy snacks rather than serious cooking.

Material test: If your trips lean coastal, choose for salt, heat, and cleaning ease first. Style comes second.

Must-Have Features for the VW Adventurer

The right features matter more than clever marketing. On the road, practical design wins. You notice it when you're parked at a windy headland trying to make dinner before dark.

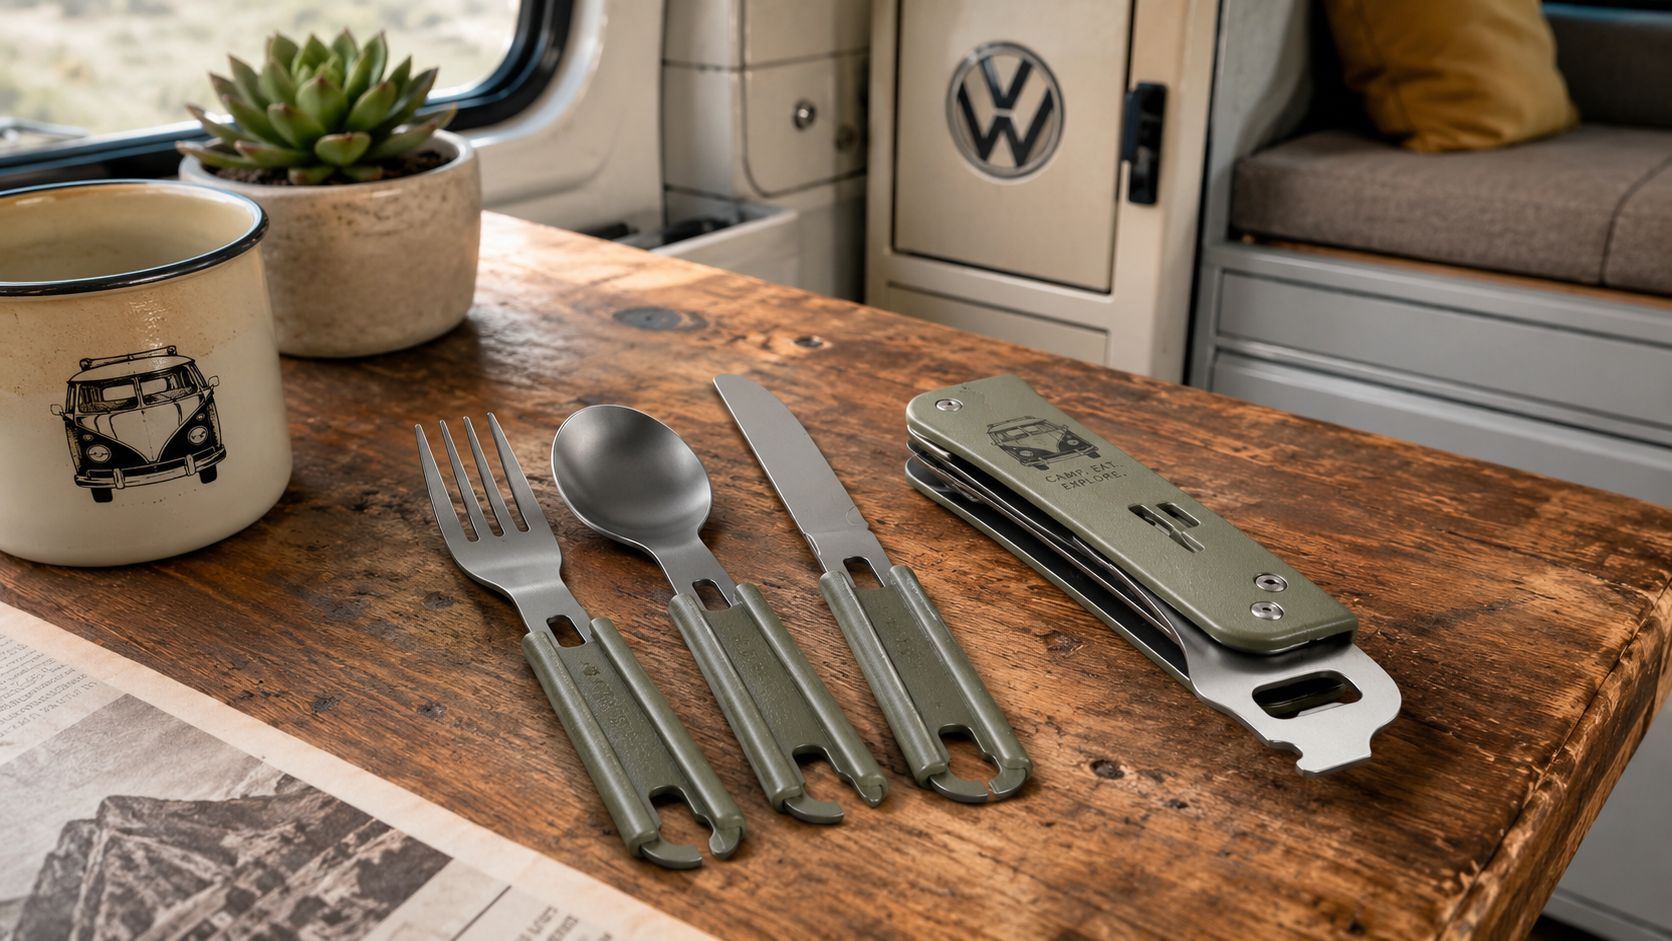
A camping utensil set featuring a fork, spoon, knife, and multi-tool on a rustic wooden table inside a van.

A tidy storage roll is high on my list. Corrugated roads and old VW cabins don't forgive loose gear. If your fork, knife, and opener all knock together in one tin, you'll hear them all day. A proper pouch or box also means you can lift the whole set from van shelf to picnic table in one move.

Full-size tools beat novelty combos

Compact multi-tools look brilliant in the shop. They don't always shine when you're cooking for more than one person. Only 22% of Australian campers use compact multi-utensil sets for week-long tent trips because they lack the prep efficiency of full spatulas, knives, and can openers needed for shared meals, as discussed in this Australian camping conversation on Reddit.

That lines up with what plenty of road-trippers already know. A combined spoon-fork-knife gadget can be handy for lunch. It's not much fun when you're trying to prep veg, open a tin, flip fish, and serve a group.

Look for these features:

  • Secure storage: Rolls and boxes stop rattles and keep drawers organised.
  • Real handles: Full-grip tools are easier to use when your hands are wet or sandy.
  • Useful extras: Can opener, bottle opener, and serving spoon save you from packing duplicates.
  • Easy cleaning: Smooth surfaces and simple joins are kinder at wash-up time.

Construction matters when gear gets used hard

If you cook often, pay attention to how pieces are built. The Front Runner Camp Kitchen Utensil Set is one example built with triple-riveted composite handles and full-size stainless steel blades, a design intended to prevent handle detachment under repeated torque stress. One retailer description notes this addresses a failure point seen in 15% of non-riveted consumer sets under Australian field testing conditions, with the riveted design increasing shear strength by approximately 40%, according to Roof Racks Galore's Front Runner product page.

That's the sort of detail you appreciate halfway through a trip, not at the checkout.

For a quick visual on camp kitchen essentials, this clip gives a decent sense of what practical setup looks like in a compact space.

Easy Packing and Cleaning Tips on the Road

Camp kitchen order doesn't come from buying more stuff. It comes from repeating a few good habits until they're automatic. Old Kombi owners know that once clutter starts, it spreads from the sink tub to the bed shelf in about ten minutes.

A simple routine that works

I like to wash in stages. Scrape first, rinse second, proper wash last. That keeps greasy water under control and stops your clean spoon ending up in yesterday's bacon film.

A few habits make life easier:

  • Pack by use, not by type: Keep cooking utensils with the stove gear, not with eating cutlery.
  • Dry before stowing: Even a little trapped moisture can leave things musty by the next stop.
  • Use a mesh bag or open roll: Airflow helps when you've washed up late and hit the road early.
  • Do a reset each evening: Two minutes of putting everything back saves a messy breakfast.

Wash-up is part of camp comfort. Do it before you sit down for the night and tomorrow starts better.

Keep the kit legal, clean, and easy to access

Storage also depends on where you stop and how you set up. If you're moving around Australia in a van, it helps to understand local expectations around overnight stays, camp behaviour, and how much gear you really want outside at any one time. This guide to van life Australia camping rules is useful for planning a setup that stays simple and respectful.

One more tip. Give every utensil a home you can reach without unpacking half the van. The best road setups aren't glamorous. They're calm.

Style Your Kit for Coastal and Retro Trips

Late afternoon at Crescent Head, the kettle is rattling on the stove, salt is still drying on the windscreen, and someone reaches into the cutlery roll for a fork that looks like it belongs in the van. That little detail changes the whole mood. In a Kombi, the camp kitchen is part of the scene, same as the striped towel on the door and the sandy thongs under the step.

A utensil set does more than help with dinner. It becomes part of the character of the trip. Stainless steel has that clean, old-school look that suits a silver Beetle or a tidy white Kombi. Bamboo handles bring in a weathered beach-shack feel. Bright retro colours suit vans with flower decals, vinyl coolers, and chairs that have seen thirty summers up and down the coast.

Let the Kombi story shape the mood

Part of the charm has always been that mix of useful and beautiful. On the official Kombi history page from Volkswagen Australia, the story begins with Ben Pon's sketch and the early Type 2 production that followed. That heritage still shows up every time a Kombi owner packs practical gear that also feels full of personality.

That is why some camp setups just look right straight away.

  • Classic silver and cream: Stainless utensils, a canvas or neutral roll, enamel mugs, plain napkins.
  • Coastal surf trip: Bamboo servers, faded blue or sea-glass tones, striped tea towels, timber boards.
  • Playful retro weekender: Colourful handles, patterned plates, sunny mugs, old folding chairs beside the van.

Screenshot from https://vwmemorabilia.com.au/shop/

Bring the same eye to your display at home

I have always liked the way road gear follows you home. A neat cutlery roll in the van often sits beside a shelf with maps, a tiny Kombi model, and a photo from some windy breakfast stop near the water. The same taste is at work in both places.

If your place has that beachy, retro VW feel, these coastal home decor ideas are worth a look. They suit the kind of home where an enamel mug, a surf print, and a little blue bus on the shelf all make perfect sense together.

A well-styled camp kit keeps the trip going long after you have parked the van.

The same eye for detail shows up in searches for VW Kombi diecast Australia, Volkswagen Beetle model, buy diecast Kombi, VW memorabilia collectibles, and Volkswagen diecast models for sale. People who care about a good-looking camp drawer usually care about the shelf in the garage or the corner of the lounge room too.

If your road-trip style spills over into the garage, office, or living room, Volkswagen Memorabilia is well worth a look. It's a strong local option for Australian VW enthusiasts who want licensed pieces with local stock and fast shipping, whether you're after a Kombi Samba Bus diecast, a classic Volkswagen Beetle model, or VW memorabilia that matches the easygoing spirit of life on the road. You can browse the range in the shop and find pieces that feel right at home beside a classic bus, a beach map, and a properly packed camp kitchen.

High Lift Jack Bracket Guide for Your VW Adventure

A lot of VW owners hit the same moment. The van's packed, the esky's cold, the surf's up, and then you stop and realise your recovery gear plan is still a bit optimistic. On a classic Kombi or Beetle, carrying a jack isn't just about having the tool. It's about where on earth you mount the thing without chewing up bodywork, upsetting weight balance, or ending up with a rattly lump of steel hanging off a vehicle you've spent years bringing back to life.

That's where a good high lift jack bracket earns its keep. Not as some macho bolt-on for a bush truck, but as a practical bit of kit for VW people who actively use their cars. Old Volkswagens reward simple, thoughtful upgrades. They punish lazy mounting points, cheap hardware, and “she'll be right” measuring. If you're fitting one for beach runs, camping trips, paddock access, or a long country loop, the bracket matters just as much as the jack.

From the Bush to the Beach Your VW's Ticket to Freedom

A classic Volkswagen always makes a trip feel bigger than it is. A quick run down the coast turns into a story. A dusty inland detour becomes the bit everyone talks about at the next cars-and-coffee meet. That's part of the magic. But the other part is preparation, because an old Bus or Beetle can still get bogged, still cop a flat, and still leave you needing a safe way to lift, shift, or recover.

A vintage light blue Volkswagen bus parked on a sandy beach during a beautiful golden sunset.

I've always liked the VW approach to adventure. It's less about brute force and more about ingenuity. A Kombi with a sensible rack, decent tyres, and recovery gear mounted properly often gets used more confidently than a heavily modified rig that's overdone and underdriven. That confidence matters when you're on corrugations, edging onto soft sand, or poking around a coastal track before sundown.

Practical rule: Recovery gear only helps if you can reach it quickly and trust it to stay put.

That's why a high lift jack bracket isn't just a holder. It's part of the vehicle's touring setup. It keeps the jack accessible, stops it becoming a loose projectile, and lets you free cabin or cargo space for the stuff that makes an old Volkswagen pleasant to travel in. On a camper Bus, that might be bedding and cooking gear. On a Beetle, it might be the difference between a tidy luggage area and total chaos.

There's also a mindset shift here. Once your recovery gear has a proper home, you start travelling like someone who expects to solve problems, not just hope they won't happen. That suits the old VW spirit down to the ground. These cars were built around making the most of modest means and smart design.

If your Kombi life leans more road trip than rock crawling, there's good inspiration in this look at van life in Australia. It taps into the same idea. Freedom feels better when the practical stuff is sorted.

Why classic VWs need extra thought

A modern 4WD often gives you obvious hard points. A Kombi or Beetle doesn't. Thin panels, ageing gutters, custom bumpers, engine lids, old repairs, and mixed aftermarket parts all complicate the job.

That means the bracket choice has to match the vehicle, not the other way around.

  • A beach-going Kombi needs corrosion resistance and a mount that won't shake loose on washboard roads.
  • A Baja Bug can sometimes use a stronger external mounting point, but only if the bar work is structural.
  • A restored Beetle often benefits from a less intrusive solution, because preserving clean body lines and paint matters too.

Choosing the Right Bracket for Your Rig

Not all brackets suit a Volkswagen, and not all mounting styles suit the way Volkswagens get used in Australia. Some are ideal for a lifted Baja with custom bars. Others make more sense on a tidy Kombi with a roof platform. The trick is matching the bracket to your body style, your travel habits, and how much fabrication you're happy to do.

A graphic showing three types of high lift jack mounts for Volkswagen vehicles: bumper, roof rack, and spare tire.

The three mounting styles most VW owners consider

Mount style Where it suits best Main upside Main trade-off
Bumper or bar mount Baja Bugs, custom bar setups, reinforced rear carriers Fast access and easy visual checks Only works if the bar is genuinely strong
Roof rack mount Kombis, T3s, touring setups with platform racks Keeps the jack out of the way and saves cabin room Raises weight higher on the vehicle
Spare tyre or rear mount Vans with custom rear carriers Good space efficiency and balanced access Needs careful swing-away or door clearance planning

A lot of people start with the idea of a bumper mount because it looks tough. Fair enough. But on a classic VW, appearance counts for less than structure. Factory bumper mounts and decorative bars often aren't the place for heavy kit unless they've been engineered or reinforced properly.

Roof mounting is often the cleanest option on a Kombi. It keeps mud and gear out of the cabin and leaves the rear area free for camping bits. Rear mounts can also work brilliantly, especially on custom setups, but they live or die by the quality of the carrier behind them.

Materials and coatings that actually matter

For Australian conditions, I lean toward coated steel hardware over bargain light-duty gear. The reason is simple. Beach air, road spray, and humidity expose weaknesses fast. Manufacturing specifications for the Leitner Designs bracket confirm it uses powder-coated steel with zinc-plated hardware, a combination that suits coastal and high-moisture conditions well, as outlined on the Leitner Designs Hi-Lift Jack Bracket product page.

Cheap finishes usually fail before the bracket itself does. Rust starts in the hardware, then stains the mount, then spreads into the vehicle where it contacts the metal.

That doesn't mean every VW needs a heavy-duty off-the-shelf system. A custom bracket can be the best answer when you've got a non-standard roof rack, unusual rear carrier, or an old bus with previous modifications. But custom only works if the builder understands load paths, reinforcement, and corrosion prevention. A dodgy one-off can be worse than no bracket at all.

Off-the-shelf or custom build

Use this test before you buy anything.

  • Choose off-the-shelf if your vehicle already has a compatible platform, rack, or carrier and you want a cleaner install.
  • Choose custom if your Kombi or Beetle has unusual dimensions, handmade bars, or a roof setup that standard clamps won't fit.
  • Walk away if the bracket relies on thin sheet metal alone, unfavorable mechanical advantage, or “just snug it up” fastening.

If you're already deep into the practical side of keeping a vintage VW on the road, the broader scene around VW parts in Australia is worth a look too. It helps put bracket choices in context with the rest of a usable touring build.

Scouting the Best Mounting Spots on Your VW

Volkswagen owners can't copy a generic 4WD mounting guide and call it done. The body structures are different, the weight distribution is different, and many old buses and Beetles have already had decades of repairs, tweaks, and accessory holes drilled into them. Before you touch a drill, find the strongest honest mounting spot on the vehicle you've got.

A black Hi-Lift jack mounted to the rear exterior of a vintage sage green Volkswagen bus.

Roof platform setups on Kombis and T3s

If your van runs a proper roof platform, this is usually the most straightforward external option. The key phrase there is proper. A decorative basket or tired old gutter rack isn't the same thing as a well-supported platform system.

Yakima's bracket is designed to mount on the perimeter of the LockNLoad platform, which gives a specific mechanical interface and keeps the jack accessible while freeing space for larger tools, as shown in this Yakima LockNLoad Hi-Lift bracket demonstration. That sort of purpose-built fitment is what you want on a touring VW. Less guesswork, fewer weird clamp angles, and cleaner weight management.

Rear carriers and reinforced bars

A custom rear carrier can be excellent on a Kombi because it keeps the jack low enough to reach without climbing on tyres or sliders. It can also tuck the weight close to the back of the vehicle instead of hanging it off a roof line.

But there's a catch. The carrier needs to be tied into something substantial, not just skin panels or thin brackets.

Look for these signs of a good rear mount:

  • Backed mounting plates behind the visible bracket.
  • Short force path so the jack isn't bouncing far from the mounting structure.
  • Clear engine access on rear-engined Volkswagens.
  • No fouling with barn doors, tailgates, or spare wheel movement.

Spots I'd avoid on most classic VWs

Some places tempt people because they're easy to reach with a drill. Easy isn't the same as smart.

  • Thin side panels on buses without reinforcement
  • Old rain gutters with unknown rust history
  • Engine lids and hatch skins
  • Factory bumpers that look solid but aren't meant for this sort of side load

If the panel flexes when you lean on it by hand, it's not a proper home for a jack bracket.

A quick placement checklist

  1. Check the metal condition. Existing rust, filler, or old repairs rule out plenty of locations.
  2. Think about access in mud or sand. A jack you can't remove quickly is decorative, not practical.
  3. Keep centre of gravity sensible. High and far-outboard mounting changes how the VW feels.
  4. Test opening paths. Doors, hatches, pop-tops, and spare wheels still need to work.

Your Toolkit and Pre-Flight Checklist

The neat installs nearly always start the same way. The owner laid everything out first, checked the vehicle twice, and didn't improvise with random hardware from the bottom drawer. A high lift jack bracket install on a classic VW should feel more like careful restoration work than backyard guessing.

The tools worth having on the bench

You don't need a machine shop, but you do need the right basics.

  • Torque wrench. This is the one people skip, then regret. Proper clamping force matters on a vibrating old vehicle.
  • Socket set and ring spanners sized to your chosen hardware.
  • Drill and sharp bits suitable for steel.
  • Centre punch for accurate hole starts on painted or curved surfaces.
  • Tape measure and straight edge so the mount sits square.
  • Deburring tool or round file to clean fresh holes.
  • Rust-proof primer, touch-up paint, and sealant for every drilled edge.

A soft pencil or paint marker also helps more than you'd think. On old VWs, accurate marking saves a lot of colourful language.

The hardware I'd insist on

For most installs, I'd want high-tensile bolts, matching washers, and nyloc nuts or another locking arrangement that won't loosen with vibration. Backing plates are often the unsung heroes. They spread load across a wider area and stop the bracket from concentrating stress into one patch of metal.

If you're carrying other touring gear as well, decent fastening gear matters across the board. Even something as simple as proper tie-down ratchet gear helps keep the whole setup organised and less likely to shift around.

Workshop note: The bracket is only as good as the hardware clamping it to the vehicle.

Pre-flight checks before the first hole

Run through this before drilling:

  • Confirm the bracket clears all moving panels
  • Inspect both sides of the mounting area for wiring, trim, fuel vapour lines, or hidden reinforcement
  • Dry-fit the jack to the bracket so you know its actual size and reach
  • Check corrosion risk if the vehicle lives near the beach
  • Decide on anti-rattle measures now, not after the first noisy trip

This bit isn't glamorous, but it's where a tidy install is won.

A Step-by-Step Guide to a Pro Installation

Once you've chosen a proper location and laid out the tools, the install itself is straightforward if you stay methodical. Most problems come from rushing alignment, drilling crookedly, or tightening by feel instead of specification.

A three-step instructional checklist illustration for installing a high-lift jack bracket on a vehicle.

Phase one getting the surface ready

Start with a clean, dry mounting surface. Dirt under the bracket can throw the alignment off, trap moisture, and scratch paint as the bracket settles. If you're mounting to a rack or bar, remove oxidation and make sure the contact area sits flat.

Where the install uses a T-slot style mount on a steel bar, proper alignment matters. On AU-spec brush bar setups, successful installs begin with accurate alignment to the bar section before any final fastening. The same principle applies on VW rack tubes and custom carriers. Square first, tighten second.

Phase two mark drill and protect

Mark all holes with the bracket clamped in position. Use a centre punch so the drill bit doesn't skate across paint. Drill a pilot hole first, then step up to the final size rather than forcing one big bit through in one go.

After drilling, clean the hole edges and seal the exposed metal. This matters even more on a coastal Kombi that sees salt air, beach spray, or humid storage. Bare edges are where rust gets its first bite.

A sensible sequence looks like this:

  1. Clamp and test-fit with the jack in place.
  2. Punch the centres accurately.
  3. Drill pilot holes and re-check alignment.
  4. Open to final size only when everything still lines up.
  5. Prime, paint, and seal every fresh edge.

Phase three bolt up with reinforcement

Improper mounting can derail many backyard projects. Don't bolt directly through thin bodywork without a backing plate where one is needed. Spread the load, keep washers flat, and make sure the bracket isn't twisting as you tighten.

Field data from the Australian Off-Road Association indicates that 92% of successful installations in the AU region avoid inadequate torque settings, and that same issue accounts for 68% of bracket failures during extreme off-road use. That verified data is included in the AUORA figures provided for this topic. The lesson is plain enough. Torque isn't fussy workshop theatre. It's the difference between a mount that stays put and one that starts moving.

Tighten in stages. Snug everything evenly, check alignment, then bring the fasteners up to the specified torque with the wrench.

Final security checks before loading the jack

Before the jack goes on for good, inspect the mount from every angle.

Check What you're looking for
Bracket sitting flat No visible rocking or gap at contact points
Backing plates seated No distortion or pulling into body metal
Hardware alignment Bolts straight, washers flat, threads clean
Sealant coverage Every drilled edge and exposed contact point protected

If anything looks forced, remove it and sort it. A bracket should look deliberate, not persuaded.

Finishing Touches for a Rattle-Free Ride

A freshly mounted bracket can still be annoying if the job stops at “it's bolted on”. The proper finish is what makes the setup feel sorted. That means security, anti-rattle control, and a habit of checking it before and after rough trips.

A good bracket should hold the jack firmly enough that it doesn't chatter over corrugations or shift when the van leans. Verified product specifications note that high-lift jack brackets are engineered to support static loads over 1,360 kg, and some use wing-nut fastening systems that prevent rattling during travel at speeds up to 100 km/h. Those details are listed on the C4 Fabrication horizontal Hi-Lift bracket specifications. For a VW owner, that's the benchmark mindset. Secure enough that the mount stays quiet and predictable on real roads.

What actually stops the noise

The biggest culprit is movement between metal parts. Not dramatic movement. Tiny repeated movement.

Use a mix of these:

  • Wing-nut or clamping hardware that keeps steady pressure on the jack body
  • Rubber isolators or contact pads where the jack touches metal
  • A handle restraint so the jack handle can't bounce
  • Padlock-ready mounting points if your bracket supports them

If the handle isn't restrained, it'll often be the first thing you hear.

A silent mount usually means a safe mount. Noise is often your first warning that something's loosening.

Theft prevention and maintenance

A high lift jack looks useful because it is useful. That also makes it attractive to thieves. If your bracket includes padlock holes, use them. If it doesn't, add a sensible secondary lock through a secure part of the bracket or carrier without compromising removal in an emergency.

Then keep the maintenance simple:

  • After rough trips check for bolt movement and chipped coating
  • After beach use rinse salt off the bracket, jack, and hardware
  • Every so often remove the jack and inspect hidden contact areas
  • At the first hint of rust clean and touch it up before it spreads

The old Volkswagen trick has always been the same. Small jobs done early save major grief later. That applies to recovery gear as much as engine tins and window seals.


If you're a true enthusiast and want that same laid-back VW spirit back at home, have a wander through Volkswagen Memorabilia. It's a top spot for officially licensed VW-themed gifts, collectible display pieces, and diecast favourites that suit any shed, office, or lounge room. If Kombis are your weakness, you can browse the main shop, check out the cheerful Volkswagen diecast collection, or go straight to pieces that capture the classic bus shape so well, including a 1962 VW Kombi diecast model, a colourful Flower Power Kombi model, and the always-popular Samba Bus diecast options. For Beetle fans, there are also plenty of Volkswagen Beetle model picks ready to round out a collection. Local stock and fast Australian shipping make it easy to buy with confidence, whether you're after a gift or adding another favourite to your own shelf.

Fiamma F45 Awning: Kombi Setup Guide 2026

You know the moment. You've finally pulled the Kombi in beside the coast, kettle's on, camp chair's out, and the side of the van is glowing in that late-morning sun. The paint looks right, the wheels sit just so, and the whole rig feels like the road trip machine you'd pictured while tinkering in the shed. Then the heat starts leaning on you, and you realise what's missing. Not another sticker. Not a cooler. A proper patch of shade.

That's where the Fiamma F45 awning earns its keep. On a classic VW camper, it doesn't feel like a bolt-on afterthought. It feels like the final piece that turns a nice old bus into a proper touring setup. You notice it at shows, too. One Kombi has the surfboards and striped chairs. Another has the neat side cassette tucked along the flank, ready to roll out for lunch, kids, dogs, or a lazy afternoon with the door open and sandals kicked off.

If you've spent any time around the old-school VW crowd, you'll know the best builds aren't always the flashiest. They're the ones that feel lived in. The ones that make you want to go somewhere. That same easy-going spirit runs through Kombi life in Australia, where the van is part transport, part memory machine, part excuse to keep chasing sun and salt air.

The Perfect Shade for Your Classic Dub

A mate of mine rolled into a beachside campground in a tidy Bay Window, two-tone paint catching the light, roof packed for a weekend away. He had the chairs, the stove, the enamel mugs, the whole scene sorted. By lunchtime, though, everyone else had drifted under whatever shade they could find, while he was doing that awkward half-sit in the van doorway trying to dodge the sun.

Next trip, he turned up with a Fiamma F45 awning fitted. Same van. Same mugs. Totally different camp.

Suddenly the side of the Kombi became the hangout spot. The awning gave the van a front porch feeling. Kids parked themselves under it with snacks, adults stood there yarning about engines and paint codes, and the whole setup looked complete in a way that's hard to explain unless you've spent years around classic Volkswagens.

Why it suits the Kombi spirit

A classic VW isn't only about getting from A to B. It's about how you arrive, how long you stay, and whether the van makes people smile when they wander past. The F45S works in that world because it keeps the shape of the vehicle tidy when packed away, then opens up the living space when you're ready to stop.

A good camper setup doesn't shout. It just makes the day easier.

For Australian owners, that matters. A Kombi here often does double duty. It's the Sunday show car, the family nostalgia project, and the weekender that heads for the coast or the bush. An awning that feels neat on the vehicle and practical at camp lands right in the sweet spot.

More than gear on the side of a van

The best old VWs tell a story. Some stories happen on the road. Some happen on the shelf back home, in the form of memorabilia, photos, and little reminders of the life you're building around the hobby. That's why classic VW culture has always stretched beyond the driveway. It follows you home.

What Is the Fiamma F45 Awning Anyway

The simplest way to explain it is this. A Fiamma F45 awning is a side-mounted cassette awning that stays housed in its own slim case when you're driving, then winds out when you're parked. On a Kombi or campervan, that means you keep a clean side profile instead of wrestling with loose poles and fabric bags.

The version most VW owners talk about is the F45S. Fiamma describes it as its “ingenious and compact awning of Italian design,” and third-party guides widely regard it as the most popular choice in the F45 family for wall or rack mounting common on campervans, as shown on the official Fiamma F45S page.

If you've seen one fitted neatly along the side of a van, that popularity makes sense straight away.

The cassette is the clever bit

When the awning is packed away, the fabric and mechanism sit inside the cassette. That matters on a classic VW because the vehicle already has enough visual character. You don't want a clumsy-looking add-on ruining the line of the roof or the side panel.

A cassette awning suits old Volkswagens for a few practical reasons:

  • It stays tidy on the road. No flapping covers, no loose storage bag.
  • It's quick to deploy when you pull up for lunch or an overnight stop.
  • It suits wall or rack mounting, which is why it's so often seen on campervan conversions.
  • It looks integrated rather than improvised.

If you want a plain-English overview of how this style works on vans generally, have a look at this guide to a wind-out awning.

Why enthusiasts keep coming back to it

The F45S has become a benchmark because it answers a very old camper problem neatly. You want shelter, but you don't want to turn your van into a clunky caravan annex on wheels. The F45S gives you shade in a format that still suits a vehicle people care about visually.

Practical rule: On a classic VW, any accessory has to earn its place twice. It needs to work well, and it needs to look right.

That's a big reason the Fiamma F45 awning stays on the shortlist for Kombi owners who are fussy about both.

Choosing the Right F45 for Your VW Kombi

The name can throw people at first. You'd be forgiven for thinking every F45 awning must be the same size, but that isn't how the range works now. Fiamma's own model explanation says the old F45 naming originally reflected a 4.5-metre size class before becoming a model family identifier, and the modern F45S line includes options such as a 3.0-metre version for shorter-wheelbase vans, as explained in this Fiamma model history video.

That bit of history is handy because it clears up a common misunderstanding. The badge stayed. The range broadened.

A comparison guide for choosing the right size Fiamma F45 awning for Short Wheelbase and longer VW Kombi campervans.

What size feels right on an old VW

On a shorter classic camper, a 3.0-metre F45S makes a lot of sense. It gives useful shade without making the van look top-heavy or out of proportion. That's especially appealing on compact builds and many classic VW campervans in Australia where the charm comes from tidy dimensions, not excess.

Longer vans can carry a longer awning more comfortably, particularly if the goal is broader coverage across the side living area.

VW setup What usually matters most F45 thinking
Shorter classic camper Keeping the van balanced visually A shorter F45S can look cleaner and still give solid shade
Longer camper build Covering door area and camp space A longer unit can better suit the extra body length
Show-focused restoration Preserving original character The cassette should look neat and not dominate the body
Touring-focused van Day-to-day usability Prioritise practical coverage near the main side opening

Match the van, not just the catalogue

The trap is buying by model name alone. Kombis vary. Some have roof racks, some have pop-top arrangements, some are set up for beach weekends, others for long inland runs. The right awning is the one that suits your body length, your layout, and how you use the van.

A few things to eyeball before choosing:

  • Your side opening area. You want shade where you cook, sit, and climb in and out.
  • The van's proportions. A classic bus can look awkward if the cassette is visually too dominant.
  • Mounting method. Side wall and rack setups each influence what feels natural on the vehicle.
  • Colour pairing. Case and fabric choice can either blend in subtly or stand out against classic paint.

A lot of owners do this mentally with a miniature first. You look at a model Kombi on the shelf, study the side profile, then step outside and do the same with the actual vehicle. It's not a bad habit. The iconic slab sides of an early bus are part of the whole appeal, whether you're staring at the actual vehicle or a 1962 VW Kombi bus diecast.

Getting It Mounted on Your Classic VW

The fitting question is where many owners get nervous, and fair enough. With a classic VW, nobody wants to make a mess of good bodywork. The comforting part is that the main issue usually isn't the awning itself. It's the combination of bracket choice, van shape, door movement, and install quality.

A man installs a Fiamma F45S awning on a vintage orange and white Volkswagen bus by a lake.

Some setups use roof racks or vehicle-specific mounts. Others do involve drilling, depending on the vehicle and hardware. That's why it pays to decide on the mounting approach before you ever pick up a tool.

Check the doors before anything else

A key installation challenge is making sure the awning sits high enough to avoid interfering with the vehicle's doors. Installation guidance often stresses checking the door's opening arc before finalising bracket position, which is especially important on VW vans with large sliding doors, as shown in this F45S installation walkthrough.

That one point saves a lot of grief.

If your sliding door or front door needs room to swing, the awning can't just go where it looks best at first glance. It has to live where the vehicle can still function properly. Open everything. Check clearances on level ground. Then think about how the body might sit at a campsite that isn't perfectly flat.

A sensible Kombi-first checklist

Before fitting a Fiamma F45 awning, work through these basics:

  • Door clearance first. Open the sliding door and any relevant front doors through their full arc.
  • Bracket type next. Decide whether your setup suits rack mounting, wall mounting, or a vehicle-specific adapter.
  • Height matters. Higher placement can help with door clearance and headroom under the awning.
  • Respect the bodywork. If you're trying to avoid unnecessary drilling, plan around the hardware that suits your van best.
  • Use the right mounting gear. Generic guesses are where trouble begins.

For owners comparing bracket options and fitment ideas, these awning vehicle mounts for vans are a useful reference point.

A good visual helps before you commit to hardware:

Mounting an awning on a classic VW is less about bravery and more about patience. Measure, open the doors, step back, and only then lock in the bracket position.

Keep it usable, not just pretty

The nicest install is the one that disappears into the shape of the van until you need it. On a Kombi, that usually means the cassette follows the side cleanly, the door still works properly, and the awning covers the area you'll use at camp.

That's the sweet spot. Good form, good function, no regrets.

Using and Caring for Your Awning in Australia

Australia is kind to campers and tough on gear. Sun, dust, salt air, sudden gusts off the coast, and the odd rough road all have a say in how your awning ages. A Fiamma F45 awning can handle regular touring well, but the way you use it matters just as much as the way you fit it.

One of the best practical tips isn't flashy at all. When the awning is out, don't force the support arms perfectly straight. Fiamma's usage guidance recommends leaving a slight bend in the support arms so they can absorb gusts instead of passing the full load into the mounting points, as noted on the official F45S product guidance.

That little bit of geometry matters more than most first-time owners realise.

A helpful infographic outlining three essential care and maintenance tips for Fiamma F45 awnings in Australia.

What to do at camp

Australian conditions reward good habits. If the breeze is freshening, treat the awning with respect.

  • Peg the support feet properly. Don't leave the legs loose on hard ground and hope for the best.
  • Use tie-downs when conditions call for it. Awnings are brilliant shade devices, not storm shelters.
  • Watch the arm position. That slight bend helps reduce stress through the structure.
  • Retract early if the weather turns. Caution beats repair work every time.

Store the awning dry when you can, and don't wait for obvious damage before checking how everything feels.

Keeping it tidy after the trip

Care isn't complicated, but it's worth doing regularly, especially after coastal runs. Salt residue, road grime, and dust all build up if you leave them there.

A simple routine works well:

  1. Brush off loose dirt before winding it away.
  2. Clean exposed surfaces with mild soap and fresh water when needed.
  3. Let fabric dry before long storage where possible.
  4. Check mounts and casing after rough roads or windy trips.

Manual living suits classic vans

There's something fitting about a manual awning on a classic Volkswagen. It slows the setup down in a good way. You park, wind it out, settle the legs, step back, and suddenly your old bus has a shady side room ready for lunch, cards, or a brew.

That's half the charm. It's not only about shelter. It's part of the ritual.

Is the Fiamma F45 Worth It for Your Build

If your Kombi mostly does short local runs and you rarely spend time outside the van once you arrive, you might not feel the need straight away. But if your classic VW is built around weekends away, club events, beach stops, and proper campground living, the Fiamma F45 awning makes a very convincing case for itself.

It suits the shape of a campervan. It's strongly associated with wall-mounted touring setups. And it has the kind of neat, established design that feels at home on a vehicle people care about. That matters when the van is both transport and passion project.

The honest trade-off

There is a trade-off, of course. An awning is an investment in usability, not only appearance. You're adding hardware, planning fitment carefully, and committing to one more thing to maintain well. For many owners, though, the payoff is immediate the first time they stop somewhere hot and realise the side of the van has become the best seat in camp.

Here's the short version:

Worth it if you… Maybe wait if you…
Tour regularly in your Kombi Mostly drive to shows and head home
Want shade without a bulky setup Prefer the van to stay completely bare outside
Care about neat, integrated accessories Don't want to think about mounts or maintenance
Use the side of the van as living space Rarely sit outside once parked

Screenshot from https://vwmemorabilia.com.au/shop/

A classic VW build is never only about the destination. It's about the shape, the memories, the little details that make the whole thing feel like yours. The F45 is one of those details. Not essential for every owner, but for the right build, it feels exactly right.

If you're still building the full-size dream, there's another way to keep that Kombi spirit close every day.

Frequently Asked Questions

Is the Fiamma F45 awning a wall-mounted awning

Yes. The F45S is a side- or wall-mounted awning, which is one of the reasons it's so often associated with campervans and motorhomes built for compact touring use, as covered in the earlier model-history section.

What does F45 actually mean

Historically, the F45 name originally referred to a 4.5-metre size class before becoming a model family name. Today, the range includes different sizes, including a 3.0-metre option mentioned earlier.

Is the F45S a good fit for a classic VW Kombi

It can be, especially if your Kombi is used for touring and camping. The key is not assuming universal fit. You need to consider body shape, bracket options, rack availability, and door clearance.

Can I fit one without drilling

Sometimes, depending on the vehicle and the mounting hardware available. Some setups use racks or vehicle-specific mounts, while others may require drilling. The safest answer is to judge it by the exact van and bracket system, not by general forum chatter.
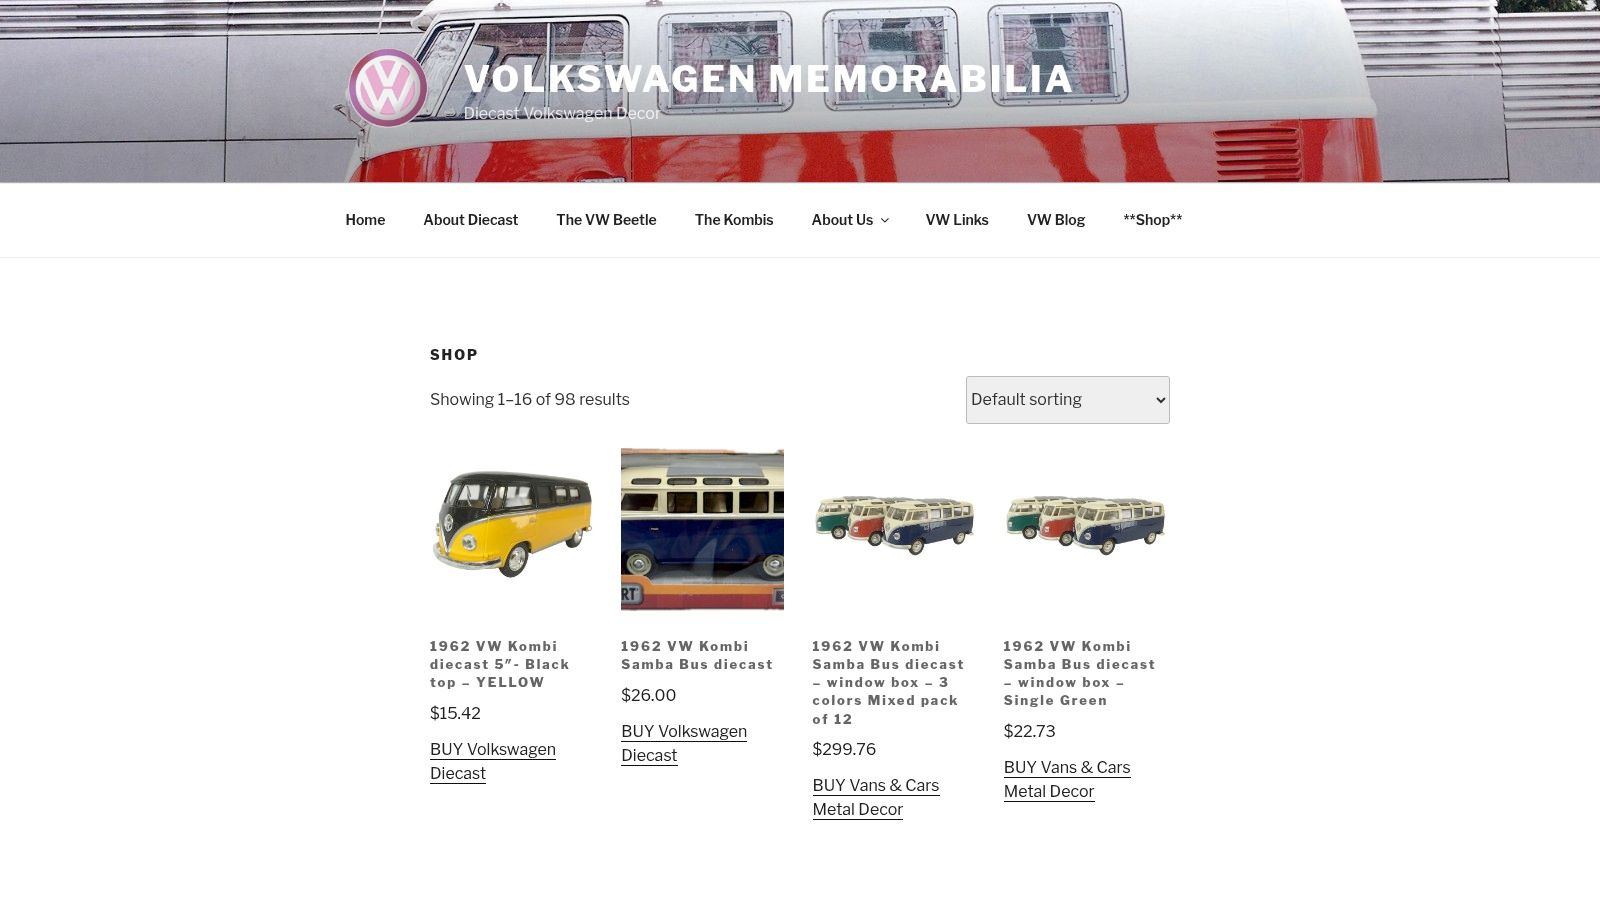
What's the biggest mistake owners make when using one

A common practical mistake is treating the awning like it should be locked dead straight and left unsupported in breezy conditions. As noted earlier, leaving a slight bend in the support arms and securing the setup properly helps reduce stress on the structure.


If you love the classic VW lifestyle, have a look through Volkswagen Memorabilia. It's a great spot to keep the passion alive with VW memorabilia collectibles, from Kombi and Beetle pieces to shelf-friendly favourites for anyone hunting VW Kombi diecast Australia, a Volkswagen Beetle model, or wanting to buy diecast Kombi gifts from local stock with fast Australian shipping. Check out their range of diecast Kombi and Beetle models in the online shop.