Your VW Camper Van Conversion: From Dream to Driveway

You're probably standing in the driveway right now with two versions of the same dream in your head. One is the glossy one. A tidy old VW with the side door open, kettle on, boards strapped up top, sunset throwing honey-coloured light across the dash. The other is the practical one. A van with tired trim, mystery wiring, a patch of rust near the sill, and a notebook full of half-finished sketches.

That's how most camper van conversion stories begin in Australia. Not with perfection. With affection.

At local shows, I always end up chatting to someone who's torn between keeping a classic Volkswagen untouched and turning it into something they'll use. My answer is always the same. If the van's meant to travel, build it to travel well. Respect the shape, respect the history, but make it yours. A good conversion doesn't erase the soul of a Kombi. It gives it another chapter.

The charm is already there. Australia formally welcomed the Volkswagen Beetle in 1953, and local assembly started at Clayton in Victoria in 1954 on the very next beat of that story, as noted in this Beetle history entry. The Type 2 story has its own local flavour too. In Australia, the passenger van version was marketed as the VW Kombi, while the utes and commercial carriers wore the VW Transporter name, as explained in this Australian Kombi overview. That distinction still matters when you're choosing a base for a camper van conversion, because the badge on the nose often hints at how the vehicle was originally used, loved, and worked.

The Blueprint for Your Dream Rig

A proper build starts long before the first screw goes in. It starts when you realise what sort of traveller you are.

Some people want a weekend surf wagon. Bed, storage, coolbox, nothing fussy. Others want a rolling little cottage with solar, water, cupboards, and enough comfort to disappear for days. If you skip that decision and buy only with your heart, you can end up with the wrong van for your own habits.
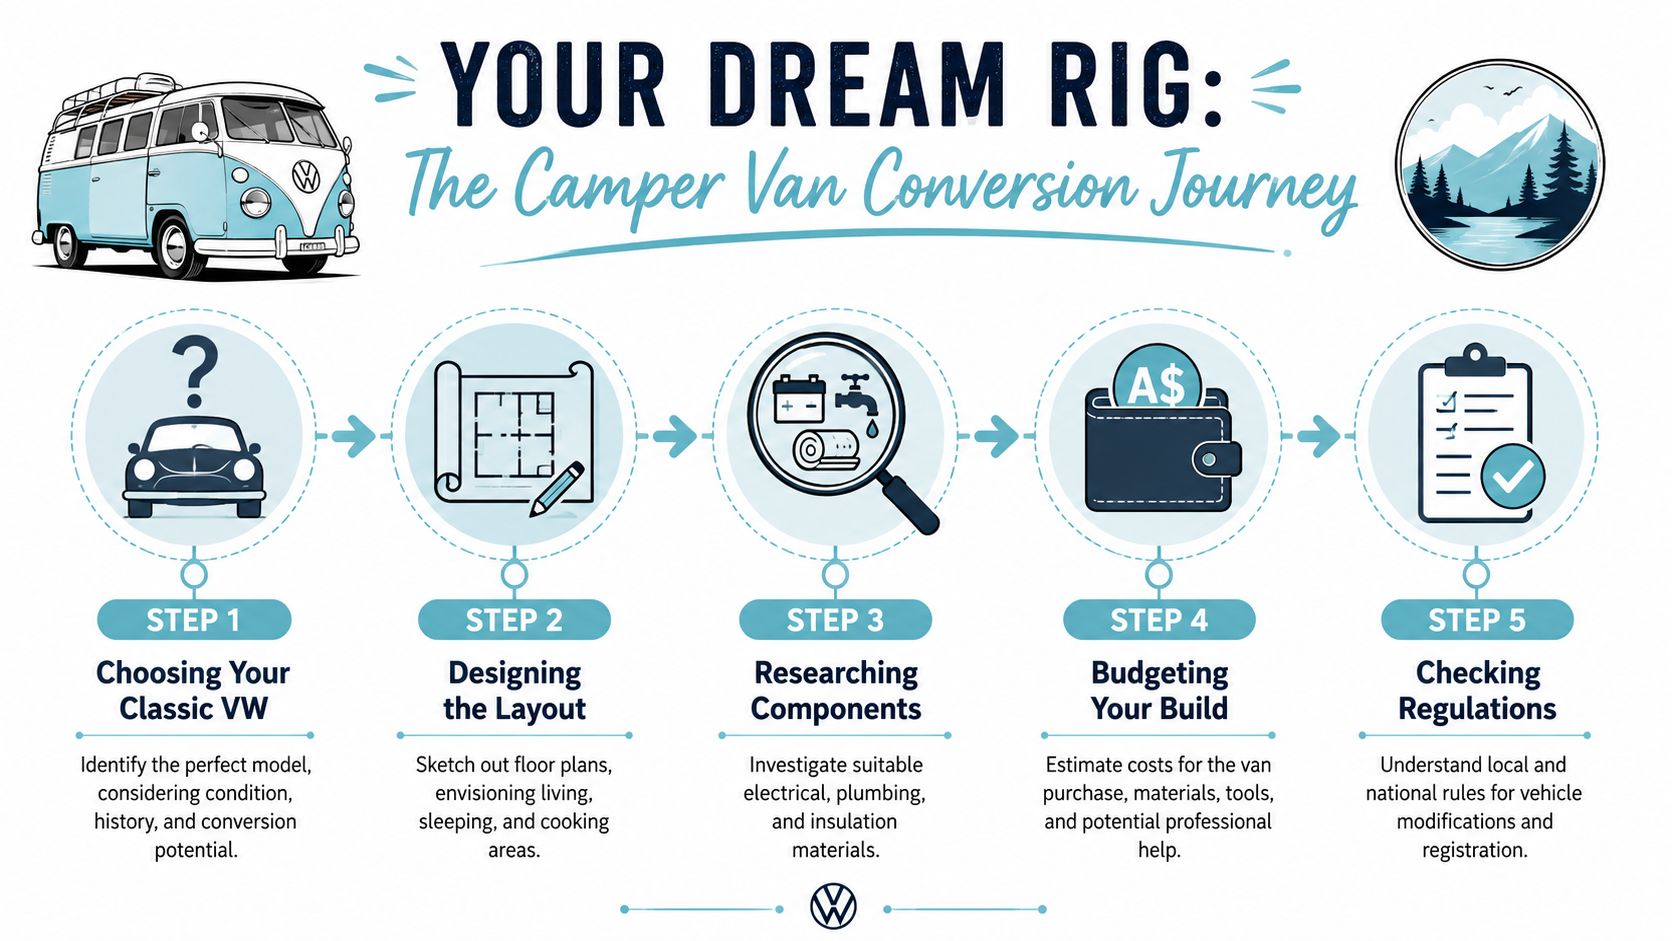
An infographic showing the five-step process of planning a classic Volkswagen camper van conversion project.

Choosing the right classic VW

The romance often points straight at a Kombi, and fair enough. Nothing else wears the road-trip grin quite like it. But nostalgia needs a partner called practicality.

A few starting points help:

  • Original use matters. A passenger-spec Kombi often gives you a different starting point from a harder-worked commercial Transporter.
  • Body condition beats pretty paint. Fresh paint can hide trouble. Solid metal saves misery.
  • Mechanical honesty counts. A van that starts, stops, and tells the truth is better than one with dazzling trim and a long list of promises.
  • Parts confidence helps. If your comfort with tools is modest, choose a base that won't frighten you every time something rattles.

If you're still hunting, it helps to browse a dedicated van for conversion shortlist and compare body styles with your intended use rather than just your favourite photos.

Practical rule: Buy the van that suits your trips, not the one that only suits your daydreams.

Sketch the life before the layout

I've seen beautiful builds that were awkward to live in because the owner designed them like a furniture catalogue instead of a moving campsite. Before you measure timber, measure habits.

Ask yourself where you'll make tea when it's raining. Where you'll throw sandy thongs. Whether you want to sit upright inside with the door shut. Whether the bed stays made, or folds into a bench. Whether storage needs to swallow tools, fishing gear, camera kit, or a little box of treasured VW bits from swap meets.

A simple planning sequence keeps things honest:

  1. Mark your fixed needs. Bed length, cooking spot, and the gear you always carry.
  2. Draw walking space. Tiny vans feel smaller once cupboards go in.
  3. Decide your must-haves. Fridge, sink, surfboard slot, reading light.
  4. Leave room for maintenance. Access panels save arguments with your future self.
  5. Plan for weight and compliance early. Last-minute heavy additions can spoil the build.

Match the build to the story you want

A weekend warrior can stay charmingly simple. A longer-haul touring van asks more of the design. That's where the blueprint earns its keep. Once the sleeping, cooking, and storage zones are settled on paper, every later choice becomes clearer. You stop guessing and start building with purpose.

Building the Bones of Your Van

The glamorous photos never show the first filthy weekend. Seats out. Old lining peeled back. Dust in your hair. Surface rust staring at you like a smirk from the past. This is still one of my favourite phases, because it's the moment a van stops being “an old bus” and starts becoming your bus.

Strip it back and read the shell

Pulling out worn flooring and trim tells you what sort of life the van has lived. You'll find old screw holes, odd repairs, and sometimes the remains of someone else's half-finished dream. Don't rush this stage. Clean every surface and inspect the shell properly before you bury anything behind timber and panels.

Rust deserves patience. Treat what you can see now, because hidden rust doesn't become charming later. It becomes expensive.

A good bones-first approach usually looks like this:

  • Remove old interior pieces carefully. You may want templates, fixings, or reference points later.
  • Check every floor edge and seam. Moisture loves corners.
  • Test mounting points. Bed frames and cabinetry need trustworthy anchors.
  • Keep notes as you go. Label wiring routes, holes, and factory features before the shell disappears behind your fit-out.

Build a floor that feels solid

The floor changes the whole character of the van. Get it wrong and every step feels hollow, cold, or noisy. Get it right and the build starts to feel planted.

The subfloor is more than a sheet of board. It's the base layer that evens out irregularities, supports the finished floor, and helps the van feel quieter under way. I've seen people race to the visible finishes and regret it later when the floor creaks, flexes, or lifts at the edges.

A quick comparison helps:

Part What it does What happens if you rush it
Floor prep Gives you a clean, sound base Trapped moisture and hidden corrosion
Subfloor Adds structure and support Soft spots and movement underfoot
Wall panels Shape the cabin and cover insulation Rattles and poor fit around curves
Ceiling lining Finishes the shell overhead Sagging panels and awkward gaps

A neat timber finish can hide a bad foundation for a while. The first rough road will reveal it.

Keep the structure serviceable

A strong build also stays accessible. Don't entomb critical areas. Leave paths to wiring runs, wheel arches, and any area you may need to inspect later. Old Volkswagens reward builders who think like caretakers rather than decorators.

By the end of this phase, the van still won't look finished. That's fine. What you've done is harder to photograph and far more important to live with.

Insulation and Airflow for Aussie Climates

Australia is merciless with badly insulated vans. A metal shell left half-done turns savage in summer and clammy in winter. This is the stage where many first-time builders cut corners because insulation feels invisible. Then they spend their first trip sweating, wiping condensation, and wondering why the floor feels like an ice tray at dawn.
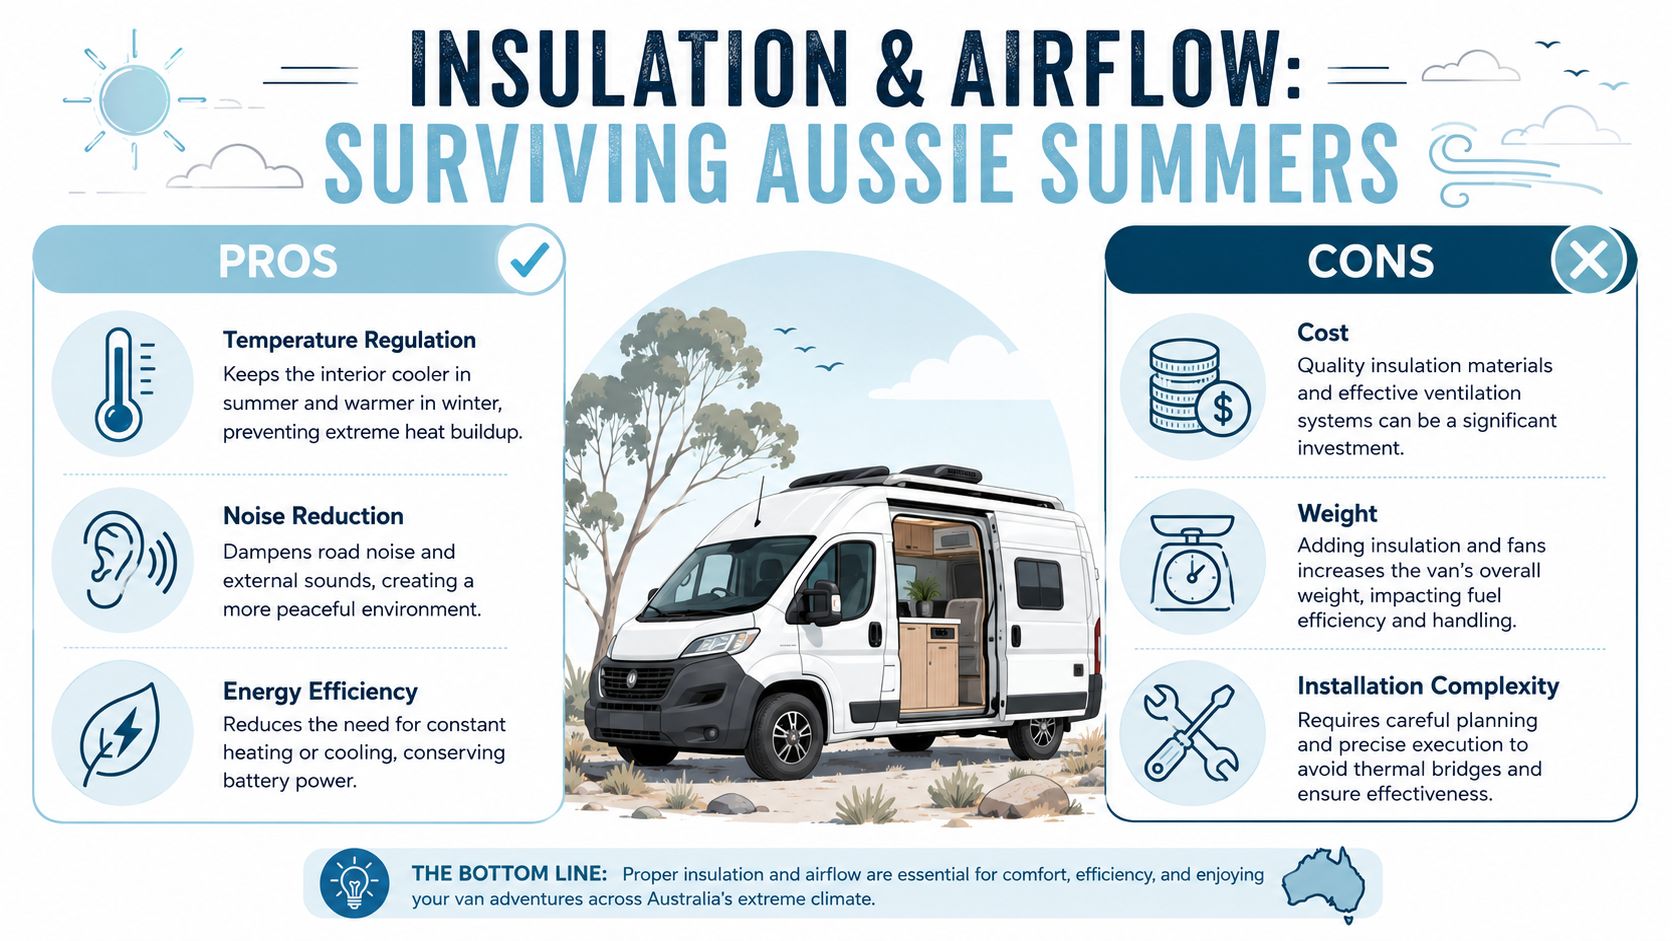
An infographic showing the pros and cons of insulation and ventilation for Australian camper van conversions.

Cover every bit of bare metal

One of the most common mistakes in an Australian camper van conversion is leaving sections of metal exposed. According to this van build guide on insulation practice, the recommended approach is a two-layer system. First comes an adhesive closed-cell foam layer with aluminium backing, 1–2cm thick, covering the full interior. Then comes a second reflective layer, often called Reflectix.

That advice sounds fussy until you've camped through a hot spell or a cold snap. Any skipped patch becomes a weak point. Heat barges in. Condensation gathers. The van feels unsettled and damp.

If you're comparing materials for your own van insulation options, focus less on marketing language and more on full coverage, clean fitment, and how the layers work together.

Airflow isn't optional

Insulation solves only half the problem. A van also needs to breathe.

Warm air from cooking, sleeping, and wet towels has to go somewhere. If it can't leave, it turns into moisture on glass and steel. That's when mould, stale smells, and general misery arrive. Good airflow can be simple, but it has to be deliberate. A roof vent, smart window habits, and clear air paths matter more than decorative extras.

Consider the trade-offs in plain terms:

  • Closed-cell foam gives dependable coverage and helps with heat control.
  • Reflective layers support radiant heat management when fitted neatly.
  • Vinyl flooring with foam underlay can improve comfort underfoot when paired correctly, which matters in dusty Australian conditions noted in the same build guide.
  • Ventilation openings protect the interior from trapped moisture, even when the weather isn't dramatic.

Skip insulation and the van works against you. Add insulation without airflow and the van still wins.

Comfort changes the whole trip

People talk about engine notes, paint colours, and clever storage. Fair enough. But cabin comfort shapes every hour you spend inside. A well-insulated van settles down at night. It sounds calmer. It feels more controlled. It gives you the sort of quiet comfort that makes a short trip feel longer and a rough day easier.

That's why this part deserves care. You won't show it off much at a meet, but you'll thank yourself every morning.

Powering Your Adventure and Keeping the Water Flowing

This is the point where the van stops being a shell with furniture and starts acting like a tiny home. Lights flick on. A fridge hums. Water runs. The first time that happens, even a grizzled old VW hand feels a bit smug.
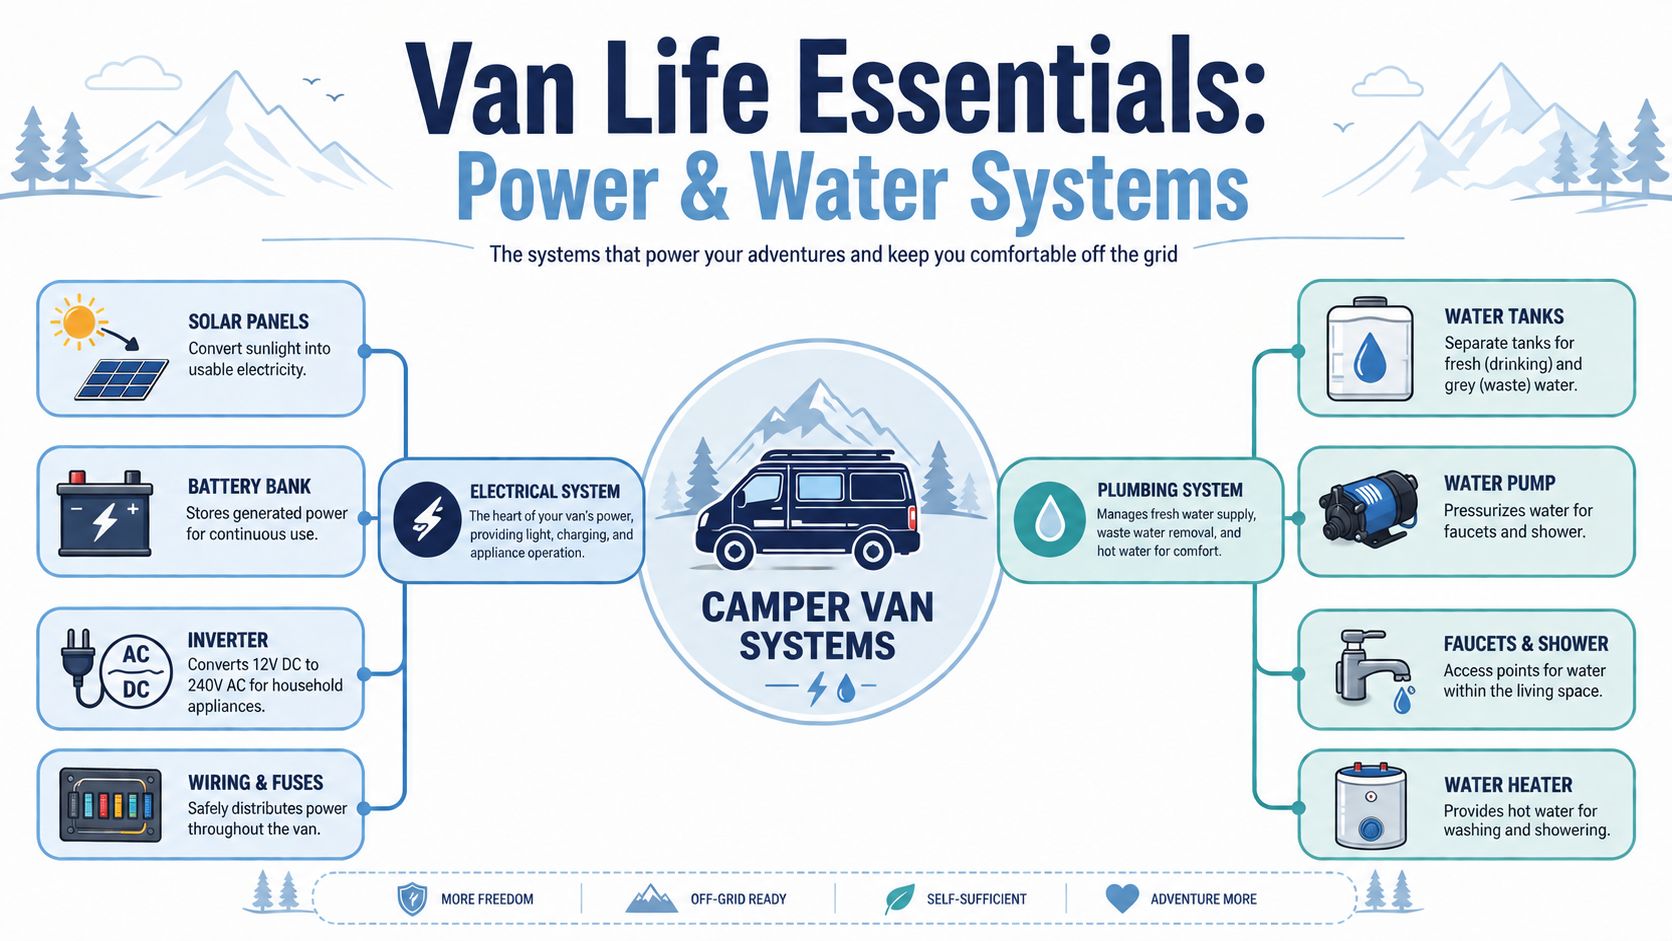
An infographic detailing essential power and plumbing systems for an off-grid camper van conversion project.

Start with simple electrical maths

Electrical planning frightens people because they picture black magic. In most DIY camper van conversion work, it starts with a list and some basic arithmetic.

The benchmark used in Australian DIY guidance is clear. Work out your daily power use in watt-hours, divide by six hours of proper sunlight per day, then round the required solar wattage up by 20% to cover shade parking or heavier use, according to Camplify's Australian van conversion guide.

Here's the practical shape of that process:

  1. List each device you'll use in a day.
  2. Convert usage into watt-hours for the full daily load.
  3. Divide by six to estimate panel wattage for Australian conditions.
  4. Add 20% headroom so the system isn't constantly on the edge.
  5. Choose battery capacity based on how long you want to stay off-grid.

That same guide also outlines the battery side. Divide your watt-hours by system voltage to get amp-hours, then multiply by your desired autonomy days. It gives the example of 960Wh divided by 12V, then expanded by 2 days of autonomy. That's the kind of tidy working you can follow without pretending to be an auto sparky.

If you're planning a larger touring setup, a slim battery format such as this 200 Ah slimline lithium battery gives you a useful reference point for how modern storage solutions fit tighter spaces.

To see the systems thinking in action, this walkthrough is handy:

Wire for vibration, not just theory

Classic Volkswagens don't live pampered lives. They buzz, bounce, and vibrate. The Australian guidance above notes chassis mounting with self-tapping screws and shake-proof lock washers to reduce vibration-related issues. That's the sort of detail that separates a clean weekend install from a long-term reliable one.

Use fuses, tidy cable runs, and accessible shut-offs. Build so you can troubleshoot later without dismantling half the interior.

Small electrical choices become big reliability stories on corrugated roads.

Keep plumbing as simple as your trips allow

Not every van needs a pressurised palace. Some of the happiest setups use a basic sink, portable fresh water, and a simple waste container. Others justify pumps, fixed tanks, and more integrated plumbing because the van stays out longer and does more work.

A practical comparison looks like this:

Setup style Best for Character
Hand-pump sink Weekend trips Simple, light, easy to maintain
Electric pump and fixed tanks Longer touring More convenience, more planning
Minimal water storage Day use and quick overnighters Fast to fill, easy to clean
More developed water system Multi-day living Better comfort, more components

Build the system that suits your use, not the one that wins the loudest applause online.

Custom Cabinetry and Clever Storage Solutions

Cabinetry is where a camper van conversion gets its personality. Up until now, you've been protecting the shell, taming temperatures, and making the systems behave. Then one Saturday afternoon you dry-fit a bench, stand back, and suddenly the van feels hospitable.

I remember a split-screen build at a show years ago. On one side was a tidy but generic fit-out with square cupboards and dead space everywhere. On the other was a home-built interior in pale ply, curved corner shelves, a bench seat that turned into a bed, and hidden cubbies under the base for tools, leads, and camp gear. The second one wasn't fancy. It was thoughtful. That's why everyone kept peering inside.

Make each piece earn its spot

In a small van, furniture can't be lazy. A bench should store something. A bed base should lift, slide, or open. A galley should leave room to stand without twisting like a circus act.

The best cabinetry choices often follow these patterns:

  • Lightweight plywood keeps the fit-out manageable without making the van feel top-heavy.
  • Vertical storage turns dead wall space into shelves, spice racks, or slim lockers.
  • Lift-up bed bases make bulky items easier to reach than deep front-opening boxes.
  • Curved edges and rounded corners feel kinder in a tight cabin and suit classic VW lines.

Build around daily rituals

I like to judge a layout by tiny repeated moments. Can you reach the kettle without unpacking the bed? Can you grab a jumper at night without unloading half the van? Can the passenger seat still feel like a seat, not a barricade?

Those questions shape cabinetry better than any trendy fit-out phrase. One owner I met had built a narrow side cabinet just deep enough for enamel mugs, a torch, maps, and two weathered workshop manuals. Another used the void beside the wheel arch for a slide-out pantry. Neither solution looked showy. Both made the van easier to inhabit.

Good cabinetry doesn't just store gear. It reduces friction in the day.

Leave room for the van's character

Old Volkswagens already carry a strong personality. Cabinetry should work with that, not smother it. Keep sightlines to the windows. Don't overbuild until the interior feels like a timber corridor. Let the curves of the body still speak.

That balance is part craft, part restraint. A van should feel lived in, not packed to the roof with cleverness.

Styling with Classic VW Memorabilia and Diecast Decor

Once the practical work is done, you can finally have a bit of fun with the soul of the thing. At this stage, the build shifts from “nice conversion” to “that's your van, isn't it?”

The easiest mistake is going overboard and turning a beautiful old camper into a novelty shop. The better move is to use a few VW touches that feel earned. Think of them as punctuation marks, not wallpaper.

Let small objects tell the story

A finished van always benefits from personal details with history behind them. In a Volkswagen-themed interior, diecast models work beautifully because they echo the actual machine without shouting over it.

A few styling ideas that suit a classic VW camper:

  • A compact display shelf near the rear cabinet for a licensed Kombi or Samba Bus model.
  • A Beetle model on a dash shelf or overhead nook where it catches the morning light.
  • A small framed Volkswagen print or badge display tucked into the galley wall.
  • A themed storage tin or tray for keys, coins, and campsite odds and ends.

Collectors know the appeal already. A VW Kombi diecast Australia search usually starts as a gift hunt and ends as a shelf problem. That same instinct can soften a van interior. One carefully placed Volkswagen Beetle model can make a timber cabinet feel like part workshop, part memory box.

Match decor to the van, not just the brand

A bright Flower Power piece suits some builds and jars with others. A patinated split-window look calls for subtler accents. A surfy beach-runner can carry bolder colours and playful details. The trick is to style in harmony with the van's mood.

A simple pairing guide helps:

Van mood Decor that fits
Restored classic Kombi Heritage-style VW art, muted diecast pieces
Beachy cruiser Colourful Kombi models, surf-inspired VW accents
Workshop-inspired build Badge displays, manuals, metal signs
Minimal touring interior One or two licensed models, restrained shelf styling

Keep it stable and useful

Anything decorative in a camper still has to survive the road. Use secure shelves, non-slip liners, and enclosed nooks for display items. If you're going to buy diecast Kombi pieces for the van itself, choose spots that won't send them skittering across the cabin at the first roundabout.

That's also why VW memorabilia collectibles work best when they're folded into useful features. A model on a lip shelf above the kitchen. A tiny framed piece above a book cubby. A Beetle tucked into the end of a cabinet beside a torch and a map. It should feel like the owner loves Volkswagens, not like the van is trying too hard to prove it.

Done well, the styling becomes the final handshake between machine and memory. That's when the conversion feels complete.

Navigating Aussie Regulations and Your Budget

The last stretch of a camper van conversion often feels less romantic than the first. There's paperwork, state rules, engineering questions, and the sharp reality of what the build has cost. It's still part of the craft. A van isn't finished when the curtains go in. It's finished when it's legal, insurable, and financially understood.
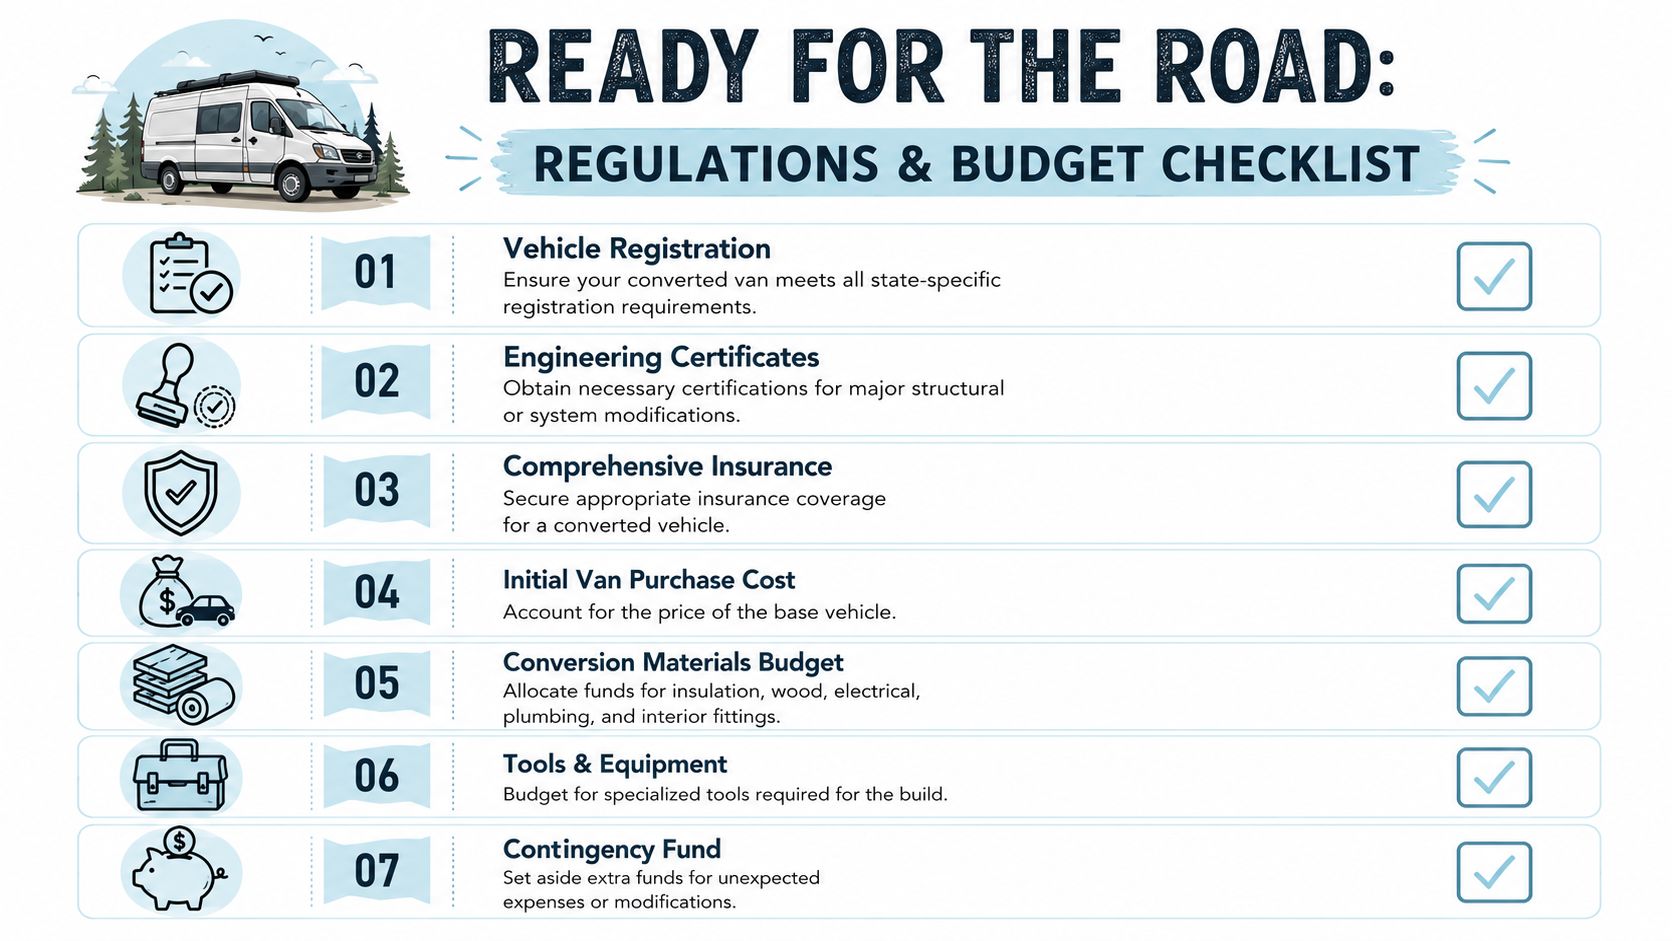
A checklist for van conversion including vehicle registration, insurance, materials, tools, and budget planning for road trips.

What the build can cost

Australian costs vary wildly by ambition. For 2026 projections, Rising Rides reports that camper van conversion costs range from $3,000 for a basic DIY setup to over $60,000 for a full professional touring conversion. The same source places a comfortable mid-range build at $10,000 to $25,000 for the conversion alone.

That spread tells an honest story. A simple weekend setup is one thing. A touring fit-out with proper systems, cabinetry, and finish quality is another. Builders often underestimate how quickly small purchases stack up. Timber, fasteners, flooring, sealants, electrical protection, plumbing fittings, trim pieces, and rework all have a habit of joining the tally.

State rules can trip you up

Australia doesn't give DIY builders one tidy national rulebook in practice. State-by-state differences in compliance can catch people badly if they treat registration, gas work, electrical changes, and modification approvals as a generic checklist.

That matters because confusion around compliance has been identified as a major reason projects get abandoned, and many guides still don't map the differences clearly. If your build includes gas or major electrical work, get proper local advice before the interior closes up. It's cheaper to ask early than to undo finished work later.

Insurance needs proof, not hope

Insurance is another area where people get casual at exactly the wrong moment. Standard vehicle cover may not respond kindly to uncertified DIY modifications. If your build includes significant changes, document them properly, keep receipts, photograph each stage, and ask insurers direct questions about converted vehicles before assuming you're covered.

A short checklist keeps the risks in view:

  • Confirm state-specific registration requirements before the build is final.
  • Check certification needs for gas, electrical, and structural changes.
  • Document the conversion with photos, receipts, and component details.
  • Ask insurers how they treat DIY modifications and certified work.
  • Budget for surprises, because old vans always have opinions.

If the build bug has bitten hard and you want the finishing touches that celebrate the old VW spirit, have a look through Volkswagen Memorabilia. It's a strong local option for officially licensed Volkswagen diecast models for sale, Kombi and Beetle gifts, and display pieces that suit a shed, shelf, or freshly finished camper. For Australian buyers, the local stock and fast shipping are a real advantage, especially when you want your next VW piece without the long wait.

Van Fit Out Your VW: A Nostalgic Aussie Guide

A mate once dragged me over to a sun-faded Kombi at a country swap meet, pointed at the rust bubbles and said, “She's rough, but can't you already see the road trips?” He was right. A classic VW doesn't ask for a quick fit-out. It asks for patience, taste, and a bit of stubborn affection.

Dreaming of the Open Road in Your Classic VW

There's something different about planning a van fit out in a classic Volkswagen. A modern van can feel like a blank shell. A Kombi already has a personality before you pick up a tape measure. The curved panels, the smell of old trim, the view through that split-style glass. It all pushes you toward a build that feels less like manufacturing and more like stewardship.

Aussies haven't fallen out of love with these old buses either. By 2024, over 2,800 restored and converted VW Kombis are actively registered in Australia, and the average price for a fully fitted-out vintage model has risen to AUD $85,000 according to Volkswagen Memorabilia's VW collection and reference page. That tells you plenty. People aren't just preserving them for Sunday shows. They're building them to use, to travel, and to keep a bit of the old surf-touring spirit alive.

Why a Kombi fit-out feels different

A classic VW build rewards restraint. What works in a tall modern cargo van often looks clumsy in a Kombi. Heavy overhead lockers, chunky square cabinetry, or oversized appliances can rob the cabin of the very charm that made you buy the van in the first place.

A good vintage-focused van fit out usually leans on three things:

  • Light touch design that respects the original lines
  • Practical comfort for weekends, coastal runs, and short touring
  • Period character with modern reliability subtly incorporated

A Kombi looks happiest when the fit-out feels like it belongs there, not like it's been forced into submission by a kitchen catalogue.

The romance is real, but so is the work

Plenty of people start with the dream of striped canvas chairs, enamel mugs, and a sunrise at Crescent Head. That's the fun bit. The true craft sits underneath. You've got to think about access to the engine bay, airflow in hot weather, compact storage, and how every added piece changes the way an old VW drives.

That's why the best van fit out projects begin with honesty. Be honest about how you'll use it. Be honest about how much work you can do yourself. And be honest about whether you're building a showpiece, a weekender, or a proper little tourer with some red dust in its future.

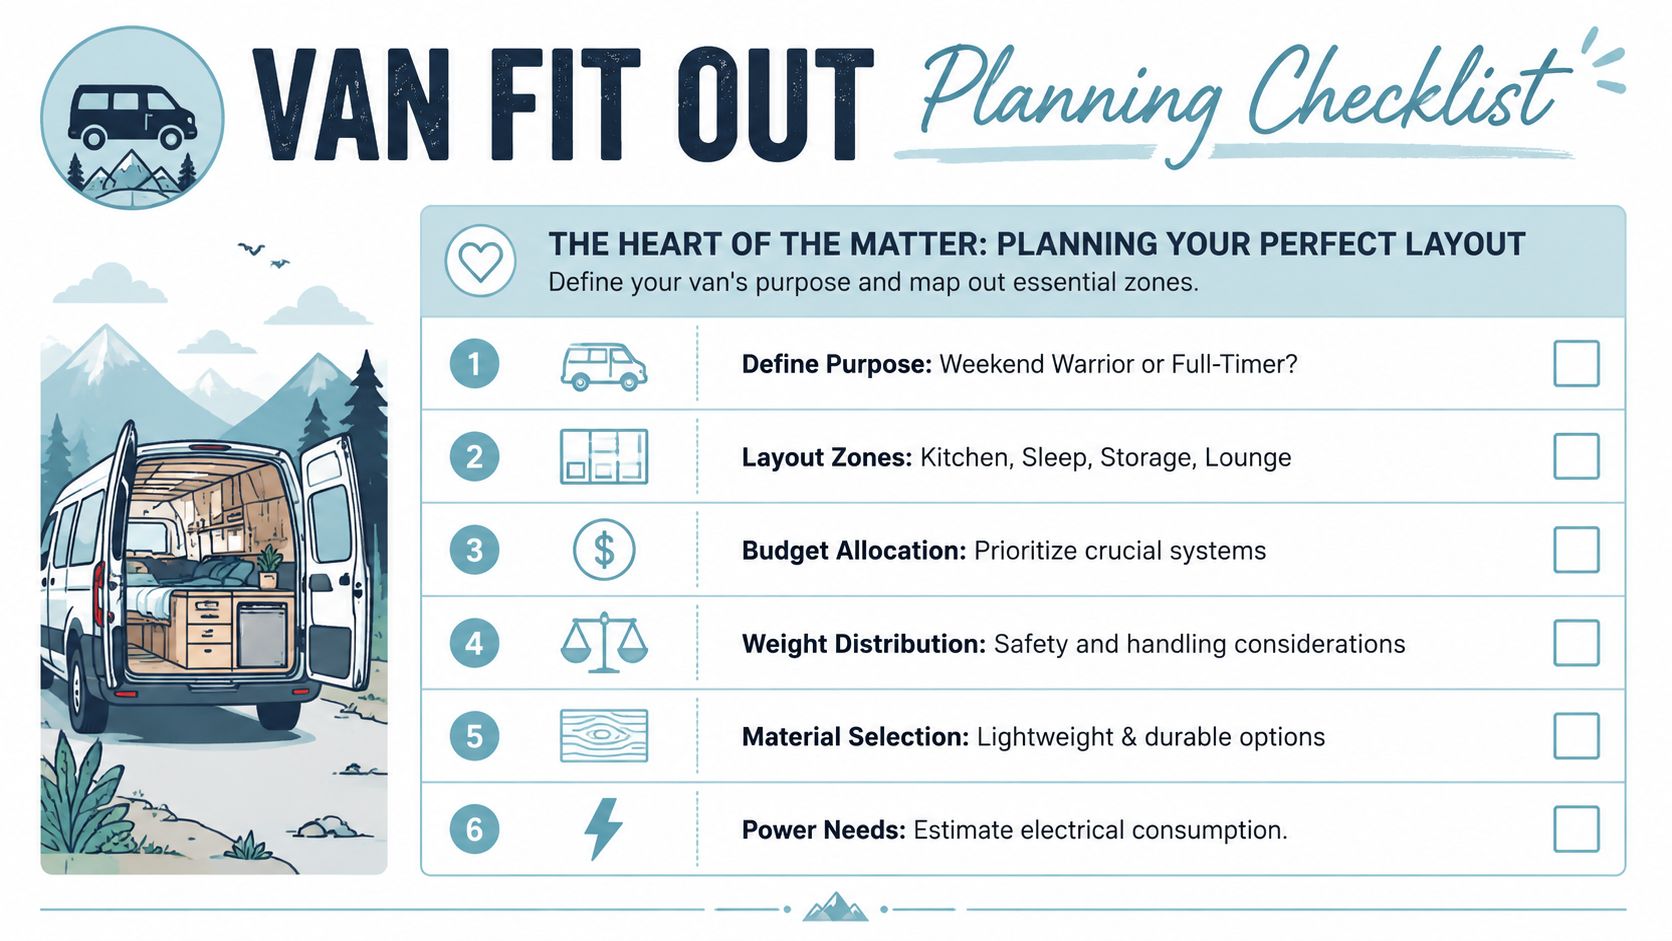
The Heart of the Matter Planning Your Perfect Layout

The smartest van fit out decisions happen before the first cut. In a classic VW, layout planning isn't just about comfort. It decides whether the van feels airy and nimble, or cramped and awkward.

A van fit out planning checklist infographic showing six essential steps for converting a camper van.

If you're pricing the job in Australia, brace yourself early. The median fit-out cost is AUD $45,000 for a full DIY build and up to AUD $95,000 for professional installations, as noted in this Australian VW reference page. That doesn't mean every build has to hit those numbers, but it does mean “I'll just throw a simple camper interior in” often turns out to be optimistic.

Start with use, not furniture

Ask the van a blunt question. What is it for?

Use case What matters most What usually gets sacrificed
Weekend beach trips Fast setup, easy bedding, simple storage Full kitchen complexity
Show-and-shine cruiser Period-correct materials, neat finishing Maximum utility
Touring weekender Power, water, organised gear access Open floor space

In a Kombi, every decision multiplies. A wider bed can steal walkway space. A fixed cabinet can make engine access annoying. Tall storage can make the cabin feel lower than it already is.

Sketch with real limits in mind

Classic VWs don't forgive sloppy measuring. The walls curve. The corners taper. The floor isn't always as true as you'd like. Cardboard templates help, painter's tape on the floor helps even more, and a scale model can be a surprisingly handy way to think through proportions before you commit to timber.

A useful planning checklist looks like this:

  1. Decide the sleeping setup. Rock-and-roll bed, fold-out platform, or simple bench-bed.
  2. Protect service access. Don't trap yourself with a pretty cabinet you have to remove for routine maintenance.
  3. Map heavy items low. Batteries, water, and dense gear should stay down low and close to the centre.
  4. Leave breathing room. A Kombi with a little open space feels twice as pleasant as one packed to the roof.

Practical rule: If a layout looks brilliant on paper but makes it hard to open, service, or clean the van, it's not brilliant yet.

Budget and payload need to talk to each other

Cost and weight are tied together more than most first-time builders realise. Premium finishes can still be heavy. Budget materials can also be heavy. The best result usually comes from choosing fewer things, but choosing them well.

Many van fit out plans go off track. Builders think in features instead of trade-offs. A second battery sounds great. So does a bigger water tank. So does extra storage. Before long, the van carries too much gear for the way it was meant to move.

Building the Bones Insulation Panelling and Flooring

Once the layout is settled, the shell work begins. This stage doesn't get the glamour of cabinetry or the buzz of wiring up lights, but it shapes how the van feels every single day.

In Australia, heat control matters. A classic VW has plenty of glass, plenty of metal, and not much mercy on a hot day. The goal with insulation isn't to turn the van into a thermos. It's to reduce radiant heat, soften temperature swings, and cut a bit of road noise without piling in unnecessary weight.

Insulation that suits an old VW

Keep it light and keep it tidy. Bulky layers can fight the Kombi's curves and make panel fitment frustrating. Thin, well-fitted insulation works better than stuffing every void with material that traps moisture or pushes trim out of shape.

Focus on these habits:

  • Clean and treat metal first. Surface rust hidden behind insulation only gets uglier with time.
  • Fit to the body shape. Small neat sections usually sit better than oversized pieces forced into corners.
  • Avoid overbuilding. Extra layers sound clever until they cost space and add weight.

A classic bus rewards neatness more than excess.

Panelling that respects the curve

Thin timber veneers can look brilliant in a Kombi, especially if you're chasing that warm, retro cabin feel. Modern lightweight boards can also work well if you want a cleaner finish and easier maintenance. Either way, template everything first. Old VW interiors rarely match side to side as neatly as you hope.

If you're choosing materials, insulation ideas for van projects can help spark finish direction, especially if you like that balance of practicality and nostalgia.

Flooring that doesn't fight the build

Flooring cops sand, wet thongs, muddy shoes, and cooking spills. It needs to be tough, easy to wipe down, and not too thick. In a Kombi, every millimetre of floor build-up affects headroom and the fit of cabinetry.

A simple comparison helps:

  • Vinyl flooring is easy to clean and suits practical touring builds.
  • Timber-look finishes bring warmth but need careful sealing.
  • Rubber-style surfaces are handy in harder-use vans, though they can feel less vintage.

The best floor is usually the one you don't worry about. If you're constantly babying it, it's probably the wrong choice for a road-going van.

The Big Three Electrics Plumbing and Gas

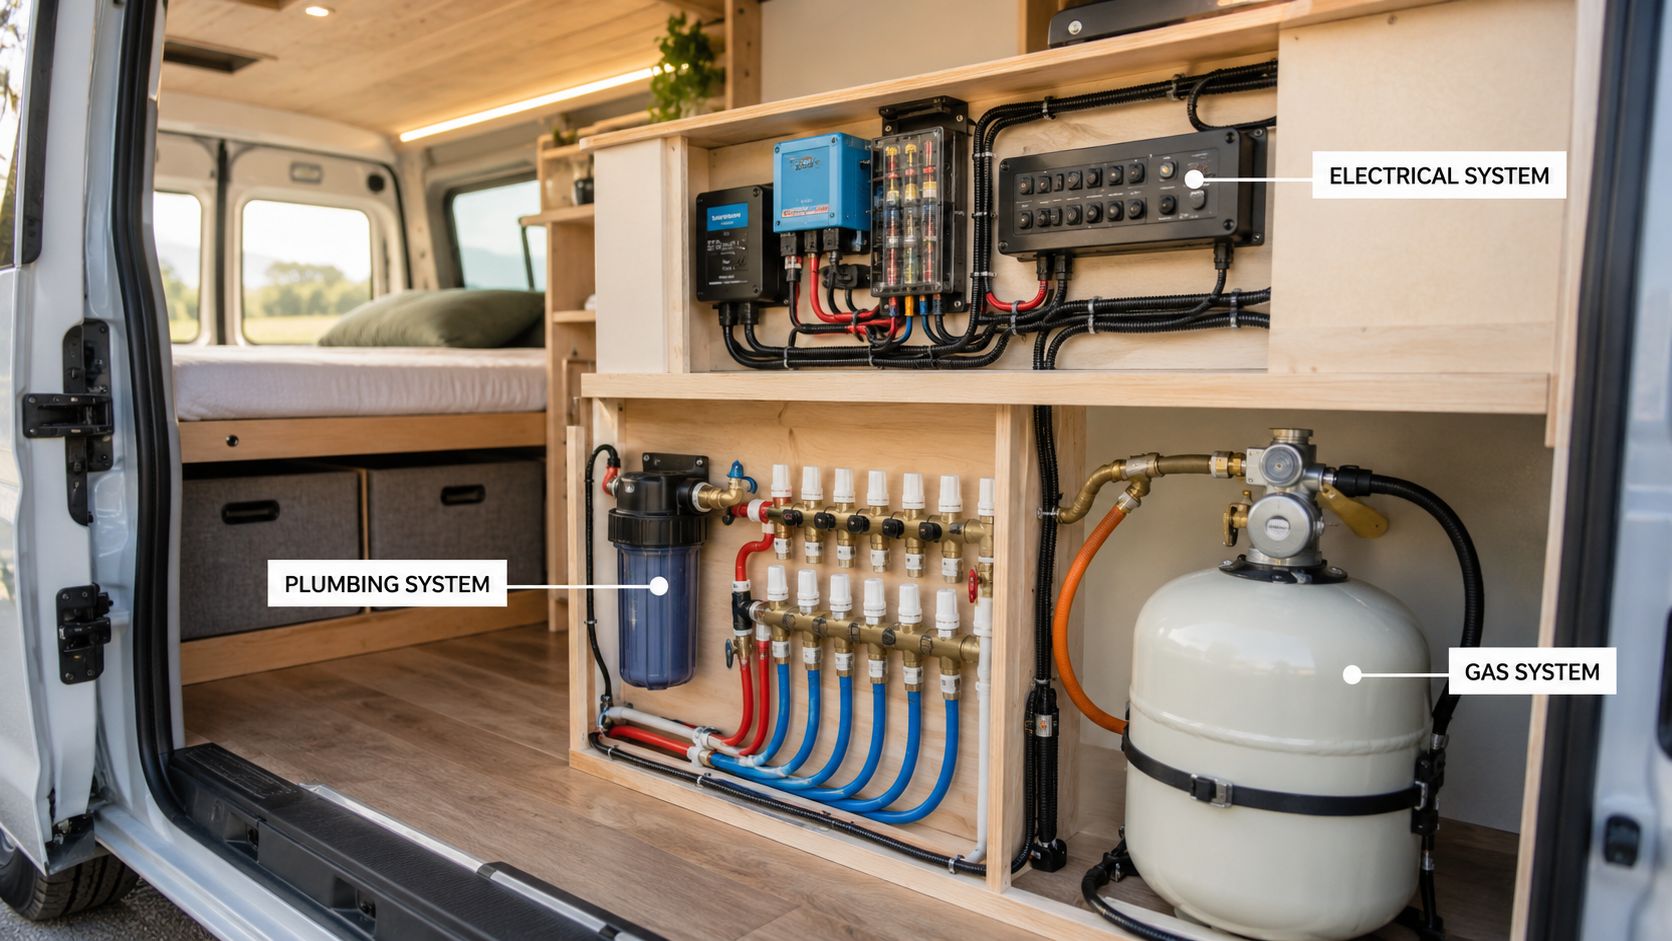
This is the part that scares people, and fair enough. Electrics, plumbing, and gas are where a van fit out stops being decorative and starts becoming a working system.

An organized utility wall inside a camper van displaying electrical, plumbing, and gas systems.

The best habit here is simple. Build in stages and test each stage before you hide it. According to this build-order guide for van conversions, a key benchmark is to run electrical cabling with proper wire sizing and protection after installing windows but before closing up panels. The same guide notes that small conductors are typically 1.5–6 mm², medium 10–35 mm², and large 50 mm²+. It also recommends copper pipe with brass compression fittings for gas systems, plus leak testing before use.

Electrics that stay simple and serviceable

A classic VW doesn't need a spaceship control panel. Most owners are better served by a modest, tidy setup that supports lighting, charging, a fridge if fitted, and maybe a fan or pump.

A few practical truths:

  • Run wires before panelling goes on. Retrofitting later is miserable.
  • Protect every connection. Proper crimps, heat-shrink, and strain relief matter.
  • Label circuits while you can still see them. Future-you will be grateful.
  • Keep heavy electrical gear low. That helps both access and vehicle balance.

If you're comparing storage and power options, a slimline lithium battery setup shows the kind of compact form factor many builders like for tight spaces.

Poor electrical work rarely announces itself on day one. It turns up later as voltage drop, hot connections, and maddening faults hidden behind finished walls.

Plumbing that matches the van

Plumbing in a Kombi works best when it's simple. Small tanks, short hose runs, easy drain access, and components you can reach without dismantling half the interior. Fancy systems often create more trouble than comfort in a compact vintage bus.

Good plumbing design usually means:

  • Fresh and grey water are easy to remove
  • The pump is accessible
  • The sink depth suits the cabinet below
  • Nothing blocks routine cleaning

That's the difference between a van you use often and a van you avoid because every little job feels fiddly.

A visual walkthrough helps when you're mapping services behind cabinets and panels:

Gas needs a stricter mindset

Gas is where cheerful DIY confidence needs a leash. If you're fitting a cooker or heater, treat the system like a regulated installation, not a casual weekend add-on. Copper pipe, brass compression fittings, proper support, and leak testing are the baseline, not the deluxe version.

The common failure isn't usually one dramatic blunder. It's a chain of smaller workmanship errors. A poor crimp here, a chafed wire there, an untested joint tucked behind a cupboard. That's why the cleanest van fit out builds tend to look almost boring behind the panels. Everything is sized, clipped, protected, and checked.

Staying Safe and Legal on Aussie Roads

A beautiful van that can't stay registered or insured is a very expensive shed ornament. That's why legal compliance has to sit inside the build from day one, not get bolted on later as paperwork.

In Australia, the practical gap isn't enthusiasm. It's understanding how modifications affect road legality. Seating changes, electrical installs, gas work, weight, anchorage points, and structural changes all interact with rules that can affect whether the vehicle remains roadworthy and insurable. The broader compliance discussion around VSB 14 and state or territory registration rules is often skipped in mainstream van content, even though it directly shapes what you can legally drive.

Weight is not a rough estimate

For Australian builds, one rule stands above the rest. A van fit out must comply with the manufacturer's weight ratings, including GVWR and GAWR, and builders should weigh the vehicle before and after conversion to ensure it remains registrable and insurable, as explained in this weight compliance guide.

That process matters because the final load includes more than cabinetry. It includes fluids, occupants, fixed equipment, and whatever gear you throw in for the trip. The same guide gives a practical benchmark of a 5,500 lb curb-weight van with about 1,800 lb of conversion payload, which shows how quickly available carrying capacity can disappear before water, fuel, passengers, and luggage are added.

The legal mindset that saves projects

You don't need to become an engineer overnight. You do need to stop thinking of payload and compliance as background admin.

Use this approach:

  • Check ratings early. Read the plate and understand the limits before buying materials.
  • Track additions as you build. Batteries, water, cabinetry, roof loads, and storage all add up.
  • Think about axle loads, not just total mass. Poor distribution can ruin handling.
  • Ask legal questions before cutting metal. Reversing a bad modification is far harder than planning properly.

The roadworthy van isn't the one with the most features. It's the one you can confidently register, insure, and drive across the country without a knot in your stomach.

The Fun Part Furniture Finishing and Nostalgic Styling

After the measuring, wiring, sealing, and legal homework, the soul goes in. Furniture gives the van its rhythm. The finishing touches give it its memory.

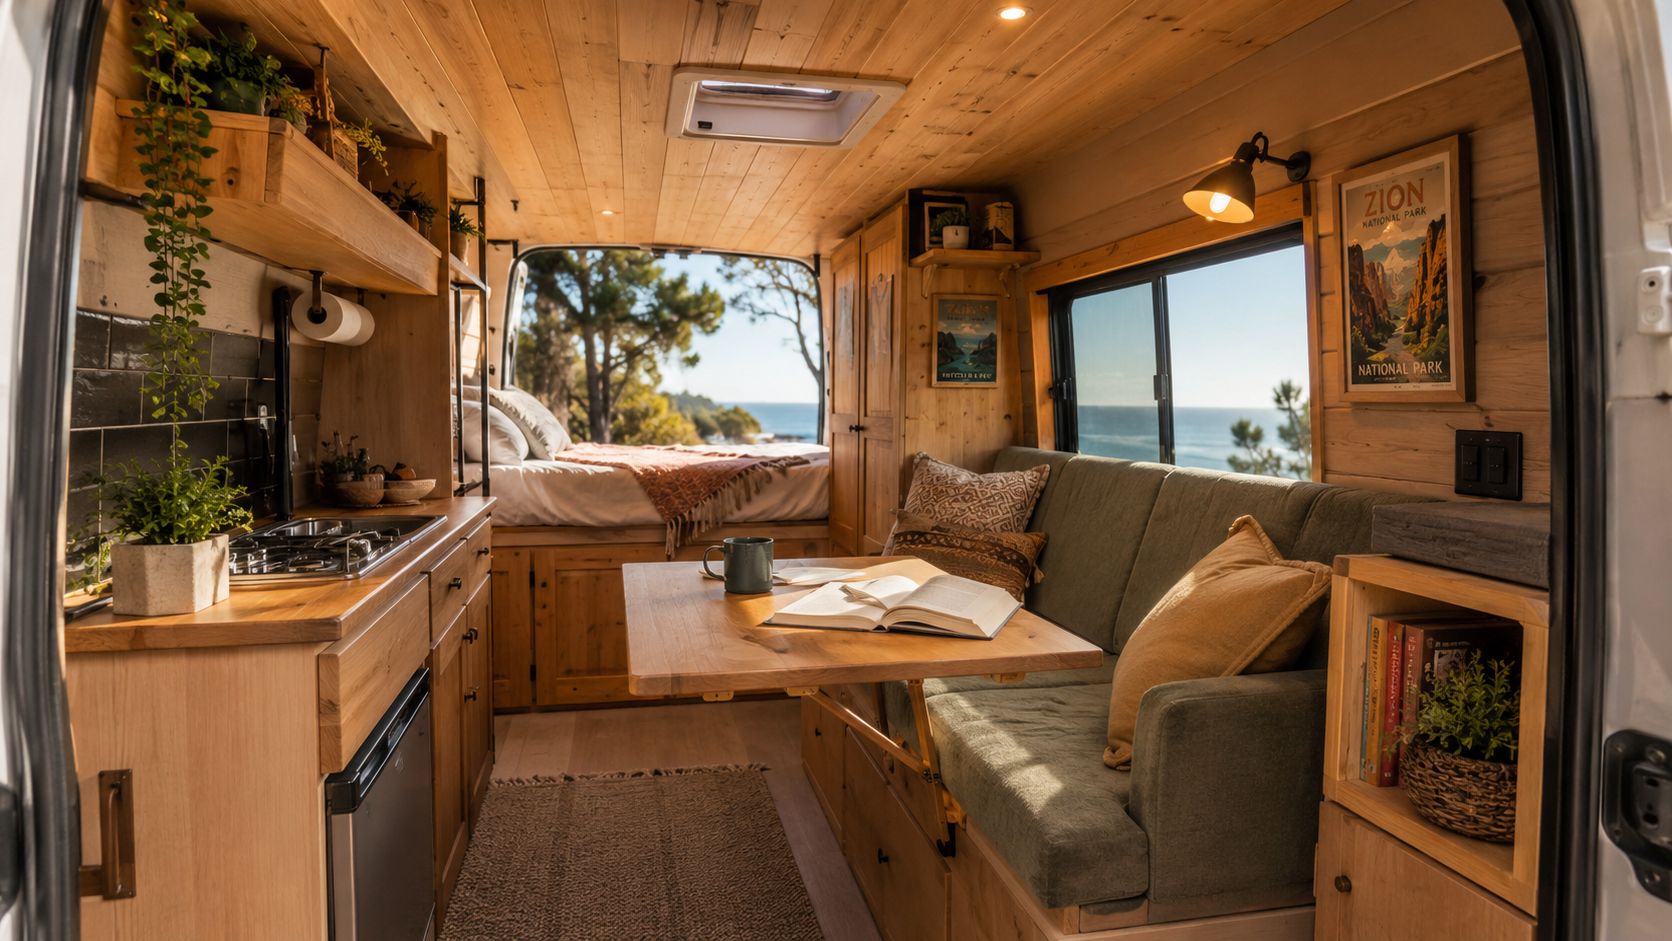
A well-sorted Kombi interior doesn't need much. A lightweight bench that doubles as storage, a bed base that's easy to lift, a small table that stows neatly, and joinery that doesn't shout over the van's original charm. Rounded edges always seem to suit these buses better than hard square forms.

A cozy, sunlit wooden camper van interior featuring a kitchen, seating area, and a bed overlooking the ocean.

Styling that feels right in a VW

The nicest classic interiors usually borrow from beach houses, old surf wagons, and honest camping gear. Think warm timber tones, muted colours, tidy curtains, simple hardware, and materials that age gracefully instead of trying to look perfect forever.

A few touches work especially well:

  • A small feature shelf for favourite VW diecast pieces or travel keepsakes
  • Vintage-style metal signs used sparingly, not plastered on every wall
  • Striped or canvas textiles that nod to old coastal camping
  • Soft warm lighting instead of harsh blue-white LEDs

Keep the furniture lighter than your ambitions

Many lovely plans tend to accumulate too much weight. Thick timber, oversized drawers, and household-style fittings can turn a nimble old bus into a sluggish one. Build furniture like boat joinery, not suburban kitchen cabinetry. Light, strong, multi-use, and easy to service.

The best part of a classic VW van fit out is that it doesn't need to be perfect to feel special. It just needs to feel lived in, cared for, and ready for another dawn run up the coast.


If you love the look and history of classic Volkswagens, Volkswagen Memorabilia is a lovely place to keep that passion going off the road as well as on it. You'll find VW memorabilia collectibles, nostalgic gifts, and display-worthy pieces for enthusiasts who adore the brand's heritage, including options that suit those seeking VW Kombi diecast Australia, a Volkswagen Beetle model, or a place to buy diecast Kombi favourites with local Australian stock and fast shipping.

Your Ultimate Guide to Finding a Van for Conversion

There's nothing quite like the dream of hitting the open road in a van you've built with your own hands. G'day! Choosing the right van for conversion is where it all begins, and the best one is simply the one that fits your travel plans, budget, and skills—whether that’s a modern workhorse or a classic VW Kombi with a story to tell.

The Dream of Van Life and Finding Your Perfect Rig

For us, it all comes back to a love for the classic VW Kombi and the freedom it has always represented. The whole #vanlife movement really just taps into that same spirit—a simpler way to get out and explore this amazing country of ours.

A white camper van with open doors parked by the sea at sunset, living the van life dream.

A van isn't just a vehicle; it’s a blank canvas for your own adventure. It’s waiting for your ideas, your hard work, and your personality. Whether you’re dreaming of waking up to the surf or finding a quiet spot in the outback, it all starts with finding the right base for your build.

Why We Love the Journey

Many of us got our start with a passion for classic Volkswagens. The iconic shape of a Beetle or the friendly face of a Splitty Kombi just sparked something—a connection to great design and the freedom of the road. That very same passion is what drives the van conversion community today. It's about:

  • Building something that's yours: Every piece of wood you cut and every light you wire makes the van a part of you.
  • The freedom to just go: Knowing you can pack up and head off wherever you please is an incredible feeling.
  • Being part of a community: You’re joining a massive group of fellow travellers, from weekend builders to full-time nomads.

This desire for self-contained travel has absolutely exploded. Here in Australia, campervan registrations have more than doubled in two decades, jumping from 40,000 vehicles in 2004 to a projected 98,000 by 2026. It just goes to show that building a van is a massive lifestyle choice for tens of thousands of Aussies. You can dig into more data on campervan ownership trends to see just how big the movement has become.

This guide is for every Aussie with that dream—whether you’re a seasoned restorer with a classic Kombi Samba Bus diecast model for inspiration, or just starting to wonder what’s possible. Let's find the perfect van to get your adventure started.

Choosing Your Canvas: Van Types for Conversion

Alright, this is where the fun really begins. Picking your van is easily the biggest decision you'll make, and it sets the tone for your entire build and every adventure that follows. Think of it like a painter choosing a canvas – the size and shape will dictate everything you can create on it.

Your choice of van directly impacts your floor plan, your budget, and even the simple act of finding a park. To help you find the right fit, let’s break down the most common types you’ll spot on Aussie roads, each with its own personality and potential.

Panel Vans: The Versatile All-Rounder

Panel vans are the trusty workhorses of Australia and a brilliant starting point for many first-time builders. You see them everywhere—think Toyota HiAce, Hyundai iLoad, and the modern VW Transporter. Their popularity is a huge advantage when you need to find spare parts or a mechanic who knows their way around the engine.

They are the ultimate blank slate. That boxy, empty cargo area is just waiting for you to bring your ideas to life. Because they’re so common as trade vehicles, they also have a fantastic ‘stealth’ factor, letting you blend right into a city street without screaming “campervan!”

This makes them perfect for:

  • Weekend warriors who need a reliable daily driver during the week.
  • Solo travellers or couples happy with a more compact living area.
  • Stealth campers who want to fly under the radar in urban spots.

The main trade-off? Headroom. Most standard panel vans won’t let an average-height person stand up straight. This means you'll be sitting or crouching inside, which is something to seriously think about if you're planning longer trips.

High-Roof Vans: Your Studio Apartment on Wheels

If being able to stand up is a non-negotiable for you, then a high-roof van is the only way to go. These are the giants of the van world—like the Mercedes-Benz Sprinter, Ford Transit High Roof, and Fiat Ducato. Honestly, stepping inside one feels less like a van and more like a small studio apartment.

The ability to stand up fully changes everything. It makes cooking, changing clothes, and just hanging out inside on a rainy day a completely different experience. You’re building a home, not just a place to sleep.

That extra vertical space opens up a whole world of layout possibilities. You can build a fixed high bed with a massive ‘garage’ underneath for bikes and gear, or even find room to install a small shower. Of course, all that size comes with its own challenges. They can be much trickier to park, forget about underground car parks, and they are definitely less "stealthy". For those drawn to this spacious feel but with a love for the classics, the original campers set the standard. You can trace this design DNA back by exploring the history of the Volkswagen Type 2 Kombi and see where it all started.

High-roof vans are ideal for:

  • Full-time van lifers who need a comfortable and spacious living area.
  • Taller folks who don’t want to spend their entire trip hunched over.
  • Adventurers with bulky gear like surfboards, mountain bikes, or climbing equipment.

To help you weigh it all up, here’s a quick comparison of the most common van types.

Comparing Popular Van Types for Your Conversion

Here's a quick look at the pros and cons of common van types to help you decide which is the right starting point for your build.

Van Type Best For Pros Cons
Panel Van Weekend trips, stealth camping, and daily driving. Affordable, easy to drive/park, very discreet, great fuel economy. Not enough headroom to stand, limited layout options due to space.
High-Roof Van Full-time living, long-term travel, and tall people. Full standing room, tons of layout flexibility, feels like a home. Harder to park, can't access low-clearance areas, less fuel-efficient.
Camper-Specific Those wanting a ready-made or semi-converted base. Often come with pop-tops, windows, and insulation installed. Can be more expensive, less of a "blank canvas" for custom builds.
Classic VW Van Nostalgic travellers, VW enthusiasts, and unique builds. Iconic style, strong community, surprisingly versatile layouts. Older mechanics, can be prone to rust, requires more maintenance.

Ultimately, choosing a van is less about specs and more about feel.

In the end, the best van is the one that gets you excited for the journey ahead. Close your eyes and picture your life on the road. Are you parked up in a bustling city or waking up to a remote coastline? Are you travelling for a week or for a year? Your answers will point you toward the perfect canvas for your own adventure.

Alright, let's get this done. You've picked out your dream van, and it's easy to get swept up in the romance of it all. But before you hand over any cash for your future van for conversion, it's time for a reality check.

Think of it less like a date and more like a pre-purchase home inspection. This step is absolutely critical to make sure you're not buying a beautiful-looking money pit that will cause you endless headaches down the road. You don't need to be a top-level mechanic, but you do need to know the right questions to ask and where to look.

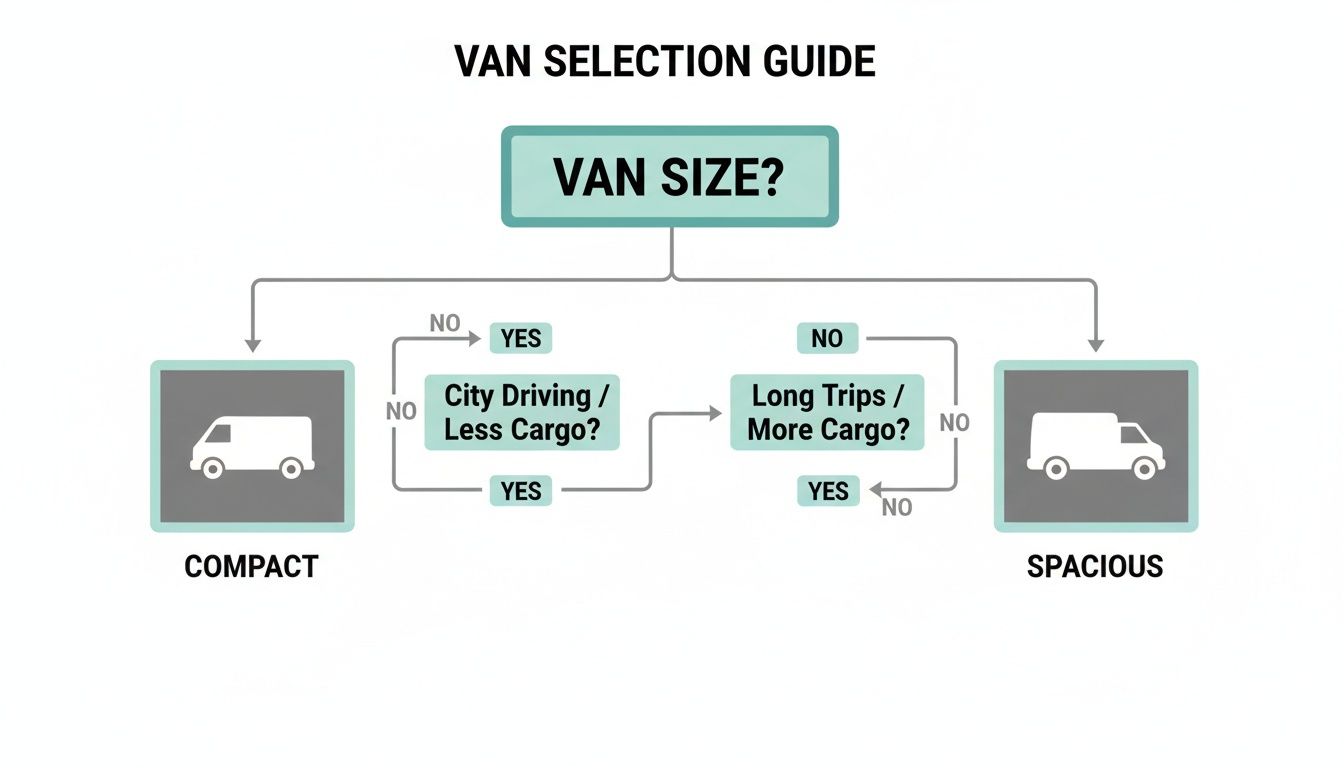
This simple flowchart can help you decide between a smaller, nimbler van and a larger, more liveable one based on how you plan to travel.

Flowchart guide for selecting a van size, differentiating between Compact for city driving or Spacious for long trips.

As you can see, a compact van is brilliant for zipping around town and weekend getaways, whereas a more spacious rig is almost essential for those long-haul adventures where comfort is king.

The Mechanical Deep Dive

Let's be blunt: the mechanical condition is everything. A shiny coat of paint can easily hide some serious, deal-breaking problems underneath.

Your number one enemy is rust. Get on your hands and knees and check everywhere. Look in the wheel arches, under the door seals, pull up the floor mats in the cab, and get right under the van to inspect the chassis. A bit of surface rust can often be treated, but if you find deep, flaky rust that has eaten right through the metal, it's best to walk away.

Once you’ve given it the rust check, it’s time to look at the guts of the van:

  • The Engine: Pop the bonnet and look for obvious oil leaks. When you start it up, listen for any weird knocking, clunking, or rattling noises.
  • Service History: A well-kept logbook with stamps and a folder full of receipts is a fantastic sign. It shows the van has been looked after and gives you a clear picture of what's been fixed or replaced.
  • Tyres: Check the tread. If the tyres are worn unevenly, it could signal an alignment or suspension issue, which can be an expensive fix.

Never just take the seller's word for it. If you feel out of your depth, spend a few hundred dollars on a pre-purchase inspection. A good mechanic will spot things you’d never notice and can save you thousands in the long run.

Fuel and Drivetrain Decisions

The old petrol vs. diesel argument is a classic, but for van life, diesel usually comes out on top. Diesel engines generally provide better fuel economy on long trips and deliver more torque, which is a huge help when you're hauling the weight of a full conversion. Modern petrols are getting better, but a solid diesel is hard to beat for this kind of work.

Next up is the drivetrain. The vast majority of vans are Rear-Wheel Drive (2WD), and for most people, that's perfectly fine. It'll get you down sealed roads and into most campsites without any trouble.

But if you dream of chasing snow, launching a boat, or exploring muddy forest tracks, you should seriously consider an All-Wheel Drive (AWD) or a full Four-Wheel Drive (4WD). They’re harder to find and will cost you more, but that extra traction can be the difference between a great story and a call to a tow truck.

Understanding Your Load Limits

This is one of the most important but most frequently ignored numbers on a van: the payload capacity. It sounds technical, but it’s simply the legal maximum weight your van can carry. That includes you, your passengers, your build materials, your water, your fuel—everything.

Treat it like a strict budget. Every piece of timber, every battery, every litre of water, and even your collection of favourite VW memorabilia collectibles adds up. Going over your payload isn't just illegal; it's dangerous. It puts a massive strain on the engine, brakes, and suspension. You'll find this number on the van's compliance plate (usually inside the driver's door) or in the owner's manual. Know this number before you even think about buying a single sheet of plywood.

Embracing the Iconic Volkswagen Legacy

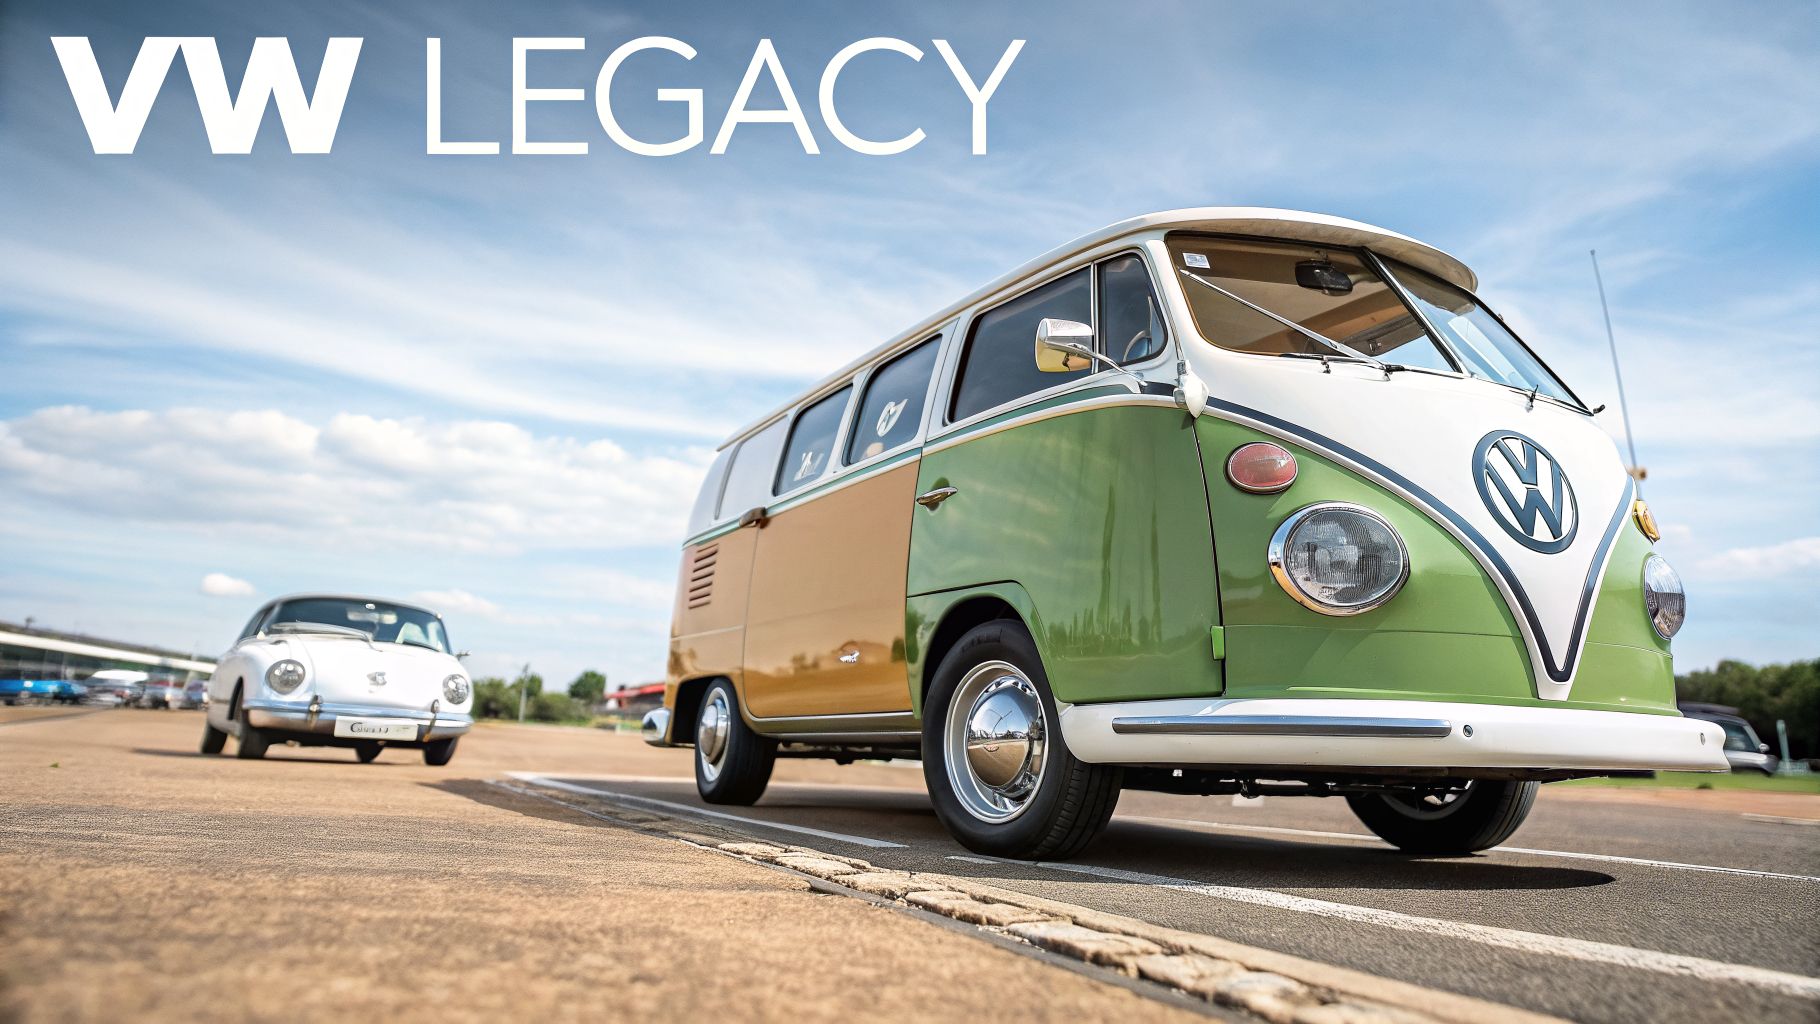
A classic green and tan Volkswagen Type 2 van and a white vintage car on an asphalt road under a blue sky.

When you picture a van for conversion, chances are you’re thinking of a Volkswagen. It’s the one that started it all. Long before #vanlife, the Kombi was the true symbol of freedom and chasing the sun along the Aussie coast. For many, this is where the dream begins.

Choosing a VW isn’t just a practical decision; you’re buying into a legacy. There’s a special kind of magic in the friendly face of a Splitty and the unmistakable rumble of an air-cooled engine that modern vans just can’t copy.

The Original Adventure Machine: The Classic Kombi

Let’s be honest, the idea of converting a vintage Kombi is the ultimate dream. The style is unmatched. Pull into a campsite in a classic Type 2, and everyone wants to have a chat.

Of course, owning an icon comes with its own unique set of challenges.

  • The Body: These vans are decades old. Finding one without rust is your biggest hurdle. You have to look past the shiny paint and check the wheel arches, sills, and under the floors.
  • The Mechanics: The air-cooled engines are simple to work on and parts are easy to find. But they need more regular attention than a modern diesel. You’ll need to be comfortable with basic maintenance or have a good specialist mechanic on speed dial.
  • The Project: A classic VW build is a labour of love. It takes patience. The reward, however, is a home on wheels with more character than anything else on the road.

Modern VWs: The Best of Both Worlds

If vintage maintenance seems a bit daunting, you can still join the VW family. Modern Volkswagens like the Transporter and the larger Crafter offer a brilliant mix of that famous heritage with the reliability you need for long-haul touring.

These vans give you a solid platform to build on, but they still carry that special VW DNA. Volkswagen's dominance in this space is no accident. The original Kombi production started on March 8, 1950, leading to around 5 million buses over forty years. Today, that legacy is so strong that the first 150 units of the latest California camper sold out instantly in Australia.

A modern VW gives you peace of mind. You get the badge and a vehicle that starts every time, so you can focus on the adventure, not the mechanics.

Bringing the VW Vibe into Any Build

No matter what van you end up with, you can always bring that classic Volkswagen spirit into your design.

Start with a retro colour palette. Think classic two-tone paint jobs in sea blue, pale yellow, or sage green. Inside, use natural timber cladding and simple white cabinetry to capture that timeless feel. For a closer look at classic layouts, check out our guide on Kombi camper history.

The best way to tie it all together is to celebrate the heritage. A beautifully detailed model on your dashboard is more than just decoration; it’s a tribute to the van that inspired it all.

Planning Your Conversion Budget Timeline and Layout

With the van selected, the next stage is planning. This is where you map out the transformation from an empty vehicle into a functional mobile home, focusing on your budget, timeline, and layout.

It's a more common project than many think. An Australian survey found that 68% of people completed their own van conversions, showing just how achievable a DIY build is. You can see more details in the full insights from the Aussie van life survey.

Setting a Realistic Budget

Your budget will define the scope of your conversion, from the materials and appliances you choose to the final finishes. A spreadsheet is the best way to track your expected costs.

Group your expenses into clear categories:

  • The Big Three: These are the core systems of Insulation, Electrics, and Plumbing.
  • The Build: Includes all structural components like timber for framing, wall panels, flooring, and cabinetry.
  • Appliances: Your fridge, cooktop, fans, and other essential hardware.
  • Finishes: The final touches that complete the look, such as paint, fabrics, handles, and decorative items like a classic Volkswagen Beetle model.

Always factor in a contingency fund of 10-15% of your total budget. Unforeseen expenses are common in any build, and this buffer prevents stress and delays.

Creating a Practical Timeline

The time required for a conversion depends on your available hours, skill level, and the complexity of the design.

That same survey showed that 58% of builders finished their projects in six months or less. A basic build with a bed and storage might only take a few weekends, whereas a complex fit-out with a full kitchen and solar could take several months.

Designing Your Perfect Layout

Before starting the build, take detailed measurements of your van's interior. Use paper and a pencil to sketch out potential layouts.

Spend time in the empty space to get a feel for how you will move around. Consider your daily routines and design a floor plan that supports them, ensuring a natural flow between sleeping, cooking, and living areas. This is your opportunity to create a space built specifically for your needs.

Introducing the Big Three Conversion Systems

A successful campervan conversion relies on three foundational systems. Getting these right is essential for comfort and function.

  1. Insulation for Climate Control: Insulation is your first priority for managing interior temperature. It protects against Australia's hot sun and cool nights, keeps the van warm in winter, and helps dampen road noise.

  2. Electrics for Off-Grid Power: The electrical system is the heart of your mobile setup, powering lights, refrigeration, and devices. This can range from a simple auxiliary battery to a comprehensive rooftop solar array, determining your capacity for off-grid living.

  3. Plumbing for Water on the Go: Onboard water is a major convenience. A basic system consists of a freshwater tank for drinking and washing, a sink, and a grey water tank for waste. This allows for self-sufficient camping.

Finishing Your Build and Starting Your Adventure

The last of the sawdust is swept up, the final screw is tightened, and your van for conversion is now a home. It’s an incredible feeling, isn’t it? But before you throw your gear in and chase the sunset, a few last-minute jobs will make sure your adventure starts without a hitch.

All that planning, budgeting, and hard work was for this very moment. Every little challenge you pushed through has led to the freedom of the open road. Now it's just a matter of sorting the paperwork so you can get out there.

Making It Official

Your build isn't truly finished until the government says it is. Depending on how much you’ve changed, you may need to get your van’s classification updated.

  • Registration Updates: Here in Australia, if you’ve fitted permanent features like a bed and kitchen or altered the number of seats, your van will likely need to be re-registered from a commercial vehicle to a campervan. It’s best to check with your state’s transport authority for their specific rules.
  • Insurance: Don’t just assume your old policy has you covered. You'll need a specialised campervan or motorhome insurance policy. This covers not just the vehicle, but also the value you’ve added through the conversion and everything inside it. Be completely upfront with your insurer about every modification.

The Unwritten Rules of the Road

With your home now on wheels, you’ve joined a brilliant community. Being a good neighbour on the road is easy, and it ensures we are all welcome wherever we park up. It really just comes down to responsible camping—leaving no trace, respecting local bylaws, and putting a few dollars into the small towns you pass through.

After months of effort, finally seeing your vision come to life is something special. The journey from an empty steel box to a rolling home is an achievement that connects you to a long line of adventurers and dreamers.

As you map out that first trip, take a second to honour the build itself. A small memento on the dash can be a great way to capture the spirit of your newfound freedom. Many builders we know love having a detailed diecast model, a little nod to the classic heritage that inspired their own journey. Whether you're celebrating a classic Kombi or your brand-new rig, you can find the perfect piece in our extensive range of VW van accessories and models.

Welcome to the club. The road is waiting for you.

Your Van Conversion Questions Answered

We get a lot of questions from people starting out. Here are a few of the most common ones we see from aspiring van builders around Australia.

What Is the Best Van for a Stealth Camper Conversion?

For stealth camping, a panel van is your best option. Models like the Toyota HiAce, Ford Transit Custom, or a modern cousin to a classic Volkswagen Beetle model, the VW Transporter, are excellent choices. They look like regular work vehicles, which means they blend into city environments and don't attract the attention that a high-roof campervan would.

How Much Does a DIY Van Conversion Cost in Australia?

The final cost depends entirely on your build quality and the materials you choose.

  • A basic build using mostly second-hand or reclaimed materials can cost under $5,000.
  • A mid-range conversion with a solar power setup, quality insulation, and a proper kitchen generally falls between $10,000 and $25,000.
  • For a high-end, professional-style finish with custom cabinets, an internal shower, and advanced electrical work, the cost can be $40,000 or more.

Do I Need to Get My Van Conversion Certified or Engineered?

This depends on the modifications you make. Major changes almost always need to be signed off by a professional to be legal on Australian roads.

Before you begin building, always check the specific requirements with your state’s transport authority. Modifications like adding or removing seats, installing 240V electrical systems, or fitting gas appliances will require certification from a licensed engineer.

Getting this sorted out from the start will prevent major issues later. It makes sure your van is safe, fully legal, and ready for the road.


Looking for something to complete your new setup? At Volkswagen Memorabilia, we have unique pieces to celebrate your build. From diecast models to classic décor, find the perfect item to keep the inspiration going at https://vwmemorabilia.com.au.