
High Lift Jack Bracket Guide for Your VW Adventure

A lot of VW owners hit the same moment. The van's packed, the esky's cold, the surf's up, and then you stop and realise your recovery gear plan is still a bit optimistic. On a classic Kombi or Beetle, carrying a jack isn't just about having the tool. It's about where on earth you mount the thing without chewing up bodywork, upsetting weight balance, or ending up with a rattly lump of steel hanging off a vehicle you've spent years bringing back to life.

That's where a good high lift jack bracket earns its keep. Not as some macho bolt-on for a bush truck, but as a practical bit of kit for VW people who actively use their cars. Old Volkswagens reward simple, thoughtful upgrades. They punish lazy mounting points, cheap hardware, and “she'll be right” measuring. If you're fitting one for beach runs, camping trips, paddock access, or a long country loop, the bracket matters just as much as the jack.

From the Bush to the Beach Your VW's Ticket to Freedom

A classic Volkswagen always makes a trip feel bigger than it is. A quick run down the coast turns into a story. A dusty inland detour becomes the bit everyone talks about at the next cars-and-coffee meet. That's part of the magic. But the other part is preparation, because an old Bus or Beetle can still get bogged, still cop a flat, and still leave you needing a safe way to lift, shift, or recover.
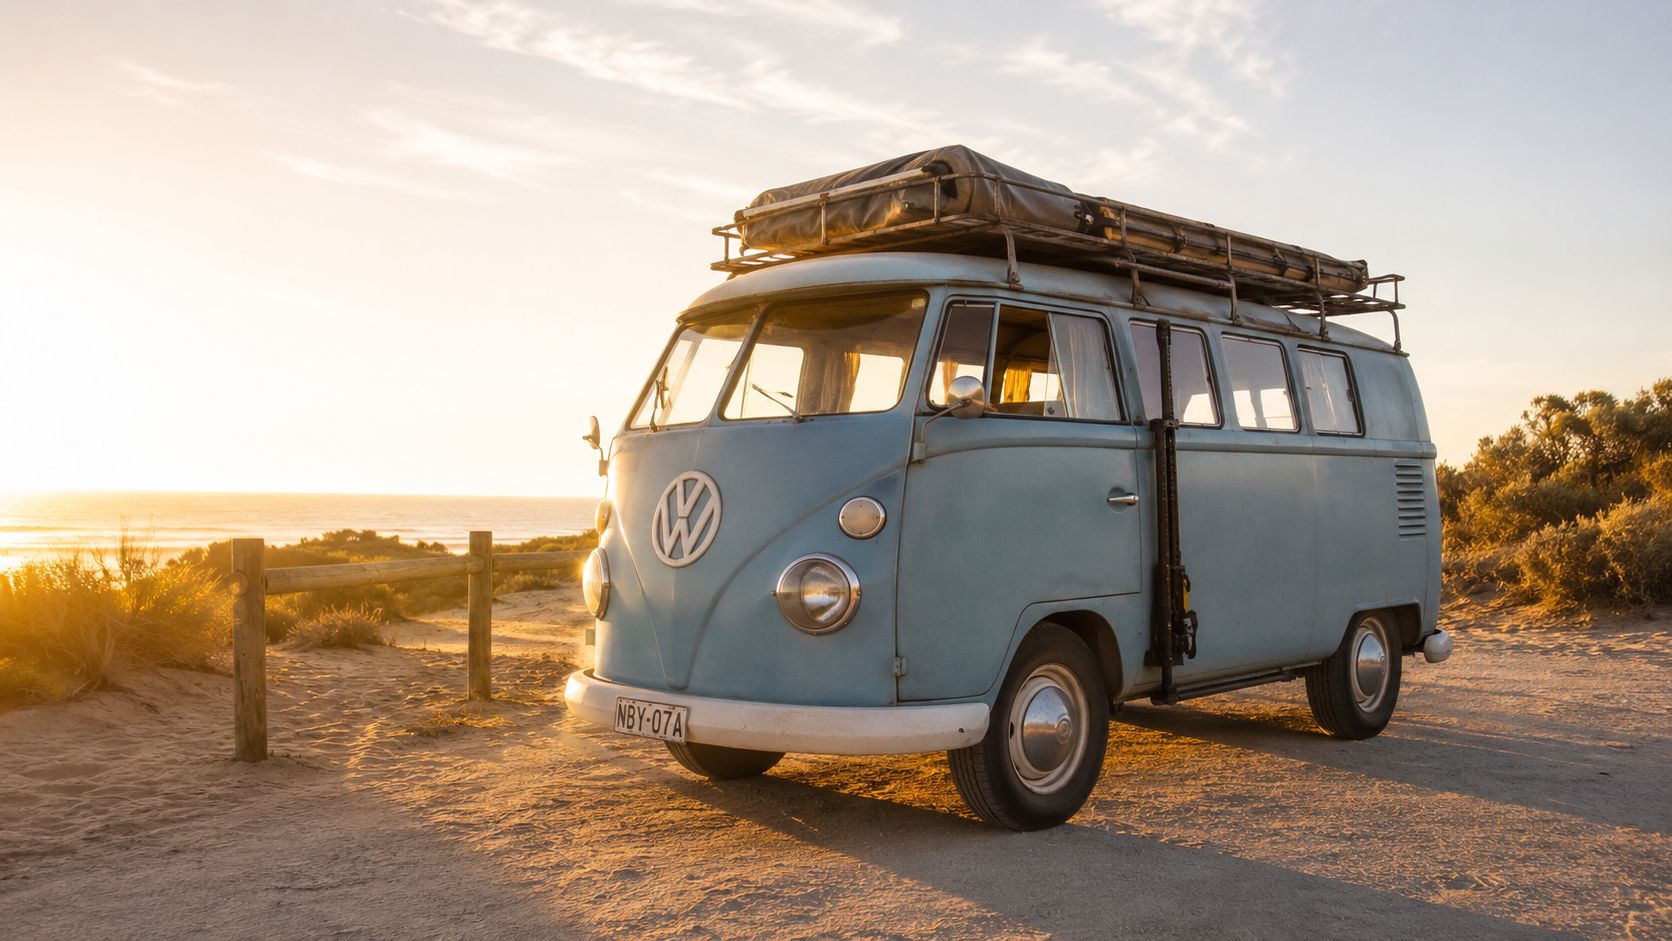
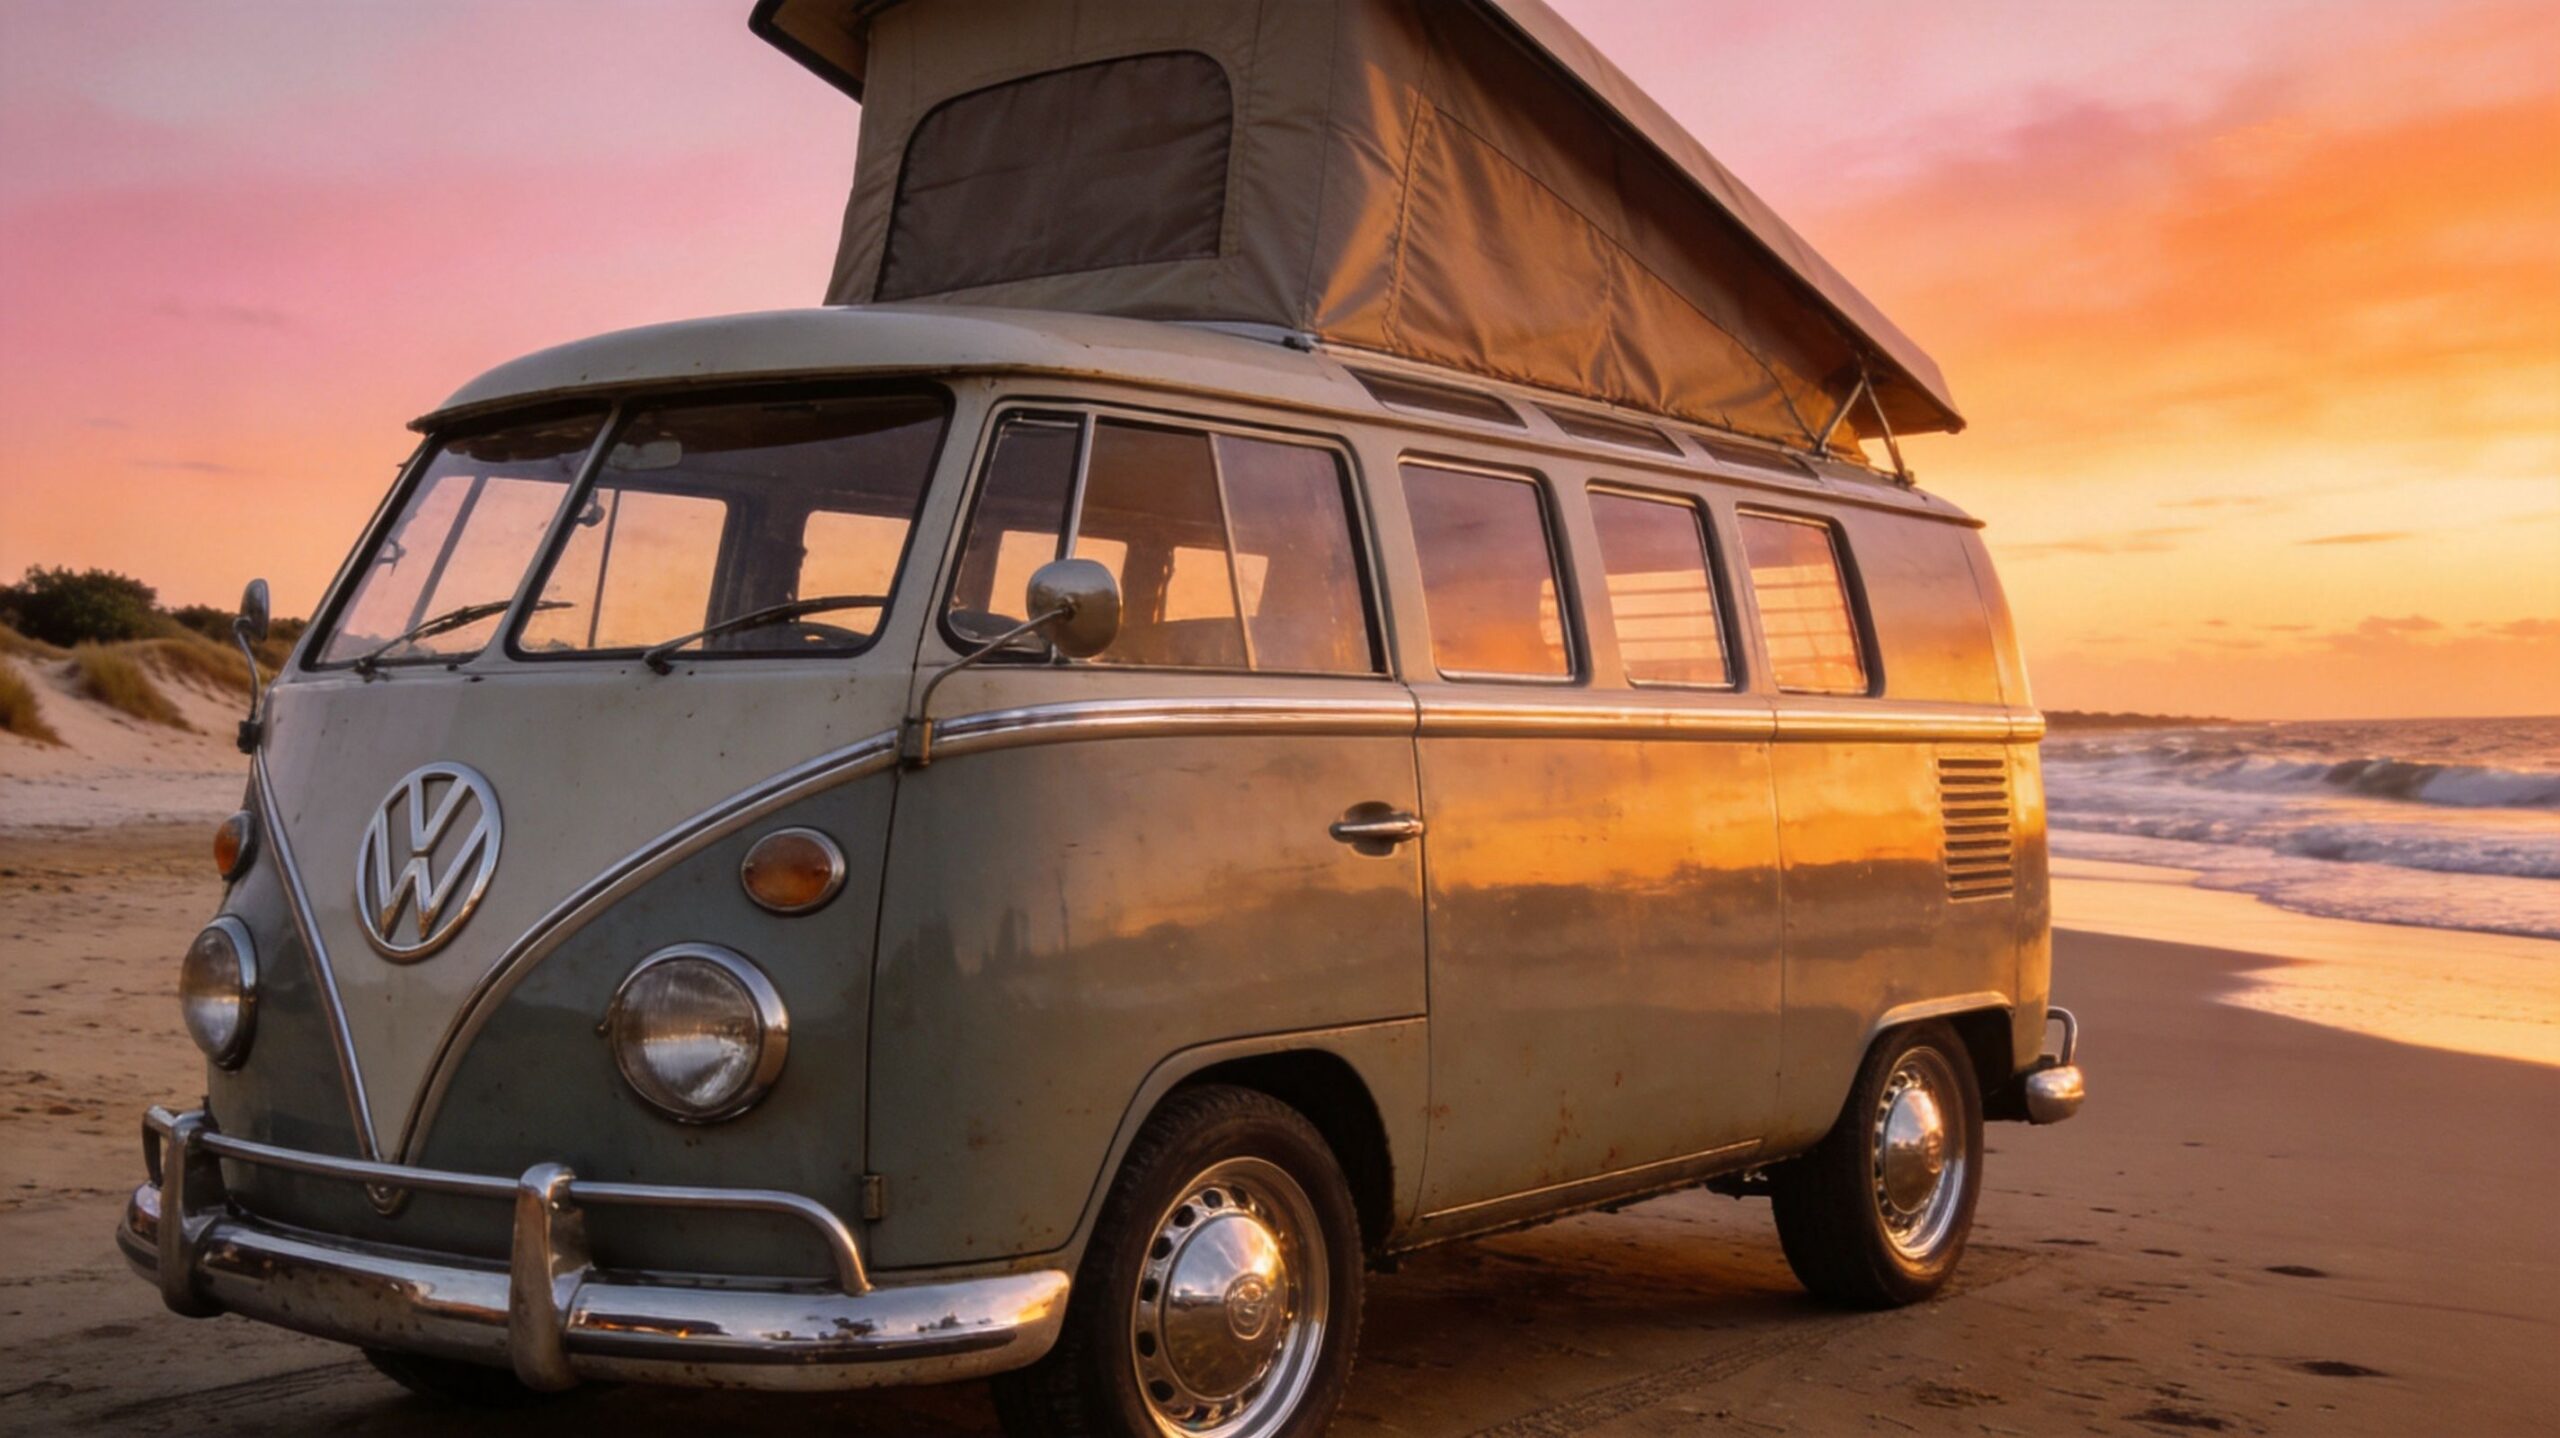
A vintage light blue Volkswagen bus parked on a sandy beach during a beautiful golden sunset.

I've always liked the VW approach to adventure. It's less about brute force and more about ingenuity. A Kombi with a sensible rack, decent tyres, and recovery gear mounted properly often gets used more confidently than a heavily modified rig that's overdone and underdriven. That confidence matters when you're on corrugations, edging onto soft sand, or poking around a coastal track before sundown.

Practical rule: Recovery gear only helps if you can reach it quickly and trust it to stay put.

That's why a high lift jack bracket isn't just a holder. It's part of the vehicle's touring setup. It keeps the jack accessible, stops it becoming a loose projectile, and lets you free cabin or cargo space for the stuff that makes an old Volkswagen pleasant to travel in. On a camper Bus, that might be bedding and cooking gear. On a Beetle, it might be the difference between a tidy luggage area and total chaos.

There's also a mindset shift here. Once your recovery gear has a proper home, you start travelling like someone who expects to solve problems, not just hope they won't happen. That suits the old VW spirit down to the ground. These cars were built around making the most of modest means and smart design.

If your Kombi life leans more road trip than rock crawling, there's good inspiration in this look at van life in Australia. It taps into the same idea. Freedom feels better when the practical stuff is sorted.

Why classic VWs need extra thought

A modern 4WD often gives you obvious hard points. A Kombi or Beetle doesn't. Thin panels, ageing gutters, custom bumpers, engine lids, old repairs, and mixed aftermarket parts all complicate the job.

That means the bracket choice has to match the vehicle, not the other way around.

  • A beach-going Kombi needs corrosion resistance and a mount that won't shake loose on washboard roads.
  • A Baja Bug can sometimes use a stronger external mounting point, but only if the bar work is structural.
  • A restored Beetle often benefits from a less intrusive solution, because preserving clean body lines and paint matters too.

Choosing the Right Bracket for Your Rig

Not all brackets suit a Volkswagen, and not all mounting styles suit the way Volkswagens get used in Australia. Some are ideal for a lifted Baja with custom bars. Others make more sense on a tidy Kombi with a roof platform. The trick is matching the bracket to your body style, your travel habits, and how much fabrication you're happy to do.
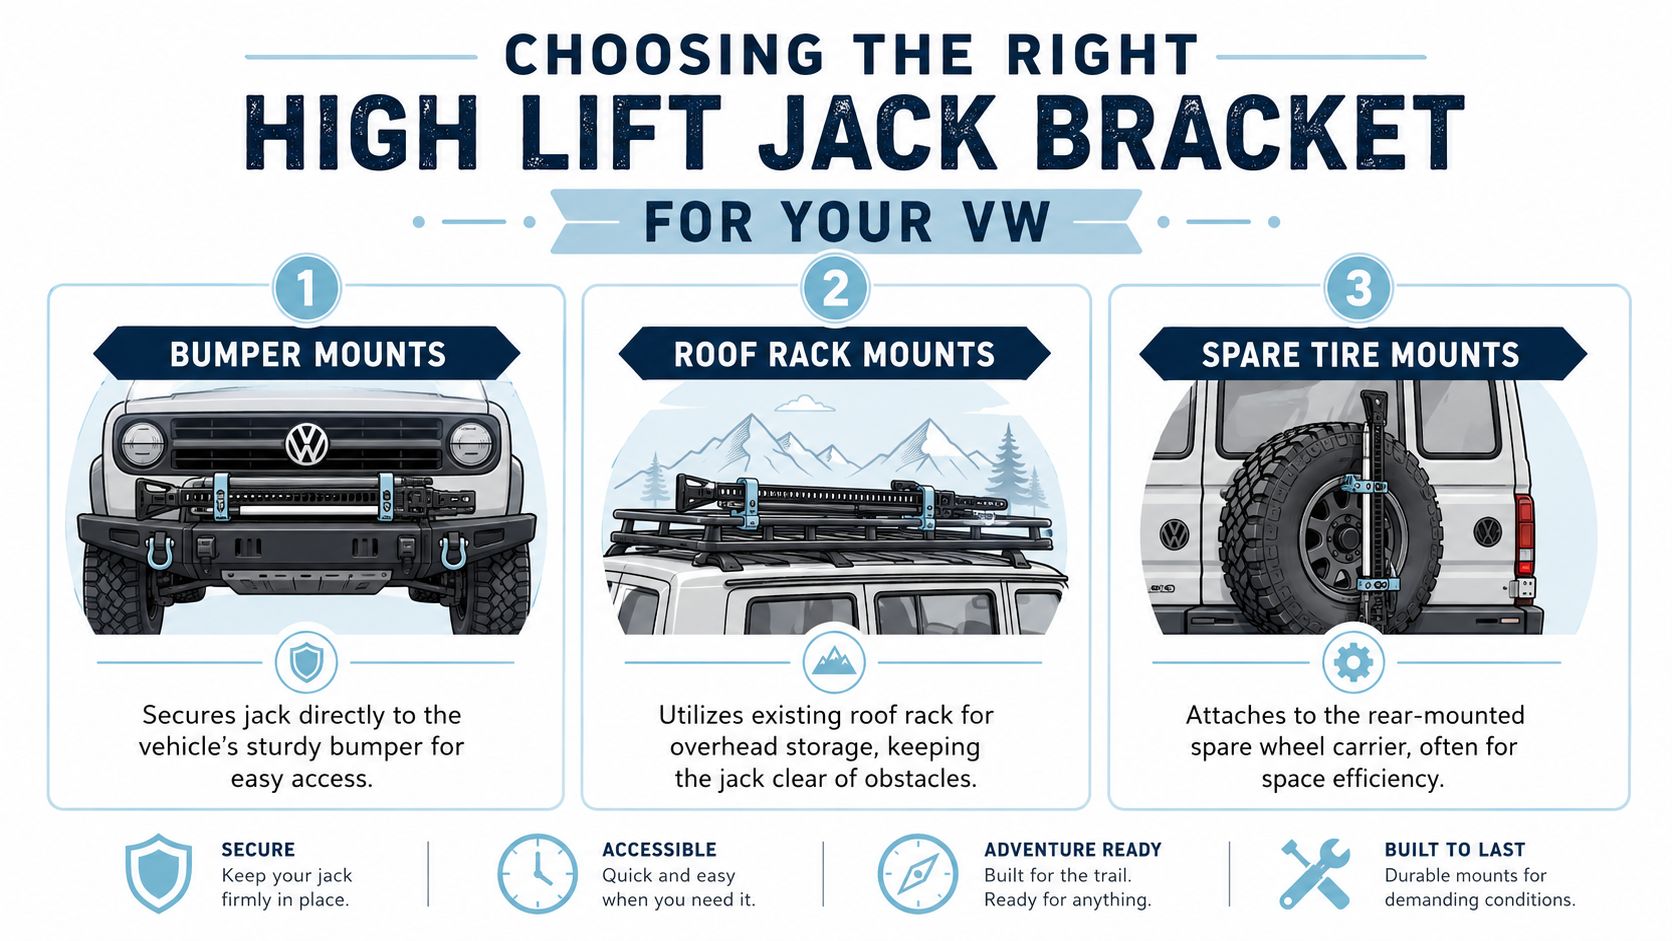
A graphic showing three types of high lift jack mounts for Volkswagen vehicles: bumper, roof rack, and spare tire.

The three mounting styles most VW owners consider

Mount style Where it suits best Main upside Main trade-off
Bumper or bar mount Baja Bugs, custom bar setups, reinforced rear carriers Fast access and easy visual checks Only works if the bar is genuinely strong
Roof rack mount Kombis, T3s, touring setups with platform racks Keeps the jack out of the way and saves cabin room Raises weight higher on the vehicle
Spare tyre or rear mount Vans with custom rear carriers Good space efficiency and balanced access Needs careful swing-away or door clearance planning

A lot of people start with the idea of a bumper mount because it looks tough. Fair enough. But on a classic VW, appearance counts for less than structure. Factory bumper mounts and decorative bars often aren't the place for heavy kit unless they've been engineered or reinforced properly.

Roof mounting is often the cleanest option on a Kombi. It keeps mud and gear out of the cabin and leaves the rear area free for camping bits. Rear mounts can also work brilliantly, especially on custom setups, but they live or die by the quality of the carrier behind them.

Materials and coatings that actually matter

For Australian conditions, I lean toward coated steel hardware over bargain light-duty gear. The reason is simple. Beach air, road spray, and humidity expose weaknesses fast. Manufacturing specifications for the Leitner Designs bracket confirm it uses powder-coated steel with zinc-plated hardware, a combination that suits coastal and high-moisture conditions well, as outlined on the Leitner Designs Hi-Lift Jack Bracket product page.

Cheap finishes usually fail before the bracket itself does. Rust starts in the hardware, then stains the mount, then spreads into the vehicle where it contacts the metal.

That doesn't mean every VW needs a heavy-duty off-the-shelf system. A custom bracket can be the best answer when you've got a non-standard roof rack, unusual rear carrier, or an old bus with previous modifications. But custom only works if the builder understands load paths, reinforcement, and corrosion prevention. A dodgy one-off can be worse than no bracket at all.

Off-the-shelf or custom build

Use this test before you buy anything.

  • Choose off-the-shelf if your vehicle already has a compatible platform, rack, or carrier and you want a cleaner install.
  • Choose custom if your Kombi or Beetle has unusual dimensions, handmade bars, or a roof setup that standard clamps won't fit.
  • Walk away if the bracket relies on thin sheet metal alone, unfavorable mechanical advantage, or “just snug it up” fastening.

If you're already deep into the practical side of keeping a vintage VW on the road, the broader scene around VW parts in Australia is worth a look too. It helps put bracket choices in context with the rest of a usable touring build.

Scouting the Best Mounting Spots on Your VW

Volkswagen owners can't copy a generic 4WD mounting guide and call it done. The body structures are different, the weight distribution is different, and many old buses and Beetles have already had decades of repairs, tweaks, and accessory holes drilled into them. Before you touch a drill, find the strongest honest mounting spot on the vehicle you've got.
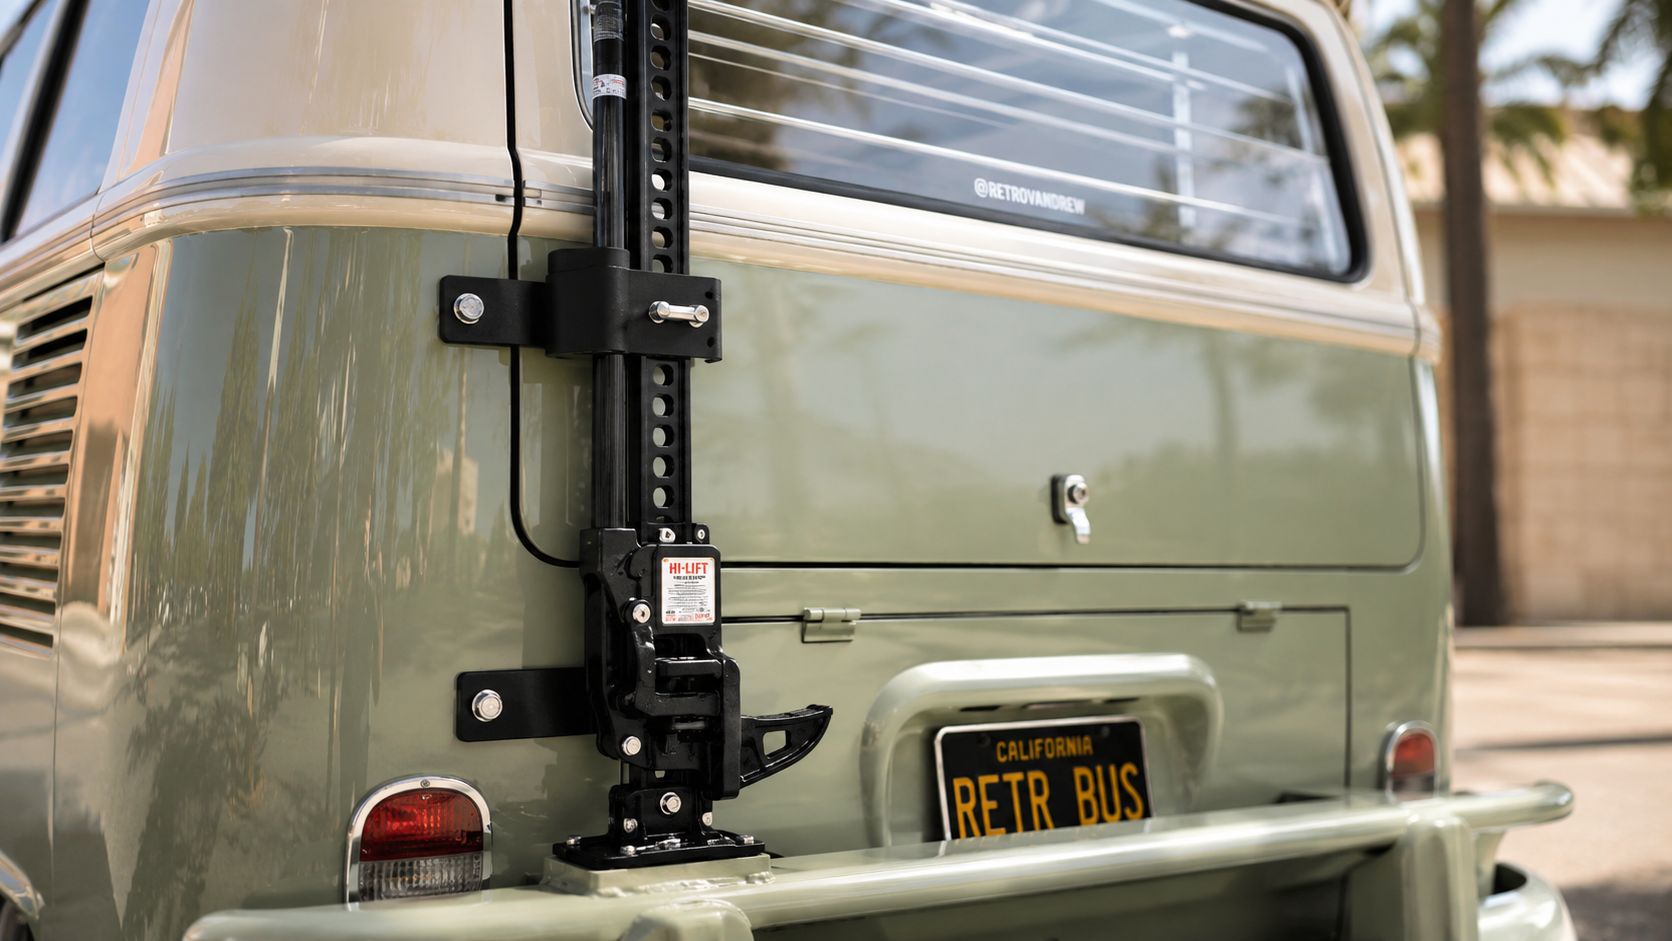
A black Hi-Lift jack mounted to the rear exterior of a vintage sage green Volkswagen bus.

Roof platform setups on Kombis and T3s

If your van runs a proper roof platform, this is usually the most straightforward external option. The key phrase there is proper. A decorative basket or tired old gutter rack isn't the same thing as a well-supported platform system.

Yakima's bracket is designed to mount on the perimeter of the LockNLoad platform, which gives a specific mechanical interface and keeps the jack accessible while freeing space for larger tools, as shown in this Yakima LockNLoad Hi-Lift bracket demonstration. That sort of purpose-built fitment is what you want on a touring VW. Less guesswork, fewer weird clamp angles, and cleaner weight management.

Rear carriers and reinforced bars

A custom rear carrier can be excellent on a Kombi because it keeps the jack low enough to reach without climbing on tyres or sliders. It can also tuck the weight close to the back of the vehicle instead of hanging it off a roof line.

But there's a catch. The carrier needs to be tied into something substantial, not just skin panels or thin brackets.

Look for these signs of a good rear mount:

  • Backed mounting plates behind the visible bracket.
  • Short force path so the jack isn't bouncing far from the mounting structure.
  • Clear engine access on rear-engined Volkswagens.
  • No fouling with barn doors, tailgates, or spare wheel movement.

Spots I'd avoid on most classic VWs

Some places tempt people because they're easy to reach with a drill. Easy isn't the same as smart.

  • Thin side panels on buses without reinforcement
  • Old rain gutters with unknown rust history
  • Engine lids and hatch skins
  • Factory bumpers that look solid but aren't meant for this sort of side load

If the panel flexes when you lean on it by hand, it's not a proper home for a jack bracket.

A quick placement checklist

  1. Check the metal condition. Existing rust, filler, or old repairs rule out plenty of locations.
  2. Think about access in mud or sand. A jack you can't remove quickly is decorative, not practical.
  3. Keep centre of gravity sensible. High and far-outboard mounting changes how the VW feels.
  4. Test opening paths. Doors, hatches, pop-tops, and spare wheels still need to work.

Your Toolkit and Pre-Flight Checklist

The neat installs nearly always start the same way. The owner laid everything out first, checked the vehicle twice, and didn't improvise with random hardware from the bottom drawer. A high lift jack bracket install on a classic VW should feel more like careful restoration work than backyard guessing.

The tools worth having on the bench

You don't need a machine shop, but you do need the right basics.

  • Torque wrench. This is the one people skip, then regret. Proper clamping force matters on a vibrating old vehicle.
  • Socket set and ring spanners sized to your chosen hardware.
  • Drill and sharp bits suitable for steel.
  • Centre punch for accurate hole starts on painted or curved surfaces.
  • Tape measure and straight edge so the mount sits square.
  • Deburring tool or round file to clean fresh holes.
  • Rust-proof primer, touch-up paint, and sealant for every drilled edge.

A soft pencil or paint marker also helps more than you'd think. On old VWs, accurate marking saves a lot of colourful language.

The hardware I'd insist on

For most installs, I'd want high-tensile bolts, matching washers, and nyloc nuts or another locking arrangement that won't loosen with vibration. Backing plates are often the unsung heroes. They spread load across a wider area and stop the bracket from concentrating stress into one patch of metal.

If you're carrying other touring gear as well, decent fastening gear matters across the board. Even something as simple as proper tie-down ratchet gear helps keep the whole setup organised and less likely to shift around.

Workshop note: The bracket is only as good as the hardware clamping it to the vehicle.

Pre-flight checks before the first hole

Run through this before drilling:

  • Confirm the bracket clears all moving panels
  • Inspect both sides of the mounting area for wiring, trim, fuel vapour lines, or hidden reinforcement
  • Dry-fit the jack to the bracket so you know its actual size and reach
  • Check corrosion risk if the vehicle lives near the beach
  • Decide on anti-rattle measures now, not after the first noisy trip

This bit isn't glamorous, but it's where a tidy install is won.

A Step-by-Step Guide to a Pro Installation

Once you've chosen a proper location and laid out the tools, the install itself is straightforward if you stay methodical. Most problems come from rushing alignment, drilling crookedly, or tightening by feel instead of specification.
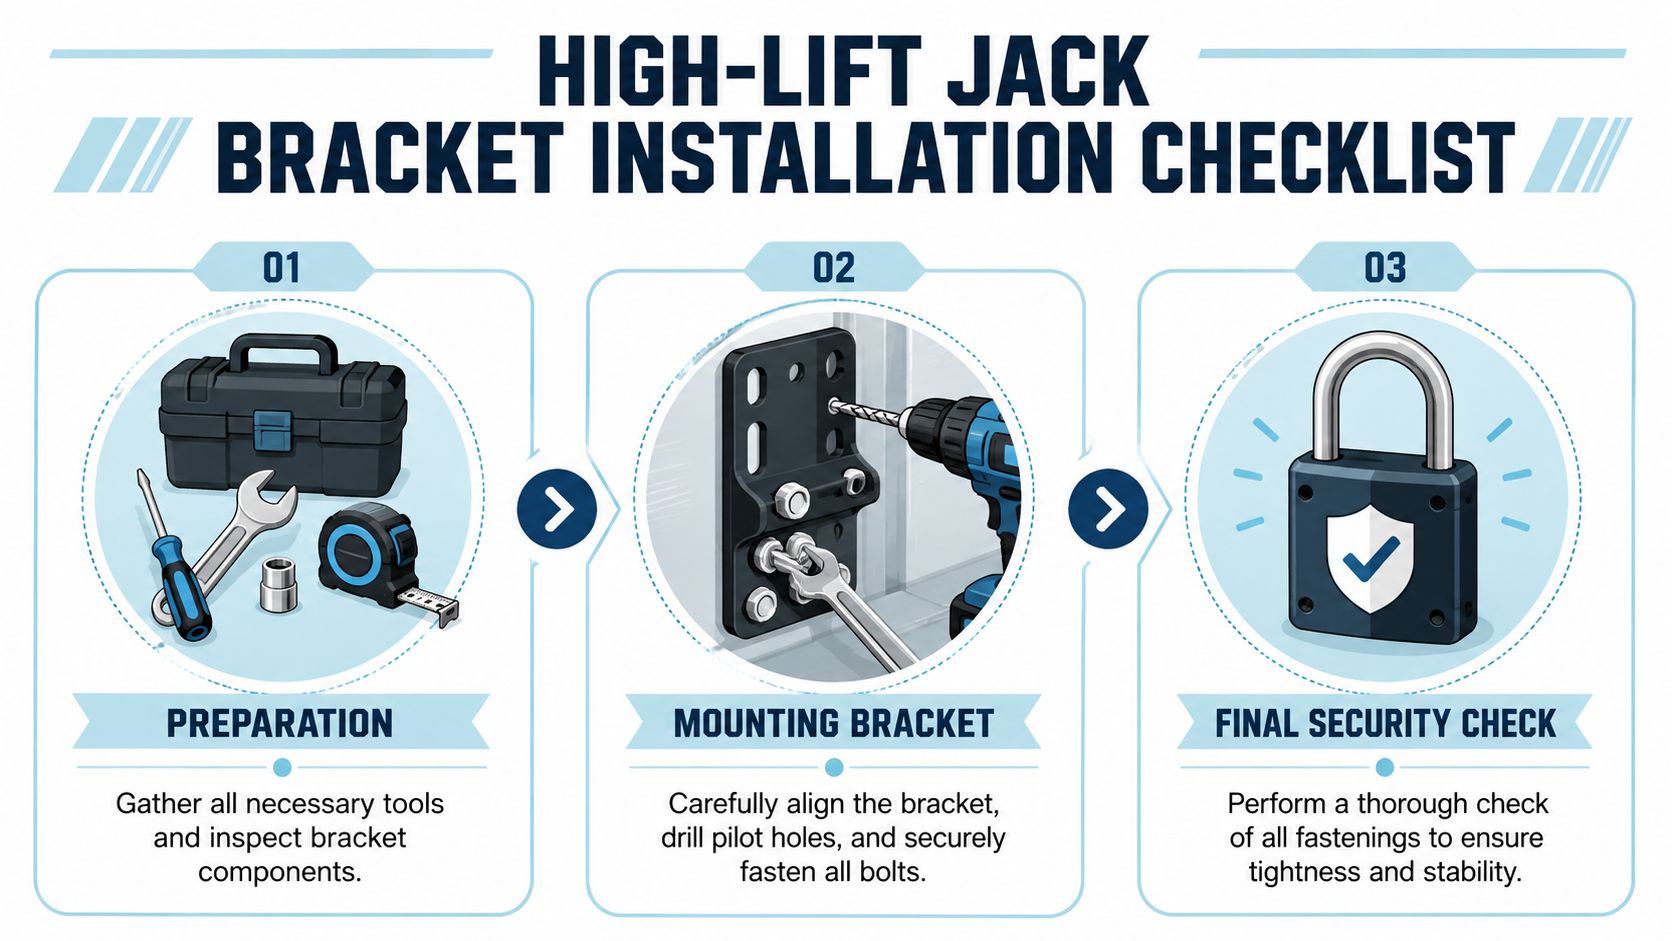
A three-step instructional checklist illustration for installing a high-lift jack bracket on a vehicle.

Phase one getting the surface ready

Start with a clean, dry mounting surface. Dirt under the bracket can throw the alignment off, trap moisture, and scratch paint as the bracket settles. If you're mounting to a rack or bar, remove oxidation and make sure the contact area sits flat.

Where the install uses a T-slot style mount on a steel bar, proper alignment matters. On AU-spec brush bar setups, successful installs begin with accurate alignment to the bar section before any final fastening. The same principle applies on VW rack tubes and custom carriers. Square first, tighten second.

Phase two mark drill and protect

Mark all holes with the bracket clamped in position. Use a centre punch so the drill bit doesn't skate across paint. Drill a pilot hole first, then step up to the final size rather than forcing one big bit through in one go.

After drilling, clean the hole edges and seal the exposed metal. This matters even more on a coastal Kombi that sees salt air, beach spray, or humid storage. Bare edges are where rust gets its first bite.

A sensible sequence looks like this:

  1. Clamp and test-fit with the jack in place.
  2. Punch the centres accurately.
  3. Drill pilot holes and re-check alignment.
  4. Open to final size only when everything still lines up.
  5. Prime, paint, and seal every fresh edge.

Phase three bolt up with reinforcement

Improper mounting can derail many backyard projects. Don't bolt directly through thin bodywork without a backing plate where one is needed. Spread the load, keep washers flat, and make sure the bracket isn't twisting as you tighten.

Field data from the Australian Off-Road Association indicates that 92% of successful installations in the AU region avoid inadequate torque settings, and that same issue accounts for 68% of bracket failures during extreme off-road use. That verified data is included in the AUORA figures provided for this topic. The lesson is plain enough. Torque isn't fussy workshop theatre. It's the difference between a mount that stays put and one that starts moving.

Tighten in stages. Snug everything evenly, check alignment, then bring the fasteners up to the specified torque with the wrench.

Final security checks before loading the jack

Before the jack goes on for good, inspect the mount from every angle.

Check What you're looking for
Bracket sitting flat No visible rocking or gap at contact points
Backing plates seated No distortion or pulling into body metal
Hardware alignment Bolts straight, washers flat, threads clean
Sealant coverage Every drilled edge and exposed contact point protected

If anything looks forced, remove it and sort it. A bracket should look deliberate, not persuaded.

Finishing Touches for a Rattle-Free Ride

A freshly mounted bracket can still be annoying if the job stops at “it's bolted on”. The proper finish is what makes the setup feel sorted. That means security, anti-rattle control, and a habit of checking it before and after rough trips.

A good bracket should hold the jack firmly enough that it doesn't chatter over corrugations or shift when the van leans. Verified product specifications note that high-lift jack brackets are engineered to support static loads over 1,360 kg, and some use wing-nut fastening systems that prevent rattling during travel at speeds up to 100 km/h. Those details are listed on the C4 Fabrication horizontal Hi-Lift bracket specifications. For a VW owner, that's the benchmark mindset. Secure enough that the mount stays quiet and predictable on real roads.

What actually stops the noise

The biggest culprit is movement between metal parts. Not dramatic movement. Tiny repeated movement.

Use a mix of these:

  • Wing-nut or clamping hardware that keeps steady pressure on the jack body
  • Rubber isolators or contact pads where the jack touches metal
  • A handle restraint so the jack handle can't bounce
  • Padlock-ready mounting points if your bracket supports them

If the handle isn't restrained, it'll often be the first thing you hear.

A silent mount usually means a safe mount. Noise is often your first warning that something's loosening.

Theft prevention and maintenance

A high lift jack looks useful because it is useful. That also makes it attractive to thieves. If your bracket includes padlock holes, use them. If it doesn't, add a sensible secondary lock through a secure part of the bracket or carrier without compromising removal in an emergency.

Then keep the maintenance simple:

  • After rough trips check for bolt movement and chipped coating
  • After beach use rinse salt off the bracket, jack, and hardware
  • Every so often remove the jack and inspect hidden contact areas
  • At the first hint of rust clean and touch it up before it spreads

The old Volkswagen trick has always been the same. Small jobs done early save major grief later. That applies to recovery gear as much as engine tins and window seals.


If you're a true enthusiast and want that same laid-back VW spirit back at home, have a wander through Volkswagen Memorabilia. It's a top spot for officially licensed VW-themed gifts, collectible display pieces, and diecast favourites that suit any shed, office, or lounge room. If Kombis are your weakness, you can browse the main shop, check out the cheerful Volkswagen diecast collection, or go straight to pieces that capture the classic bus shape so well, including a 1962 VW Kombi diecast model, a colourful Flower Power Kombi model, and the always-popular Samba Bus diecast options. For Beetle fans, there are also plenty of Volkswagen Beetle model picks ready to round out a collection. Local stock and fast Australian shipping make it easy to buy with confidence, whether you're after a gift or adding another favourite to your own shelf.

Camper Van Pop Top: The Ultimate VW Kombi Guide

You're probably here because one of two things has happened. Either you've spotted a Kombi with the roof kicked up at a show, kettle on and chairs out, and thought, “Yep, that's the life.” Or you've been eyeing off a camper van pop top for your own bus and want the honest yarn before taking the plunge.

That feeling is hard to shake once it gets you. One minute you're admiring the lines of a Type 2 in a paddock at the VW Nationals. Next minute you're mentally packing a surfboard, a billy, and enough gear for a run down the coast. The pop top sits right at the centre of that dream. Closed up, the van still looks like the friendly old VW everyone loves. Park it by the beach, lift the roof, and suddenly it becomes a tiny weekender with room to stretch, sleep, and shelter from a gusty southerly.

For Australian VW people, that's not just clever design. It's part of the folklore.

That Pop Top Dream The Heart of Every Kombi Adventure

I still reckon the pop top changes the whole mood of a trip before the engine's even cooled. You pull in late, maybe after a long run with salt on the windows and sand in your thongs, and the van is still just a van. Then someone unclips the catches, gives the roof a push, and the place transforms. No motel keys, no tent poles, no fuss.

That's why the camper van pop top has such a grip on Kombi lovers. It turns a humble bus into a proper camp companion. You can brew a cuppa without folding yourself in half, stash the kids upstairs, or sit inside while the weather does its thing outside. It feels a bit magical every time, even when you know exactly how it works.

For plenty of us, the dream starts long before ownership. It starts at shows, in old family photos, or while reading stories about Kombi life in Australia. You see a weathered bus with sun-faded stripes, a board strapped on top, and a canvas section peeking out under the roofline. Straight away, you know what sort of life that van has had, or at least the life it promises.

A good pop top doesn't just add space. It changes how you use the whole van once you've pulled up.

There's nostalgia in that, sure, but there's also plain common sense. A Kombi has never been about brute size or luxury. It's about making simple things feel like adventure. The pop top is the bit that makes that bargain work.

So What Exactly Is a Camper Van Pop Top

A camper van pop top is an extendable roof section that lifts when the van is parked. Closed, it keeps the vehicle lower and tidier for driving. Open, it creates extra headroom and usually an upper sleeping platform.

That's the plain-English version.

The two jobs it does best

Most pop tops earn their keep in two ways:

  • Standing room: You can move about inside without doing the classic Kombi hunch.
  • Extra bed space: Many layouts use the raised roof area as a sleeping loft.

That combination is why the design has lasted. A compact van still behaves like a compact van on the road, then feels far more liveable at camp. It's a neat answer to an old problem. How do you make a small van work harder without turning it into a big, awkward box?

Why owners fall for them

The best thing about a camper van pop top isn't flashy engineering. It's what it lets you do. Pull over for lunch and the van's still easy to park. Stay the night and it becomes a little two-level hideaway.

There's also something very VW about that sort of ingenuity. The van doesn't pretend to be more than it is. It just uses space brilliantly.

Practical rule: If you want a van that still feels friendly to drive and park, but more comfortable once you stop, a pop top is usually the sweet spot.

For families, couples, and anyone who likes old-school touring with a bit of comfort, that raised roof can be the difference between “we survived the weekend” and “let's do another lap next month.”

The Classic VW Pop Top A True Aussie Legend

A fella rolls into a coastal showground at dawn in a mustard T2. Salt still crusted on the boards inside, kettle rattling in the cupboard, pop top folded down for the highway. By smoko, the roof is up, the camp chair is out, and three strangers have wandered over to say the same thing. “My old man had one just like that.”

A vintage Volkswagen camper van with a pop top roof parked on a sandy beach at sunset.

When the Westy became the dream

That reaction didn't happen by accident. In Australia, the pop top Kombi arrived at the sweet spot between practicality and romance. Surf clubs, bush camps, school holiday runs up the coast. The van suited all of it, and the Westfalia name quickly became part of local camper folklore.

By the early 1970s, pop top campers had become a familiar sight here, and in 1972 Volkswagen Australia began assembling Type 2 pop top campers at Clayton in Melbourne, according to this historical overview of camper van pop top culture.

That local connection matters. It turned the pop top from an imported curiosity into something woven into the Australian VW story. These weren't vans kept under covers and wheeled out for polishing. They hauled kids to caravan parks, sat outside point breaks, and copped plenty of red dust on inland runs.

Walk around any classic VW meet and you hear the same sort of yarns. A couple who did their honeymoon in one. A family that squeezed three kids into bunks and cupboards for a lap down the Great Ocean Road. A bloke who still remembers the hiss of the old cooker before breakfast at Mallacoota.

Why that history still matters

That is why the pop top roof means more in the local scene than simple camper convenience. On a Kombi or early Bay, it marks out a van with a life story. It hints at beach towels on the parcel shelf, dog-eared road maps in the glovebox, and wet thongs left by the sliding door.

Collectors notice that straight away.

A clean original bus is always welcome, but a period-correct pop top has a different pull because it carries both Volkswagen heritage and Australian touring culture in one shape. The roofline is part of the memory. On a Samba or a well-kept camper conversion, it changes how people read the whole vehicle. Less delivery van. More holiday machine.

A short clip says plenty about the vibe these vans still carry at gatherings and on the road.

The Aussie version of freedom

Our scene gave the classic VW pop top its own flavour. European roots, sure, but Australian use shaped the legend. Long distances between towns, rough camp spots, windy beach car parks, and weekends built around fishing, surfing, and making do with what was in the cupboard.

That is why the best old pop tops never feel sterile, even after a careful restoration. They still look ready for a run up the coast.

For plenty of Kombi owners, that is the magic. A pop top VW is collectible, but it is also familiar. It reminds people of ordinary trips that became family folklore, and that is a big part of why these old buses still stop people in their tracks.

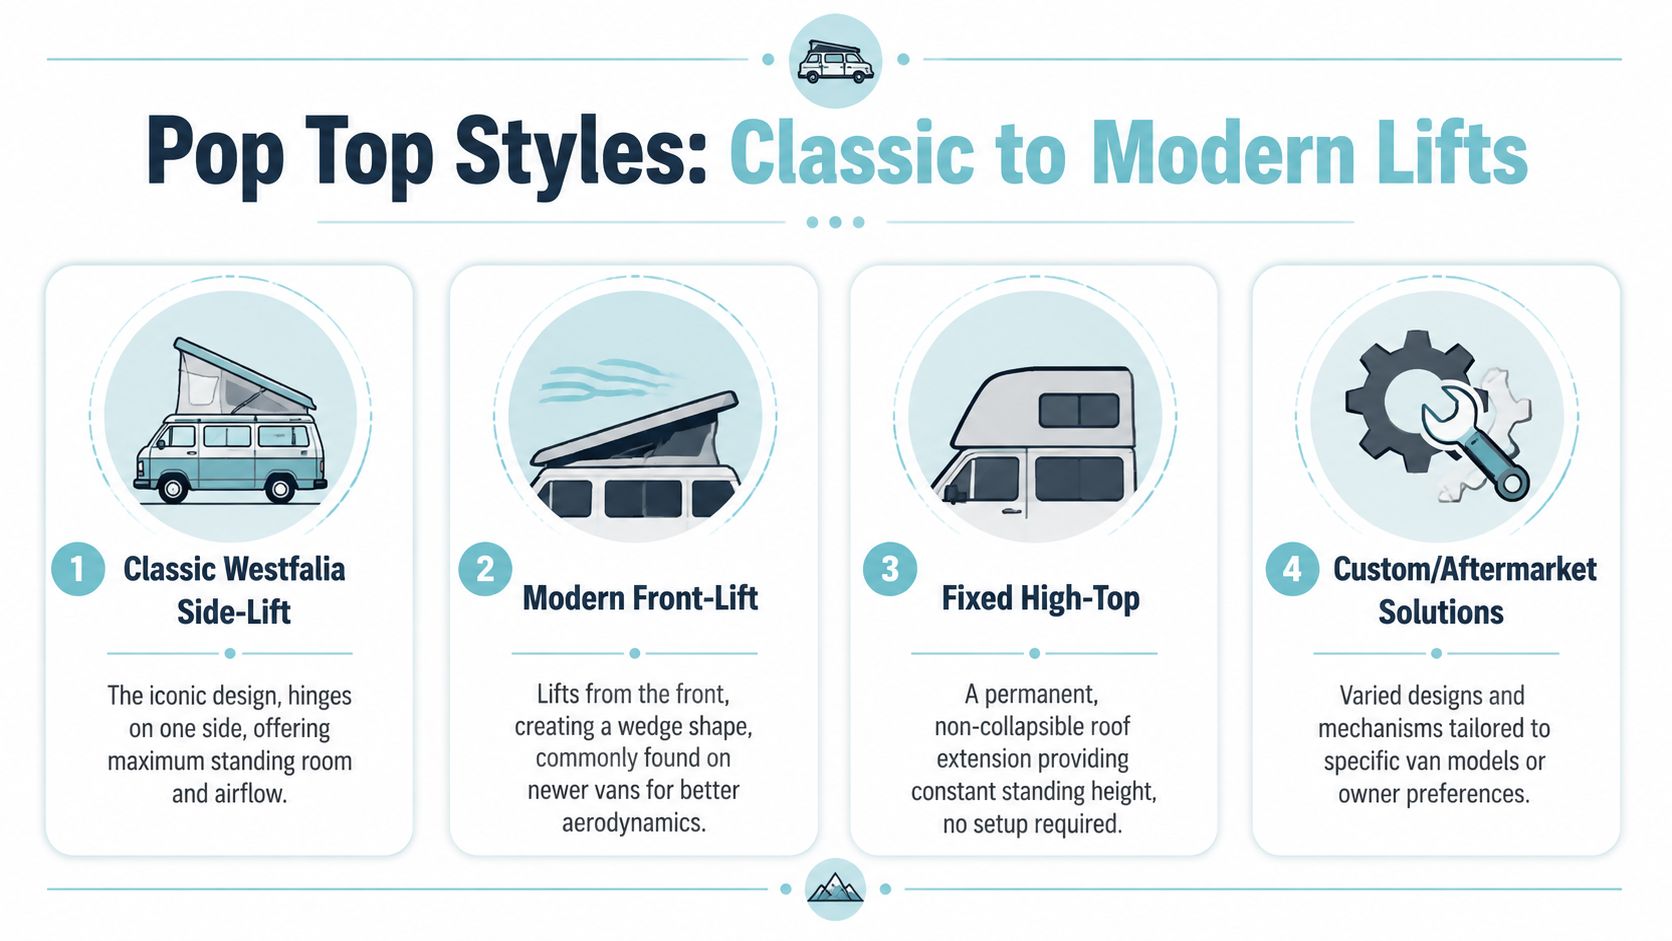
Pop Top Styles From Classic Westy to Modern Lifts

You see it at VW Nationals before you even read the windscreen cards. One Kombi pops its roof sideways like an old Westy and suddenly half a dozen grey-haired owners are swapping stories about trips to Lakes Entrance and Byron. Park beside it is a later bus with a neat wedge roof, lower and tidier when shut, built for owners who still want weekend comfort without losing the feel of driving a classic VW.

An infographic showing four common camper van pop top roof styles from classic to modern designs.

The classic shapes you'll spot around the grounds

The Westfalia side-lift is the shape plenty of Kombi fans carry around in their heads. It rises to one side, gives the bus that unmistakable camper profile, and looks right at home on a period-style restoration. Closed up, it still reads like a proper old VW. Opened up at camp, it turns a snug cabin into somewhere you can live in for a few days.

Then you've got the front-hinged or rear-hinged wedge style. These suit later conversions and owners who want a cleaner roofline when driving. They tend to feel a bit more current in use too, especially if the bus has been rebuilt for regular touring rather than concours display.

A smaller number of builds use full vertical lift roofs. They raise more evenly and give a squarer upper section, which can be handy for headroom and bed space. On a bay or splitty, though, they can look a touch less in keeping with the original lines, which matters if heritage is part of why you bought the bus in the first place.

Canvas, shell, and the feel of camp

Roof style is only half the story. The sides change the mood.

  • Canvas bellows give you that old camping rhythm. Undo the zip, hear the canvas flap a bit in the sea breeze, and the van feels connected to the campsite.
  • Hard-shell or composite tops feel neater and more enclosed when shut. They often suit owners mixing classic looks with more modern touring habits.
  • Hybrid setups sit somewhere in the middle, keeping some vintage character while borrowing newer construction ideas.

That choice says a lot about the owner. Some want the bus to feel like 1978 every time they pull into a coastal caravan park. Others want the old shape outside and a more practical setup once the kettle's on.

If you're weighing old-school charm against newer touring comfort, this Kombi and Crafter camper comparison gives handy context for how different VW camper styles suit different trips.

Matching the roof to the bus

The best-looking Kombis usually have a pop top that matches the story of the vehicle. A tidy, period-correct Westy-style roof suits a heritage-minded bus with stock wheels, plaid trim, and a folder of old rego papers. A wedge roof makes more sense on a bus that's been subtly updated for long runs up the Hume or a family lap of the coast.

That's really the trick. Choose a roof that suits how the van will be used and how you want it to be remembered.

A good pop top should feel like it belongs there, like the bus left the dealer ready for holidays. That's the difference between a conversion that gets admired in passing and one that sparks a proper yarn.

The Great Kombi Debate Pop Tops vs High Tops

Ask this around a camp kitchen and you'll get ten different answers. Some swear by the camper van pop top because it keeps the bus looking right. Others love a high top because they can stand up the second they slide the door open.

Neither camp is wrong.

Pop Top vs High Top At a Glance

Feature Pop Top High Top
Driving feel Lower profile, feels closer to a standard van Permanent extra height changes the feel on the road
Parking and storage Easier for garages and lower spaces when shut Less friendly for low car parks and some home storage
Camp setup Needs to be raised for full use Standing room is always there
Classic VW look Keeps much of the original silhouette closed Changes the roofline more permanently
Sleeping layout Often adds an upper bed area Depends on interior layout rather than lift-up roof space
Weather at camp Fabric section can feel more tent-like Solid roof gives a more enclosed feel

Why purists love the pop top

A lot of VW owners care greatly about silhouette. Fair enough too. The shape of a Kombi is half the magic. A pop top lets you keep that familiar profile while still gaining space when parked.

For many people, that's the winning argument. The van still looks like the bus they fell in love with. It just gets taller when needed.

If you enjoy reading how different camper layouts stack up, this old-versus-new conversation has a cousin in the wider VW scene too. The Crafter camper and Kombi comparison shows how strongly design and use shape owner preferences.

Why some owners choose a high top

A fixed high top suits owners who value convenience above all. No lifting, no folding canvas, no packing the roof away before moving off. You get permanent headroom and a more consistently enclosed interior.

That said, it changes the personality of the van. Some people don't mind that one bit. Others feel it loses some of the easy-going charm that makes a Kombi a Kombi.

If originality and road manners sit at the top of your list, a pop top often wins. If instant headroom matters more than roofline, a high top deserves a serious look.

The Nitty Gritty What to Know Before You Buy

At the VW Nationals, you'll always hear the same story. Someone spots a tidy old Kombi with a smart pop top, falls head over heels, hands over the cash, then finds mould in the canvas and rust creeping around the roof opening by the first wet weekend away. The dream is still there. It just pays to look past the two-tone paint and the nice photos.

A classic VW camper asks for a careful eye, especially in Australia where harsh sun, salty air, and years of patch-up repairs can leave their mark. A genuine period-style conversion has real charm, and collectors notice that straight away. A retrofit can still be a beauty, but only if the work was done properly and suits the age and character of the bus.

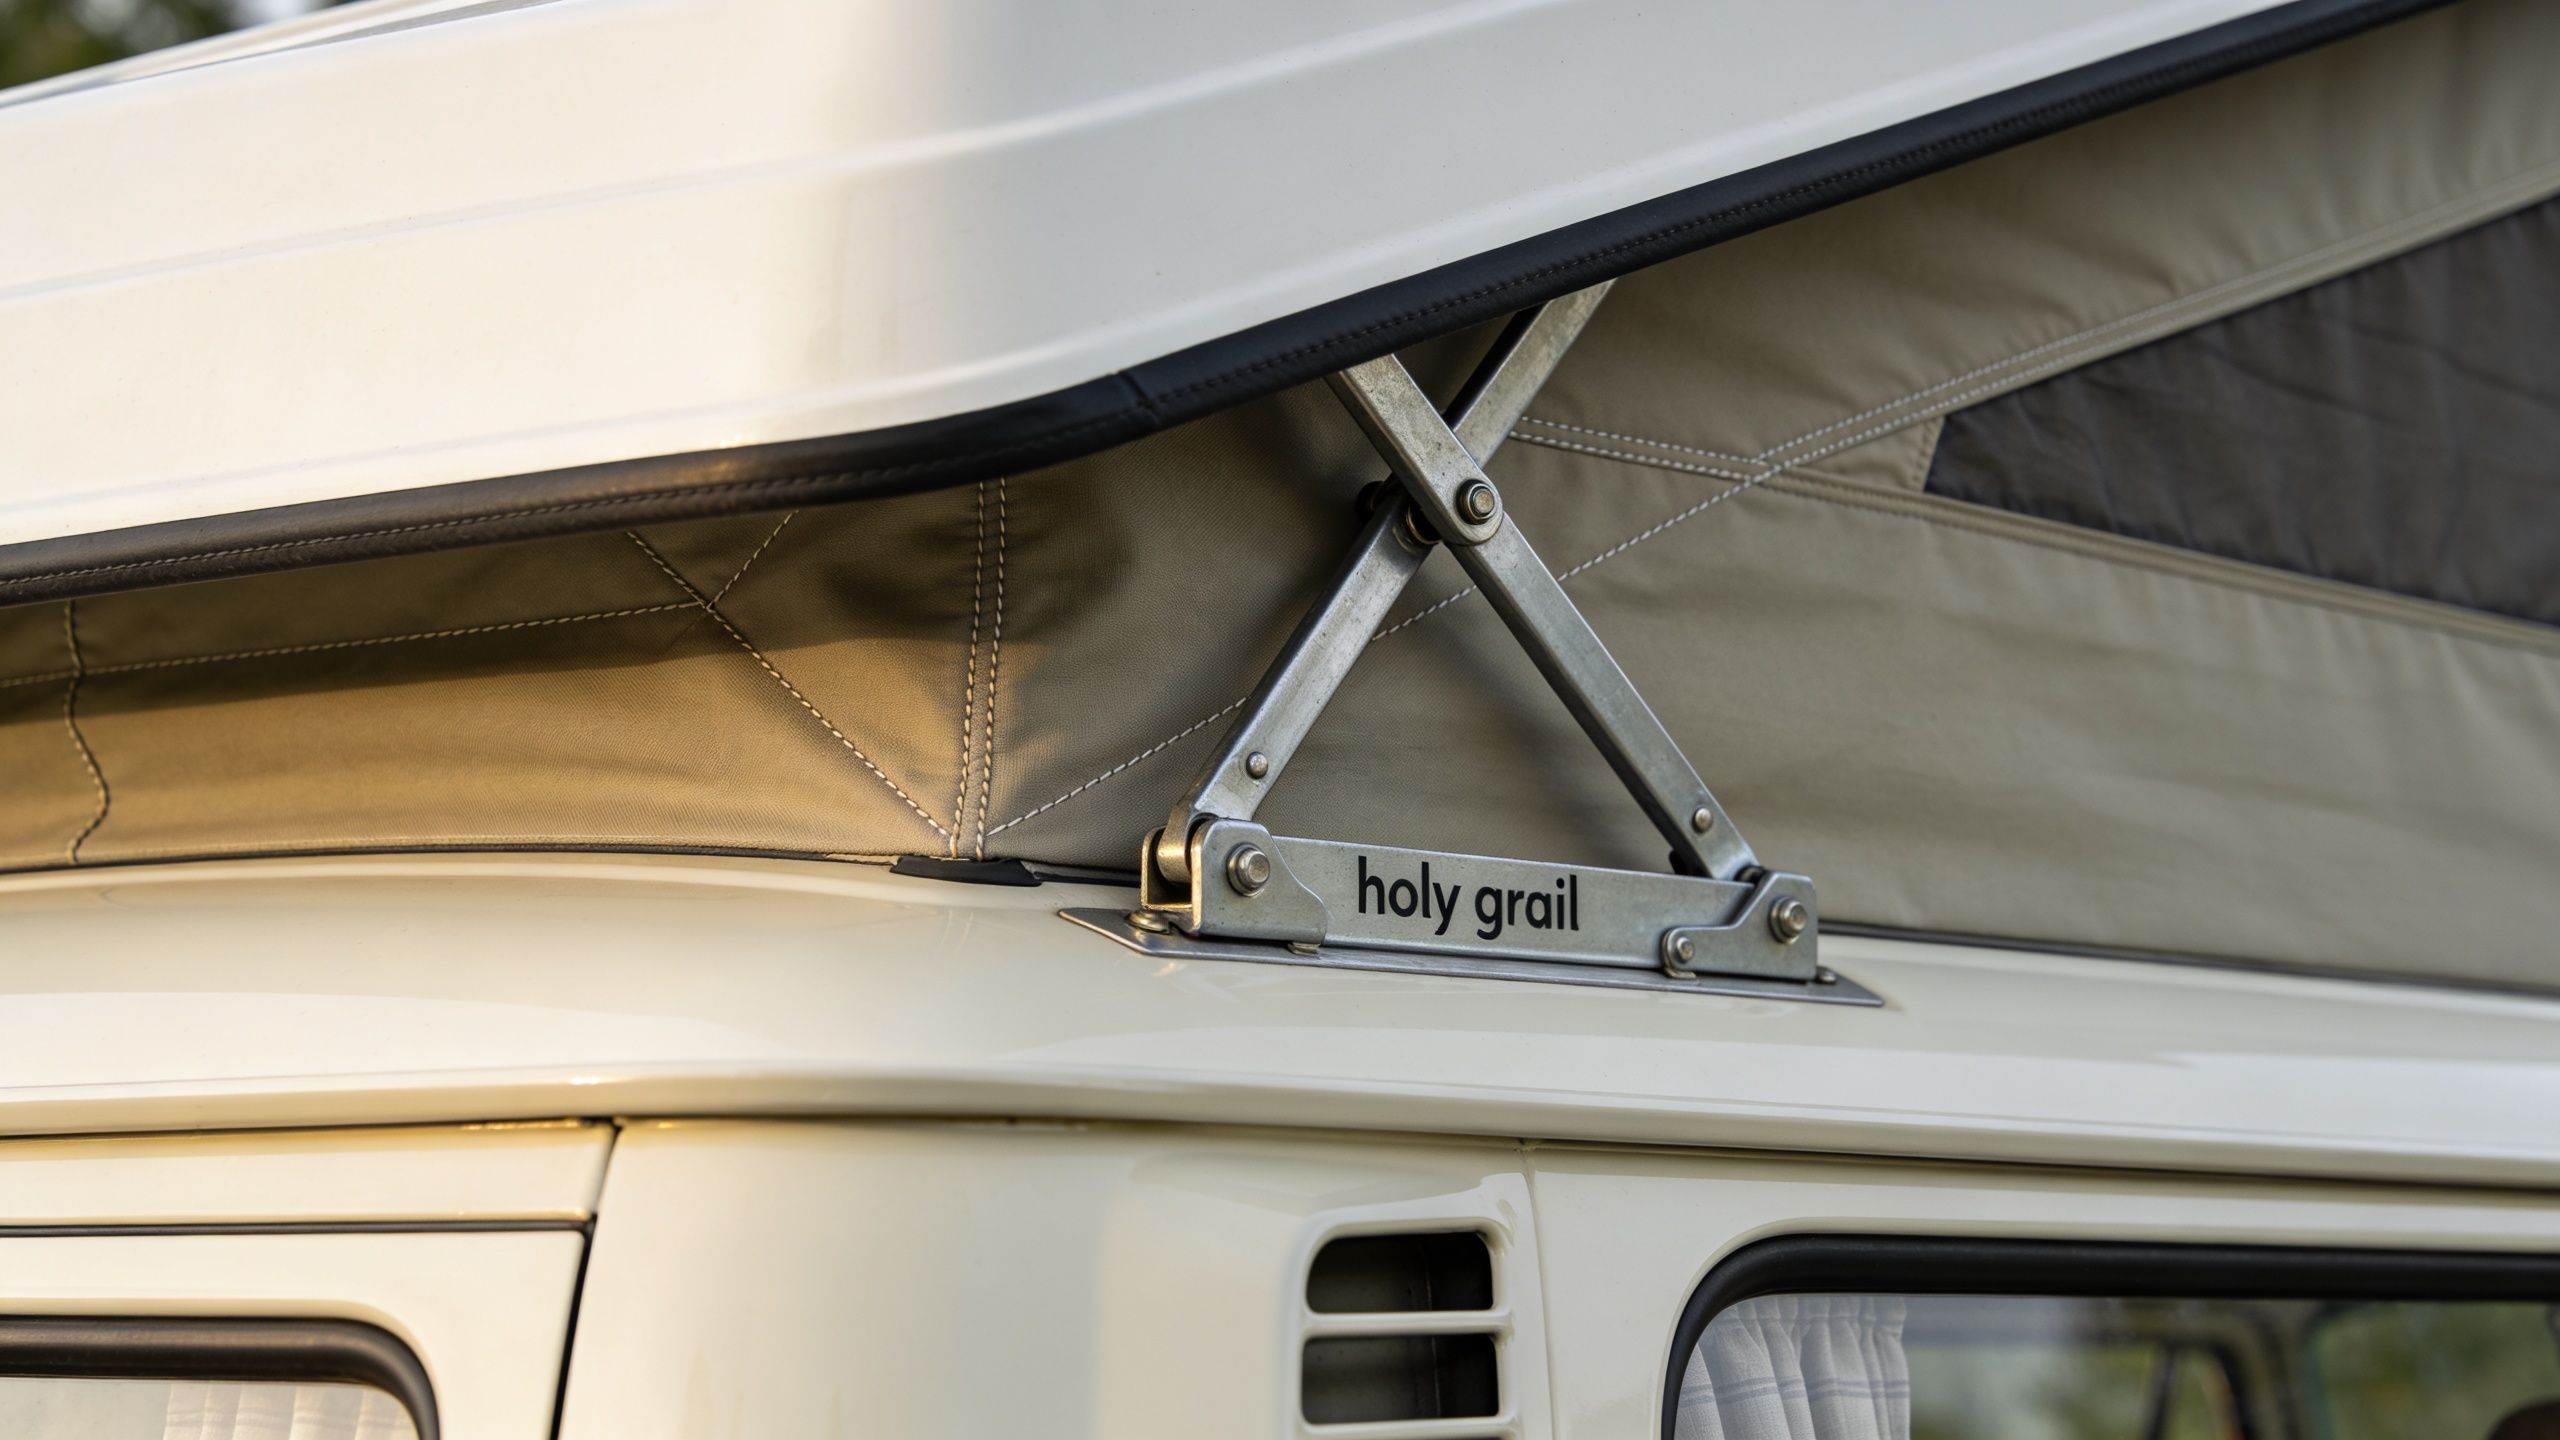
A close-up view of a metal scissor hinge mechanism supporting the pop-top roof on a camper van.

What to inspect with your own eyes

Start up top. Open the roof fully, stand back, and watch how it sits. A good pop top should lift cleanly, latch properly, and close without a wrestling match.

Then get fussy:

  • Canvas condition: Check for mould, brittle stitching, sun damage, and zips that fight you.
  • Seals and edges: Look for cracked rubber, old sealant, and any sign water has been sneaking in.
  • Lift mechanism: Hinges, struts, and scissor arms should move smoothly, without grinding or twisting.
  • Roof cut and finish: The opening should look neat and properly reinforced, not hacked out in someone's shed after a few beers.
  • Signs of rust: Pay close attention to gutters, roof joins, mounting points, and the corners where water likes to sit.

One bad repair up here can turn a lovely weekender into a long restoration.

The bits buyers often forget

Paperwork matters as much as paint. If the van has had a roof fitted later in life, ask who did it, when it was done, and whether there's any record of the work. Insurance can get messy if modifications were never declared, and registration questions are easier handled before money changes hands.

Weight matters too. A pop top may keep the Kombi's classic lines, but it still adds structure, bedding, and hardware up high. Pack in an awning, fridge, water, and camping gear, and an old bus can feel that load quickly on country roads and long climbs.

Storage catches people out as well. A shut pop top helps if your garage opening is tight, but you still need enough room to raise it for cleaning, drying, and the odd bit of tinkering at home.

Buy for the trips you actually take

A couple doing lazy weekends up the coast needs something very different from a family hauling kids, boards, and an esky to the river. Be honest about how you'll use it. If the van will spend more time at shows, club runs, and Sunday coffees than at remote campsites, originality and condition may matter more than squeezing in every camping extra.

That's why it helps to study a few real examples before committing. Browsing a Volkswagen bus camper for sale sharpens your eye for roof styles, fit-out quality, and the little details that separate a well-kept Kombi from an expensive headache.

Buy the Kombi that suits your weekends, your shed, and your budget. The best camper is the one you'll actually use.

More Than a Roof It's What Makes It a Collectible

The pop top is practical, yes, but that's not the whole story. Plenty of useful vehicles have come and gone without becoming beloved. The Kombi pop top stuck because it carries emotion as much as function.

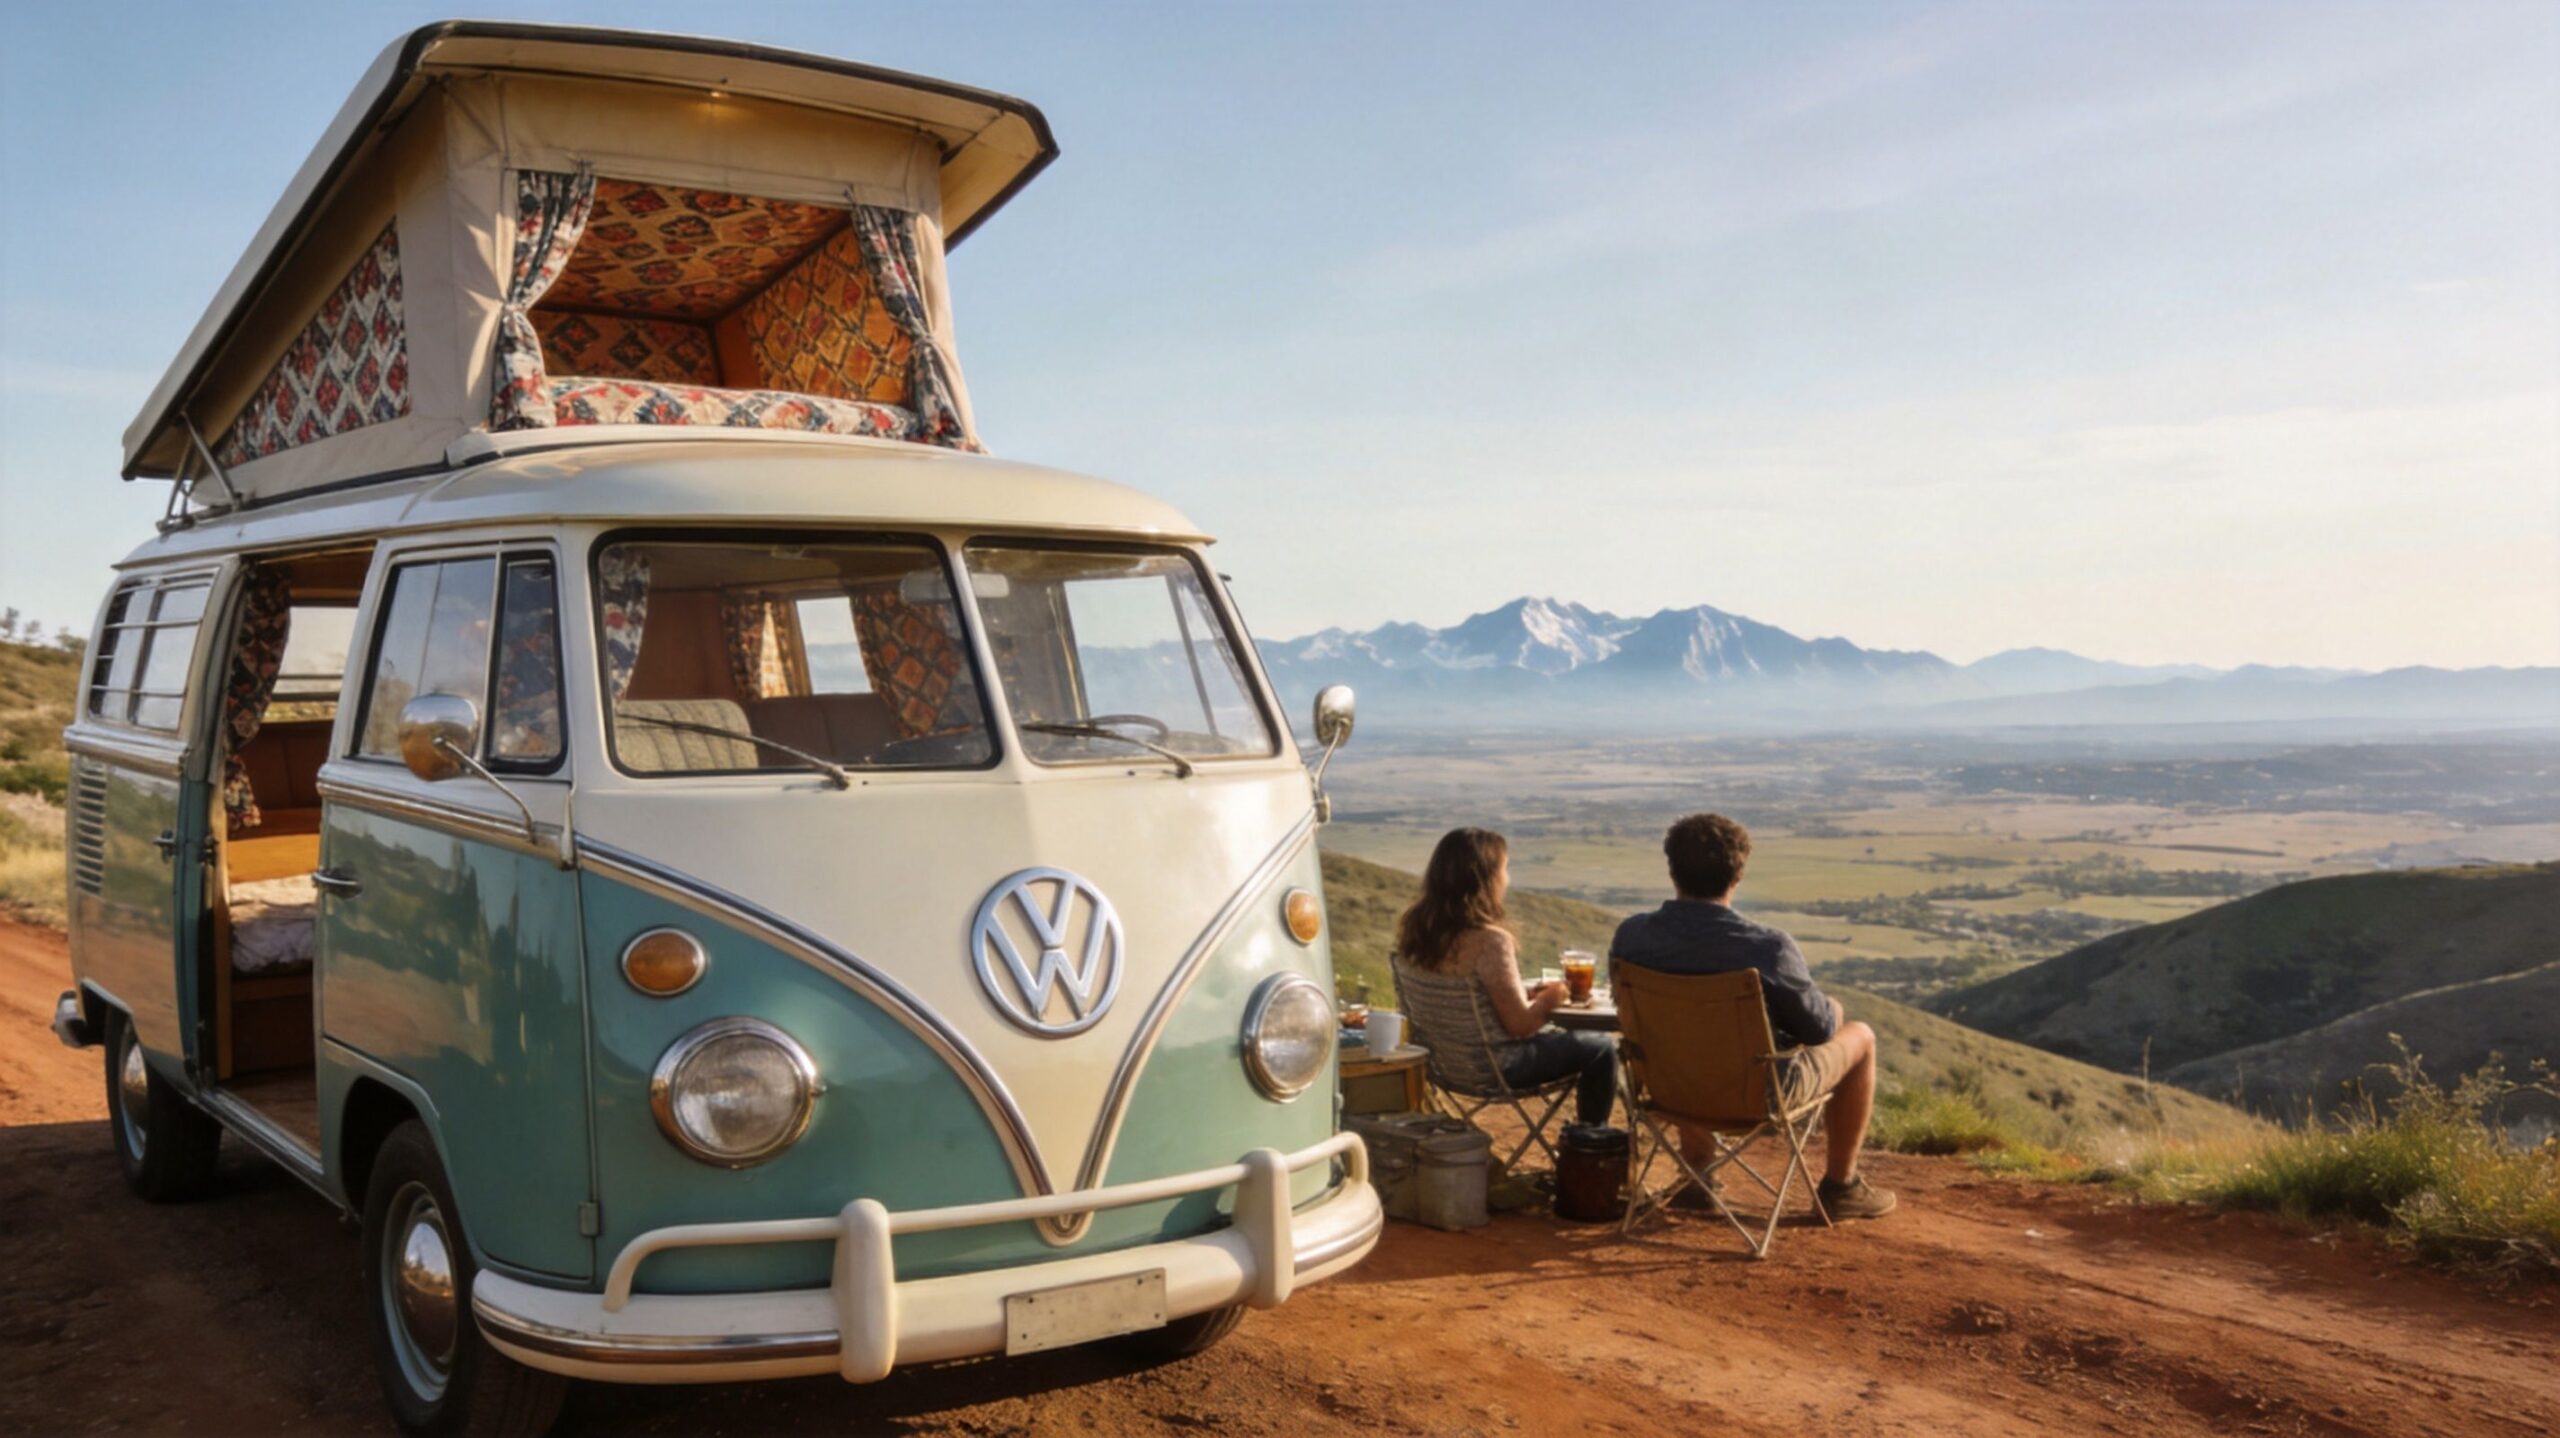
A couple sits on camping chairs next to a teal and white Volkswagen camper van overlooking mountains.

Why collectors care

A pop top Kombi tells a richer story than a plain van. It hints at road trips, beach mornings, packed eskies, little gas cookers, and kids climbing into the upper bunk before dark. The roof itself becomes part of the identity.

That's why collectors and enthusiasts often respond so strongly to camper versions of the Type 2. The feature changes the whole feeling of the vehicle. It's not just transport. It's a memory machine.

From driveway icon to shelf icon

That same charm carries beautifully into miniatures and display pieces. A diecast VW bus with camping cues, surf styling, or period detail does more than mimic a shape. It captures a whole slice of the VW story.

You see it in the way people display them too. A Kombi model beside old holiday snaps. A shelf of buses in different liveries. A little line-up in the study that says more about a person's taste than any generic ornament ever could.

Some vehicles are collected for rarity. Pop top Kombis are collected for the life they represent.

That's the lovely thing about them. Whether you own a real camper van pop top, hope to own one one day, or love the look and history, the appeal lands in the same place. It's about freedom, character, and that unmistakable VW warmth.


If this yarn has you in the mood to bring a bit of that Kombi spirit home, have a wander through Volkswagen Memorabilia. It's a top spot for officially licensed VW pieces, from diecast Kombis and Beetles to gift-worthy collectibles that suit Aussie enthusiasts, collectors, and anyone chasing that classic road-trip nostalgia. With local stock and fast Australian shipping, it's an easy way to add a little VW magic to your shelf, desk, or display cabinet.

Your Guide to Finding a Volkswagen Bus Camper for Sale in Australia

So, you've got the bug. The dream of owning a classic Volkswagen bus camper is a powerful one, and if you're here, you're already on the right track. Finding the perfect bus is all about knowing which models suit your style, where to look beyond the usual suspects, and what to check for before you hand over your hard-earned cash.

Chasing the Dream of a VW Camper

That iconic image of a classic VW Bus parked up at a sun-drenched Aussie beach? It’s a feeling we all know. It’s not just a van; it’s a symbol of freedom, of adventure, and of a life less ordinary that still pulls on our heartstrings.

For years, these campers have been a core part of the Australian story. They’ve carried us on surf trips down the coast, taken our families on unforgettable holidays, and become a ticket to escape the daily grind. It's always been about the journey itself, the stories you gather, and the memories you create. This shared love has created one of the best enthusiast communities you could ever hope to join.

A National Passion That's Still Growing

And that love affair is only getting stronger. The dream of hitting the open road has never been bigger in Australia. The number of registered campervans skyrocketed from 55,757 in 2014 to an incredible 97,701 by 2024. That's a 75.2% jump, and it’s put these iconic buses right back in the spotlight.

This boom is part of a huge national movement. The whole recreational vehicle scene was valued at $27.1 billion by 2022, and the classic VW camper holds a special, nostalgic place for anyone who loves our coasts. The growing popularity means it’s a fantastic time to begin your search, with a thriving community and more resources than ever before. The spirit of adventure is well and truly alive.

For so many of us, owning a VW Bus is that ultimate pipe dream. It’s the simple idea of packing a bag, turning the key, and just seeing where the road takes you, flower power curtains and all.

Getting there is an adventure in itself. You'll need to:

  • Get to know the different models and their unique quirks.
  • Figure out where to find well-loved campers from people you can trust.
  • Learn what to look for so you don't end up with a money pit.

Think of this guide as your friendly co-pilot. We're here to help you navigate the whole process with the confidence of someone who's been there and done that. We’ll cover everything you need to find, inspect, and finally buy your own piece of automotive history. To get in the right headspace, check out our piece on the soul of van life in Australia and what makes it so special.

Choosing the Right VW Bus Generation for Your Adventure

So, you've decided to take the plunge. Fantastic. But which Volkswagen bus is the one for you? It's a bit like picking a travel mate for a trip up the coast—each one has its own vibe, its own strengths, and its own set of lovable quirks.

Let’s run through the main players. Think of this as a quick chat at a car show, helping you figure out which classic VW camper best fits your dream. Picking the right one is the very first step, and honestly, it’s one of the most exciting parts of the whole journey.

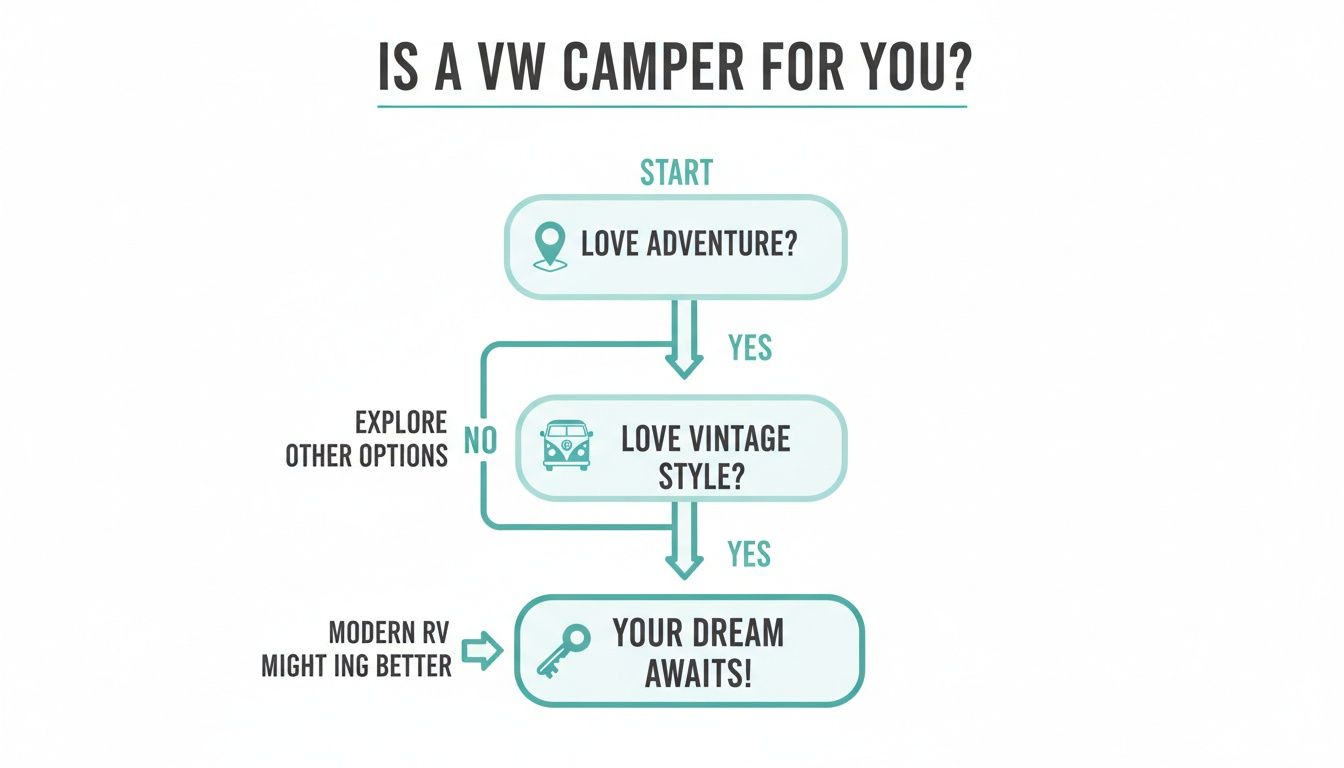
This flowchart gets right to the heart of it. If you’ve got a love for adventure and that timeless vintage style, then a classic camper is already calling your name.

Flowchart helping decide if a vintage VW camper is right for you, based on adventure and style preferences.

As you can see, if that sounds like you, you're in the right place. Now, let’s find your perfect match.

To give you a quick overview, here's a look at the most popular generations side-by-side.

VW Bus Generations At a Glance

Generation Nickname Production Years Key Features Best For
T1 Splittie 1950–1967 Split front windscreen, large VW badge, iconic V-shape front. Collectors, weekend shows, and die-hard enthusiasts.
T2 Bay Window 1967–1979 Single curved windscreen, more interior space, improved engine. Classic road-trips, family adventures, and usable vintage charm.
T3 Vanagon 1979–1992 Boxy '80s design, water-cooled engine options, spacious interior. Long-distance touring, practical camping, and first-time owners.

Each of these has a dedicated following, and for good reason. Now let's get into the details of what makes each one special.

The T1 'Splittie' (1950–1967): The Icon

When you close your eyes and picture a classic VW Bus, this is almost certainly it. The T1 Type 2, or the 'Splittie' as it’s universally known, is defined by its split front windscreen and that massive VW emblem on the nose. It's the original surf bus, the poster child for a whole generation, and a guaranteed head-turner.

Owning a Splittie is a true labour of love. They ooze vintage charm like nothing else and easily command the highest prices, especially the famous 21-window Samba models.

  • Pros: Unbeatable retro style, highest collector value, the absolute heart of VW culture.
  • Cons: The most expensive to buy and restore, slower on the road, and their simple mechanics demand a more hands-on approach.
  • Price Guide: A project bus can start around $25,000, but a fully restored, show-quality Splittie can soar well past $100,000.

A Splittie is for the dedicated purist—someone who wants a prized collector's item for weekend cruises and car shows. It’s less about doing a lap of Australia and more about owning and preserving a beautiful piece of motoring history.

The T2 'Bay Window' (1967–1979): The Reliable Road-Tripper

Next in line is the T2, nicknamed the 'Bay Window' because it swapped the split screen for a large, single, curved windscreen. This is the model that truly brought the campervan dream to the masses. It’s noticeably more practical than a Splittie, with a bit more power, better brakes, and a comfier ride.

The T2 really hits the sweet spot between classic looks and genuine usability. It’s the go-to choice for so many adventurers and families who want to actually get out there and explore.

The Bay Window is the quintessential Aussie road-trip machine. It has enough of that old-school cool to turn heads, but it’s reliable enough to take you from Byron Bay to the Great Ocean Road without too much fuss.

You'll find two main versions. The 'Early Bay' (1967-1971) has its low front indicators and rounded bumpers, while the 'Late Bay' (1972-1979) sits a bit higher and features a more modern engine layout, making it slightly easier to work on.

The T3 'Vanagon' (1979–1992): The Modern Classic

Enter the T3, or Vanagon. This generation marked a shift to a more modern, angular, and boxy design. While it might lack some of the rounded charm of its predecessors, it more than makes up for it in sheer practicality and comfort. These were the first buses to offer options like water-cooled engines, power steering, and even all-wheel drive on the legendary 'Syncro' models.

For many, the T3 is a brilliant and affordable gateway into VW camper ownership. It’s roomier, more comfortable on long drives, and generally easier to live with. Don’t let the '80s styling fool you; these vans are incredibly capable and have a fiercely loyal following.

  • Pros: More affordable, spacious, and comfortable for long-distance travel. Parts are generally easy to find and well-supported.
  • Cons: The boxy aesthetic isn't for every classic purist, and they don't have the same iconic look as a Splittie or Bay.
  • Price Guide: You can find a T3 project for under $10,000, with good, road-ready campers typically sitting in the $20,000 to $40,000 range.

Ultimately, choosing your bus comes down to you. It's about finding the one that speaks to your sense of adventure and fits how you plan to use it. And while you’re planning the big purchase, you can always start small. A beautifully crafted VW Kombi Samba Bus diecast model on your desk is the perfect bit of inspiration to keep the dream alive.

Where to Find Your Dream Volkswagen Bus Camper for Sale

You’ve decided on the generation, and now the search begins. Finding a quality Volkswagen bus camper for sale requires looking in the right places, and the best ones are not always the most obvious.

While standard online classifieds are a starting point, the most sought-after buses are often found within the dedicated VW enthusiast community. Here is where to focus your search efforts.

Online Marketplaces: The Starting Line

The major Australian online classifieds offer the widest initial selection. These platforms provide a national overview of what is available, from restoration projects to immaculate, road-ready campers.

  • Carsales: As Australia’s largest vehicle marketplace, it’s a reliable place to gauge the market. We recommend setting up alerts for specific models like "VW Kombi" or "T3 camper" to receive notifications for new listings.
  • Gumtree: A great source for private sales where you can uncover genuine bargains. Gumtree is also a good spot to find project buses and unique owner-built conversions not always listed on mainstream sites.
  • Facebook Marketplace: Now a major centre for classic car sales. The volume is significant, so you will need to be methodical in your search to filter through the listings.

When using these sites, prioritise listings with extensive photos and clear, detailed descriptions. Vague advertisements are a potential warning sign. A passionate owner will be proud of their bus and will provide a thorough history of the work completed.

Community Hubs: Where the Best Buses Hide

Here is an insider tip: the best-maintained campers frequently change hands privately within the VW community, never reaching the open market. This is where you find buses with well-documented histories from owners who truly understand them.

Tapping into the VW club scene is like getting a backstage pass. You'll hear about campers for sale before anyone else, get honest advice from seasoned owners, and connect with people who share your passion.

Consider these community-focused avenues:

  • Dedicated VW Forums: Websites like The DUB GUM and Aussie Vee Dubbers are invaluable resources. Their "For Sale" sections are monitored by the community, which holds sellers to a high standard of transparency.
  • Owner Clubs and Social Media Groups: Search Facebook for groups such as "Kombi Club Australia" or "VW T3 Australia". Owners often post their buses for sale to fellow members first before advertising elsewhere.
  • VW Shows and 'Show & Shine' Events: Nothing replaces an in-person inspection. Events like Volksfest, the VW Nationals, or local club meetings are ideal for networking. Owners often place a "For Sale" sign in the window, allowing you to discuss the vehicle directly and inspect it on the spot.

Engaging with the community is about more than just a transaction; it's an entry into a network of knowledgeable enthusiasts. If you are thinking about a custom build, our guide on selecting a van for conversion offers additional expert advice.

Your Essential Pre-Purchase Inspection Checklist

Alright, this is where the rubber really meets the road. It’s incredibly easy to get swept up in the romance of a classic Kombi, but a smart buy is one you make with your head, not just your heart. Think of this as a checklist from a mate who's been there, helping you figure out if that Volkswagen bus camper for sale is your dream ride or a money pit in disguise.

Working through a bus systematically gives you the power to either confidently walk away from a dud or put in a fair offer on a gem. We’ll go over the non-negotiable checks to help you sidestep those nasty, expensive surprises down the track.

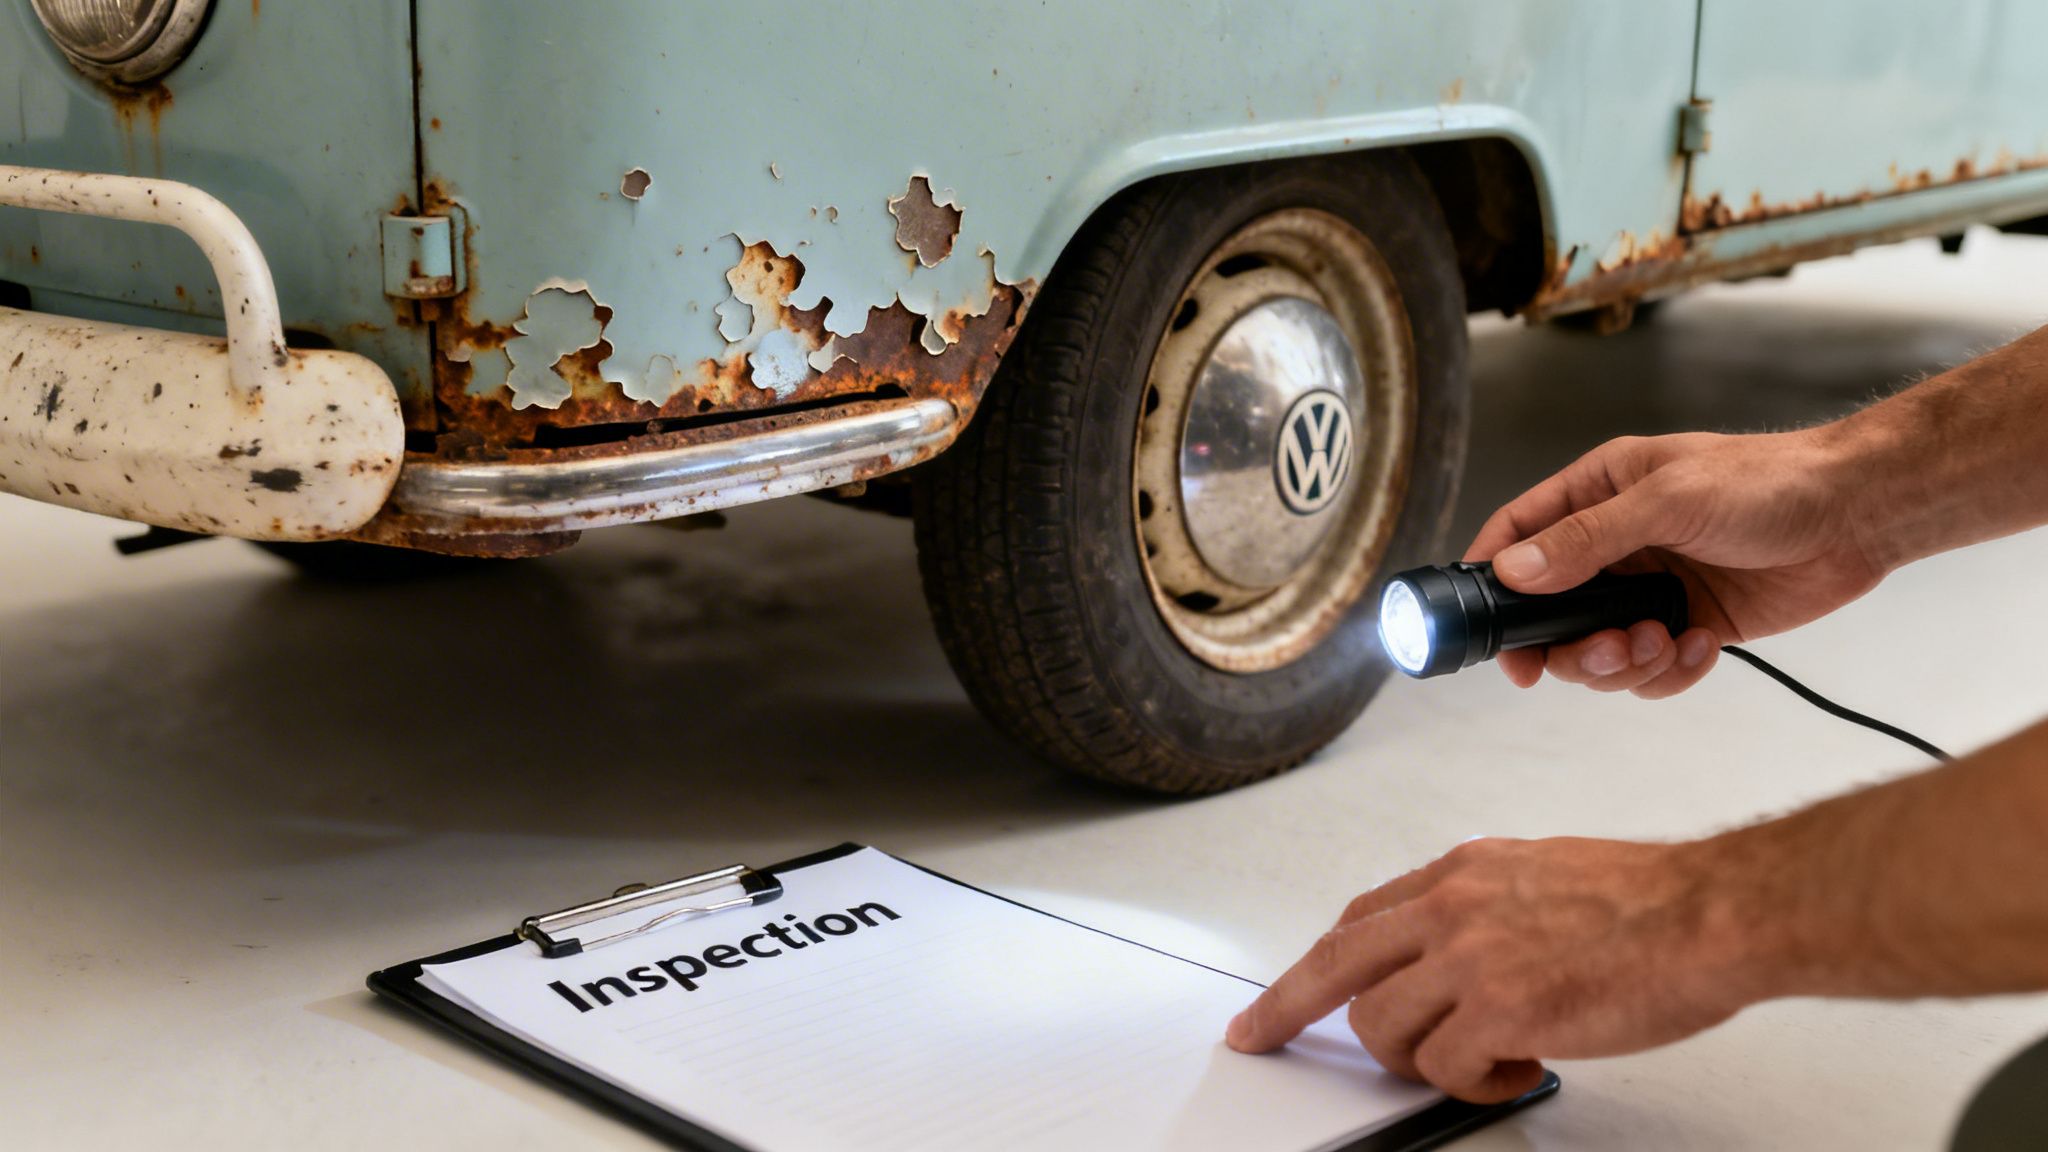
Person inspecting a rusty vintage Volkswagen bus with a flashlight and a clipboard.

Step 1: Hunt for Rust, the Silent Killer

Before you even pop the engine lid, you need to become a rust detective. Hands down, rust is the number one enemy of these old VWs and the most expensive problem you can face. A quick, cheap paint job can hide a world of hurt, so it’s on you to look deeper.

Be sure to bring a small torch and a magnet. Slide the magnet over all the usual trouble spots; if it suddenly loses its grip, you’ve likely found a thick patch of body filler covering up some dodgy repair work.

Here’s where you need to focus your attention:

  • Under the Mats: Don't be shy. Pull up every single floor mat, both in the driver's cab and throughout the living space. You’re looking for any sign of corrosion, dampness, or questionable repairs on the floor pans.
  • Wheel Arches & Sills: These areas get pelted with road grime and water. Get right down on the ground and have a good, long look at them from every angle.
  • Gutters: Those rain gutters running along the roofline are notorious for trapping moisture and rusting out from the inside. Keep an eye out for bubbling paint or any tell-tale brown streaks.
  • Window and Door Seals: Carefully peel back the rubber seals around the windows and doors to inspect the metal underneath. Water loves to pool here and start its dirty work.
  • Battery Tray: Over the years, a leaky battery can easily chew through the metal tray and the floor beneath it. Give this area a very thorough inspection.

Don’t get distracted by a fresh coat of shiny paint. Look closely for tiny bubbles or a ‘crinkly’ texture, particularly along the bottom 15 centimetres of the van. That’s a classic sign of rust brewing just below the surface.

Step 2: Get a Feel for the Engine and Mechanicals

Now it’s time to check the heart of the machine. You don’t need to be a qualified mechanic, but knowing the basic things to look and listen for is crucial. The air-cooled engines in these buses have their own unique character and sound.

If you can, try to start the bus from cold. A healthy engine should kick over without too much fuss. Let it idle and listen carefully for any loud knocking or rattling. A bit of tappet noise is pretty standard for these motors, but anything more dramatic is a serious red flag.

With the engine running, have a look for:

  • Oil Leaks: A few drips are part of the charm with these old girls, but if you see significant pools forming on the ground, it points to worn seals that will definitely need sorting.
  • Exhaust Smoke: Take a look at what’s coming out of the exhaust. A little puff of black smoke when it first fires up is generally fine, but constant blue smoke is bad news—it means the engine is burning oil, a sign of expensive internal wear.
  • Gearbox: On your test drive, pay close attention to the gear changes. It should shift smoothly without any awful crunching sounds. If it’s hard to find a gear, you could be looking at anything from worn linkages to a major gearbox problem.

Step 3: Check the Electrics and Camper Interior

Hop inside and start flicking every switch you can find. The electrical systems are fairly basic, but you’ll want to make sure the essentials are working. Check the headlights, indicators, windscreen wipers, and of course, the horn.

Next, turn your focus to the camper-specific gear. The condition of the interior tells you a huge amount about how the bus has been treated over its life.

  • Pop-Top Roof: If it has one, make sure you operate it. Does it go up and down without a fight? Check the canvas for any mould, mildew, or rips. A new pop-top canvas can be a surprisingly pricey job.
  • Cabinetry and Upholstery: Open every cupboard and drawer. See how the original fit-out has held up. Is the upholstery badly torn or stained? While it might seem cosmetic, a full re-trim can really blow the budget.
  • Appliances: If the bus is kitted out with a fridge, sink, or stove, ask the owner if they’re in working order. If possible, test them yourself.

And finally, always, always ask to see the paperwork. Double-check that the Vehicle Identification Number (VIN) on the registration papers matches the number stamped on the van’s chassis. This simple check confirms you’re looking at the right vehicle and can save you from a world of bureaucratic pain. Taking your time here will ensure your VW adventure gets off to a dream start, not a nightmarish one.

Budgeting for a Bus: The Real Costs of Ownership

Alright, you’ve found the one. It’s got the right look, the right feel, and you can already picture yourself cruising down the coast. Before you get swept away, let's have a real yarn about what happens after you’ve paid for it. The price tag on a Volkswagen bus camper for sale is just the start of your journey, not the whole road trip.

Getting your head around the full financial picture is the best way to make sure your dream of hitting the open road stays a dream, and doesn't turn into a financial headache. Let's pull back the curtain on the real costs of owning one of these classic beauties here in Australia, so you can plan properly.

The Upfront Costs Beyond the Purchase Price

That moment you shake hands on a price is a massive buzz, but that number isn't the final one to leave your bank account. A few other immediate costs will pop up straight away.

  • Stamp Duty: This is the government's slice of the pie, a tax on the vehicle's sale price. How much you pay depends on your state and the bus's value, but there’s no getting around it.
  • Registration: You can't legally drive your new home on wheels without it being registered. This is an annual fee that gets you your plates and keeps you on the right side of the law.
  • Specialised Insurance: Forget a standard car policy; it simply won't do. You need specialised classic vehicle insurance. These policies usually work on an "agreed value," where you and the insurer decide on the bus's true worth. It’s peace of mind, ensuring you're properly covered if something goes wrong.

These initial bits and pieces can easily add a few thousand dollars to your purchase, so make sure you’ve got that cash ready to go.

Ongoing Running and Maintenance Costs

Once the bus is officially yours, a new set of costs roll in—the ones that keep it humming along happily. These aren't one-offs, but the regular rhythm of keeping a vintage machine on the road.

First up, fuel. Let's be blunt: these old air-cooled engines were never built for today’s fuel economy. They’re thirsty beasts, no doubt about it. But the smiles-per-gallon are completely off the charts.

Then there’s the upkeep. A classic VW needs a bit more regular TLC than your modern daily driver. You'll want to budget for:

  • Regular Servicing: Get ready for more frequent oil changes and check-ups. It pays to find a mechanic who really knows their way around air-cooled VWs.
  • The "Just in Case" Fund: Old cars have character, and sometimes that character includes a few unexpected hiccups. Tucking away a couple of thousand dollars in a repair fund is one of the smartest things you can do.

Think of it like this: you’re not just buying a van; you’re becoming the caretaker of a little piece of history. A bit of ongoing love and money is what keeps that history alive and rolling.

The Big One: Restoration Costs

Finally, we need to talk about restoration. A lot of the buses you'll see for sale are rolling projects, and how much you spend here can vary wildly. It all comes down to how much work is needed and how perfect you want the end result to be.

  • Mechanical Refresh ($5,000 – $15,000): This sort of money will get the engine, brakes, and suspension solid and dependable. It’s about making it a reliable driver, not a show winner.
  • Cosmetic & Mechanical ($20,000 – $40,000): Here you’re covering the mechanical work plus tackling rust, laying down a fresh coat of paint, and giving the interior a proper tidy-up.
  • Full Nut-and-Bolt Restoration ($50,000+): This is the whole shebang. The bus is stripped back to bare metal for a finish that’s often better than when it left the factory. It's a massive undertaking, but the final product is a genuine masterpiece.

Knowing these costs doesn't take any of the magic away. It just makes you a smarter, more prepared owner. It means your VW adventure can kick off with pure excitement, not a surprise bill.

Celebrating the VW Icon Through Collectible Memorabilia

Owning a full-sized Volkswagen bus is the big dream, but it's not always a practical one. That doesn't mean the passion has to sit on the back burner. The spirit of the VW bus is just as much about celebrating its iconic design as it is about hitting the open road.

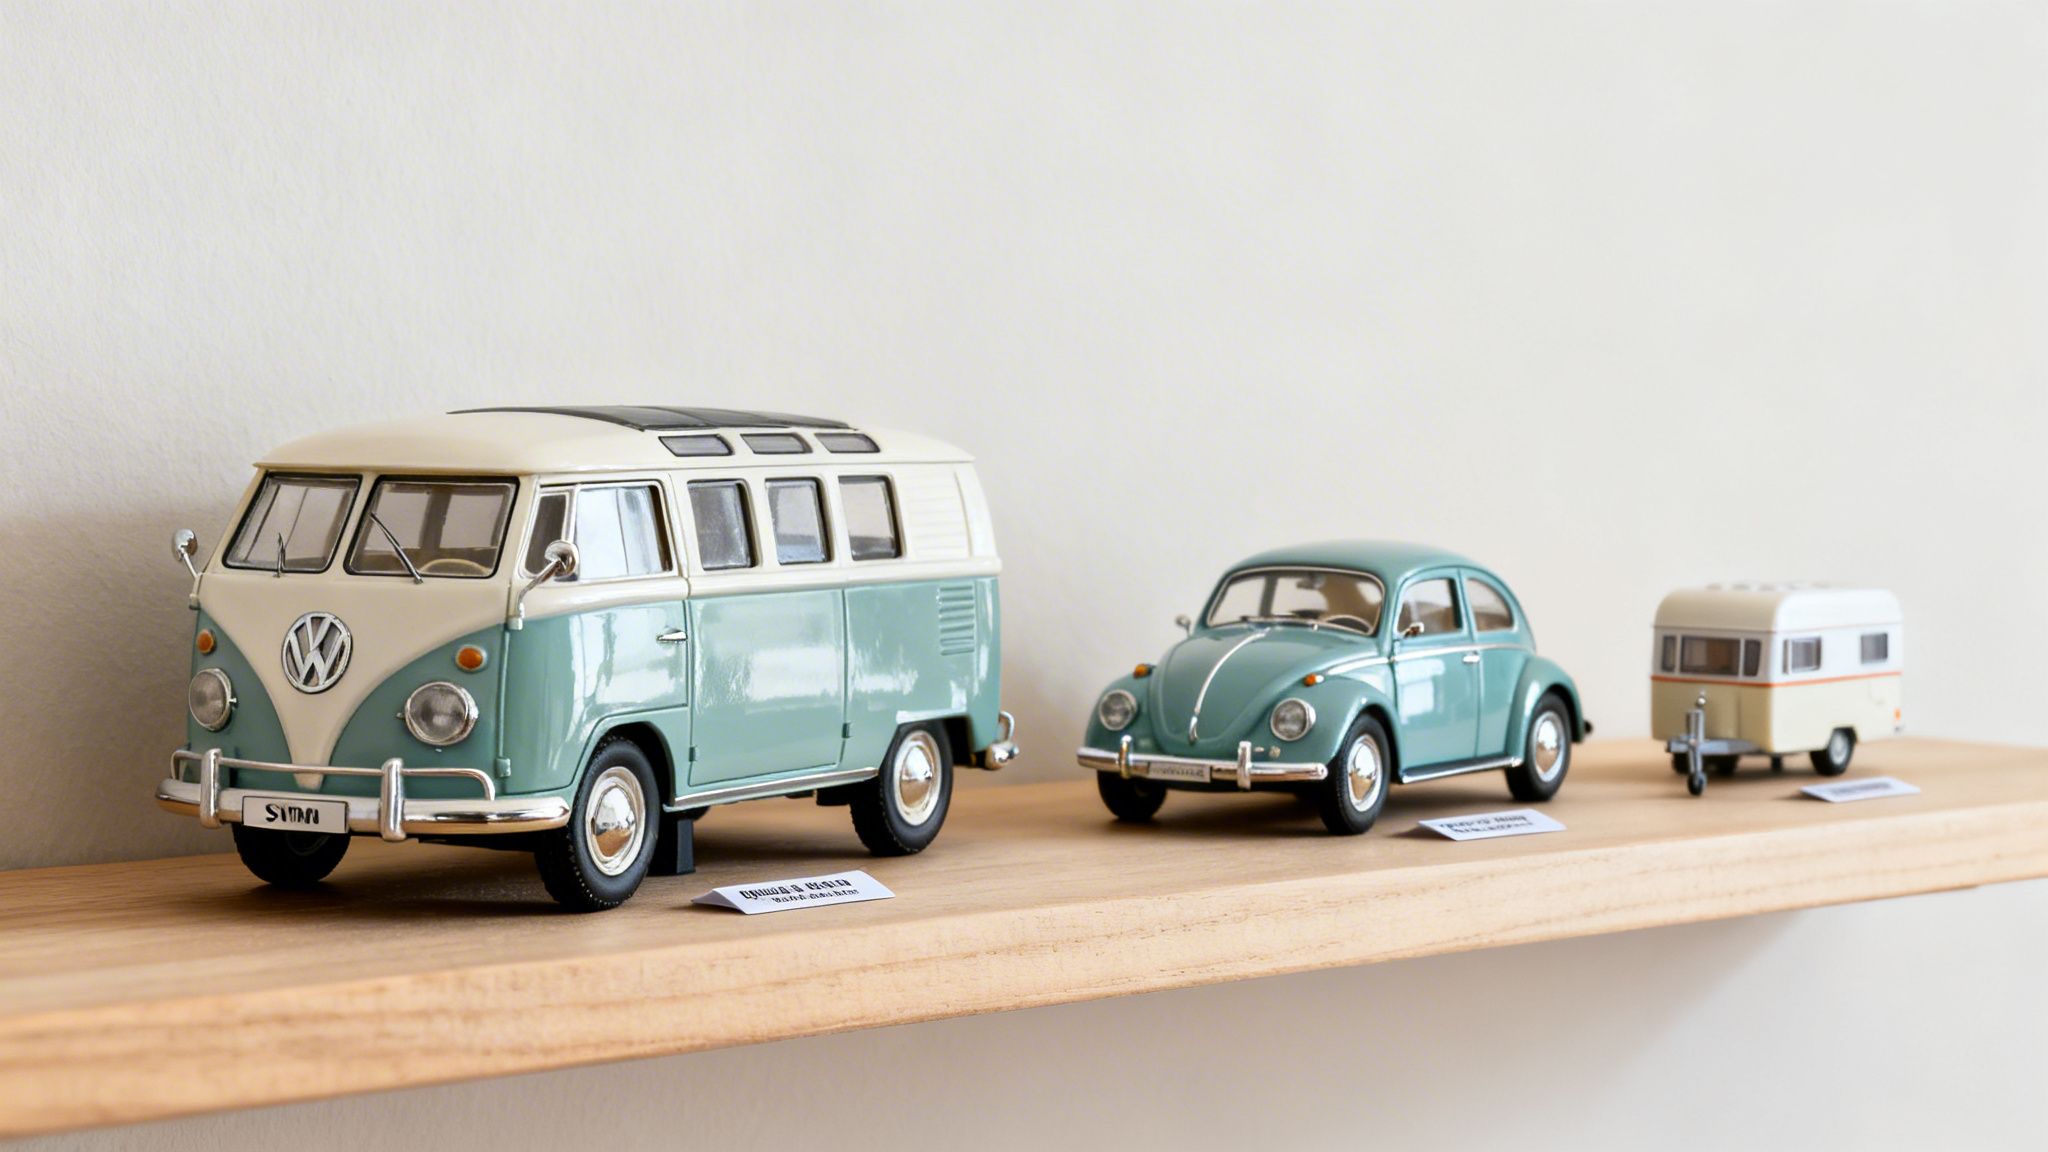
This is where collecting comes in. For many enthusiasts, a perfectly detailed diecast model is the next best thing. It’s a way to appreciate the classic lines and heritage of these vehicles right on your own shelf, keeping the dream alive with a colourful reminder of the VW community.

Miniature models of a teal and cream Volkswagen bus, Beetle car, and camper trailer on a shelf.

Your Home for VW Memorabilia in Australia

We get it because we're enthusiasts, too. Here at vwmemorabilia.com.au, we've sourced a huge range of collectibles for fellow VW fans. As a local Australian importer, we stock officially licensed VW memorabilia collectibles right here, so you get your gear quickly without the long international shipping delays.

Our online shop is a treasure trove for anyone looking to add to their collection or find the perfect gift. We have everything from stunning, highly detailed 1:18 scale models to the more compact 1:24 scale versions that are perfect for starting out. These aren't just toys; they’re miniature pieces of VW history. You'll find everything from the legendary VW Kombi Samba Bus diecast models to classic Beetle replicas that capture the feel of the originals.

Collecting diecast models is about more than just owning tiny cars. It's about building a personal display of automotive art that tells a story. Each model represents a piece of the VW legacy you can hold in your hand.

Tips for Starting Your VW Collection

Building a collection is a great way to stay connected to the VW culture, especially when you're between road trips. If you're looking to get started, here are a few simple tips:

  • Find Your Focus: Decide which models you love most. Are you a fan of the classic Split-Screen Kombi, or do you prefer the timeless Beetle? Focusing on a specific model, colour, or era can give your collection a great, cohesive look.
  • Create a Great Display: Don't hide your models away. A dedicated shelf, a glass cabinet, or even a simple diorama can turn your collection into a fantastic feature for your home or office.
  • The Perfect Gift: If you're searching for a gift for a VW lover, a high-quality diecast model is a personal and thoughtful present that's guaranteed to be a hit.

Diving into the world of Volkswagen diecast models for sale is a brilliant way to keep your passion for these vehicles burning bright. It’s a hobby that brings a lot of joy and celebrates the enduring magic of the VW brand every single day.

A Few Common Questions About Buying a VW Camper

Jumping into the world of classic VWs is an absolute thrill, but it's totally normal to have a few questions buzzing around. We get asked these all the time, so here are some straight-up answers to help you on your journey.

What’s the Go with Insuring a Classic VW Camper in Australia?

The cost of insuring a classic VW camper can be a bit of a "how long is a piece of string" question. It really hinges on the agreed value you and the insurer decide on for your bus, your own driving record, and even where you park it at night. Generally, you can expect to budget anywhere from $400 to over $1,000 a year for a proper classic car policy. It's well worth it, as these policies protect your investment with an agreed value, which is miles better than a standard car policy.

Can I Actually Use a VW Bus as My Daily Car?

Ah, the dream! While it sounds brilliant, using a vintage Kombi for the daily grind isn't the most practical idea. These old beauties lack modern safety features, the air conditioning is a wound-down window, and power steering is, well, you. They thrive on a bit of hands-on care and are far better suited for creating memories on weekend escapes and epic road trips, not so much the stop-start traffic on the way to work.

What's the Difference Between a Kombi and a Samba?

Great question, and one that gets to the heart of VW lore! Think of 'Kombi' as the family name for the entire VW Type 2 lineup. The 'Samba Bus', however, is a very specific, top-of-the-line model that truly gets collectors' hearts racing.

You'll know a Samba when you see one. They're famous for their incredible 21 or 23 windows, including the iconic little skylight windows that line the roof, and a massive canvas sunroof perfect for sunny days. It’s this distinctive look that makes them one of the most sought-after and valuable VWs on the planet.

Are Parts for Old VW Buses Hard to Find in Australia?

You’d be surprised! Thanks to an incredible global community and some brilliant specialist suppliers right here in Australia, getting parts is easier than you might think. Of course, tracking down a super-rare piece of original trim for a 1950s Splittie can be a bit of a treasure hunt. But for most of the crucial mechanical bits for T1 and T2 buses, the parts are out there. This fantastic support network is what keeps these classic campers on the road for us all to enjoy.


Here at VW Memorabilia, we're just as passionate about these amazing vans as you are. Whether you're chasing the real deal or starting a collection of your own, we’re here to help you celebrate the VW spirit. Check out our full range of officially licensed diecast models and memorabilia to bring a bit of that magic home.